

Canon
Photo All-in-One
PI}{MAM
P490
series
Getting
Started
Read
Me
First
1111111111111111111111111111111111111111
Make sure to read this manual before using the machine. Please keep itinhand for future reference. QT 5 2 5 8 9 V 0 I
•
Symbols
Used
In
This
Document
M
Instructions including important information. Be sure to read these indications.
Instructions as notes for operation or additional explanations.
Descriptions for operations that take some time to complete.
Indicates operations
in
Windows.
Indicates operations
in
Macintosh.
• Microsoftisa registered trademarkofMicrosoft Corporation.
• Windows
is
a trademarkorregistered trademarkofMicrosoft Corporationinthe U.S and/or other countries.
• Windows Vista
is
a trademark or registered trademarkofMicrosoft Corporationinthe U.S. and/or other countries.
• Internet Explorer
is
a trademark or registered trademarkofMicrosoft Corporationinthe U.S. and/or other countries.
• Macintosh and Mac are trademarks
of
Apple
Inc,
registeredinthe U.S. and other countries.
Model Number: K10340 (MP490)
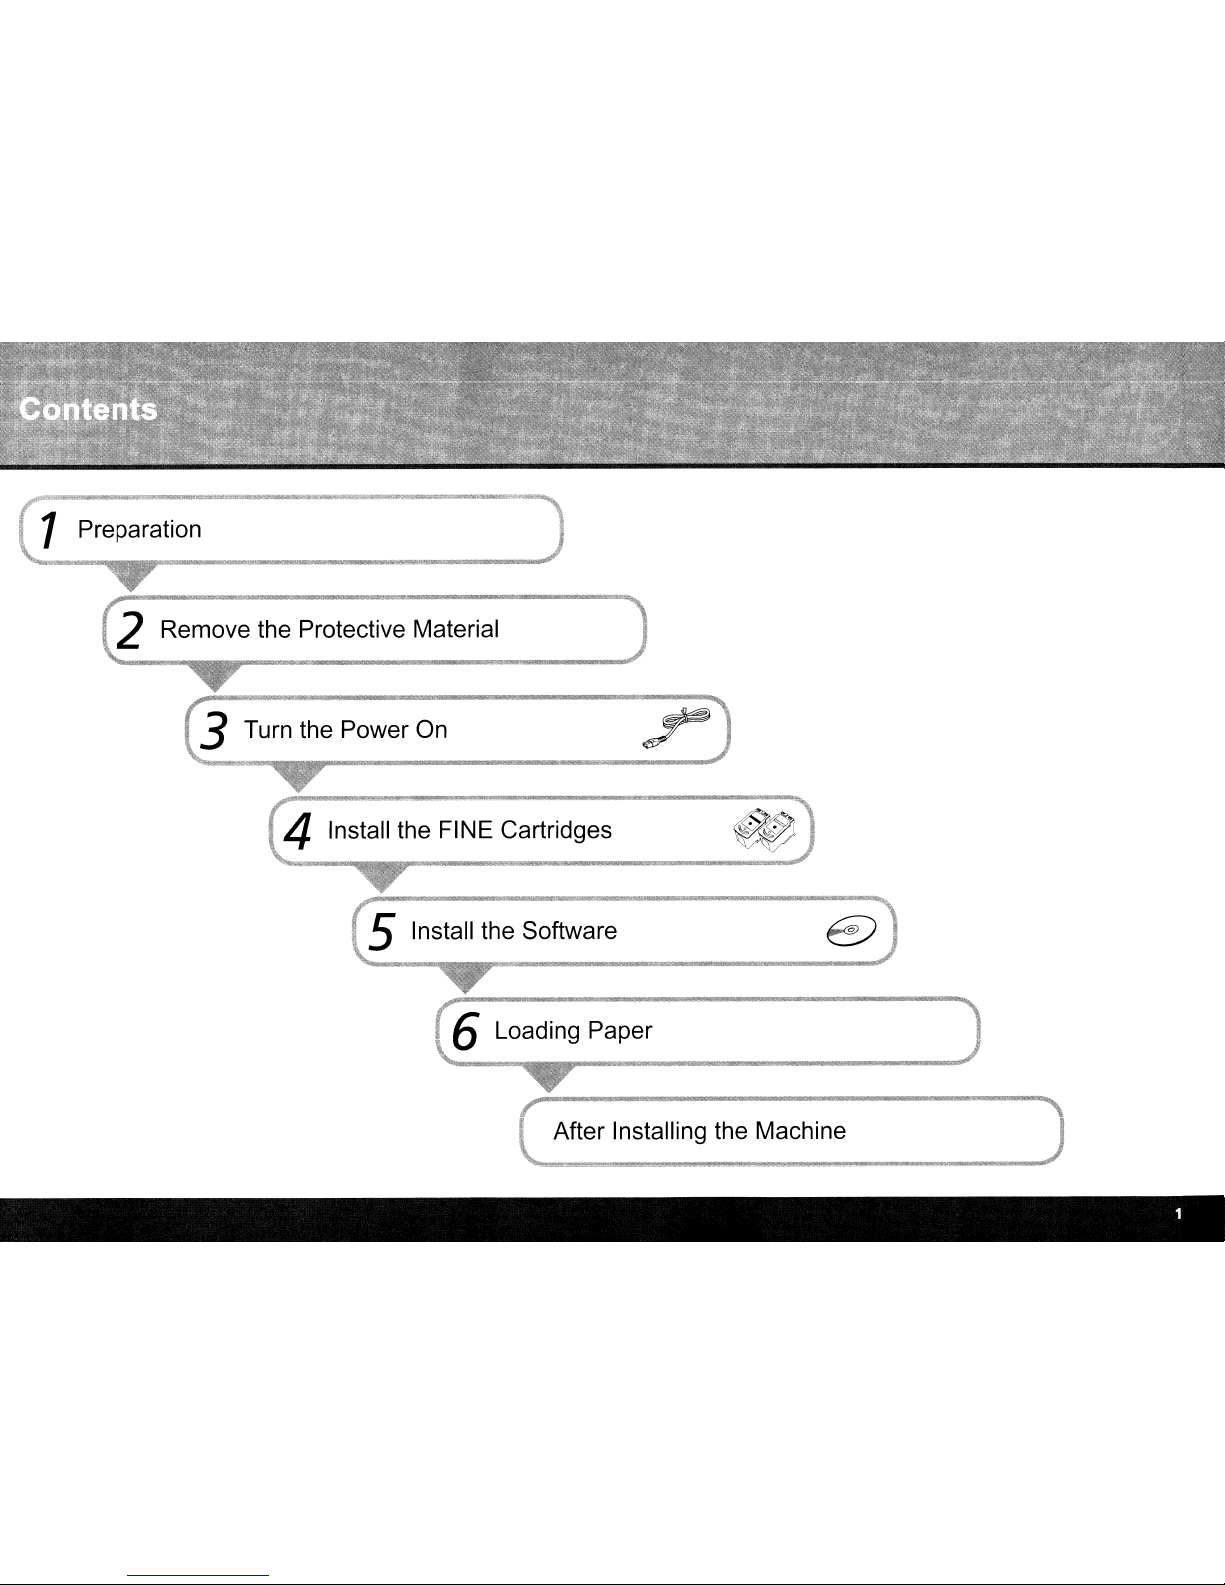
After Installing the Machine
6 Loading Paper
2 Remove the Protective Material
1 Preparation
•
Check
the
Included
Items
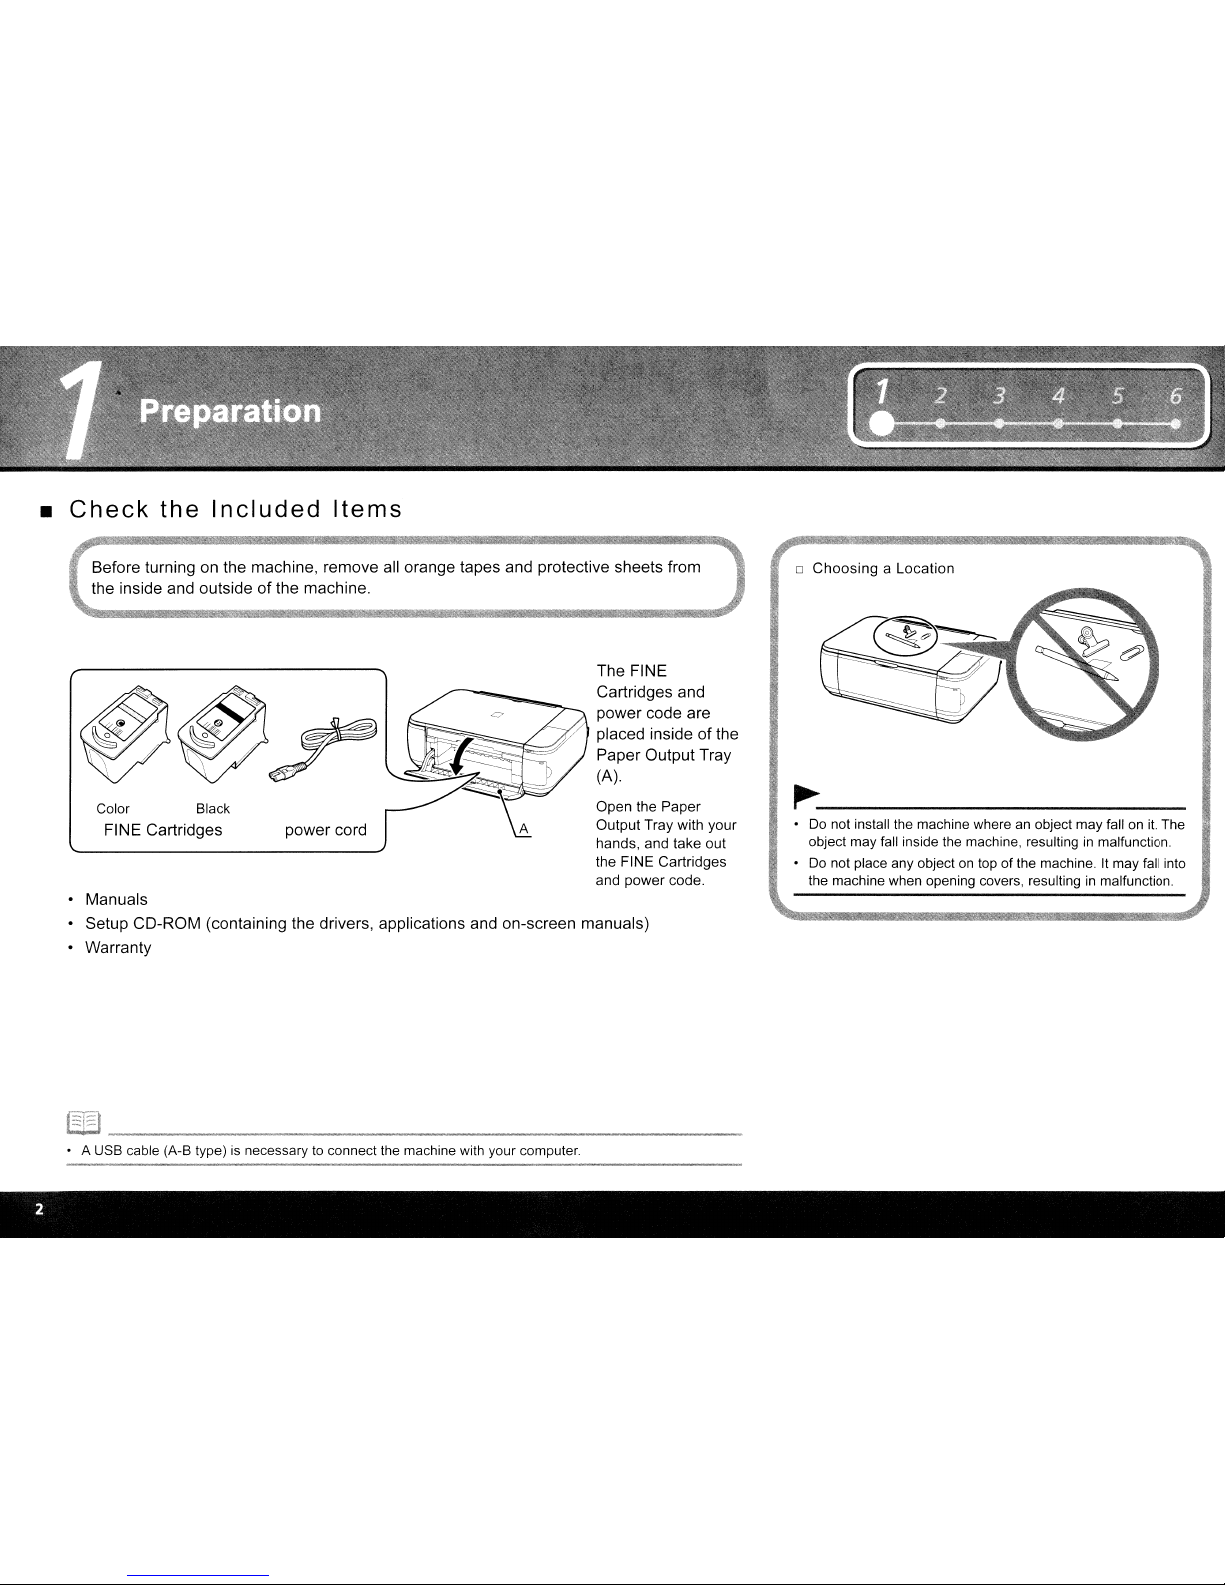
• Manuals
• Setup CD-ROM (containing the drivers, applications and on-screen manuals)
• Warranty
~
~
Before turning on the machine, remove all orange tapes and protective sheets from
the inside and outsideofthe machine.
~
~
o
ChoosingaLocation
~-----------
•Donot install the machine whereanobject may fall on
it.
The
object may fall inside the machine, resulting
in
malfunction.
•
Do
not place any objectontop of the machine.Itmay fall into
the machine when opening covers, resulting
in
malfunction.
The FINE
Cartridges and
power code are
placed insideofthe
Paper Output Tray
(A).
Open the
Paper
Output Tray with your
hands, and take out
the FINE Cartridges
and power code.
power cord
Color Black
FINE Cartridges
• A USB cable (A-B type)isnecessary to connect the machine with your computer.
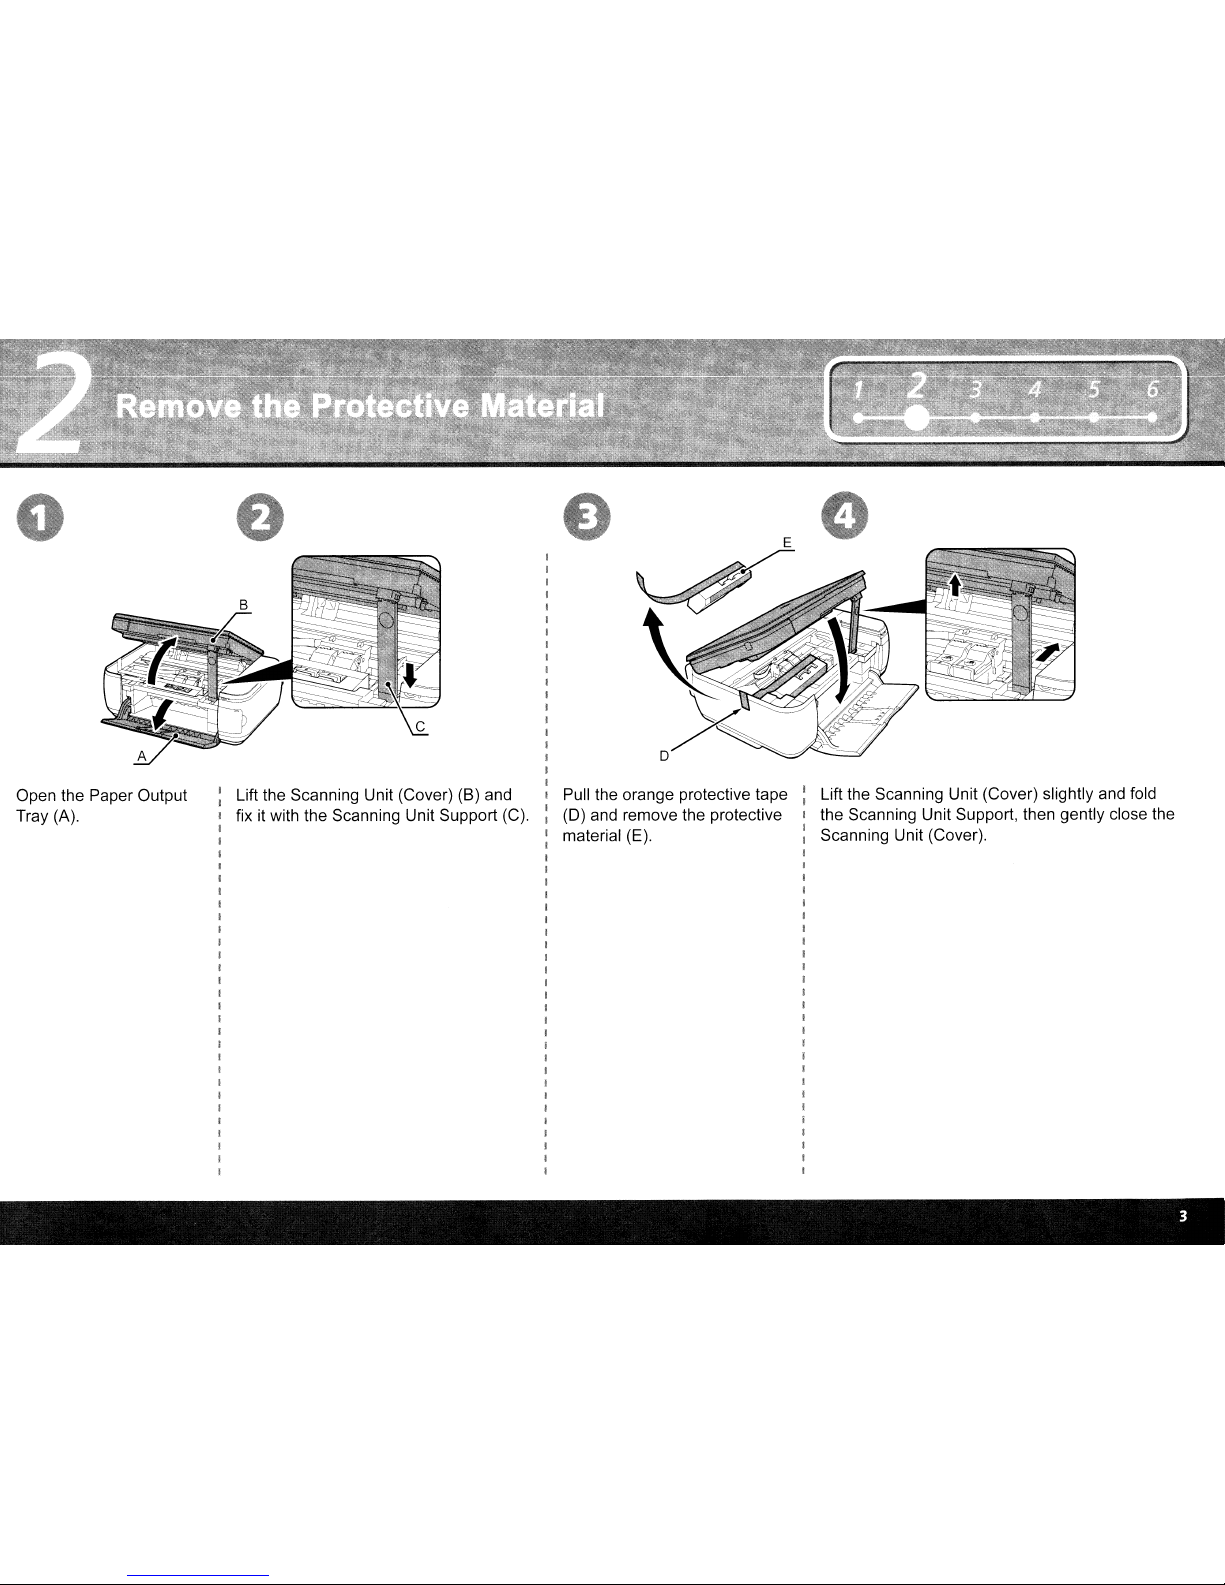
Open the Paper Output
Tray (A).
Lift the Scanning Unit (Cover)
(8)
and
fix it with the Scanning Unit Support (C).
Pull the orange protective tape
(0)
and remove the protective
material (E).
Lift the Scanning Unit (Cover) slightly and fold
the Scanning Unit Support, then gently close the
Scanning Unit (Cover).
Set
the
ink
cartridge.
LanuaeseI
eetl
on
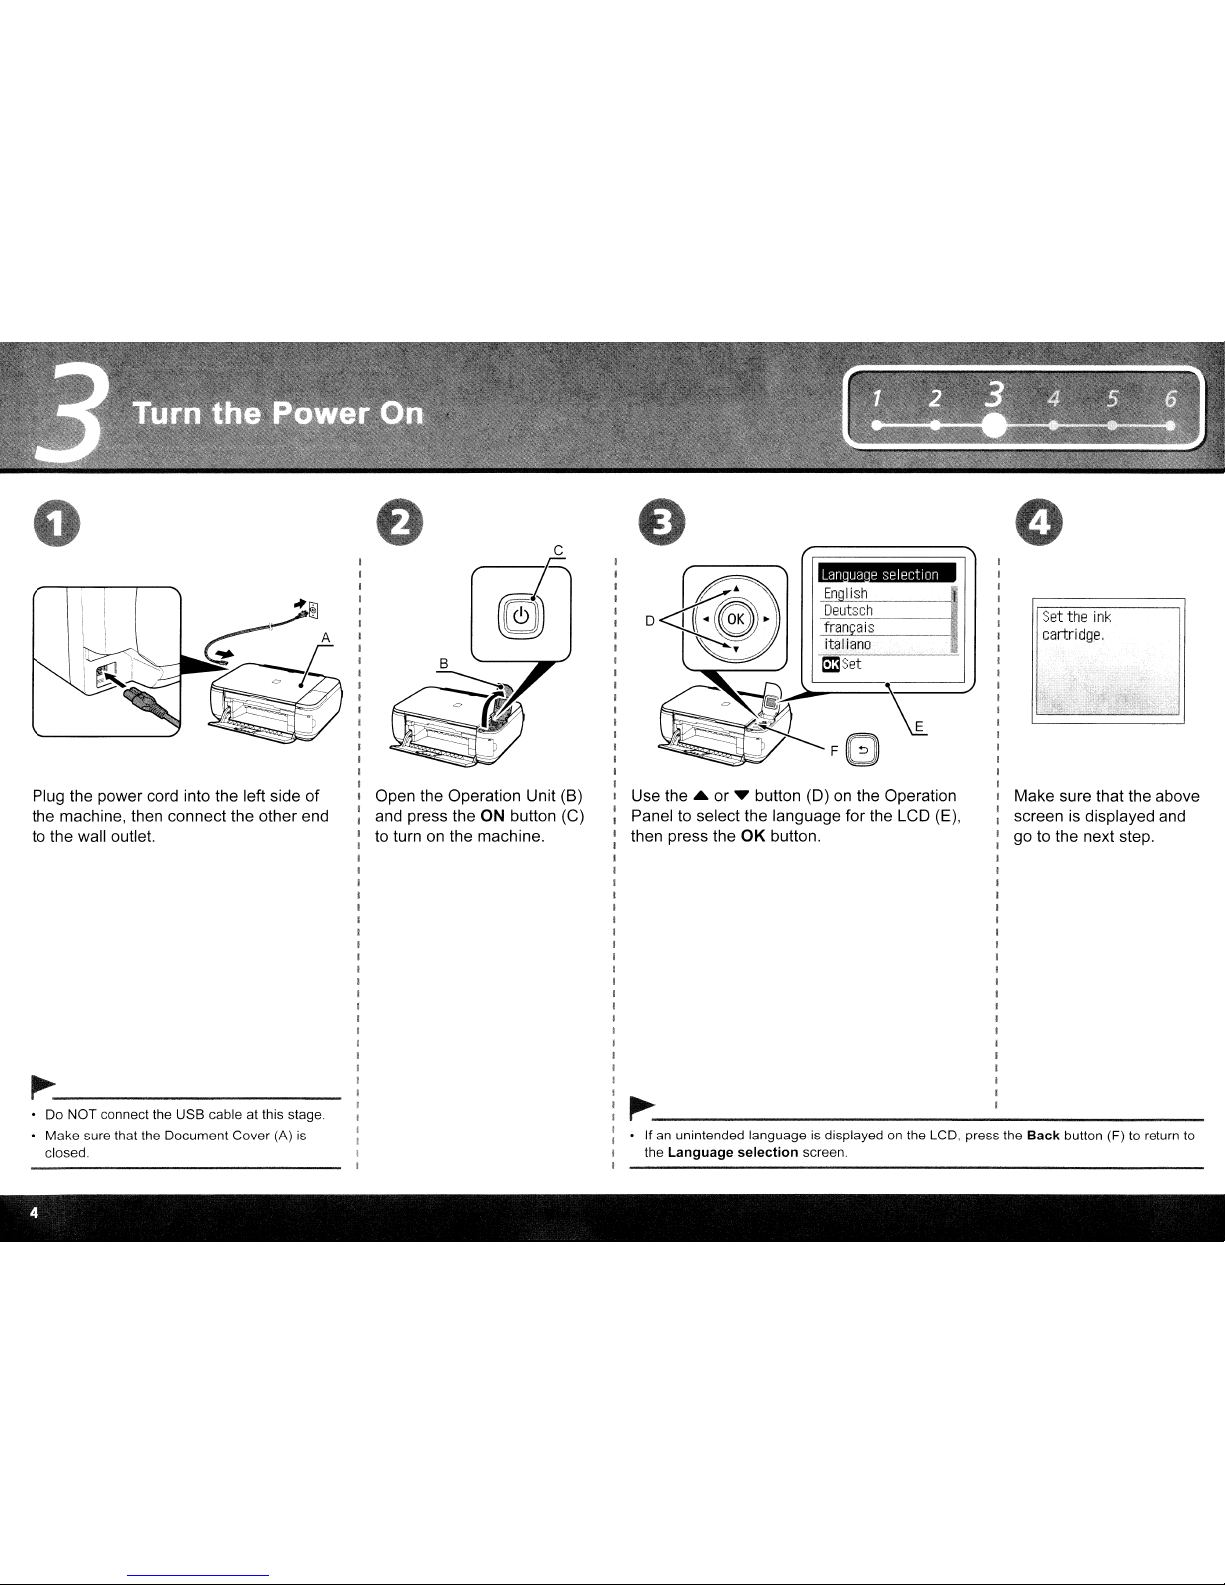
• Ifanunintended languageisdisplayedonthe LCD. press the
Back
button (F) to return
to
the
Language
selection
screen.
I
I
I
I
I
I
I
I
I
I
I
I
I
I
I
I
I
I
I
I
Make sure that the above
I
I screen
is
displayed
and
I go to the next step.
i
I
I
I
I
I
I
I
I
I
I
I
I
I
I
I
I
I
I
I
I
~-------
I
--
I
I
I
I
I
I
I
,
I
I
I
I
I
I
I
I
I
I
I
I Use the A
or.
button (D)onthe Operation
I
I
Panel to select the language for the LCD (E),
I then press the OK button.
I
I
I
I
I
I
I
I
I
I
I
I
i
!
I
I
I
I
I
I
I
!
I
I
I
I
I
I
I
I
I
I
I
I
I
I
I
I
I
I
I
I
I
I
I
I
I Open the Operation Unit (8)
: and press the
ON button (C)
I
to
turnonthe machine.
I
I
I
I
I
I
I
I
I
I
I
I
I
I
I
I
I
I
I
Plug the power cord into the left side of
the machine, then connect the other end
to the wall outlet.
• Do NOT connect the USB cable at this stage
• Make sure that the Document Cover (A)
is
closed.
~---------
o
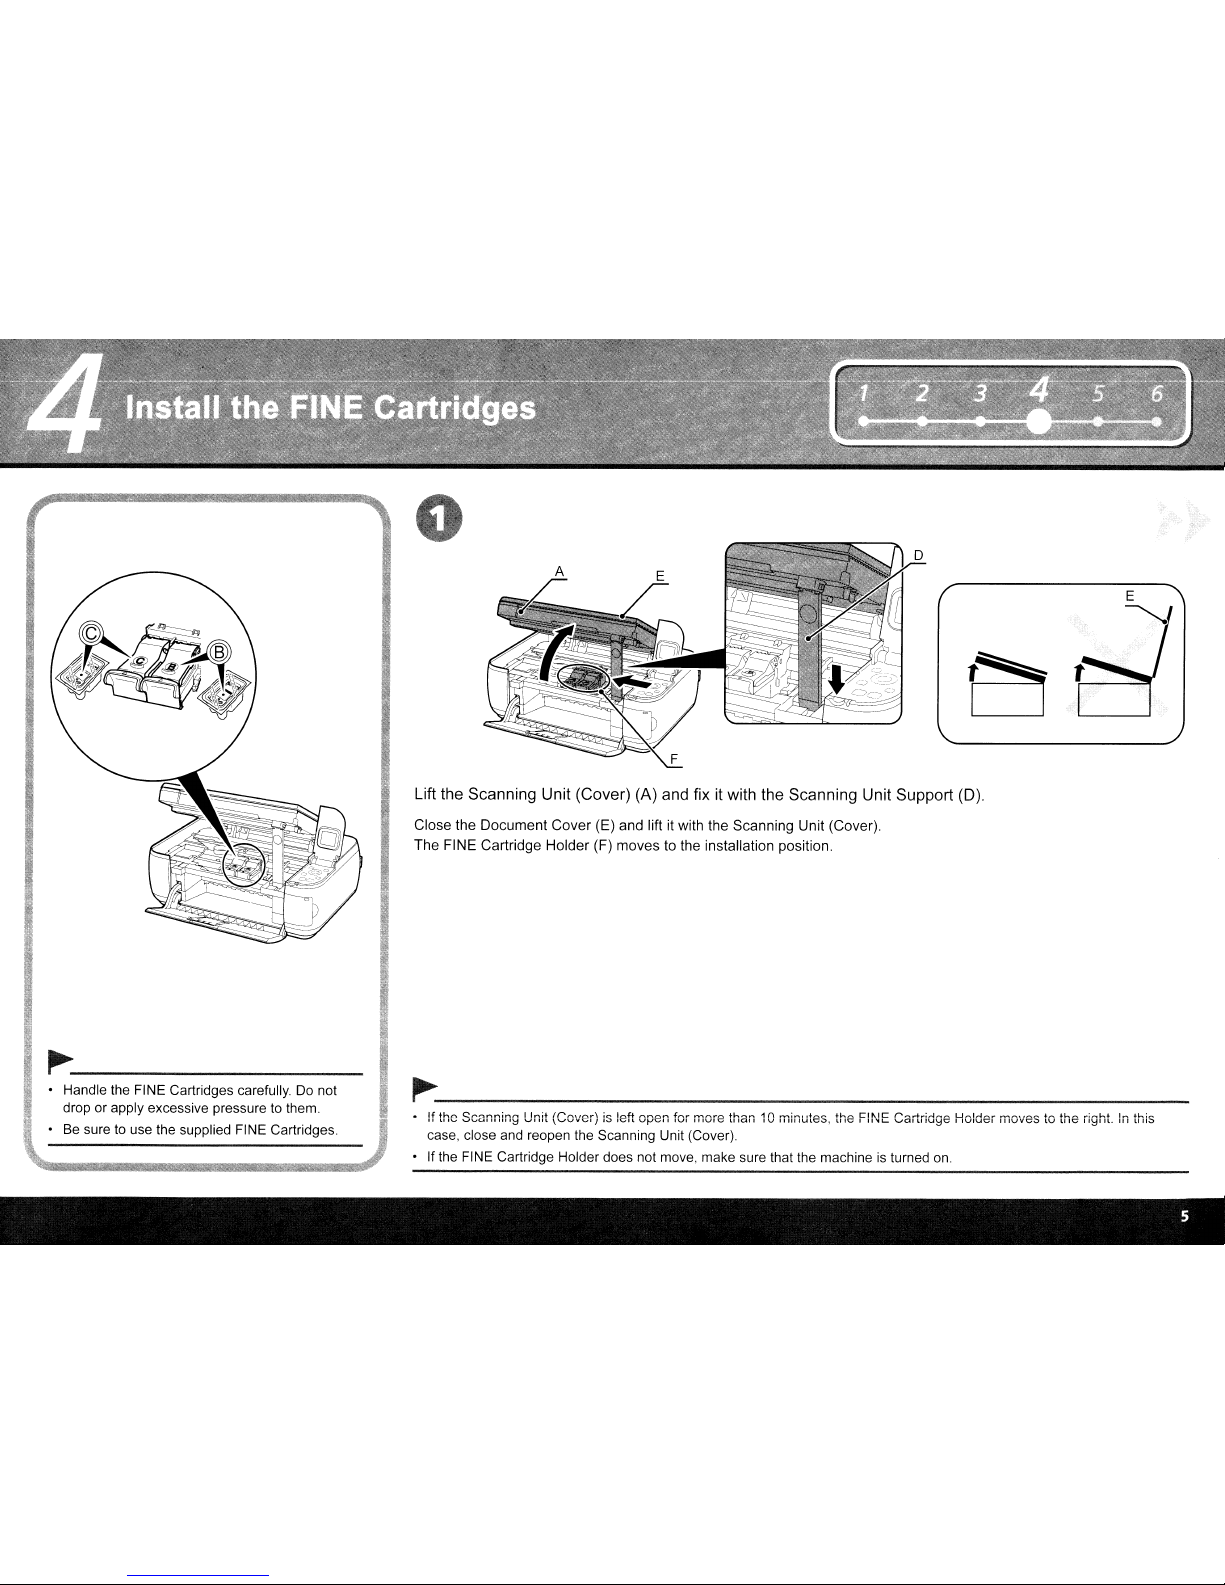
Lift the Scanning Unit (Cover) (A) and fix it with the Scanning Unit Support (0).
Close the Document Cover (E) and lift it with the Scanning Unit (Cover).
The FINE Cartridge Holder (F) moves to the installation position.
~--------
• Handle the FINE Cartridges carefully.Donot
drop or apply excessive pressure
to
them.
•
Be
suretouse the supplied FINE Cartridges.
~-------------------
•Ifthe
Scanning
Unit
(Cover)isleft
open
for
more
than
10
minutest
the
FINE
Cartridge
Holder
movestothe
right.Inthis
case, close
and
reopen the Scanning Unit (Cover).
If
the
FINE Cartridge Holder does not move, make sure that the machineisturned
on.
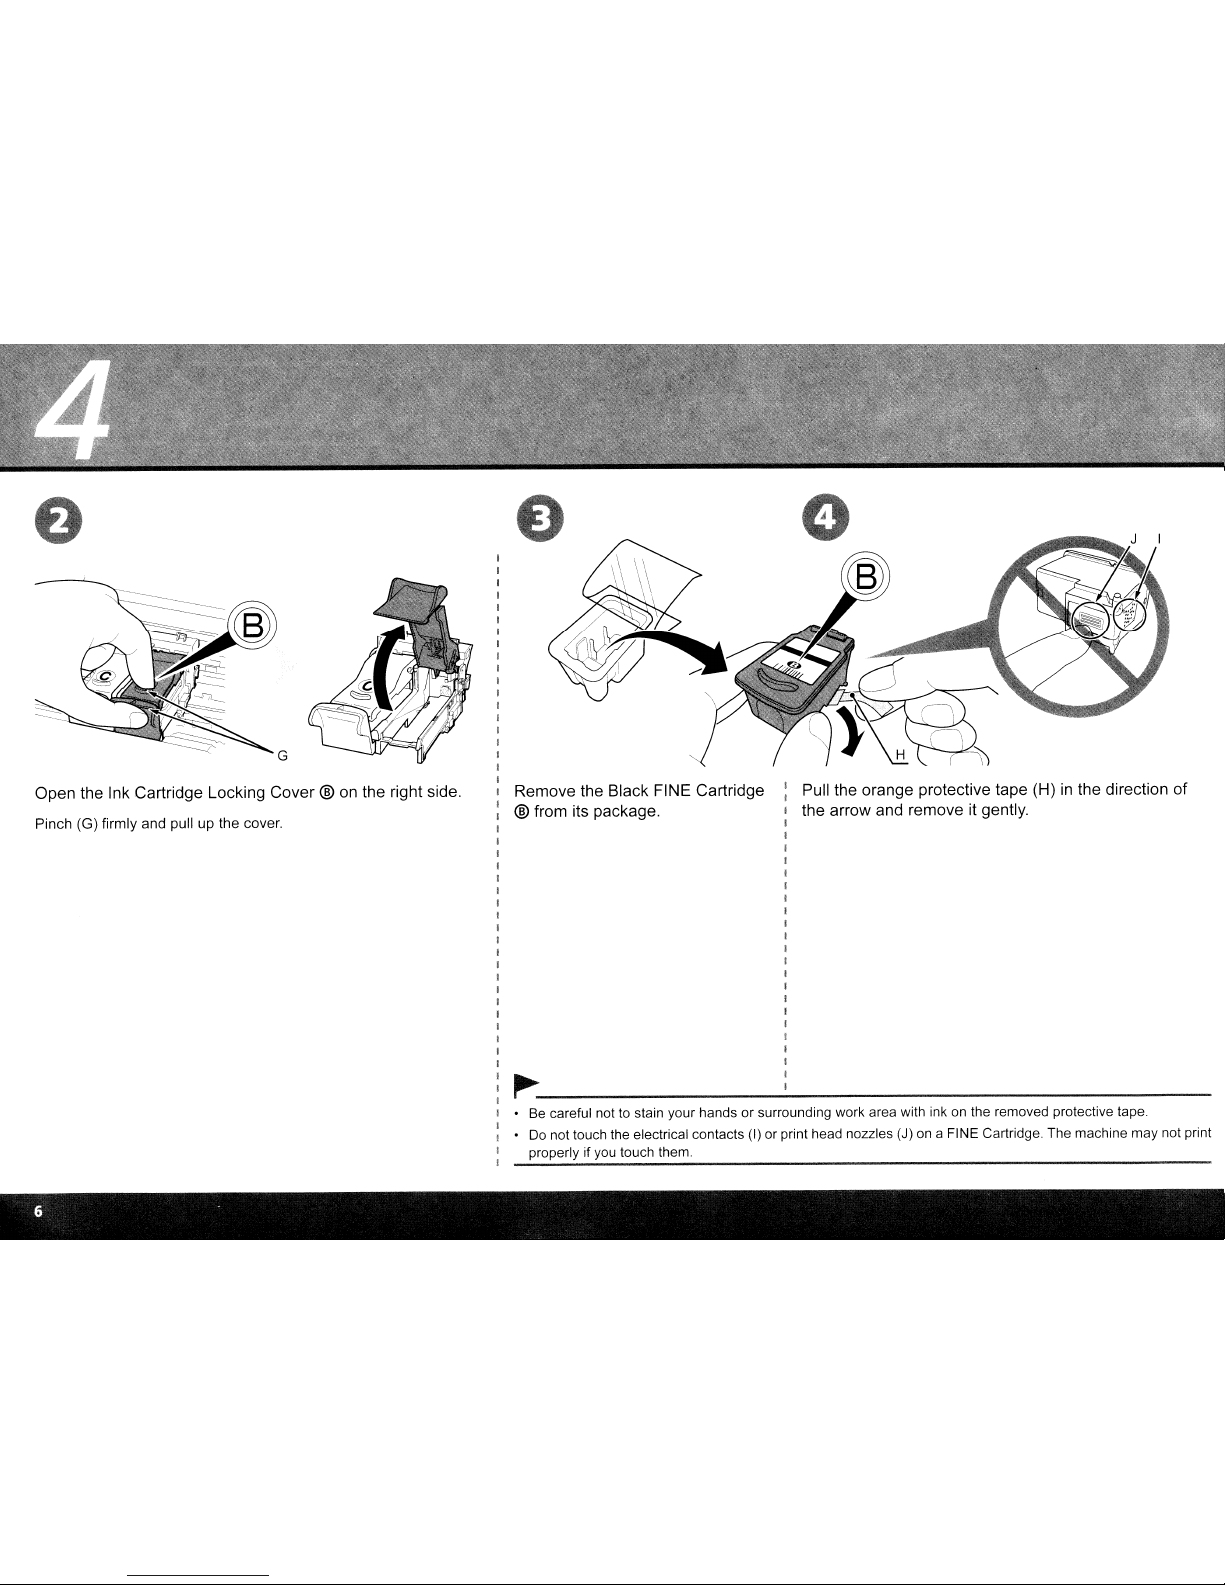
Open the Ink Cartridge Locking Cover ®onthe right side.
Pinch (G) firmly and pull up the cover.
Remove the Black FINE Cartridge
® from its package.
Pull the orange protective tape (H)
in
the direction
of
the arrow and remove it gently.
~-------------------
• Be careful not to stain your hands or surrounding work area with inkonthe removed protective tape.
Do not touch the electrical contacts (I) or print head nozzles (J) on a FINE Cartridge. The machine may not print
properly if you touch them.
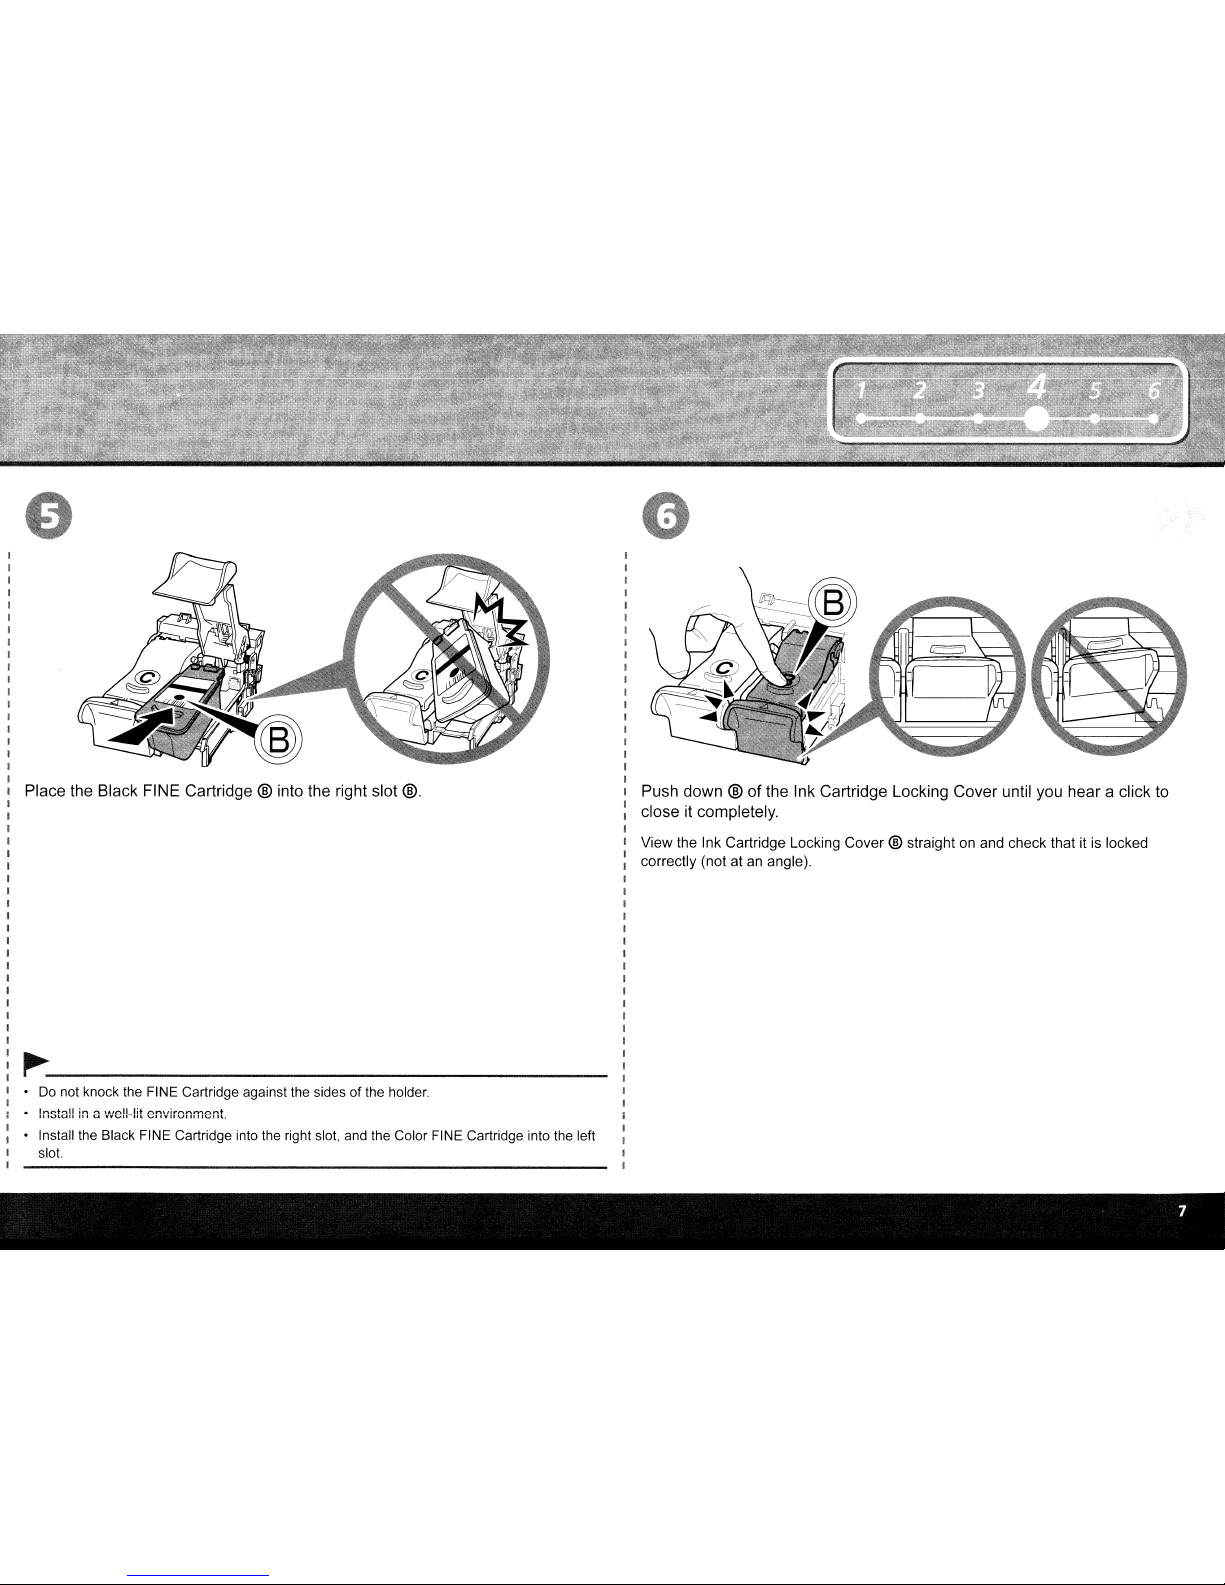
View the Ink Cartridge Locking Cover ® straight on and check that it is locked
correctly (not at an angle).
Place the Black FINE Cartridge ® into the right slot
®.
~----------------
•Donot knock the FINE Cartridge against the sides of the holder.
• Install the Black FINE Cartridge into the right slot, and the Color FINE Cartridge into the left
slot.
I
I
I
I
I
I
I
I
I
I
I
I
I
I
I
I
I
I
I
I
Push down ®ofthe Ink Cartridge Locking Cover until you hear a click
to
I
I close it completely.
I
I
I
I
I
I
I
I
I
I
I
I
I
I
I
I
I
I
I
I
I
I
I
o
o
Standard
copy
----------
a
Print settings
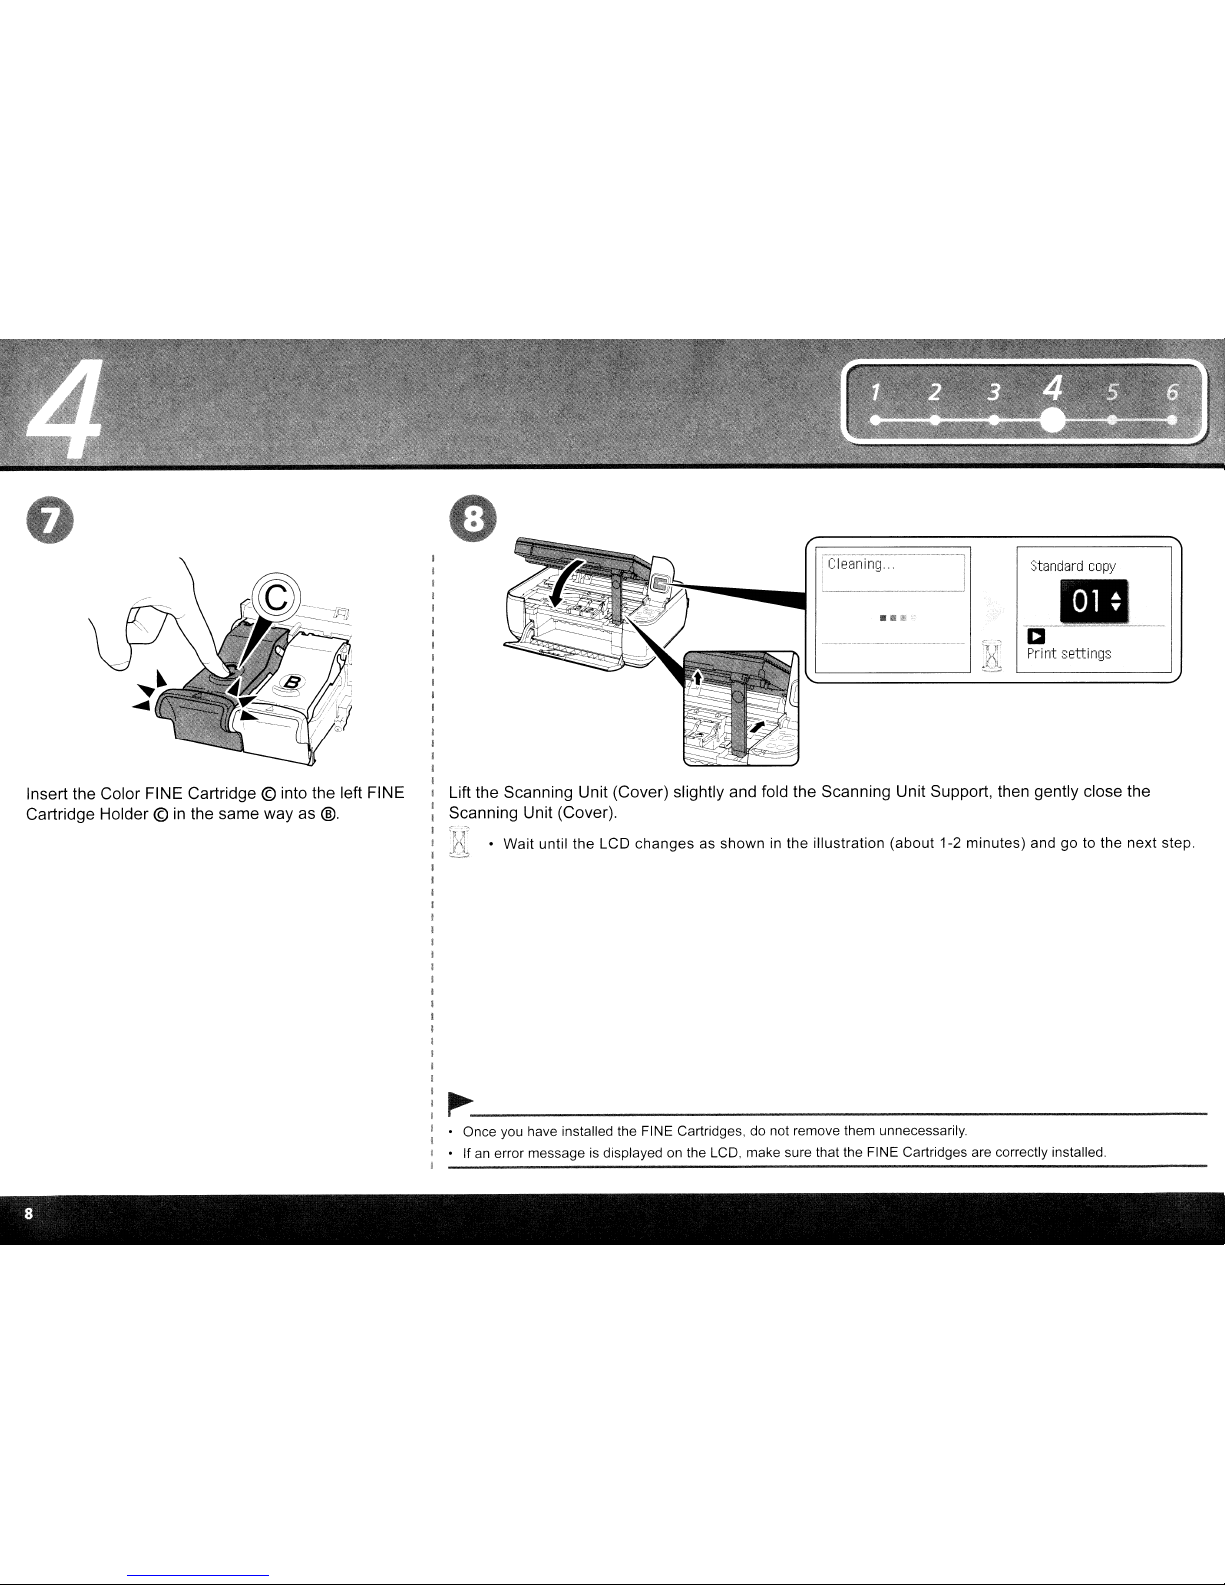
Insert the Color FINE Cartridge © into the left FINE
Cartridge Holder ©inthe same way as
@_
Lift the Scanning Unit (Cover) slightly and fold the Scanning Unit Support, then gently close the
Scanning Unit (Cover).
:;r
.-:
~<i
.
Wait
until
the
LCD
changesasshowninthe
illustration
(about
1-2
minutes)
andgoto
the
next
step.
o
~---------------------
• Once you have installed the FINE Cartridges, do not remove them unnecessarily.
If
an
error message is displayed on the LCD, make sure that the FINE Cartridges are correctly installed.
To
use the machine by connecting it to a computer, software including the drivers
needs to
be
copied (installed) to the computer's hard disk. The installation process
takes about 20 minutes. (The installation time varies depending
on
the computer
environment or the number
of
applications to be installed.)
The screens below are based
on
Windows Vista operating system Ultimate Edition
(hereafter referred to as "Windows Vista") and Mac
as
x
v.1
0.5.x.
~-----------------
• Quit all running applications before installation.
• Logonas the administrator (or a member of the Administrators group).
•
Do
not switch users during the installation process.
• Internet connection may be required during the installation. Connection fees apply.
• It may be necessary to restart your computer during the installation process. Follow the onscreen instructions and do not remove the
Setup
CD·ROM
during restarting. The installation
resumes once your computer has restarted.
• Mac
as
9,
Mac
as
x Classic environments, or Mac as x
v.1
0.3.8 or earlier are not supported.
D
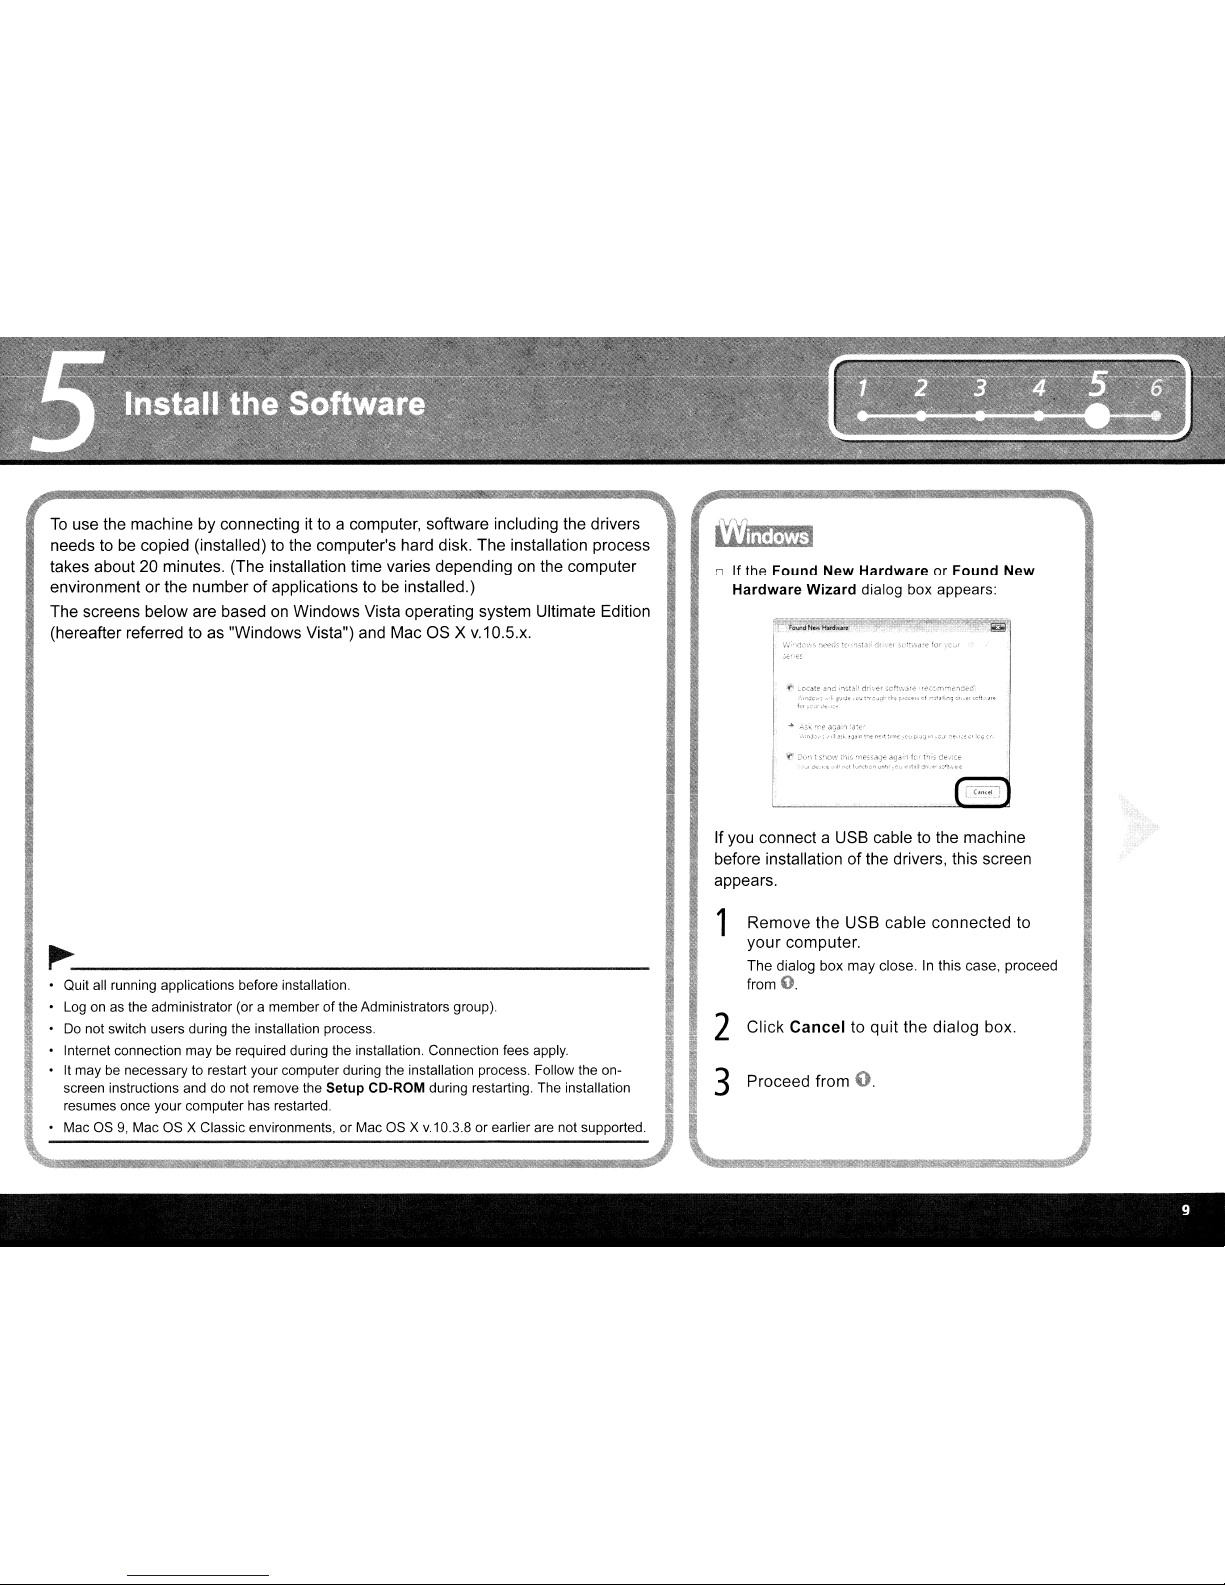
If
the
Found New HardwareorFound New
Hardware Wizard
dialog
box
appears:
,~,-",ft\."I:l'-e
'!t'CGm:'T:c'lGed
·",",••1.,
•.••
1' ,0<; !Y'c,;C;lc
:b
e
;:'0(0;-,,,
'A
,~,:.tJ'L~j
:iI:,f'
,oft.'Jl£·
If
you connect a USB cable to the machine
before installation of the drivers, this screen
appears.
1 Remove the USB cable connected to
your computer.
The
dialog box
may
close. In this case, proceed
from
2 Click Cancel to quit the dialog box.
3 Proceed from
"
'"
D
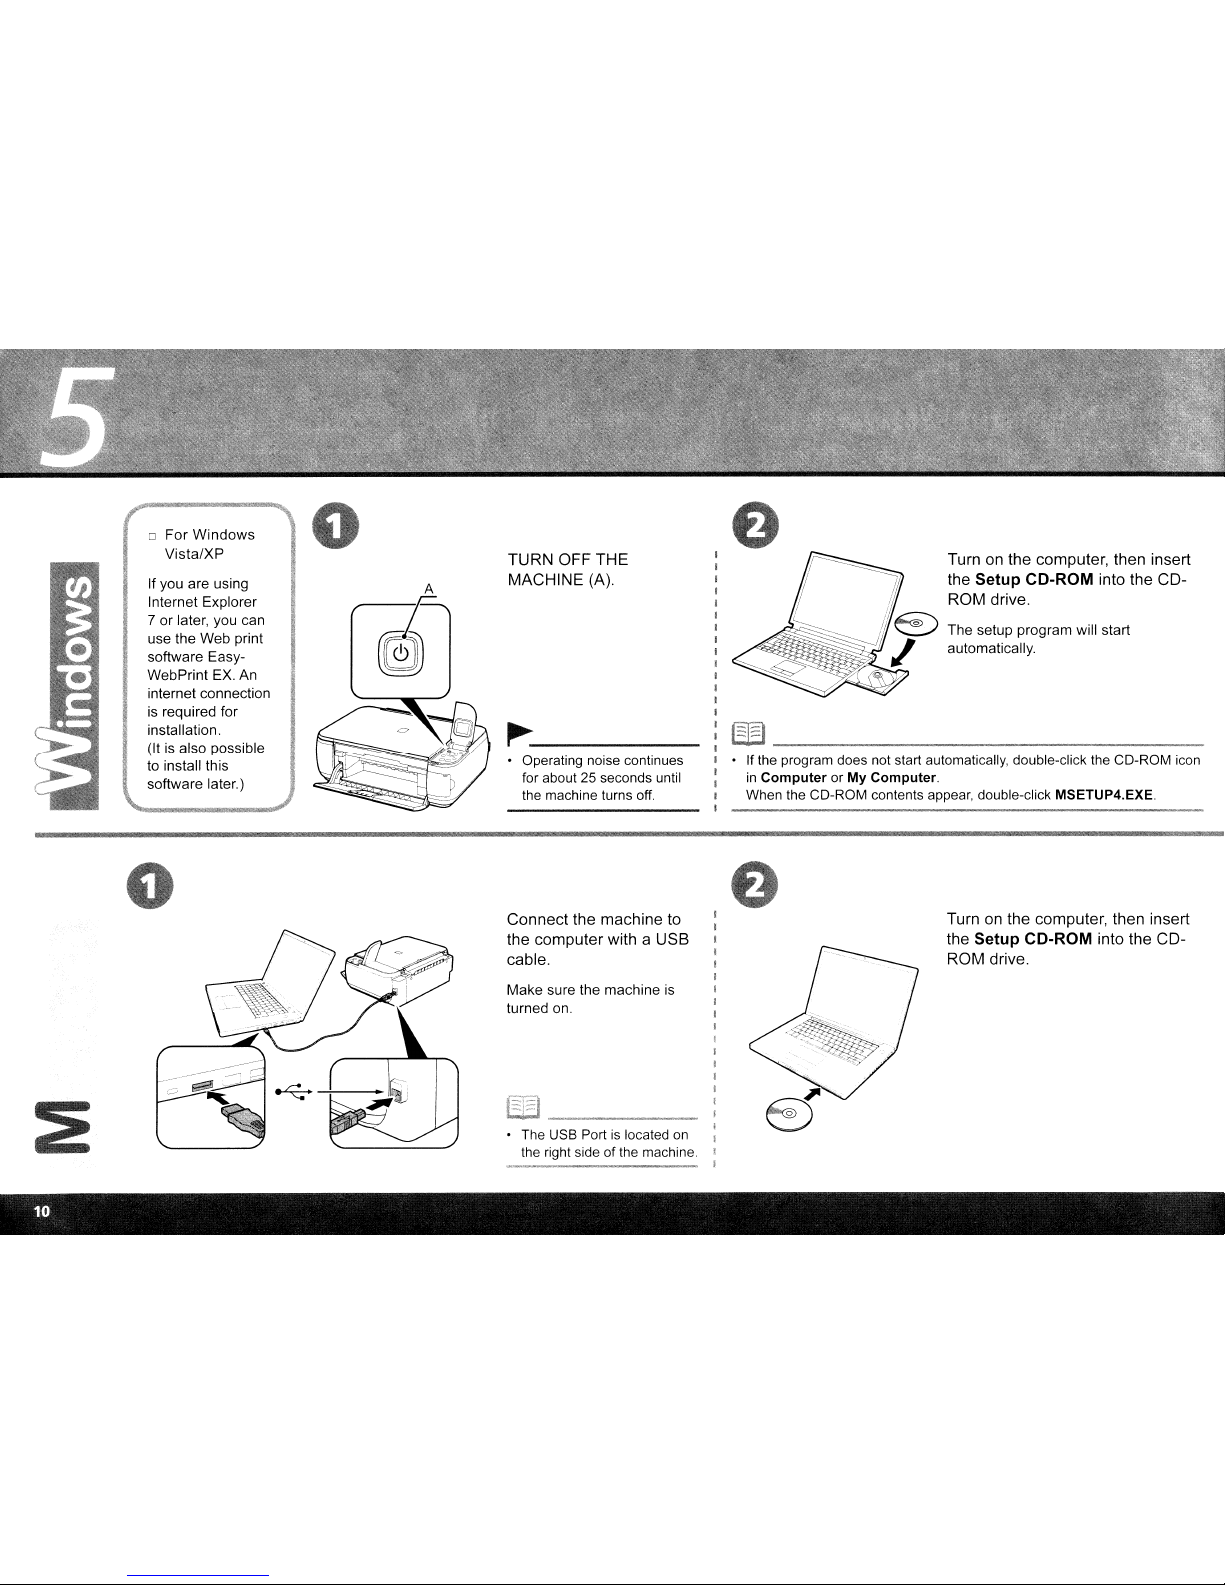
For
Windows
Vista/XP
TURN OFF THE
Turn on the computer, then insert
If you are using
A
MACHINE (A). the Setup CD-ROM into the CD-
Internet Explorer
r
ROM drive.
7orlater, you can
The setup program will start
use the
Web
print
~
automatically.
software EasyWebPrint EX. An
internet connection
is required for
installation.
~
(It is also possible
to install this
• Operating noise continues
• If the program does not start automatically, double-click the CD-ROM icon
software later.)
for about 25 seconds until
in
Computer
or My Computer.
~.
..i
the machine turns
off.
When the CD-ROM contents appear, double-click MSETUP4.EXE.
Connect the machine to
the computer with a USB
cable.
Make sure the machine is
turned on.
• The USB Port
is
located
on
the right side of the machine.
Turn on the computer, then insert
the Setup CD-ROM into the CDROM drive.
 Loading...