

Canon imageCLASS D660, imageCLASS D680, imageCLASS D661, imageCLASS D600 Series Setup Instructions
For installation help and operational
instructions, call:
1-800-828-4040 1-800 OK CANON
U.S.A. CUSTOMERS CANADA CUSTOMERS
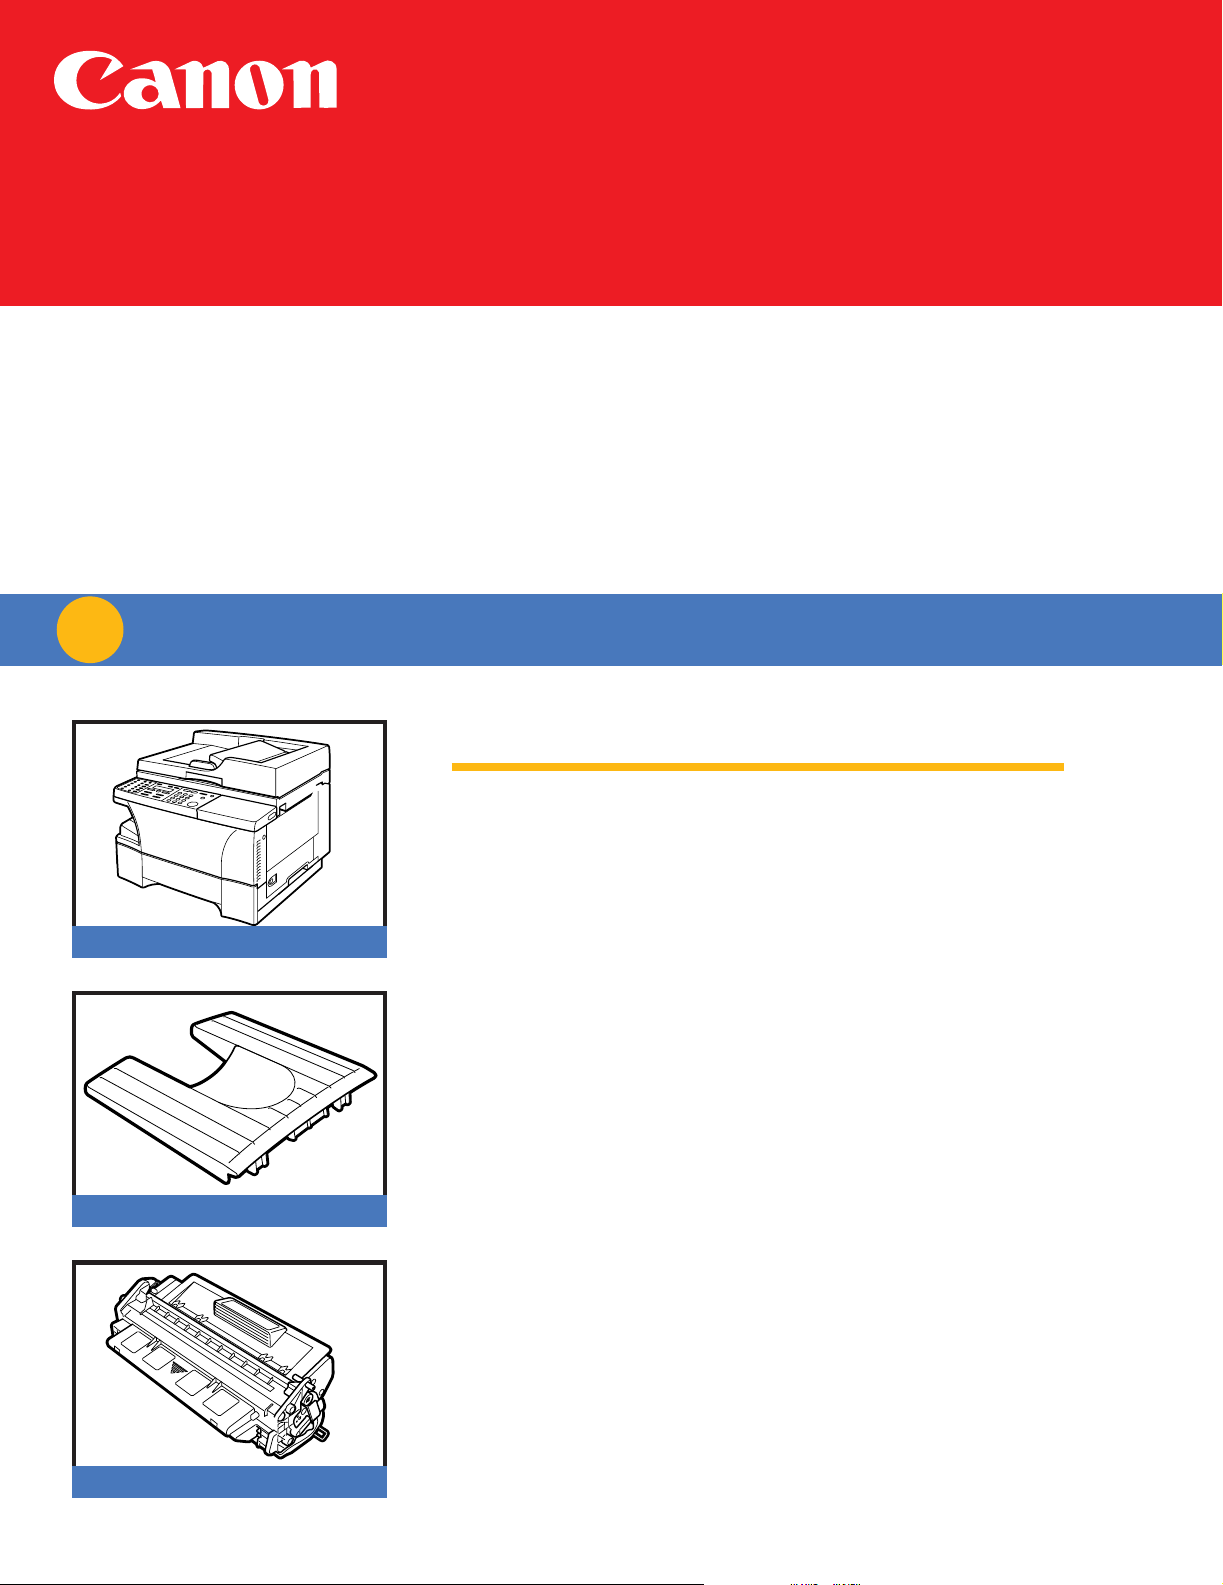
Output Tray
L50 Cartridge
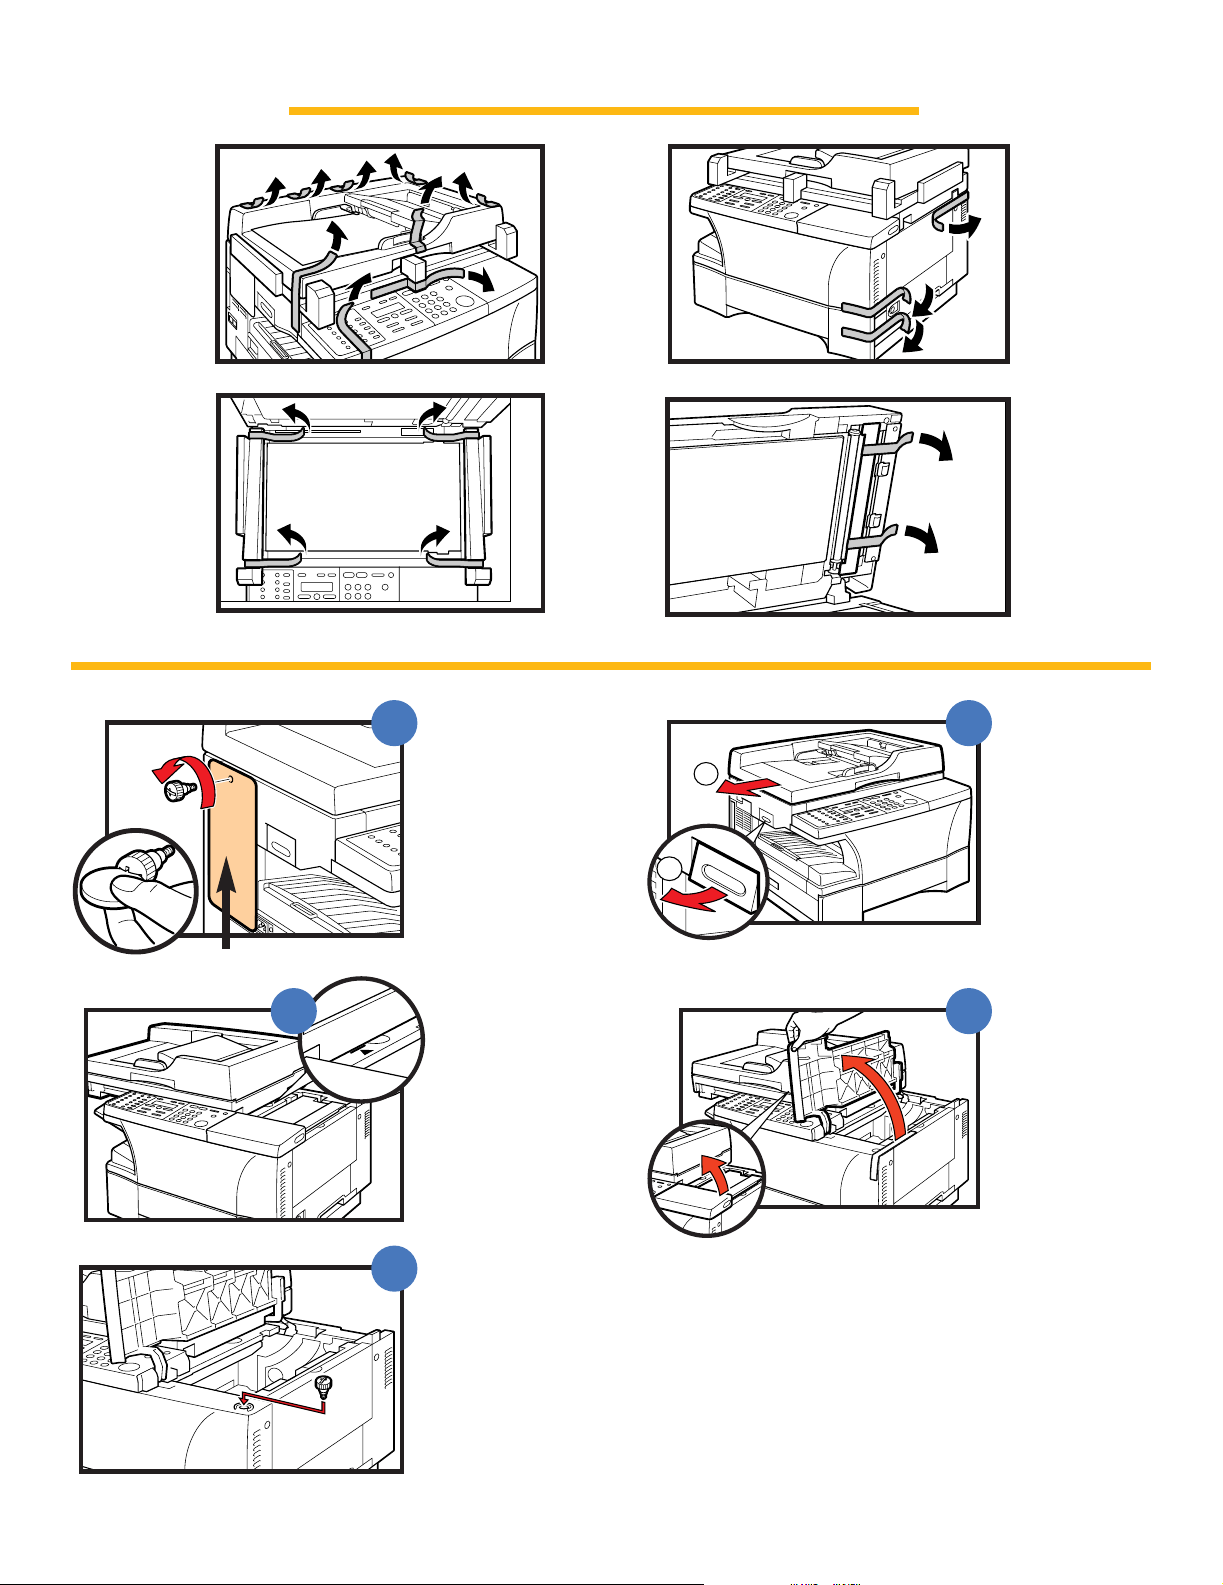
Connect the supplied power cord to the power
cord connector on the left side of the machine.
REMOVE ALL ITEMS FROM THE BOX
• POWER CORD
• TELEPHONE LINE
*
• DOCUMENTATION
(Set-up Instructions, Reference Guide, Fax Guide*,
Limited Warranty Card, Registration Card)
• DESTINATION LABEL
*
• CD-ROM
UNPACK MACHINE
1
SET-UP INSTRUCTIONS
imageCLASS D600 Series
Machine
*D680 Model
Pub. NO. FA7-3911-010
Printed in Thailand
1
PAR
USB interface connection
Connect to your computer using USB cable.
PARALLEL
Parallel interface connection
Connect to your computer using parallel cable.
Fix the connector solidly using the wire clips.
Label
Connect the supplied power cord to the power
cord connector on the left side of the machine.
Remove the shipping
attachment on the left
side using a coin.
Otherwise the scanning
unit of the machine is
locked and you cannot
make copies or send faxes.
Slide left until the
|<mark appears.
Insert the removed
shipping attachment
in the holder.
Keeping the cartridge
cover open, go
to section 2 INSTALL CARTRIDGE
Keep the shipping
attachment in the holder
in case you need to
transport the machine.
REMOVE ALL SHIPPING MATERIALS
1
Lift the platen unit
lever (1) and slide
the platen unit (2)
Open the
cartridge cover.
A
E
B
C D
PAR
USB interface connection
Connect to your computer using USB cable.
PARALLEL
Parallel interface connection
Connect to your computer using parallel cable.
Fix the connector solidly using the wire clips.
2
Connect the supplied power cord to the power
cord connector on the left side of the machine.
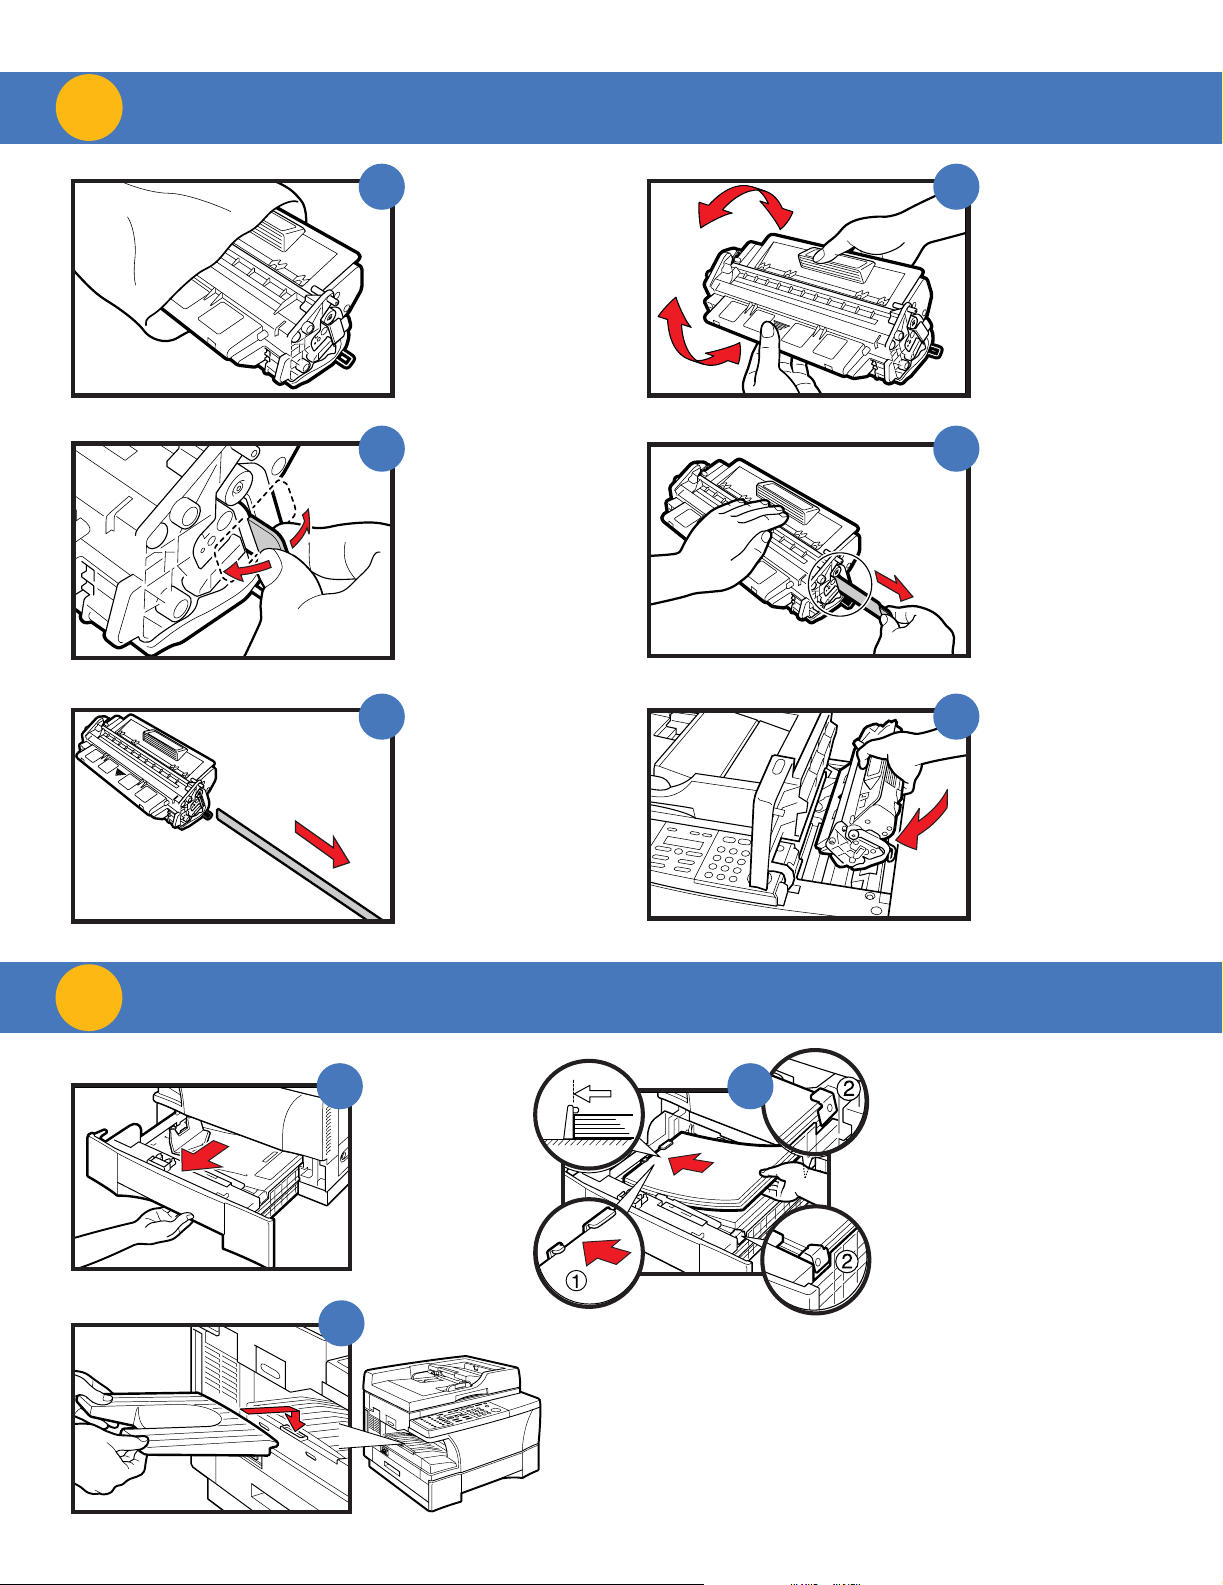
Grasp the cartridge
with one hand, firmly
and slowly pull the
sealing tape tab with
the other hand.
Remove the
sealing tape
completely.
Remove the
new cartridge
from its bag.
INSTALL CARTRIDGE
2
Place the cartridge
on a flat and stable
surface, grip the
sealing tape tab
and snap in the
direction shown.
Make sure that the
tab is detached from
the cartridge.
Rock the cartridge
5 or 6 times to
distribute the
toner evenly.
Position the arrow mark
on the cartridge towards
the inside of the machine,
and gently slide the
cartridge in the machine
as far as it will go.
Close the cartridge cover
and slide the platen unit
to the original position.
A
B
C D
E F
Grip the cassette
handle, and pull
out towards you
until the cassette
comes to a stop.
Load the paper stack beneath
the cassette’s length guide (1)
and width guide’s claws (2).
Make sure that the paper stack does
not exceed the length and width
guide’s claws in the cassette. Failure
to do so will cause a paper jam.
Gently insert the cassette as
far as it will go.
Hook the tab on
the output tray
onto the opening
on the machine.
LOAD PAPER
3
A
B
C
PAR
USB interface connection
Connect to your computer using USB cable.
PARALLEL
Parallel interface connection
Connect to your computer using parallel cable.
Fix the connector solidly using the wire clips.
 Loading...