

Starter Guide
1
2
3
Preface
Next Page
Installing the Machine
P. 5
Configuring and
Connecting the Fax
P. 13
Read this guide first.
Please read this guide before operating this
product.
The remarks for important safety
instructions are described in "Basic
Operation Guide." Read the guide also.
After you finish reading this guide, store it in
a safe place for future reference.
4
Illustrations and displays used in this manual are which of MF4570dn unless specified.
Connecting to a Computer
and Installing the Drivers
P. 17
Appendix
P. 28
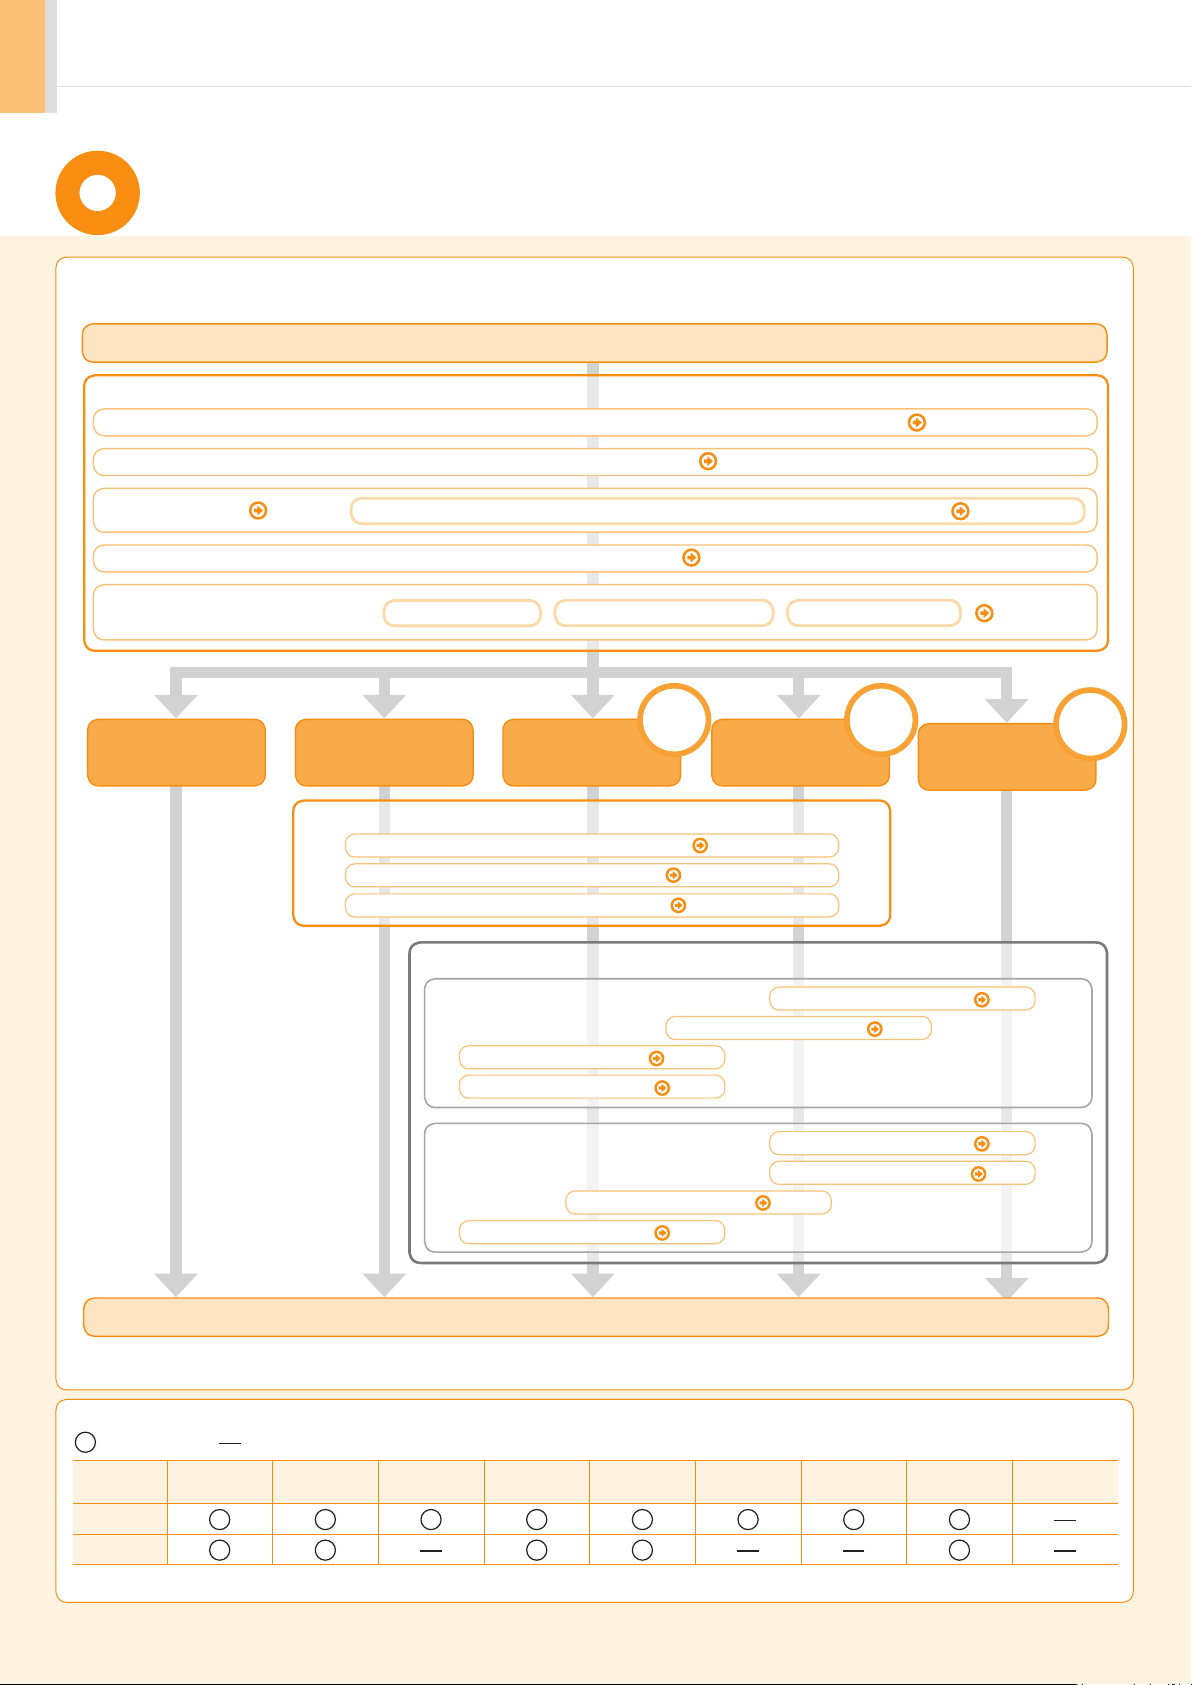
Setting Up the Machine to Suit Your Needs
1
*
Determine which machine functions (Copy, Print, Fax, PC Fax, Scan, Remote UI
according to the flowchart below.
Start settings.
Required Operations
Carrying the Machine to the Installation Site and Removing the Packing Materials P. 5
Preparing the Toner Cartridges P. 6
) you intend to use, and make settings
Loading Paper P. 9
Turning the Power ON and
Specifying the Initial Settings
Copy Fax
Settings for paper sizes and paper types are required after turning the power ON.
Connecting the Power Cord P. 10
Language Settings
Country and Region Settings
USB
Print
Connection
Scan
PC Fax
Current Time Settings
Network
*
Connection
2
Print
Scan
PC Fax
Fax Settings
Registering the Sender Information P. 13
Selecting the Receive Mode P. 14
Connecting a Telephone Line P. 15
Settings in a Computer
For Windows
Checking the IP Address*
Installing the Software P. 20
Connecting a USB Cable P. 21
Connecting to a Network*
1
P. 18
P. 12
1
*
Settings from
a Computer
P. 11
Remote
1
*
UI
1
P. 17
For Macintosh
Connecting a USB Cable P. 24
Settings are now complete.
*1 The network function is available only for MF4570dn.
*2 You may use network scan function only in the Windows environment.
Available Features
: available : not available
Copy Print
MF4570dn
MF4450
* You may use network scan function only in the Windows environment.
2
2-sided
Printing
Fax
(PC Fax)
Connecting to a Network*
Checking the IP Address*
Installing the Software P. 23
Scan
(USB)
Scan
(Network)*
Remote UI
1
1
ADF
(1-sided)
P. 17
P. 18
ADF
(2-sided)
1
Preface
2
Installing the Machine
3
Configuring and Connecting the Fax
4
Connecting to a Computer and
Installing the Drivers
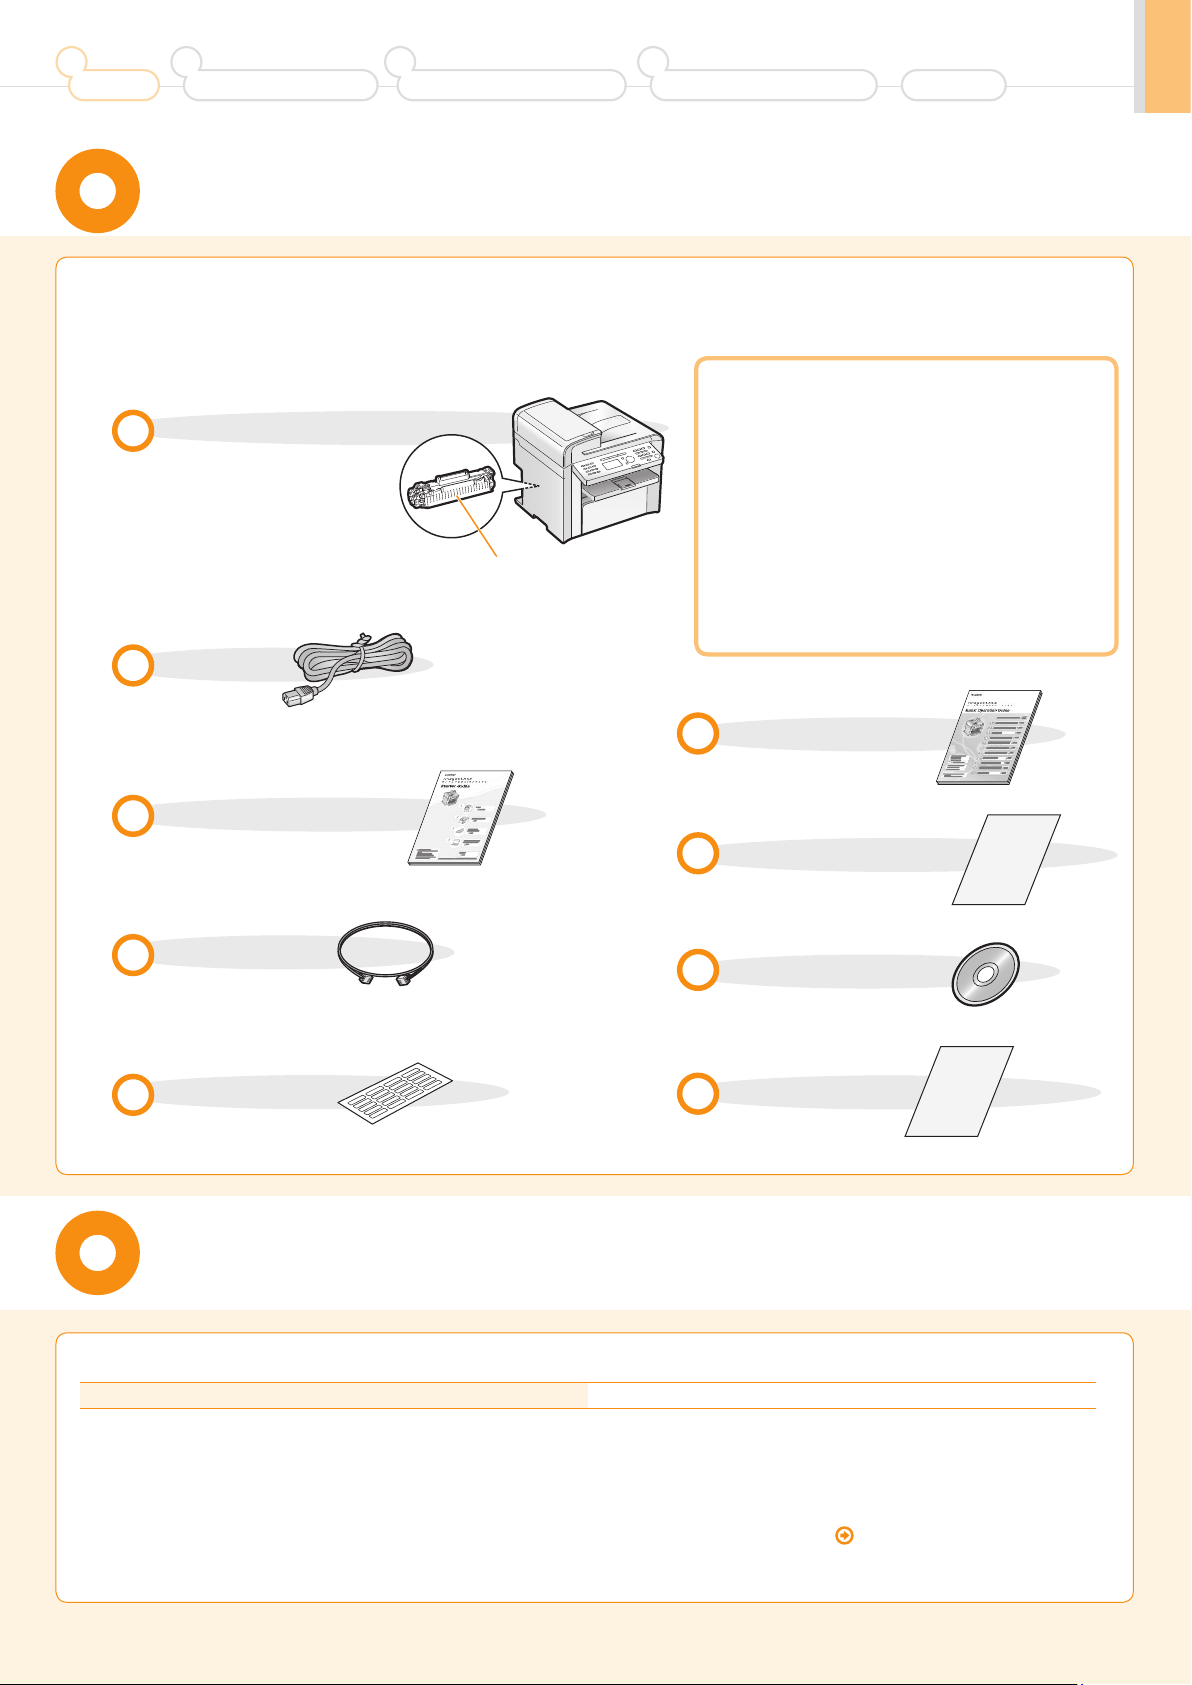
Checking the Supplied Accessories
Appendix
Confirm that all the supplied
1.
accessories are contained in the box.
The machine unit
The toner cartridge is already
installed.
Power cord
Starter Guide (This manual)
Toner cartridge
If an item is missing or damaged, please contact our Canon
Authorized Service Facilities or the Canon Customer Care
Center.
About the LAN cable
The machine does not come with a LAN cable
or a hub. Have cables or a hub ready as needed.
• Use a Category 5 or higher twisted pair cable.
• If you want to connect the machine to a 100BASE-TX
Ethernet network, all the devices to be connected to the
LAN must support 100BASE-TX.
About the USB cable
The machine does not come with a USB cable.
Have cables ready as needed.
Basic Operation Guide
Limited Warranty Notice
Telephone cable
Speed dial label
User Software CD-ROM
Registration Card
Supplied Toner Cartridge
The average yield of the included toner cartridge is as follows.
Canon Cartridge 128 Starter Average yield*1: 1,000 sheets
*1
The average yield is on the basis of "ISO/IEC 19752"* when printing A4 size paper with the default print density setting.
*2
"ISO/IEC 19752" is the global standard relating to "Method for the determination of toner cartridge yield for monochromatic electrophotographic printers
and multi-function devices that contain printer components" issued by ISO (International Organization for Standardization).
The average yield of the replacement toner cartridge differs from which of the supplied toner cartridge.
To purchase replacement toner cartridges, see "About Replacement Toner Cartridge" in the
e-Manual.
1
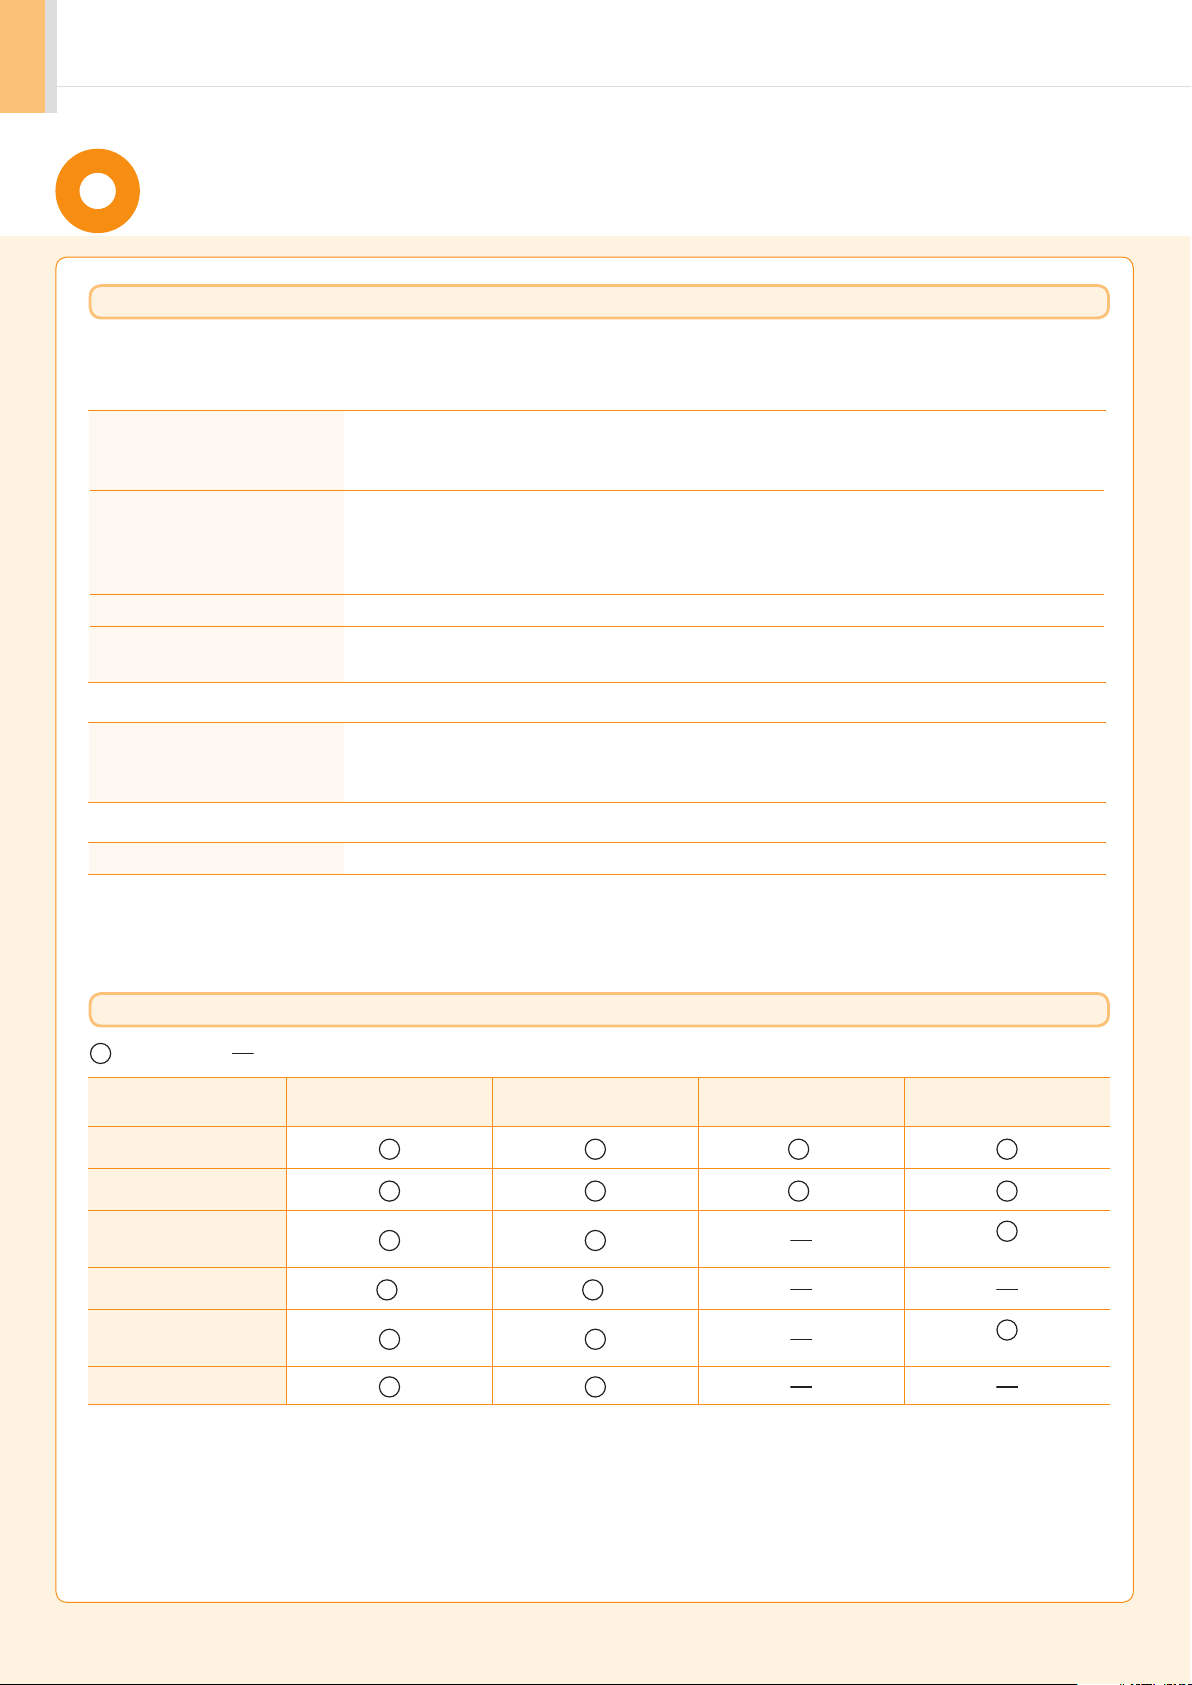
User Software CD-ROM
About the Drivers and Software
The drivers and software included in the CD-ROM supplied with this machine are as follows.
MF Drivers
Printer driver You can print from an application using the machine by installing the printer driver on
your computer. You can process print data at high speed by compressing the print data
using the computer's processing capabilities.
Fax driver If you install the fax driver on your computer, you can select “Print” from an application,
select the Canon fax driver as a printer, and specify the output destination and options.
The fax driver converts the data into an image that conforms to standard fax protocols so
that the data can be printed or saved using the recipient’s fax machine.
Scanner driver You can use the machine as a scanner if you install the scanner driver on your computer.
Network Scan Utility
(MF4570dn only)
MF Toolbox
MF Toolbox* MF Toolbox is a program which allows you to easily open an image scanned by the
This software is required for using the scan functions via a network. This software is
installed with the scanner driver.
scanner in an application, attach the scanned image to an e-mail, and store the scanned
image in a hard disk.
Additional Software Programs
Presto! PageManager This is software for managing scanned images.
* MF Toolbox for Macintosh and MF Toolbox for Windows may be different in some features.
For details, see the Scanner Driver Guide.
Supported Operating Systems
: available
Printer driver
Fax driver
Scanner driver
Network Scan Utility
MF Toolbox
Presto! PageManager
: not available
Windows 2000/XP Windows Vista/7
*
2 pt
*
2 pt
Windows Server 2003/
Server 2008
*
2 pt
*
2 pt
Mac OS X
(version 10.4.9 or later)
(Only for USB connection)
(Only for USB connection)
* Available only with a network connection.
2
1
Preface
2
Installing the Machine
3
Configuring and Connecting the Fax
4
Connecting to a Computer and
Installing the Drivers
About the Supplied Manuals
Appendix
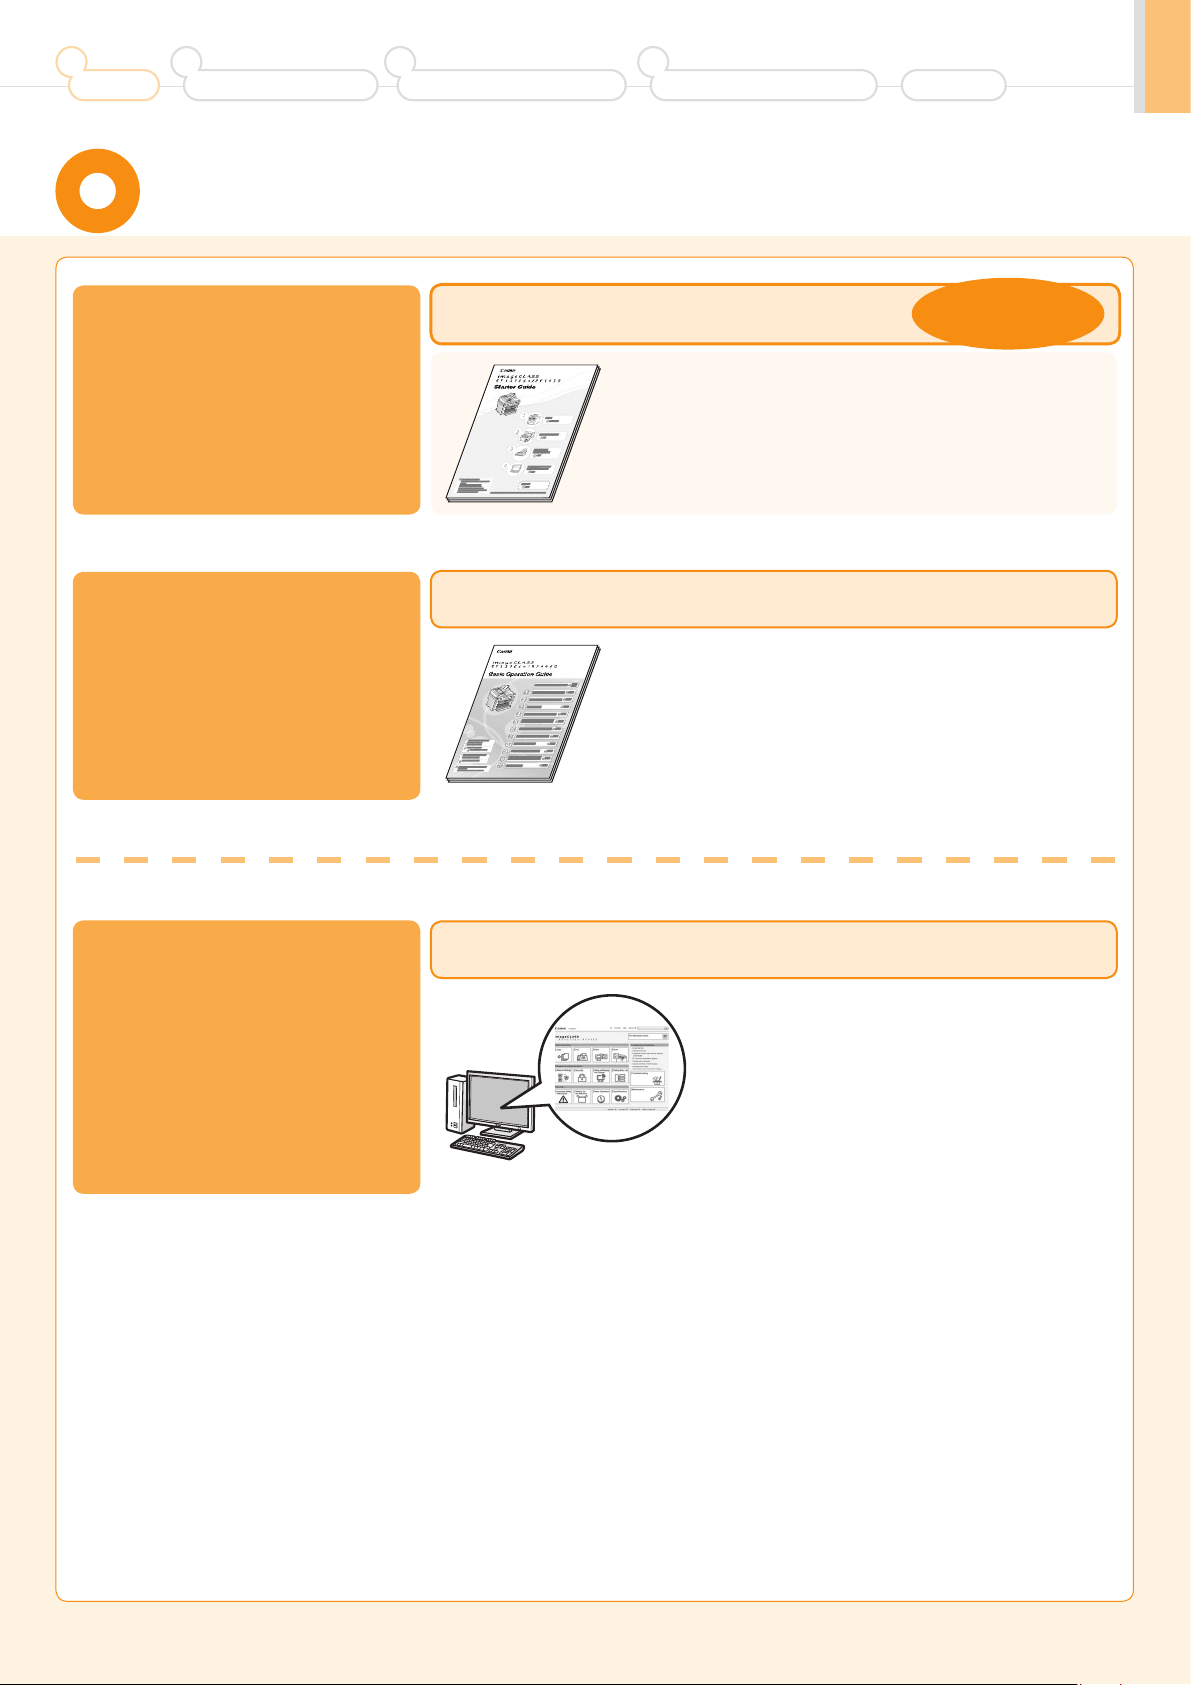
Read this manual first.
This manual describes the settings for
setting up the machine and installing
the software. Be sure to read this
manual before using the machine.
Read this manual next.
This manual describes the basic use of
the machine.
Starter Guide
• Preface
• Installing the Machine
• Configuring and Connecting the Fax
• Connecting to a Computer and Installing the Drivers
• Appendix
Basic Operation Guide
• Before Using the Machine
• Document and Paper Handling
• Copying
• Printing from a Computer
• Registering Destinations in the
Address Book
• Using the Fax Functions
This manual
• Using the Scan Functions
• Maintenance
• Troubleshooting
• Registering/Setting the
Various Functions
• Appendix
Read the desired chapter
to suit your needs.
The e-Manual is categorized by subject to
find desired information easily.
For details about using the e-Manual, refer
to “Using the e-Manual“ in “Appendix.”
e-Manual
*1 The network function is available only for MF4570dn.
*2 If you are using Macintosh, see the following Driver Guides or Help for more details on these functions.
You can find the driver guides in the following locations on the User Software CD-ROM.
• Fax: User Software CD-ROM → [Manuals] → [GUIDE-FAX-US.pdf]
• Print: User Software CD-ROM → [Manuals] → [GUIDE-UFR II-US.pdf]
• Scan: User Software CD-ROM → [Manuals] → [GUIDE-SCAN-US.pdf]
* The e-Manual is included in the User Software CD-ROM.
• Basic Operation
• Copy
2
*
• Fax
2
*
• Print
2
*
• Scan
• Network Settings
• Setting and Managing from
1
Computer
*
• Troubleshooting
• Maintenance
• Setting Menu List
1
• Specifications
*
• Security
3

Determining the Installation Site
• MF4570dn
• MF4450
Paper
cassette
Paper
cassette
4"
(100 mm)
4"
(100 mm)
31 5/8" (804 mm)
4" (100 mm)
4" (100 mm)
30 7/8" (784 mm)
4" (100 mm)
(100 mm)
4"
(100 mm)
4"
24 1/4"
(617 mm)
24 1/4
(617 mm)
4" (100 mm)
Feeder
cover
29"
(735 mm)
4" (100 mm)
Feeder
cover
"
29"
(735 mm)
4" (100 mm)
4
1
Preface
2
Installing the Machine
3
Configuring and Connecting the Fax
4
Connecting to a Computer and
Installing the Drivers
Appendix
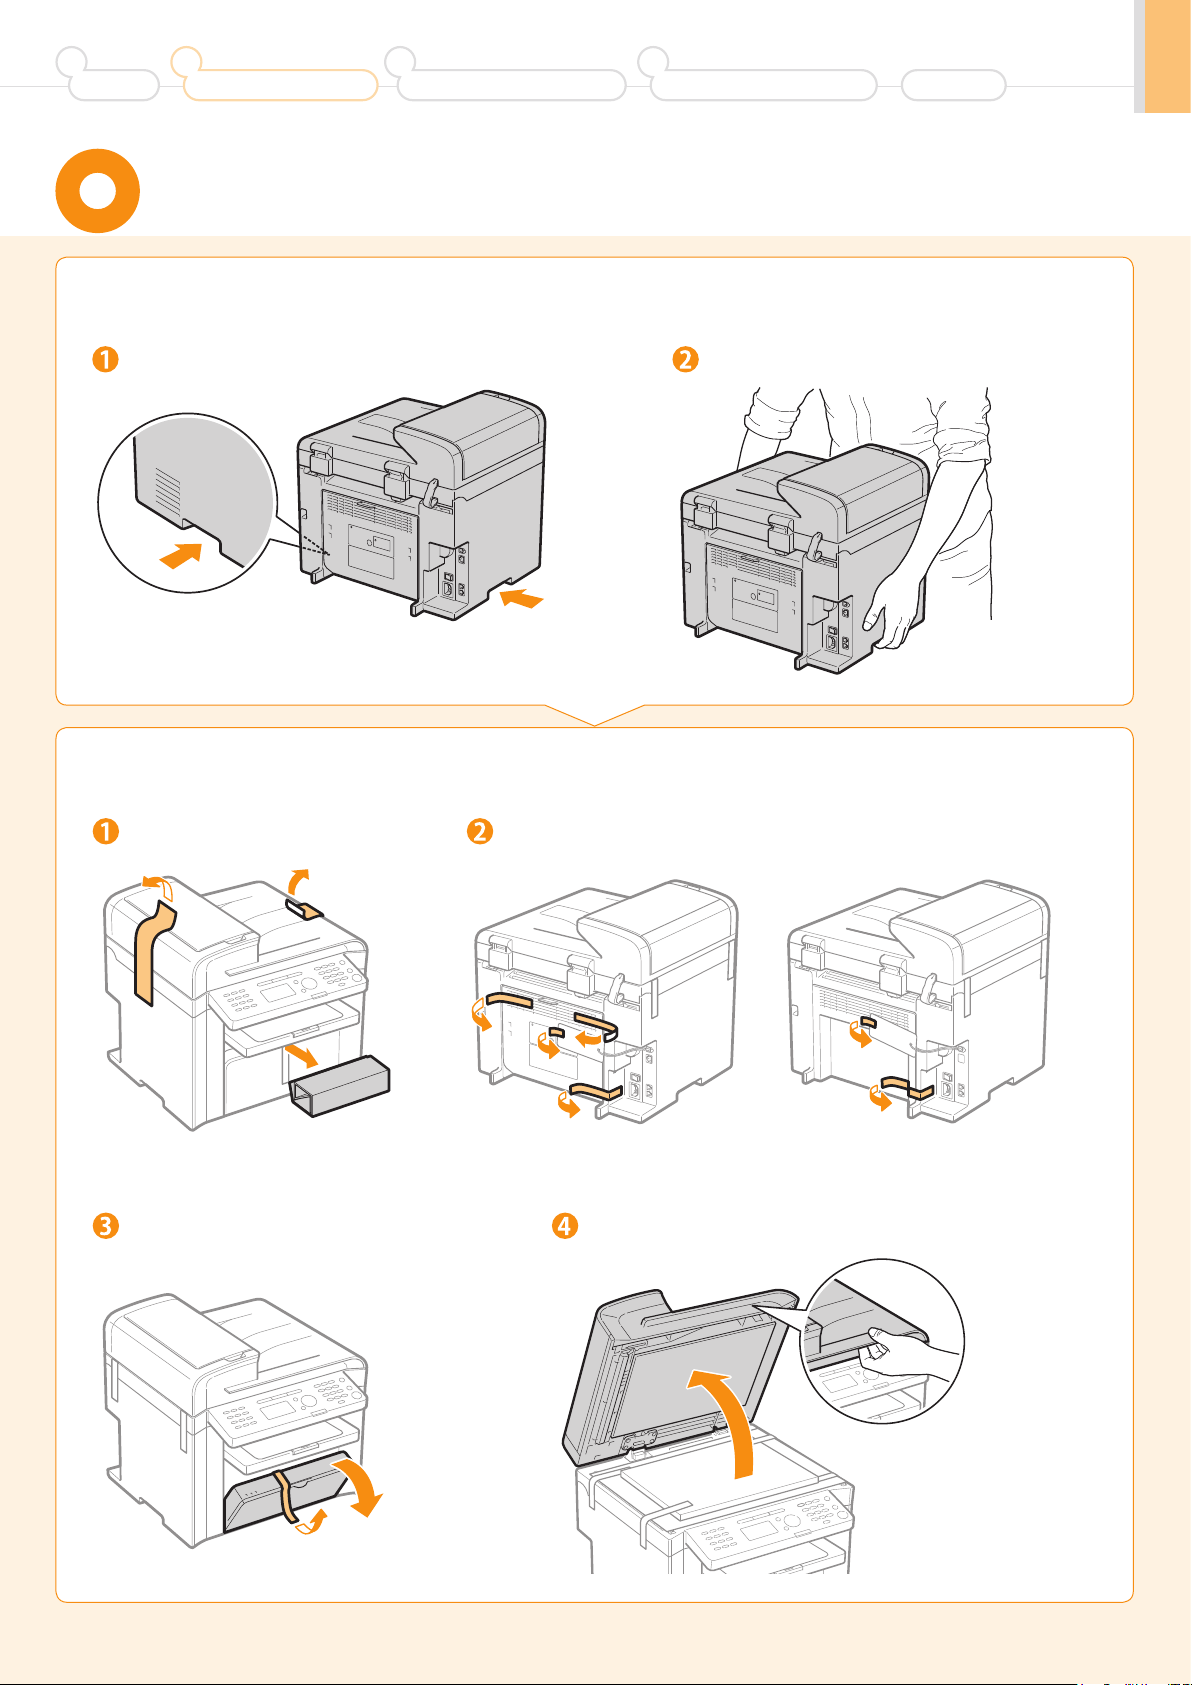
Carrying the Machine to the Installation Site
and Removing the Packing Materials
Carry the machine to the installation site.
1.
Hold the grips. Carry the machine.
Remove the packing materials.
2.
Remove the packing materials. Remove the packing materials.
Remove the tape while opening
the paper cassette.
* The packing materials may be changed in form or placement, or may be
added or removed without notice.
• MF4570dn • MF4450
Open the feeder.
5

Remove the packing materials with tape. Close the feeder.
Check!
Did you remove all the packing materials?
• MF4570dn: Tape x 7
• MF4450: Tape x 5
Packing materials with tape x2
Packing material x1
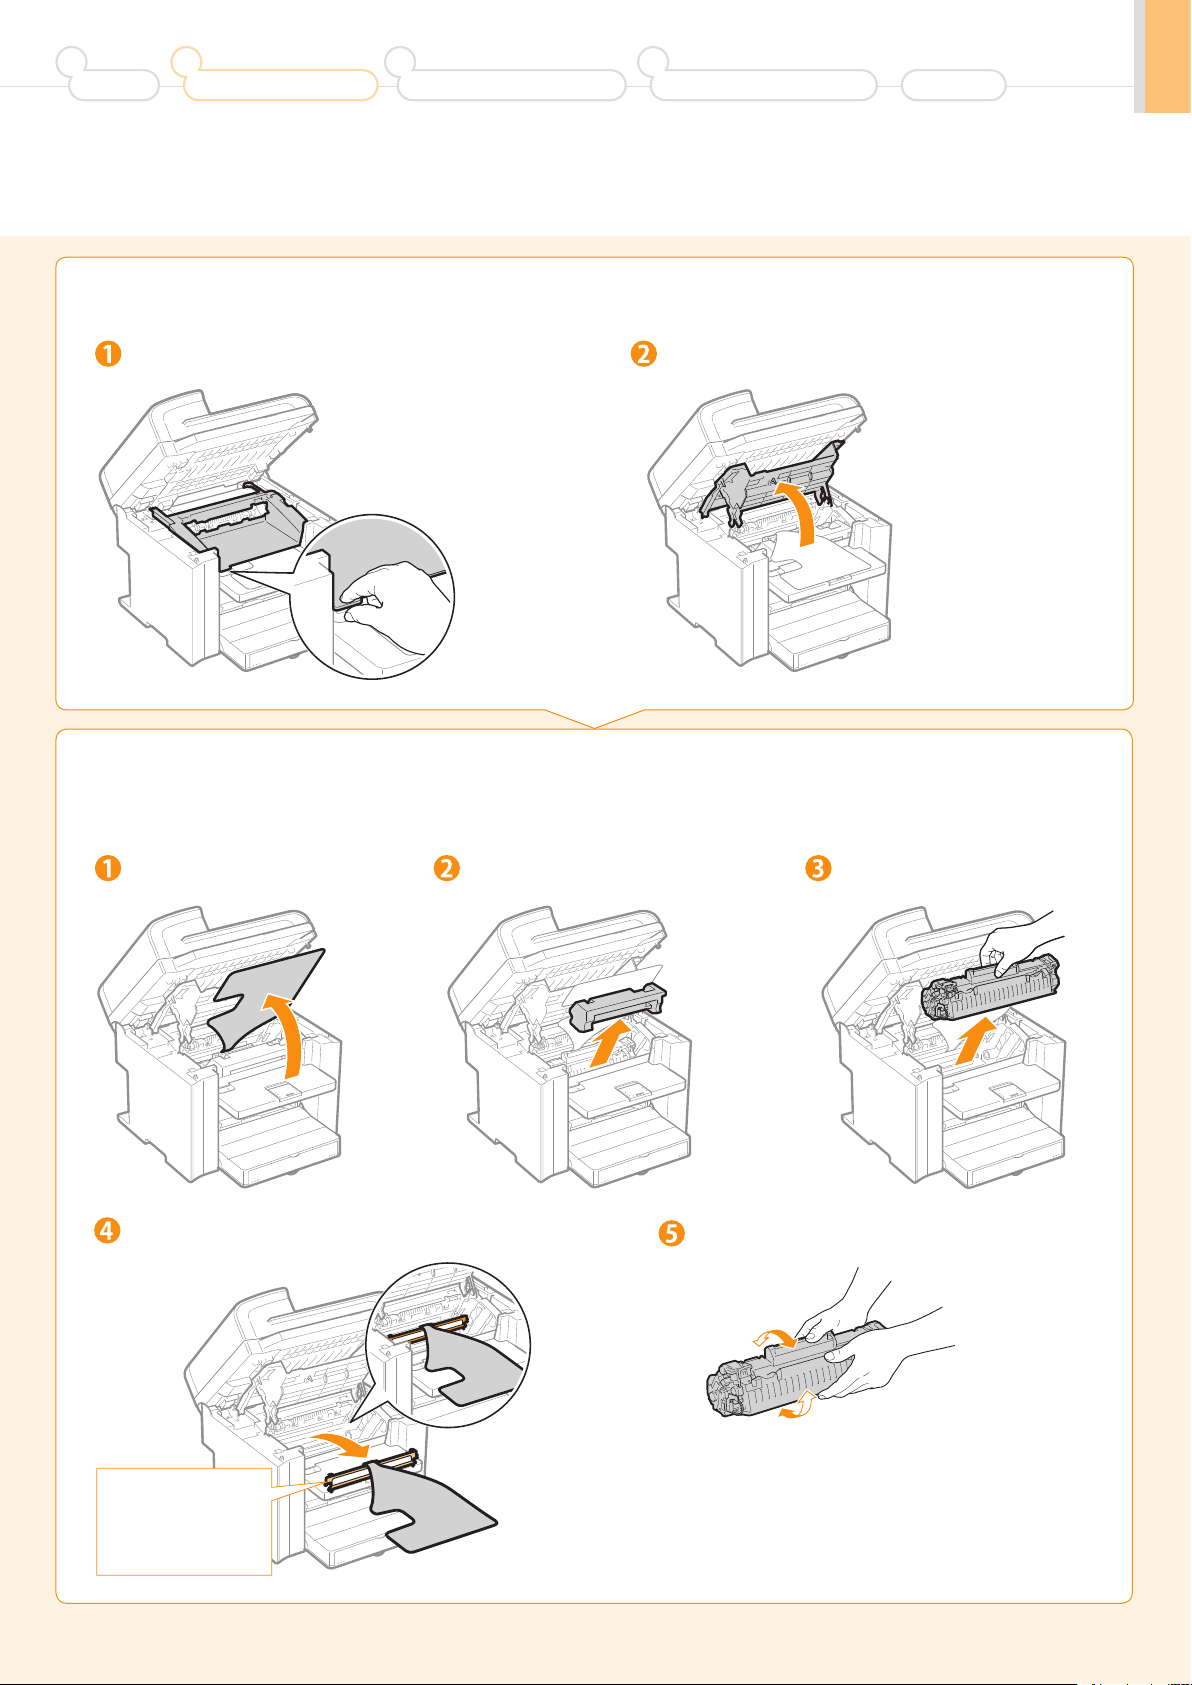
Preparing the Toner Cartridges
Lift the scanning platform.
1.
6
Lift the scanning platform. Hold the operation panel.
If you cannot lift the
scanning platform
Ensure that the feeder is
completely closed.
Do not forcefully lift the
scanning platform, as this
may damage the machine.
1
2
Preface
Open the toner cover.
2.
Installing the Machine
3
Configuring and Connecting the Fax
4
Connecting to a Computer and
Installing the Drivers
Appendix
Hold the grip on the left front side of toner cover.
Remove the packing materials from the toner cartridge, and then
3.
Open the toner cover.
distribute the toner.
Turn the sheet to the back. Remove the toner cartridge.
Remove the packing material.
Remove the packing material.
This part (a plastic part
attached to the end of
paper) is also a packing
material. Be sure to
remove it.
Shake five to six times.
7
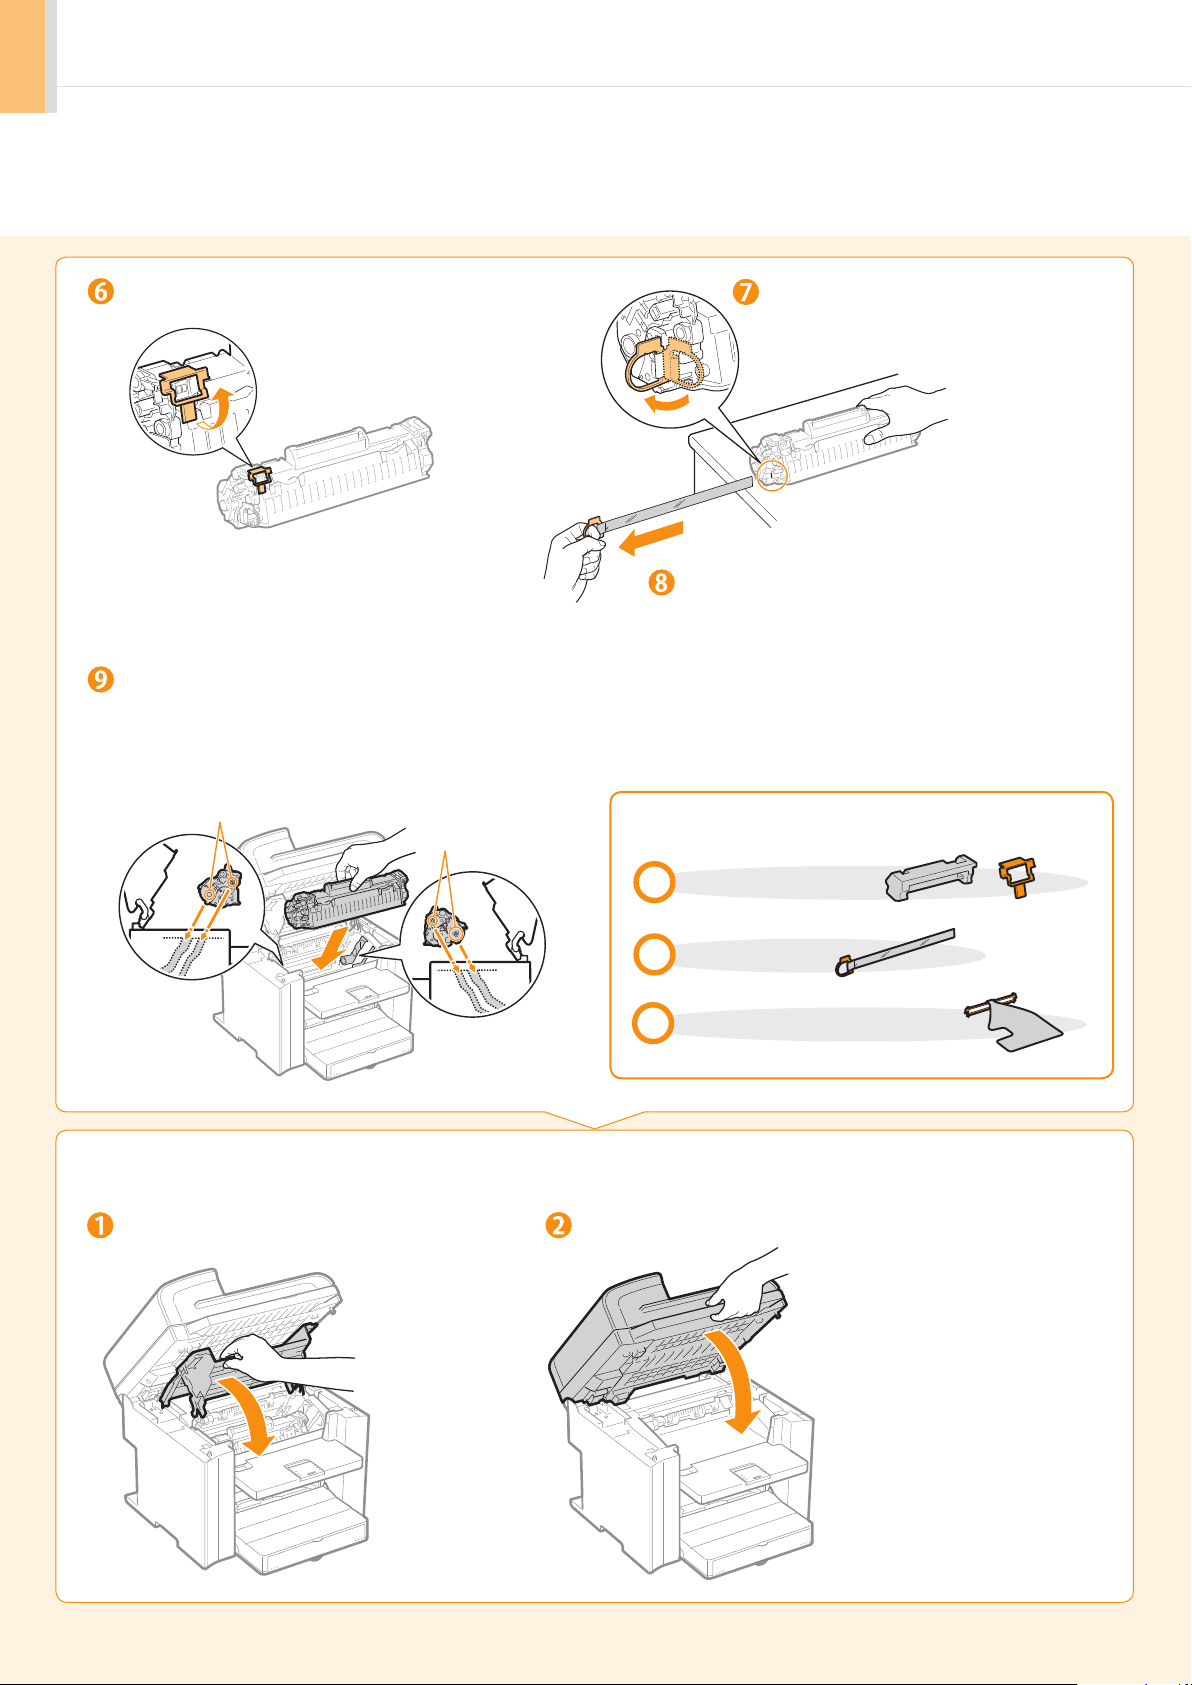
Remove the packing material.
Lift the tab.
Place the toner cartridge on a flat surface,
and then lift the tab.
Insert the toner cartridge.
Fit the protrusions on each side of the toner cartridge into
the guides located on each side of the machine, and then
slide the toner cartridge into the machine.
Protrusion
Protrusion
Pull the sealing tape completely out.
The full length of the sealing tape is
approximately 20” (50 cm).
Check!
Did you remove all the packing materials?
Packing materials x2
Sealing tape x1
Packing material with a sheet x1
Close the toner cover, and then lower the scanning platform.
4.
Close the toner cover.
8
Lower the scanning platform.

1
Preface
2
Installing the Machine
3
Configuring and Connecting the Fax
Loading Paper
Lift the dust cover.
1.
4
Connecting to a Computer and
Installing the Drivers
Appendix
Load the paper, and then adjust the paper guides.
2.
Spread the paper guides.
Spread the paper guides a little
wider than the paper size.
Load the paper.
Load the paper until the edge of the
paper stack meets the back of the paper
cassette.
When changing the size of the paper
to be loaded
Be sure to set the paper size.
“Setting a Paper Size and Type” (P.12)
Check!
Ensure that the
paper stack does not
exceed the load limit
guides.
Load limit guide
When using envelopes
For details on how to load
media, see “Basic Operation
Guide.”
Adjust the paper guides to
the width of the paper.
Adjust the paper guides to
the length of the paper.
9
 Loading...