

Canon
EF~
LENS
EF-S
17-85mm
1/4-5.6
IS
USM
Instruction
Mode
d'emploi
Bedienungsanleitung
Instrucciones
IMAGE
STABILIZER
1$
ULTRASONIC
~ffl*m~~,~w~~~*~~~o
i~~$}i5~JJj~*~1*f¥,
~j~~$}*~~
0
Thank you for purchasing a Canon USM lens.
The Canon EF-S17-85mm f/4-5.6 IS USM lens
is
a compact and lightweight standard zoom
lens developed for EOS cameras* compatible
with EF-S lenses.
It
is
equipped withanImage Stabilizer
effective for hand-held shooting at slow
shutter speeds.
$ "IS" stands for Image Stabilizer.
$ "USM" stands for Ultrasonic Motor.
Features
1.
Aspheric lens element for excellent imaging
performance.
2.
The Image Stabilizer gives the equivalent
effect of a shutter speed three stops faster.
3.
USM for fast, quiet focusing.
4.
Great close-ups at 0.35 m/1.2 ft at all focal
lengths.
5.
Manual focusing availableinautofocusing
mode (ONE SHOT AF).
6.
A truly round aperture hole resultsina nicer
background blur.
Conventions used.in
this
instruction
E-1
Warning to prevent
lensorcamera
malfunctionordamage.
Supplementary notes
on
using the lens
and taking pictures.
Lt. Safety Precautions
1.Donot
lookatthe
sunora
bright
light
source
through
the
lensorcamera. Doing so could
result
in
loss of vision. Looking at the sun directly
through the lens is especially hazardous.
2.
Whetheritis
attachedtothe cameraornot,
do
not
leave
the
lens under the sun
without
the
lens cap attached.
Thisisto prevent the lens
from concentrating the sun's rays, which could
cause a
fi
re.
Lt.Handling
Cautions
If the lensistaken
from
a cold environment
into
a warm one, condensation may develop on the
lens surface and internal parts.
To prevent
condensation
in
this case, first put the lens into
an
airtight plastic bag before taking it from a cold to
warm environment. Then take out the lens after it
has warmed gradually.
Do
the same when taking the
lens from a warm environment into a cold one.
unless otherwise specified in the instructions. If such changes or
modifications should be made, you could be required to stop
operation of the equipment.
This equipment has been tested and found to comply with the
limits for a class B digital device, pursuant to part 15 of the FCC
Rules. These limits are designed to provide reasonable protection
against harmful interference in a residential installation. This
equipment generates, uses and can radiate radio frequency
energy and, if not installed and used
in
accordance with the
instructions, may cause harmful interference to radio
communications.
However, there is no guarantee that interference will not occur
in
a particular installation. If this equipment does cause harmful
interference to radio or television reception, which can be
determined by turning the equipment off and on, the user is
encouraged to try to correct the interference by one or more of
the following measures:
• Reorient or relocate the receiving antenna.
• Increase the separation between the equipment and receiver.
• Consult the dealer or an experienced radiofTV technician for
help.
This digital apparatus does not exceed the Class B limits for
radio noise emissions from digital apparatus as set out
in
the
interference-causing equipment standard entitled "Digital
Apparatus", ICES-003 of the Industry Canada.
This device complies with Part 15 of the FCC Rules. Operation is
subject to the following two conditions: (1) This device may not
cause harmful interference, and
(2)
this device must accept any
interference received, including interference that may cause
undesired operation.
Do
not make any changes or modifications to the equipment
CE:
The
(E:
Markisa Directive conformity mark of the
European Community (EC)
N118
E-2
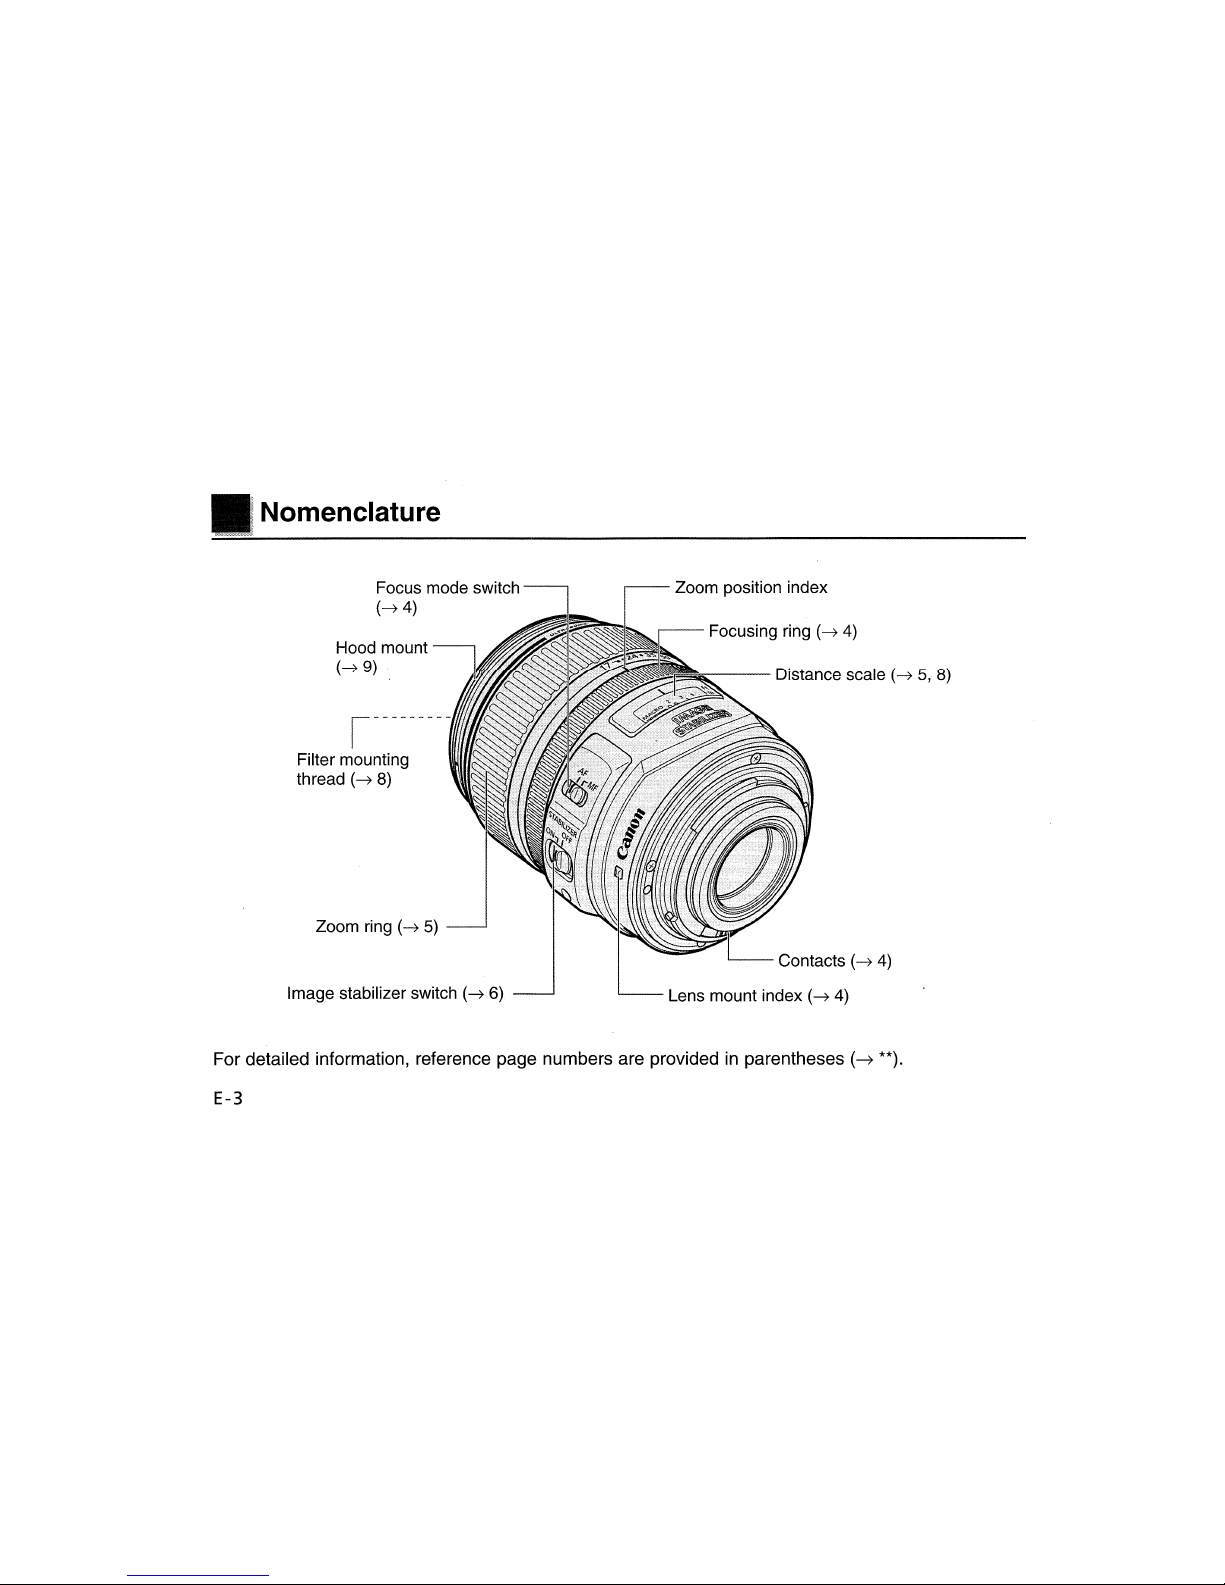
IIINomenclature
Focus mode switch
(~4)
Hood mount
(~9)
Filter mounting
thread
(~8)
Zoom ring
(~5)
Image stabilizer switch(~6)
Zoom position index
Focusing ring
(~
4)
~o:----
Distance scale
(~5,
8)
Contacts(~4)
Lens mount index
(~4)
For detailed information, reference page numbers are providedinparentheses(~**).
E-3
o
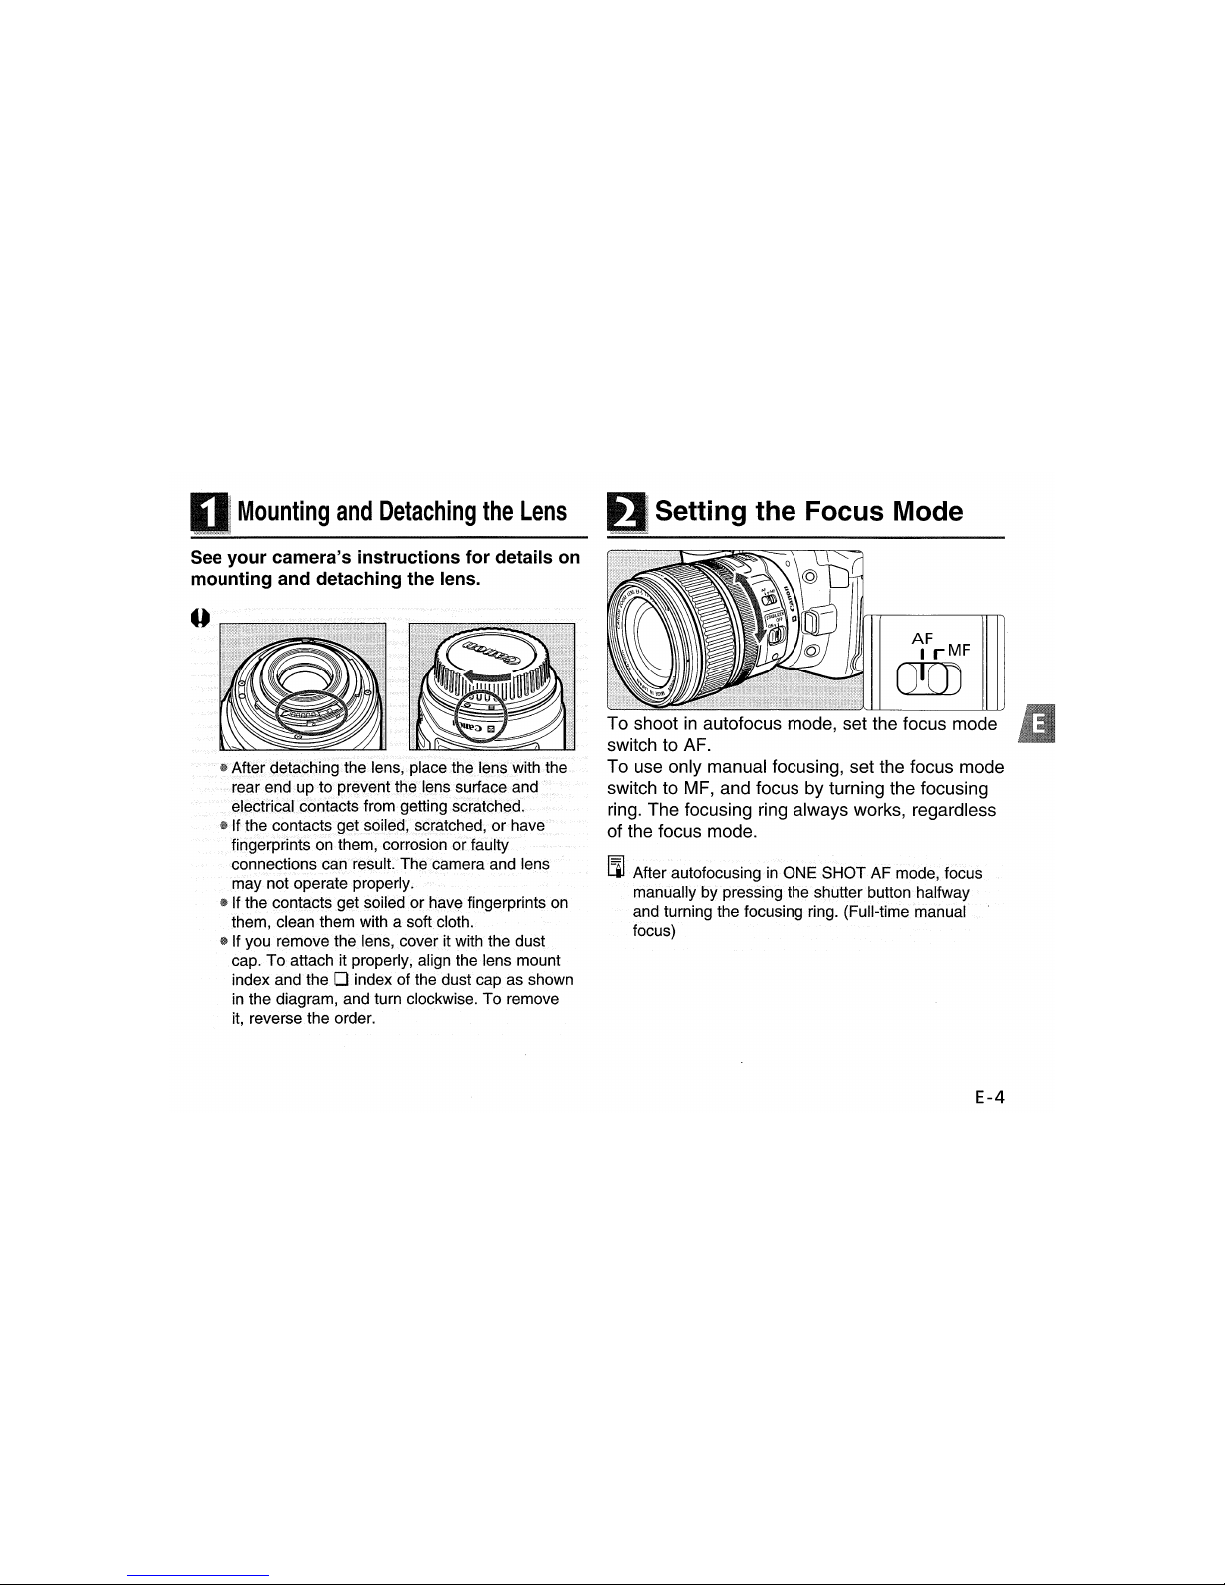
Mounting
and
Detaching
the
Lens
See
your
camera's
instructions
for
details on
mounting
and detaching the lens.
@Afterdetachingthe.lens,
.•.
placethelenswiththe
rear
.end.uptoprevenfthelenssurfaceand
el.ectricalcontactsfrom•gettingscratched.
erlfthe
contactsgetsoiled,scratched,<or· have
fingerprints on.them, corrosion
or.
faulty
connections
can
result.
The
camera and lens
may not operate properly.
@If the contacts get soiled or have fingerprints on
them, clean them with a softcloth.
® If you remove
the.
lens,
cover
it with the dust
cap. To attach it properly, align the lens mount
index
and
the 0 index ofthe
dust
cap as shown
in the diagram, and turn clockwise. To remove
it, reverse the order.
AF
I r
MF
mIJ
To shootinautofocus mode, set the focus mode
switch to AF.
To use only manual focusing, set the focus mode
switch to MF, and focus by turning the focusing
ring. The focusing ring always works, regardless
of the focus mode.
[l]
•.
After·autofocusing••in
ONE
SHOTAFmode.,
focus
manually by pressing the shutterbutton halfway
and turning the focusing ring. (Full-time manual
focus)
E-4
 Loading...