

Canon AK1, BU1, AK2, BT1 Operation Manual

Operation guide
Finisher-AK1
Saddle Finisher-AK2
Puncher Unit-BT1-BU1

Copyright
Copyright 2013 by Canon Inc. All rights reserved.
No part of this publication may be reproduced or transmitted in any form or by any means,
electronic or mechanical, including photocopying and recording, or by any information storage or
retrieval system without the prior written permission of Canon Inc.
© 2013, Océ
All rights reserved. No part of this work may be reproduced, copied, adapted, or transmitted in
any form or by any means without written permission from Océ.
Océ makes no representation or warranties with respect to the contents hereof and specifically
disclaims any implied warranties of merchantability or fitness for any particular purpose.
Furthermore, Océ reserves the right to revise this publication and to make changes from time to
time in the content hereof without obligation to notify any person of such revision or changes.
Edition 2013-06
US
Operation Guide Finisher-AK1, Saddle Finisher-AK2, Puncher Unit-BT1-BU1: VarioPrint (VP) 110, VP120, VP135 - Edition 2013-06

Contents
Chapter 1
Preface.................................................................................................................................5
Notes for the reader.........................................................................................................................................6
Naming conventions for accessories (generic naming in User Interfaces).................................................7
Chapter 2
Parts and their functions....................................................................................................9
Introduction.....................................................................................................................................................10
External view..................................................................................................................................................11
Internal view...................................................................................................................................................12
Chapter 3
Use the stacker/stapler....................................................................................................13
The finishing modes.......................................................................................................................................14
Use the joggers in the output trays..............................................................................................................20
Check the status of the staple cartridges......................................................................................................21
Replace the staple cartridge of the stapler unit (Staple N1).......................................................................23
Replace the staple cartridge of the saddle stitch unit (Staple P1)..............................................................25
Remove the puncher waste box....................................................................................................................27
Chapter 4
Troubleshooting................................................................................................................29
Labels inside the stacker/stapler...................................................................................................................30
Clear a paper jam in the top cover of the stacker/stapler...........................................................................33
Clear a paper jam inside the stacker/stapler................................................................................................37
Clear a paper jam in the saddle stitch unit...................................................................................................39
Clear a staple jam inside the stapler unit.....................................................................................................43
Clear a staple jam in the saddle stitch unit..................................................................................................45
Appendix A
Miscellaneous....................................................................................................................49
Specifications..................................................................................................................................................50
Optional accessories......................................................................................................................................60
Index...................................................................................................................................61
Contents
3
Canon Finisher-AK1/Saddle Finisher-AK2/Puncher Unit-BT1/BU1
Operation Guide Finisher-AK1, Saddle Finisher-AK2, Puncher Unit-BT1-BU1: VarioPrint (VP) 110, VP120, VP135 - Edition 2013-06

Contents
4
Canon Finisher-AK1/Saddle Finisher-AK2/Puncher Unit-BT1/BU1
Operation Guide Finisher-AK1, Saddle Finisher-AK2, Puncher Unit-BT1-BU1: VarioPrint (VP) 110, VP120, VP135 - Edition 2013-06

Chapter 1
Preface
Operation Guide Finisher-AK1, Saddle Finisher-AK2, Puncher Unit-BT1-BU1: VarioPrint (VP) 110, VP120, VP135 - Edition 2013-06
Notes for the reader
Introduction
This manual helps you to use the
Finisher-AK1/Saddle Finisher-AK2/Puncher Unit-BT1/BU1. The
manual contains a description of the product and guidelines to use and operate the Finisher-AK1/
Saddle Finisher-AK2/Puncher Unit-BT1/BU1.
Definition
Attention-Getters
Parts of this manual require your special attention. These parts can provide the following:
• Additional general information, for example, information that is useful when you perform a
task.
•
Information to prevent personal injuries or property damage.
Symbols used in this manual
The following symbols are used in this manual to explain procedures, restrictions, handling
precautions, and instructions that should be observed for safety.
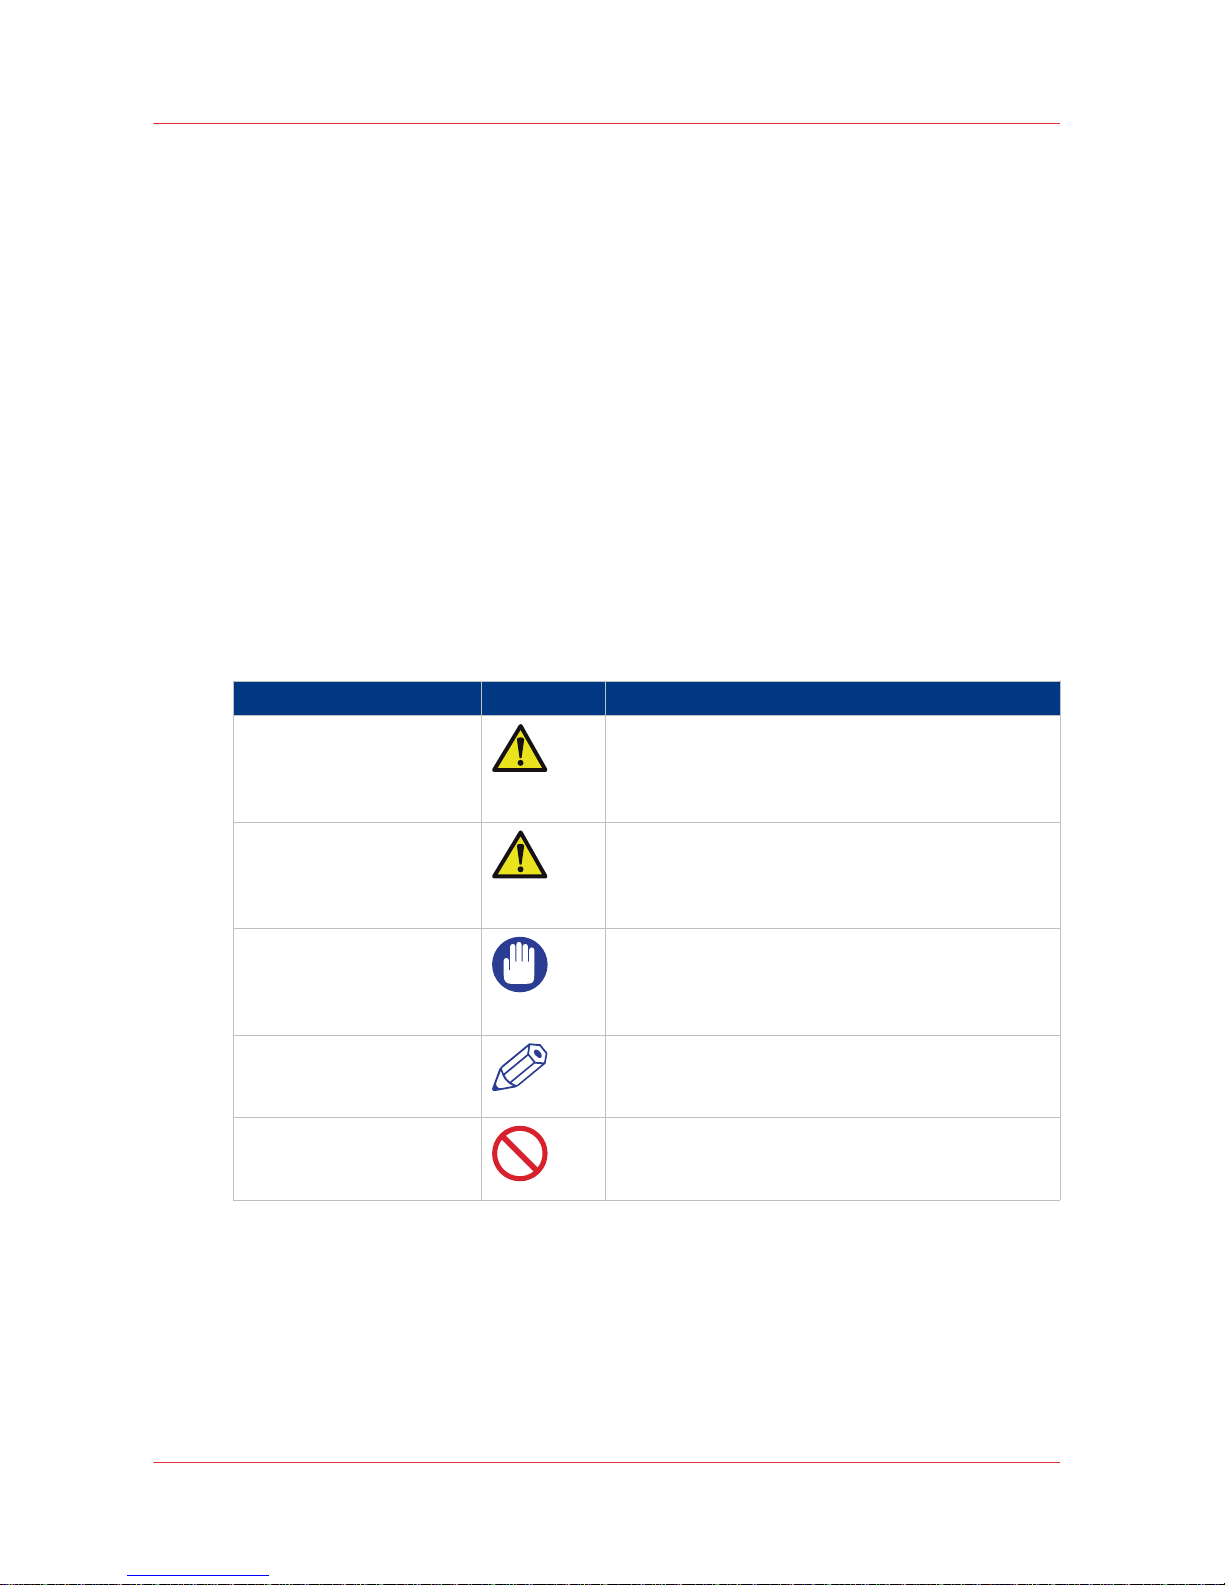
Overview of the attention-getters
Word Icon Indicates
WARNING
Indicates a warning concerning operations that may
lead to death or injury to persons if not performed
correctly. To use the machine safely, always pay attention to these warnings.
CAUTION
Indicates a caution concerning operations that may
lead to injury to persons if not performed correctly.
To use the machine safely, always pay attention to
these cautions.
IMPORTANT
Indicates operational requirements and restrictions.
Be sure to read these items carefully to operate the
machine correctly and to avoid damaging the machine or property.
NOTE
Indicates a clarification of an operation or contains
additional explanations for a procedure. Reading
these notes is highly recommended.
Indicates an operation that must not be performed.
Read these items carefully and make sure not to
perform the described operations.
Notes for the reader
6 Chapter 1 - Preface
Canon Finisher-AK1/Saddle Finisher-AK2/Puncher Unit-BT1/BU1
Operation Guide Finisher-AK1, Saddle Finisher-AK2, Puncher Unit-BT1-BU1: VarioPrint (VP) 110, VP120, VP135 - Edition 2013-06

Naming conventions for accessories (generic naming in
User Interfaces)
Generic naming of accessories in User Interfaces
To improve the readability of texts in User Interfaces of control panels and software, the
accessories are generally referred to by their function. The table below shows the naming
conventions for accessories (commercial product names and the generic terminology used in
User Interfaces).
NOTE
In some cases, there is only 1 name for more modules. The reason is that a configuration can
only contain 1 of the available types of modules.
Conversion table for commercial names versus generic terminology in User Interfaces
Commercial product name: In UI, printer driver and software referred to
as:
Finisher-AF1 and Finisher-AK1 [Stacker/stapler]
Saddle Finisher-AF2 and Saddle Finisher-AK2 [Stacker/stapler]
Puncher Unit-BP1/BQ1/BR1 and Puncher UnitBT1/BU1
[Puncher]
Professional Puncher-B1 [Puncher]
Paper Folding Unit-F1 [Folder]
Document Insertion Unit-F1 [Inserter]
High Capacity Stacker-E1 [Stacker]
High Capacity Stacker-F1 [Stacker]
Booklet Trimmer-D1 [Trimmer]
Two-Knife Booklet Trimmer-A1 [Trimmer]
Perfect Binder-C1 [Perfect Binder]
Duplex Color Image Reader Unit-D1 [Scanner]
NOTE
High Capacity Stacker-E1 and High Capacity Stacker-F1 cannot be combined.
Finisher-AF1/Saddle Finisher-AF2/Puncher Unit-BP1/BQ1/BR1 and Finisher-AK1/Saddle FinisherAK2/Puncher Unit-BT1/BU1 cannot be combined.
Naming conventions for accessories (generic naming in User Interfaces)
Chapter 1 - Preface 7
Canon Finisher-AK1/Saddle Finisher-AK2/Puncher Unit-BT1/BU1
Operation Guide Finisher-AK1, Saddle Finisher-AK2, Puncher Unit-BT1-BU1: VarioPrint (VP) 110, VP120, VP135 - Edition 2013-06

Naming conventions for accessories (generic naming in User Interfaces)
8 Chapter 1 - Preface
Canon Finisher-AK1/Saddle Finisher-AK2/Puncher Unit-BT1/BU1
Operation Guide Finisher-AK1, Saddle Finisher-AK2, Puncher Unit-BT1-BU1: VarioPrint (VP) 110, VP120, VP135 - Edition 2013-06

Chapter 2
Parts and their functions
Operation Guide Finisher-AK1, Saddle Finisher-AK2, Puncher Unit-BT1-BU1: VarioPrint (VP) 110, VP120, VP135 - Edition 2013-06

Introduction
Finisher-AK1/Saddle Finisher-AK2/Puncher Unit-BT1/BU1
Finisher-AK1 and Saddle Finisher-AK2 can process jobs with the following settings:
•
Sort by set
• Sort by page
• Offset stacking
• Stapling
•
High-volume mode
• Saddle stitching (only when Saddle Finisher-AK2 is installed)
• Saddle folding (only when Saddle Finisher-AK2 is installed)
• Punching (only when Puncher Unit-BT1/BU1 is installed)
NOTE
• If you use paper weights lower than 64 g/m² (17 lb bond) for covers, the paper can crease
when saddle-stitched.
• If you use paper weights lower than 64 g/m² (17 lb bond) for covers when the Booklet Trimmer
is installed, the paper may be trimmed with uneven edges.
• If you use small paper, the paper may be saddle stitched with uneven edges. In this case,
check the width of the paper.
• If you use small paper, the paper may be stapled (corner/double) with uneven edges. In this
case, check the width of the paper.
•
If you use small paper, and the Booklet Trimmer is used, the paper may be trimmed with
uneven edges. In this case, check the width of the paper.
• If you create a saddle-stitched booklet using coated paper or inserted sheets for the cover, the
image printed on the page after the cover may stick to the back of the cover, or back of the
inserted sheets, depending on the type of coated paper you are using.
• If you create a saddle-stitched booklet using coated paper for the cover, cracks may appear
around the fold of the cover, depending on the type of coated paper you are using.
• If you use staple (corner / double) multiple copy sets using coated paper for the cover, the
staples of copy sets may dirty the surface of the cover of copy sets that have already been
output, depending on the type of coated paper you are using.
Introduction
10 Chapter 2 - Parts and their functions
Canon Finisher-AK1/Saddle Finisher-AK2/Puncher Unit-BT1/BU1
Operation Guide Finisher-AK1, Saddle Finisher-AK2, Puncher Unit-BT1-BU1: VarioPrint (VP) 110, VP120, VP135 - Edition 2013-06

External view
Illustration
[1] The main parts of the Saddle Finisher-AK2 and Finisher-AK1
Main parts
Main parts
Component Function
1 Main power switch Put the switch on "I" to turn on the stacker/sta-
pler.
2 Top cover Open the top cover to clear a paper jam inside
the unit.
3 Front door Open the front door to replace the staple car-
tridge, remove jammed paper, or clear a staple
jam in the stacker/stapler, in the stapler unit or
in the saddle stitch unit.
4 Booklet tray (Saddle Finisher-AK2
only)
Receive saddle stitched booklets.
5 Auxiliary booklet tray (Saddle Fin-
isher-AK2 only)
Pull out the auxiliary booklet tray to receive
large size booklets.
6 Lower tray Receive finished documents.
The 2 joggers can improve the straightness of
the stacks.
7 Upper tray Receive finished documents.
The 2 joggers can improve the straightness of
the stacks.
External view
Chapter 2 - Parts and their functions 11
Canon Finisher-AK1/Saddle Finisher-AK2/Puncher Unit-BT1/BU1
Operation Guide Finisher-AK1, Saddle Finisher-AK2, Puncher Unit-BT1-BU1: VarioPrint (VP) 110, VP120, VP135 - Edition 2013-06

Internal view
Illustration
[2] The waste trays
Num‐
ber
Item Description
1 Puncher waste box The punch waster box contains the confetti that occurs
when holes are punched.
2 Stapler waste box The stapler waste box contains the residual material that
occurs when the staples are cut to the required length.
Internal view
12 Chapter 2 - Parts and their functions
Canon Finisher-AK1/Saddle Finisher-AK2/Puncher Unit-BT1/BU1
Operation Guide Finisher-AK1, Saddle Finisher-AK2, Puncher Unit-BT1-BU1: VarioPrint (VP) 110, VP120, VP135 - Edition 2013-06

Chapter 3
Use the stacker/stapler
Operation Guide Finisher-AK1, Saddle Finisher-AK2, Puncher Unit-BT1-BU1: VarioPrint (VP) 110, VP120, VP135 - Edition 2013-06

The finishing modes
IMPORTANT
• Do not place anything other than output paper in the trays of the finisher. Otherwise, the trays
can get damaged.
• Do not place anything under the trays of the finisher. Otherwise, the trays can get damaged.
Illustration
[3] Do not place anything under the trays
[4] Do not place your hands in the part of the tray where stapling is performed (near the rollers) when a finisher is
attached, as this may result in personal injury.
Sort by set mode
Prints are automatically collated into sets arranged in page order (123, 123, for example).
Sort by page mode
All prints of the same original page are grouped together (111, 222, 333, for example).
Offset stacking mode
The printed output is shifted alternately to the front and back of the tray, in a vertical (portrait)
orientation, or a horizontal (landscape) orientation, depending on the orientation of your
originals. For example, if you place A4R or LTRR originals, the paper is output and shifted in the
horizontal direction. If you place A4 or LTR originals, the paper is output and shifted in the vertical
direction.
When you use the Offset stacking mode while Sort by set or Sort by page is selected, then each
set of prints is shifted the following amount before it is delivered to the output tray:
• No staple: Each set is shifted 20 mm (3/4"), except for A4R media. For A4R, the set is shifted 15
mm (0.6")
The finishing modes
14 Chapter 3 - Use the stacker/stapler
Canon Finisher-AK1/Saddle Finisher-AK2/Puncher Unit-BT1/BU1
Operation Guide Finisher-AK1, Saddle Finisher-AK2, Puncher Unit-BT1-BU1: VarioPrint (VP) 110, VP120, VP135 - Edition 2013-06
• Corner staple: Each set is shifted 20 mm (3/4").
• Double staple: Each set is shifted 20 mm (3/4").
NOTE
In the following cases, problems can occur, for example the output is not aligned correctly or the
output falls from the tray.
• If you use thin paper (due to the temperature, humidity, characteristics of the paper type, or
paper curling).
• If you use the machine in high temperatures or high humidity.
• If you use coated paper, tab paper, or other special paper.
• If the paper is curled.
•
If the Punch mode is set.
• When the [High-volume mode enabled] setting is set to [Yes] (due to the temperature,
humidity, characteristics of the paper type, or paper curling).
• When the [High-volume mode enabled] setting is set to [Yes], and the output paper stack
exceeds the maximum stack volume of the tray (depending on the paper type or the
functional mode that you use, the output paper can exceed the stacking limit).
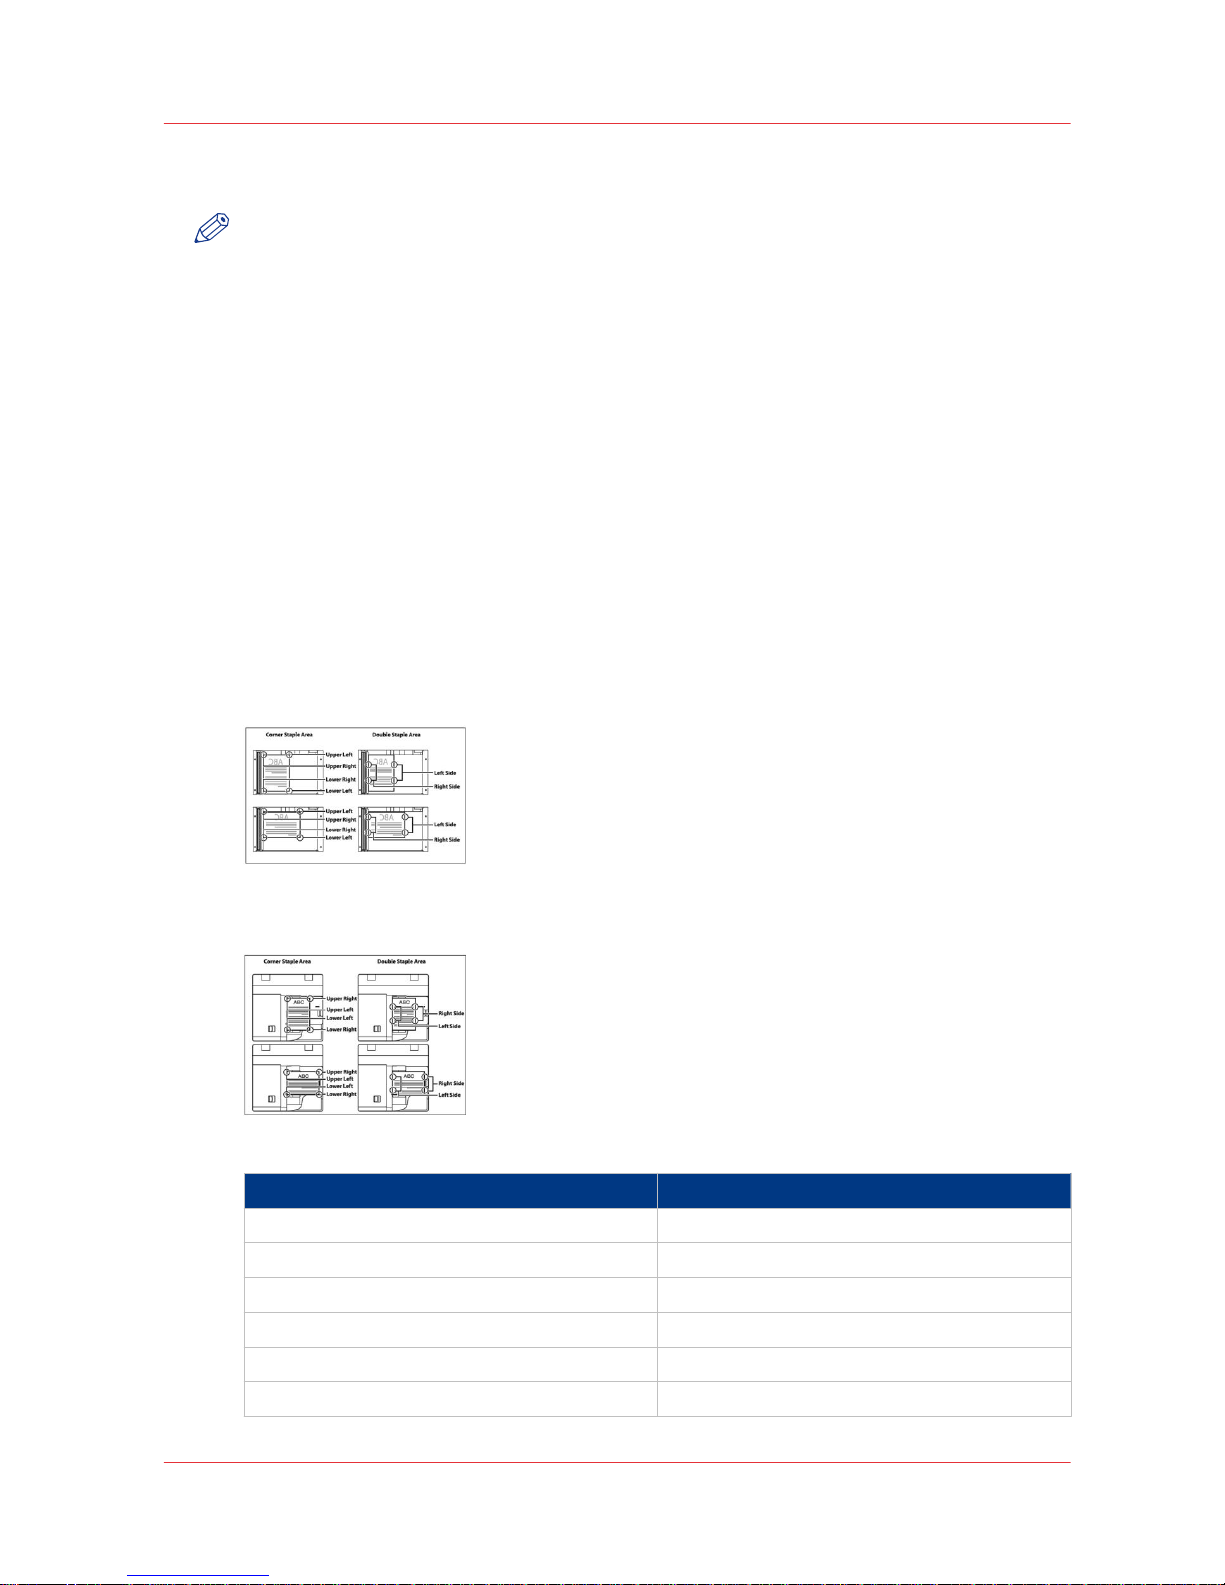
Staple mode
Prints are automatically sorted by set and stapled. When you carry out a copy job, the prints are
stapled at the following positions:
If an original is placed on the glass plate:
If originals are placed in the ADF:
Legend for the illustrations above
English text Translation
Corner Staple Area Corner Staple Area
Double Staple Area Double Staple Area
Upper Left Upper Left
Upper Right Upper Right
Lower Right Lower Right
Lower Left Lower Left
4
The finishing modes
Chapter 3 - Use the stacker/stapler 15
Canon Finisher-AK1/Saddle Finisher-AK2/Puncher Unit-BT1/BU1
Operation Guide Finisher-AK1, Saddle Finisher-AK2, Puncher Unit-BT1-BU1: VarioPrint (VP) 110, VP120, VP135 - Edition 2013-06
English text Translation
Left Side Left Side
Right Side Right Side
IMPORTANT
•
If Staple mode is set, the output trays move downward as the stack of paper that is output
increases in quantity and thickness. When an output tray has reached its stacking limit, or
after 100 sets of prints or the predefined height has been output, printing and stapling stop
temporarily. Remove all of the stapled prints from the output tray, and printing and stapling
resume.
•
You cannot output a stapled set of prints to the upper tray.
•
You cannot staple transparencies or labels.
•
Do not pull copies or prints out of the output area while they are being stapled. Remove the
copies or prints after they are output to one of the output trays.
NOTE
• Staple-N1 is standard on Finisher-AK1.
• Staple-N1 and Staple-P1 are standard on Saddle Finisher-AK2.
• If you want to staple more than 50 sheets (80 g/m² / 20 lb bond) of A3/Tabloid or A4R/LTRR
paper, or 100 sheets (80 g/m² / 20 lb bond) of A4/LTR paper, the prints are only offset but not
stapled. In addition, when you select coated or heavy paper, you may not be able to staple the
job, even if the number of sheets, including sheet insertions or job separators, is below the set
limit of a finisher.
• When the machine stops while stapling and a message on the control panel asks you to refill
the staplers, you must replace the staple cartridge.
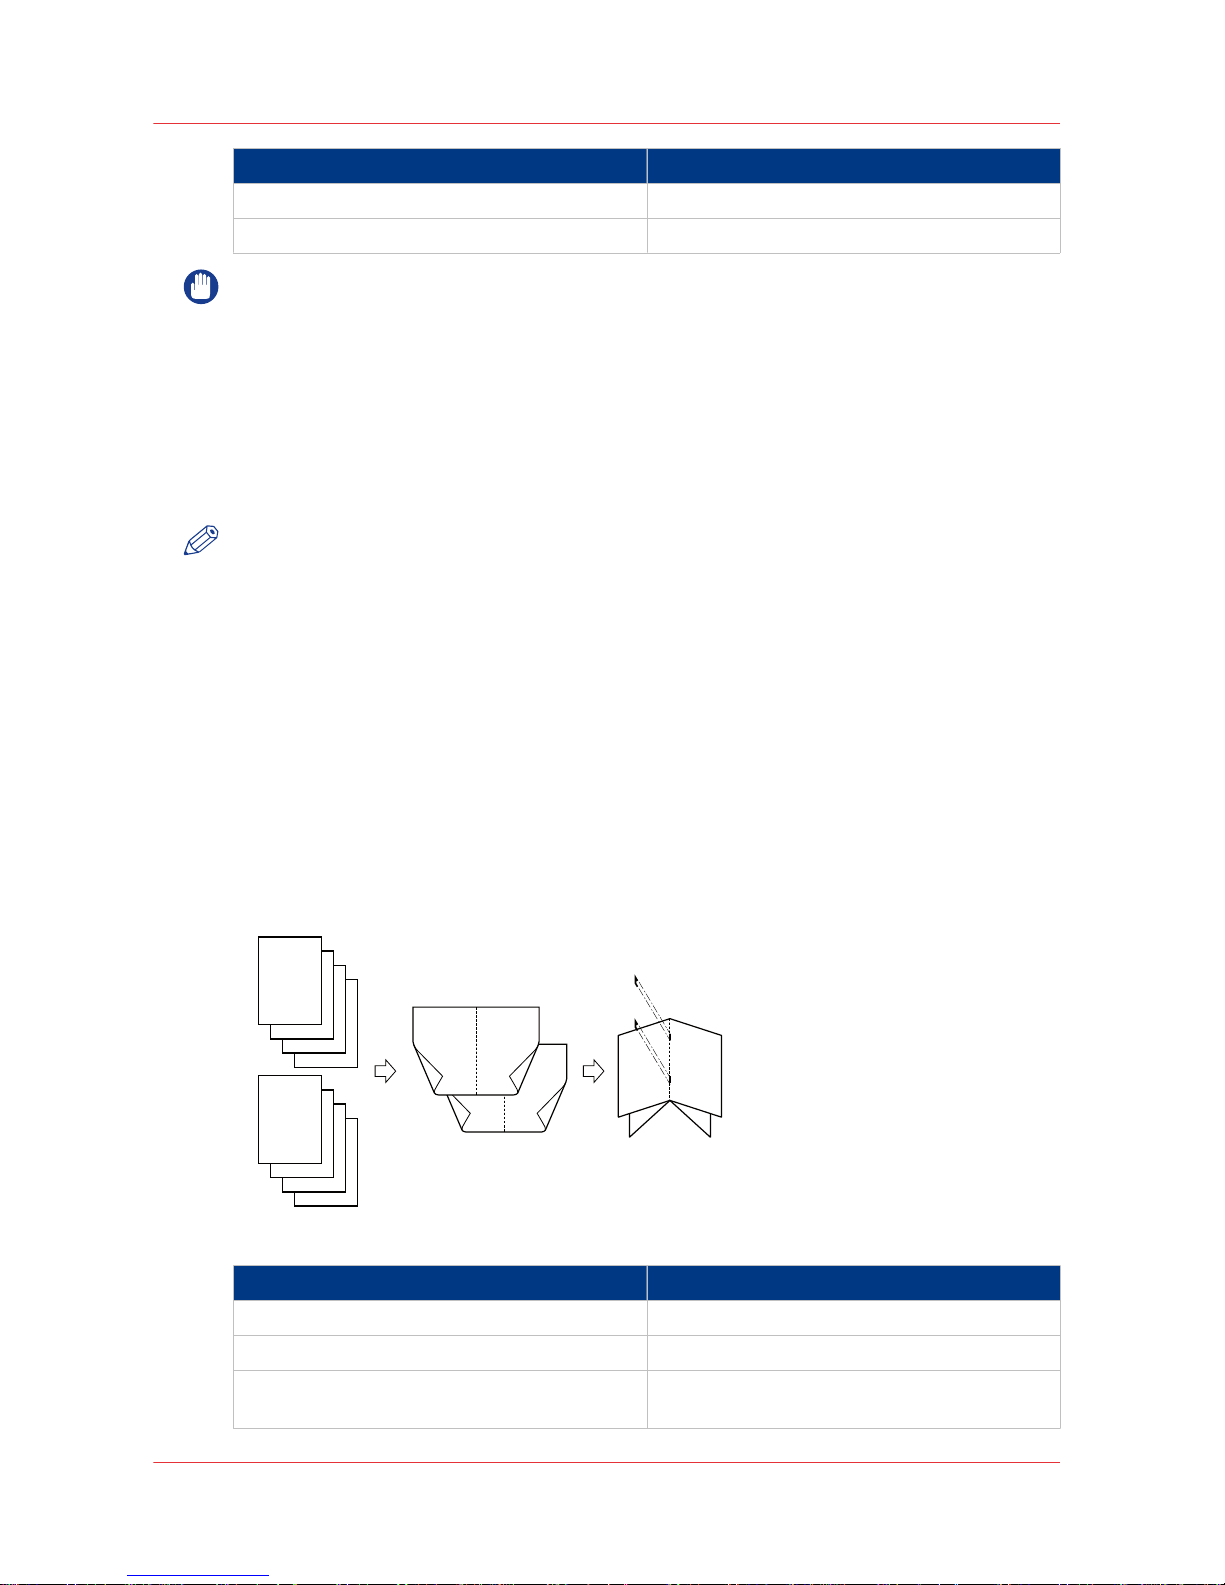
Saddle stitch mode
The Saddle stitch mode enables you to make booklets, consisting of pages that are folded and
stapled in the center.
6
5
4
3
4
3
2
1
3
8
7
6
5
8
7
2
1
6
8
1
Originals
Copy
The pages are folded
and stapled in the centre to
form a booklet.
Legend for the illustration above
English text Translation
Originals Originals
Copy Copy
The pages are folded and stapled in the centre
to form a booklet.
The pages are folded and stapled in the centre
to form a booklet.
The finishing modes
16 Chapter 3 - Use the stacker/stapler
Canon Finisher-AK1/Saddle Finisher-AK2/Puncher Unit-BT1/BU1
Operation Guide Finisher-AK1, Saddle Finisher-AK2, Puncher Unit-BT1-BU1: VarioPrint (VP) 110, VP120, VP135 - Edition 2013-06
NOTE
• The saddle stitch mode is only available when Saddle Finisher-AK2 is installed.
• The maximum number of sheets that can be saddle stitched differs depending on the paper
weight and type.
• When you use plain paper (80 g/m² / 20 lb bond), 25 sheets of paper (100 pages) can be saddle
stitched at once.
• The paper sizes that can be saddle stitched are: A3/Tabloid, A4R/LTRR, 304.8 mm × 457.2 mm
(12" x 18"), 320 × 450 mm (12.6" x 17.7") (SRA3), 330.2 mm × 482.6 mm (13" x 19"), and custom
sizes (210 mm × 279.4 mm to 330.2 mm × 487.7 mm / 8.3" x 11" to 13" x 19.2").
•
The accuracy of folds created in the saddle stitch mode can vary depending on the paper type
and the number of sheets.
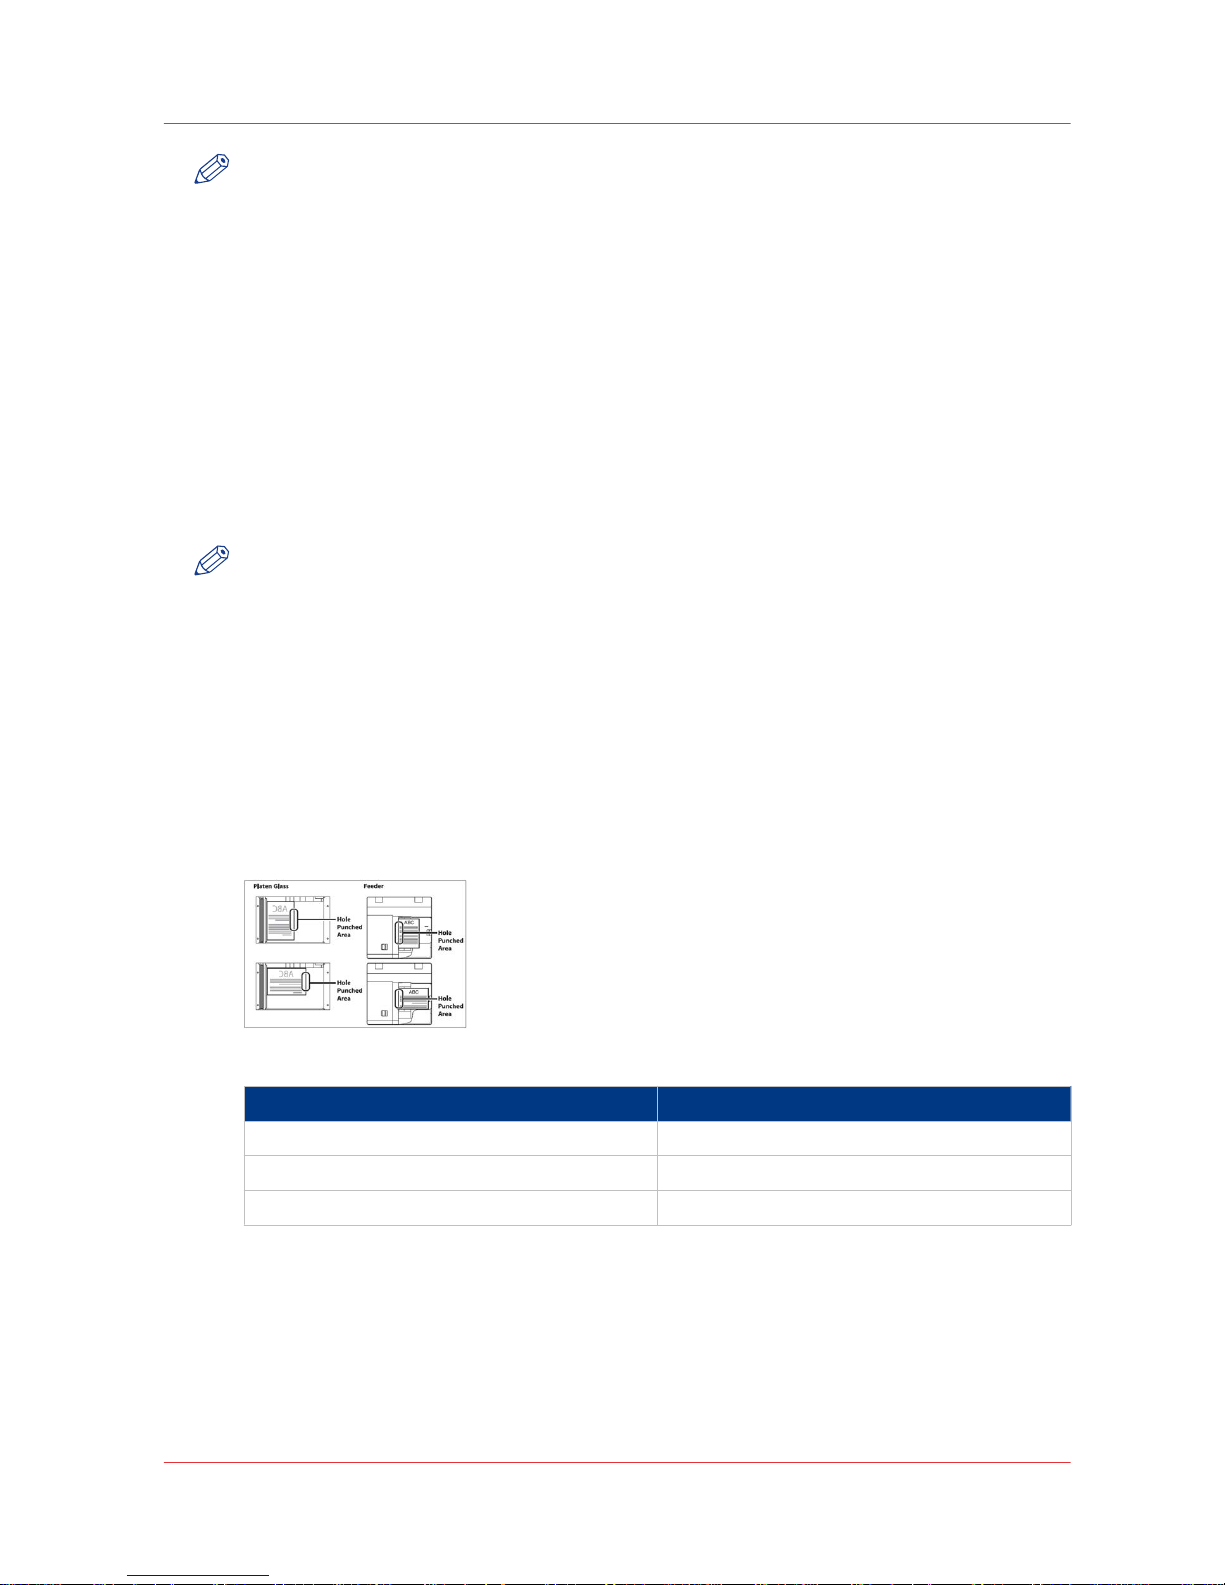
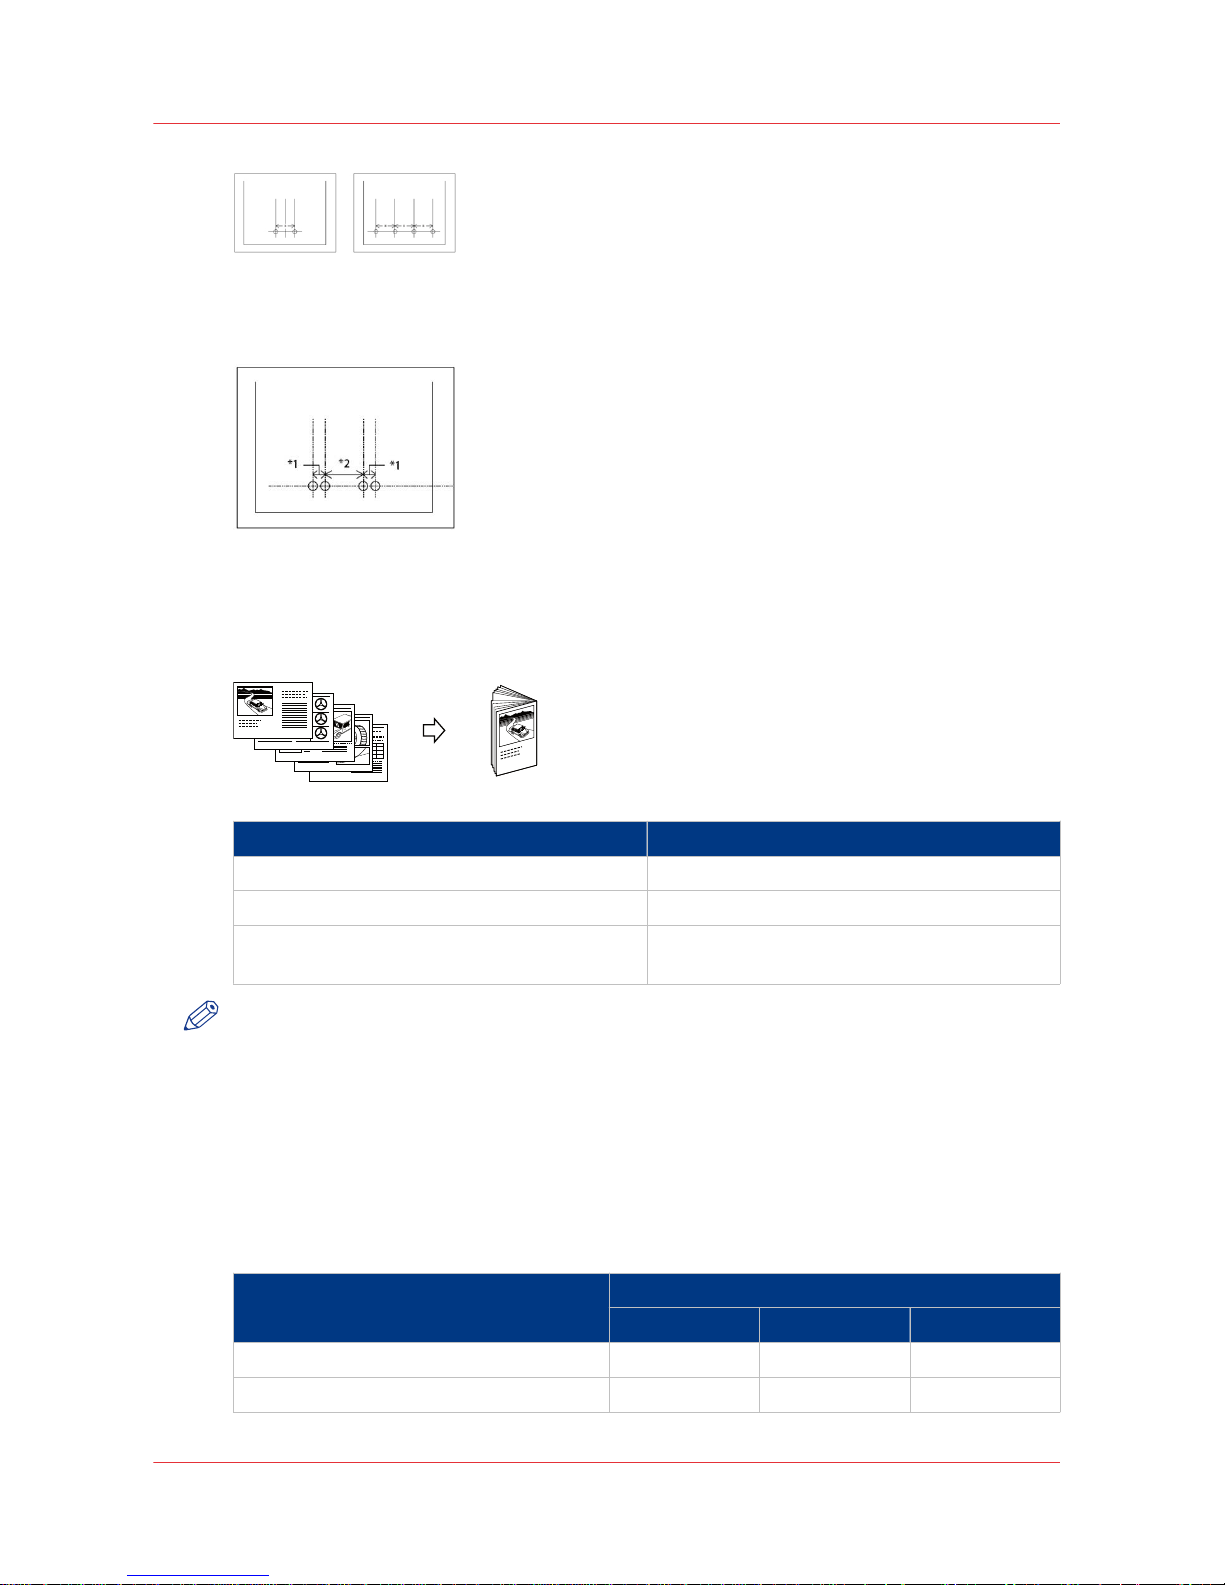
Punch mode
The punch mode allows you to punch your documents. The number of holes depends on the type
of puncher unit installed.
NOTE
• The punch mode is only available when the Puncher Unit-BT1/BU1 is installed.
• The Puncher Unit-BT1 can punch holes in the following paper:
Two Holes: A3, A4, A4R, custom size (182 mm x 182 mm to 297 mm x 432 mm / 7.2" x 7.2" to
11.7" x 17").
Four Holes: A3, A4R, custom size (257 mm x 182 mm to 297 mm x 432 mm / 10.1" x 7.2" to
11.7" x 17").
• The Puncher Unit-BU1 can punch holes in the following paper:
Four Holes: A3, A4, A4R, custom size (257 mm x 182 mm to 297 mm x 432 mm / 10.1" x 7.2" to
11.7" x 17").
• Holes cannot be punched in transparencies, labels, or pre-punched paper.
When you carry out a copy job, the hole punched areas are shown in the illustration below.
Legend for the illustration above
English text Translation
Platen Glass Glass plate
Feeder ADF
Hole Punched Area Hole Punched Area
If you use Puncher Unit-BT1, the distance between the punch holes is shown in the illustration
below.
The illustration on the left shows the distance for two holes. The illustration on the right shows
the distance for four holes.
The finishing modes
Chapter 3 - Use the stacker/stapler 17
Canon Finisher-AK1/Saddle Finisher-AK2/Puncher Unit-BT1/BU1
Operation Guide Finisher-AK1, Saddle Finisher-AK2, Puncher Unit-BT1-BU1: VarioPrint (VP) 110, VP120, VP135 - Edition 2013-06
If you use Puncher Unit-BU1, the distance between the punch holes is shown in the illustration
below (four holes).
Saddle fold mode
This is a mode for folding multiple sheets in 2-folds.
5
4
3
2
1
1
English text Translation
Originals Originals
Copies Copies
The paper is saddle folded with a maximum of
5 sheets
The paper is saddle folded with a maximum of
5 sheets
NOTE
• The saddle fold mode is only available when the Saddle Finisher-AK2 is installed.
• The paper is saddle-folded with a maximum of 5 sheets (80 g/m² / 20 lb bond), and then
output.
• The sizes of paper that can be used with the saddle fold mode are: A3/Tabloid, A4R/LTRR,
304.8 mm × 457.2 mm (12" x 18"), 320 × 450 mm (12.6" x 17.7") (SRA3), 330.2 mm × 482.6 mm
(13" x 19"), and custom sizes (210 mm × 279.4 mm to 330.2 mm × 487.7 mm / 8.3" x 11" to 13"
x 19.2").
The following are paper sizes that can be output to the output trays of the finisher. However, if
certain functions are selected it is possible that some paper sizes are not output.
Paper size Output tray
Upper tray Lower tray Booklet tray
A3/Tabloid Yes Yes Yes
A4/LTR Yes Yes No
4
The finishing modes
18 Chapter 3 - Use the stacker/stapler
Canon Finisher-AK1/Saddle Finisher-AK2/Puncher Unit-BT1/BU1
Operation Guide Finisher-AK1, Saddle Finisher-AK2, Puncher Unit-BT1-BU1: VarioPrint (VP) 110, VP120, VP135 - Edition 2013-06

Paper size Output tray
Upper tray Lower tray Booklet tray
A4R/LTRR Yes Yes Yes
Custom size 182 mm x 182 mm to
330.2 mm x 487.7 mm /
7.2" x 7.2" to 13" x 19.2"
Yes Yes Yes *
* Custom paper sizes can only be output if they are between 210 mm x 279.4 mm to 330.2 mm x
487.7 mm (8.3" x 11" to 13" x 19.2").
NOTE
You can only use the booklet tray when Saddle Finisher-AK2 is installed.
High-volume mode
The Settings Editor on the PRISMAsync controller contains a
[High-volume mode enabled]
setting. When this setting is set to [Yes] the upper tray and the lower tray of the stacker/stapler
will be linked to increase the output capacity for non-stapled jobs. The total output capacity will
become 5,000 sheets for 80 g/m² / 20 lb bond media (3,000 sheets in the upper tray and 2,000
sheets in the lower tray).
NOTE
The mode is not active when trimmer D1 is present.
• You can still select the lower tray or upper tray as desired output location but the system
ignores the choice.
• First the lower tray will be filled, then the upper tray.
• When both trays are full, you must first empty the trays before printing continues.
• When stapling is required, the trays will be filled to their normal capacity (3,000 sheets).
The finishing modes
Chapter 3 - Use the stacker/stapler 19
Canon Finisher-AK1/Saddle Finisher-AK2/Puncher Unit-BT1/BU1
Operation Guide Finisher-AK1, Saddle Finisher-AK2, Puncher Unit-BT1-BU1: VarioPrint (VP) 110, VP120, VP135 - Edition 2013-06
 Loading...