

Canon VIXIA HG10, Backup Utility Instruction Manual
Backup Utility
You can use Backup Utility to easily back up onto a computer all the video data on your
camcorder's hard disk or to transfer backed up data back to the camcorder. Making
regular backups allows you to protect your important recordings in case of damage to the
camcorder's hard disk, which may also lead to permanent data loss.
Back Up Data
Back up onto a computer all the video data on your camcorder's hard disk.
Transfer Back Data
Transfer back to the camcorder video data that has already been backed up in order
to play back the recordings. Make sure to initialize the camcorder's hard disk before
transferring data back.
System Requirements
The following table gives the recommended system configuration for the software.
The software may not work correctly depending on the specifications and settings
of your computer and other software already installed.
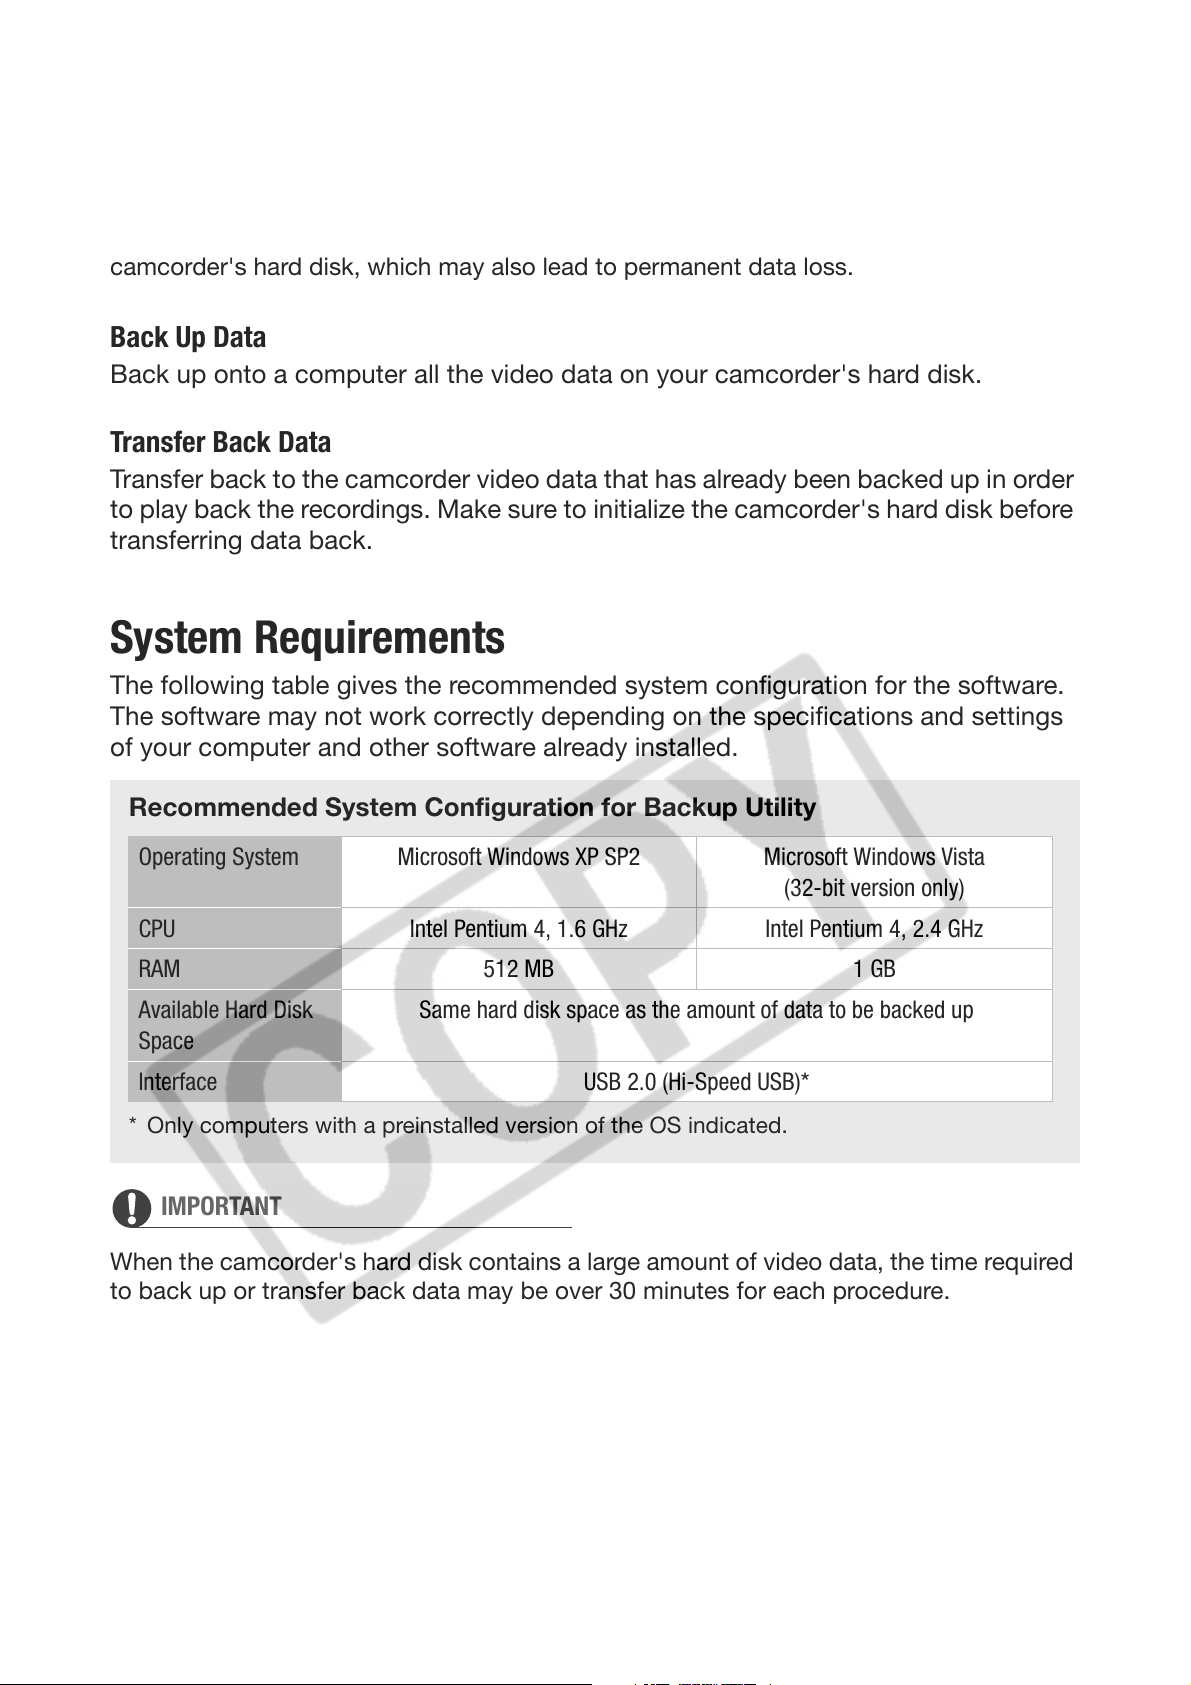
Recommended System Configuration for Backup Utility
Operating System Microsoft Windows XP SP2 Microsoft Windows Vista
(32-bit version only)
CPU Intel Pentium 4, 1.6 GHz Intel Pentium 4, 2.4 GHz
RAM 512 MB 1 GB
Available Hard Disk
Space
Interface USB 2.0 (Hi-Speed USB)*
* Only computers with a preinstalled version of the OS indicated.
IMPORTANT
When the camcorder's hard disk contains a large amount of video data, the time required
to back up or transfer back data may be over 30 minutes for each procedure.
Same hard disk space as the amount of data to be backed up
2
Preparing to Use the Software
Turn on the computer and start
Windows. Before you use this
software, copy Backup Utility and
instruction manual to your computer.
1 Insert the Backup Utility CD-ROM
into the computer's CD or DVD
drive.
2 From Computer (in Windows
Vista) or My Computer (in
Windows XP), double-click the
icon of the drive in which you
inserted the disc.
3 Double-click [English].
4 Copy the folder [HGBACKUP] to
your computer's desktop.
IMPORTANT
Do not disconnect the camcorder's
power source or USB cable while using
this software. Doing so may result in
damage to the camcorder's hard disk
and/or permanent data loss. Insert a fully
charged battery pack into the camcorder
in advance and use the compact power
adapter. Do not allow the USB cable to be
inadvertently disconnected. Before
disconnecting the USB cable, use the
"Safely Remove Hardware" icon in the
System Tray to end the connection.
Starting Backup Utility
Connecting the Camcorder to the
Computer
Connect the camcorder to the
computer to back up your video data
or to transfer it back to the camcorder.
1 Connect the camcorder to a
power outlet.
Insert a fully charged battery pack
and power the camcorder using the
compact power adapter.
2 Turn on the camcorder and set it
in video playback mode.
Refer to the camcorder's instruction
manual.
The first time you use this software,
make sure to read the license
agreement.
1 Open the desktop folder
[HGBACKUP].
2 Double-click the icon
[HGBACKUP.exe].
If this is the first time you are using
this software, the license agreement
will appear. Continue to step 3. If
you have already agreed to the
license agreement, the main menu
will appear. Skip directly to the
section corresponding to the
desired function in the main menu.
3 Read the license agreement and
select [I agree].
The main menu will appear.
3 Connect the camcorder to the
computer using the USB cable.
3
 Loading...