


|
|
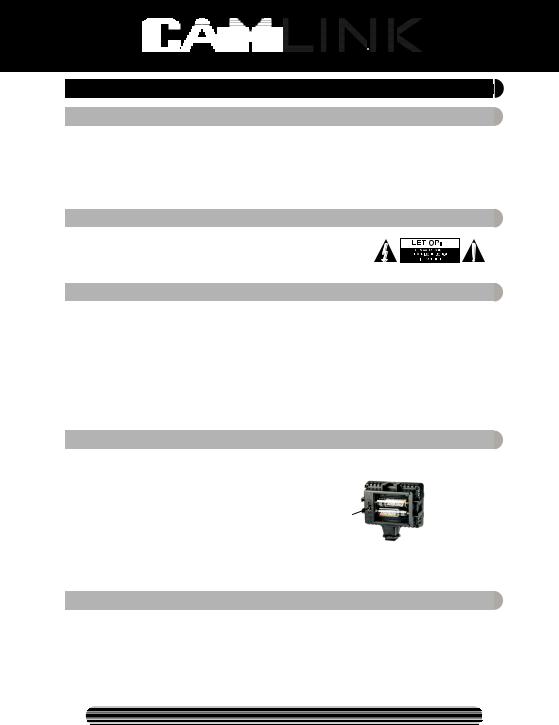
Type: CL-LED48 |
Document version: 1 |
|
|
|
|
|
|
|
|
|
|
|
|
|
|
|
|
|
|
|
|
|
|
|
|
|
|
|
|
|
|
|
|
|
|
|
|
• GB |
- |
Photography LED Light |
- |
User manual |
3 |
||||
|
|
|
|
• DE |
- |
Fotografie LED-Licht |
- |
Bedienungsanleitung |
4 |
||||
|
|
|
|
• FR |
- |
Photographie Lampe LED |
- |
Manuel de l’utilisateur |
5 |
||||
|
|
|
|
• NL |
- |
Fotografie LED-verlichting |
- |
Gebruikershandleiding |
7 |
||||
|
|
|
|
• ES |
- |
Fotografía Luz LED |
- |
Manual de Usuario |
8 |
||||
|
|
|
|
• IT |
- |
Fotografia Luce LED |
- |
Manuale Utente |
9 |
||||
|
|
|
|
• FI |
- |
Valokuvaus LED-valo |
- |
Käyttöopas |
11 |
||||
|
|
|
|
• SE |
- |
Fotografi LED-lampa |
- |
Bruksanvisning |
12 |
||||
|
|
|
|
• NO |
- |
Fotografi LED-lys |
- |
Brukermanual |
13 |
||||
|
|
|
|
• DK |
- |
Fotografi LED lampe |
- |
Brugervejledning |
14 |
||||
|
|
|
|
• CZ |
- |
Fotografie LED osvětlení |
- |
Návod k použití |
16 |
||||
|
|
|
|
• HU |
- |
Fényképészeti LED fényforrás |
- |
Használati útmutató |
17 |
||||
|
|
|
|
• GR |
- |
Φωτογραφία Λυχνία LED |
- |
Εγχειρίδιο Χρήστη |
18 |
||||
|
|
|
|
• RO |
- |
Fotografiere Lampă bliţ LED |
- |
Manual de instrucţiuni |
20 |
||||
|
|
|
|
• RU |
- |
Фотографирование LED лампа |
- |
Руководство пользователя |
21 |
||||
|
|
|
|
|
|
|
|
|
|
|
|
|
|
|
|
|
|
|
|
|
|
|
|
|
|
|
|
|
|
|
|
|
|
|
|
|
|
|
|
|
|
|
|
|
|
|
|
|
|
|
|
|
|
|
|
|
|
|
|
|
|
|
|
|
|
|
|
|
|

Nedis B.V., part of the Nedis Group De Tweeling 28
5215 MC ‘s-Hertogenbosch The Netherlands
Tel: +31 73 599 1055
Fax: +31 73 599 9699
Web: www.nedis.com or www.nedis.nl
© Any unauthorised use of the information in this manual is prohibited. No part of this manual may be reproduced, stored in a database or retrieval system, or published, in any form or in any way, electronically or mechanically, by print, photocopy, microfilm or by any other means without the express written permission of NEDIS.
©2012 NEDIS BV. Camlink is a registered trademark of NEDIS BV. Although every effort has been made |
2 |
|
to ensure the accuracy of the information contained in this manual specifications are subject to change |
||
|
||
and therefore NEDIS BV cannot guarantee its correctness and completeness at all times. |
|
 GB – English
 Technical specifications
Light source: |
48 high power LEDs |
Colour temperature white filter: |
5400 K |
Colour temperature orange filter: |
3200 K |
Colour temperature pink filter: |
3200 K |
Light intensity: |
440 lm |
Battery: |
2x AA |
 Safety precautions
To reduce risk of electric shock, this product should ONLY be opened by an authorised technician when service is required. Disconnect the product from mains and other equipment if a problem should occur. Do not expose the product to water or moisture.
 Installation instructions
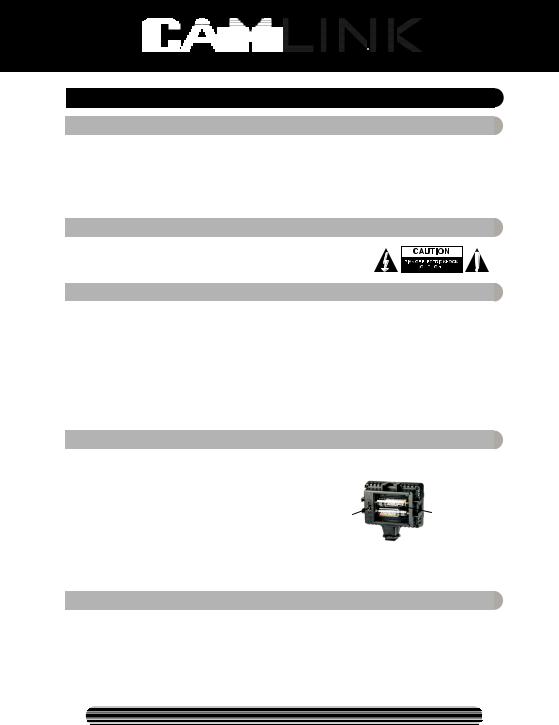
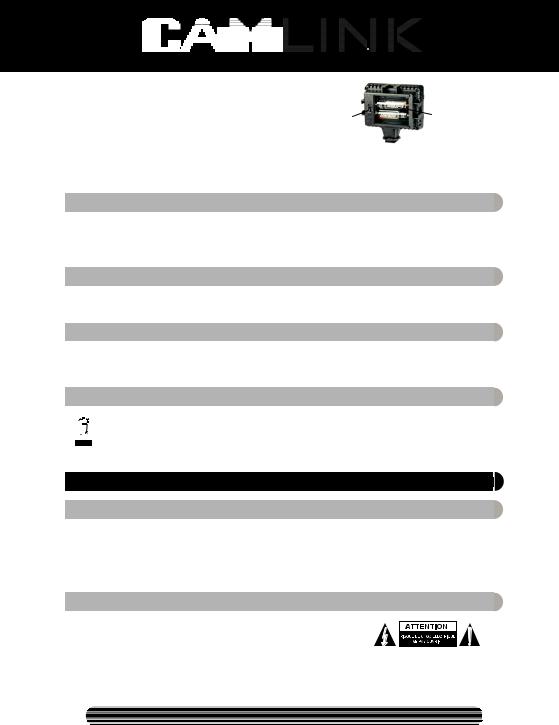
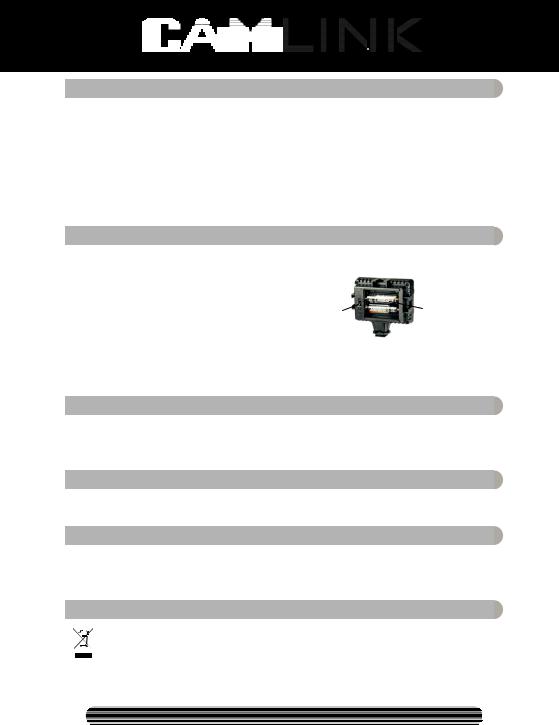
1.Diffuser and filter:
Without the diffuser and filter the light has a spotlight effect and is suitable for shooting at a relatively long-distance range.
With the diffuser the light will have a soft light effect.
Slots are installed on the front surface of the frame to fix the diffuser and filter.
2.Hot shoe adapter:
The hot shoe adapter connects the lamp with the camcorder.
3.Select On to switch the lamp on and Off to switch the lamp off.
4.Battery holder cover: To secure the battery.
5.Battery: 2x AA
6.Gel holder: to store the diffuser and filter.
 User instructions
1.Install the AA batteries. Please make sure the positive and negative poles are positioned according to the “+” and “-” symbols. Place the battery holder cover after the batteries are installed.
Switch |
Battery holder |
|
2.Mount the LED lamp on a camcorder. Insert the hot shoe adapter into the hot shoe of the camcorder and screw in the hot shoe knob to place the LED lamp on the camcorder.
3.Switch the lamp on to use it.
4.Switch the lamp off after use.
 Maintenance
1.Please turn off the power after use to avoid long time heat generation and a waste of the battery and service life of the LED bulbs.
2.Remove the batteries when you are not using the LED lamp.
3.Please install the batteries carefully to avoid damage to the battery holder.
©2012 NEDIS BV. Camlink is a registered trademark of NEDIS BV. Although every effort has been made |
3 |
|
to ensure the accuracy of the information contained in this manual specifications are subject to change |
||
|
||
and therefore NEDIS BV cannot guarantee its correctness and completeness at all times. |
|
 Warranty
No guarantee or liability can be accepted for any changes and modifications of the product or damage caused due to incorrect use of this product.
 Disclaimer
Designs and specifications are subject to change without notice.
All logos, brands and product names are trademarks or registered trademarks of their respective holders and are hereby recognised as such. Keep this manual and packaging for future reference.
 Disposal
• This product is designated for separate collection at an appropriate collection point. Do not dispose of this product with household waste.
•For more information, contact the retailer or the local authority responsible for waste management.
 DE-Deutsch
 Technische Daten
Lichtquelle: |
48 Hochleistungs-LEDs |
Farbtemperatur mit Filter: |
5400 K |
Farbtemperatur Orangefilter: |
3200 K |
Farbtemperatur Pinkfilter: |
3200 K |
Lichtstrom: |
440 lm |
Batterie: |
2 x AA |
 Sicherheitsvorkehrungen
Um das Risiko eines elektrischen Schlags zu verringern, sollte dieses Produkt AUSSCHLIESSLICH von einem autorisierten Techniker geöffnet werden. Bei Problemen trennen Sie das Gerät bitte von der Spannungsversorgung und von anderen Geräten ab. Stellen Sie sicher, dass das Gerät nicht mit Wasser oder Feuchtigkeit in Berührung kommt.
 Installationsanleitungen
1.Diffusor und Filter:
Ohne den Diffusor und Filter hat das Licht einen Scheinwerfer-Effekt. Es können Aufnahmen aus einem relativen großen Abstand gemacht werden.
Mit dem Diffusor bekommt das Licht einen weichen Effekt.
Auf der vorderen Oberfläche befinden sich Aussparungen, um den Diffusor und den Filter zu befestigen.
2.Blitzschuhadapter:
Der Blitzschuhadapter verbindet die Lampe mit dem Camcorder.
3.Wählen Sie On, um die Lampte einzuschalten und Off, um die Lampe auszuschalten.
4.Abdeckung des Batteriefachs: Zur Befestigung der Batterie.
5.Batterie: 2 x AA
6.Gel-Halter: Diffusor und Filter aufbewahren.
 Benutzerhinweise
1.Legen Sie die AA-Batterien ein. Stellen Sie bittte sicher, dass Sie die Polarität beachten. Beachten Sie dabei die Symbole „+“ und „-“. Verschließen Sie die Abdeckung des Batteriefaches, nachdem Sie die Batterie eingelegt haben.
©2012 NEDIS BV. Camlink is a registered trademark of NEDIS BV. Although every effort has been made |
4 |
|
to ensure the accuracy of the information contained in this manual specifications are subject to change |
||
|
||
and therefore NEDIS BV cannot guarantee its correctness and completeness at all times. |
|
Schalter |
Batteriefach |
|
2.Befestigen Sie die LED-Lampe auf einem Camcorder. Setzen Sie den Blitzschuhadapter in den Blitzschuh des Camcorders und schrauben Sie ihn daran fest, um die LED-Lampe auf dem Camcorder zu befestigen.
3.Schalten Sie die Lampe an, um sie zu nutzen.
4.Schalten Sie die Lampe nach Gebrauch aus.
 Wartung
1.Schalten Sie die Lampe nach der Benutzung bitte aus, um eine Hitzeentwicklung zu vermeiden und die Batterie und LEDs zu schonen.
2.Entnehmen Sie die Batterien, wenn Sie die LED-Lampe nicht verwenden.
3.Setzen Sie die Batterien bitte sorgfältig ein, um Schäden an der Batteriehalterung zu vermeiden.
 Garantie
Es kann keine Garantie oder Haftung für irgendwelche Änderungen oder Modifikationen des Produkts oder für Schäden übernommen werden, die aufgrund einer nicht ordnungsgemäßen Anwendung des Produkts entstanden sind.
 Haftungsausschluss
Design und technische Daten können ohne vorherige Ankündigung geändert werden.
Alle Logos, Marken und Produktnamen sind Marken oder eingetragene Marken ihrer jeweiligen Eigentümer und werden hiermit als solche anerkannt. Bitte bewahren Sie Bedienungsanleitung und Verpackung für spätere Verwendung auf.
 Entsorgung
• Dieses Produkt muss an einem entsprechenden Sammelpunkt zur Entsorgung abgegeben werden. Entsorgen Sie dieses Produkt nicht mit dem Haushaltsmüll.
•Weitere Informationen erhalten Sie beim Verkäufer oder der für die Abfallwirtschaft verantwortlichen örtlichen Behörde.
 FR – Français
 Caractéristiques techniques
Source d'éclairage : |
48 diodes à haute puissance |
Filtre de température de couleur blanc : |
5400 K |
Filtre de température de couleur orange : |
3200 K |
Filtre de température de couleur rose : |
3200 K |
Intensité lumineuse : |
440 lm |
Piles : |
2 piles AA |
 Consignes de sécurité
Pour réduire le risque de choc électrique, ce produit ne doit être ouvert que par un technicien qualifié si une réparation s’impose. Débranchez l’appareil et les autres équipements du secteur s’il y a un problème. Ne pas exposer l’appareil à l’eau ni à l’humidité.
©2012 NEDIS BV. Camlink is a registered trademark of NEDIS BV. Although every effort has been made |
5 |
|
to ensure the accuracy of the information contained in this manual specifications are subject to change |
||
|
||
and therefore NEDIS BV cannot guarantee its correctness and completeness at all times. |
|
 Notice de montage
1.Diffuseur et filtre :
Sans diffuseur ni filtre, la lampe produit un effet de projecteur et convient à la prise de vue à relativement longue portée.
Grâce au diffuseur, la lampe produit un effet de lumière douce.
La face avant du cadre dispose de rainures qui permettent la fixation du diffuseur et du filtre.
2.Griffe porte-accessoires :
La griffe porte-accessoires relie la lampe au caméscope.
3.Placez l'interrupteur sur On pour allumer la lampe, et sur Off pour l'éteindre.
4.Porte du logement de piles : Pour fixer les piles.
5.Piles : 2 piles AA.
6.Porte-filtre couleur : permet de poser le diffuseur et le filtre.
 Mode d'emploi
1.Mettez en place les piles AA. Vérifiez soigneusement que les pôles positif et négatif correspondent aux signes « + »et « - ». Refermez le couvercle du logement de piles après avoir mis les piles en place.
Interrupteur |
Logement de piles |
|
2.Installation de la lampe LED sur un caméscope. Insérez l'adaptateur de griffe porte-accessoires dans la griffe porteaccessoires du caméscope et vissez le bouton rotatif de la griffe porte-accessoire afin d'installer la lampe LED sur le caméscope.
3.Allumez la lampe pour l'utiliser.
4.Eteignez la lampe après utilisation.
 Entretien
1.Veillez à bien éteindre après utilisation afin d'éviter de générer de la chaleur pendant un long moment, et pour éviter le gaspillage des piles ainsi que la réduction de la durée de vie des ampoules LED.
2.Enlevez les piles lorsque vous ne vous servez pas de la lampe LED.
3.Veillez à installer les piles avec soin afin d'éviter d'endommager le logement de piles.
 Garantie
Aucune garantie ou responsabilité ne sera acceptée en cas de modification et/ou de transformation du produit ou en cas de dommages provoqués par une utilisation incorrecte de l’appareil.
 Avis de non responsabilité
Le design et les caractéristiques techniques sont sujets à modification sans notification préalable.
Tous les logos de marques et noms de produits sont des marques déposées ou immatriculées dont leurs détenteurs sont les propriétaires et sont donc reconnues comme telles dans ce documents. Conservez ce manuel et l’emballage pour toute référence ultérieure.
 Elimination
• Ce produit doit être jeté séparément des ordures ménagères dans un point de collecte approprié. Ne jetez pas ce produit avec les ordures ménagères ordinaires.
•Pour plus d'informations, contactez le distributeur ou l'autorité locale responsable de la gestion des déchets.
©2012 NEDIS BV. Camlink is a registered trademark of NEDIS BV. Although every effort has been made |
6 |
|
to ensure the accuracy of the information contained in this manual specifications are subject to change |
||
|
||
and therefore NEDIS BV cannot guarantee its correctness and completeness at all times. |
|
 NL - Nederlands
 Technische specificaties
Lichtbron: |
48 hoog vermogen Leds |
Kleurtemperatuur van de witfilter: |
5400 K |
Kleurtemperatuur van de oranjefilter: |
3200 K |
Kleurtemperatuur van de rozefilter: |
3200 K |
Lichtsterkte: |
440 lm |
Batterij: |
2x AA |
 Veiligheidsvoorschriften
Om het risico op elektrische schokken te voorkomen mag dit product ALLEEN worden geopend door een erkende technicus wanneer er onderhoud nodig is. Koppel het product los van de elektrische voeding en van andere apparatuur als zich problemen voordoen. Stel het product niet bloot aan water of vocht.
 Installatie-instructies
1.Diffuser en filter:
Zonder de diffusor en filter heeft het licht het spotlighteffect en is geschikt voor het fotograferen op een relatief lang afstandsbereik.
Met de diffuser zal het licht een zacht lichteffect hebben.
Sleuven zijn op de voorzijde van het frame geïnstalleerd om de diffusor en filter te bevestigen.
2.Hot shoe-adapter:
De hot shoe-adapter verbindt de lamp met de camcorder.
3.Selecteer “On” (Aan) om de lamp in te schakelen en “Off” (Uit) om de lamp uit te schakelen.
4.Batterijklep:
Om de batterij te borgen.
5.Batterij: 2x AA
6.Gelhouder: om de diffuser en filter te bewaren.
 Gebruiksaanwijzing
1.Plaats de AA-batterijen. Zorg ervoor dat de positieve en negatieve polen volgens de “+”- en “-”-symbolen zijn geplaatst. Plaats de klep van de batterijhouder nadat de batterijen zijn geïnstalleerd.
 Batterijhouder
Schakelaar
2.Monteer de LED-lamp op een camcorder. Plaats de hot shoe-adapter in de hot shoe van de camcorder en schroef de hot shoe-knop erin om de LED-lamp op de camcorder te plaatsen.
3.Schakel de lamp in voor gebruik.
4.Schakel de lamp uit na gebruik.
 Onderhoud
1.Schakel de voeding na gebruik uit om langdurige warmteontwikkeling en verspilling van de batterij en de levensduur van de LED-lampen te voorkomen.
2.Verwijder de batterijen wanneer u de LED-lamp niet gebruikt.
3.Installeer de batterijen zorgvuldig om schade aan de batterijhouder te voorkomen.
©2012 NEDIS BV. Camlink is a registered trademark of NEDIS BV. Although every effort has been made |
7 |
|
to ensure the accuracy of the information contained in this manual specifications are subject to change |
||
|
||
and therefore NEDIS BV cannot guarantee its correctness and completeness at all times. |
|
 Loading...