

Cameo Zenit B200 User Manual

USER´S MANUAL
BEDIENUNGSANLEITUNG
MANUEL D`UTILISATION
MANUAL DE USUARIO
INSTRUKCJA OBSŁUGI
MANUALE D‘ USO
ZENIT® B200
LED BATTERY OUTDOOR WASHLIGHT
CLZB200

CONTENTS / INHALTSVERZEICHNIS / CONTENU / CONTENIDO / TREŚĆ / CONTENUTO
ENGLISH
PREVENTIVE MEASURES 3-5
INTRODUCTION 5
CONNECTIONS, OPERATING AND DISPLAY ELEMENTS 6-7
OPERATION 7-14
IR REMOTE CONTROL 14
INSTALLATION 15
OPTIONAL ACCESSORIES 15-16
DMX TECHNOLOGY 16-17
TECHNICAL DATA 17
MANUFACTURER’S DECLARATIONS 18-19
DMX CONTROL 110-115
DEUTSCH
SICHERHEITSHINWEISE 20-22
EINFÜHRUNG 22
ANSCHLÜSSE, BEDIEN- UND ANZEIGEELEMENTE 23-24
BEDIENUNG 24-31
IR FERNBEDIENUNG 32
AUFSTELLUNG UND MONTAGE 33
OPTIONALES ZUBEHÖR 33-34
DMX TECHNIK 34-35
TECHNISCHE DATEN 35-36
HERSTELLERERKLÄRUNGEN 36-37
DMX STEUERUNG 110-115
FRANCAIS
MESURES PRÉVENTIVES 38-40
INTRODUCTION 40
RACCORDEMENTS, ÉLÉMENTS DE COMMANDE ET
D’AFFICHAGE 41-42
MODE D’EMPLOI 42-49
PILOTAGE PAR TÉLÉCOMMANDE INFRAROUGE 50
INSTALLATION ET MONTAGE 51
ACCESSOIRES DISPONIBLES EN OPTION 51-52
TECHNOLOGIE DMX 52
CARACTÉRISTIQUES TECHNIQUES 53-54
DÉCLARATIONS DU FABRICANT 55
PILOTAGE EN MODE DMX 110-115
ESPAÑOL
MEDIDAS DE SEGURIDAD 56-58
INTRODUCCIÓN 58
CONEXIONES, ELEMENTOS DE MANEJO Y ELEMENTOS
DE VISUALIZACIÓN 59-60
FUNCIONAMIENTO 60-67
MANDO A DISTANCIA POR INFRARROJOS 68
INSTALACIÓN Y MONTAJE 69
ACCESORIOS OPCIONALES 69
TECNOLOGÍA DMX 70
DATOS TÉCNICOS 71-72
DECLARACIONES DEL FABRICANTE 73
CONTROL DMX 110-115
POLSKI
ŚRODKI OSTROŻNOŚCI 74-76
WPROWADZENIE 76
GNIAZDA, ELEMENTY OBSŁUGI I WSKAŹNIKI 77-78
OBSŁUGA 78-85
PILOT NA PODCZERWIEŃ 85
USTAWIANIE I MONTAŻ 87
OPCJONALNE AKCESORIA 87-88
TECHNIKA DMX 88-89
DANE TECHNICZNE 89-90
OŚWIADCZENIA PRODUCENTA 91
STEROWANIE DMX 110-115
ITALIANO
MISURE PRECAUZIONALI 92-94
INTRODUZIONE 94
CONNETTORI, ELEMENTI DI COMANDO E DI
VISUALIZZAZIONE 95-96
UTILIZZO 96-103
TELECOMANDO A INFRAROSSI 104
INSTALLAZIONE E MONTAGGIO 105
ACCESSORI OPZIONALI 105-106
TECNOLOGIA DMX 106-107
DATI TECNICI 107-108
DICHIARAZIONI DEL PRODUTTORE 109
CONTROLLO DMX 110-115

ENGLISH
YOU‘VE MADE THE RIGHT CHOICE!
We have designed this product to operate reliably over many years. Please read this User‘s Manual carefully, so that you can begin making
optimum use of your Cameo Light product quickly. Learn more about Cameo Light on our website WWW.CAMEOLIGHT.COM.
PREVENTIVE MEASURES
1. Please read these instructions carefully.
2. Keep all information and instructions in a safe place.
3. Follow the instructions.
4. Observe all safety warnings. Never remove safety warnings or other information from the equipment.
5. Use the equipment only in the intended manner and for the intended purpose.
6. Use only sufficiently stable and compatible stands and/or mounts (for fixed installations). Make certain that wall mounts are properly installed and
secured. Make certain that the equipment is installed securely and cannot fall down.
7. During installation, observ e the applicable safety regulations for your country.
8. Never install and operate the equipment near radiators, heat registers, ovens or other sources of heat. Make certain that the equipment is
always installed so that is cooled sufficiently and cannot overheat.
9. Never place sources of ignition, e.g., burning candles, on the equipment.
10. Ventilation slits must not be blocked.
11. This appliance is designed exclusively for indoor use, do not use this equipment in the immediate vicinity of water (does not apply
to special outdoor equipment - in this case, observe the special instructions noted below). Do not expose this equipment to flammable
materials, fluids or gases.
12. Make certain that dripping or splashed water cannot enter the equipment. Do not place containers filled with liquids, such as vases or
drinking vessels, on the equipment.
13. Make certain that objects cannot fall into the device.
14. Use this equipment only with the accessories recommended and intended by the manufacturer.
15. Do not open or modify this equipment.
16. After connecting the equipment, check all cables in order to prevent damage or accidents, e.g., due to tripping hazards.
17. During transport, make certain that the equipment cannot fall down and possibly cause property damage and personal injuries.
18. If your equipment is no longer functioning properly, if fluids or objects have gotten inside the equipment or if it has been damaged in
anot her way, switch it off immediately and unplug it from the mains outlet (if it is a powered device). This equipment may only be repaired
by authorized, qualified personnel.
19. Clean the equipment using a dry cloth.
20. Comply with all applicable disposal laws in your country. During disposal of packaging, please separate plastic and paper/cardboard.
21. Plastic bags must be kept out of reach of children.
FOR EQUIPMENT THAT CONNECTS TO THE POWER MAINS:
22. CAUTION: If the power cord of the device is equipped with an earthing contact, then it must be connected to an outlet with a protective
ground. Never deactivate the protective ground of a power cord.
23. If the equipment has been exposed to strong fluctuations in temperature (for example, after transport), do not switch it on immediately.
Moisture and condensation could damage the equipment. Do not switch on the equipment until it has reached room temperature.
24. Before connecting the equipment to the power outlet, first verify that the mains voltage and frequency match the values specified on the
equipment. If the equipment has a voltage selection switch, connect the equipment to the power outlet only if the equipment values and the
mains power values match. If the included power cord or power adapter does not fit in your wall outlet, contact your electrician.
25. Do not step on the power cord. Make certain that the power cable does not become kinked, especially at the mains outlet and/or power
adapter and the equipment connector.
26. When connecting the equipment, make certain that the power cord or power adapter is always freely accessible. Always disconnect the
equipment from the power supply if the equipment is not in use or if you want to clean the equipment. Always unplug the power cord and
power adapter from the power outlet at the plug or adapter and not by pulling on the cord. Never touch the power cord and power adapter
with wet hands.
27. Whenever possible, avoid switching the equipment on and off in quick succession because otherwise this can shorten the useful life of
the equipment.
28. IMPORTANT INFORMATION: Replace fuses only with fuses of the same type and rating. If a fuse blows repeatedly, please contact an
authorised service centre.
29. To disconnect the equipment from the power mains completely, unplug the power cord or power adapter from the power outlet.
30. If your device is equipped with a Volex power connector, the mating Volex equipment connector must be unlocked before it can be removed. However, this also means that the equipment can slide and fall down if the power cable is pulled, which can lead to personal injuries
and/or other damage. For this reason, always be careful when laying cables.
31. Unplug the power cord and power adapter from the power outlet if there is a risk of a lightning strike or before extended periods of disuse.
32. The device must only be installed in a voltage-free condition (disconnect the mains plug from the mains).
33. Dust and other debris inside the unit may cause damage. The unit should be regularly serviced or cleaned (no guarantee) depending on
ambient conditions (dust etc., nicotine, fog) by qualified personnel to prevent overheating and malfunction.
34. Please keep a distance of at least 0.5 m to any combustible materials.
35. Power cables to power multiple devices must have a cross-section of at least 1.5 mm². Within the EU, the cables must correspond to
H05VV-F, or similar. Suitable cables are offered by Adam Hall. With these cables, you can connect multiple devices via the power OUT connection to the power IN connection of an additional device. Make sure that the total current consumption of all connected devices does not
exceed the specified value on all connected devices (label on the device). Make sure to keep power cable connections as short as possible.
ENGLISH
DEUTSCHFRANCAIS
ESPAÑOL
ITALIANO POLSKI
DMX
3

DEUTSCHENGLISH
FRANCAIS
CAUTION:
To reduce the risk of electric shock, do not remove cover (or back). There are no user serviceable parts
inside. Maintenance and repairs should be exclusively carried out by qualified service personnel.
The warning triangle with lightning symbol indicates dangerous uninsulated voltage inside the unit, which may cause an
electrical shock.
The warning triangle with exclamation mark indicates important operating and maintenance instructions.
The housing surface of the spotlight can heat up to temperatures as high as 70 °C in regular use. Ensure that it is not possible
to come into contact with the housing unintentionally. Always allow sufficient time for the lamp to cool down before
dismantling, carrying out maintenance work or charging etc.
Warning! This device is designed for use below 2000 metres in altitude.
Warning! This product is not intended for use in tropical climates.
ESPAÑOL
POLSKI
ITALIANO
CAUTION! IMPORTANT INFORMATION ABOUT LIGHTING PRODUCTS!
1. The product has been developed for professional use in the field of event technology and is not suitable as household lighting.
2. Do not stare, even temporarily, directly into the light beam.
DMX
3. Do not look at the beam directly with optical instruments such as magnifiers.
4. Stroboscope effects may cause epileptic seizures in sensitive people! People with epilepsy should definitely avoid places where
strobes are used.
Caution! Intense LED light source! Risk of eye damage. Do not look into the light source.
The spotlight is fitted with a rechargeable lithium-ion battery. Keep the spotlight well away from excessive heat and direct
sunlight. Do not place it on or in heating appliances such as microwaves, ovens or radiators. Non-compliance can result in
damage to the spotlight. If they overheat, batteries can catch fire and explode.
Never immerse the spotlight in water or other liquids. This could result in a fire, explosion or other dangerous situation.
Do not put the spotlight into a fire, as it could explode.
Do not drop the spotlight or allow it to be exposed to severe vibration or impact. Non-compliance can result in fire and explosion.
The spotlight has an integrated, non-removable rechargeable battery; do not attempt to remove the battery – the spotlight may
not be opened. To have the rechargeable battery replaced, take the device to an authorised service centre.
Fully recharge the battery immediately after discharge. Batteries which are not fully charged will lose capacity, and their
lifetime will be reduced. Only store the spotlight with a fully charged battery. If the spotlight is not used for an extended period
of time, fully recharge the battery every six months. Do not charge the battery at ambient temperatures of less than 0 °C or
more than 40 °C.
4

BATTERY SAFETY
1. Keep the battery poles away from conductive objects such as keys, jewellery and the like. This can lead to the battery being
short-circuited, which can cause injuries and burns.
2. Never alter the polarity of the battery contacts.
3. Keep the battery well away from excessive heat and direct sunlight. Do not place it on or in heating devices such as microwaves, ovens
or radiators. Batteries can explode if they overheat.
4. Do not attempt to alter or adapt the battery or put foreign objects inside it and do not immerse it or allow it to come into contact with
water or other liquids. This can result in a fire, explosion or other dangerous situation.
5. If battery acid leaks, take care to ensure that it does not come into contact with skin or eyes. If this does happen, rinse immediately with
clear water and seek medical advice.
6. In the event of the battery deforming, changing colour or overheating during charging or storage, stop using the device immediately and
remove the battery. If you continue to use the device, battery acid may leak or a fire or explosion may occur.
7. Never throw batteries into a fire since they can explode. Damaged batteries can also explode.
8. Dispose of used batteries in compliance with local regulations. Improper use of the battery can result in a fire, explosion or other
dangerous situation.
9. Never allow children or pets to chew or suck on the battery. This can result in damage or an explosion.
10. Do not smash or pierce the battery and do not expose it to high pressure. This can result in short-circuiting or overheating.
11. Never drop the device or the battery. If the device or battery is dropped, in particular on a hard surface, they can be damaged.
12. If the standby time of the device decreases significantly, replace the battery.
13. If the device has an integrated, non-removable battery, do not try to remove the battery since this may damage the device. Take the
device to an authorised service centre to have the battery replaced.
INTRODUCTION
LED BATTERY OUTDOOR WASHLIGHT WITH W-DMX™
CLZB200
CONTROL FUNCTIONS:
2-channel CCT, 3-channel color macros, 3-channel RGB 8-bit, 4-channel RGBW 8-bit, 6-channel RGB 16-bit, 8-channel RGBW 16-bit,
10-channel full-access 8-bit, and 15-channel full-access 16-bit DMX control
Master/Slave operation
Standalone functions
IR remote control
W-DMX™
ENGLISH
DEUTSCHFRANCAIS
ESPAÑOL
FEATURES:
DMX-512. 21 x 15 W High Power RGBW LEDs. W-DMX™. Battery operation with up to 24 hours running time. IR remote control included.
Strobe. 16-bit dimmer. 4 dimmer curves. Colour temperature correction. Adjustable LED PWM frequency. Fast Access Feature. IP65-rated. IP65
5-pin DMX ports. Plastic feet. Omega mounting bracket included. Operating voltage 100–240 V AC. Power consumption 180W. 25°, 45°, 60° x
10°, 100° diffusers and barn-door available as an option.
The spotlight features the RDM standard (Remote Device Management). This remote device management system makes it possible to carry out
status checks and configure RDM devices with an RDM-enabled controller.
ITALIANO POLSKI
DMX
5

CONNECTIONS, OPERATING AND DISPLAY ELEMENTS
1 4
7 7
3
6
5 2
DEUTSCHENGLISH
1
POWER IN
IP65 power input socket with rubber sealing cap. Operating voltage 100 - 240 V AC / 50 - 60Hz. Connection via supplied power cable (when
FRANCAIS
not in use, always close with rubber sealing cap).
2
POWER OUT
IP65 power output socket with rubber sealing cap. Facilitates power supply to other CAMEO lights. Ensure that the total current consumption of all
connected devices does not exceed the value specified on the device in amperes (A) (when not in use, always close with the rubber sealing cap).
3
ESPAÑOL
POLSKI
ON/OFF
Ensure that the battery is charged sufficiently or connect the lights correctly to the power supply. Move the switch to the down position to
make the floodlight ready for operation. During the start-up process, “Welcome to Cameo”, the model name and the software version will be
shown consecutively on the display. When the switch is not in the down position, the floodlight is in standby mode. In both operating states,
the battery is constantly being charged, as long as the floodlight is connected to the power supply correctly.
4
DMX IN
Male IP65 5-pin XLR socket for connecting a DMX control device (e.g. DMX console. When not in use, always close with the rubber sealing
cap).
5
DMX OUT
Female IP65 5-pin XLR socket for sending DMX control signal (when not in use, always close with the rubber sealing cap).
6
OLED DISPLAY
Shows current operating mode, charging status of the battery and the menu items in the edit menu.
ITALIANO
7
TOUCH-SENSITIVE CONTROLS
MODE – Press mode to access the selection menu for system settings. Press repeatedly to go back to the main display.
ENTER – Press ENTER to access the menu levels to make value changes, and to access the sub-menus. Confirm value changes by pressing
ENTER.
UP and DOWN – Select individual menu items in the selection menu (DMX address, operating mode etc.) and in the sub-menus. Allow changes to
the value of a menu item, such as the DMX address as required.
PRESSURE EQUALISATION ELEMENT
DMX
The pressure compensation element to prevent condensation forming inside the housing is located in the base of the device behind the
cable feed to the LED unit. In order to ensure its proper function, the element must be protected from contamination.
6

PLEASE NOTE: In order to provide protection from spraying water, in accordance with protection class IP65, special IP65-rated XLR
connectors must be used correctly with the DMX input and output sockets, or they must be closed using the rubber sealing caps. When
connected correctly, or when sealed correctly with the rubber sealing caps, the POWER IN and POWER OUT sockets are protected from
spraying water according to IP65.
OPERATION
PLEASE NOTE
• When the lamp is correctly connected to the mains supply and the standby switch is in the down position, "Welcome to Cameo", the model name and the software version are shown on the display consecutively during start-up. After this process, the lamp is ready for operation
and starts in the previously enabled mode.
• If one of the DMX operating modes is activated and there is no DMX signal to the DMX input, the currently programmed DMX address is
displayed and the characters on the display will begin to flash. The flashing stops when a DMX signal is present.
• Following approximately one minute of no input, the display automatically returns to the main display and the currently active mode is
displayed.
• Fast Access Feature: In order to simplify the menu guide, the device has an intelligent menu structure that allows direct access to previously selected menu items and sub-menu items. 1. Press MODE and ENTER simultaneously for direct access to the last-edited sub-menu
item, where you can make changes instantly as required (DMX starting address and all modes). 2. Press MODE for direct access to the
last-selected and last-edited menu item. Press ENTER repeatedly to access the sub-menu items in order to change individual settings (DMX
starting address and all modes).
• Before changing device settings, ensure that the control panel is dry and dust free, in order not to impair its functionality.
• The display can be rotated through 180° by pressing UP when the main display is visible.
CHARGING THE BATTERY, OPERATING AND STORING THE SPOTLIGHT
• Once the spotlight is correctly connected to the power supply, the internal battery is charged. This means that the battery is also charged,
if the spotlight is in use.
• The battery charge status is shown in the display when the device is switched on or in standby mode.
• Charge time from 0% to 100% charge status is approximately 4 hours.
• Battery life in full operation (RGBW at 100%) is approximately 3 hours. Use of individual colours and colour-change programmes gives
much longer battery life. Battery life can be increased to up to 24 hours by reducing brightness accordingly.
• After about 300 charging cycles (0–100%), the battery will retain approx. 70% of its nominal capacity.
• The electronic battery management system protects against overcharging and deep discharging.
• The rechargeable battery may only be replaced with original equipment by an authorised service centre.
• Charge the battery of the Zenit B200 spotlight at ambient temperatures above 0°C and below 40°C.
• If the Zenit B200 spotlight is operated on the mains, ensure that the ambient temperature is not below 0°C and not above 40°C.
• If the Zenit B200 spotlight is operated on its internal battery, ensure that the ambient temperature is not below -15°C and not above 40°C.
• Charge the battery immediately after full discharge. Batteries which are not fully charged will lose capacity and their lifetime will be reduced.
• Store the spotlight only with a fully charged battery.
• If the spotlight is not used for a long time, recharge the battery every 6 months.
• To extend the lifetime of the battery, it is recommended that the battery is recharged as soon as possible and it is charged before its
energy is completely discharged.
• In cold environments, battery life may be shorter than expected.
• Store the spotlight in cool and dry conditions to ensure optimal storage conditions for the battery.
ENGLISH
DEUTSCHFRANCAIS
ESPAÑOL
ITALIANO POLSKI
DMX
7

MAIN DISPLAY
After the power-up process, the lamp is ready for operation and starts in the previously activated mode. The main display appears with the
following information: current mode (e.g. DMX mode), W-DMX™ status, battery charge status and mains operation.
W-DMX™ status Battery charge status
Mains operation
DMX Address
DEUTSCHENGLISH
BATTERY CHARGE STATUS IN STANDBY MODE
To recharge the internal battery, connect the lamp to the mains with the supplied power cable. The battery charge status is indicated by the
battery symbol on the display.
001
Current operating mode
FRANCAIS
W-DMX™
1. To pair with W-DMX™ compatible transmitters, enable W-DMX™ in the device settings (Settings -> Wireless Setting -> W-DMX On Off
ESPAÑOL
-> On) and reset the W-DMX™ module (Receive Reset -> Yes). Start the pairing process as described in the operating instructions of the
W-DMX™ transmitter. Pairing is then completed automatically.
2. Connect a group of W-DMX™ devices to create a DMX universe. Disconnect all devices that are supposed to form the group (Settings
-> Wireless Setting -> Receive Reset). Now activate a CLZB200 with a DMX controller via DMX cable and in the settings, select "Transmit"
(Send) (Settings -> Wireless Setting -> Operating Mode -> Transmit). In the settings of the W-DMX™ devices to be controlled via W-DMX™,
select "Receive" (Settings -> Wireless Setting -> Operating Mode -> Receive), pair them and confirm by selecting "Link" (Settings ->
Wireless Setting -> Link -> Link) in the settings of the CLZB200 controlled via DMX cable. Pairing is then completed automatically.
POLSKI
3. It is also possible to create a networked group of W-DMX™ devices via W-DMX™ and to operate them in master/slave mode to use.
Disconnect all devices that are supposed to form the group (Settings -> Wireless Setting -> Receive Reset). Now, in the settings (Settings
-> Wireless Setting -> Operating Mode) of the master unit select "Transmit" (send) and in the settings of the selected slave units, select
"Receive". In the master unit, select the entry "Link" (Settings -> Wireless Setting -> Link -> Link) and confirm by pressing ENTER. Pairing
of the devices is then completed automatically. In the master unit, select one of the standalone modes (Auto, Colour Macro, Static, Tunable
White, User Colour) and control the slave units with it.
ITALIANO
DMX
8

W-DMX™ STATUS
G3 G4S
W-DMX™
deactivated
SETTING DMX START ADDRESS (DMX ADDRESS)
Press MODE to access the selection menu. Using the UP and DOWN controls, select the menu item “DMX address” (observe arrow) and
confirm with ENTER. The display will show a three-digit number field and you can use the UP and DOWN controls to configure the desired
DMX start address. Confirm the entry with ENTER and press MODE to return to the main display (in the example, “DMX address 001”).
---------------- Menu ----------------
DMX Address
DMX mode
Stand Alone
Slave
Settings
System Info
CONFIGURING DMX MODE (DMX Mode)
Press MODE to access the selection menu. Using the UP and DOWN controls, select the menu item “DMX Mode” (observe arrow) and
confirm with ENTER. In the sub-menu, you can now select between eight different DMX operating modes with the UP and DOWN buttons.
Confirm your selection with ENTER. Tables with the channel assignments can be found in these instructions under DMX CONTROL.
---------------- Menu ----------------
DMX Address
DMX Mode
Stand Alone
Slave
Settings
System Info
W-DMX™
as receiver
activated,
not coupled
W-DMX™
as receiver
activated and
device coupled,
Transmitter off,
or out of range
001
–
5xx
------------ DMX MODE ------------
15CH Full Access
10CH Full Access
8CH User-Calibrated
6CH Factory-Calibrated
4CH User-Calibrated
3CH Factory-Calibrated
3CH Color Macro
2CH CCT Factory-Calib
W-DMX
activated and
coupled device,
no DMX signal
DMX Address
001
W-DMX™
as reveicer
activated and
coupled device,
DMX signal is
present
W-DMX™
and transmissi-
on mode G3
Arrow up = send
operation
Down arrow =
Receive mode
Arrow flashing =
Coupling
Flashing stops =
Coupled
W-DMX™
and transmissi-
on mode G4S
Arrow up = send
operation
Down arrow =
Receive mode
Arrow flashing =
Coupling
Flashing stops =
coupled
ENGLISH
DEUTSCHFRANCAIS
ESPAÑOL
ITALIANO POLSKI
DMX
9

SETTING STANDALONE MODE
Press MODE to access the selection menu. Using the UP and DOWN controls, select the menu item “Stand Alone” (observe arrow) and
confirm with ENTER. In the sub-menu you can now select from the stand-alone modes “Auto”, “Colour Macro”, “Static”, “Tunable White”,
and “User Colour” with UP and DOWN. Confirm your selection with ENTER.
---------------- Menu ----------------
DMX Address
DMX mode
Stand Alone
Slave
Settings
System Info
DEUTSCHENGLISH
----------------- Mode ----------------
Auto
Colour Macro
Static
Tunable White
User Colour
AUTO MODE (programme 1 - programme 6)
The 6 different auto-programmes each comprise non-editable colour-change sequences. Brightness and speed are independently adjustable.
Select auto mode as per the procedure previously described in SETTING STAND ALONE MODE and confirm with ENTER. Using the UP and DOWN
controls, now select one of the 6 auto-programmes (observe arrow) and confirm with ENTER. To adjust brightness, use the UP and DOWN
controls to select the menu item “Dim”, and confirm with ENTER, then use the UP and DOWN controls to select the desired value between 000
and 255. Confirm with ENTER. To adjust the run speed, select the menu item “Speed”, confirm with ENTER, and then select the desired value
FRANCAIS
between 001 and 100. Confirm with ENTER. Press MODE four times to return to the main display (Mode Auto).
----------- Stand Alone -----------
Colour Macro
Static
Tunable White
User Colour
ESPAÑOL
Auto
---------------- Auto ----------------
Program 1
Program 2
Program 3
Program 4
Program 5
Program 6
---------- Programme x ----------
Dim <255>
Speed <100>
Dim
000
–
255
Speed
001
–
100
001
100
–
COLOUR MACROS (Colour Macro)
15 different preset colour macros are available. Select colour macro mode as per the procedure previously described in SETTING OPERATION
MODE and confirm with ENTER. Using the UP and DOWN controls, now select the desired colour preset (observe arrow) and confirm with ENTER
(Colour Off = blackout). The display will show a three-digit number field and you can use the UP and DOWN controls to set the desired brightness between 000 and 100. Confirm with ENTER. Press MODE three times to return to the main display (colour macro mode).
----------- Stand Alone -----------
POLSKI
Auto
Static
Tunable White
User Colour
Colour Macro
--------- Colour Macro ---------
Colour O
Red <100>
Amber <100>
Yellow Warm <100>
Yellow <100>
Green <100>
Turquoise <100>
Cyan <100>
Blue <100>
Lavender <100>
Mauve <100>
Magenta <100>
Pink <100>
Warm White <100>
White <100>
Cold White <100>
001
100
–
Colour Macro
Mode
Auto
Mode
STATIC MODE (Static)
ITALIANO
The static mode allows the Dimmer, Strobe, R, G, B, W to be adjusted directly on the device with values between 000 and 255, in a similar
way to with a DMX controller. In this way, an individual scene can be created without an additional DMX controller. Select static mode as per
the procedure previously described in SETTING OPERATION MODE and confirm with ENTER. Using the UP and DOWN controls, now select
the menu item that you wish to edit (observe arrow) and confirm with ENTER. The display will show a three-digit number field and you can
use the UP and DOWN controls to configure the desired value between 000 and 255. Confirm with ENTER. Press MODE three times to return
to the main display (static mode).
----------- Stand Alone -----------
Auto
Colour Macro
DMX
Tunable White
User Colour
Static
---------------- Static ----------------
Dimmer <255>
Strobe <255>
Red <255>
Green <255>
Blue <255>
White <255>
000
255
–
Mode
Static
10

COLOUR TEMPERATURE (Tunable White)
The colour temperature mode enables you to configure the colour temperature from cold white to warm white (CTC) and the brightness (Dim) of the
light directly on the device. Select the colour temperature mode as per the procedure previously described in SETTING STAND ALONE MODE and
confirm with ENTER. Using the UP and DOWN controls, now select the menu item that you wish to edit (observe arrow) and confirm with ENTER.
The display will show a three-digit number field and you can use the UP and DOWN controls to configure the desired value. Confirm with ENTER.
Press MODE three times to return to the main display (Mode Tunable White).
----------- Stand Alone -----------
Auto
Colour Macro
Static
Tunable White
User Colour
---------- Programme x ----------
Dim <100>
CTC <255>
Dim
000
–
100
CTC
000
–
255
Mode
Tunable White
USER PRESETS (User colour)
The operating mode “User Presets” allows you to store five individual colour presets of overall brightness, strobe and a colour mix of R, G, B and W
directly in the device. Select the “User Colour” mode as per the procedure previously described in SETTING STAND ALONE MODE and confirm with
ENTER. Use UP AND DOWN to select one of the stored presets Color1 to Color5 and confirm with ENTER and select the submenu item you want to
edit (see arrows). Confirm with ENTER.
The display will show a three-digit number field and you can use the UP and DOWN controls to set the value as required between 000 and 255.
Confirm by pressing ENTER again. When all settings are configured as required, press MODE 4 times to return to the main display (Mode User
Colour).
----------- Stand Alone -----------
Auto
Colour Macro
Static
Tunable White
User Colour
------------ User Colour ------------
Color1
Color2
Color3
Color4
Color5
------------ Colour1 ------------
Dimmer <255>
Strobe <255>
Red <255>
Green <255>
Blue <255>
White <255>
001
255
–
Mode
User Colour
ENGLISH
DEUTSCHFRANCAIS
ESPAÑOL
SLAVE MODE CONFIGURATION
Press MODE to access the selection menu. Using the UP and DOWN controls, select the menu item “Slave” (observe arrow) and confirm
with ENTER. Connect the slave and the master units (same model) with a DMX cable and enable one of the standalone modes on the master
unit (Auto, Colour Macro, Static, Tunable White, User Colour). Now the slave unit will follow the master unit. If there is no control signal, the
display characters will flash. Flashing stops as soon as a control signal is present.
---------------- Menu ----------------
DMX Address
DMX mode
Stand Alone
Slave
Settings
System Info
Mode
Slave
DEVICE SETTINGS (Settings)
Press MODE to access the selection menu. Using the UP and DOWN controls, select the menu item “Settings” (observe arrow) and confirm
with ENTER.
---------------- Menu ----------------
DMX Address
DMX mode
Stand Alone
Slave
Settings
System Info
This will take you to the submenu for setting the following submenu items (see table, select with UP and DOWN, confirm with ENTER,
change value or status with UP and DOWN, confirm with ENTER):
ITALIANO POLSKI
DMX
11

Settings
Runtime = Increase battery life by up to
Wireless Setting = W-DMX settings (Wire-
24 hours with correspondingly reduced brightness
(calculated on full with 100%
battery)
less-DMX)
DEUTSCHENGLISH
FRANCAIS
Display Reverse = Flip display On Rotate display by 180° (e.g. for overhead
Display Backlight = Display lighting On On permanently
ESPAÑOL
DMX Fail = Operating status with DMX
signal fault
POLSKI
AC Failure = Operating status in the event
ITALIANO
Dimmer Curve = Dimmer curve Linear Light intensity increases linearly with DMX value
of a power failure
DMX
Dimmer Response = Dimmer sensitivity LED Lamp responds abruptly to changes in DMX value
Off Function deactivated
4 hours - 24 hours Configure battery run time from 4 hours to 24
hours in 1 hour increments.
W-DMX On/Off On = W-DMX enabled
Off = W-DMX disabled
Operating Mode Receive = W-DMX module as receiver
Receive = W-DMX module as sender
Transmitting Mode G3 = G3 broadcasting standard
G4S = G4S broadcasting standard
Link Link = pair with W-DMX units. W-DMX must be
enabled on all devices, and the pairing with a
transmitter be retained (Receive Reset).
Unlink = decoupling of all devices
Receive Reset No = Do not retain transmitter pairing
Yes = Retain transmitter pairing
installation)
Off No display rotation
Off Deactivation after approximately 1 minute of
inactivity
Hold Last command is retained
Blackout Activates blackout
Full On All the LEDs have 100% output
Stand Alone Spotlight switches to the last selected stand-
alone mode
No Action Last command is retained
Blackout Activates blackout
Full On All the LEDs have 100% output
Stand Alone Spotlight switches to the last selected stand-
alone mode
Exponential Light intensity can be finely adjusted at lower
DMX values and broadly adjusted at higher DMX
values
Logarithmic Light intensity can be broadly adjusted at lower
DMX values and finely adjusted at higher DMX
values
S-Curve Light intensity can be finely adjusted at lower
and higher DMX values and broadly adjusted at
medium DMX values
Halogen Lamp behaves like a halogen spotlight with soft
brightness changes
12

Color calibration = Color calibration
(If one of the DMX factory
calibration modes is activated, no other calibration can
be selected and the message
“no possible change in this
DMX Mode” will be shown
on the display. If one of the
DMX user calibration modes
is activated, RAW can be
selected as the alternative
calibration.)
RAW R, G, B and W with maximum value 225
User calibration Individual colour calibration. Cross-mode bright-
ness setting of the 4 LED groups RGBW with
values from 000 - 255
Factory calibration Factory-default calibration of R, G, B, and W
(across all operating modes). Select this setting
to ensure the consistent-looking presentation of
color macros in stand-alone mode and to control
color macros with DMX
ENGLISH
Autolock = Automatic locking of the
LED Frequency = LED PWM frequency 800Hz / 1200Hz /
IR Remote = Activate or deactivate control
Factory Reset = Reset to factory settings Reset Now! Reset to factory settings:
BATTERY RUN TIME (Runtime)
Battery life can be increased to up to 24 hours by reducing brightness accordingly (see table Settings). Battery life is calculated with
spotlight on full and 100% battery charge status. Battery life is extended considerably if not all of the colours red, green, blue and white are
activated (Full On), instead only red, for example.
DIMMER CURVES
linear
Light intensity
DMX value
SYSTEM INFORMATION (System Info)
Press MODE to access the selection menu. Using the UP and DOWN controls, select the menu item "System Info" (observe arrow) and
confirm with ENTER.
---------------- Menu ----------------
DMX Address
DMX mode
Stand Alone
Slave
Settings
System Info
controls
by IR remote control
exponential
Light intensity
DMX value
On Automatic locking of the controls after approx-
Off Automatic locking of the controls is disabled
2000Hz / 3600Hz /
12kHz / 25kHz
On IR remote control activated
Off IR remote control deactivated
logarithmic
Light intensity
DMX value
imately 1 minute of inactivity. Display shown
upon attempted use: “Locked!" To unlock: Press
and hold UP and DOWN simultaneously for
approx. 5 seconds
Configuration of LED PWM frequency
Confirm with ENTER. Cancel with MODE
S-curve
Light intensity
DMX value
DEUTSCHFRANCAIS
ESPAÑOL
ITALIANO POLSKI
DMX
Use the UP and DOWN controls to select the desired submenu item, and press ENTER to display the corresponding information.
13
System Info
Firmware = Displays device
Temperature = Displays temperature of
Operation Hours = Displays operating time xx:xx h Displays total operating time in hours and minutes
DEUTSCHENGLISH
MANUAL LOCKING FUNCTION
In addition to the ability to protect the lamp automatically from accidental and unauthorised operation (see "Settings" - "Auto-lock"), the controls can also be locked manually. Press and hold the UP and DOWN controls simultaneously for approximately 5 seconds. If an attempt is made
to change settings, "Locked!" will appear in the display and changing the lamp’s settings via the controls is no longer possible. After approx. 1
minute, the current operating mode is displayed again. To unlock, press and hold the UP and DOWN controls simultaneously for approximately
5 seconds.
The display will show the previously displayed information.
firmware
LED unit
Main CPU Vx.xx
LED driver Vx.xx
LED xx°C / xx°F
Unit °C (= display in degrees Celsius)
°F (= display in degrees Fahrenheit)
FRANCAIS
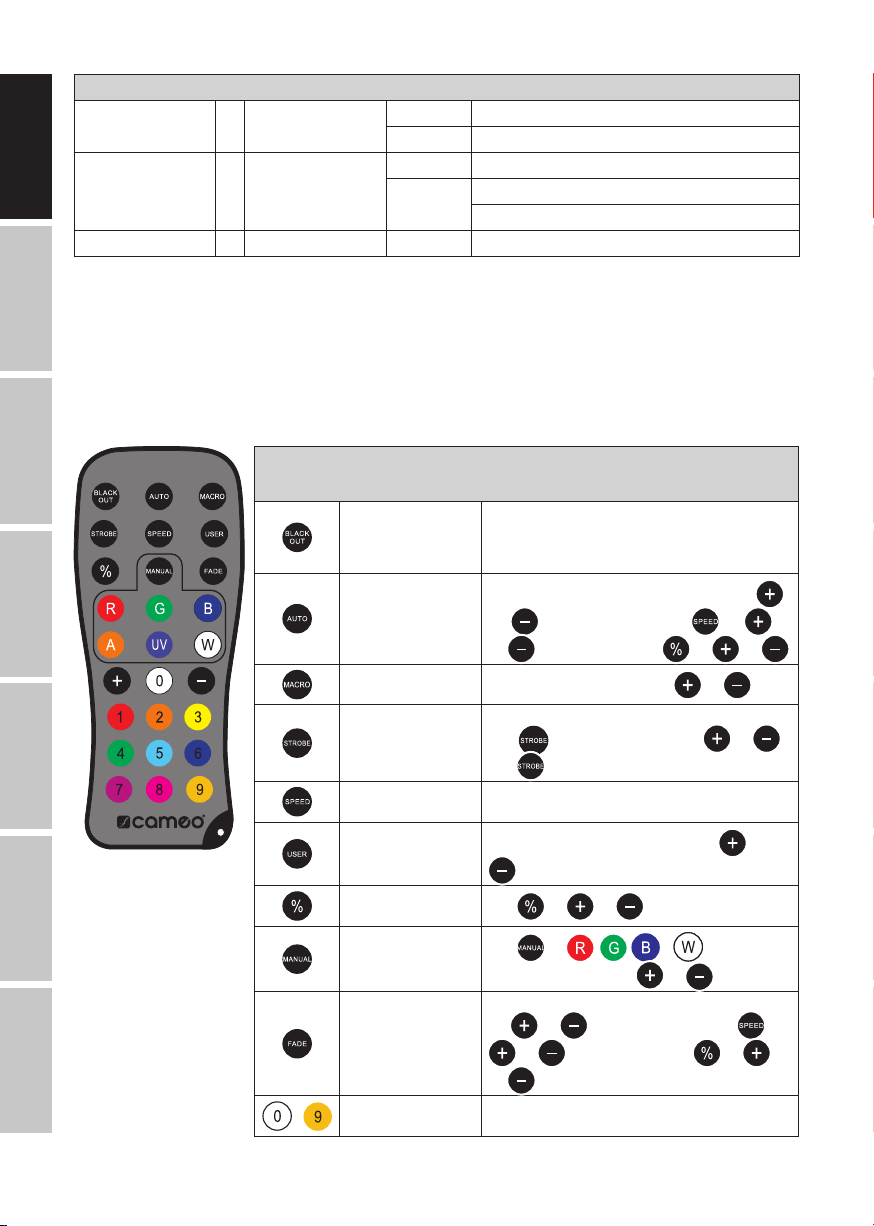
IR REMOTE CONTROL
Aim the infrared remote control directly at the infrared sensor on the front of the lamp. The maximum
range is approximately 8 metres. In DMX and Slave modes, the remote control is deactivated. Battery
for IR remote control = CR2025.
The blackout button is used to switch off all LEDs, regard-
Blackout
ESPAÑOL
Auto programme
Colour macro
POLSKI
Strobe
Speed
less of operating mode enabled via the remote control.
Press the blackout button again to reactivate the previously
selected mode.
Auto-Programmes 1 - 6. Programme selection with
and . Programme run speed with and
. Brightness setting with and and .
and
Colour Macros 1-15. Selection with
Strobe light for AUTO, FADE and MANUAL operating modes.
Press to activate. Strobe speed with and .
to deactivate strobe.
Press
Setting the running speed for Auto and Fade programmes.
and .
ITALIANO
DMX
14
Individual colour macros
Brightness
Manual colour mix
Fade programmes
-
Colour preset
Individual colour macros 1-5. Selection with and
.
and and to adjust brightness.
Press
Press
and , , or to manually mix
colours. Adjust intensity with
Fade programmes Auto 1 - Auto 5. Programme selection
and . Programme run speed with and
with
and . Brightness setting with and
and .
Direct selection of colour presets 0 to 9.
and .

INSTALLATION
Thanks to its integrated plastic feet, the lamp can be positioned in a suitable location on a level surface. Installation
on a traverse is carried out with an Omega bracket, mounted in the centre of the base of the device (A). A Omega bracket is included. Suitable beam clamps are available as an option. Ensure firm connections and secure the spotlight to the securing lug (B) with a suitable safety
cable. Beam angle of the LED unit is independent of the device and is adjusted with the side-mounted thumb screws.
Important: Overhead installation requires extensive experience, including the calculation of the load limits for
the installation materials used and the regular safety inspection of all installation materials and lights.
If you do not have these qualifications, do not attempt to perform an installation yourself. Refer instead to a qualified professional.
B
A
OPTIONAL ACCESSORIES
ENGLISH
DEUTSCHFRANCAIS
CLZW300B2004b
Barn doors – Tool-free installation by spring-loaded locking pins,
safety cable included
CLZW300B200SMLSD40
45° diffuser
Tool-free installation via SNAPMAG
®
technology
CLZW300B200SMLSD20
25° diffuser
Tool-free installation via SNAPMAG
CLZW300B200SMLSD100
100° diffuser
Tool-free installation via SNAPMAG® technology
®
technology
ESPAÑOL
ITALIANO POLSKI
DMX
15

CLZW300B200SMLSD6010
60° x 10° diffuser
Tool-free installation via SNAPMAG
®
technology
DEUTSCHENGLISH
FRANCAIS
ESPAÑOL
DMX TECHNOLOGY
DMX-512
DMX (Digital Multiplex) is the designation for a universal transmission protocol for
communications between corresponding devices and controllers. A DMX controller sends
DMX data to the connected DMX device(s). The DMX data is always transmitted as a serial
data stream that is forwarded from one connected device to the next via the "DMX IN" and
"DMX OUT" connectors (XLR plug-type connectors) that are found on every DMX-capable
device, provided the maximum number of devices does not exceed 32 units. The last device
POLSKI
in the chain needs to be equipped with a terminator (terminating resistor).
DMX CONNECTION
DMX is the common "language" via which a very wide range of types and models of equipment from various manufacturers can
be connected with one another and controlled via a central controller, provided that all of the devices and the controller are DMX
compatible. For optimum data transmission, it is necessary to keep the connecting cables between the individual devices as short as
possible. The order in which the devices are integrated in the DMX network has no influence on the addresses. Thus the device with
the DMX address 1 can be located at any position in the (serial) DMX chain: at the beginning, at the end or somewhere in the middle.
If the DMX address 1 is assigned to a device, the controller "knows" that it should send all data allocated to address 1 to this device
ITALIANO
regardless of its position in the DMX network.
SERIAL CONNECTION OF MULTIPLE LIGHTS
1. Connect the male XLR connector (3-pin or 5-pin) of the DMX cable to the DMX output (female XLR socket) of the first DMX device
(e.g. DMX-Controller).
2. Connect the female 3-pin XLR connector of the DMX cable connected to the first projector to the DMX input (male 3-pin socket)
of the next DMX device. In the same way, connect the DMX output of this device to the DMX input of the next device and repeat until
all devices have been connected. Please note that as a rule, DMX devices are connected in series and connections cannot be shared
without active splitters. The maximum number of DMX devices in a DMX chain should not exceed 32 units.
The Adam Hall 3 STAR, 4 STAR, and 5 STAR product ranges include an extensive selection of suitable cables.
DMX
DMX CABLES
When fabricating your own cables, always observe the illustrations on this page. Never connect the shielding of the cable to the ground
contact of the plug, and always make certain that the shielding does not come into contact with the housing of the XLR plug. If the shielding
is connected to the ground, this can lead to short-circuiting and system malfunctions.
16

Pin Assignment
DMX cable with 3-pin XLR connectors: DMX cable with 5-pin XLR connectors (pin 4 and 5 are not used):
1
3
2
Shield
1
3
2
5
4
3
2
1
Shield
5
4
3
2
1
DMX TERMINATORS (TERMINATING RESISTORS)
To prevent system errors, the last device in a DMX chain needs to be equipped with a terminating resistor (120 ohm, 1/4 Watt).
3-pin XLR connector with a terminating resistor: K3DMXT3
5-pin XLR connector with a terminating resistor: K3DMXT5
Pin Assignment
3-pin XLR connector: 5-pin XLR connector:
1
3
2
5
4
3
2
1
DMX ADAPTER
The combination of DMX devices with 3-pin connectors and DMX devices with 5-pin connectors in a DMX chain is possible with suitable
adapters.
Pin Assignment
DMX Adapter 5-pin XLR male to 3-pin XLR female: K3DGF0020
Pins 4 and 5 are not used.
Pin Assignment
DMX Adapter 3-pin XLR male to 5-pin XLR female: K3DHM0020
Pins 4 and 5 are not used.
ENGLISH
DEUTSCHFRANCAIS
TECHNICAL DATA
Product number: CLZB200
Product type: LED battery-powered wash light
Type: Outdoor floodlight
Color spectrum LED: RGBW
Number of LEDs: 21
LED type: 15 W
LED PWM frequency: 800 Hz, 1200 Hz, 2000 Hz, 3600 Hz, 12 kHz, 25 kHz (adjustable)
Beam angle: 21° (40° Field)
DMX input: 5-pin male XLR, IP65
DMX output: 5-pin female XLR, IP65
DMX modes: 2-channel CCT, 3-channel color macros, 3-channel RGB 8-bit, 4-channel RGBW 8-bit, 6-channel RGB
16-bit, 8-channel RGBW 16-bit, 10-channel full-access 8-bit, and 15-channel full-access 16-bit
DMX functions: Dimmer, dimmer fine, RGBW, RGBW fine, color macros, color change, color blend, strobe, dimmer
curves, color temperature correction, dimming, LED PWM frequency
Standalone functions: Color mixing, color macros, master/slave operation, automatic programmes, strobe, user color, tunable
white
System settings: W-DMX settings, display rotate 180°, runtime, display lighting, DMX fail, AC failure, dimmer curves,
dimmer sensitivity, color calibration, display lock Function, LED PWM frequency, IR remote control,
factory reset
Control: DMX512, W-DMX™, IR remote control, RDM-enabled
Operating controls: Mode, Enter, Up, Down, ON/OFF switch
ESPAÑOL
ITALIANO POLSKI
DMX
17

Display elements: OLED display
Operating voltage: 100–240 V AC/50–60 Hz
Power consumption: 180W
Battery type: LG F1L
Battery voltage: 44.4 V
Battery capacity: 6.71 Ah
Battery power: 298 Wh
DEUTSCHENGLISH
Battery charge time: 4h
Battery protection: Protection against overloading and deep discharge
Battery charging cycles: 300 charging cycles 0% -> 100% ≅ 70% capacity
Illuminance (@ 1m, without
diffuser):
Luminous flux (RGBW): 6600 lm (calibrated Mode)
FRANCAIS
Power connection: Input and output jacks, special IP65 (Max. Output 10A)
Ambient temperature during
operation with internal
battery:
Ambient temperature during
operation with mains voltage:
Housing material: Metal
ESPAÑOL
Housing color: Black
Housing cooling: Convection
IP rating: IP65
Dimensions (W x H x D,
without bracket):
Weight: 9.2kg
Additional features: 1 m power cable with special IP65 plug, IR remote control, feet and 1x Omega bracket included. 25°,
POLSKI
22100lx
–15°C to +40°C
0°C to +40°C
377 x 256 x 140mm
45°, 60° x 10°, 100° diffusers and barn-door available as an option
MANUFACTURER´S DECLARATIONS
MANUFACTURER‘S WARRANTY & LIMITATIONS OF LIABILITY
You can find our current warranty conditions and limitations of liability at: https://cdn-shop.adamhall.com/media/pdf/Manufacturers-Decla-
ITALIANO
rations-CAMEO_DE_EN_ES_FR.pdf. To request warranty service for a product, please contact Adam Hall GmbH, Adam-Hall-Str. 1,
61267 Neu Anspach / Email: Info@adamhall.com / +49 (0)6081 / 9419-0.
CORRECT DISPOSAL OF THIS PRODUCT
(valid in the European Union and other European countries with a differentiated waste collection system)
This symbol on the product, or on its documents indicates that the device may not be treated as household waste. This is to avoid
environmental damage or personal injury due to uncontrolled waste disposal. Please dispose of this product separately from other waste
and have it recycled to promote sustainable economic activity. Household users should contact either the retailer where they purchased
this product, or their local government office, for details on where and how they can recycle this item in an environmentally friendly manner.
Business users should contact their supplier and check the terms and conditions of the purchase contract. This product should not be mixed
with other commercial waste for disposal.
DMX
18

FCC STATEMENT
This device complies with Part 15 of the FCC Rules. Operation is subject to the following two conditions:
(1) This device may not cause harmful interference, and
(2) This device must accept any interference received, including interference that may cause undesired operation
CE Compliance
Adam Hall GmbH states that this product meets the following guidelines (where applicable):
R&TTE (1999/5/EC) or RED (2014/53/EU) from June 2017
Low voltage directive (2014/35/EU)
EMV directive (2014/30/EU)
RoHS (2011/65/EU)
The complete declaration of conformity can be found at www.adamhall.com.
Furthermore, you may also direct your enquiry to info@adamhall.com.
ENGLISH
DEUTSCHFRANCAIS
ESPAÑOL
19
ITALIANO POLSKI
DMX

DEUTSCH
SIE HABEN DIE RICHTIGE WAHL GETROFFEN!
Dieses Gerät wurde unter hohen Qualitätsanforderungen entwickelt und gefertigt, um viele Jahre einen reibungslosen Betrieb zu gewährleisten. Bitte lesen Sie diese Bedienungsanleitung sorgfältig, damit Sie Ihr neues Produkt von Cameo Light schnell und optimal einsetzen
können. Weitere Informationen über Cameo Light erhalten Sie auf unserer Website WWW.CAMEOLIGHT.COM.
SICHERHEITSHINWEISE
1. Lesen Sie diese Anleitung bitte sorgfältig durch.
2. Bewahren Sie alle Informationen und Anleitungen an einem sicheren Ort auf.
3. Befolgen Sie die Anweisungen.
DEUTSCHENGLISH
4. Beachten Sie alle Warnhinweise. Entfernen Sie keine Sicherheitshinweise oder andere Informationen vom Gerät.
5. Verwenden Sie das Gerät nur in der vorgesehenen Art und Weise.
6. Verwenden Sie ausschließlich stabile und passende Stative bzw. Befestigungen (bei Festinstallationen). Stellen Sie sicher, dass Wandhalterungen
ordnungsgemäß installiert und gesichert sind. Stellen Sie sicher, dass das Gerät sicher installiert ist und nicht herunterfallen kann.
7. Beachten Sie bei der Installation die für Ihr Land geltenden Sicherheitsvorschriften.
8. Installieren und betreiben Sie das Gerät nicht in der Nähe von Heizkörpern, Wärmespeichern, Öfen oder sonstigen Wärmequellen. Sorgen
Sie dafür, dass das Gerät immer so installiert ist, dass es ausreichend gekühlt wird und nicht überhitzen kann.
9. Platzieren Sie keine Zündquellen wie z.B. brennende Kerzen auf dem Gerät.
10. Lüftungsschlitze dürfen nicht blockiert werden.
11. Das Gerät wurde ausschließlich für die Verwendung in Innenräumen entwickelt, betreiben Sie das Gerät nicht in unmittelbarer Nähe von
FRANCAIS
Wasser (gilt nicht für spezielle Outdoor Geräte - beachten Sie in diesem Fall bitte die im Folgenden vermerkten Sonderhinweise). Bringen Sie
das Gerät nicht mit brennbaren Materialien, Flüssigkeiten oder Gasen in Berührung.
12. Sorgen Sie dafür, dass kein Tropf- oder Spritzwasser in das Gerät eindringen kann. Stellen Sie keine mit Flüssigkeit gefüllten Behältnisse
wie Vasen oder Trinkgefäße auf das Gerät.
13. Sorgen Sie dafür, dass keine Gegenstände in das Gerät fallen können.
14. Betreiben Sie das Gerät nur mit dem vom Hersteller empfohlenen und vorgesehenen Zubehör.
15. Öffnen Sie das Gerät nicht und verändern Sie es nicht.
16. Überprüfen Sie nach dem Anschluss des Geräts alle Kabelwege, um Schäden oder Unfälle, z. B. durch Stolperfallen zu vermeiden.
17. Achten Sie beim Transport darauf, dass das Gerät nicht herunterfallen und dabei möglicherweise Sach- und Personenschäden verursachen kann.
ESPAÑOL
18. Wenn Ihr Gerät nicht mehr ordnungsgemäß funktioniert, Flüssigkeiten oder Gegenstände in das Geräteinnere gelangt sind, oder das Gerät
anderweitig beschädigt wurde, schalten Sie es sofort aus und trennen es von der Netzsteckdose (sofern es sich um ein aktives Gerät handelt).
Dieses Gerät darf nur von autorisiertem Fachpersonal repariert werden.
19. Verwenden Sie zur Reinigung des Geräts ein trockenes Tuch.
20. Beachten Sie alle in Ihrem Land geltenden Entsorgungsgesetze. Trennen Sie bei der Entsorgung der Verpackung bitte Kunststoff und
Papier bzw. Kartonagen voneinander.
21. Kunststoffbeutel müssen außer Reichweite von Kindern aufbewahrt werden.
BEI GERÄTEN MIT NETZANSCHLUSS:
22. ACHTUNG: Wenn das Netzkabel des Geräts mit einem Schutzkontakt ausgestattet ist, muss es an einer Steckdose mit Schutzleiter
POLSKI
angeschlossen werden. Deaktivieren Sie niemals den Schutzleiter eines Netzkabels.
23. Schalten Sie das Gerät nicht sofort ein, wenn es starken Temperaturschwankungen ausgesetzt war (beispielsweise nach dem Transport).
Feuchtigkeit und Kondensat könnten das Gerät beschädigen. Schalten Sie das Gerät erst ein, wenn es Zimmertemperatur erreicht hat.
24. Bevor Sie das Gerät an die Steckdose anschließen, prüfen Sie zuerst, ob die Spannung und die Frequenz des Stromnetzes mit den auf
dem Gerät angegebenen Werten übereinstimmen. Verfügt das Gerät über einen Spannungswahlschalter, schließen Sie das Gerät nur an die
Steckdose an, wenn die Gerätewerte mit den Werten des Stromnetzes übereinstimmen. Wenn das mitgelieferte Netzkabel bzw. der mitgelieferte Netzadapter nicht in Ihre Netzsteckdose passt, wenden Sie sich an Ihren Elektriker.
25. Treten Sie nicht auf das Netzkabel. Sorgen Sie dafür, dass spannungsführende Kabel speziell an der Netzbuchse bzw. am Netzadapter
und der Gerätebuchse nicht geknickt werden.
ITALIANO
26. Achten Sie bei der Verkabelung des Geräts immer darauf, dass das Netzkabel bzw. der Netzadapter stets frei zugänglich ist. Trennen Sie
das Gerät stets von der Stromzuführung, wenn das Gerät nicht benutzt wird, oder Sie das Gerät reinigen möchten. Ziehen Sie Netzkabel und
Netzadapter immer am Stecker bzw. am Adapter und nicht am Kabel aus der Steckdose. Berühren Sie Netzkabel und Netzadapter niemals
mit nassen Händen.
27. Schalten Sie das Gerät möglichst nicht schnell hintereinander ein und aus, da sonst die Lebensdauer des Geräts beeinträchtigt werden könnte.
28. WICHTIGER HINWEIS: Ersetzen Sie Sicherungen ausschließlich durch Sicherungen des gleichen Typs und Wertes. Sollte eine Sicherung
wiederholt auslösen, wenden Sie sich bitte an ein autorisiertes Servicezentrum.
29. Um das Gerät vollständig vom Stromnetz zu trennen, entfernen Sie das Netzkabel bzw. den Netzadapter aus der Steckdose.
30. Wenn Ihr Gerät mit einem Volex-Netzanschluss bestückt ist, muss der passende Volex-Gerätestecker entsperrt werden, bevor er entfernt
werden kann. Das bedeutet aber auch, dass das Gerät durch ein Ziehen am Netzkabel verrutschen und herunterfallen kann, wodurch Personen verletzt werden und/oder andere Schäden auftreten können. Verlegen Sie Ihre Kabel daher immer sorgfältig.
DMX
31. Entfernen Sie Netzkabel und Netzadapter aus der Steckdose bei Gefahr eines Blitzschlags oder wenn Sie das Gerät länger nicht verwenden.
32. Das Gerät darf nur im spannungsfreien Zustand (Trennung des Netzsteckers vom Stromnetz) installiert werden.
33. Staub und andere Ablagerungen im Inneren des Geräts können es beschädigen. Das Gerät sollte je nach Umgebungsbedingungen
(Staub, Nikotin, Nebel etc.) regelmäßig von qualifiziertem Fachpersonal gewartet bzw. gesäubert werden (keine Garantieleistung),
um Überhitzung und Fehlfunktionen zu vermeiden.
34. Der Abstand zu brennbaren Materialien muss mindestens 0,5 m betragen.
35. Netzleitungen zur Spannungsversorgung mehrerer Geräte müssen mindestens 1,5 mm² Aderquerschnitt aufweisen. In der EU müssen
20

die Leitungen H05VV-F, oder gleichartig, entsprechen. Geeignete Leitungen werden von Adam Hall angeboten. Mit diesen Leitungen können
Sie mehrere Geräte über den Power out Anschluss mit dem Power IN Anschluss eines weiteren Gerätes verbinden. Beachten Sie, dass die
gesamte Stromaufnahme aller angeschlossenen Geräte den vorgegebenen Wert nicht überschreitet (Aufdruck auf dem Gerät). Achten Sie
darauf, Netzleitungen so kurz wie möglich zu halten.
ACHTUNG
Entfernen Sie niemals die Abdeckung, da sonst das Risiko eines elektrischen Schlages besteht. Im
Inneren des Geräts befinden sich keine Teile, die vom Bediener repariert oder gewartet werden können.
Lassen Sie Wartung und Reparaturen ausschließlich von qualifiziertem Servicepersonal durchführen.
Das gleichseitige Dreieck mit Blitzsymbol warnt vor nichtisolierten, gefährlichen Spannungen im Geräteinneren, die einen
elektrischen Schlag verursachen können.
Das gleichseitige Dreieck mit Ausrufungszeichen kennzeichnet wichtige Bedienungs- und Wartungshinweise.
Die Gehäuseoberfläche des Scheinwerfers kann sich im regulären Betrieb auf bis zu 70°C erwärmen. Stellen Sie sicher, dass ein
versehentliches Berühren des Gehäuses ausgeschlossen ist. Lassen Sie die Lampe vor dem Abbau, vor Wartungsarbeiten und vor
dem Aufladen etc. immer ausreichend abkühlen.
Warnung! Dieses Gerät ist für eine Nutzung bis zu einer Höhe von maximal 2000 Metern über dem Meeresspiegel bestimmt.
Warnung! Dieses Gerät ist nicht für den Einsatz in tropischen Klimazonen bestimmt.
ENGLISH
DEUTSCHFRANCAIS
Vorsicht! Intensive LED Lichtquelle! Gefahr der Augenschädigung. Nicht in die Lichtquelle blicken.
Der Scheinwerfer ist mit einem wiederaufladbaren Lithium-Ionen Akku ausgestattet. Halten Sie den Scheinwerfer fern von
übermäßiger Hitze und direkter Sonneneinstrahlung. Legen Sie ihn nicht auf oder in Heizgeräte, wie Mikrowellen, Öfen oder
Heizkörper. Der Scheinwerfer kann bei Nichtbeachtung beschädigt werden. Akkus können bei Überhitzung in Brand geraten
und explodieren.
Tauchen Sie den Scheinwerfer nicht in Wasser oder andere Flüssigkeiten. Andernfalls kann es zu einem Brand, einer Explosion
oder anderen gefährlichen Situationen kommen.
Werfen Sie den Scheinwerfer nicht ins Feuer, da er explodieren könnte.
Lassen Sie den Scheinwerfer nicht fallen und setzen ihn keinen starken Erschütterungen und Stößen aus. Nichtbeachtung kann
zu Feuer und Explosion führen.
Der Scheinwerfer verfügt über einen integrierten, nicht herausnehmbaren Akku, versuchen Sie nicht, den Akku zu entnehmen,
der Scheinwerfer darf nicht geöffnet werden. Zum Austauschen des Akkus bringen Sie das Gerät zu einem autorisierten
Service-Center.
Laden Sie den Akku nach Entladung sofort wieder vollständig auf. Nicht vollständig geladene Akkus verlieren an Kapazität und
Lebensdauer. Lagern Sie den Scheinwerfer nur mit vollständig geladenem Akku. Wenn der Scheinwerfer über einen längeren
Zeitraum nicht verwendet wird, laden Sie den Akku alle 6 Monate vollständig auf. Laden Sie den Akku des Zenit B200
Scheinwerfers nicht bei Umgebungstemperaturen von unter 0°C und über 40°C.
ESPAÑOL
ITALIANO POLSKI
DMX
21

VORSICHT! WICHTIGE HINWEISE IN BEZUG AUF LICHT-PRODUKTE!
1. Das Produkt ist für den professionellen Einsatz im Bereich der Veranstaltungstechnik entwickelt worden und ist nicht für die Raumbeleuchtung in
Haushalten geeignet.
2. Blicken Sie niemals, auch nicht kurzzeitig, direkt in den Lichtstrahl.
3. Blicken Sie niemals mit optischen Geräten wie Vergrößerungsgläsern in den Lichtstrahl.
4. Stroboskopeffekte können unter Umständen bei empfindlichen Menschen epileptische Anfälle auslösen! Epilepsiekranke Menschen
sollten daher unbedingt Orte meiden, an denen Stroboskopeffekte eingesetzt werden.
AKKUSICHERHEIT
1. Halten Sie die Akkupole von leitenden Gegenständen fern, wie Schlüssel, Schmuck oder andere Materialien. Ansonsten wird möglicherweise
der Akku kurzgeschlossen, was zu Verletzungen und Verbrennungen führen kann.
2. Verändern Sie niemals die Polung der Kontakte des Akkus.
DEUTSCHENGLISH
3. Halten Sie den Akku fern von übermäßiger Hitze und direkter Sonneneinstrahlung. Legen Sie ihn nicht auf oder in Heizgeräte, wie
Mikrowellen, Öfen oder Heizkörper. Akkus können bei Überhitzung explodieren.
4. Versuchen Sie nicht, den Akku zu ändern oder zu überarbeiten, Fremdkörper in den Akku einzuführen oder ihn in Wasser oder andere
Flüssigkeiten einzutauchen bzw. mit diesen in Kontakt zu bringen. Andernfalls kann es zu einem Brand, einer Explosion oder anderen
gefährlichen Situationen kommen.
5. Stellen Sie bei Austreten von Batteriesäure sicher, dass diese nicht auf die Haut oder in die Augen gerät. Sollte dies dennoch der Fall sein,
spülen Sie diese unverzüglich mit klarem Wasser ab bzw. aus und suchen Sie einen Arzt auf.
6. Bei einer Verformung, einer Farbänderung oder einer Überhitzung von Akkus während des Ladevorgangs oder der Aufbewahrung stellen
Sie die Verwendung des Geräts sofort ein und entnehmen Sie den Akku. Wenn Sie das Gerät weiterhin verwenden, kann Batteriesäure
austreten oder es kann zu einem Brand oder einer Explosion kommen.
FRANCAIS
7. Werfen Sie Akkus nicht ins Feuer, da sie explodieren können. Beschädigte Akkus können ebenfalls explodieren.
8. Entsorgen Sie gebrauchte Akkus in Übereinstimmung mit den lokalen Vorschriften. Eine unsachgemäße Nutzung des Akkus kann zu
einem Brand, einer Explosion oder anderen gefährlichen Situationen führen.
9. Lassen Sie Kinder und Haustiere nicht auf dem Akku kauen oder daran nuckeln bzw. saugen. Andernfalls kann es zu Schäden oder einer
Explosion kommen.
10. Zerschlagen oder durchstechen Sie den Akku nicht und setzen Sie ihn keinen hohen Drücken aus. Ansonsten kann es zu einem
Kurzschluss oder Überhitzung kommen.
11. Lassen Sie das Gerät bzw. den Akku nicht fallen. Wenn das Gerät oder der Akku fallen gelassen wird, insbesondere auf eine harte
Oberfläche, kann es bzw. er beschädigt werden.
ESPAÑOL
12. Wenn sich die Standby-Zeit des Geräts deutlich verkürzt, tauschen Sie den Akku aus.
13. Falls das Gerät über einen integrierten, nicht herausnehmbaren Akku verfügt, versuchen Sie nicht, den Akku zu entnehmen, da das Gerät
ansonsten beschädigt werden kann. Zum Austauschen des Akkus bringen Sie das Gerät zu einem autorisierten Service-Center.
EINFÜHRUNG
LED BATTERY OUTDOOR WASHLIGHT WITH W-DMX™
CLZB200
POLSKI
STEUERUNGSFUNKTIONEN:
2-Kanal CCT, 3-Kanal Color Macros, 3-Kanal RGB 8 Bit, 4-Kanal RGBW 8 Bit, 6-Kanal RGB 16 Bit, 8-Kanal RGBW 16 Bit, 10-Kanal Full
Access 8 Bit und 15-Kanal Full Access 16 Bit DMX-Steuerung
Master / Slave Betrieb
Standalone Funktionen
IR Fernbedienung
W-DMX™
ITALIANO
EIGENSCHAFTEN:
DMX-512. 21 x 15W High Power RGBW LEDs. W-DMX™. Akku-Betrieb mit bis zu 24 Stunden Laufzeit. IR Fernbedienung inklusive. Stroboskop.
16-Bit Dimmer. 4 Dimmerkurven. Korrektur der Farbtemperatur. LED PWM Frequenz einstellbar. Fast Access Feature. IP65 Schutzart. IP65
5-Pol DMX-Anschlüsse. Kunststofffüße. Omega-Montagebügel inklusive. Betriebsspannung 100-240V AC. Leistungsaufnahme 180W. 25°, 45°,
60°x10°, 100° Streuscheiben und Torblende optional erhältlich.
Der Scheinwerfer verfügt über den RDM-Standard (Remote Device Management). Diese Gerätefernverwaltung ermöglicht die Statusabfrage
und Konfiguration von RDM-Endgeräten über einen RDM-fähigen Controller.
DMX
22

ANSCHLÜSSE, BEDIEN- UND ANZEIGEELEMENTE
1 4
7 7
3
1
POWER IN
IP65 Netzeingangsbuchse mit Gummidichtkappe. Betriebsspannung 100 - 240V AC / 50 - 60Hz. Anschluss mit Hilfe des mitgelieferten
Netzkabels (bei Nichtgebrauch stets mit der Gummidichtkappe verschließen).
2
POWER OUT
IP65 Netzausgangsbuchse mit Gummidichtkappe. Dient der Netzversorgung weiterer CAMEO Scheinwerfer. Achten Sie darauf, dass die gesamte
Stromaufnahme aller angeschlossenen Geräte den auf dem Gerät in Ampere (A) angegebenen Wert nicht überschreitet (bei Nichtgebrauch stets mit
der Gummidichtkappe verschließen).
3
ON / OFF
Stellen Sie ausreichenden Ladestatus des Akkus sicher, bzw. schließen Sie den Scheinwerfer korrekt am Stromnetz an. Schalten Sie den
Scheinwerfer nun betriebsbereit, indem Sie den Schalter in die heruntergedrückte Position bringen. Während des Startvorgangs werden
nacheinander „Welcome to Cameo“, die Modellbezeichnung und die Software Version im Display angezeigt. In der nicht heruntergedrückten
Position des Schalters befindet sich der Scheinwerfer im Standby-Modus. Während beider Betriebszustände wird stets der Akku geladen,
sobald der Scheinwerfer korrekt am Stromnetz angeschlossen ist.
4
DMX IN
Männliche IP65 5-Pol XLR-Buchse zum Anschließen eines DMX-Kontrollgeräts (z.B. DMX-Pult, bei Nichtgebrauch stets mit der
Gummidichtkappe verschließen).
6
5 2
ENGLISH
DEUTSCHFRANCAIS
ESPAÑOL
5
DMX OUT
Weibliche IP65 5-Pol XLR-Buchse zum Weiterleiten des DMX-Steuersignals (bei Nichtgebrauch stets mit der Gummidichtkappe verschließen).
6
OLED-DISPLAY
Zeigt den aktuellen Betriebsmodus, Ladestatus des Akkus und die Menüpunkte im Bearbeitungsmenü an.
7
BERÜHRUNGSEMPFINDLICHE BEDIENFELDER
MODE - Durch Drücken auf MODE gelangen Sie in das Auswahl-Menü für Systemeinstellungen. Durch wiederholtes Drücken gelangen Sie
zurück zur Hauptanzeige.
ENTER - Durch Drücken auf ENTER gelangen Sie auf die Menü-Ebene um Wertänderungen vornehmen zu können und um eines der Untermenüs
zu erreichen. Wertänderungen bestätigen Sie ebenfalls durch Drücken auf ENTER.
UP und DOWN - Auswählen der einzelnen Menüpunkte im Auswahl-Menü (DMX-Adresse, Betriebsart usw.) und in den Untermenüs. Ermöglichen
es, den Wert eines Menü-Punkts, wie z.B. die DMX-Adresse, wunschgemäß zu verändern.
ITALIANO POLSKI
DMX
23

DRUCKAUSGLEICHSELEMENT
Das Druckausgleichselement zur Vermeidung von Kondenswasserbildung im Gehäuseinneren befindet sich in der Gerätebasis hinter der
Kabelzuführung der LED-Einheit. Um die einwandfreie Funktion zu gewährleisten, ist das Element vor Verschmutzung zu schützen.
HINWEISE: Um den Spritzwasserschutz nach Schutzart IP65 bei den DMX-Buchsen zu gewährleisten, müssen die speziellen DMX Eingangsund Ausgangsbuchsen korrekt mit den IP65 Spezial-XLR-Steckern verschlossen sein, bzw. die Gummidichtkappen zum Verschließen verwendet
werden. Die Netzbuchsen POWER IN und POWER OUT sind in korrekt gestecktem Zustand spritzwassergeschützt nach IP65, ebenso bei
korrekter Verwendung der Gummidichtkappen.
BEDIENUNG
DEUTSCHENGLISH
ANMERKUNGEN
• Sobald der Scheinwerfer korrekt am Stromnetz angeschlossen und der Standby-Schalter in die heruntergedrückte Position gebracht
ist, werden während des Startvorgangs nacheinander „Welcome to Cameo“, die Modellbezeichnung und die Software Version im Display
angezeigt. Nach diesem Vorgang ist der Scheinwerfer betriebsbereit und startet in der Betriebsart, die zuvor aktiviert war.
• Ist eine der DMX-Betriebsarten aktiviert und es liegt kein DMX-Signal am DMX-Eingang an, wird die aktuell eingestellte DMX-Adresse
angezeigt und die Zeichen im Display beginnen zu blinken. Das Blinken stoppt, sobald ein DMX-Signal anliegt.
• Erfolgt innerhalb circa einer Minute keine Eingabe, wechselt die Anzeige im Display automatisch auf die Hauptanzeige und die aktuell
FRANCAIS
aktivierte Betriebsart wird angezeigt.
• Fast Access Feature: Um die Menüführung zu vereinfachen, verfügt das Gerät über eine intelligente Menüstruktur, die es ermöglicht, auf
Menüpunkte und Untermenüpunkte, die zuletzt ausgewählt waren, direkt zugreifen zu können. 1. Durch gleichzeitiges Drücken auf MODE
und ENTER gelangen Sie direkt zu dem Untermenüpunkt, der zuletzt editiert wurde und können den entsprechenden Wert augenblicklich
nach Wunsch ändern (DMX-Startadresse und alle Betriebsarten). 2. Durch Drücken auf MODE gelangen Sie direkt zu dem Menüpunkt,
der als Letztes angewählt und editiert wurde, drücken Sie nun wiederholt auf ENTER, erreichen Sie die Untermenüpunkte, um individuelle
Einstellungen vornehmen zu können (DMX-Startadresse und alle Betriebsarten).
• Achten Sie vor dem Ändern von Geräteeinstellungen darauf, dass die Bedieneinheit trocken und staubfrei ist, um ihre Funktionalität nicht
zu beeinträchtigen.
ESPAÑOL
• Die Display-Anzeige kann durch Drücken auf UP um 180° gedreht werden, sobald im Display die Hauptanzeige abgebildet wird.
LADEN DES AKKUS, BETREIBEN UND LAGERN DES SCHEINWERFERS
• Sobald der Scheinwerfer korrekt am Stromnetz angeschlossen ist, wird der interne Akku geladen, das heißt, dass der Akku auch geladen
wird, wenn der Scheinwerfer in Betrieb ist.
• Der Akku-Ladestatus wird sowohl im eingeschalteten Zustand, als auch im Standby-Betrieb im Display angezeigt.
• Die Ladezeit von 0% Ladestatus auf 100% Ladestatus beträgt circa 4 Stunden.
POLSKI
• Die Akku-Laufzeit bei Full On (RGBW auf 100%) beträgt circa 3 Stunden, bei der Nutzung von Einzelfarben und Farbwechselprogrammen
ist die Laufzeit entsprechend erheblich länger. Die Akku-Laufzeit kann durch die Runtime-Funktion bei entsprechend reduzierter Helligkeit
auf bis zu 24 Stunden verlängert werden.
• Nach etwa 300 Ladezyklen (0% - 100%) beträgt die Akku-Kapazität noch circa 70% der nominalen Kapazität.
• Das elektronische Battery Management System schützt vor Überladung und Tiefentladung.
• Der Akku darf nur durch Original-Zubehör durch ein autorisiertes Service-Center ausgetauscht werden.
• Laden Sie den Akku des Zenit B200 Scheinwerfers nicht bei Umgebungstemperaturen von unter 0°C und über 40°C.
ITALIANO
• Bei Betrieb des Zenit B200 Scheinwerfers mit Netzspannung darf die Umgebungstemperatur 0°C nicht unter- und +40°C nicht überschreiten.
• Bei Betrieb mit internem Akku darf die Umgebungstemperatur -15°C nicht unter- und +40°C nicht überschreiten.
• Laden Sie den Akku nach Entladung sofort wieder vollständig auf. Nicht vollständig geladene Akkus verlieren an Kapazität und Lebensdauer.
• Lagern Sie den Scheinwerfer nur mit vollständig geladenem Akku.
• Wenn der Scheinwerfer über einen längeren Zeitraum nicht verwendet wird, laden Sie den Akku alle 6 Monate vollständig auf.
• Um die Lebensdauer des Akkus zu verlängern, wird empfohlen, den Akku möglichst frühzeitig wieder aufzuladen und nicht so lange zu
betreiben, bis die Energie des Akkus vollständig verbraucht ist.
• Bei Betrieb in kalter Umgebung kann die Akkulaufzeit kürzer sein, als erwartet.
DMX
• Lagern Sie den Scheinwerfer kühl und trocken, um optimale Lagerbedingungen für den Akku zu ermöglichen.
24

DISPLAY HAUPTANZEIGE
Nach dem Anschaltvorgang ist der Scheinwerfer betriebsbereit und startet in der Betriebsart, die zuvor aktiviert war. Die Hauptanzeige
erscheint mit folgenden Informationen: Aktuelle Betriebsart (im Beispiel DMX-Betriebsart), W-DMX™ Status, Akku-Ladestatus und Betrieb
am Stromnetz.
W-DMX™ Status Akku-Ladestatus
Betrieb am Stromnetz
DMX Address
001
Aktuelle Betriebsart
AKKU-LADESTATUS IM STANDBY-MODUS
Zum Laden des internen Akkus schließen Sie den Scheinwerfer mit Hilfe des mitgelieferten Netzkabels am Stromnetz an. Der Akku-Ladestatus
wird dabei durch das Batterie-Symbol im Display angezeigt.
W-DMX™
1. Zum Koppeln mit W-DMX™ kompatiblen Transmittern aktivieren Sie W-DMX™ in den Geräteeinstellungen (Settings -> Wireless Setting
-> W-DMX On Off -> On) und setzen das W-DMX™-Modul zurück (Receive Reset -> Yes). Starten Sie den Kopplungsprozess, wie in der
Bedienungsanleitung des W-DMX™ Transmitters beschrieben. Die Kopplung erfolgt nun automatisch.
2. Koppeln Sie eine Gruppe von W-DMX™-Geräten, um mit ihnen ein DMX-Universum zu bilden. Entkoppeln Sie dabei zuerst alle Geräte,
die die Gruppe bilden sollen (Settings -> Wireless Setting -> Receive Reset). Steuern Sie nun einen CLZB200 mit einem DMX-Controller
via DMX-Kabel an und wählen in den Einstellungen „Transmit“ (senden) aus (Settings -> Wireless Setting -> Operating Mode -> Transmit).
Wählen Sie in den Einstellungen der W-DMX™-Geräte, die per W-DMX™ angesteuert werden sollen „Receive“ aus (Settings -> Wireless
Setting -> Operating Mode -> Receive) und koppeln sie, indem Sie in den Einstellungen des via DMX-Kabel angesteuerten CLZB200 „Link“
auswählen und bestätigen (Settings -> Wireless Setting -> Link -> Link). Die Kopplung erfolgt nun automatisch.
ENGLISH
DEUTSCHFRANCAIS
ESPAÑOL
3. Des Weiteren ist es möglich, via W-DMX™ eine vernetzte Gruppe von W-DMX™-Geräten zu bilden und im Master/Slave-Betrieb zu
verwenden. Entkoppeln Sie dabei zuerst alle Geräte, die die Gruppe bilden sollen (Settings -> Wireless Setting -> Receive Reset). Nun wird
in den Einstellungen (Settings -> Wireless Setting -> Operating Mode) der Master-Einheit „Transmit“ (senden) gewählt und in den Einstellungen der Slave-Einheiten „Receive“ (empfangen). Wählen Sie in der Master-Einheit den Eintrag „Link“ (Settings -> Wireless Setting ->
Link -> Link) und bestätigen durch Drücken auf ENTER. Die Kopplung der Geräte erfolgt nun automatisch. Wählen Sie in der Master-Einheit
eine der Standalone-Betriebsarten aus (Auto, Color Macro, Static, Tunable White, User Color) und steuern damit die Slave-Einheiten.
ITALIANO POLSKI
DMX
25

W-DMX™ STATUS
G3 G4S
W-DMX™
deaktiviert
DEUTSCHENGLISH
DMX-STARTADRESSE EINSTELLEN (DMX Address)
FRANCAIS
Durch Drücken auf MODE gelangen Sie in das Auswahl-Menü. Mit Hilfe der Bedienfelder UP und DOWN wählen Sie nun den Menü-Punkt
„DMX Address“ aus (Pfeil beachten) und bestätigen mit ENTER. Im Display wird nun ein dreistelliges Ziffernfeld angezeigt und Sie können
mit Hilfe von UP und DOWN die gewünschte DMX-Startadresse einstellen. Bestätigen Sie die Eingabe mit ENTER und drücken auf MODE,
um zur Hauptanzeige zurückzugelangen (im Beispiel „DMX Address 001“).
---------------- Menu ----------------
DMX Address
DMX Mode
Stand Alone
ESPAÑOL
Slave
Settings
System Info
DMX-BETRIEBSART EINSTELLEN (DMX Mode)
Durch Drücken auf MODE gelangen Sie in das Auswahl-Menu. Mit Hilfe der Bedienfelder UP und DOWN wählen Sie nun den Menu-Punkt
„DMX Mode“ aus (Pfeil beachten) und bestätigen mit ENTER. Im Untermenü können Sie nun unter den 8 verschiedenen DMX-Betriebsarten
mit UP und DOWN auswählen. Bestätigen Sie die Auswahl mit ENTER. DMX-Tabellen mit den Kanalbelegungen finden Sie in dieser Anleitung
POLSKI
unter DMX STEUERUNG.
---------------- Menu ----------------
DMX Address
DMX Mode
Stand Alone
Slave
Settings
System Info
ITALIANO
W-DMX™
als receiver
aktiviert,
nicht gekoppelt
W-DMX™ als
receiver aktiviert
und Gerät
gekoppelt,
Transmitter
abgeschaltet,
oder außer
Reichweite
001
5xx
------------ DMX MODE ------------
15CH Full Access
10CH Full Access
8CH User-Calibrated
6CH Factory-Calibrated
4CH User-Calibrated
3CH Factory-Calibrated
3CH Color Macro
2CH CCT Factory-Calib
-
W-DMX
aktiviert und
Gerät gekoppelt,
kein DMX-Signal
DMX Address
001
W-DMX™ als
reveicer aktiviert
und Gerät
gekoppelt,
DMX-Signal
liegt an
W-DMX™
und Übertra-
gungs-Modus
G3 aktiviert
Pfeil nach oben
= Sendebetrieb
Pfeil nach unten
= Empfangs-
betrieb
Pfeil blinkt=
Kopplungsvor-
gang
Blinken stoppt =
Gekoppelt
W-DMX™
und Übertra-
gungs-Modus
G4S aktiviert
Pfeil nach oben
= Sendebetrieb
Pfeil nach unten
= Empfangs-
betrieb
Pfeil blinkt =
Kopplungsvor-
gang
Blinken stoppt =
Gekoppelt
DMX
26
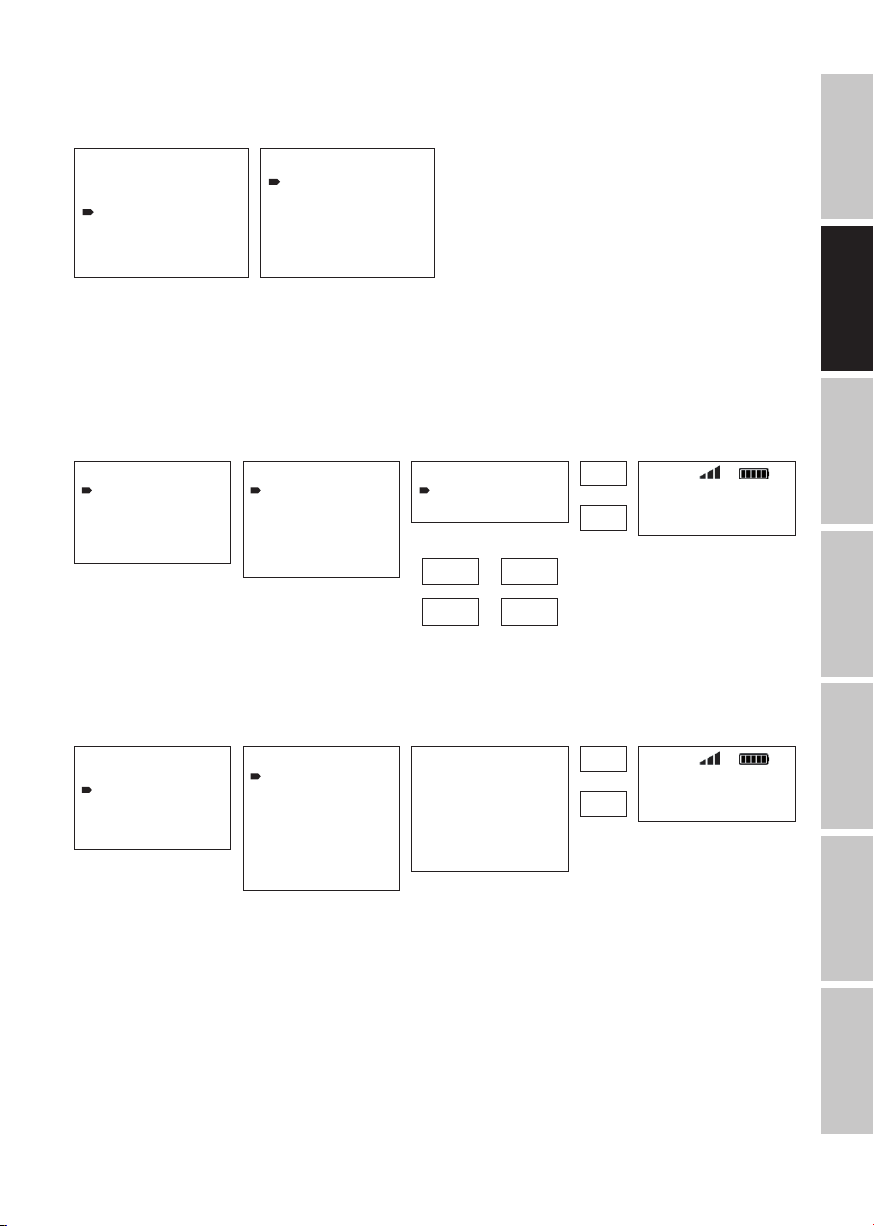
STAND-ALONE-BETRIEBSART EINSTELLEN
Durch Drücken auf MODE gelangen Sie in das Auswahl-Menu. Mit Hilfe der Bedienfelder UP und DOWN wählen Sie nun den Menu-Punkt
„Stand Alone“ aus (Pfeil beachten) und bestätigen mit ENTER. Im Untermenü können Sie nun unter den Stand-Alone-Betriebsarten „Auto“,
„Color Macro“, „Static“, „Tunable White“, und „User Color“ mit UP und DOWN auswählen. Bestätigen Sie die Auswahl mit ENTER.
---------------- Menu ----------------
DMX Address
DMX Mode
Stand Alone
Slave
Settings
System Info
----------------- Mode ----------------
Auto
Color Macro
Static
Tunable White
User Color
ENGLISH
AUTO-BETRIEBSART (Program 1 - Program 6)
Die 6 verschiedenen Auto-Programme bestehen jeweils aus fest programmierten Farbwechselsequenzen, Helligkeit und Laufgeschwindigkeit
sind separat einstellbar. Wählen Sie, wie zuvor unter Punkt „STAND-ALONE-BETRIEBSART EINSTELLEN“ beschrieben, die Auto-Betriebsart
aus und bestätigen die Eingabe mit ENTER. Wählen Sie nun mit Hilfe von UP und DOWN eines der 6 Auto-Programme aus (Pfeil beachten) und
bestätigen mit ENTER. Um nun die Helligkeit einzustellen, wählen Sie mit Hilfe von UP und DOWN den Menüpunkt „Dim“ aus, bestätigen mit
ENTER und wählen den gewünschten Wert mit Hilfe von UP und DOWN von 000 bis 255 aus. Bestätigen Sie mit ENTER. Zum Einstellen der
Laufgeschwindigkeit wählen Sie nun den Menüpunkt „Speed“ aus, bestätigen mit ENTER und wählen den gewünschten Wert von 001 bis
100 aus. Bestätigen Sie mit ENTER. Drücken Sie 4x auf MODE, um zur Hauptanzeige zurückzugelangen (Mode Auto).
----------- Stand Alone -----------
Auto
Color Macro
Static
Tunable White
User Color
---------------- Auto ----------------
Program 1
Program 2
Program 3
Program 4
Program 5
Program 6
------------- Program x -------------
Dim <255>
Speed <100>
Dim
000
-
255
Speed
001
-
100
001
100
-
Mode
Auto
FARBMAKROS (Color Macro)
15 verschiedene Farbmakros stehen als Preset zur Verfügung. Wählen Sie, wie zuvor unter Punkt BETRIEBSART EINSTELLEN beschrieben, den
Menüpunkt „Color Macro“ aus und bestätigen die Eingabe mit ENTER. Wählen Sie nun mit Hilfe von UP und DOWN die gewünschte Farbe als
Preset aus (Pfeil beachten) und bestätigen mit ENTER (Color Off = Blackout). Im Display wird nun ein dreistelliges Ziffernfeld angezeigt und Sie
können mit Hilfe von UP und DOWN die gewünschte Helligkeit von 000 bis 100 einstellen. Bestätigen Sie mit ENTER. Drücken Sie 3x auf MODE,
um zur Hauptanzeige zurückzugelangen (Mode Color Macro).
----------- Stand Alone -----------
Auto
Color Macro
Static
Tunable White
User Color
------------ Color Macro ------------
Color O
Red <100>
Amber <100>
Yellow Warm <100>
Yellow <100>
Green <100>
Turqoise <100>
Cyan <100>
Blue <100>
Lavender <100>
Mauve <100>
Magenta <100>
Pink <100>
Warm White <100>
White <100>
Cold White <100>
001
100
-
Mode
Color Macro
DEUTSCHFRANCAIS
ESPAÑOL
27
ITALIANO POLSKI
DMX

STATISCHER MODUS (Static)
Der Statische Modus ermöglicht es, ähnlich wie mit einem DMX-Steuergerät, Dimmer, Stroboskop (Strobe), R, G, B und W direkt am Gerät
mit Werten von 000 bis 255 einzustellen. Somit kann eine individuelle Szene erstellt werden, ohne einen zusätzlichen DMX-Controller zu benötigen. Wählen Sie, wie zuvor unter Punkt BETRIEBSART EINSTELLEN beschrieben, den Statischen Modus aus und bestätigen die Eingabe
mit ENTER. Wählen Sie nun mit Hilfe von UP und DOWN den Menüpunkt aus, den Sie bearbeiten möchten (Pfeil beachten) und bestätigen
mit ENTER. Im Display wird nun ein dreistelliges Ziffernfeld angezeigt und Sie können mit Hilfe von UP und DOWN den gewünschten Wert
von 000 bis 255 einstellen. Bestätigen Sie mit ENTER. Drücken Sie 3x auf MODE, um zur Hauptanzeige zurückzugelangen (Mode Static).
----------- Stand Alone -----------
Auto
Color Macro
DEUTSCHENGLISH
Tunable White
User Color
Static
---------------- Static ----------------
Dimmer <255>
Strobe <255>
Red <255>
Green <255>
Blue <255>
White <255>
000
255
-
Mode
Static
FARBTEMPERATUR (Tunable White)
Der Farbtemperatur Modus ermöglicht es, Licht mit einer Farbtemperatur von Kaltweiß bis Warmweiß (CTC) und die Helligkeit (Dim) direkt am Gerät
FRANCAIS
einzustellen. Wählen Sie, wie zuvor unter Punkt “STAND-ALONE-BETRIEBSART EINSTELLEN” beschrieben, den Farbtemperatur Modus aus und
bestätigen die Eingabe mit ENTER. Wählen Sie nun mit Hilfe von UP und DOWN den Menüpunkt aus, den Sie bearbeiten möchten (Pfeil beachten)
und bestätigen mit ENTER. Im Display wird nun ein dreistelliges Ziffernfeld angezeigt und Sie können mit Hilfe von UP und DOWN den gewünschten
Wert einstellen. Bestätigen Sie mit ENTER. Drücken Sie 3x auf MODE, um zur Hauptanzeige zurückzugelangen (Mode Tunable White).
----------- Stand Alone -----------
Auto
Color Macro
Static
User Color
ESPAÑOL
Tunable White
------------- Program x -------------
Dim <100>
CTC <255>
Dim
000
-
100
CTC
000
-
255
Tunable White
Mode
BENUTZER-PRESETS (User Color)
Die Betriebsart “Benutzer-Presets” ermöglicht es, Gesamthelligkeit, Stroboskop und eine Farbmischung aus R, G, B und W direkt im Gerät
in fünf individuellen Farb-Presets abspeichern zu können. Wählen Sie, wie zuvor unter Punkt „STAND-ALONE-BETRIEBSART EINSTELLEN“
beschrieben, den Menüpunkt “User Color” aus und bestätigen die Eingabe mit ENTER. Wählen Sie nun mit Hilfe von UP und DOWN einen
POLSKI
der Speicherplätze Color1 bis Color5 aus, bestätigen mit ENTER und wählen den Untermenüpunkt aus, den Sie bearbeiten möchten (Pfeil
beachten). Bestätigen Sie mit ENTER.
Im Display wird nun ein dreistelliges Ziffernfeld angezeigt und Sie können mit Hilfe von UP und DOWN den Wert nach Wunsch von 000
bis 255 einstellen. Bestätigen Sie wiederum mit ENTER. Sind alle Einstellungen wunschgemäß erfolgt, drücken Sie 4x auf MODE, um zur
Hauptanzeige zurückzugelangen (Mode User Color).
----------- Stand Alone -----------
Auto
Color Macro
ITALIANO
Static
Tunable White
User Color
------------ User Color ------------
Color1
Color2
Color3
Color4
Color5
------------ Color1 ------------
Dimmer <255>
Strobe <255>
Red <255>
Green <255>
Blue <255>
White <255>
001
255
-
DMX
28
Mode
User Color
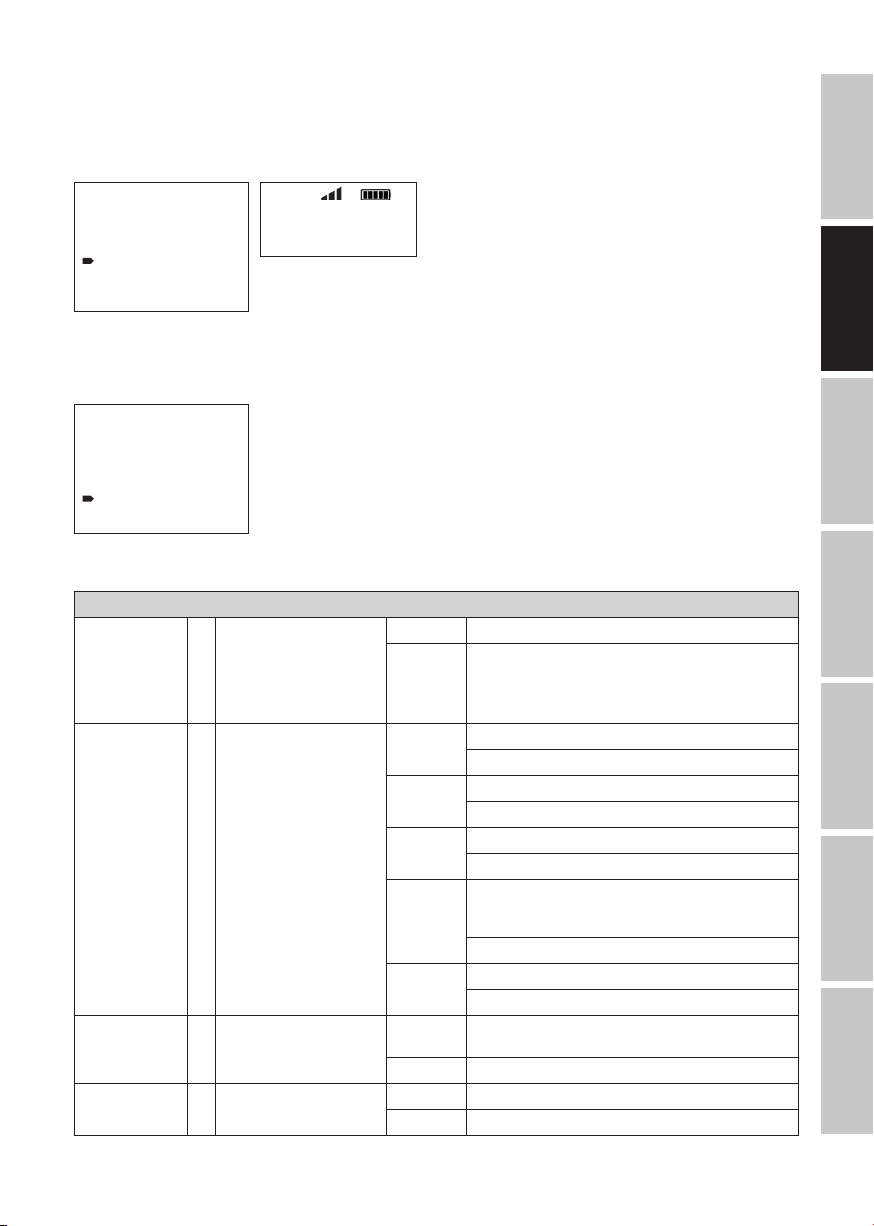
SLAVE BETRIEBSART EINSTELLEN
Durch Drücken auf MODE gelangen Sie in das Auswahl-Menü. Mit Hilfe der Bedienfelder UP und DOWN wählen Sie nun den Menü-Punkt
„Slave“ aus (Pfeil beachten) und bestätigen mit ENTER. Verbinden Sie die Slave- und die Master-Einheit (gleiches Modell) mit Hilfe eines
DMX-Kabels und aktivieren in der Master-Einheit eine der Stand-Alone Betriebsarten (Auto, Colour Macro, Static, Tunable White, User Color).
Nun folgt die Slave-Einheit der Master-Einheit. Liegt kein Steuersignal an, beginnen die Zeichen im Display zu blinken, das Blinken stoppt,
sobald ein Steuersignal anliegt.
---------------- Menu ----------------
DMX Address
DMX Mode
Stand Alone
Slave
Settings
System Info
GERÄTEEINSTELLUNGEN (Settings)
Durch Drücken auf MODE gelangen Sie in das Auswahl-Menü. Mit Hilfe der Bedienfelder UP und DOWN wählen Sie nun den Menü-Punkt
„Settings“ aus (Pfeil beachten) und bestätigen mit ENTER.
---------------- Menu ----------------
DMX Address
DMX Mode
Stand Alone
Slave
Settings
System Info
Daraufhin gelangen Sie in das Untermenü zum Einstellen folgender Untermenüpunkte (siehe Tabelle, Auswahl mit UP und DOWN, bestätigen
mit ENTER, Wert bzw. Status ändern mit UP und DOWN, bestätigen mit ENTER):
Settings
Runtime = Akkulaufzeit auf bis zu 24
Wireless Setting = W-DMX Einstellungen
Display Reverse = Flip Display On Drehung der Display-Anzeige um 180° (z.B. Überkopfmon-
Display Backlight = Display-Beleuchtung On Permanent an
Mode
Slave
Stunden verlängern, bei
entsprechend reduzierter
Helligkeit
(kalkuliert auf Full On und
100% Akku)
(Wireless-DMX)
Off Funktion deaktiviert
4 hours -
24 hours
W-DMX On/
Off
Operating
Mode
Transmitting
Mode
Link Link = mit W-DMX-Geräten koppeln. W-DMX muss bei allen
Receive
Reset
Off Keine Drehung der Display-Anzeige
Off Deaktivierung nach ca. 1 Minute Inaktivität
Einstellen der Akkulaufzeit von 4 Stunden auf bis zu 24
Stunden in 1 Stunden Schritten.
On = W-DMX aktiviert
Off = W-DMX deaktiviert
Receive = W-DMX-Modul als Empfänger
Transmit = W-DMX-Modul als Sender
G3 = G3 Sendestandard
G4S = G4S Sendestandard
Geräten aktiviert und die Kopplung mit einem Transmitter
aufgehoben sein (Receive Reset).
Unlink = Entkoppeln aller Geräte
No = Die Kopplung mit einem Transmitter nicht aufheben
Yes = Die Kopplung mit einem Transmitter aufheben
tage)
ENGLISH
DEUTSCHFRANCAIS
ESPAÑOL
ITALIANO POLSKI
DMX
29
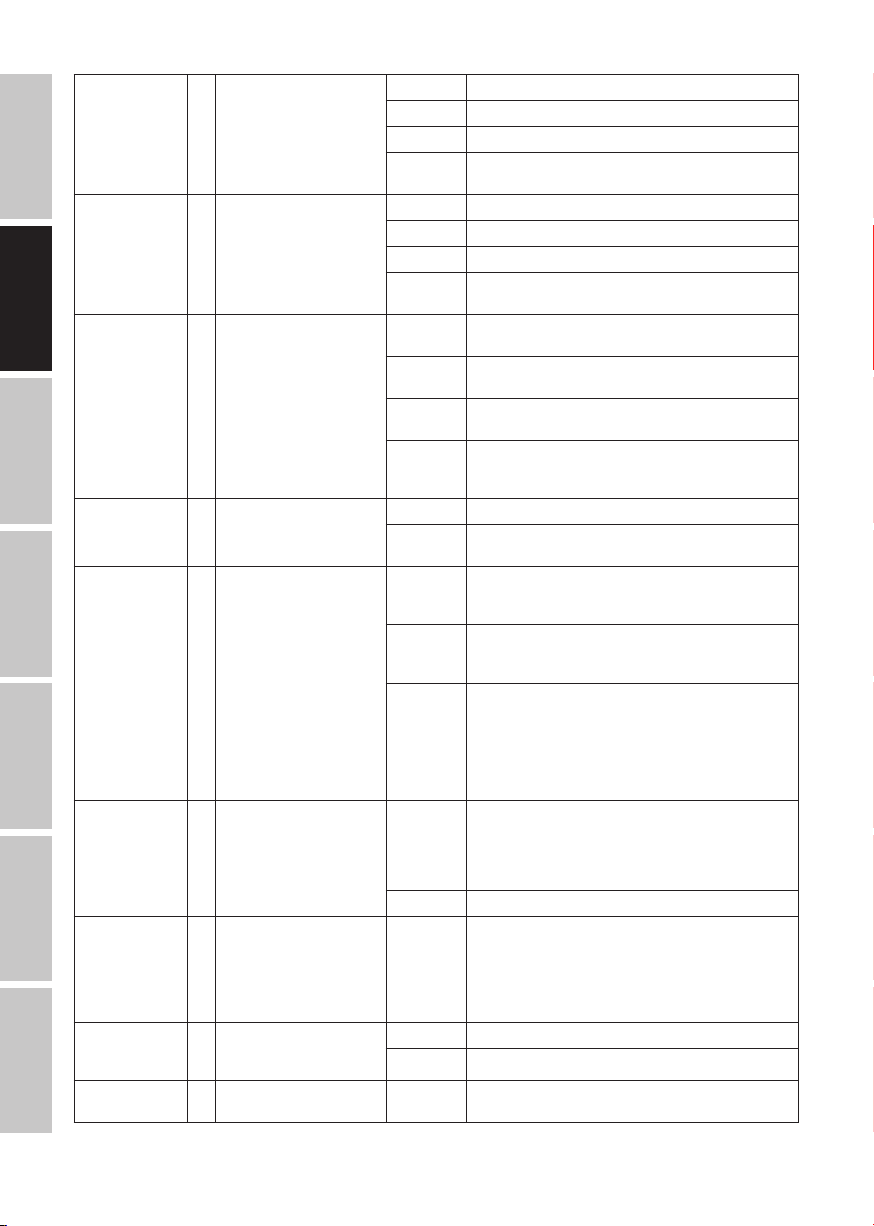
DMX Fail = Betriebszustand bei
AC Failure = Betriebszustand bei Strom-
DMX-Signal-Unterbrechung
ausfall
DEUTSCHENGLISH
Dimmer Curve = Dimmerkurve Linear Die Lichtintensität steigt linear mit dem
FRANCAIS
Dimmer Response = Dimmer-Reaktion Led Der Strahler reagiert abrupt auf Änderungen des DMX-Werts
ESPAÑOL
Color Calibration = Farbkalibrierung
POLSKI
Autolock = Automatische Sperrung der
(Wenn eine der DMX-Betriebsarten mit Factory-Kalibrierung aktiviert ist, kann
keine andere Kalibrierung
ausgewählt werden und im
Display wird “no possible
change in this DMX Mode“
angezeigt. Ist eine der
DMX-Betriebsarten mit
User-Kalibrierung aktiviert,
kann als alternative Kalibrierung RAW ausgewählt
werden)
Bedienelemente
ITALIANO
LED Frequency = LED PWM Frequenz 800Hz /
IR Remote = Steuerung durch IR Fernbe-
DMX
Factory Reset = Zurücksetzen auf Werksein-
dienung ermöglichen bzw.
abschalten
stellungen
Hold Letzter Befehl wird gehalten
Blackout Aktiviert Blackout
Full On Alle LEDs 100% Output
Stand Alone Scheinwerfer wechselt in die zuletzt ausgewählte Stand-Alo-
No Action Letzter Befehl wird gehalten
Blackout Aktiviert Blackout
Full On Alle LEDs 100% Output
Stand Alone Scheinwerfer wechselt in die zuletzt ausgewählte Stand-Alo-
Exponential Die Lichtintensität lässt sich im unteren DMX-Wertbereich
Logarithmic Die Lichtintensität lässt sich im unteren DMX-Wertbereich
S-Curve Die Lichtintensität lässt sich im unteren und oberen
Halogen Der Strahler verhält sich ähnlich einem Halogenstrahler mit
RAW R, G, B und W mit Maximalwert 255
User
Calibration
Factory
Calibration
On Automatische Sperrung der Bedienelemente nach ca. 1
Off Automatische Sperrung der Bedienelemente deaktiviert
1200Hz /
2000Hz /
3600Hz /
12kHz /
25kHz
On Steuerung durch IR Fernbedienung aktiviert
Off Steuerung durch IR Fernbedienung deaktiviert
Reset Now! Zurücksetzen auf Werkseinstellungen:
ne-Betriebsart
ne-Betriebsart
DMX-Wert an
fein und im oberen DMX-Wertbereich grob einstellen
grob und im oberen DMX-Wertbereich fein einstellen
DMX-Wertbereich fein und im mittleren DMX-Wertbereich
grob einstellen
sanften Helligkeitsänderungen
Individuelle Anpassung von R, G, B, und W mit Werten von
jeweils 000 bis 255 (betriebsartübergreifend)
Werksseitige Kalibrierung von R, G, B und W (betriebsartübergreifend). Wählen Sie diese Einstellung für die einheitliche
Darstellung der Farbmakros in der Standalone-Betriebsart,
sowie bei der Ansteuerung der Farbmakros per DMX.
Minute Inaktivität. Anzeige im Display nach Bedienversuch:
„Locked!“
Entsperren: Gleichzeitiges Drücken von UP und DOWN für ca.
5 Sekunden
Einstellen der LED PWM Frequenz
bestätigen mit ENTER, abbrechen mit MODE
30
 Loading...