


D-POWER 7 USER MANUAL
P.1
D - P O W E R
S E R I E S
INFORMATION FOR USE FOR
D-POWER 7
TDA225USERGBA_12-2012
The leading version of this brochure is the English one which shall prevail to the exclusion of the national translation on hand.
Copyright 2011-2012 by CAMCO Produktionsund Vertriebs-GmbH für Beschallungsund Beleuchtungsanlagen Fischpicke 5, D-57482 Wenden, Germany Telephone +49 (0) 2762 408-0
D - P O W E R
S E R I E S
Please visit our website www.camcoaudio.com for the latest version of this user manual. Please note that the leading version of CAMCO manuals is always the English one.
USER MANUAL
D-POWER 7
IMPORTANT SAFETY INSTRUCTIONS
P.2
IMPORTANT SAFETY INSTRUCTIONS
1. General
The amplifier may only be used in accordance with the information provided in the user manual. Before and during the usage of the amplifier please ensure that all recommendations, especially the safety recommendations as detailed in the user manual, are adhered to.
The D-POWER 7 amplifier is designed for the amplification of pulsed audio signals. The amplifier should only be connected to speakers with an average impedance as indicated.
2. User Manual
Read the information for use (user manual) and heed all warnings. Keep this user manual in a safe place during the lifetime of the amplifier. The user manual forms an integral part of the amplifier. Reselling the amplifier is only possible if the user manual is available. In case of reselling the amplifier, the reseller has to document any changes made to the amplifier in writing and pass the documentation on to the buyer.
3. Environments
Use this amplifier only in E1, E2, E3, or E4 environments according to EN55103-2 “Electromagnetic compatibility – Product family standard for audio, video, and audio-visual and entertainment lighting control apparatus for professional use – Part 2: Immunity”.
4. Mounting/Placement
Do not place this amplifier on an unstable cart, stand, tripod, bracket, or table. The amplifier may fall causing serious injury and serious damage to the product. Any mounting of the amplifier should follow the manufacturer´s instructions. Only mounting accessory shall be used which is recommended by the manufacturer.
USER MANUAL
D-POWER 7
D - P O W E R
S E R I E S
5. Power Cord Protection
Power supply cords should be routed so that they are not likely to be walked on or pinched by items placed upon them or against them, paying particular attention to cords and plugs and the point where they exit from the amplifier.
6. Heat
Do not use this amplifier near any heat sources such as radiators, heat registers, stoves, or other apparatuses that produce heat.
7. Water and Moisture
Do not expose this device to rain or moisture. Do not use this amplifier near water (for example swimming pools and fountains). Do not place any objects containing liquids, such as bottles or glasses, on the top of the unit. Do not splash liquids on the unit. IP-20 equipment. There is no protection against splashing water.
8. Ventilation
Slots and openings in the cabinet are provided for ventilation to ensure reliable operation of the amplifier and to protect it from overheating. These openings must not be blocked or covered. This amplifier should not be installed unless proper ventilation is provided or manufacturer’s instructions have been adhered to.
9. Interference Of External Objects and/or Liquids with the Appliance Never push objects of any kind into this amplifier through openings as they may touch dangerous voltage points or short-out parts that could result in fire or electric shock. Never spill liquid of any kind on the amplifier.

IMPORTANT SAFETY INSTRUCTIONS
P.3
D - P O W E R
S E R I E S
10. Connections
When you connect the amplifier to other equipment, turn off the power and unplug all of the equipment from the supply source. Failure to do so may cause an electric shock and serious personal injury. Read the user manual of the other equipment carefully and follow the instructions when making the connections.
11. Lightning
For additional protection of this amplifier during lightning storms or when it is left unattended and/or unused for long periods of time, unplug it from the wall outlet. This will prevent damage to the amplifier due to lightning and power line surges. Disconnection from the mains power supply can only be achieved by removing the plug from the mains socket and by external disconnecting all poles from the mains.
12. Damages that Require Service
Unplug this amplifier from the mains supply and refer to your dealer/distributor or other authorized repair workshop if any of the following situations occur:
 if liquid has been spilled or objects have fallen into the amplifier
 if the amplifier has been exposed to rain or moisture
 if the amplifier has been dropped or damaged in any other way
 if the power supply cord or plug has been damaged
 when the amplifier exhibits a distinct change from its normal function or performance
 in case the amplifier has been used in a dusty environment for quite a period of time
13. Servicing
All service and repair work must be carried out by a dealer/distributor authorized by CAMCO. Do not attempt to service this amplifier yourself. As opening or removing covers may expose you to dangerous voltage or other hazards, the amplifier may only be opened by qualified personnel. Please refer to your dealer/distributor.
14. Spare Parts
When spare parts are required, please ensure that the dealer/distributor only uses spare parts specified by the manufacturer. The use of un authorized spare parts may result in injury and/or damage through fire or electric shock or other electricity-related hazards.
15. Safety Check
Upon completion of any service or repairs to this product, ask the dealer/ distributor to perform safety checks to determine that the amplifier works properly.
Recommendations on how to carry out the safety test can be found in DIN VDE 0701-1 “Maintenance, Modification and Test of Electronic Appliances“.
16. Cleaning
Unplug this amplifier from the wall outlet before cleaning. Do not use liquid or aerosol cleaners. Clean only with dry cloth.
17. Packaging and Shipping
When shipping the D-POWER 7 amplifier, always use the original shipping carton and packing materials. For maximum protection repack the unit as it was originally packed at the factory.
USER MANUAL
D-POWER 7
EXPLANATION OF SYMBOLS
P.4
USER MANUAL
D-POWER 7
D - P O W E R
S E R I E S
|
|
CAUTION – HIGH VOLTAGE HAZARDS |
|
CAUTION |
|
|
EXIST WITHIN THIS PRODUCT. |
|
|
RISK OF ELECTRIC SHOCK |
REFER ALL SERVICING TO |
|
DO NOT OPEN |
AUTHORIZED PERSONNEL. |
|
|
|
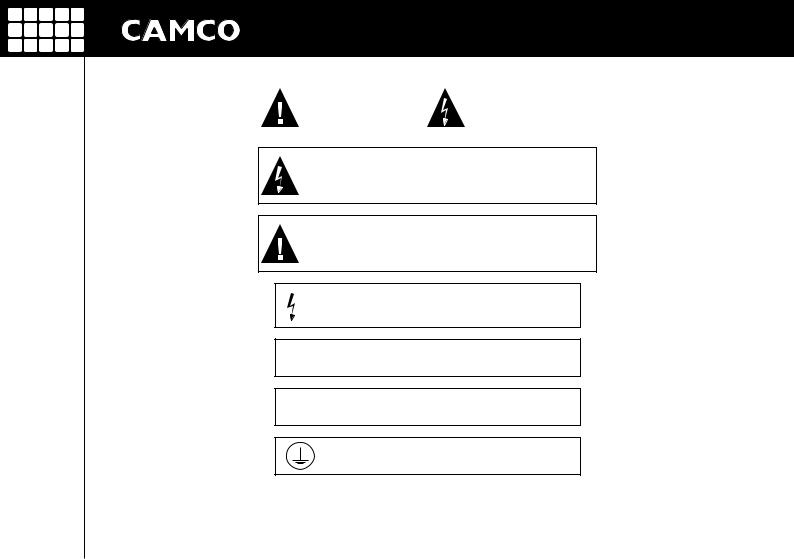
THE LIGHTNING FLASH WITH ARROW HEAD SYMBOL IS INTENDED TO
ALERT THE USER TO THE PRESENCE OF UNINSULATED DANGEROUS
VOLTAGE WITHIN THE PRODUCT’S ENCLOSURE.
THE EXCLAMATION MARK IS INTENDED TO ALERT THE USER
TO IMPORTANT INSTRUCTIONS ALSO FOR MAINTENANCE IN THE
LITERATURE ACCOMPANYING THE AMPLIFIER.
THE LIGHTNING FLASH WITH ARROW HEAD SYMBOL ALERTS
THE USER TO DANGEROUSLY HIGH VOLTAGE AT THE OUTPUT
CONNECTORS! THAT COULD POTENTIALLY BE LIFE THREATENING.
CAUTION – RISK OF ELECTRIC SHOCK – DO NOT OPEN.
WARNING – TO PREVENT FIRE OR SHOCK HAZARD, DO NOT
EXPOSE THIS AMPLIFIER TO RAIN OR MOISTURE.
THE AMPLIFIER MAY ONLY BE CONNECTED
TO A SOCKET WITH A PROTECTIVE EARTH CONDUCTOR.

EC DECLARATION OF CONFORMITY
P.5
D - P O W E R
S E R I E S
EC Declaration Of Conformity In Accordance To EC Directives: electromagnetic compatibility (Council Directive 2004/108/EC); low-voltage electrical equipment (Council Directive 2006/95/EC)
Manufacturer´s Name:
CAMCO Produktionsund Vertriebs-GmbH für Beschallungsund Beleuchtungsanlagen
Manufacturer´s Address:
Fischpicke 5, D-57482 Wenden, Germany
Declares That The Product With The Model Name:
CAMCO Power amplifier D-POWER 7
Conforms To The Following Standards:
 EN60065 Safety
 EN55103-1 Emission
 EN55103-2 Immunity
The operating conditions and application environments presupposed in the information for use (user manual) are to be kept to accordingly.
Wenden, 07.10.2011
Joachim Stöcker
USER MANUAL
D-POWER 7

CONTENTS
P.6
|
|
|
|
|
|
D - P O W E R |
|
|
|
|
|
|
S E R I E S |
P. 2 IMPORTANT SAFETY INSTRUCTIONS |
P. 18 4.3 Power Amp Protection Systems |
P. 32 11 DECOMMISSIONING |
||||
P. 4 EXPLANATION OF SYMBOLS |
|
4.3.1 Clip Limiter |
P. 33 COMPANY INFORMATION |
|||
P. 5 EC DECLARATION OF CONFORMITY |
|
4.3.2 Under Impendance Limiter |
P. 34 NOTICES/CHANGES MADE TO THE |
|||
P. 6 |
CONTENTS |
|
4.3.3 SOA Protection |
AMPLIFIER |
||
P. 7 |
1 WELCOME |
|
4.3.4 Speaker Protect Limiter |
|
||
|
1.1 |
Welcome To CAMCO |
P. 19 |
4.3.5 DC Protection |
|
|
|
2 THE AMP |
|
4.3.6 DC Servo |
|
||
|
2.1 |
Unpacking |
|
4.3.7 Over Current Protection |
|
|
P. 8 |
2.2 |
The Amplifier |
|
4.3.8 Thermal Protection |
|
|
P. 9 |
2.3 |
D-POWER 7 – The Front |
|
4.4 |
Main Protections |
|
|
2.4 |
D-POWER 7 – The Rear |
|
4.4.1 Inrush Current Limitation |
|
|
P. 10 |
2.5 |
Factory settings |
|
4.4.2 Mains Over Voltage Detection |
|
|
|
3 INSTALLATION |
|
4.4.3 Mains Failure Detection |
|
||
|
3.1 |
Mains supply |
|
4.4.4 Fuse Protection |
|
|
P. 11 |
3.2 |
On/Off Switch |
P. 20 4.5 Main SMPS Protections |
|
||
|
3.3 |
Mounting |
|
4.5.1 Over Current Protection |
|
|
P. 12 |
3.4 |
Cooling |
|
4.5.2 Thermal Protection |
|
|
|
3.5 |
Ground Lift |
|
4.6 |
Fans |
|
|
3.6 |
Optional Feature |
P. 21 4.7 Filter Cleaning |
|
||
|
3.7 Mode Selector |
P. 22 5 TROUBLESHOOTING |
|
|||
P. 13 |
3.8 |
Wiring |
|
5.1 |
On LED Flashing Sequences |
|
|
3.8.1 E.U.I. and XLR Connection |
P. 23 5.2 Problem: No Sound |
|
|||
|
3.8.2 Stereo Operation |
|
5.3 Problem: No Sound or Sound Is Too |
|
||
|
3.8.3 Parallel Mono Operation |
|
|
Low |
|
|
P. 14 |
3.8.4 Mono Bridge Operation |
|
5.4 |
Problem: No Channel Seperation |
|
|
|
3.8.5 SPEAKON® Connection |
|
5.5 |
Problem: Distorted Sound |
|
|
P. 15 |
4 OPERATION |
P. 24 5.6 Problem: Hiss |
|
|||
|
4.1 |
Controls |
|
5.7 |
Problem: Squeals and Feedback |
|
|
4.1.1 Volume Control |
P. 25 |
6 SPECIFICATION |
|
||
P. 16 |
4.1.2 Gain Selector |
P. 27 7 TYPICAL PERFORMANCE DIAGRAMS |
|
|||
|
4.1.3 Gain and Input Sensitivity |
P. 30 |
8 WARRANTY INFORMATION |
|
||
|
4.1.4 Limiter Switch |
|
8.1 |
Summary of Warranty |
|
|
P. 17 |
4.2 |
Indicators |
|
8.2 |
Items Excluded from This Warranty |
|
|
4.2.1 On LEDs (multifunctional) |
|
8.3 |
What CAMCO Will Do |
|
|
|
4.2.2 Signal LEDs |
|
8.4 |
How to Obtain Warranty Service |
|
|
|
4.2.3 Output Current LEDs |
|
8.5 |
CAMCO’s Product Improvement |
|
|
|
4.2.4 Clip LEDs (multifunctional) |
P. 31 |
9 SERVICE INFORMATION |
|
||
P. 18 |
4.2.5 Mode Indicators |
P. 32 10 MAINTENANCE INFORMATION |
|
|||
USER MANUAL
D-POWER 7
1 WELCOME / 2 THE AMPLIFIER
P.7
1.1 Welcome to CAMCO
Established in 1983, CAMCO has gained worldwide experience with professional sound reinforcement technology. Within the audio market, CAMCO specialises in the production and marketing of high quality power amplifiers and sound systems for use both on tour and in static installations.
The success of the TECTON and VORTEX series power amps has made the CAMCO name synonymous with professional quality, high performance and utterly reliable power amps.
CAMCO’s commitment to research and development, seen not just in the area of materials and technology but also most importantly in its highly skilled and motivated workforce, is one of the keys to its ongoing success.
With its all-new D-POWER 7 power amp, CAMCO is pioneering a new dimension in professional power amp construction. The seamless combination of ground-breaking technology with proven safety elements is the hallmark of the new amplifier.
Welcome to the new world of professional power amplifiers –
WELCOME TO CAMCO!
USER MANUAL
D-POWER 7
D - P O W E R
S E R I E S
2.1 Unpacking
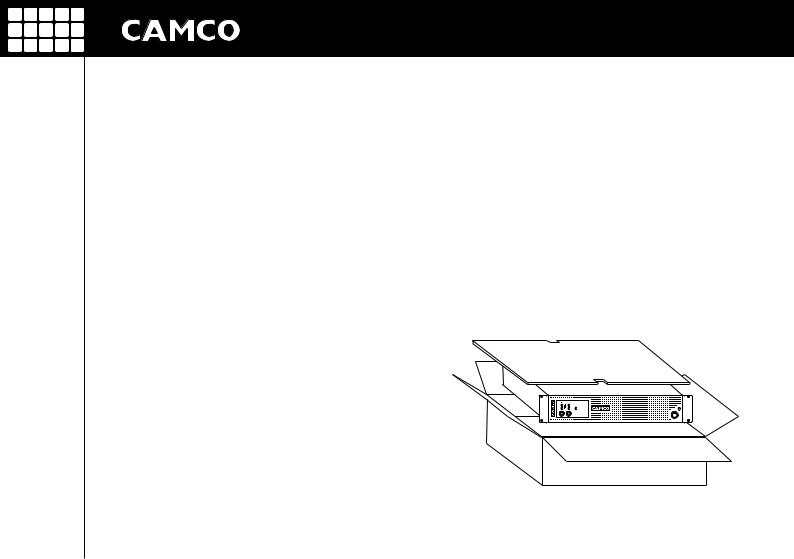
Please unpack and inspect your new amplifier for any damage that may have occurred during transit. If damage is found, notify the transportation company immediately. Only you the consignee may initiate a claim for shipping damage. CAMCO will be happy to cooperate fully as needed. Please save the shipping carton as evidence of damage for the shipper’s inspection.
Even if the amplifier has arrived in perfect condition, save all packing materials so you will have them if you ever need to transport the unit.
NEVER SHIP THE AMPLIFIER WITHOUT THE ORIGINAL PACKING MATERIALS.
When shipping the D-POWER 7 amplifier, always use the original shipping carton and packing materials. For maximum protection, repack the unit as it was originally packed at the factory.
2 THE AMPLIFIER
P.8
2.2 The Amplifier
The D-POWER 7 is a Class-H power amplifier with a power output of:
•3 kW per channel @ 2 Ω •6 kW in Mono Bridge @ 4 Ω •6 kW in Parallel Mono @ 1 Ω
The D-POWER 7 power amplifier is fitted with Switched Mode Power Supply (SMPS), which significantly reduces the weight and size (only 2U). Using SMPS, the 3 symmetrical supply voltages of the power amplifier are more stable than the power supplies used in conventional amplifiers.
The D-POWER 7 also uses a microprocessor for controlling and monitoring the power amp. This has four main advantages over more traditional power amp systems:
 Reduced Distortion
 Improved Noise Characteristics
 Indication of Protection or Failures by different LED sequences
USER MANUAL
D-POWER 7
D - P O W E R
S E R I E S
The D-POWER 7 has been designed as an intelligent and powerful amplifier for performing specialised tasks within a complex audio system. Users can adapt the power amp to meet their specific audio requirements before use. Controls mounted on the front and the rear of the D-POWER 7 allow the different functions to be accessed.
Since some of the externally mounted controls have multiple functions, it is important that users should familiarise themselves thoroughly with the entire range of controls and programmable features before using the power amp.
If you have any questions regarding features and/or functions of your D-POWER 7, CAMCO will be pleased to offer you further information. Alternatively, contact your dealer or distributor.

2 THE AMPLIFIER
P.9
D - P O W E R
S E R I E S
1 2 |
3 4 |
5 6 |
|
|
|
|
|||||||
|
|
|
|
|
|
|
|
|
|
|
|
|
|
|
|
|
|
|
|
|
|
|
|
|
|
|
|
|
|
|
|
|
|
|
|
|
|
|
|
|
|
|
|
|
|
|
|
|
|
|
|
|
|
|
|
|
|
|
|
|
|
|
|
|
|
|
|
|
|
|
|
|
|
|
|
|
|
|
|
|
|
|
|
|
|
|
|
|
|
|
|
|
|
|
|
|
|
|
|
|
|
|
|
|
|
|
|
|
|
|
|
|
|
|
|
|
|
|
|
|
|
|
|
|
|
|
|
|
|
|
|
|
|
|
|
|
|
|
|
|
|
|
|
|
|
|
|
|
|
|
|
|
|
|
|
|
|
|
|
|
|
|
|
|
|
|
|
|
|
|
|
|
|
|
|
|
|
|
|
|
|
|
7 |
8 |
|
9 |
10 |
|
|
|
11 |
2.3 D-POWER 7 - The Front |
|
|
|
|
2.4 D-POWER 7 - The Rear |
|
|
||
1 |
Clip LEDs |
|
7 |
Volume Control Channel A |
12 |
Rating Plate |
18 |
Limiter Switch |
|
2 |
Output Current LEDs |
|
8 |
Volume Control Channel B |
13 |
SPEAKON® Connectors |
19 |
Gain Selector |
|
3 |
Signal LEDs |
|
9 |
Removable Air Filter System |
14 |
Cooling Air Outlet Vents |
20 |
AC Power Connector |
|
4 |
On LEDs |
|
10 |
Cooling Air Inlet Vents |
15 |
Input Ground Lift Switch |
21 |
XLR - Line Inputs |
|
5 |
Parallel Mono Mode LED |
|
11 |
On/Off Switch |
|
16 |
Optional Feature Selector |
22 |
XLR - Line Link Outputs |
6 |
Mono Bridge Mode LED |
|
|
|
|
17 |
Mode Selector |
|
|
12 |
13 |
14 |
15 |
16 |
17 |
18 |
19 |
|
|
|
|
|
|
|
|
|
|
|
|
|
|
|
|
|
|
|
|
|
|
|
|
20 |
21 |
22 |
USER MANUAL
D-POWER 7
2 THE AMPLIFIER / 3 INSTALLATION
P.10
|
|
|
|
|
|
|
|
|
|
|
|
|
|
|
|
|
|
|
|
|
|
|
|
|
|
|
|
|
|
|
|
|
|
|
|
|
|
|
|
|
|
|
|
|
|
|
D - P O W E R |
|
|
|
|
|
|
|
|
|
|
|
|
|
|
|
|
|
|
|
|
|
|
|
|
|
|
|
|
|
|
|
|
|
|
|
|
|
|
|
|
|
|
|
|
|
|
|
|
|
S E R I E S |
2.5 Factory settings |
|
|
|
|
|
|
|
|
|
|
|
|
|
|
|
|
|
3.1 Mains supply |
|
|
|
|
|
|
|
|
|
|
|
|
||||||||||||||||||
D-POWER 7 amplifiers are delivered with the following factory settings |
When mounting or connecting the amp always disconnect it from |
|||||||||||||||||||||||||||||||||||||||||||||||
|
|
|
|
|
|
|
|
|
|
|
|
|
|
|
|
|
|
|
|
|
|
|
|
|
mains. Only connect the D-POWER 7 amplifier to an appropriate AC cir- |
|||||||||||||||||||||||
|
|
|
|
|
|
|
|
|
|
|
|
|
|
|
|
|
|
|
|
|
|
|
|
|
cuit and outlet, according to the requirements indicated in the second |
|||||||||||||||||||||||
|
|
|
|
|
|
|
|
|
|
|
|
|
|
|
|
|
|
|
|
|
|
|
|
|
line on the rating plate. |
|
|
|
||||||||||||||||||||
|
|
|
|
|
|
|
|
|
|
|
|
|
|
|
|
|
|
|
|
|
|
|
|
|
|
|
|
|
|
|
|
|
|
|
|
|
|
|
|
|
|
|
|
|
|
|
|
|
|
|
|
|
|
|
|
|
|
|
|
|
|
|
|
|
|
|
|
|
|
|
|
|
|
|
|
|
|
|
|
D-POWER 7 |
|
|
|
||||||||||||||
|
|
|
|
|
|
|
|
|
|
|
|
|
|
|
|
|
|
|
|
|
|
|
|
|
|
|
|
|
|
|
|
|
|
|
|
|
|
|
|
|
|
|
|
|
|
|
|
|
|
|
|
|
|
|
|
|
|
|
|
|
|
|
|
|
|
|
|
|
|
|
|
|
|
|
|
|
230 V ~ 50/60 Hz 12 A 1800 W |
|
|
|
|||||||||||||||||
|
|
|
|
|
|
|
|
|
|
|
|
|
|
|
|
|
|
|
|
|
|
|
|
|
|
|
|
|
|
|
|
|
|
|
|
|
|
|
||||||||||
|
|
|
|
|
|
|
|
|
|
|
|
|
|
|
|
|
|
|
|
|
|
|
|
|
|
3000 W / 2 Ohm |
|
|
|
|
|
|||||||||||||||||
|
|
|
|
|
|
|
|
|
|
|
|
|
|
|
|
|
|
|
|
|
|
|
|
|
|
|
|
|
|
|
|
|
|
|
|
|
|
|
|
|
|
|
|
|
|
|
|
|
|
|
|
|
|
|
|
|
|
|
|
|
|
|
|
|
|
|
|
|
|
|
|
|
|
|
|
|
|
|
|
|
|
|
|
|
|
|
|
|
|
|
|
|
|
|
|
|
|
|
|
|
|
|
|
|
|
|
|
|
|
|
|
|
|
|
|
|
|
|
|
|
|
|
|
|
|
|
|
xxxxxxx |
|
|
|
|
|
|
||||||||||||
|
|
|
|
|
|
|
|
|
|
|
|
|
|
|
|
|
|
|
|
|
|
|
|
|
Exemplary rating plate for a mains supply of 230 V AC 50/60 Hz. |
|||||||||||||||||||||||
|
|
|
|
|
|
|
|
|
|
|
|
|
|
|
|
|
|
|
|
|
|
|
|
|
||||||||||||||||||||||||
Front panel: |
|
|
|
|
|
|
|
|
|
|
|
|
|
|
|
|
|
|||||||||||||||||||||||||||||||
|
|
|
|
|
|
|
|
|
|
|
|
|
|
|
|
|
|
|
|
|
|
|
|
|
|
|
|
|
|
|
|
|
|
|
|
|
|
|
|
|
||||||||
On/Off Switch |
|
|
Off |
|
Amplifier is switched off |
|
|
|
|
|
|
|
|
|
|
|
|
|
|
|
|
|
|
|
|
|
|
|
|
|||||||||||||||||||
|
|
|
|
|
|
|
|
|
|
|
|
|
|
|
|
|
|
|
|
|
|
|
|
|
Power Supply Data: |
|
|
|
||||||||||||||||||||
|
|
|
|
|
|
|
|
|
|
|
|
|
|
|
|
|
|
|
|
|
|
|
|
|
|
Voltage |
|
|
Mains Frequency |
|
Current |
|
Power Consumption |
|
||||||||||||||
|
|
|
|
|
|
|
|
|
|
|
|
|
|
|
|
|
|
|
|
|
|
|
|
|
|
|
|
|
|
|||||||||||||||||||
|
|
|
|
|
|
|
|
|
|
|
|
|
|
|
|
|
|
|
|
|
|
|
|
|
|
100 V |
|
|
50/60 Hz |
|
|
|
|
|
|
28 A |
|
1800 W |
|
|||||||||
|
|
|
|
|
|
|
|
|
|
|
|
|
|
|
|
|
|
|
|
|
|
|
|
|
|
|
|
|
|
|
|
|||||||||||||||||
|
|
|
|
|
|
|
|
|
|
|
|
|
|
|
|
|
|
|
|
|
|
|
|
|
|
120 V |
|
|
50/60 Hz |
|
|
|
|
|
|
24 A |
|
1800 W |
|
|||||||||
|
|
|
|
|
|
|
|
|
|
|
|
|
|
|
|
|
|
|
|
|
|
|
|
|
|
|
|
|
|
|
|
|
|
|
||||||||||||||
|
|
|
|
|
|
|
|
|
|
|
|
|
|
|
|
|
|
|
|
|
|
|
|
|
|
|
|
|
|
|
|
|||||||||||||||||
|
|
|
|
|
|
|
|
|
|
|
|
|
|
|
|
|
|
|
|
|
|
|
|
|
|
220 V |
|
|
60 Hz |
|
|
|
|
|
|
12 A |
|
1800 W |
|
|||||||||
|
|
|
|
|
|
|
|
|
|
|
|
|
|
|
|
|
|
|
|
|
|
|
|
|
|
230 V |
|
|
50/60 Hz |
|
|
|
|
|
|
12 A |
|
1800 W |
||||||||||
|
|
|
|
|
|
|
|
|
|
|
|
|
|
|
|
|
|
|
|
|
|
|
|
|
|
|
|
|
|
|
|
|
|
|
||||||||||||||
|
|
|
|
|
|
|
|
|
|
|
|
|
|
|
|
|
|
|
|
|
|
|
|
|
NOTE: Even under normal conditions the mains current can reach lev- |
|||||||||||||||||||||||
|
|
|
|
|
|
|
|
|
|
|
|
|
|
|
|
|
|
|
|
|
|
|
|
|
els up to 60 A (230 V), 120 A (120 V) and 140 A (100 V), respectively; |
|||||||||||||||||||||||
Rear panel: |
|
|
|
|
|
|
|
|
|
|
|
|
|
|
|
|
|
this could cause lamps to flicker if connected to the same mains as |
||||||||||||||||||||||||||||||
Input Ground Lift |
|
|
|
|
|
|
Grounded |
the amp. The impedance of the AC circuit should be less than 0,157 |
||||||||||||||||||||||||||||||||||||||||
Optional Feature |
|
|
|
|
|
|
Circle |
Ohms to avoid flicker according to EN61000-3-11 “Electromagnetic |
||||||||||||||||||||||||||||||||||||||||
Mode |
|
|
|
|
|
|
Stereo |
compatibility – Part 3-11: Limits – Limitation of voltage changes, volt- |
||||||||||||||||||||||||||||||||||||||||
Limiter |
|
|
|
|
|
|
SpP |
age fluctuations and flicker in the public low-voltage supply systems |
||||||||||||||||||||||||||||||||||||||||
Gain |
|
|
|
|
|
|
26 dB |
– Equipment with rated current |
|
|
|
|||||||||||||||||||||||||||||||||||||
|
|
|
|
|
|
|
|
|
|
|
|
|
|
|
|
|
|
|
|
|
|
|
|
|
≤ 75 A and subject to conditional connection”. |
|||||||||||||||||||||||
If in any doubt, consult your local power provider. Never attempt to measure this impedance level with your ohmmeter. This may damage your meter and expose you to the risk of electric shock!
USER MANUAL
D-POWER 7
 Loading...