

Cambridge Audio Incognito AS-10 Owners manual

AS10
A-BUS Active Ceiling Speakers
Installation Guide

2 Incognito active ceiling speakers
Introduction ................................................................................................3
Preparing the location ................................................................................4
Mounting the AS10 .....................................................................................5
Painting the frame and grille ......................................................................5
Care and maintenance ...............................................................................5
AS10-A rear connections ............................................................................6
Connecting the AS10 ..................................................................................7
Wiring guide.................................................................................................8
Using the remote handset ..........................................................................8
Sound adjustment functions ......................................................................9
Advanced features....................................................................................10
AS10-A jumper settings ............................................................................11
Troubleshooting.........................................................................................12
CONTENTS

AS10
A-BUS
Active ceiling speakers
Incognito active ceiling speakers 3
AS10
A-BUS
Active ceiling speakers
Thank you for purchasing these Cambridge Audio Incognito AS10
A-BUSTMActive Ceiling Speakers. Incognito is a cost-effective,
modular based system using standard Cat-5 or Cat-6 cable to
distribute hi-fi quality sound and video around a home. The AS10
over-paintable ceiling-mounted active speakers have amplifiers and
IR sensors built-in, and so do not require an Incognito KP10 keypad
to work. These neat components are the only visual clues to an
Incognito equipped room.
The AS10 is based on the A-BUS standard and can be used with other
manufacturers equipment based on this standard. Note that different
modes of operation are possible and it is very important that the
instructions within this guide are read and followed or the unit may not
operate correctly.
About this unit
The AS10 pair is made up of one speaker with the amplifier attached
(active AS10-A) and one conventional (passive AS10-P) speaker. The AS10
is A-BUS compatible for use where an installer wishes to avoid the
complication of a separate keypad and speakers. The drive unit and
crossover have been designed to take account of the angles,
frequencies and energy distribution characteristics of in-wall and in-ceiling
applications.
The discreet visual design of this product ensures that it is the quality of
the audio performance rather than their appearance that holds the
attention. Where required, grilles may also be painted to co-ordinate with
existing décor, rendering them virtually invisible.
Please take time to read this guide, as it contains important installation
information. The AS10 can only be as good as the system it is connected
to. Please do not compromise on your audio/visual source components.
Naturally, we recommend products from the Cambridge Audio Azur range.
Now we invite you to sit back, relax and enjoy!
Matthew Bramble
Technical Director
Incognito is a trademark of Cambridge Audio Ltd. All rights reserved.
A-BUS is a registered trademark of LeisureTech Electronics Pty Ltd Australia
INTRODUCTION
4 Incognito active ceiling speakers
It is advisable to plan all aspects of installation in advance of work
beginning, preferably with the house/flat building schematics if available.
Great care should be taken to ensure that all building regulations are
followed. If in doubt consult an expert.
When placing the AS 10 speakers, thought should be given to positions
which give the best desired sound coverage throughout a room, while
not interfering with existing or planned light fittings or joists. Also, locate
speakers taking into account location of furnishings for optimal stereo
reproduction.
Follow these steps to prepare the mounting location:
1. Remove the round cardboard pad from inside the supplied template
(see below).
PREPARING THE LOCATION
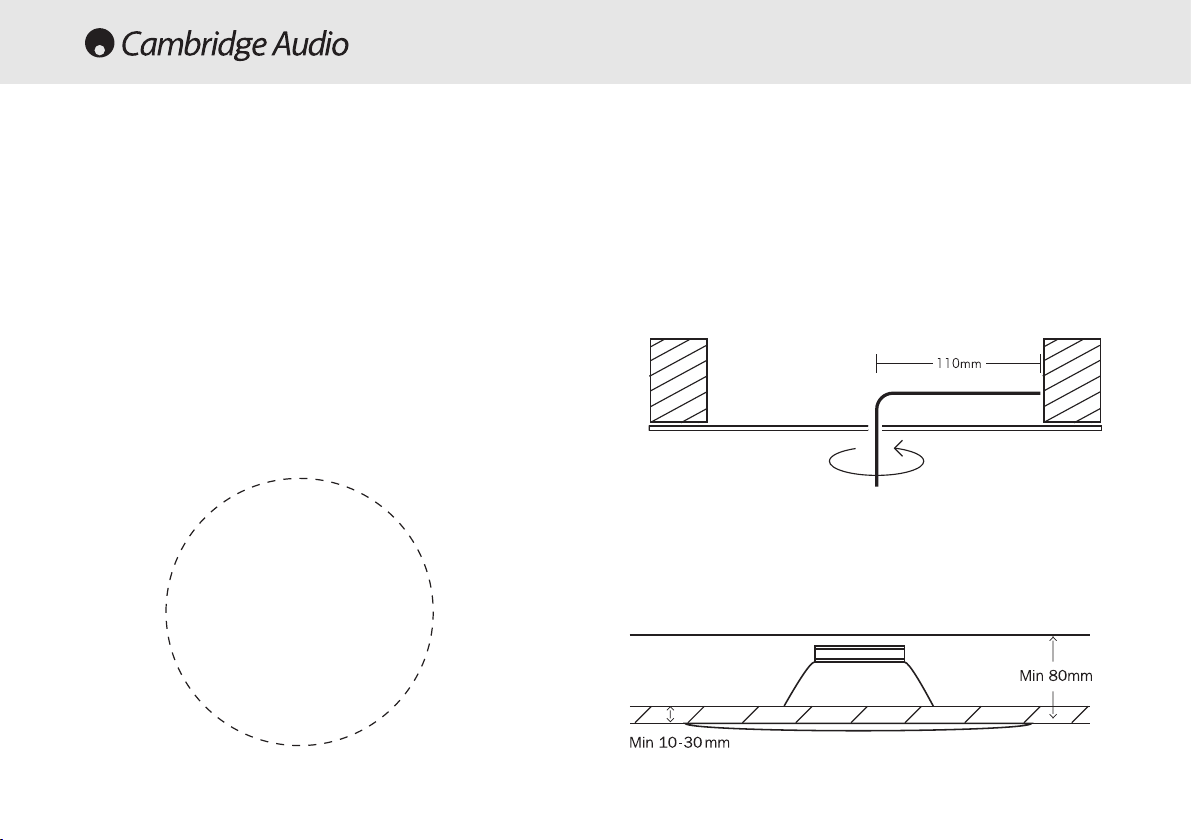
Use an L-shaped probe
to check available void
space before cutting
loudspeaker holes
3. Cut the mounting hole with a drywall or keyhole saw.
Be sure the mounting surface is between 10 and 30mm thick, and
that there is at least 80mm of clearance behind the mounting
surface. Also, be sure no wall studs or other objects block the back
of the speaker.
2. Use the template to mark the position for the mounting hole at the
selected location.
Before cutting ceiling speaker holes, it is suggested that the area is
tested for clearance by making an L-shaped probe from strong wire
(see illustration below), drilling a small hole in the target area,
inserting the probe and slowly turning. Any obstructions will be
immediately obvious, and the target area can be moved to a more
suitable position.
AS10
207mm diameter
mounting hole
AS10
A-BUS
Active ceiling speakers
Incognito active ceiling speakers 5
Before mounting, ensure that the four fixing screws are slackened off so
that the red mounting dog-legs can move freely.
Move each red dog-leg foot to the LEFT into it’s holding slot, and then
insert the speaker into the mounting hole.
Using a cross-head screwdriver, slowly turn each fixing screw clockwise,
this will move the mounting dog-legs out of their slots.
Tighten each fixing screw until the mounting dog-legs grip the ceiling.
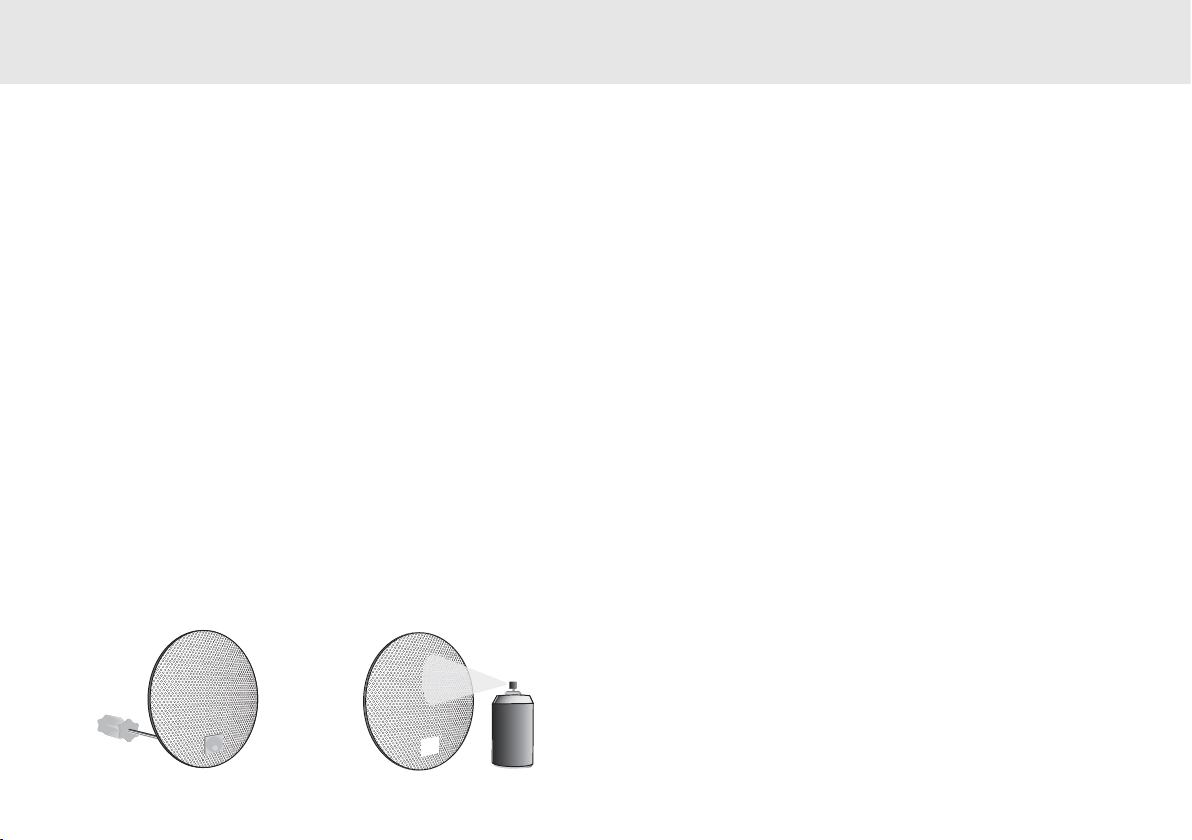
PAINTING THE FRAME AND GRILLE
Remove grille by inserting a small hook or similar small implement into
one of the grille openings, then pulling on the grille.
For AS10-A, carefully disconnect the IR connector lead before proceeding
(see fig.1 below).
Fit the clear plastic painting mask provided when painting the speaker
surround to avoid getting paint getting on the speaker cone.
For AS10-A unscrew IR window assembly before spray painting (see
fig. 2 below).
MOUNTING THE AS10
Your speakers are an example of superior design and craftsmanship.
These suggestions will help you care for them so you can enjoy them for
years.
Keep the speakers dry. If they get wet dry immediately. Liquids can
contain minerals that can corrode electronic components.
Keep the speakers away from dust or dirt, which can cause premature
wear of parts.
Wipe the speaker frame occasionally with a damp cloth to keep it
looking new. Do not use harsh chemicals, cleaning solvents or strong
detergents.
CARE AND MAINTENANCE
fig.1 fig.2
 Loading...