

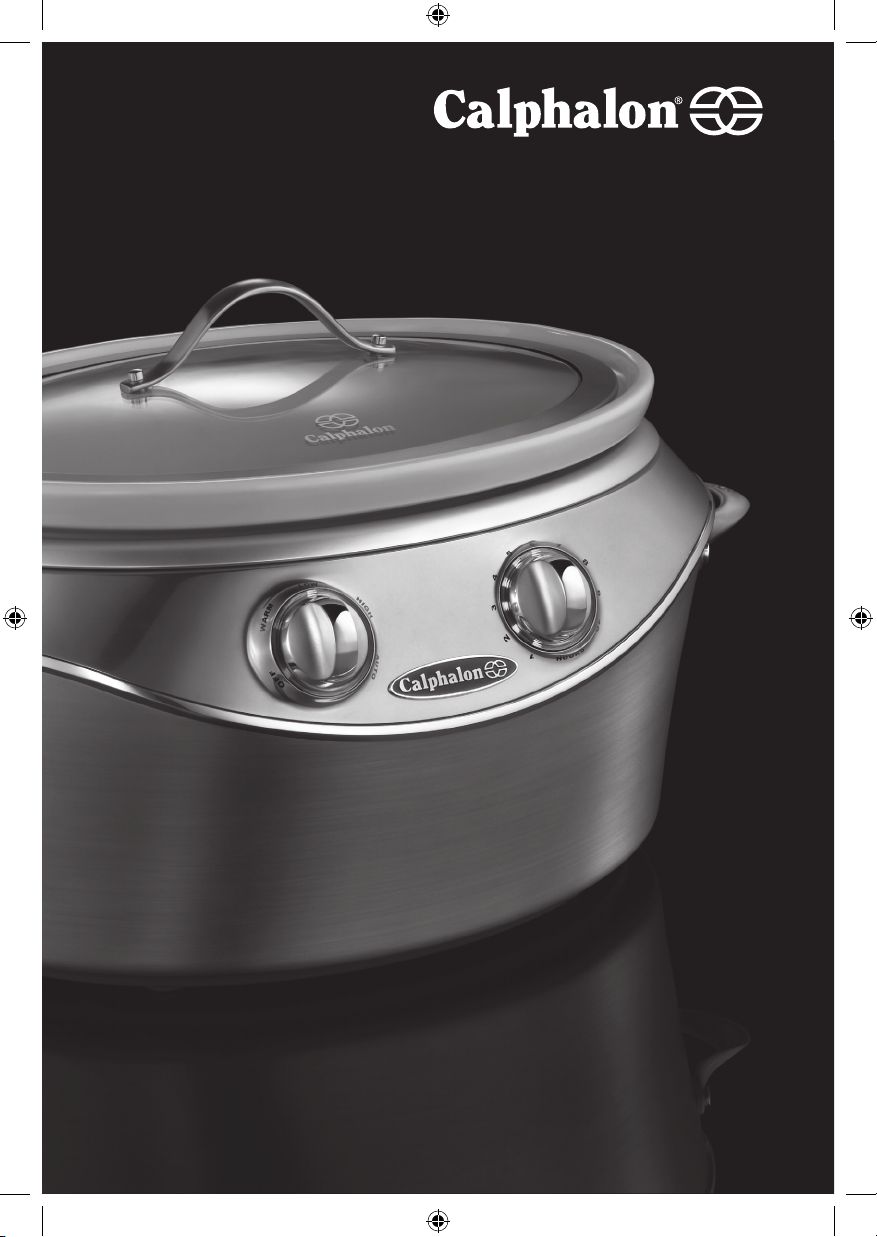
7 Qt. Slow Cooker
USER GUIDE
Model HE700SC
Cocotte mijoteuse
7 pintes US
GUIDE DE
L’UTILISATEUR
Modèle HE700SC

2
Thank you for choosing the Calphalon 7 Qt. Slow Cooker.
All Calphalon small electrics are engineered to deliver premium
heating performance.
The Calphalon OPTI-HEATTM System is made up of two
parts: premium materials and optimal heat delivery, which work
together to offer even heating and create beautiful results.
We know you are excited to get cooking, and we promise to
enhance your culinary experience every step of the way. So
whether you’re a novice in the kitchen, or an experienced gourmet, the tips and recipes in this guide will help you express your
flavor – with impressive (and easy) slow cooker creations.
Table of Contents
Important Safeguards page 3
Parts and Features page 6
Assembling Your 7 Qt. Slow Cooker page 7
Operating Your 7 Qt. Slow Cooker page 8
Cleaning and Care page 12
Frequently Asked Questions page 13
Warranty/Customer Service page 14
Recipes page 17
Table des matières
Mise en gardes importantes page 21
Pièces et fonctions page 24
Assemblage de votre cocotte mijoteuse 7 pintes US page 26
Utilisation de votre cocotte mijoteuse 7 pintes US page 27
Nettoyage et entretien page 32
Foire aux questions page 33
Garantie/service client page 35
Recettes page 38

3
WARNING
CAUTION
WARNING
What You Need To Know About
Safety Instructions
Warning and Important Safeguards appearing in this guide are
not meant to cover all possible conditions and situations that
may occur. Common sense, caution and care must be exercised
when maintaining or operating your 7 qt. slow cooker. Always
contact your dealer, distributor, service agent or manufacturer
about problems or conditions you do not understand.
Recognize Safety Symbols, Words, Labels
Warning – Hazards or unsafe practices which COULD result
in severe personal injury or death.
Caution – Hazards or unsafe practices which COULD result in
minor personal injury.
IMPORTANT SAFEGUARDS
When using electrical appliances, basic safety precautions
should always be followed including the following.
1. Read all instructions
2. Do not touch hot surfaces. Use handles or knobs.
3. To protect against electrical shock do not immerse cord,
plugs, or slow cooker base in water or other liquid.
4. Close supervision is necessary when any appliance is used
by or near children.

4
5. Unplug from outlet when not in use and before cleaning.
Allow to cool before putting on or taking off parts.
6. Do not operate any appliance with a damaged cord
or plug or after the appliance malfunctions or has been
damaged in any manner. Return appliance to the nearest authorized service facility for examination, repair, or
adjustment.
7. The use of accessory attachments not recommended by
Calphalon may cause injuries.
8. Do not use outdoors.
9. The power cord must be fully unwound from the cord wrap
when the product is used.
10. Do not let cord hang over edge of table or counter, or
touch hot surfaces.
11. Do not place on or near a hot gas, electric, or induction
burner, or in a heated oven.
12. Extreme caution must be used when moving an appliance
containing hot oil or other hot liquids.
13. To disconnect, turn any control to “off”, then remove plug
from wall outlet.
14. This product is designed for household use only. Do not
use appliance for other than intended purpose.
15. Cook only in the slow cooker ceramic crock to avoid risk
of electric shock.
16. The ceramic crock is intended only for use in the slow
cooker. Do not use the ceramic crock or its lid on a
stovetop, in a microwave, or in an oven.
17. Do not operate the slow cooker when the ceramic crock is
empty or when the ceramic crock is removed from the slow
cooker.
18. Do not refrigerate foods in the removable crock and then
place directly in the slow cooker to begin cooking. Instead
refrigerate foods in separate storage containers.

5
Electrical Requirements
Avoid electrical shock. This appliance is equipped with a
3-prong grounding plug for your protection against shock hazard and it should be plugged directly into a properly grounded
receptacle. Do not cut or remove the grounding prong from this
plug. If the plug fails to fit into an existing outlet, contact a qualified electrician to update the outlet.
Use proper extension cord. The extension cord must be a
grounding-type 3-wire cord. A short power-supply cord should
be used to reduce the risk resulting from becoming entangled in
or tripping over a longer cord. Extension cords are available
and may be used if care is exercised in their use. If an extension cord is used, the marked electrical rating of the cord set
or extension cord should be at least as great as the electrical
rating of the appliance and the cord should be arranged so that
it will not drape over the countertop or tabletop where it can be
pulled on by children or tripped over unintentionally.
SAVE THESE INSTRUCTIONS.

6
Parts and Features
OPTI-HEATTM System
Optimal Heat Delivery:
The precision placement of the 7 qt. slow cooker heating element, along with the internal temperature sensor, helps maintain
even heat throughout the slow cooker’s ceramic crock.
Premium Materials:
Your 7 qt. slow cooker includes an internal heater wrapped
around an aluminum jacket and a thick ceramic crock that provide even heating while you cook.
Sleek, Contoured Design – The updated, contoured shape
complements contemporary kitchen designs, and the sleek stainless steel housing coordinates with other Calphalon countertop
appliances. You’ll be proud to display your 7 qt. slow cooker
on the counter or tote it along to parties and family gatherings.
7-Quart Removable Crock – Built to handle a variety of
slow-simmered favorites, the extra large removable crock is perfect for roasts, poultry, soups, stocks – and even desserts and
beverages. Remove the dishwasher-safe crock and form-fitting
lid for easy cleaning.
Elevated, Easy-to-Read Controls – No more straining to
see control knobs and settings. Our raised controls illuminate so
you know when the 7 qt. slow cooker is “On” and “Off” and
how much cooking time remains. Choose from “Warm”, “Low”,
“High” and “Auto” settings.
Automatic Keep Warm Setting – If you’re running late,
count on the 7 qt. slow cooker to keep dinner warm by automatically switching from the selected cook setting to a food-safe
“Keep Warm” mode for an extra four hours.

7
Auto-Off Feature – As an added safety feature, once the
designated cooking time and the four hour “Keep Warm” mode
have elapsed, the 7 qt. slow cooker will automatically turn
itself off.
10-hour Timer – The versatile timer allows you to set the cook
time up to ten hours. The illuminated timer counts down each
hour so you know, at a glance, how much time remains.
Integrated Power Cord Wrap – The power cord on your
Calphalon 7 Qt. Slow Cooker can be conveniently stored by
wrapping it on the bottom of the base and snapping the plug
into the holder.
Assembling Your 7 Qt. Slow Cooker
1. Carefully remove all the pieces of the 7 qt. slow cooker
from the packaging and place on counter near a suitable
electrical outlet. (See page 5 for information regarding
electrical requirements.) Remove all packaging materials,
including any stickers or tags, from the slow cooker before
the first use.
2. Before the first use, wash the removable crock and lid in
hot, soapy water. Rinse and dry thoroughly.
3. Place crock into 7 qt. slow cooker base.
4. Fill crock with desired food or beverage and cover
with lid.
5. Plug power cord into 3-prong electrical outlet and continue
with steps for “Operating Your 7 Qt. Slow Cooker”.

8
Operating Your 7 Qt. Slow Cooker
As you place foods into your 7 qt. slow cooker, keep food quality and safety in mind. Here are a few important tips:
Tips for Loading Your 7 Qt. Slow Cooker:
• Thaw any frozen ingredients, such as poultry and meats.
• Keep perishable foods refrigerated before placing them
in a slow cooker.
• Cut large pieces of meat (such as roasts) or poultry into
pieces to ensure thorough cooking.
• The United States Department of Agriculture (USDA)
recommends filling slow cookers between ½ and
2
/3 full.
• Meats cook faster than vegetables in slow cookers. So
if cooking both, place the vegetables in first, then layer
the meat on top and add cooking liquid.
• To make clean up easier, spray the inside of the removable crock with a little nonstick cooking spray.
Setting The Controls
Step 1: Choose the heat setting. Turn the control knob to
the desired heat setting. The indicator light turns on next to the
setting you choose. Most slow cooker recipes provide cooking
times for either “Low” or “High” settings, so use these as your
guide. Keep in mind, the slow cooker does not begin operating until the timer is set. Consider the following general tips for
selecting a heat setting.

9
High – Use this setting when time is short and you need food
done within a few hours rather than eight to ten hours.
Low – Choose this setting when you want to place food in the
7 qt. slow cooker in the morning and return home in the evening
to serve dinner. Many main dish recipes cooked on the “Low”
setting take up to eight to ten hours.
Setting
Warm
Low
High
Auto
Suggested
Foods
Use to keep cooked
foods warm for
serving.
Less-tender cuts of
meat, ribs, poultry
pieces, dressing,
dried beans, creamy
rice pudding and
cheesy soups.
Roasts, ribs, poultry
pieces, casseroles,
broth-based soups,
beverages, and desserts such as cakes
and cobblers.
Roasts, ribs, poultry
pieces, casseroles,
broth-based soups,
and beverages.
Cooking
Time
Selectable up
to 10 hours
Selectable up
to 10 hours
Up to 4 hours
Selectable up
to 10 hours
Up to 4 hours
First 2 hours of
selected time
Remaining
selected time
(up to 8 hrs.)
Up to 4 hours
Cooking
Temperature
165˚F (73˚C)
Stage 1 –
195˚F (90˚C)
Automatic
Keep Warm –
165˚F (73˚C)
Stage 1 –
212˚F (100˚C)
Automatic
Keep Warm –
165˚F (73˚C)
Stage 1 –
212˚F (100˚C)
Stage 2 –
195˚F (90˚C)
Automatic
Keep Warm –
165˚F (73˚C)

10
Warm – Use this setting to keep cooked foods warm until serving. DO NOT use the “Warm” setting to reheat leftovers or to
cook foods (since the temperature is not hot enough to do so).
Auto – Once you select your desired cook time, the 7 qt. slow
cooker runs on “High” for two hours to make sure foods reach
a safe temperature. (This time may not be reduced). Then the
slow cooker automatically switches to “Low” for the remaining
cook time. Once the cook time ends, the slow cooker keeps the
food “Warm” for up to four hours or until serving.
Note: The temperature indicator light displays the selected setting on the 7 qt. slow cooker. For example, if you select “High”,
the High light will be on for the selected time; then the Warm
light will come on for four hours. And, if you select “Auto”, the
Auto light will be on for the selected cook time and then the
Warm light will be on for four hours.
Step 2: Set the timer.
When you first select a cooking temperature, the timer lights
will flash to remind you to also select a cooking time. The 7 qt.
slow cooker does not begin operating until the timer is set. Turn
the timer knob to adjust the cooking time up or down from an
initial setting of five hours. Once the timer is set, the indicator
lights will stop flashing and remain on.
To reduce the time, turn and hold the timer knob left. Or, to
increase the time, turn and hold the timer knob right. Lights appear to indicate the time selected. As each hour of time elapses
during cooking, the corresponding indicator lights turn off. So,
you will know at a glance the time remaining.
Note: If you select a temperature but not a cooking time, all
of the lights will go out after two minutes and the slow cooker
will not start. Remember that you need to select both a cooking
temperature and cooking time for the 7 qt. slow cooker to begin
heating. To start the 7 qt. slow cooker, choose the desired set
-
ting and select a cooking time.

11
Step 3: Leave the lid on. Avoid the temptation to lift the lid
and peek inside the 7 qt. slow cooker. Each time you remove the
lid heat and steam escapes, and the cooking time takes about 20
minutes longer. Be sure to cook food for the recommended time.
Automatic Keep Warm – At the end of the designated
cooking time, the Warm light illuminates, and the 7 qt. slow
cooker automatically switches to the “Warm” setting for four
additional hours.
WARNING: Food Poisoning Hazard
• DO NOT cook foods using the “Warm” setting. Doing so may
result in food poisoning or illness. The “Warm” setting is intended to keep already cooked, hot foods warm until serving.
• DO NOT reheat leftovers in a slow cooker. Doing so may
result in food poisoning or illness. Instead, reheat leftovers to
steaming hot on the stove top or in the microwave, and then
transfer to the slow cooker to keep warm until serving.
Step 4: Serve the food. Turn the 7 qt. slow cooker “Off”
and unplug the cord when finished cooking. Use hot pads to
remove the crock from the slow cooker, if desired. Be careful
when removing the lid, as steam may escape and cause burns.
Never place the hot slow cooker or crock directly on a wooden
table or other non-heat resistant surface.
We recommend that you use a ladle or other serving utensil to
remove food from the ceramic crock.
THE CERAMIC CROCK, LID, AND 7 QT. SLOW COOKER
HANDLES MAY GET HOT WHILE THE SLOW COOKER IS IN
USE. USE CAUTION WHEN HANDLING.
WARNING
CAUTION

12
Increasing or Reducing Cooking Time
You can extend or shorten the cooking time with the timer knob.
Just turn it to the right to add time or to the left to shorten the
time. If you hold the timer knob in either position, time will be
added or removed. The timer lights will change to show the
new cooking time.
If you select the “High” or “Low” setting and reduce the cooking
time to zero, the 7 qt. slow cooker will switch to the Automatic
Keep Warm mode.
Once the 7 qt. slow cooker switches to the Automatic Keep
Warm mode, adding cooking time will switch the slow cooker
back to the cooking mode you had initially selected.
Once the 7 qt. slow cooker is in the Automatic Keep Warm
mode, selecting another cooking temperature will restart the
cooking program with a default cooking time of five hours. The
cooking time can be adjusted with the timer knob, if desired.
Ending a Cooking Cycle
To end a cooking cycle manually, simply turn the temperature
knob to the “Off” position.
Cleaning and Care
1. When you are done using the 7 qt. slow cooker, turn the
slow cooker “Off” and carefully unplug it.
2. Remove any leftover food and place in storage containers;
refrigerate. Do not store leftovers in the crock.
3. Allow the 7 qt. slow cooker to cool and then remove the
crock.
4. Wash the crock and lid in the dishwasher, if desired. Or,
wash in hot soapy water. Rinse and dry thoroughly. 5.
5. Wipe the 7 qt. slow cooker base with a clean, damp cloth.

13
DO NOT use abrasive cleaners or scouring pads, as they
may scratch the surface of the slow cooker.
6. DO NOT IMMERSE THE 7 QT. SLOW COOKER BASE IN
WATER OR ANY OTHER LIQUID.
7. Store the power cord using the cord wrap feature on the
bottom of the slow cooker base.
8. Place crock in 7 qt. slow cooker base and put lid on top.
Frequently Asked Questions
My 7 qt. slow cooker is not heating; what am I doing wrong? Be sure the power cord is plugged into a suitable
outlet. See page 5 for electrical requirements. Then, check to
make sure both the temperature control knob and the timer are
set. The lights should be illuminated but not blinking. If they are
blinking, the timer is not set. Turn the knob to select a time.
How do I know which heat setting to choose? Begin
by looking at the 7 qt. slow cooker recipes in this guide. They
provide suggested cook times and heat settings. Most foods
may be cooked on either the “Low” or the “High” setting. It
depends on the amount of time available for cooking and how
tender you want the food to become. The longer the cook time,
the more tender the food.
I selected a temperature setting, but now all the
lights have gone out. What happened? If you se-
lect a temperature setting and let the 7 qt. slow cooker sit for
two minutes without selecting a cooking time (which starts the
cooking cycle), the 7 qt. slow cooker control lights will turn off.
Simply turn the temperature knob to “Off”, turn it again to select
a cooking temperature, and then turn the timer knob to select a
cooking time.
WARNING

14
I’ve cooked my food for the designated time, but it’s
not steaming hot. How could this be? Check to make
sure you didn’t start with frozen ingredients. All foods you place
in the 7 qt. slow cooker should be thawed before using. Also,
determine if you’ve overloaded the slow cooker. The USDA
recommends filling a slow cooker between ½ and
2
/
3 full.
Finally, make sure you cut large pieces of meat or poultry into
smaller pieces before cooking.
How do I adapt my favorite slow-simmered recipe
to the 7 qt. slow cooker? Find a similar slow cooker recipe
(like the recipes in this guide) and model after it. In general,
brown meats before adding them to the slow cooker. Reduce
liquids slightly, since the slow cooker captures steam during the
cooking process. And, place vegetables into the bottom of the 7
qt. slow cooker, because they take longer to cook than meats and
poultry. Finally, add quick-cooking vegetables, pasta and rice to
the slow cooker during the last 30 minutes of cooking time.
Warranty/Customer Service
Warranty
If you could take a few moments to register your product, it
would greatly expedite any warranty inquiries you may have.
Also, with your help, we can continue to develop new products
and services that make your culinary experience even better.
Please visit www.calphalon.com for complete details.
 Loading...