

Cafina Coffee Center c60 Operating Instructions Manual
-1-
OPERATING INSTRUCTIONS
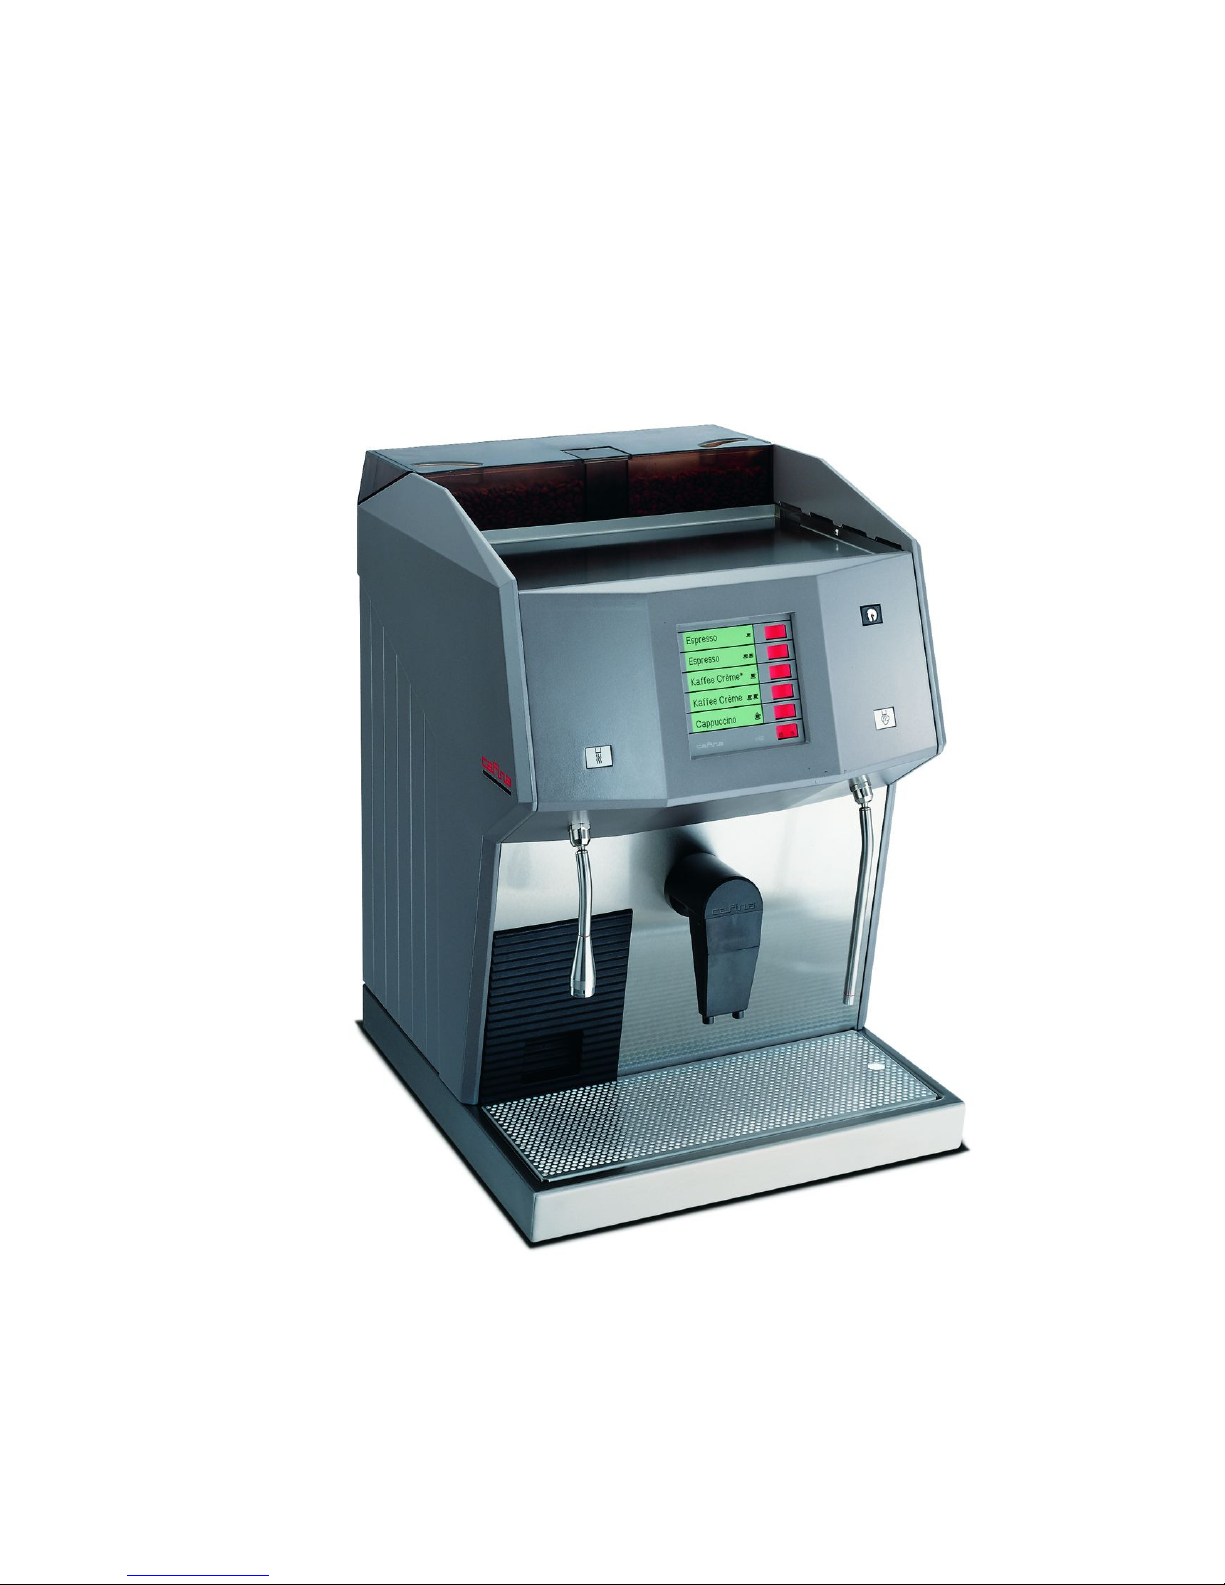
Coffee Center c60
Cafina Ltd. Phone +41 (0)62 889 42 42
Roemerstrasse 2 Fax +41 (0)62 889 42 89
5502 Hunzenschwil E-Mail info@cafina.ch
Switzerland www.cafina.ch

-2-
CONTENTS
♦
Connection and installation 3
♦
Warning 4
♦
Dimensions and parts of the machine 5
♦
Description of the parts 6
♦
Controls 7
♦
Commissioning 8
♦
Coffee bean container 9
♦
Choice of coffee beverage 10
♦
Different kind of coffee 11
♦
Coffee grounds drawer 12
♦
Hot water and steam outlets 13
♦
Cleaning, care and maintenance 14
♦
Cleaning program 15
♦
Setting and programming 16
♦
Daily counter 17
♦
Change water quantity 18
♦
Change hot water/steam flow time 19
♦
Change coffee quantity 20
♦
Blocking the buttons 21
♦
TURBO, self-service and EXTERNAL functions 22
♦
Self-service machines 23
♦
Problems and display messages 24
♦
Safety instructions 25
♦
Technical data 26
-3-
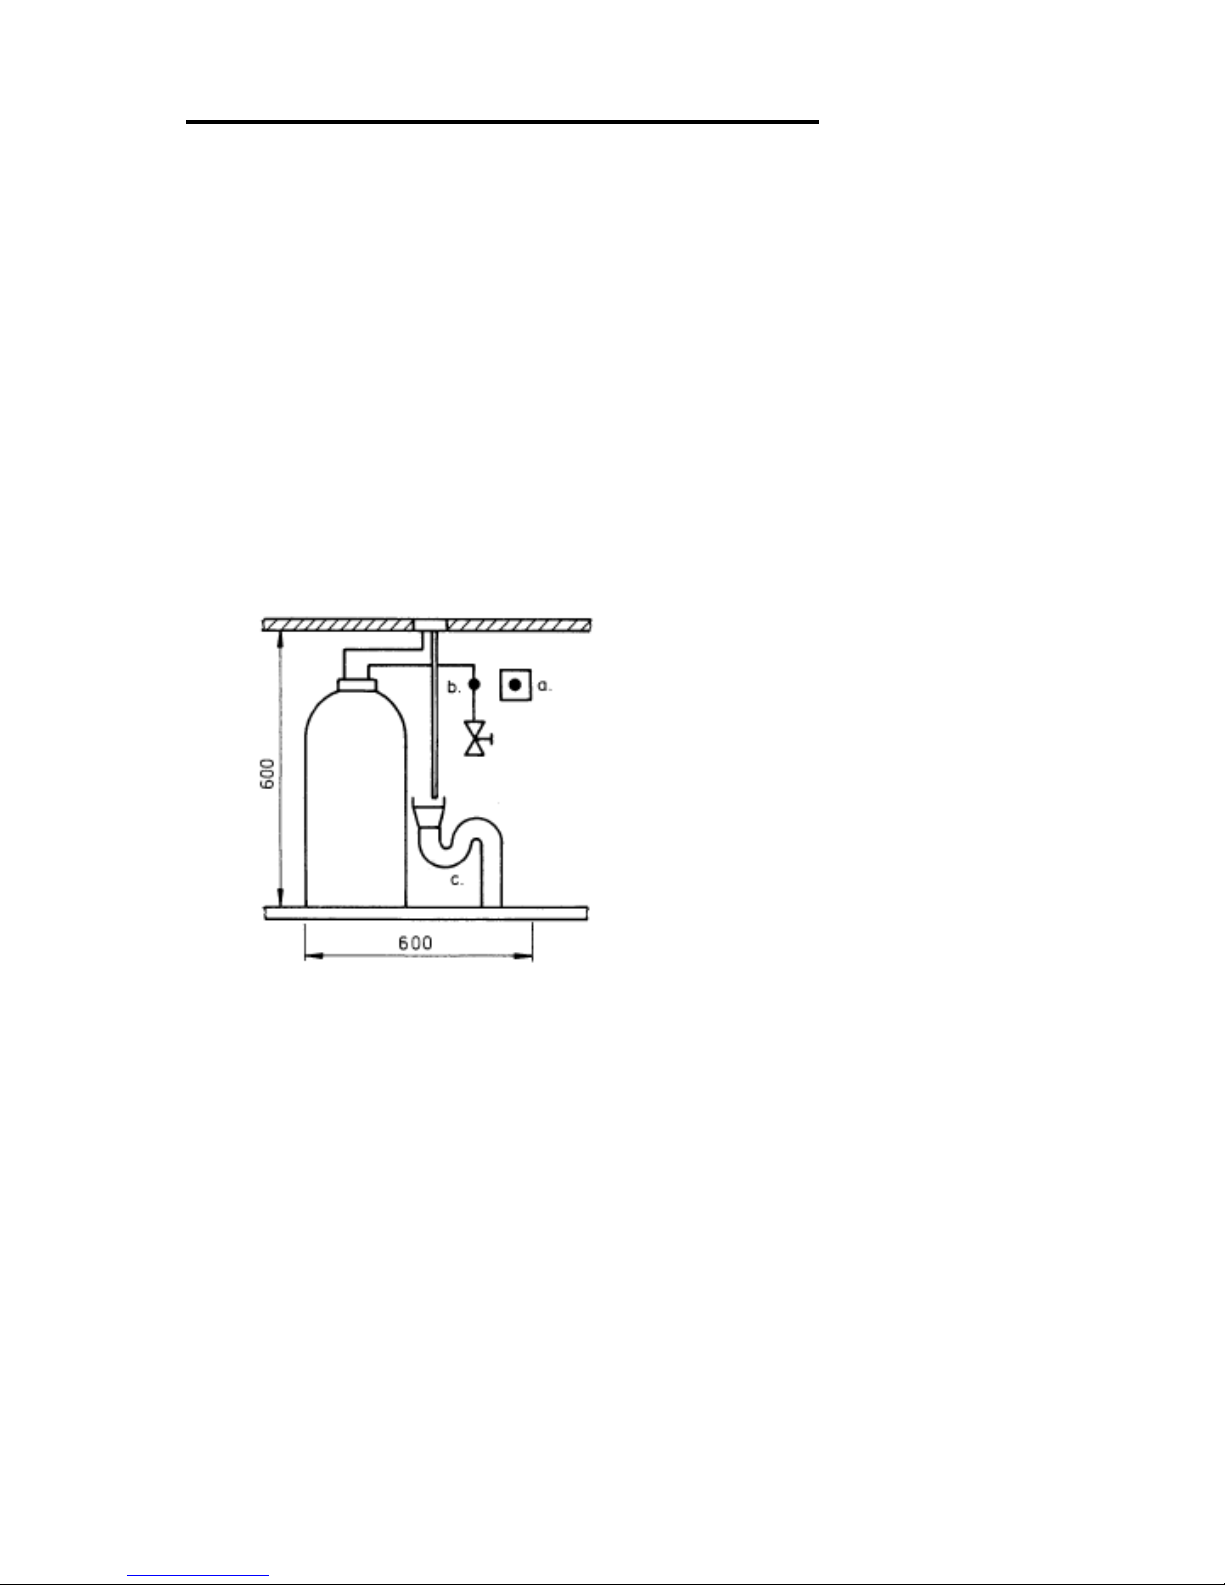
CONNECTION AND INSTALLATION
All Cafina machines are supplied ready for connection. Before a machine can be
installed, however, the service outlets and the drain must be prepared (according to the
connections diagram) and be located within 1 m.
This work must be carried out by appropriately qualified personnel and be in strict
accordance with the applicable regulations. The Cafina service department is not
authorised to install the service outlets or the drain and can accept no responsibility
for them.
The machine must be placed on a solid table top or counter surface. A hole with a
diameter of 120 mm must be drilled in the surface for the connections as shown in the
connections diagram.
Please do not install the machine in large catering kitchens. It is has not been
designed for that kind of operation.
a) Electrical connection
The power supply voltage must agree with
the data on the nameplate. The supply must
be separately fused in accordance with
local regulations. A power point outlet is
preferred. However, where the connection is
directly terminated at junction box, a switch
must be provided which breaks all poles and
has a contact gap when open of at least
3 mm.
b) Water supply
A stop-cock with a back-pressure valve must be installed in an easily accessible position.
A water filter (option) should be fitted where the local conditions require it. The filter must
be mounted vertically. Water supply and drain hoses are provided with the machine. The
hoses must not be shortened during installation for safety reasons. The steady-state
water pressure must be at least 2 bar. A pressure reduction valve must be included
between the stop-cock and the machine where the water pressure exceeds 5 bar.
Before using the machine for the first time, any water filter fitted must be activated as
directed in the specific instructions (Brita® = 3 min, Everpure
®
= 5 min). The activation
procedure must be repeated whenever the filter element is replaced.
c) Water drain
All machines are equipped with a drain outlet to which the hose supplied can be fitted.
The hose is inserted into an open drain pipe.

-4-
WARNING
Maximum safety is one of those Cafina product features which receives our very special
attention.
Nevertheless if it is used incorrectly, an element of danger always remains with every
item of technical apparatus in spite of all the precautions taken in the design.
For this reason, we have included the following warnings for your safety.
Important instructions you should carefully observe for your own safety:
♦
The connection of the machine to the outlets which have been prepared for it and also
the performance of maintenance and repairs may only be carried out by the especially
trained and authorised personnel of the Cafina customer service department using
original parts and spares.
♦
The safety devices included in the machine may in no circumstances be repaired,
bridged or adapted by unqualified personnel.
CAUTION!
♦
There is danger of scalding near the hot water/steam outlet (3 and 5) and the coffee
outlet (4).
CAUTION!
♦
Never touch the coffee bean container when the machine is switched on.
Danger of pinching!
-5-
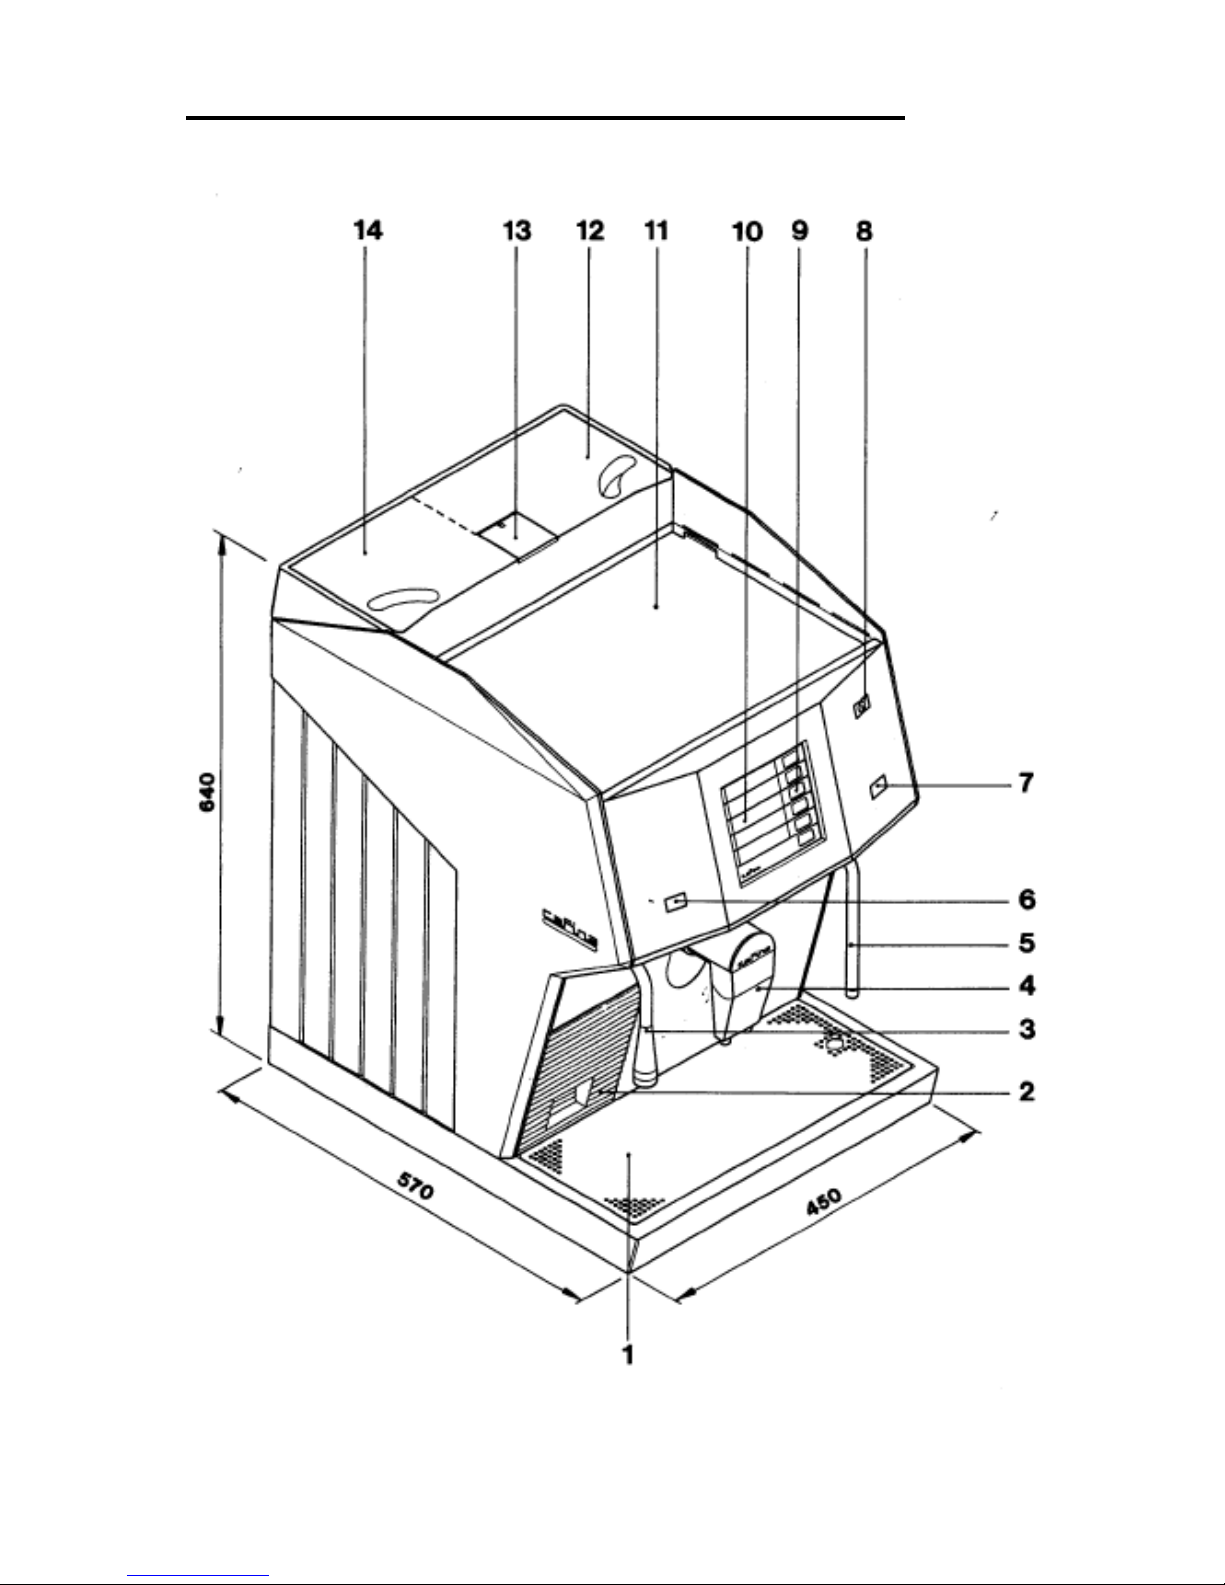
DIMENSIONS AND PARTS OF THE MACHINE

-6-
DESCRIPTION OF THE PARTS
1 Drip tray
2 Coffee grounds drawer
3 Hot water outlet
4 Coffee outlet
5 Steam outlet
6 Hot water button
7 Steam water button
8 Key switch
9 Coffee beverage button
10 Display
11 Cup tray
12 Coffee bean container 1
13 Decaffeinated coffee filler
14 Coffee bean container 2
-7-
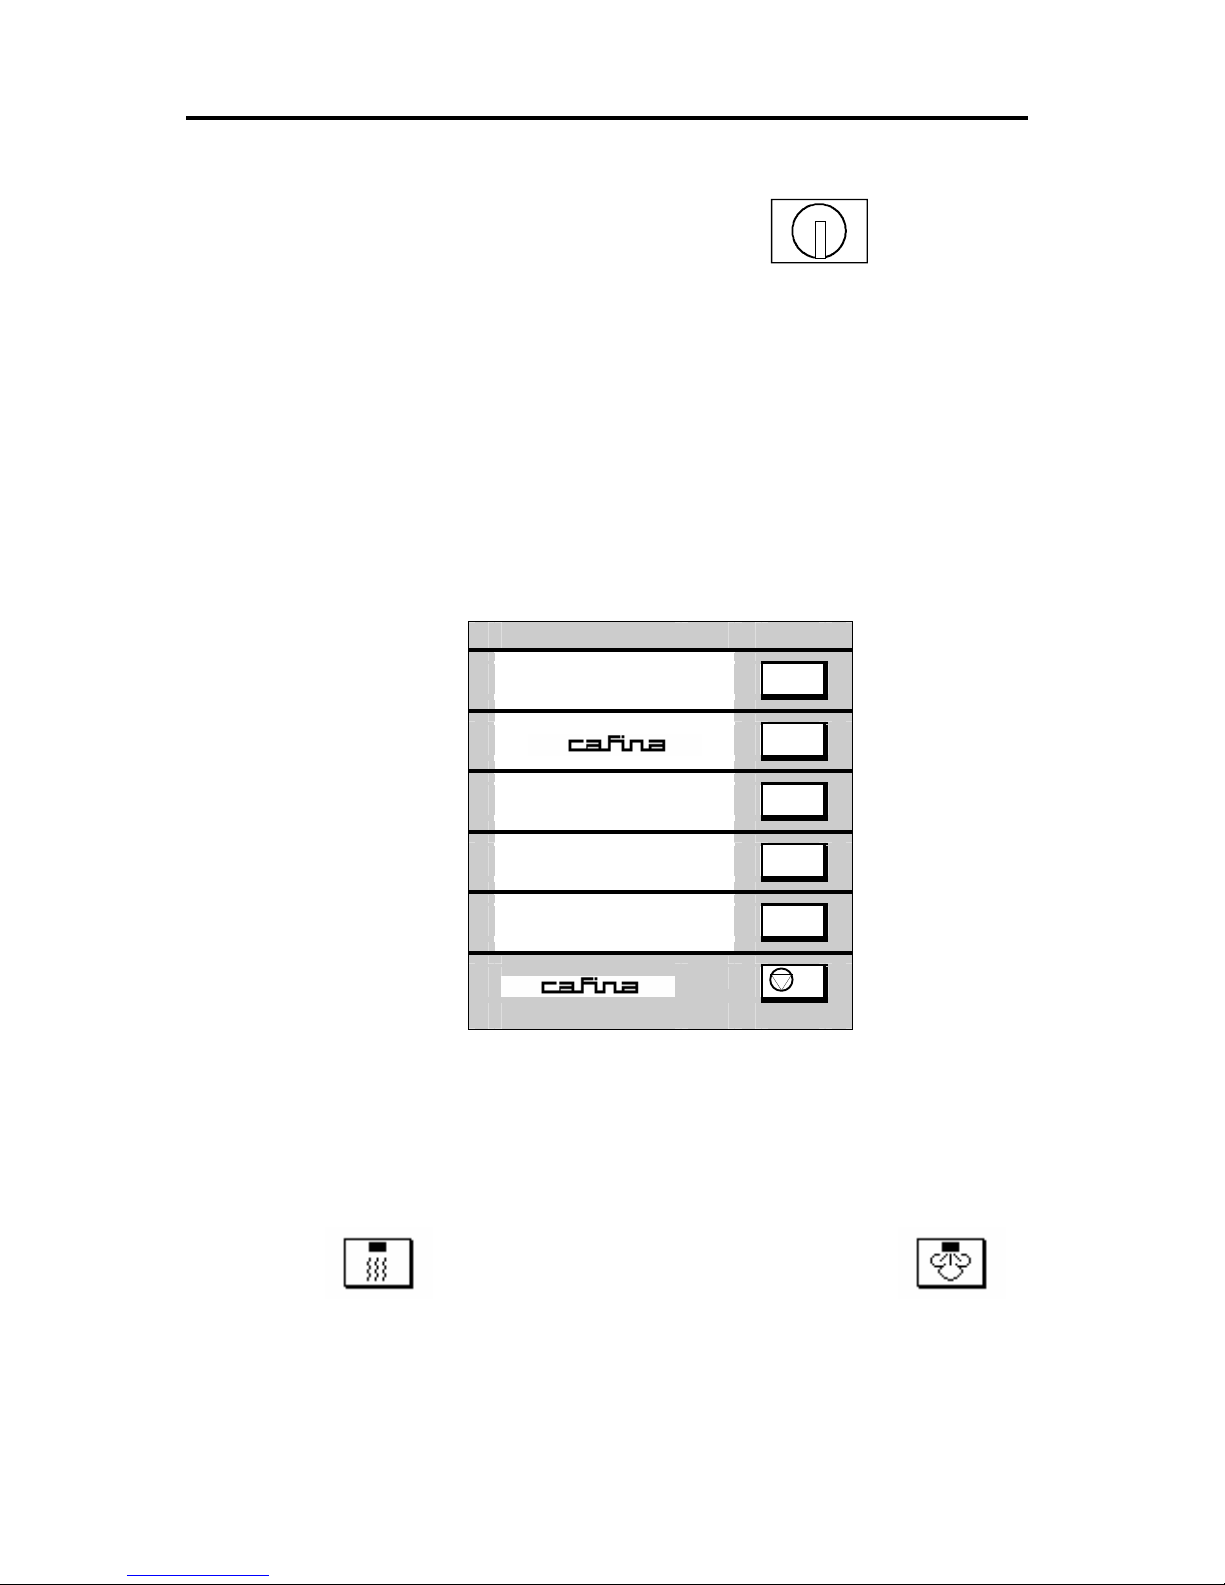
CONTROLS ON THE CAFINA c60 COFFEE MACHINE
KEY SWITCH POSTIONS:
Manager
Maint.
Service
0
♦
Position "0" = machine OFF (or cleaning)
♦
Position "Service" = machine ON ( key N° 1 )
♦
Position "Manager" = programming by manager ( key N° 2 )
♦
Position "Maint." (maintenance) = programming by technician ( key N° 3 )
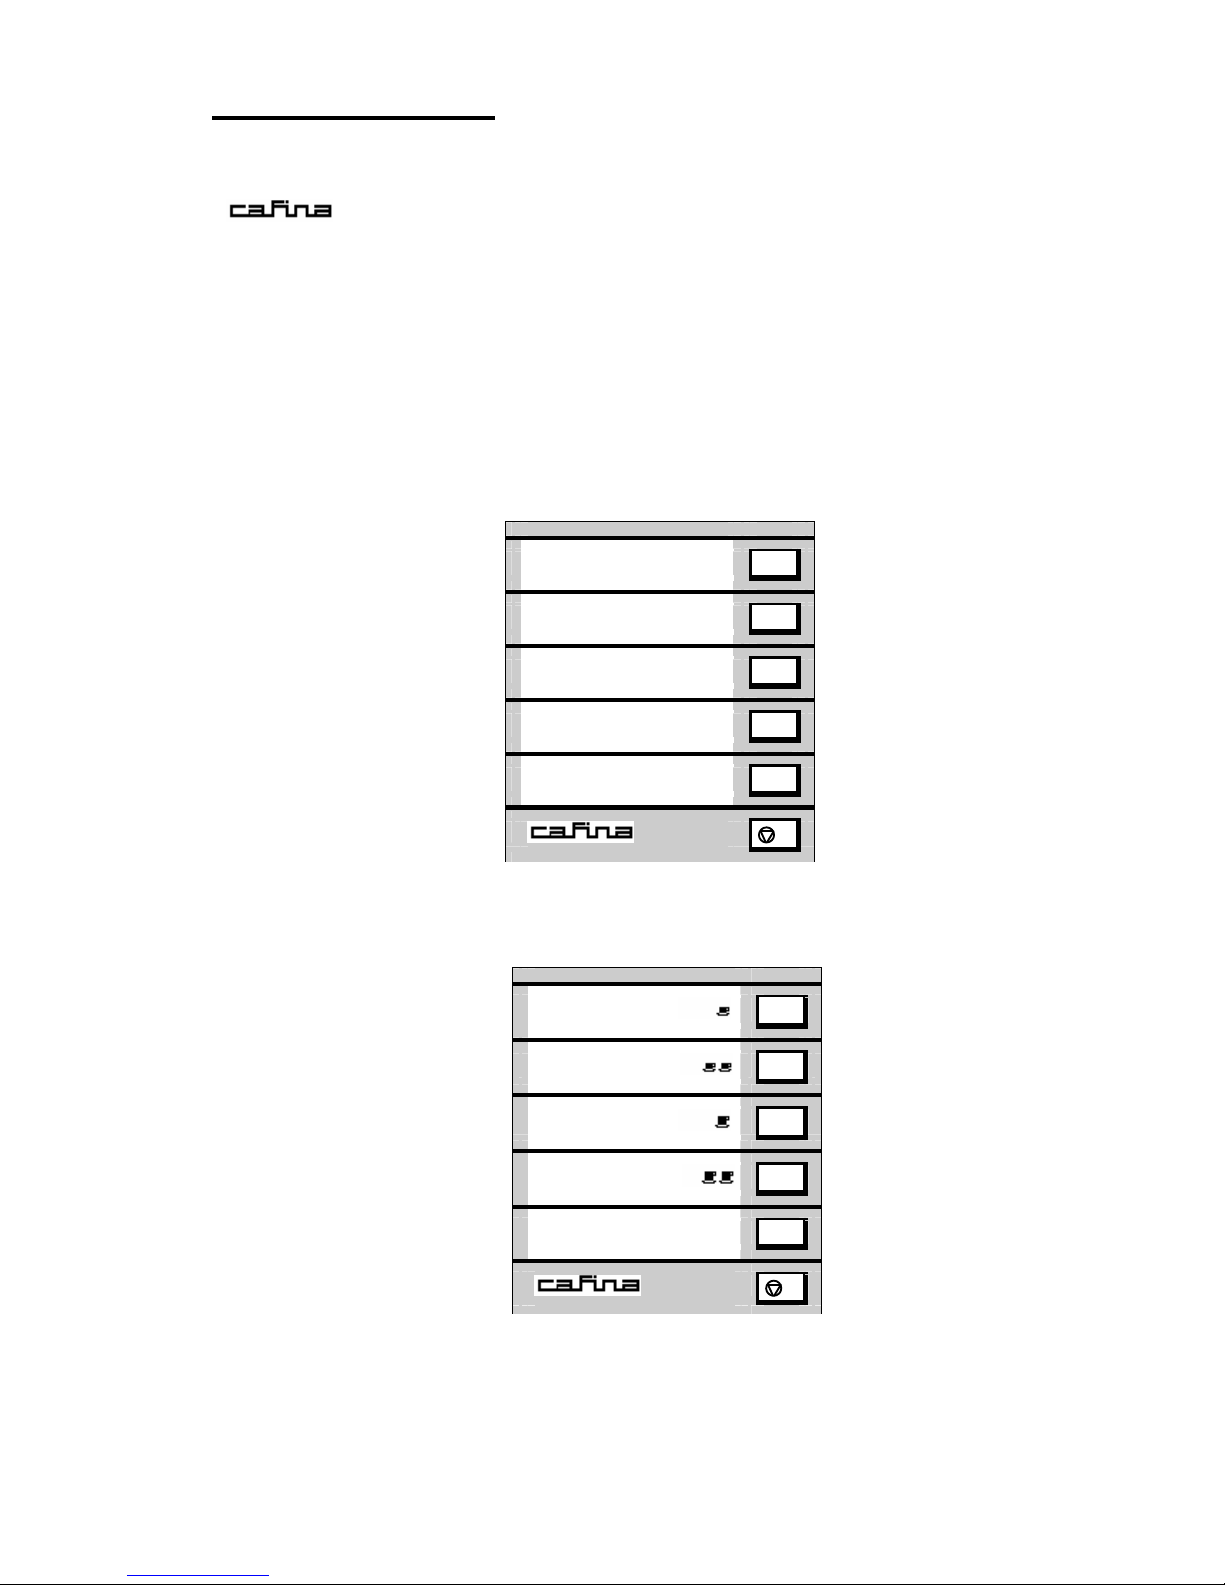
COFFEE SELECTION BUTTONS / DISPLAY:
DISPLAY LINE 1 BEVERAGE BUTTON 1
INTERMEDIATE LINE 1
DISPLAY LINE 2 BEVERAGE BUTTON 2
INTERMEDIATE LINE 2
DISPLAY LINE 3 BEVERAGE BUTTON 3
INTERMEDIATE LINE 3
DISPLAY LINE 4 BEVERAGE BUTTON 4
INTERMEDIATE LINE 4
DISPLAY LINE 5 BEVERAGE BUTTON 5
STOP / SHIFT BUTTON
♦
Instructions such as FILTER, CLEANING etc., are displayed on intermediate lines!
HOT WATER AND STEAM BUTTONS:
Hot water button (6) Steam button (7)
1
2
c 60 3
4
C 60 - 12
5
c 60
S
-8-
COMMISSIONING
Before switching the machine on, check that the water stop-cock is open and the
electrical power is switched on. As soon as electricity is applied to the machine,
" c60 " appears on the otherwise unilluminated display.
Up to 15 different beverages can be programmed and listed on three display pages.
Pressing the SHIFT button switches from one page to the next. Only pages containing at
least one beverage are displayed (empty pages are omitted).
The control system switches back to the first page, unless a beverage button on one of
the other pages is pressed within 6 seconds.
The service department technician will enter the beverages in the lists according to your
wishes. Apart from the well-known types of beverages, special names can also be
entered.
Place the control switch (8) to the "Service" position. "ON" lights on the display and the
machine goes through its initialisation routine. At the same time the flow-through water
heater starts to warm up.
The display shows:
Present temperature >
> SET temperature
The initialisation program terminates once the water heater has reached the SET
temperature.
The display shows
for example
1st. page >
Beverage buttons 1 to 5
> next page
On machines equipped with a hot water or steam module, this module is also ready for
operation after a further 4 to 5 minutes.
CAUTION: Hot water flows out of the coffee spout (4) after the machine is switched on!
1
please wait
2
70°C 88°C
3
4
5
c60
S
Espresso**
1
Espresso
2
Café Créme*
3
Café Créme
4
Decaffeinated
5
c 60
S
 Loading...