

Page 1
STREAM
source
notice d,installation
owner,s manual
Page 2
2
7
f r a n c a i s e n g l i s h
5
2
Page 3
10
4
2
1
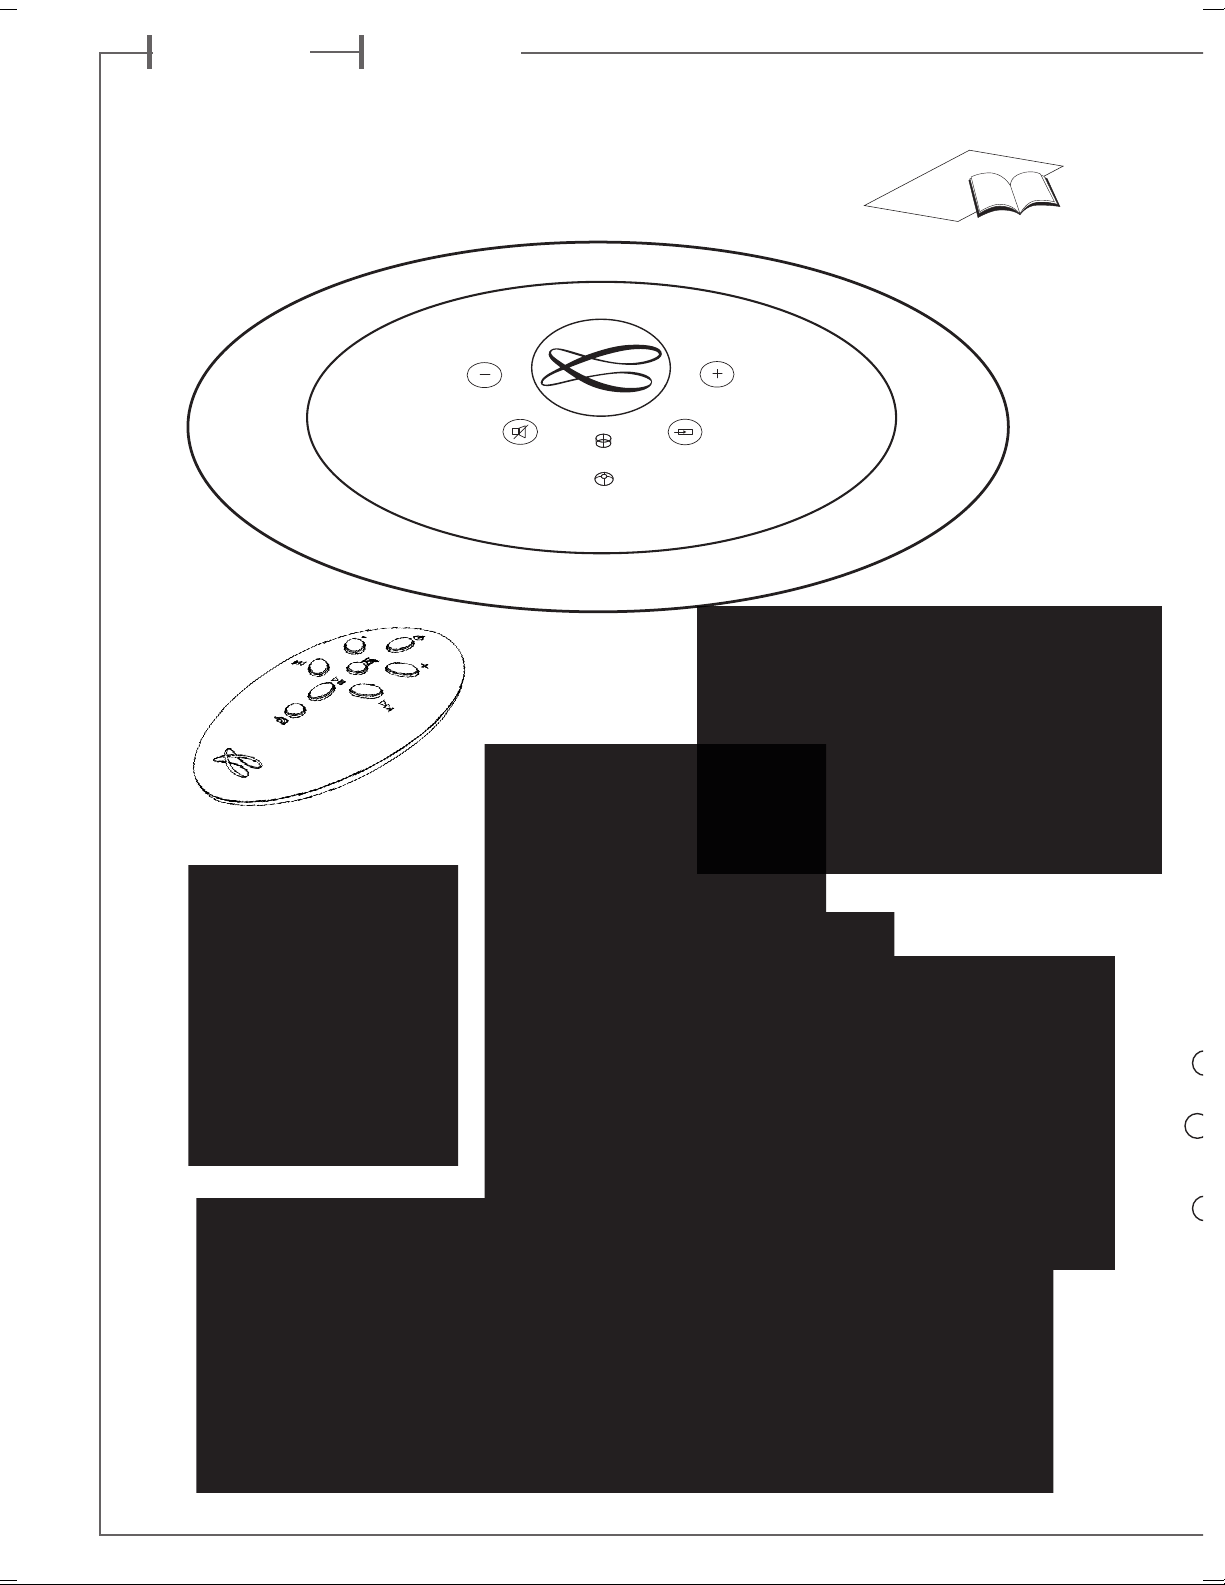
IDENTIFYING CONTROLS IDENTIFICATION DES COMMANDES
POWER
1
LED
2 VOL - Volume DOWN Diminution du volume
Red: loading / Green: on Rouge : initialisation / Vert: marche
9
3
8
5
2
7
1
3 VOL + Volume UP Augmentation du volume
4
8
9
10
SOURCE
LED
Mute on/off Active et désactive la coupure du son
Source selection Selection de la source
Blue: Bluetooth
Orange: WiFi
NFC patch Patch NFC
1
3
2
4
3
4
LED display
on/off
VOL
Volume DOWN Diminution du volume
-
VOL
Volume UP Augmentation du volume
+
Mute on/off Active et désactive la coupure du son
Bleu : Bluetooth / Orange: WiFi
IDENTIFYING
CONTROLS
6
WiFi: reverse scanning
5
Bluetooth: previous title of the
played album
IDENTIFICATION
DES COMMANDES
Marche/arrêt de
l’éclairage des diodes
WiFi: retour rapide
Bluetooth: titre précédent de l’album
lu
8
WiFi: forward scanning
6
7 Play/Pause (WiFi and Bluetooth) Lecture/Pause (WiFi et Bluetooth)
8
Bluetooth: next title of the
played album
Source selection Selection de la source
WiFi: avance rapide
Bluetooth: titre suivant de l’album lu
3
Page 4
f r a n c a i s e n g l i s h
1
Poser le Stream Source sur ou
à coté de l'amplificateur ou
préamplificateur.
Prévoir un espace suffisant
pour le cas échéant pouvoir
poser brièvement un
smartphone NFC sur le Stream
source et réaliser une liaison
Bluetooth automatique. Cet
espace est aussi nécessaire
au bon fonctionnement des
antennes bluetooth et WiFi.
2
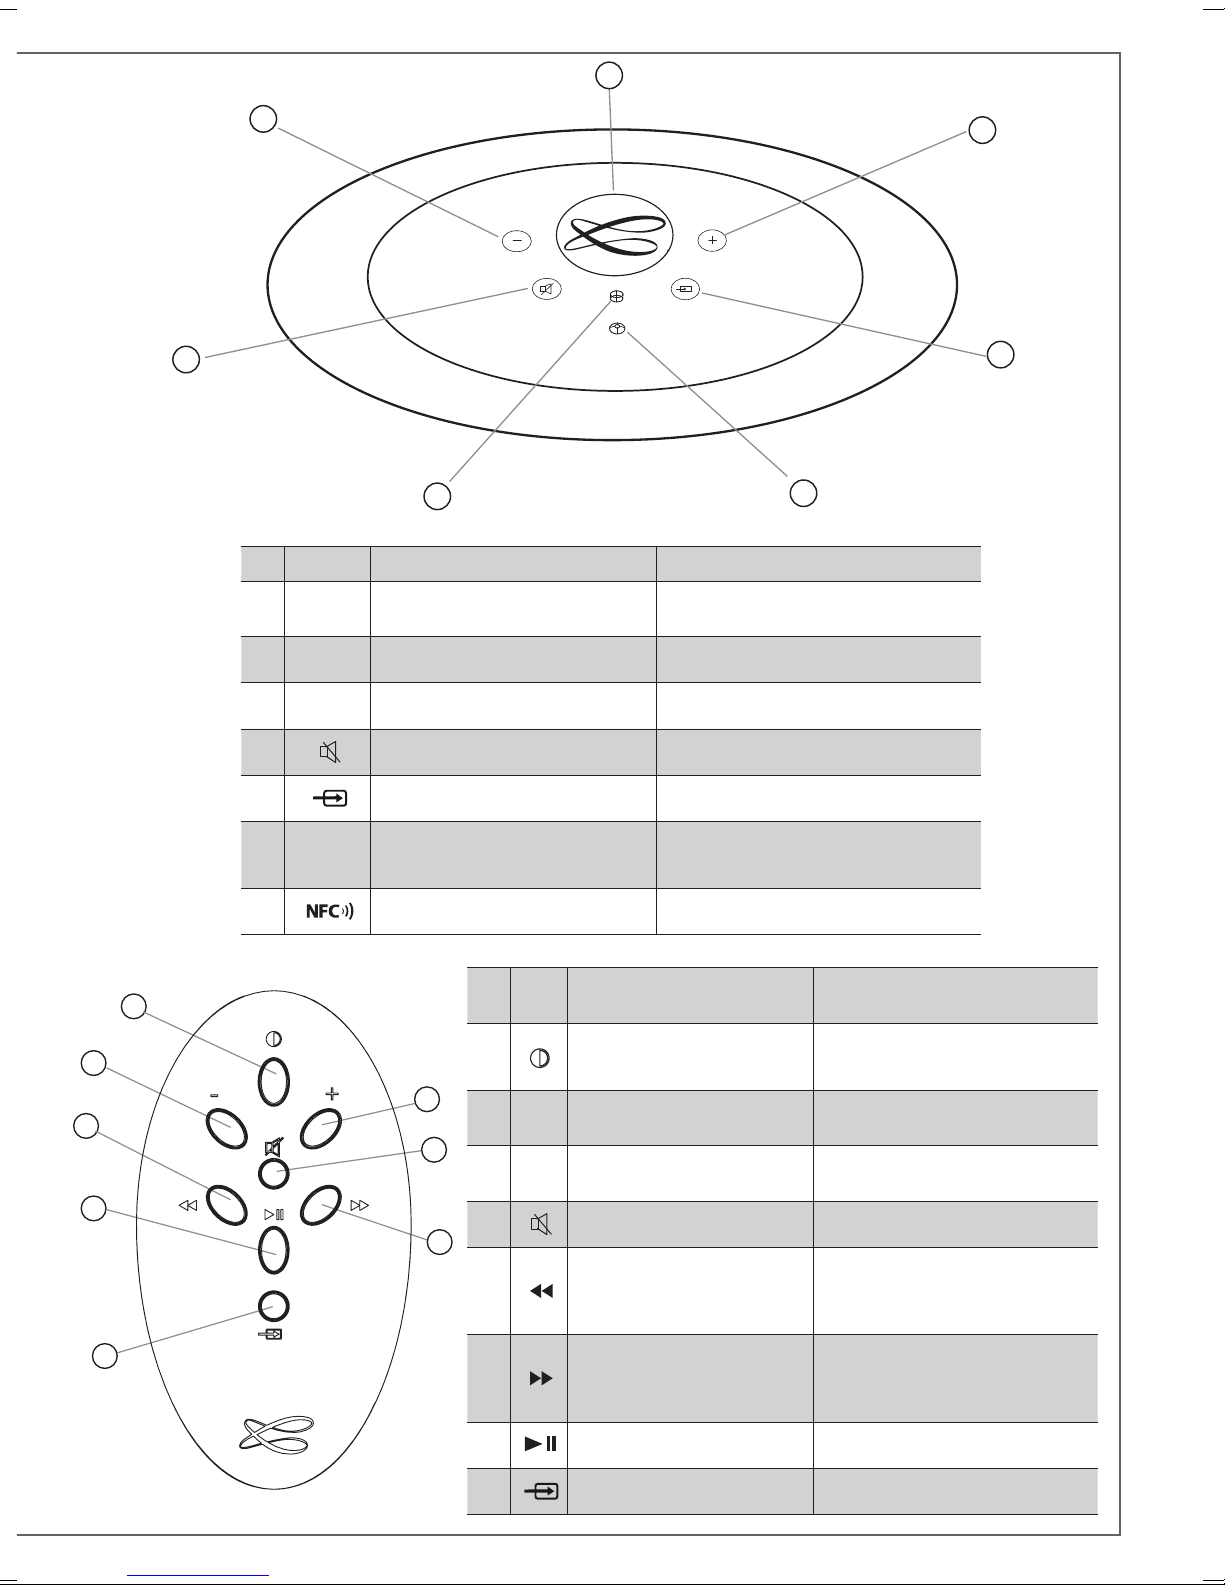
INSTALLATION RAPIDE
QUICK PLUG & PLAY
Place the Stream Source close
to or even on the amplifier
or amplifier, with enough
available headroom above the
NFC patch for a smartphone
and the use of instant
Blutooth connection. This
headroom is also necessary for
the optimum efficiency of the
Bluetooth and WiFi antennas.
CONNEXION A L'AMPLIFICATEUR :
2 possibilités :
connexion analogique avec un câble stéréo RCA
une entrée (AUX, TUNER, CD..) de l'amplificateur intégré ou de
l'amplificateur de puissance. Faire correspondre la sortie droite
du Stream Source et l'entrée droite de l'amplificateur avec les
fiches rouges du cable RCA-RCA.
-
connexion digitale SPDIF avec liaison optique (volume fixe
100%).
Sélectionner et monter la prise mâle
3
adaptée à votre réseau électrique sur
l'alimentation externe. Connecter
l'alimentation externe au Stream
Source puis brancher l'alimentation
au secteur. L'initialisation du
Stream Source dure environ
40 secondes. Le système est
opérationnel dès que la diode
“POWER” passe du rouge au vert et
active par défaut la source WiFi.
Avant la première utilisation : retirer la languette de protection qui dépasse du
4
couvercle
Before first use: remove the battery protection tab to activate the battery.
Remplacement de la pile bouton type CR-2025:
retourner la télécommande, enlever le couvercle, enlever la pile usagée, insérer
la pile neuve, coté marquée "+" vers l'extérieur, remettre le couvercle.
1
-RCA : choisir
Select and insert the right plug
on the power supply. Connect
the power supply to the Stream
Source, then plug it to the mains.
The initialisation lasts around 40
seconds, Stream Source is ready
to play when the LED
from red to green, with the source
selector on WiFi.
CONNECTION T
2 possibilities:
Analog connection with a stereo RC
cable: choose an input (AUX, TUNER, CD...) of the integrated
amplifier, preamplifier or even power amplifier, with red sockets
used for right output of Stream Source and right input of the
amplifier.
-
Digital SPDIF connection with an optical cable (with full output
level).
turns
1
O THE AMPLIFIER
A-RCA interconnect
Replacement of the CR-2025 type battery in the Stream remote
control: Insert your thumbnail under the clasp and press to
realease it, remove the rear lid, remove the old battery and
load the new battery properly with the “+” side on the
clasp side, put the rear cover back on.
4
Page 5
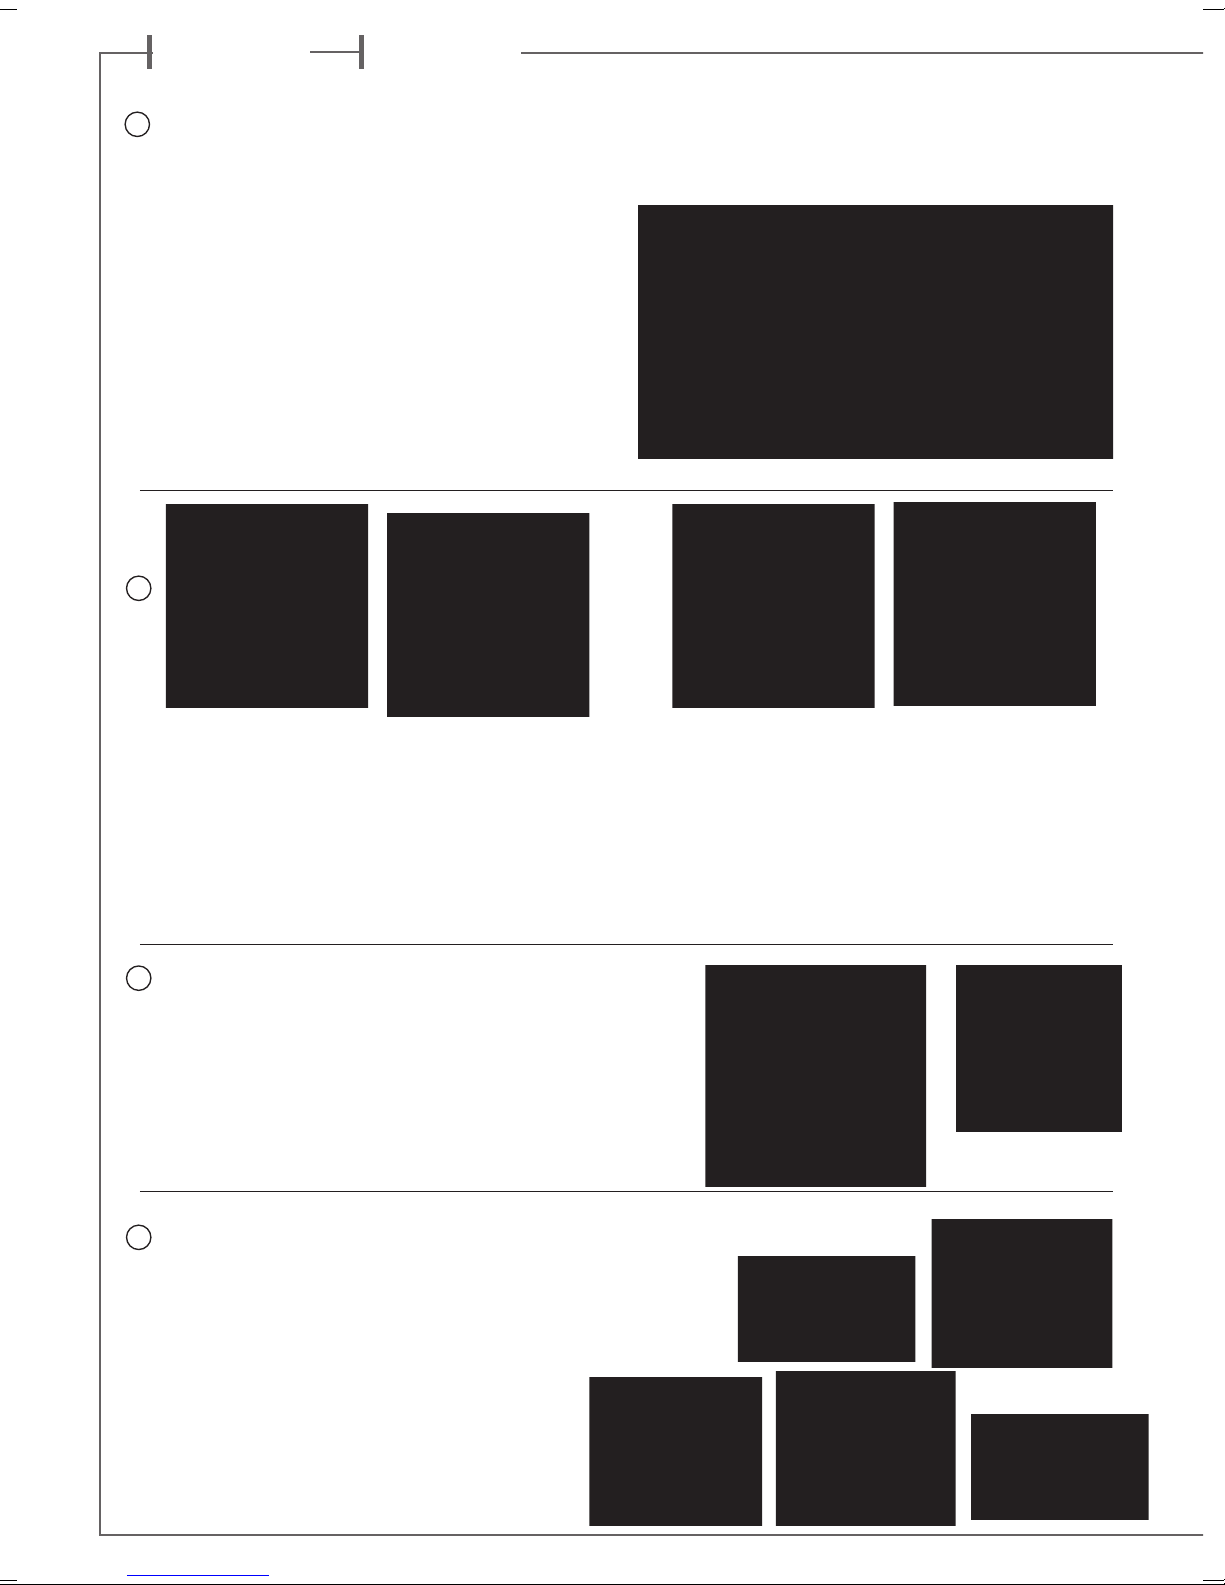
Une fois les connexions Bluetooth et
5
WiFi activées (voir chapitres suivants),
sélectionner entre la source Bluetooth et la
WiFi avec la touche (8) de la télécommande
Stream:
- la LED bleue s'allume pour la source
Bluetooth
- le LED orange pour la source WiFi.
Connecter une clé USB ou un disque dur contenant
des fichiers audio à cette entrée pour les mettre
automatiquement en réseau. Tous les fichiers aux
formats reconnus par le serveur DLNA inclus dans
Stream Source sont alors listés dans l’application
Stream et peuvent être lus par tous les lecteurs
Cabasse Stream connectés au même réseau. La
prise USB de Stream Source est pourvue d’une
alimentation de 800 mA pour l’utilisation d’un
disque dur nomade sans recours à une alimentation
externe.
Once the Bluetooth and WiFi connections
activated, press the (8) key of the remote
control until you get the requested source:
- The blue LED enlights for the Bluetooth
source
- The orange LED enlights for the WiFi
source.
ENTRÉE USB
USB INPUT
Connect an USB stick or a hard-drive to this input
to get all the stored audio files available on the
domestic network. All the audio files under formats
compatible with the built-in DLNA server of Stream
Source will be listed in the Stream applications
and can be played by any Cabasse Stream player
connected to the same domestic network. The USB
input is fitted with a 800 mA power output enabling
the use of a portable hard drive with no need of an
external power supply.
CONNEXION BLUETOOTH
BLUETOOTH CONNECTION
Le Stream Source est configuré en mode ouvert pour les connexions
Bluetooth, il faut dans le menu de l’appareil à connecter
sélectionner "Cabasse Stream Source" dans la liste des appareils
Bluetooth disponibles. Sélectionner si nécessaire la source Bluetooth
en pressant le bouton (8) de la télécommande "Stream" jusqu'à ce
que la diode bleue du module IR s'illumine. Si un appareil est déjà
connecté en Bluetooth avec Stream Source, il faut interrompre cette
liaison avant d'en réaliser une nouvelle avec un autre appareil.
EXEMPLE DE CONNEXION BLUETOOTH AVEC UNE TABLETTE
ANDROID : voir la version française en page 11
CONNEXION ET UTILISATION AVEC UN ORDINATEUR APPLE:
version française en page 13
CONNEXION INSTANTANÉE AVEC UN SMARTPHONE NFC
INSTANT NFC CONNECTION WITH A NFC SMARTPHONE
INSTANT-ANSCHLUSS AN EIN NFC SMART PHONE
1) Installation de l’application NFC Cabasse
a) Activer le mode NFC dans le menu de votre smartphone NFC.
b) Vérifier/activer la connexion du smartphone à Internet (réseau
cellulaire WiFi ou 3G, 4G).
c) Approcher le smartphone du patch NFC placé sous le logo au
sommet du Stream Source.
d) valider la demande d’installation de l’application Cabasse NFC
via Google Play.
e) Votre smartphone est prêt pour sa première connexion NFC.
2) Utilisation de l’application
a) Approcher votr
établir la connexion Bluetooth, la source Bluetooth est alors
automatiquement sélectionnée et le premier morceau de la playlist
de votre smartphone est transmis au Stream Source.
b) Approcher une nouvelle fois pour interrompre la connexion
Bluetooth.
NOTE : Une fois installée sur votre smartphone NFC,
l’application NFC Cabasse fonctionne en permanence de
manière invisible.
e smartphone au Stream Source pour
Bluetooth NFC Cabasse
Stream Source is set up on open mode for Bluetooth connections.
Select "Cabasse Stream Source" among the Bluetooth items listed
in the menu of the item to be used as an audio data source. If a
Bluetooth source is already connected to Stream Source, disconnect
this item before selecting a new one.
BLUETOOTH CONNECTION WITH AN ANDROID TABLET: see
the English explanation on page 19.
CONNECTION AND USE OF STREAM SOURCE WITH AN APPLE
COMPUTER: see the English version page 20.
1) Installation of the Cabasse NFC application
a) Activate the NFC function in the set up of the NFC smartphone.
b) Check/activate the WiFi or 3G connection of the smartphone
to Internet .
c) Touch the smartphone together with the NFC patch placed
under the logo on top of the Stream Source.
d) Accept the installation of the Cabasse NFC app from Google
Play.
e) Your smartphone is now ready for instant Bluetooth NFC
connections.
2) Using the Cabasse
a) Tap your smartphone on the NFC on the logo on top of Str
Source for instant Bluetooth pairing, the Bluetooth input is
automatically selected and the first track of the smartphone’s
playlist is being played through the Stream Source.
b) Tap again to unpair both items and before pairing another
smartphone to the Stream Source.
NOTE: the Cabasse NFC application is invisible once installed
in the smartphone and remains active.
Bluetooth NFC application
eam
5
Page 6

f r a n c a i s e n g l i s h
CONNEXION FILAIRE (LAN) AU RESEAU ETHERNET
LAN WIRE CONNECTION TO THE ETHERNET NETWORK
CONNEXION DLNA SANS FIL (WLAN) AU RESEAU WIFI
DLNA (WLAN) WIRELESS CONNECTION TO THE WIFI NETWORK
Connecter un câble RJ45 entre le Stream Source et votre routeur
(ou Box Internet). La connexion est établie quand la diode ETH
passe au bleu fixe.
ATTENTION : le routeur doit être configuré en DHCP.
Use a RJ45 type cable to connect Stream Source to the domestic
router. The connection is running when the blue LED “ETH” stops
flashing and remains on.
ATTENTION: set up the router on DHCP mode.
Appuyer sur le bouton "RESET" avant d'utiliser un nouveau routeur.
Press "RESET" before starting a connection to a new router.
IL EXISTE 3 SOLUTIONS POUR
CONNECTER STREAM SOURCE
AU RESEAU WIFI :
1- CONNEXION AUTOMATIQUE avec les touches
WPS du Stream Source et du routeur (ou box
Internet) s’il en est équipé: presser le bouton WPS
du routeur pendant au moins 2 secondes, puis
dans les 2 minutes qui suivent (durées indicatives,
à vérifier dans le manuel du routeur), presser le
bouton WPS du Stream Source. La diode bleue
«WiFi CONFIGURATION» s’allume, la connexion est
effective. Continuer à la page 14 avec l’installation
de l’application Cabasse.
2) CONNEXION SEMI-AUTOMATIQUE avec
l’application Cabasse Stream Audio Control sur
un smartphone ou une tablette connecté(e) au
réseau WiFi.
a) Installer l’application Cabasse Stream Audio
Control sur la tablette et/ou le smartphone
depuis “Play Store” pour un appareil Android
ou “App store” pour un Mac.
b) Mettre le Stream Source sous tension (et
appuyer sur le bouton RESET s’il y a eu une
connexion précédente à un autre routeur),
activer le mode WiFi dans l’application “paramètres” du smart phone ou de la tablette.
3 SOLUTIONS TO CONNECT
STREAM SOURCE TO THE WIFI
(WLAN) NETWORK :
1 - WPS CONNECTION: push the WPS
button of the wireless router for minimum
2 seconds and push the WPS button of the
Stream Source within around 2 minutes (check
for precise delays in the router's manual) .
The connection is completed when the blue
LED "WiFi CONFIGURATION" is on. Now go
to page 21 for the installation of the Cabasse
application.
2) EASY WIFI CONNECTION with the
Cabasse Stream Audio Control app & with
a smartphone or tablet WiFi connected to
the domestic network.
a) Install the Cabasse Stream Audio
Control App on an Android or Mac tablet
or smartphone from “Play Store” or “App
Store”.
b) Switch the Stream Source on and press
the reset button if previously connected
to another router. Activate the WiFi in
the “settings” application mode of the
smartphone or tablet.
c) Sélectionner Stream Source parmi les appareils disponibles et demander la connexion.
d) Une fois la connexion établie, ouvrir
l’application Cabasse. Une fois connecté à
Stream Source, choisir Stream Source parmi les
appareils Stream du réseau et suivre pas à pas
les instructions d'installation.
Note: vous pouvez lancer l’application
Cabasse dès la fin de la phase b), et continuer
le processus de connexion, l’assistant de
configuration apparaissant automatiquement
pour la première utilisation.
c) Select Stream Source among the available items and launch the connection.
d) Launch the Cabasse Stream app. Once
connected to Stream Source, select Stream
Source among the Stream items available
and follow the set-up instructions.
Note: from phase b), you may open
the Cabasse application and follow
the instructions of the wizzard set-up,
which is launched automatically when
connecting for the first time.
6
Page 7

e) Vérifier que la diode bleue WiFi à
l’arrière du Stream Source clignote.
e) The WiFi blue LED on the back
of Stream Source flashes for 30
seconds.
f) La diode bleue WiFi est fixe :
appuyer sur “Fermer la Page” : Stream
Source est prêt à lire les fichiers audio
partagés de votre réseau ou les radios
web proposées par vTuner.
3 - CONNEXION MANUELLE avec
l'utilisation d'un ordinateur avec WiFi,
d'un smartphone ou d'une tablette.
a) Mettre le Stream Source sous tension
et ouvrir la fenêtre configuration réseau
WiFi de l'ordinateur (ou smart phone,
tablette):
b) Sélectionner Stream Source parmi
les réseaux disponibles et demander la
connexion.
c) Une fois la connexion établie, ouvrir
votre navigateur Internet, entrer
http://192.168.0.
d’adresse et valider.
d) Choisir parmi les réseaux
disponibles celui correspondant au
serveur à connecter avec le Stream
Source (ici "Belkin221")
1 dans la barre
:
f) The WiFi blue LED stops flashing
and remains on: press on “Close
This Window”: Stream Source is
now ready to play all the shared
audio files in your network as well
as all the web radios proposed by
vTuner.
3 - MANUAL CONNECTION with
a WiFi fitted computer, a smartphone
or a tablet:
a) Turn Stream Source on and open the
WiFi network configuration window of
the computer (or smartphone, tablet).
b) Select Stream Source among
the available networks and ask for
connection.
c) Once the connection is completed,
open a web browser, enter and
validate in the search window:
http://192.168.0.1
d) Select among the available networks
the one of the router to be connected
to Stream Source (here "Belkin 221")
e) Entrer et valider le code de sécurité fourni
avec le routeur : la diode
"WiFi configuration" clignote.
f) La connexion est établie quand la diode
passe au bleu fixe. Stream Source fait
maintenant partie de votre réseau WiFi.
Fermer le navigateur et continuer à la page 14
par l'installation de l'application Cabasse.
e) Enter and validate the security
code for the router : the “WiFi
configuration” LED flashes.
f) The connection is completed
when the blue LED stops flashing
but remains on. Stream Source is
now part of your wireless network.
Close the browser and jump to
page 21 for the installation of the
Cabasse application.
7
Page 8

e n g l i s h
Thank you very much for choosing Cabasse speakers.
Please read these instructions carefully before setting up your speakers.
SAFETY INSTRUCTIONS
Explanation of graphical
symbols -
triangle, is intended to alert you
to the presence of uninsulated “dangerous voltage” within the
product’s enclosure that may be of sufficient magnitude to
constitute a risk of electric shock to persons.
The exclamation point within an equilateral triangle
is intended to alert you to the presence of important
operating and maintenance (servicing) instructions in the literature accompanying the appliance.
The lightning flash
with arrowhead symbol,
within an equilateral
Instructions - Carefully read through all the safety and ope-
rating instructions before switching on any device for the first
time.
Keep these instructions in mind - They will be constant-
ly referred to through this manual.
Pay special care to warnings - All the warning labels on
the product or warning notes in the user’s manual must be
followed.
Follow the instructions - Follow carefully all the installa-
tion and operation instructions.
Cleaning - Always remove the power cord before cleaning
the device. Do not use cleaning solvent, whether liquid or air
spray. Using a soft damp cloth is recommended.
Accessories - To avoid incidents, only use accessories ex-
pressly recommended by Cabasse.
Water and moisture -
damp or wet locations, such as humid basements, next to a
bathtub, sink, swimming pool or any other similar conditions.
The product shall not be used in
Carts and Stands - The appliance should be
used only with a cart or stand that is recommended by the manufacturer.
> Portable cart warning
Installation on a piece of furniture and stands - Do
not place this device on an unsteady surface, i.e. a stand, tripod, table, shelf, etc. It may fall and cause serious injury to a
nearby child or adult.
Ventilation outlets - The device shall not be placed in a
position that restrains the operation of its fans. Avoid installing the device on a bed, couch, blanket or other similar
surfaces that may prevent the appropriate air flow. Do not
install the device in a confined space, such as a book shelf
or other piece of furniture, that could prevent sufficient air
from flowing freely.
Power - The device shall only be connected to a source of
power compliant to the one described in this manual or on
relevant printed labels on the product. If you are not sure of
the type of power available, please contact your reseller or the
local power company.
Power cords - The power cords must be laid out in such
a way that they cannot be walked on, pinched, bent under
other devices. Also pay special attention to the matching of
the plugs and the connection of the cord to the device.
Lightning - For better protection against lightning or if the
device must remain unused for long stretches of time, unplug
the power adaptor from the mains. This minimizes potential
damages due to lightning or line surges.
Overloads - Avoid overloading the power plugs, extension
cords or power relays. This could result in fire or electric
shocks.
Foreign bodies and liquids - The apparatus shall not be
exposed to dripping or splashing. Objects filled with liquids,
such as vases, shall not be placed on the apparatus. Avoid
letting foreign materials or liquids enter the device. They
could cause fire or electric shocks. Never spill any liquid on
the device.
Maintenance - Users must never attempt to maintain the
device on their own, except for those maintenance operations
described in this manual. Any task beyond regular user maintenance must be performed by qualified service operators.
Troubleshooting - You must unplug your device from the
power supply and have it checked by a qualified technician if:
The power supply or the plug is damaged.
Foreign bodies or liquid penetrated the device.
The device was exposed to dripping or splashing.
The device does not seem to work correctly under normal
operating conditions. Only operate the controls described
in this manual. Any other operation could damage the de-
vice and require on-site visit of a qualified technician.
The device has fallen or its housing is damaged.
The performances of the device are strongly altered.
Spare parts - If spare parts are needed to repair the device,
make sure that the technician followed the manufacturer’s recommendations or that the replacing parts feature the same
specifications as the original ones. Non-compliant parts can
result in multiple damage, including fire or electric shocks.
Checks - After any servicing of the device, ask the technician
to perform appropriate testing to make sure that the device
works safely.
Exposure to high temperatures - The apparatus has
been designed for use in moderate climates. It should be kept
away from heating sources, such as radiators, heaters, amplifiers or any other similar item likely to make the operating
temperature rise excessively.
Applicable for USA, Canada or where approved for usage
Caution ! To prevent electric shock, match wide blade plug to wide
slot, insert fully.
16
Page 9

UNPACKING
Open carton flaps; remove all the components. If the speakers or the subwoofer appear damaged, do not use them.
Repack everything in the original packing and contact your
authorised Cabasse dealer immediately. We suggest you to
retain the packing for future use.
SETTING UP
THE COMPONENTS OF YOUR SYSTEM 1
1 Stream Source, 1 external power supply with socket
adaptors, 1 optical cable, 1 RCA-RCA stereo audio cable,
1 remote control, 1 manual and one warranty card.
INSTALLATION 5
Place Stream Source close to or on the amplifier it will be
connected to.
It should be placed if possible at eyes level for easy vision
of the LEDs, with enough room above it for good WiFi and
Bluetooth transmission and for a smartphone to brush
against the FNC patch for instant Bluetooth connection.
:
:
CONNECTION TO THE AMPLIFIER
Use the supplied optical cable if your amplifier is fitted with
a high-end up to date digital to analog converter.
Connect otherwise the analog RCA output of Stream Source
to an analog input (CD, DVD, Tuner, Aux, Tape..) of the
amplifier
Select the appropriate source on the front panel of the
amplifier.
Connection to a power amplifier: use the analog output
when the power amplifier is not fitted with a volume control.
Mount the appropriate male plug on the power supply,
connect the power supply first to the Stream Source then
to the mains. After around 40 seconds initialisation, the
"POWER" LED
Source is ready to play.
1
turns from red to green and Stream
ATTENTION ! The level of the digital outputs being fixed,
only the volume control and the remote control of the amplifier must be used for the adjustment of the sound level
ATTENTION ! the analog output of Stream Source being variable, azdjust bthe sound level with the Stream remote control and the ""+ and
"-" keys of Stream Source.
If you need the level of the analog output to remain fixed, select the
"OFF" position for the VOL ON/OFF switch on the back of Stream
Source.
ON / OFF
Stream Source is designed to remain powered on with minimum consumption for instant access with the Cabasse app.
GREEN POWER LED: Stream Source is active
RED POWER LED: Stream Source is under initialisation or
software update.
DUL POWER LED: Stream Source is not powered and needs
to be connected to the mains.
When you do not use Stream Source, press the (1) key of
the remote control to switch the LEDs off for discretion and
improved energy saving.
USE OF STREAM SOURCE WITH CONTROL
KEYS AND THE STREAM REMOTE CONTROL
1
Control LEDs on/off: available only on the Stream remote
control
2 3 4
VOL "+" and "-", Mute keys: theses functions are
available only when the VOL ON/OFF switch is ON and when
the analog output of Stream Source is being used.
5
and 6 WiFi DLNA source: fast forward and backward wit
5 seconds jump each time a key is being pressed.
Bluetooth source: press to select previous or next track when
playing an album or a playlist.
8
Sources selection: press this key to select the Bluetooth
9
source (
blue LED) or the WiFi source (9 orange LED).
CAUTION ! The main plug used to power the system
should remain easy to reach for rapid unplugging of the
device and its external power adaptor.
17
Page 10

e n g l i s h
BLUETOOTH CONNECTION TO AN
ANDROID TABLET
- If not already done, activate the Bluetooth Function in the
« Settings » menu of your tablet by pressing on the ON-OFF
switch.
- Press “Scan for devices” and select « Cabasse Stream
Source » among the available devices.
Stream Source is now paired with the tablet. Push on
« Cabasse Stream Source » to launch the connection.
The connection is now launched. If the message « Connection.. » does not show up, stop the running Bluetooth
connection with another device, either through the set
up menu of the device either by switching off and on the
Stream Source. Press on « Cabasse Stream Source » again.
Your Stream Source is now connected.
To play on Stream Source the audio files stored in the tablet
(or smartphone), open the audio player application, select
a file and press on “play”.
If Stream Source remains silent, first check that the main volume of the tablet (or smartphone) is not down to zero level
and that « mute » is off. Adjust the volume on maximum
level in the player’s application and finally raise the volume
of the Stream Source with the Stream remote. Finally select
« Bluetooth » as the active source on Stream Source pressing
the « 8 » key of the Stream remote until the blue LED flashes.
18
Page 11

BlUETooTH ConnECTIon To An
APPlE CoMPUTER
1) BLUETOOTH MODE ACTIVATION
Connection completed. Stream Source is now paired with
your Mac computer.
Connect the Stream Source to mains to power it on. Stop any
Bluetooth connection of the Stream with any other item.
Activate the Bluetooth function : open the « apple » menu and
select « Systems Preferences ».
Select « Bluetooth » in the window for the « Systems Preferences ».
Select « On » and click on « Set Up New Device”
2) SELECTION OF THE AUDIO OUTPUT DEVICE
To enjoy the musics stored on you Mac with Stream Source, set
up Stream Source as your audio output device in the “System
Preferences” menu.
Select « Sound » in the « Hardware » section.
Select « Stream Source » in the list of items and click on
“Continue”
Connecting…
Select « Stream Source » in the « Output » tab.
Set the volume control on far right position.
Close the “Sound” window.
If the Stream Source is on stand-by mode, it will take around
6 seconds to start playing, the Bluetooth input being automatically selected. Use the Stream remote control to adjust the
sound level.
If Stream Source is active and connected to another active
source (WiFi, analog or optical digital) use the Stream remote
control and select the Bluetooth input with the
adjust the sound level.
8
key, then
19
Page 12

e n g l i s h
InTEGRATIon oF sTREAM soURCE To
THE HoME WIFI-lAn nETWoRK
A) CONNECTING Stream Source TO THE HOME DLNA
NETWORK
Be insured that Stream Source does belong to your WiFi
network (see page 9 if not). The smartphone or/and the
tablet to be used with the Cabasse Stream application must
be also WiFi connected to the same network.
B) INSTALL OF THE CABASSE APPLICATION
The Cabasse Stream applications are available for free on
Google Store for the Android versions and on the App Store
for the iPhone and iPad versions.
You are free to install the application on several devices and
use them to drive one single Stream Source or several ones.
IMPORTANT: the Cabasse Stream application can be opened
only if minimum one Stream Source or another audio player
based on the Awox-Cabasse application is within reach.
Download and install the application for your
tablet or smartphone. Launch the application
with a push on the white Cabasse icon displayed.
2 lines must appear under the rotating
wheel on the start window of the application:
-
The confirmation of the WiFi connec-
tion: here “belkin.221”
- The confirmation that a Stream Source
system is being detect
ATTENTION: the application might
detect several players. If so select in “Settings/Audio Devices” the Stream Source
to be used as the default
audio device.
If no Stream Source is being detected during the launch of the
application the above window will be replaced by a warning
signal. Check that the Stream Source is powered ON (Power
LED green enlightened) or on “FULL AUTO” stand-by mode
(Power LED red enlightened).
C) LAYOUT OF THE CA
“Music” tab : it lists all the available storage devices (Digital Media Servers):
-
In any case the sub-tabs “My Play-list”, “Stream Source xx...”
and “Local Music”,
- Other connected DMS such as shown her
o a Mac computer with a DLNA server (here from Twonky)
o
a multimedia hard disk: here named MyBookLive and
others when connected to the network:
o a USB stick connect
o a PC under Windows 7 or 8
o a USB stick or a hard-disk directly connected to Stream 1
ed
BASSE STREAM APPLICATION
The ap
quick access to all the audio
sources available in the
network.
The 4 main tabs are:
ed to the router
plication gives a
e above:
“Play” tab: it displays either the list view or the gra-
phical view all the song queue. Click on the “Play”
tab to switch from one display mode to the other.
The graphical view shows one song only. Swipe left or right to
go up and down the queue.
The current play graph is displayed when the graphic mode is
active. Click on the graph or grab and drag the indicator for
quick scanning.
“Settings” tab with 2 sub-tabs:
o
The Tablet or Phone sub-tab enables to choose in the View
Mode between “Graphical View” and “List View”, to rescan
al Media Servers in the network, to reset application set-
Digit
tings.
For a smartphone, the sub-tag "Incoming call" enables the following settings when the phone rings:
- do nothing: music continues to play at same level
- mute volume: the music continues to play but is muted
- pause: music is paused and start playing again once the call
has ended.
o
The Audio Devices sub-tab lists all the Stream Source sys
tems available in the network, enables the identification of the
default player and the renaming of the players.
“Information” tab: enables checking the current
version of the Cabasse Stream Application and
uploading of any available update.
D) NAVIGATION
The buttons on the bottom of
the application depends upon
the page displayed. Their use
in addition to the dir
by selecting tabs and sub-tabs eases the navigation.
Exit: press this button to exit the application. This button appears only at the highest level of browsing of any
sub-tab.
ATTENTION: if you don’t pause the current track before
exiting the program or shutting down the tablet or smartphone, the WiFi transmission of the files listed in the Queue
on the “Play” tab will carry on to the end of the list.
Back: press this button to navigate back to the previous
view
Home: press Home to return to the entry level of the
tab
Sound ON: press the button to Mute the sound
Mute: press the button to get the sound back on
Help: this button gives specific help and hints at each
level of navigation
ect access
-
If many media servers are connected, you might need to scroll
horizontally the icons’ window on top of the Music tab by
swipping left/right.
20
Page 13

E) « MUSIC » TAG: PLAYING SHARED TRACKS
Press on one sub-tab
to access to the shared
tracks. The available
categories easing the
access depend upon
the servers. Selecting
“All Tracks” gives access to all the shared
tracks in the server,
here a multimedia
player.
Press on the line of the
track for immediate
selection and play. This
opens the “Play” tag
and erases all the tracks previously listed on the “Play” tag.
Press the button on the right end of the track’s line to access
four options:
- Add to Queue: adds the track to the queue
- Add to Playlist: adds the track to the playlist named
- Create New Playlist:
allows creating a new
playlist. Name it with
the pop-up keyboard
and confirm. The selected track becomes
the first item of the
new playlist.
- Info: provides relevant data for the
track which the DMS
makes available
such as: Title, Artist,
Album, Genre, Date,
Duration, Bitrate.
F) «MUSIC » TAG: PLAYING WE
- Press the selected radio station for direct play
- Press the arrow on the right end of the line to get the play and
playlist options.
B-RADIOS
The Stream Source player
is also a radio server
thanks to the vTuner
application on board.
Other applications might
be added during auto
updates of the application’s software. Press the
Stream Source sub-tag
and select vTuner.
Select a radio the way
you would select a track
on the network:
G) « PLAY » TAG
This tag shows the song queue. If not deleted with a direct track
selection on the « Music » tag, this list remains unmodified even if
the tablet or smartphone hosting the application is switched off.
Use the 7 icons below the playback position:
Volume control: Press once to expose the current level. Grab
and drag the volume indicator to the desired position and
release. The volume control fades out after a few seconds
if not accessed. You can use this control or the one on the Stream
remote control simultaneously.
Pause: the current track is paused. Press the button to play-
back the track.
Play: press on this icon to stop playback and get to Pause
mode.
Starts playback at the next song in the Queue.
Starts playback at the previous song in the Queue.
Shuffle icon: when on (illuminated), all songs in the category
play randomly. If the icon is illuminated, press it to come
back to standard playback. Shuffle and continuous play cannot be
selected simultaneously.
Repeat icon. When repeat is on, all songs in category keeps
continuous playing from the beginning once the last song
is completed. If the icon is illuminated, press it to come back to
standard playback.
H) PLAYLISTS MANAGEMENT
Press the button on the right of the playlist’s line to get the pop-up
menu and select one of the 4 possible actions:
- Play: start playing the playlist immediately and replaces the currently plying queue.
- Add to queue: adds the playlist to the queue
- Rename: brings up a dialog bow that allows you to rename the
playlist (function not available for songs)
- Delete: delete the playlist or remove a song from the playlist. This
action requires reconfirmation before deletion.
21
Page 14

e n g l i s h
OPTIMISATION FOR USE WITH A TV-SET
Use the original TV remote control to select the following settings when available:
- TV loudspeakers disconnection: it avoids any risk of parallel
playing of the TV speakers with Stream Source. If this option
is not available in the TV set-up menu, lower the TV volume
control down to the minimum value.
- SPDIF delay : the SPDIF digital link offers the best audio quality. It may create a noticeable delay in the sound/image synchronisation. Use the “SPDIF delay” or the “Lipsync” option in
the TV set-up menu. “Lipsync” stands for lip synchronisation
and the best solution to calibrate the delay is to compare the
movements of the lips with the sound of the voice.
- Connection of additional sources : all video sources should
be, when possible, linked to the TV-set using HDMI inputs for
best video and audio results.
- Remote control(s): Use the Stream remote control for sound
and the original remotes of each source.
BATTERIES REPLACEMENT
Take the remote control in your hand with the keyside facing
the floor. Lift the locker and pull out the battery. Remove the
dead battery and replace it with a new CR-2025 battery. Dispose of the old batteries according to these instructions.
CAUTION: there is a danger of explosion if the battery is
incorrectly replaced. Replace only with the same or equivalent type. The battery shall not be exposed to excessive
heat such as sunshine, fire or the like.
AUTO UPDATE
The updates of the firmware for Stream Source are done automatically in 2 steps.
Step 1: download of the new version via internet. The “Power”
LED
1 flashes quickly. The Stream Source can play tracks.
Step 2 : install of the new version with a restart of the network
card.
The “Power” LED
comes back to green when the install is completed. The sound
is temporarily muted and comes back at default level (30%).
1 turns red for around 25 seconds and
ATTENTION: avoid shutting down the system during
update.
CLEANING
The Stream Source satellites and subwoofer may be cleaned
with a soft damp cloth. Do not use any sprays near the system
or allow liquids to spill into any openings. Also, do not use any
solvents, chemicals, or cleaning solutions containing alcohol,
ammonia, or abrasives.
FAQ
Looking for more information? Read our detailed answers to the
Frequency Asked Question on www.cabasse.com, page Stream
Source
CUSTOMER SUPPORT SERVICE
The Cabasse retailer network is at your disposal to ensure the
after sale service of your product. To get the list of Cabasse
retailers, contact us or consult our web site www.cabasse.com.
WEEE MARK
Disposal of Wastes of Electrical & Electronic
Equipment (Applicable in the European Union)
This symbol on the product, consisting of the crossed-out wheeled bin, indicates that this product
shall not be treated as household waste. Instead
it shall be handed over to the applicable collec-
tion point for the disposal of electrical and electronic equipment at the end of life. By ensuring this product is
disposed of correctly, you will help prevent potential negative
consequences for the environment and human health, which
could otherwise be caused by inappropriate waste handling of
this product. The recycling of materials will help to preserve natural resources. For more detailed information about recycling
of this product, please contact your local city office, your household waste disposal service or the shop where you purchased
the product.
22
Page 15

STREAM SOURCE
Digital inputs
- 1 DLNA input: either wired with RJ45 cable or WiFi
- 1 Bluetooth APTX input
- 1 USB input
Ouputs
External power supply
Power consumption
(with no USB item connected)
Available USB power supply
Useable temperature range
Storage temperature
Useable humidity range
Network:
Audio formats
(WiFi/RJ45)
Dimensions (h x l x p)
- 1 analog RCA
- 1 optical SPDIF 96 kHz/24 bits
Input: 100-240 V ~60/50 Hz, 0.5A
Output : 12 V DC, 1A
2.2W
5 V / 800 mA
+5 °C to +35 °C
-5 °C to +40 °C
40 % to 75 %
10/100Mb Ethernet
MAC & PHY
Wireless LAN 802.11b/g/n
WPS 2.0 security
Digital media renderer (compliant with DLNA 1.5)
WMA (WMA9, CBR,CBR, up to 320kbps)
PCM (16 bits-44.1kHz, 24 bits-44/48/96 kHz, .wav,
.aiff, .aif, .aifc files, HTTP streams)
AAC-LC (up to 320kbps), ALAC (.m4a)
FLAC (16 bits-44.1kHz, 24 bits- 44/48/96 kHz)
4 x 23.1 x 13.6 cm - 1.6 x 9.1 x 5.4 in
Weight
By following the above information, your Stream Source system is now properly set up and we hope you will enjoy your speaker system for many
years. We receive letters every day from customers expressing the ever growing satisfaction and musical emotion they have been getting with our
speakers over the years. These letters are our first motivation.
0.5 kg - 1.1 lb
23
Page 16

Cabasse SA - 210, rue René Descartes - BP 10 - 29280 Plouzané
Tel +33 (0)2 98 05 88 88 - Fax +33 (0)2 98 05 88 99
www.cabasse.com
GPO; CABASSE - NOT0338 - 1310
 Loading...