

Cabasse Cinesound Brochure
CinesounD SAT - Owner’s manual
ENGLISH
CinesounD PROFILE - Owner’s manual
www.cabasse.com

CONTENT 2
1. SAFETY INSTRUCTIONS 3
2. UNPACKING CINESOUND SAT 4
3. UNPACKING CINESOUND PROFILE 4
4. SETTING UP 5
5. POSITIONING YOUR CINESUB 5
6. POSITIONING THE 3 CINESOUND SAT SATELLITES 5
7. POSITIONING YOUR CINESOUND PROFILE SATELLITE 7
8. CONNECTIONS 8
TV SET + CINESOUND + DVD/DVDR PLAYER OR VCR 8
TV SET + CINESOUND + DECODER 9
OTHER: CD PLAYER, MP3 PLAYER, CAMCORDER… 12
TV SET + CINESOUND 8
TV SET + CINESOUND + DVD/DVDR PLAYER + VCR 9
TV SET + CINESOUND + DECODER + DVD/DVDR PLAYER OR VCR 10
TV SET + CINESOUND + DECODER (CANAL+…) + DVD/DVDR PLAYER + VCR 10
TV SET + CINESOUND + SATELLITE DEMODULATOR 11
TV SET + CINESOUND + SATELLITE DEMODULATOR + DVD/DVDR PLAYER OR VCR 11
OTHER: TV / CINESUB CONNECTION VIA RCA CABLES 12
9. SWITCHING ON YOUR CINESUB 13
10. PROGRAMMING YOUR TV OR UNIVERSAL REMOTE CONTROL TO OPERATE CINESOUND 13
11. CONTROLING THROUGH A PROGRAMMED REMOTE 14
12. ADJUSTING YOUR CINESUB 15
13. OFF/AUTO/ON POWER SWITCH 15
14. PLAYING A DVD OR VIDEO TAPE, LISTENING TO SOUND FROM YOUR DECODER
OR SATELLITE DEMODULATOR 15
15. THE 3DCLS EFFECT (3 DIMENSIONS CABASSE LIVE SOUND) 16
16. TROUBLESHOOTING 16
17. TECHNICAL SPECIFICATIONS 19
18. CLEANING THE SPEAKERS 19
19.
AFTER SALE SERVICE 19
2

Thank you very much for choosing a CABASSE CINESOUND system.
CINESOUND is a Cabasse innovative solution, providing your screen with a grandiose Hi Fi or 3DCLS (“3 D Cabasse Live
Sound”) live sound.
The 3DCLS processor produces a Home Cinema surround effect without the need for rear speakers and enables several
people to experience the outstanding quality of Home Cinema sound, whatever the physical conditions.
This system is really easy to install and use. Once the connections are made, simply program your TV or universal remote
control to operate your CINESOUND, so that you can control everything using a single remote.
CABASSE CINESOUND enables you to reproduce sound from any audio source (CD, DVD, VCR, CAMCORDER, MP3…) and
benefit from a high quality listening experience by Cabasse.
Please read this manual carefully to get the best possible installation. Once you have read it, keep this manual in a safe
place for future reference. Depending on your country or region, your power plug and socket can differ from the one
represented on the drawings, but the connection and operation of CINESOUND remain the same as indicated.
1. SAFETY INSTRUCTIONS
1/ Instructions - Carefully read through all the safety and operating instructions before switching on any device for the first time.
2/ Keep these instructions in mind - They will be constantly referred to through this manual.
3/ Pay special care to warnings - All the warning labels on the product or warning notes in the user’s manual must be followed.
4/ Follow the instructions - Follow carefully all the installation and operation instructions.
5/ Cleaning - Always take off the power cord before cleaning the device. Do not use cleaning solvent, whether liquid or air
spray. Using a soft damp cloth is recommended.
6/ Accessories - To avoid incidents, only use accessories expressly recommended by Cabasse.
7/ Water and moisture - The product shall not be used in damp or wet locations, such as humid basements, next to a
bathtub, sink, swimming pool or any other similar conditions.
8/ Installation on a piece of furniture and stands - Do not place this device on an unsteady surface, i.e. a stand, tripod, table,
shelf, etc. It may fall and cause serious injury to a nearby child or adult.
9/ Ventilation outlets - The device shall not be placed in a position that restrains the operation of its fans. Avoid installing the
device on a bed, couch, blanket or other similar surfaces that may prevent the appropriate air flow. Do not install the device
in a confined space, such as a book shelf or other piece of furniture, that could prevent sufficient air from flowing freely.
10/ Power - The device shall only be connected to a source of power compliant to the one described in this manual or on
relevant printed labels on the product. If you are not sure of the type of power available, please contact your reseller or the
local power company.
11/ Power cords - The power cords must be laid out in such a way that they cannot be walked on, pinched, bent under other
devices. Also pay special attention to the matching of the plugs and the connection of the cord to the device.
12/ Lightning - For better protection against lightning or if the device must remain unused for long stretches of time, unplug
the power cord and antenna jack. This minimizes potential damages due to lightning or line surges.
13/ Overloads - Avoid overloading the power plugs, extension cords or power relays. This could result in fire or electric shocks.
14/ Foreign bodies and liquids - Avoid letting foreign materials or liquids enter the device. They could cause fire or electric
shocks. Never spill any liquid on the device.
15/ Maintenance - Users must never attempt to maintain the device on their own, except for those maintenance operations
described in this manual. Any task beyond regular user maintenance must be performed by qualified service operators.
16/ Troubleshooting - You must unplug your device from the power supply and have it checked by a qualified technician if:
- The power supply or the plug is damaged.
- Foreign bodies or liquid penetrated the device.
- The device was exposed to dripping or splashing.
- The device does not seem to work correctly under normal operating conditions. Only operate the controls described in this
manual. Any other operation could damage the device and require on-site visit of a qualified technician.
- The device has fallen or its housing is damaged.
- The performances of the device are strongly altered.
17/ Spare parts - If spare parts are needed to repair the device, make sure that the technician followed the manufacturer’s
recommendations or that the replacing parts feature the same specifications as the original ones. Non-compliant parts can
result in multiple damages, including fire or electric shocks.
18/ Checks - After any servicing of the device, ask the technician to perform appropriate testing to make sure that the
device works safely.
19/ Exposure to high temperatures - The device should be kept away from heating sources, such as radiators, heaters,
amplifiers or any other similar item likely to make the operating temperature rise excessively.
ENGLISH
3
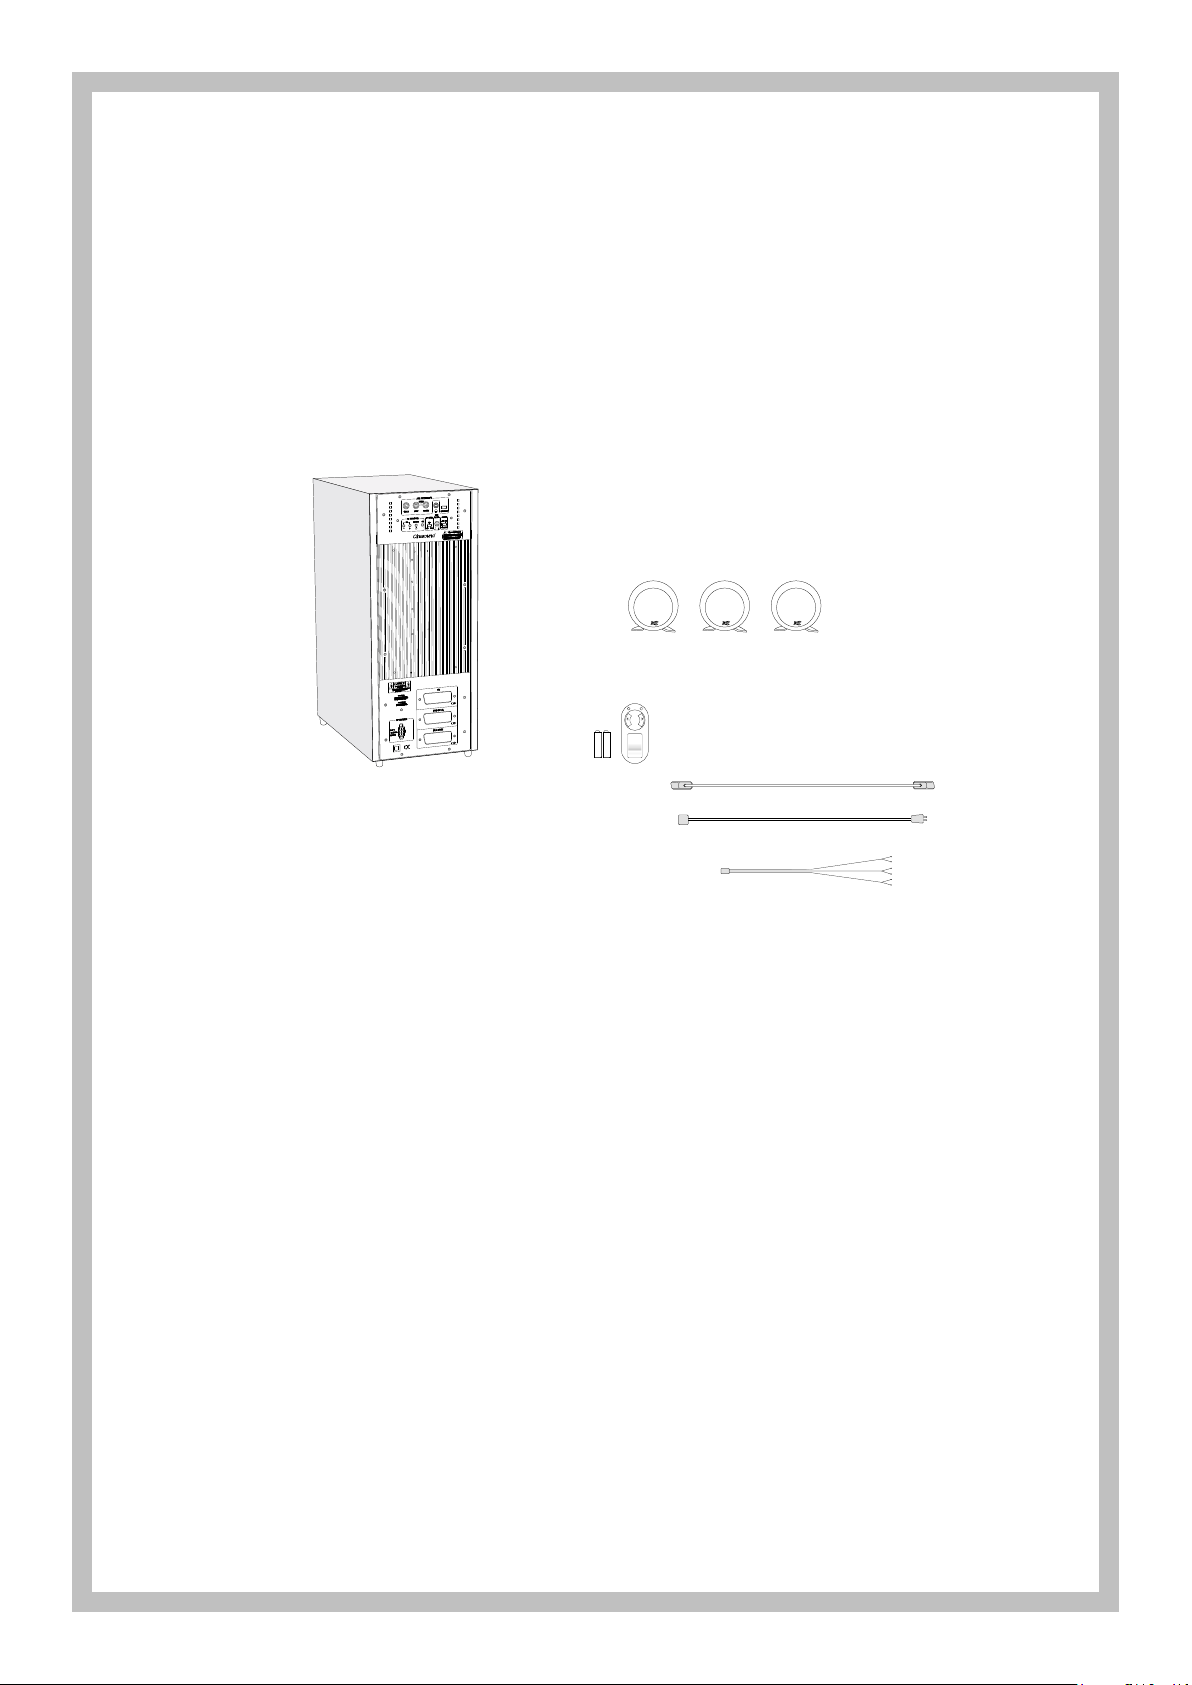
2. UNPACKING CINESOUND SAT
CinesounD SAT
CINESUB
Make sure that all supplied accessories are in the box.
CINESUB - 1 CINESUB active subwoofer with a built-in audio preamplifier and multimedia processor
- 1 scart cord with male/male 21-pin connectors
- 1 power cord
- 1 CINESOUND remote control in case your existing remote cannot operate CINESOUND
after the learning process.
- 2 AAA 1.5V batteries
- 1 owner’s manual
- 1 guarantee certificate
SAT - 3 satellites fitted with 2-way coaxial speakers by Cabasse
- 1 speaker wire with an end-connector to plug into CINESUB. The other 3 end-plugs are to be
connected to each satellite (left, center and right).
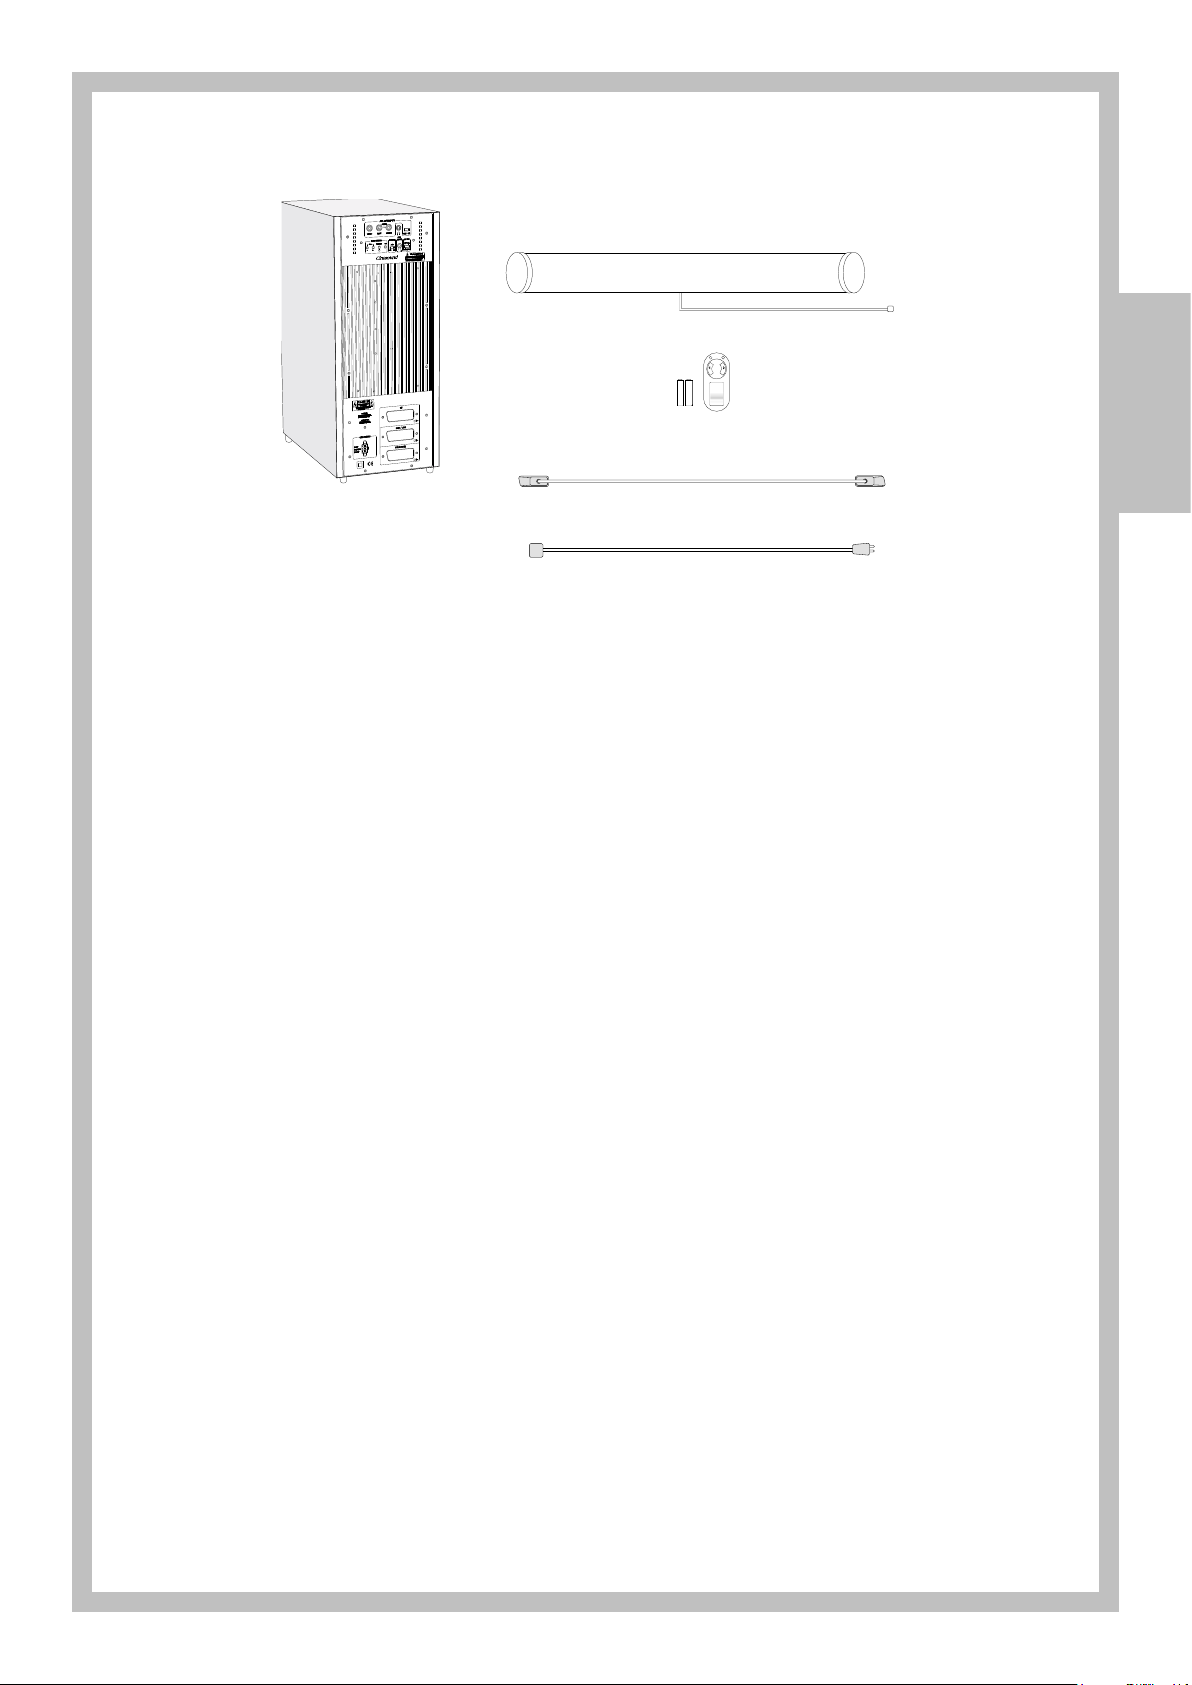
3. UNPACKING CINESOUND PROFILE
Make sure that all supplied accessories are in the box.
CINESUB - 1 CINESUB active subwoofer with a built-in audio preamplifier and multimedia processor
- 1 scart cord with male/male 21-pin connector
- 1 power cord
- 1 CINESOUND remote control in case your existing remote cannot operate CINESOUND
after the learning process.
- 2 AAA 1.5V batteries
- 1 owner’s manual
- 1 guarantee certificate
PROFILE - 1 PROFILE satellite fitted with 2-way coaxial speakers by Cabasse and 1 speaker wire to connect to
CINESUB.
- 1 black front grill
To remove the grey front grill and to replace it by the black front one, you just need to remove (by the back) one
of the caps located on the each side of the PROFILE, slip and withdraw delicately the grey grill by the side, then
delicately slip the black grill in the place of the grey grill, and finally fix the cap on the section.
4
CinesounD PROFILE
CINESUB
4. SETTING UP
When deciding where to place your system, make sure to select a firm, level surface, properly secured to prevent rocking.
Do not put it:
- Close to a tape player or any device that generates magnetic fields or sound disturbances
- In direct sunlight
- In a damp place
- Where exposed to extreme temperatures
- In locations subject to vibrations or other abnormal movements
- In highly dusty, smoky, or greasy rooms (i.e. kitchen)
5. POSITIONING YOUR CINESUB
Before connecting your CINESUB, make sure the power switch is on the ON position and that the power cord of the device
is taken off the wall socket.
Never use damaged cables as they may cause electrical contacts and shocks, which could permanently damage your
system.
When installing your CINESUB subwoofer, make sure there is enough space (at least 10cm) on the electronics side of the
cabinet to provide for the free flow of heat. Otherwise, water may condense inside the cabinet and alter the performance
of the device or damage it. Do not place objects on top of CINESUB.
Do not cover it, either with any fabric or other material. Anything that prevents air from flowing through the ventilation outlets
will make the temperature rise inside the device, and might result in failures or fire.
Place CINESUB to the right or left of your screen, facing you or in profile. The side of the CINESUB woofer covered by a grille
should not be positioned against a wall or other surface in order to support appropriate diffusion of low frequencies. CINESUB
is fitted with 2 infrared LEDs (signal receivers), one on the front and the other on the right side (the loudspeaker side). These
LEDs allow the device to understand any signal transmitted by your remote control.
ENGLISH
6. POSITIONING YOUR CINESOUND SAT 3 SATELLITES SET
Place all 3 satellites around your screen: one on the left, one in the middle (on top of or under the screen) and one on the
right of your screen. Both the left and right satellites (on each lateral side of the screen) should be at the same distance from
the center of the screen.
The satellites can be placed on shelves or on top of your screen, or wall-mounted using supplied wall brackets.
To mount the satellites onto the wall, simply unscrew their stands and mount them on the wall brackets, once these are
securely held onto the wall. For aesthetic purposes when using the wall-mounted system, connection cables can pass
above or inside the fixing.
5
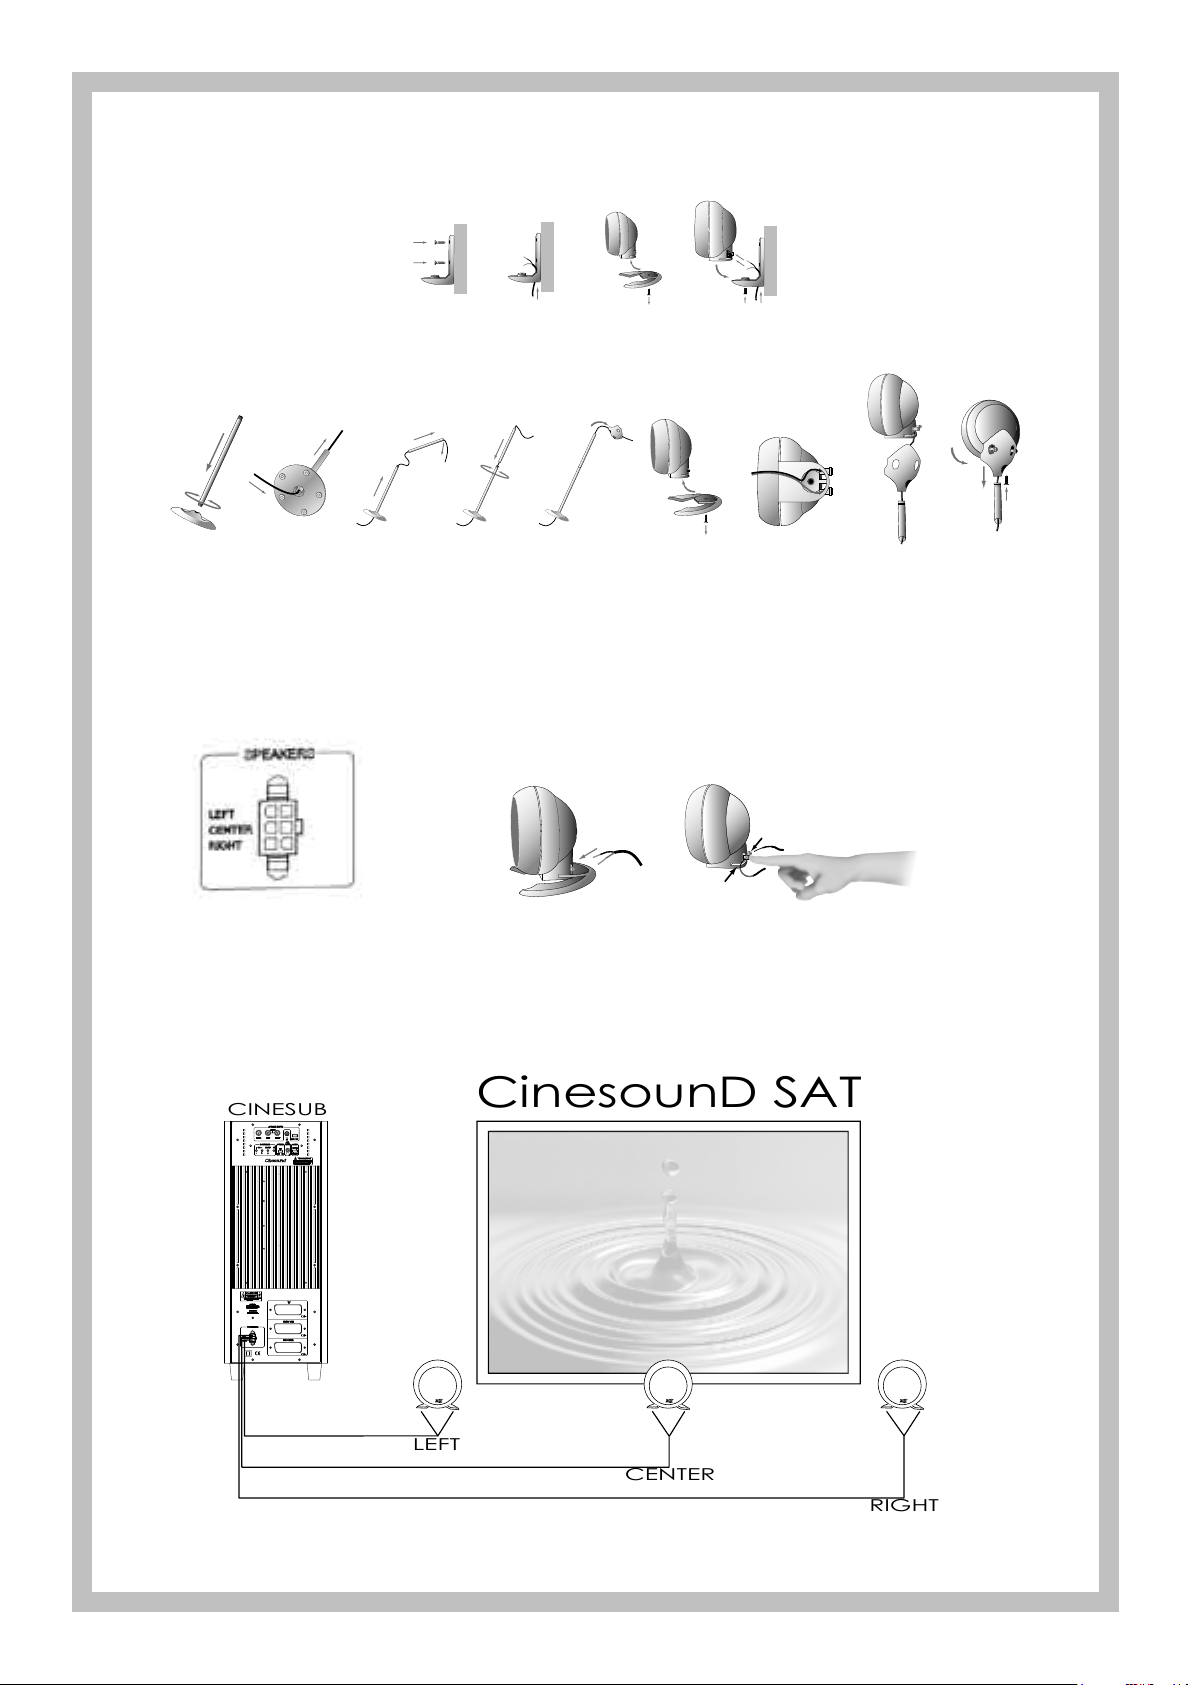
Both left and right satellites can be mounted on stands (sold separately).
CinesounD SAT
CINESUB
CENTER
LEFT
RIGHT
Make sure the satellites are positioned in a secure and stable way. Thus, you get enhanced sound quality, but you also
mitigate the risks of potential damage or injury resulting from the displacement or falling of the satellites in case of external
shocks, such as earthquakes.
Then connect each satellite to its corresponding output, as indicated by the printed labels near the SPEAKERS outlet of
CINESUB: Left, Center and Right.
When connecting the satellites, pay special attention to phasing: connect the speakers red cords to the +/red terminals of
the satellites. Proceed then in the same way for the -/black terminals.
Make sure the wires of the stripped-off satellite cord are tightly twisted together and properly plugged into the satellite’s
terminal.
6
 Loading...