

Bushnell TRKR H225L User Manual
User Guide
Made in China • Printed in China
ONE YEAR LIMITED WARRANTY
This Bushnell® product is warranted for a period of
1 year from the original date of purchase against
any defects in materials or workmanship. At the
discretion of the manufacturer, they may provide
replacement parts to original purchaser. Original
receipt or proof of purchase, as well as confirmation
of the defect is required. The manufacturer will not
be responsible for shipping costs incurred outside
the continental USA. Warranty is valid for the original purchaser one year from the date of purchase
and is not transferable. This Warranty does not cover
any product purchased through non-authorized
dealers and/or online auction websites.
This Warranty Does Not Cover
This 1 Year Limited Warranty does NOT cover normal
wear and tear, abuse or misuse of this product.
All replacement products or parts will assume the
remaining warranty of the original product. This
warranty gives you speci c legal rights. You may
also have other rights which vary from state to state.
This Bushnell® product is made under license by
Insight 2 Design, Inc.
To Obtain Warranty Service
Call Toll Free 1-888-774-5840 for warranty
service or product questions. Mon-Fri, 8:00 a.m.
– 5:00 p.m. Central Time
Insight 2 Design, Inc., Overland Park, KS
IMPORTANT INFORMATION
1. Operating time for your Bushnell® TRKRTM H225L
Headlamp depends on continuous or intermittent use.
Intermittent operation extends the run time of the batteries.
2. The LEDs are a lifetime light source. They will never need to
be replaced.
3. Do not leave discharged batteries in the Bushnell® TRKRTM H225L Headlamp. This
could lead to permanent damage to the headlamp.
4. Do not mix old and new batteries. Do not mix alkaline, standard (carbon-zinc), or
rechargeable (NiCad or NiMH) batteries.
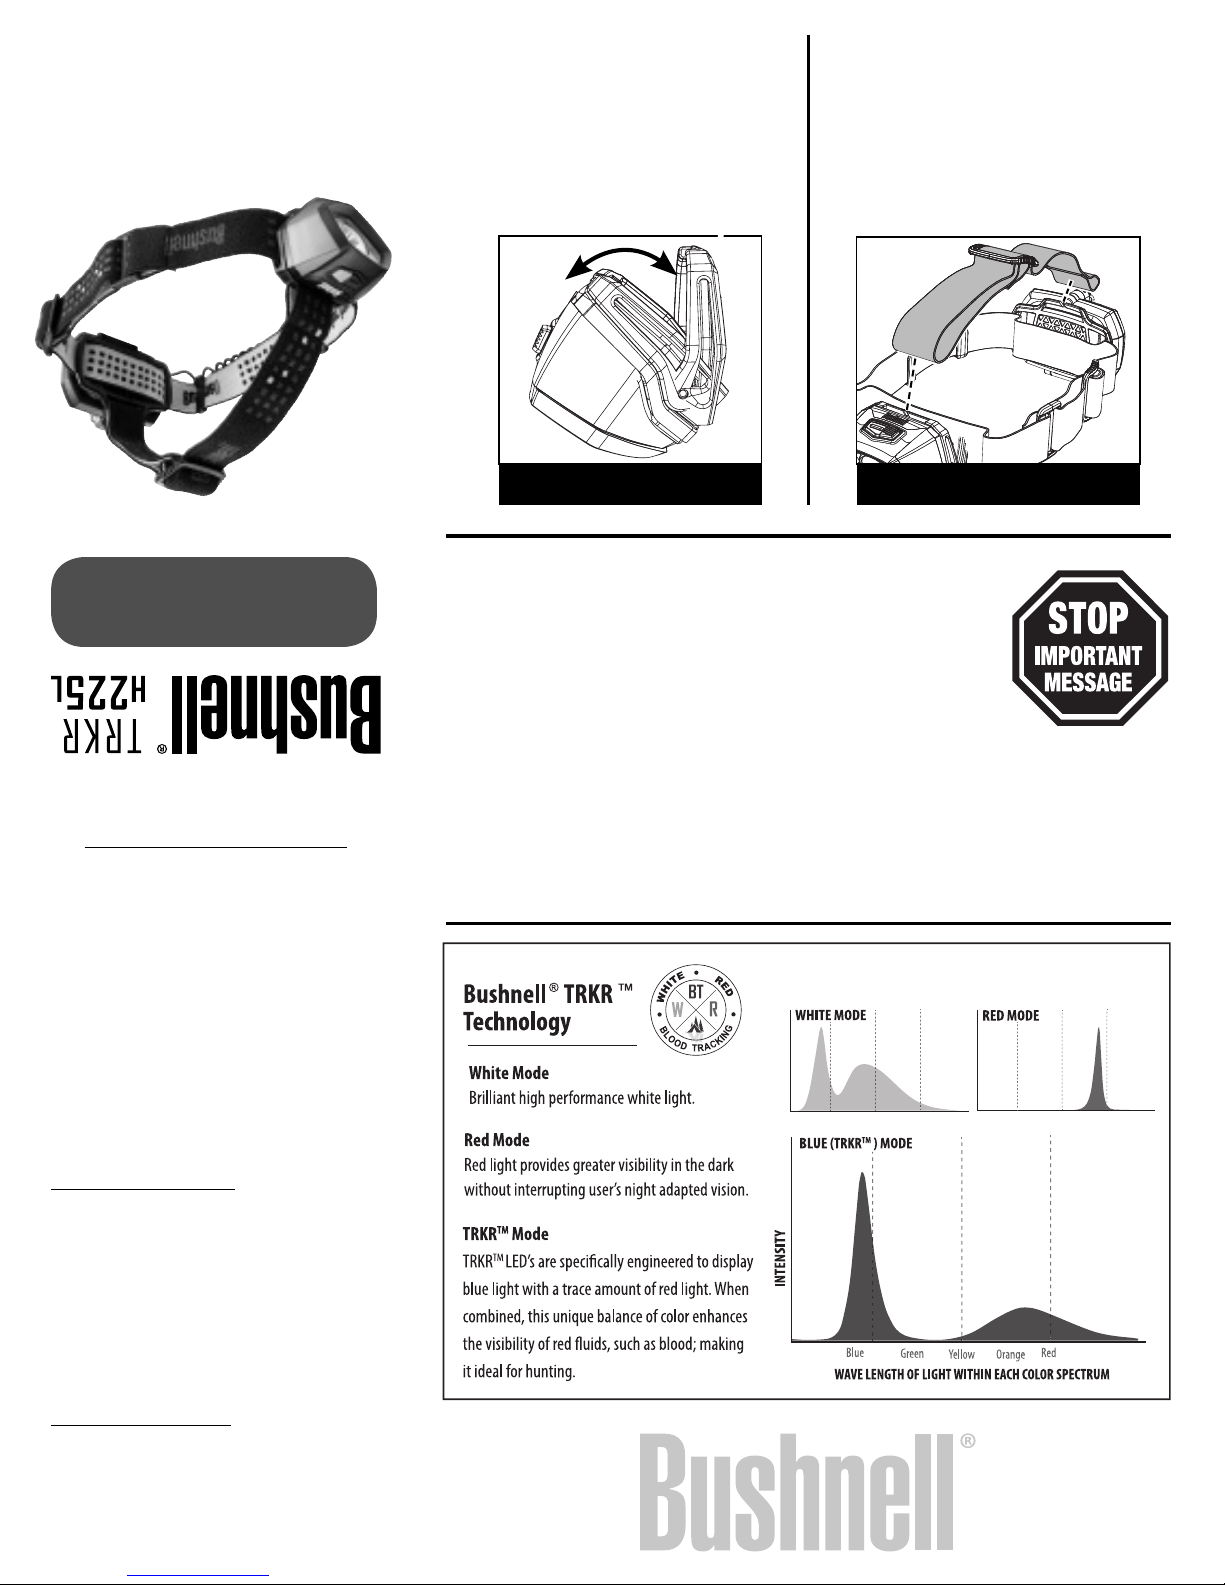
Aim Adjustment
Your Bushnell® TRKRTM H225L Headlamp
is equipped with a self-locking, fourposition aim adjustment feature.
1. Grasp sides of headlamp and rotate
to desired position. (Fig. 5)
FIG. 5 FIG. 6
Removable Top Strap
1. Remove strap from front and back
through the slots in the plastic
guides. (Fig. 7)
NOTE: Store top strap in a safe place and
reattach when needed or before storing.
TM
Carefully read all instructions before
use and save for future reference.
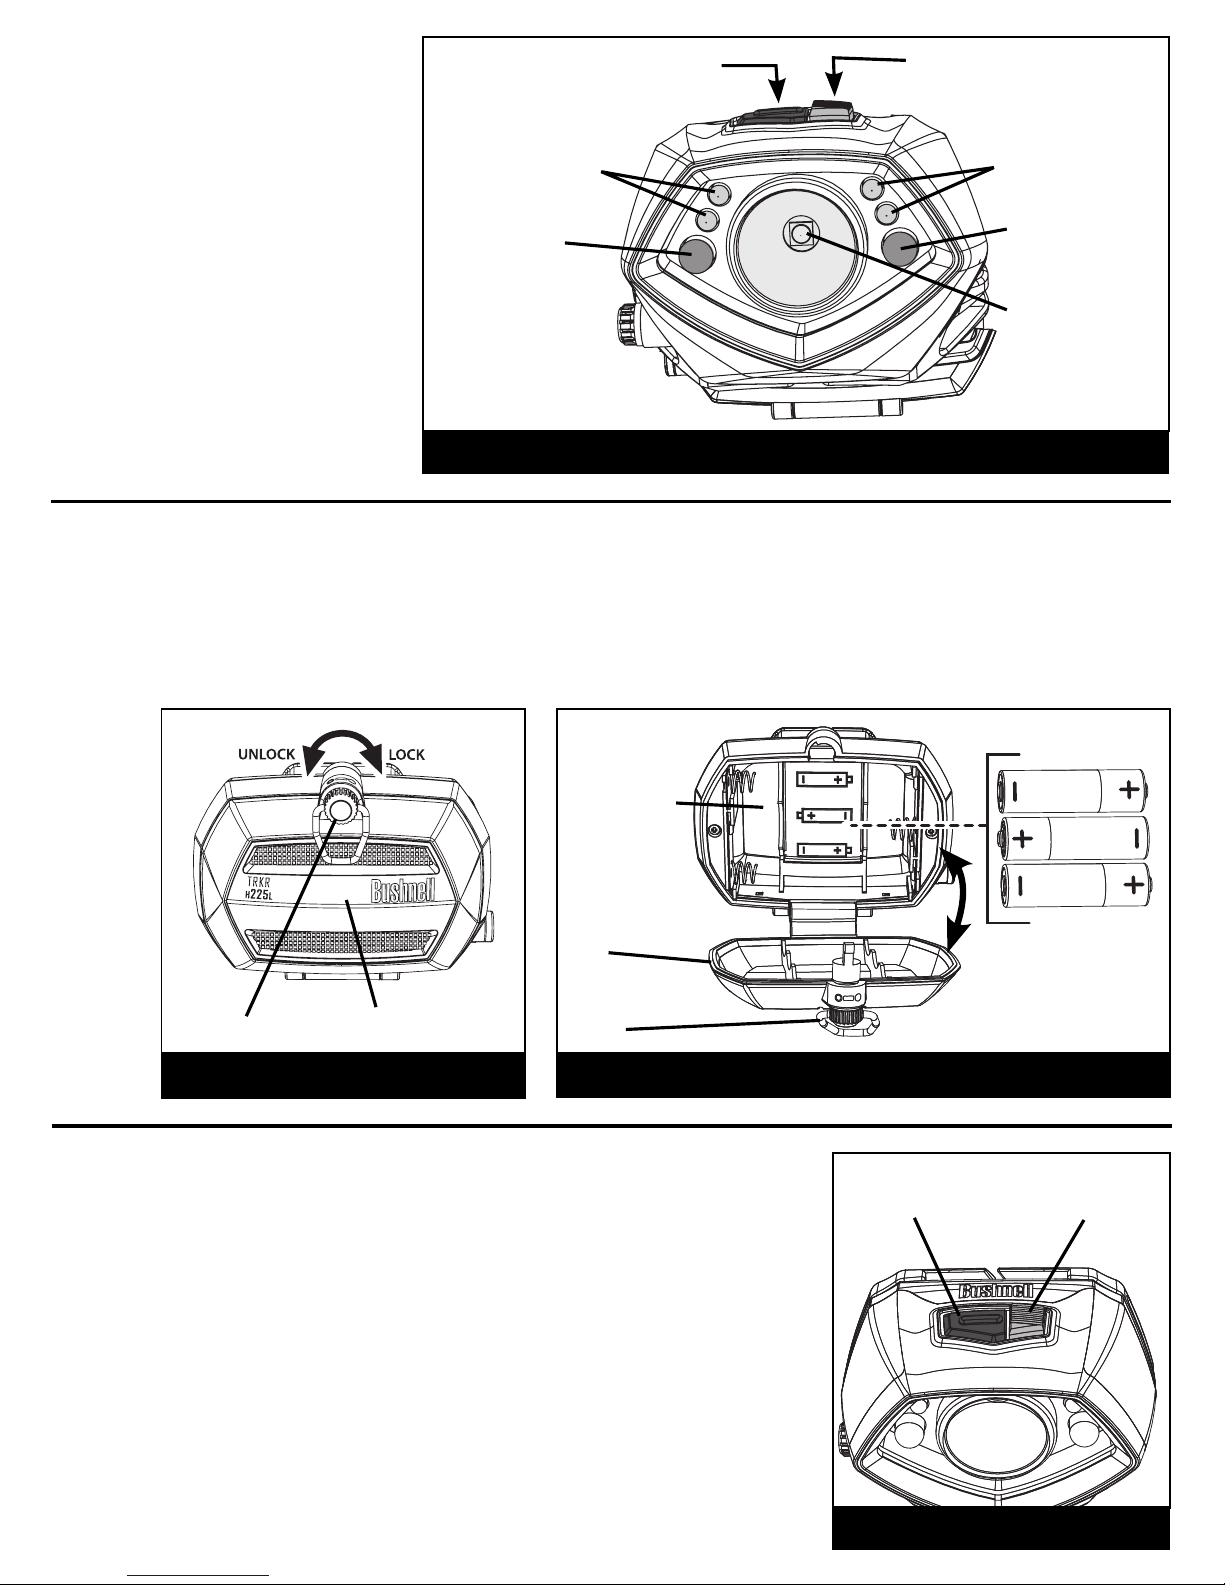
The diagram (Fig. 1) will help you
locate and identify various features
and functions used in the User Guide
of your Bushnell® TRKR
TM
H225L
Headlamp.
TO INSTALL OR REPLACE BATTERIES IN BATTERY PACK
Your Bushnell® TRKRTM H225L Headlamp operates on 3 AA batteries.
1. Turn Latch 1/4 turn counterclockwise and open lid. (Fig. 2)
2. Install AA batteries in the correct orientation as shown. (Fig. 3)
3. Close the lid and rotate Latch 1/4 turn clockwise to the locked position.
FIG. 3
Latch
Battery Pack
Lid
FIG. 1
White Spot Light
Red Light
Push Black Button for Spot Light
High – Low – O
Red Light
Blue TRKRTM Lights
Blue TRKRTM Lights
Push Orange Button
Red Light – TRKR
TM
Light – O
FIG. 2
Latch
Battery Pack
Your Bushnell® TRKRTM H225L Headlamp has easy access multiple switch functions: Black
Button Switch for center White Spot Light, Orange Button Switch for Red Light mode to
preserve your night adapted vision, and Blue Light TRKR
TM
mode for tracking blood trails
at night or in low light situations.
OPERATION
Black Button Switch (White Spot Light):
1. Press once for “High”, twice for “Low”, third to turn “O ”. (Fig. 1 & 4)
Orange Button Switch To access “Red” and “Blue Light TRKR
TM
” Modes:
1. Press Orange Button Switch down fully to turn the Red Light Mode “On”. (Fig. 1 & 4)
2. Press down twice to turn Blue Light “TRKR
TM
” Mode “ON”.
3. Press down a third time to turn “O ”.
FIG. 4
Black Button
Switch
Orange Button
Switch
(continued on back panel)
 Loading...