

Page 1
Installation Guide – Please keep for future reference
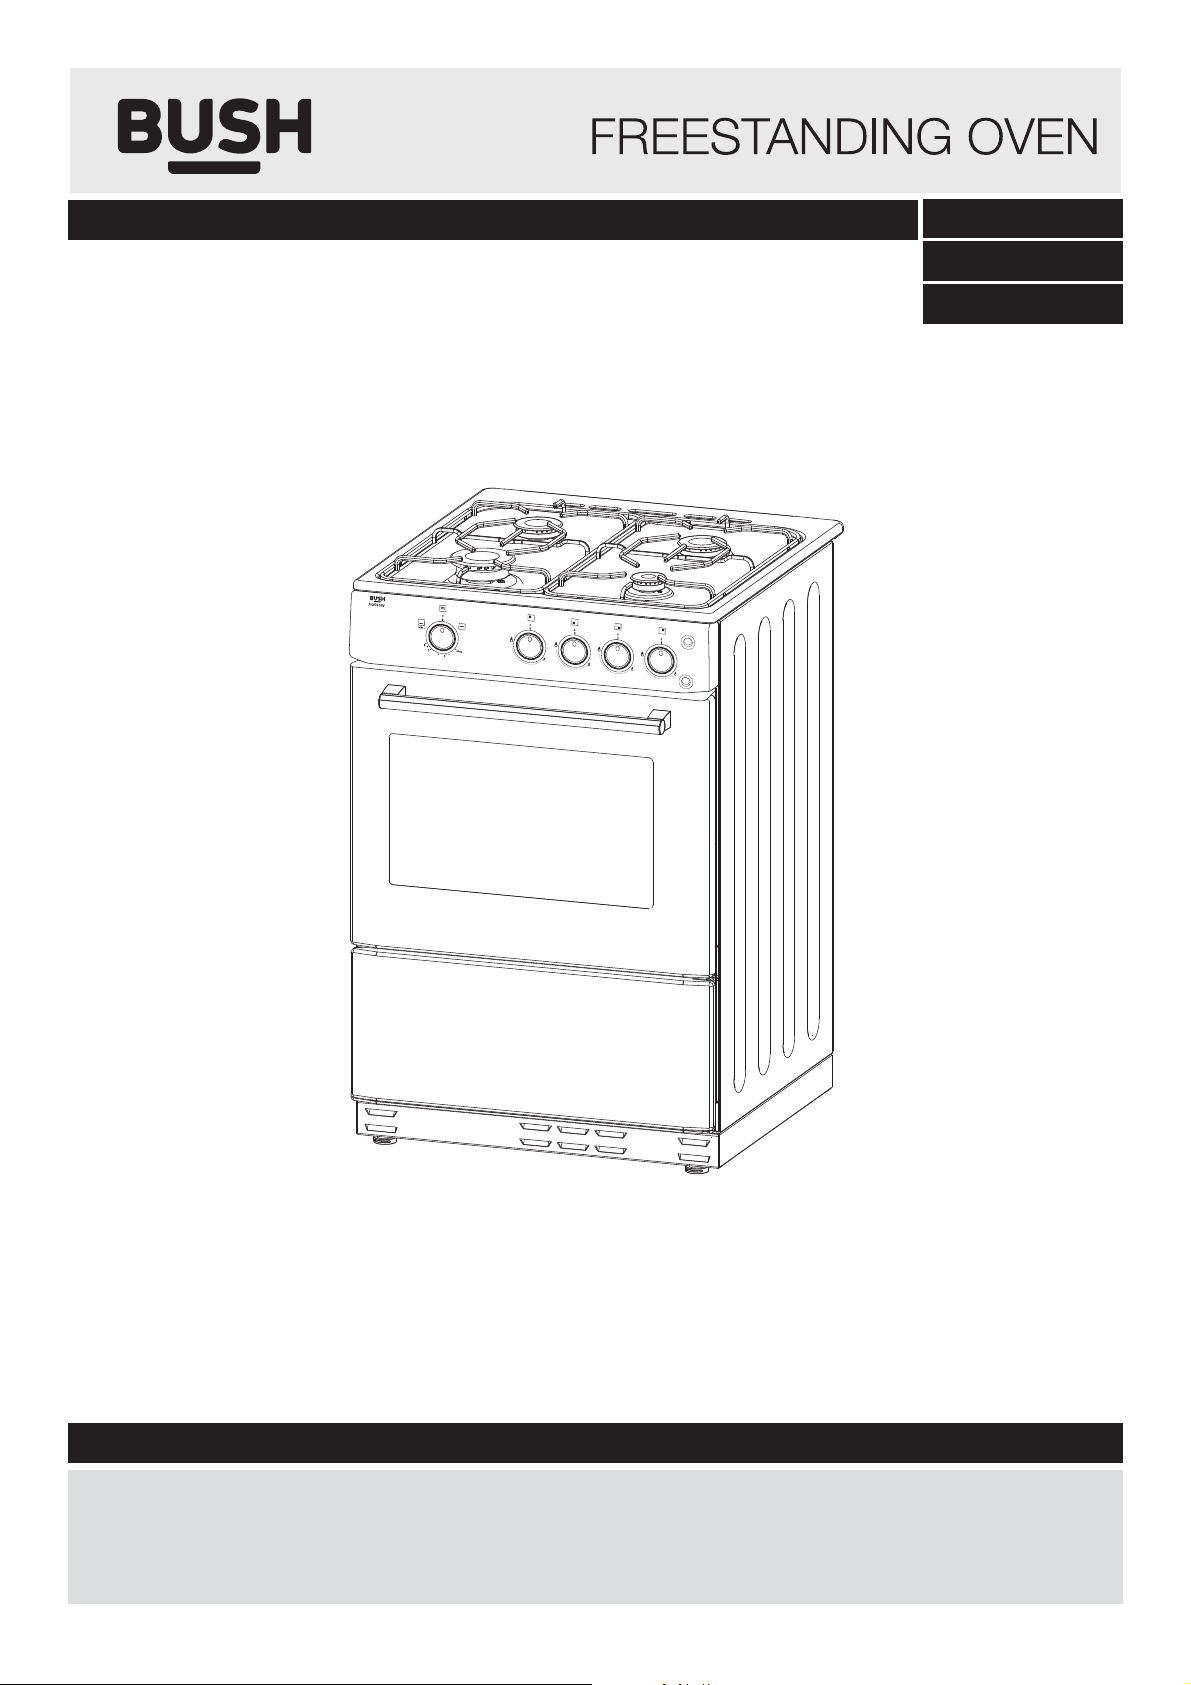
AG56SW
AG56SW
AG56SS
AG56SB
Important – Please read these instructions fully before using
These instructions contain important information that will help you get the best from your
appliance, ensuring safe and correct installation, use and maintenance.
If you need help or have damaged or missing parts, call the Customer Helpline on 0345 257 7271
Page 2

Safety Information
C
ustomer Helpline 0345 257 7271
Important – Please read these instructions fully before installation
This appliance is produced in conformity with all
safety regulations relating to electrical appliances.
Maintenance and repair work must only be
performed by authorised or suitably qualifi ed
service technicians. Installation and repair work
performed without observing the rules may be
dangerous.
IMPORTANT - This appliance has been designed
for non-professional, domestic use only.
IMPORTANT - Make sure your electrical isolation
switch is in an easily accessible position following
installation.
IMPORTANT - Switches must be set to the ‘0’
position when the appliance is not in operation.
WARNING - Before connecting the appliance
to the household electrical supply, make sure
the appliance is rated correctly for the type of
electrical supply in your house by checking the
information on the rating plate.
WARNING - The appliance must be installed
by an authorised technician prior to use. The
manufacturer is not responsible for any damage
that might be caused by installation not in
accordance with these instructions.
WARNING - Accessible parts become hot during
use, children must be kept away.
WARNING - When the oven door is in the open,
do not place anything on it. This could disturb the
balance of the appliance or break the door.
WARNING - Make sure cables of other electrical
devices cannot come into contact with the hot
parts of this appliance.
WARNING - Protect your appliance from
atmospheric effects. Do not expose to the effects
of sun, rain, snow, dust etc.
WARNING - Disconnect the gas supply when not
in use for prolonged periods.
WARNING - Switch off the mains electrical
supply at the isolation switch when not in use for
prolonged periods.
CAUTION - Do not keep fl ammable materials
close to the appliance when it is in operation.
2
Page 3
Installation
Important information for installation engineer
INSTALLATION AND PREPARATIONS FOR USE
Ventilation requirements
• For rooms with a volume of less than 5 m³ - permanent
ventilation of 100 cm² is required.
• For rooms with a volume of between 5 m³ and 10 m³
a permanent ventilation of 50 cm² will be required
unless the room has a door which opens directly
the outside,
required.
• For rooms with a volume greater than 10 m³ - no
permanent ventilation is required.
!
Pay attention: Regardless of room size, all rooms
containing the appliance must have direct access to the
outside air via an openable window or
room containing the cooker should have an air supply in
accordance with BS 5440: Part 2.
in which case no permanent ventilation is
equivalent. The
to
C
ustomer Helpline 0345 257 7271
3
Page 4

Installation
Important information for installation engineer
Extraction
Gas cooking appliances must be adequately
ventilated using an extraction fan or cooker hood
which vents outside.
Positioning
Make sure that there are no combustible or1.
fl ammable materials, such as curtains, in
the vicinity of the appliance.
Furniture and cabinets surrounding the2.
appliance must be made of a material
resistant to temperatures greater than
50ºC.
Surrounding furniture, cabinets and the3.
extractor fan should be positioned in
accordance with the diagram shown in
fi gure 1.
C
ustomer Helpline 0345 257 7271
EXTRACTOR FAN
There must be at least 2cm of free space4.
between the back wall and the rear of
the appliance to allow ventilation and air
circulation.
If fi tted, the extractor fan must be at least5.
65cm above the hob. If no extractor fan
is fi tted, the minimum distance between
the hob and any cabinet or other structure
must be 70cm.
Feet height adjustment
The height and level of the appliance can be1.
adjusted by rotating the feet located underneath the appliance at each corner as shown in
fi gure 2.
Rotate in a clockwise direction to decrease2.
the height and anti clockwise to increase the
height.
Once the desired height has been achieved, lift3.
the appliance into its location. Do not drag it as
this may cause damage to your fl oor and the
appliance.
Figure 1
See Detail A
Detail A
Figure 2
4
Page 5

Installation
Gas connection
Cu
stomer Helpline 0345 257 7271
The connection of the appliance should be
performed in accordance with local and
international standards and applicable regulations.
You can fi nd the information related to appropriate
gas types and appropriate gas injectors in
the Technical Specifi cations of the Operating
Instructions.
If the gas pressure used is different to the values
in the Technical Specifi cations or the gas supply
pressure is not stable, the gas inlet requires a
pressure regulator.
You must contact your authorised service agent to
make these changes.
Flexible hose connection
If the appliance is to be connected to the gas
inlet with a fl exible hose, the following must be
observed:
• The fl exible hose must be secured with a pipe
collar.
• The fl exible hose must not exceed 1.5m in
length and should be kept as short as possible.
• Inspect the fl exible hose prior to installation and
annually for signs of damage including ruptures,
bends or folds. Do not use damaged hoses.
Fixed gas connection
The appliance is supplied with the most common
parts required to connect the appliance to a fi xed
gas connected.
Additional spares can be supplied by calling
the Customer Helpline on 0345 257 7271.
If the appliance is to be connected to the gas inlet
using a fi xed gas connection, the following must
be observed:
• The nut on the gas manifold must always
remain in a fi xed position. Only rotate mating
parts.
• Use the correct size tools for all connections.
• Only the supplied seals should be used. Do
not use plumbing seals to make connections.
Alternative supplies
The appliance is equipped for connection in the
country of manufacture. This is indicated on the
rating plate of the appliance.
If the appliance is to be used in another country,
the alternative connections shown in fi gure 3
may be used. You must only use the alternative
connections designed for the selected supply.
• Make sure the fl exible hose is located away
from sharp objects.
WARNING – Do not use naked fl ames or sources
of ignition to perform leak tests.
• All connections including the fl exible hose must
be leak tested using a suitable fl uid.
IMPORTANT – Make sure all metal connections
are free from rust. Rust may pose a potential
source of ignition.
Figure 3
5
Page 6

Installation
Electrical connection
IMPORTANT – Electrical connections must be
carried out by a suitably qualifi ed person and in
accordance with all relevant local building and
installation regulations.
Electrical connections
This appliance is fi tted with fused plug which1.
should be inserted into a suitable mains socket.
It is recommended that the mains socket is2.
located behind the appliance and is switched
on and off via a separate switched Fused
Connection Unit (FCU).
It is recommended that the switched FCU3.
is located adjacent to the appliance within a
maximum distance of 2m. The switched FCU
must not be located above the appliance
but should be easily accessible in case of an
emergency.
C
ustomer Helpline 0345 257 7271
Securing the oven
To prevent the appliance tilting a stability chain
should be connected to the rear of the appliance.
The stability chain is not supplied with the
appliance.
Remove the screw on the rear of the1.
appliance as shown in fi gure 4.
Align the stability chain with the screw hole.2.
Refi t the screw to the rear of the appliance.3.
Secure the opposing end of the stability4.
chain to a wall using a suitable fastener
Figure 4
6
Page 7

Installation
Gas conversions
WARNING - Gas conversions must only be carried
out by suitably qualifi ed personnel.
The appliance can be converted to operate on LPG
by replacing the appliance’s injectors and adjusting
the minimum fl ame length.
Replacement injectors are supplied as part of the
gas conversion kit.
Changing the hob burner injectors
IMPORTANT - The following procedure must be
performed on each hob burner.
Disconnect the Gas supply and mains1.
electricity supply from the appliance.
Spanner
C
ustomer Helpline 0345 257 7271
Remove the hob cap and adapter.2.
Using a 7mm spanner, unscrew the injector3.
as shown in fi gure 5.
Select an appropriate injector for the4.
desired gas using the information chart
supplied with the gas conversion kit.
Fit the replacement injector to the appliance5.
and tighten using a 7mm spanner.
Refi t the hob cap and adapter.6.
Changing the grill injector
Open the oven door and locate the retaining1.
screw on the tip of the grill burner as shown
in fi gure 6.
Remove the screw and withdraw the burner2.
to reveal the injector as shown in fi gure 7.
Using a 7mm spanner, unscrew the injector.3.
Injector
Figure 5
Screw
Select an appropriate injector for the4.
desired gas using the information chart
supplied with the gas conversion kit.
Fit the replacement injector to the5.
appliance.
Refi t the burner and screw.6.
Figure 6
Figure 7
7
Page 8

Installation
52136721 R003 05/15
Changing the oven injector
C
ustomer Helpline 0345 257 7271
Open the oven door.1.
Locate the retaining screw below the burner2.
as shown in fi gure 8.
Remove the screw and withdraw the burner3.
diagonally to reveal the injector as shown in
fi gure 9.
Using a 7mm spanner, unscrew the injector.4.
Select an appropriate injector for the5.
desired gas using the information chart
supplied with the gas conversion kit.
Fit the replacement injector to the6.
appliance.
Refi t the burner and screw.7.
Clip
Figure 8
Injector
Figure 9
 Loading...