


BURY Time Suite
Index
Introductory Information 2
1. General 2
Installation and types of use 3
2. Technical Requirements 3
3. Installation of the Software 3
4. The first time you use the BURY Time Suite 5
5. Installation of Software Updates 6
6. Use of the software with other users in the network 7
First steps 10
7. Overview of the menu items 10
8. Creating additional drivers 12
9. Create vehicles 13
10. Create destinations / contacts 14
11. Create journey reasons 17
12. Back-up / restore the database 18
Creating a driver’s logbook 19
13. Importing positional data 19
14. Changing the positional data 23
15. Concluding tours 27
16. Print out the driver’s logbook 28
Configuring BURY Time Products 29
17. The Configuration menu item 29
Further Information 31
18. Service 31

2
Introductory Information
1. General
Dear Customer,
We are pleased that you have decided to buy an electronic driver’s logbook system by BURY. This system, which will be installed in your vehicle, also includes an administration programme – the BURY
Time Suite – the operation of which is explained in detail below.
Please read through these instructions carefully to be able to use the full functional scope of the software. If you have any further questions, please ask your specialist BURY retailer or ring our hotline.
The telephone and fax numbers are provided under the Services heading.

3
Installation and types of use
2. Technical Requirements
Prior to the installation of the BURY Time Suite, please check that your PC / laptop satisfies the following technical conditions:
Processor: Intel Pentium (or equivalent) with 1.5 GHz
Operating system: Microsoft Windows XP with Service Pack 2 or higher, Windows Vista, Windows 7,
.NET 3.5 Service Pack 1 (supplied on DVD)
Datenbank: Firebird SQL 2.1 (supplied on DVD)
Working memory: at least 512 MB
Hard disk drive: at least 3 GB
Screen resolution: at least 1024x768 pixels
USB interface
If your PC / laptop does not correspond with the requirements then it may not be possible for the
software to be installed.
3. Installation of the Software
Place the DVD with the BURY Time Suite Software in the DVD drive of your PC / laptop. Your computer
will now start the installation routine automatically.
Note:
If the installation routine does not start automatically, please open Windows explorer and click X
on your DVD drive. Now open the ‘BuryTimeSuite’ drive and double click on the ‘BURYTimeSuiteSetup.exe.’ file to start the installation routine manually.
Now select a language for the installation routine. You will then receive the descriptions for the installation which will be shown in this language. This does not have any affect on the subsequent menu
language in the BURY Time Suite. You can set this separately later on.
Please now read through the licence agreement. Once you have accepted this the installation can
continue.
Now select a path in which you would like to install the fields for the BURY Time Suite. If you are not
sure simply use the target directory that is provided. Make sure you also comply with the saving information for the software and the memory that is available on your PC / laptop. Depending on the using
of the BURY Time Suite (single user / several users), the database and the saved journeys may require
several megabytes of memory. For this reason, please make sure that sufficient resources (about 400
MB) are available in this context.

4
The installation process starts with a click on ‘install’ and the data will be transferred to the hard disc.
Depending on the hardware configuration of your PC / laptop, this may take 10 – 15 minutes. You can
see its progress on the green status bars.
Note:
You can cancel the installation process at any time. The files that have already been installed X
will then be deleted.
From software version 1.26 onwards (the update
1.26) the BURY Time Suite also supports the legal
regulations that apply in the Netherlands. In this
country, the law requests fewer details concerning
an electronic logbook than the laws that apply in
Germany, for instance. For you the user, in the future the selection ‚Netherlands‘ will mean less outlay, as certain compulsory fields are omitted. Further details are provided in the following chapters.
Please note:
If you do not submit your ta x d eclaratio n in t he X
Netherlands but in Germany, for example, then
you must click on the ‚Rest of europe‘ during the
selection.
Installation and types of use
After all of the larger programme files have been transferred you will be asked whether you would like
to create a desktop link. If you would like to do this, an icon will then appear on your desktop’s window.
You can then open the BURY Time Suite by double clicking on this symbol. Otherwise please click on
‘start’ in the taskbar, proceed to ‘all programmes‘ and look for an entry with the name ‘BURY Time
Suite’.
Now click on ‘finish’ in order to complete the installation. The BURY Time Suite will then be started.

4. The first time you use the BURY Time Suite
When you open the BURY Time Suite for the first
time, you must set an administrator and enter a
user name and password. If you use the software
on a private basis, then you only manage your own
data. If you use the software in a network and several people need to be able to work with it, than
the roles of the persons (who is the administrator)
should be defined in advance. Further information
about this subject is provided in the following chapters.
In the User details window, now enter a password.
This can be alphanumerical and can also consist of
just one character. Passwords are case-sensitive,
so please take care when you are entering it. The
password will only be displayed to you in asterisks,
which means that making a typo is quite easy.
For this reason, you have to enter your password a
second time. The details that you enter are compared against each other. You can only click on ‚Save‘
and finish entering the data if both sets of details
match.
5
Note:
You can also amend the details of the user X
subsequently within the software programme.
The BURY Time Suite does not support a pass-X
word reset for an administrator-user. Therefore
please keep this password safe in another way;
via a password manager, for example.
The login for the BURY Time Suite now appears.
Enter your password once again and set the menu
language with which you wish to use the BURY
Time Suite. The software will start when you click
on „OK“.
6
Installation and types of use
Important:
The use of Cleaning or Performance Tools software for the cleansing of old data and settings X
in the Windows registration database that are apparently no longer used may mean that it is no
longer possible to start the BURY Time Suite. In this case, the suite must be reinstalled.
If your PC / laptop just fulfils the minimum technical requirements for the installation and ope-X
ration of the BURY Time Suite, then you should close all of the other applications when you work
with this software.
5. Installation of Software Updates
When purchasing your BURY product including electronic logbook you automatically receive the latest
version of the BURY Time Suite on DVD. It can be the case, however, that depending on the number
of intermediaries, your product may have been in circulation for a certain period of time before you are
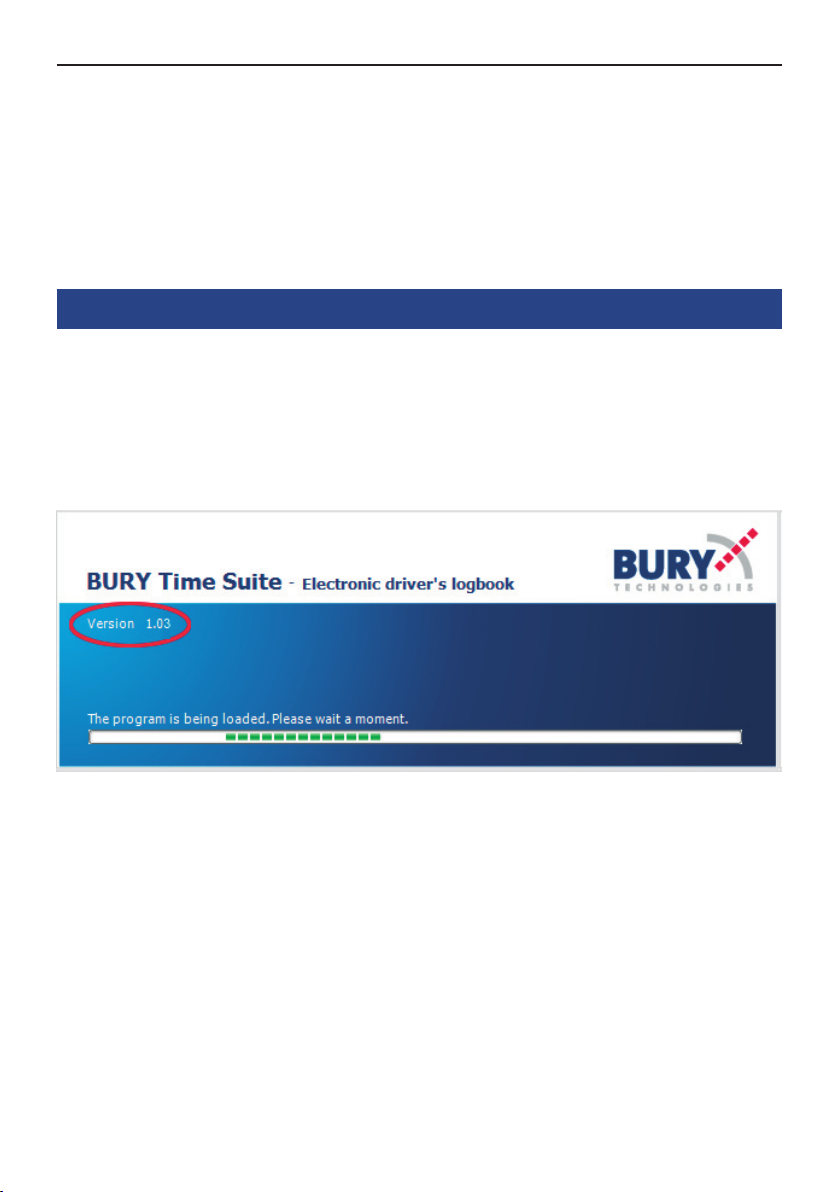
finally in receipt of it. For this reason, after installation and long term use, you should check the software to see whether an update is available for your version. To check this, please note the version
number that is displayed on starting the software:
The version number shown in the example is 1.03. Several updates are available on the internet for this
version on the page www.bury.com with the version numbers 1.13, 1.24 and 1.26 (as at January
2011). Save the files that are provided there onto your computer and install them successively starting
with 1.13. Your BURY Time Suite software is then up to date again. You can read about the alterations
to the recorded updates in the ‚Release Notes‘.
7
6. Use of the software with other users in the network
Premise:
Your company owns several company vehicles which some employees are also able to use privately in
addition to their work-related use. The vehicles are equipped with an electronic driver’s logbook from
BURY Technologies. The administration and storage of the recorded positional data of all vehicles shall
take place centrally in a database. The employees work locally at their workstations using the BURY
Time Suite and are able to create their individual logbooks.
Step 1:
Appoint an administrator / personal contact in your company who enters and maintains the users,
vehicles and drivers within the BURY Time Suite. Depending on the structure and size of your company,
these employees can be entrusted with additional tasks, such as read-out of the positional data of the
vehicle systems, if this is not to be carried out by the individual employees.
Notes:
Please note that these employees are able to acces s the pers onal data of other persons. The X
corresponding confidentiality obligations should therefore be agreed with these employees.
The employee should be suitable for carrying out the activity, e.g. through demonstrating X
special knowledge regarding the German Federal Data Protection Act, data protection in general
and data security.
Step 2:
Install the BURY Time Suite on a server which all employees who are going to work with this administration software are able to access. Note down the path (IP address / drive letters and directory
names) for the directory in which the GPSLOGGERDATABASE.FDB database is to be found. The
data for the user administration and positional data is saved in this file.
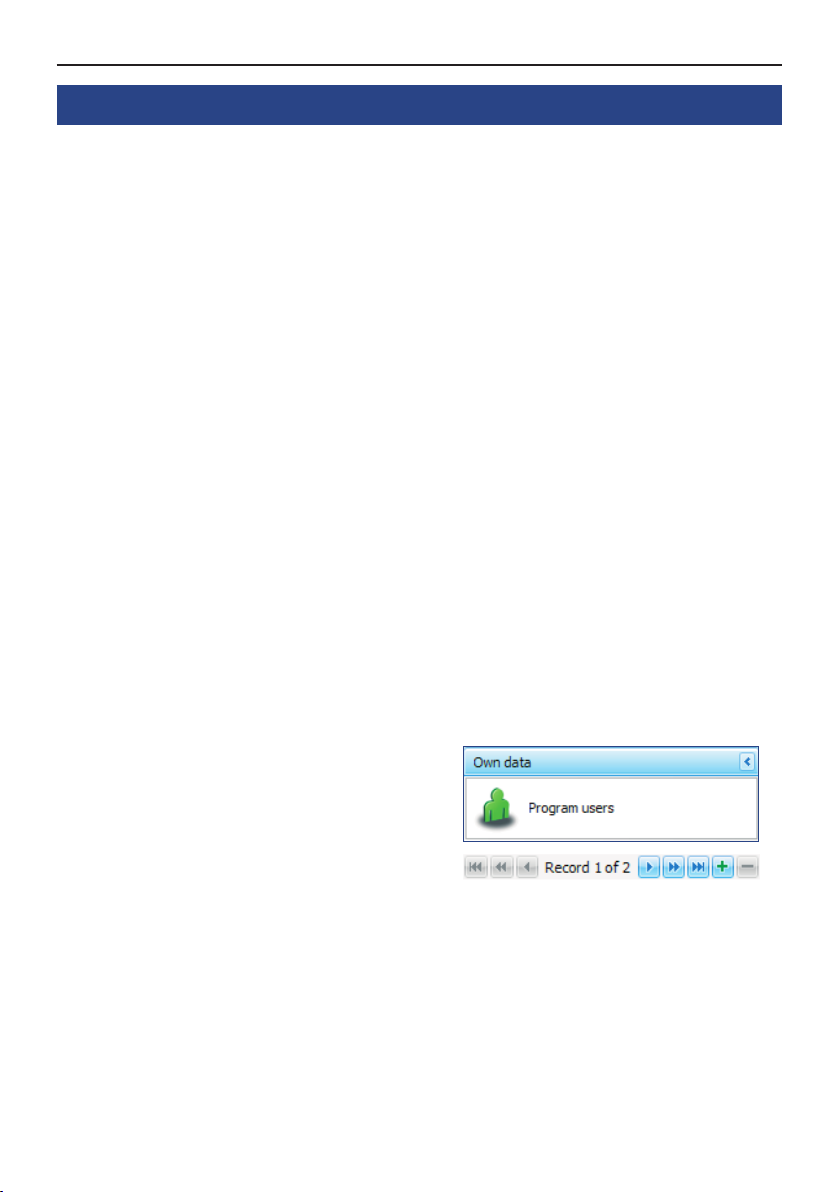
Step 3:
Copy and paste the additional programme users
into the master data. In order to create a new data
set, click on the ‘plus’ symbol, which is situated at
the bottom of the screen. Up to 1,000 additional
users can be added and can subsequently work simultaneously with the BURY Time Suite.
é
8
Installation and types of use
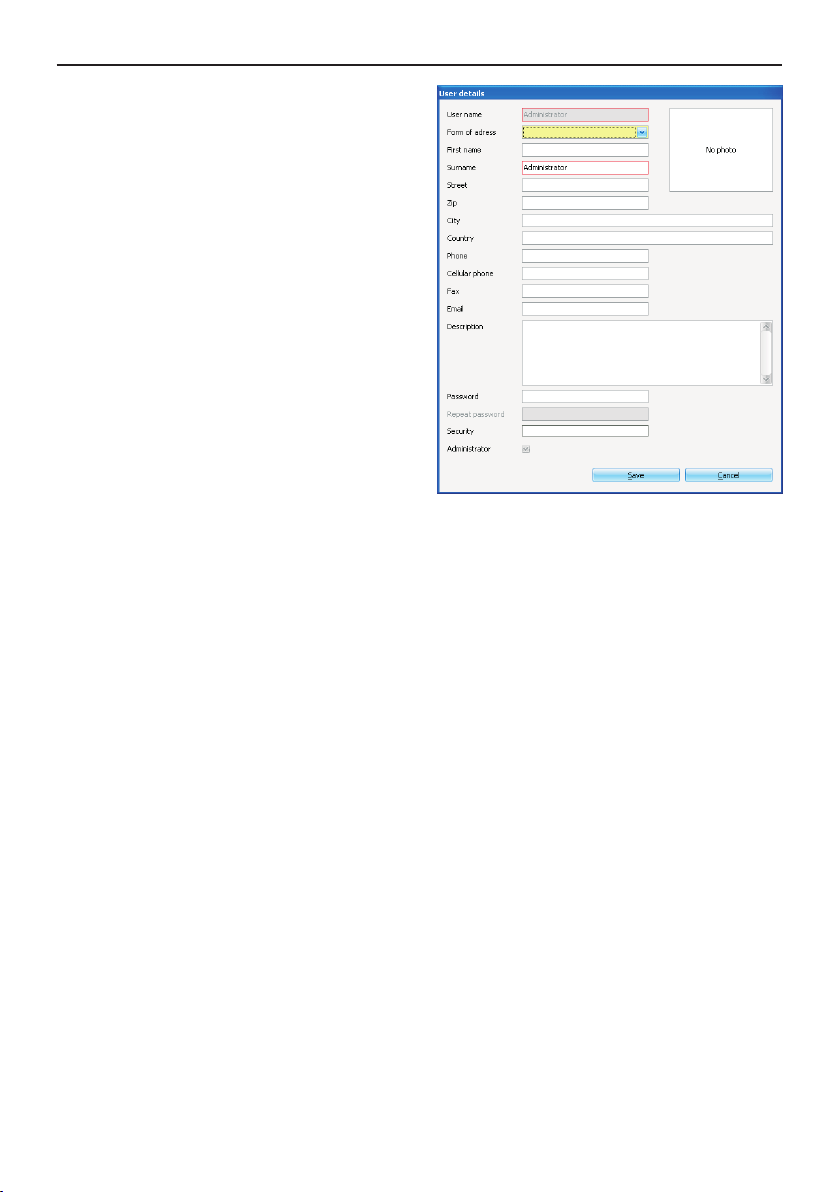
An input window appears for the user details.
Here, first of all enter the user name. This should
be chosen so that is as clear as possible and, if
available, corresponds with your in-house designation guidelines.
Subsequently enter all of the additional details in as
far as you want to maintain the secondary data of
the employee here. A photograph of the employee
can also be added by clicking on the photo
section.
The compulsory fields are equipped with a red frame. These have to be filled in to be able to input
the data set. Finally, specify a password for the
user. Next, click on ‘save’ in order to input the data
set. The new user now appears under the entry for
the administrator who you entered when you first
started the administration software.
Repeat step 3 until all of the users have been registered.
Step 4:
Also install the software on the PC systems of the employees who are to use the BURY Time Suite
software later.
Start the BURY Time Suite and enter a password for the administrator. This password is completely
independent of the one which you used on the server during the installation. For safety reasons, it
should differ from it, however. You can use this new password with all subsequent installations. As a
rule, it won’t be needed any more in the future, as the users don’t use the local database but the database of the server.
After the appearance of the user interface, click on file and then on settings in the upper left corner.
In the window which then opens, please enter the IP address of the server and the noted path details
of the database. By clicking on ‘test connection’ you can check your inputs and the access. A corresponding message appears. If the details are correct, please click on ‘save’. The BURY Time Suite is
subsequently closed.

9
The employees can now log on with their user
name and the passwords which you have previously entered during the server installation. The setting up of network is now complete.
Note:
The users are no longer able to log in with ad-X
ministrator rights unless you have granted them
this user right for their user account.
If a user activates their local database, then they
are not able to log on again after closing the software as they do not know the (second) password of
the administrator and no additional users are stored in their local database. Only the administrator is
able to specify the correct database again.
10
First steps
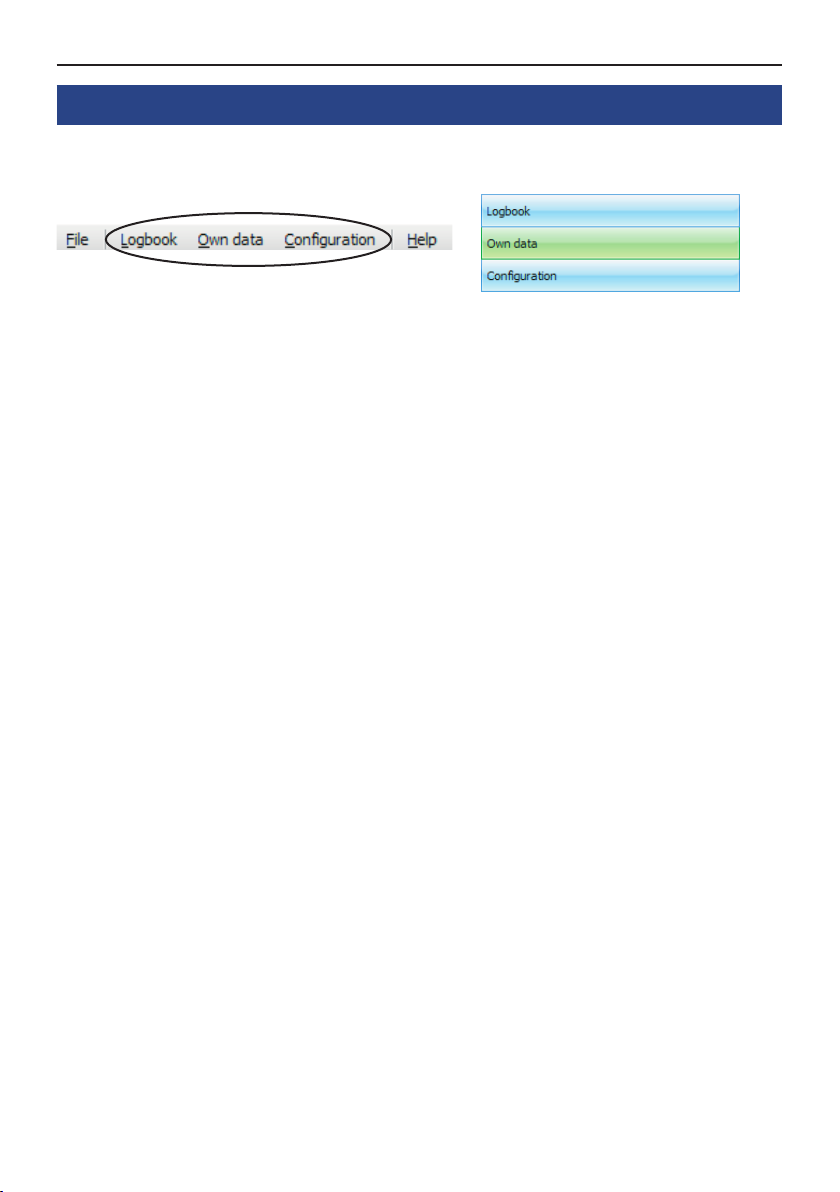
7. Overview of the menu items
In the BURY Time Suite you will find the three subject areas of driver’s logbook, own data and configuration. You can activate these sections and their sub-functions via the menu bars.
Menu items in the logbook section
You can enter the missing data for your journeys under Processing routes.
Clicking on View map opens a map of Europe, on which you can zoom into your corresponding area
of application. To do this, please use your mouse wheel or press and hold the shift key, and then press
the left mouse key to mark the area of the map that you would like to enlarge.
Under Driver’s logbook you will find your journeys, and you can display and print these in different
ways using the filter settings.
Menu items in the own data section
If you are logged on as an administrator, you can create other users under Programme users who
are allowed to work with the programme. Double-click with the left mouse button on an existing entry
to edit it. Click on „+“ to create additional users. A window opens in which the user data can be
entered. Here, you must pay attention to the assignment of user rights. If you are using the administrative programme without administrative rights, you will not be able to see this menu entry.
If you have locations that you frequently drive to, you can enter the data of persons or companies
under Destinations/Contacts. These can later be easily applied to your journeys or are automati-
cally recognised and entered with data import.
If you use or manage more than one vehicle, these can be assigned and maintained under Cars.

11
If a vehicle is used by several drivers (e.g. in the family or in fleets), these can be entered under Drivers. The drivers, however, are not programme users, and can therefore not manage their journeys
themselves.
Various Journey reasons can be entered under the same menu item. This is an advantage if the
journey is made regularly, e.g. journeys to customers, service trips, commuting trips etc.
Menu items in the configuration section
In this menu, the functional scope is dependent on several factors. The menu item Backup database
and Restore database can only be used and viewed if you have administrator rights. With both of
these functions, you can save your data on a separate drive at any time and recopy any lost data.
The other menu items can only be used when the corresponding BURY product is connected to the PC
using an USB cable or an SD card with position data.
In Device configuration you can, for example, define the standard journey type. This is then automatically set when the power supply to the system in the vehicle is established (ignition/engine on).
Clicking on Danger zones, brings up a new window. Here you can play a file on your BURY product
or the SD card, in which more than 25,000 danger zones are saved for the whole of Europe. If the file
is available on the BURY product, a warning function is automatically activated in front of these locations.
Using the Factory reset menu item, you can delete the entire memory of connected BURY system or
the SD card. This should be carried out after the data is read for the driver’s log and in the case that
the system is used in a new vehicle.
With the Firmware update menu item, you can update the connected BURY system. In the event
that an SD card is connected, the new firmware is stored to this and the system is later updated in the
vehicle.
If you would like to read data from an SD card, the administrative programme must first be notified of
the drive. This can be carried out in the next menu item Connect to UNI CarTalk Time card.

12
First steps
Additional menu items
In the top menu bar you can find the two items of File and Help.
Using the Settings menu item under file, you can enter an alternative path to your database. This is
useful when saving the database on another drive or with several users who only have to use one
database. You can also specify here as to whether the journeys that you make are being displayed in
the distance measurement unit of kilometres or English miles (stat.mi.). Via the next entry of Exit
application, you close the BURY Time Suite subsequent to a security question.
Under the menu item Help, you can find the contact details and telephone numbers of the manufacturer for possible questions.
8. Creating additional drivers
Every programme user is automatically entered as
a driver in the driver administration. If it should
come to occur that another driver drives the vehicle
than the one to which the vehicle is assigned (and
they themselves are not a programme user) then
this driver should be included in the driver administration separately.
Example for the private sphere:
You also use the company vehicle privately and a family member drives the car.
Example for the business sphere:
A colleague drives your car who does not have their own company vehicle.
Every programme user is able to create additional drivers. During network operation, it is recommended not making the drivers who are of a private nature visible to all users.
To enter an additional driver, please click on the plus symbol on the bottom of the screen. Enter the
driver details in the window which then opens. These consist of the driver ID and the first name and
surname of the employee. The only compulsory field is the surname. The driver ID can be an alphanumerical value with a total of 20 characters. In the event of business use, personnel numbers can be
used here, for instance. For an improved overview, the driver IDs should be logically designed. After
the data has been saved, the new driver is displayed in the list.
Note:
You can delete a driver again as long as no tours are booked in their name.X

13
9. Create vehicles
Before you create one or several vehicles, you
should acquire the vehicle documentation (registration document / certificate) and note down the corresponding number of kilometres/mileage.
Under Own data, open the vehicle administration
using the Cars icon. Enter a new car by clicking on
the ‘plus’ symbol on the bottom of the screen. In
the window which opens next, you must fill in the
compulsory fields Licence, Mileage, User and
Driver that are framed in red.
The number of kilometres/mileage should correspond with the value that was displayed during the
installation of the electronic driver’s log system in
the vehicle. As an owner, please select either yourself or a user who is able to use the vehicle privately. If no other drivers are available, the user will be
entered as the standard driver at the same time.
The vehicle is listed subsequent to the saving of the information.
If several vehicles are created and you want to list these later according to your categories, then please
click on the corresponding category of licence plate, manufacturer or vehicle type. You will then be
shown the listing in ascending or descending form.

14
First steps
10. Create destinations / contacts
You can also store destinations/contacts here, such as your own address, that of your employer or your
office and frequently visited customers so you don‘t have to enter them separately for every journey.
In the destination/contact administration you are able to enter new contact data or import existing
contact data from other software programmes. There is a direct interface for this purpose for data
from Microsoft Outlook. It is also possible to import so-called CSV files.
Please note:
In the descriptions/instructions concerning the software programmes that you use, please read X
about how you can export the contact data you have stored in a CSV file.
Importing contact data
Please click once on the „Import contacts from...“
button.
Select the ‚Outlook‘ entry if you use this programme
and you have stored contacts in it. Next please select the ‚Contacts‘ folder in the window that opens
and then click on ‚OK‘. The contact data are then
imported.
Please choose the entry ‚CSV file‘, look for the file
you want to import in the window that opens and
then click on ‚OK‘. The contact data are then imported.
After the import, the contacts are listed in the form
of a table. To edit a contact, please click on the
corresponding line. If you would like to enter another contact, please click on the ‚Plus‘ symbol on
the lower image border. The Details window then
opens in both cases.

15
Enter / edit new contacts
To enter a new contact, please click on the ‚Plus‘ symbol. The Details window then opens with the
Address data and Map tabs. Using your address data, you then have to fill in compulsory fields such
as Name/Company, the Street and the City yourself.
If the contact you entered is for instance your employer‘s address then entering a standard journey
purpose is recommended. You might decide to call this ‚Journey to office‘. This journey purpose is then
automatically used for all journeys that subsequently end at this address and does not need to be
entered manually.
You can optionally save the details of a contact partner. If you would like to enter several contact
partners, please click on the ‘plus’ symbol behind the email entry field. If you have entered your
contacts as appropriate, please click on save. Your contact will now be displayed in the list.

16
Entering coordinates via the Map tab
The BURY product that you use in your vehicle captures geographical coordinates from the GPS signals
it receives. These coordinates and/or positions can be displayed visually using the map material in the
BURY Time Suite. In order to display a contact you have entered or imported (the address) and to be
able to allocate your trips correctly, you also have to assign the contact coordinates. This is only possible in the Map tab.
Using the left hand mouse key, you can highlight a
position on the map (yellow pin-tack). Since it is
difficult to enter a correct address in the initial view
you have to increase the level of detail. You can
zoom in on the map via the scroll column on the left
hand side or using the mouse wheel. You zoom in
on the map by moving the mouse wheel upwards
(away from yourself). If you move the mouse wheel
in the other direction (towards yourself), the scale
of the map excerpt becomes smaller and you don‘t
see as many details.
Zoom in on the area in which the address of your
contact is located. If the map has been magnified
sufficiently then the pin-tack can positioned at the
correct place.
First steps
Since it is likely, however, that you are not always
able to drive to and call at these individual coordinates with your vehicle, please set up a Target
area surrounding the specific position. To do this,
click on the button of the same name that is above
the map display so that this is deposited in green.
Next, press and hold down the left hand mouse key
and draw a sufficiently large frame around the highlighted position.
As soon as you drive into this section later, the
address that was entered is automatically assigned.
This is an advantage if you have to park a few meters away from it, e.g. because parking places are
occupied or due to building work. The same applies
if an address of a contact stretches over a large
area, e.g. an industrial estate.

Now, please click on ‚Accept‘. If information has already been entered for the addresses a warning
notice appears stating that this data will be overwritten.
Please note:
->If the road and location of the highlighted position does not match with the previously entered information in the addressee tab this will not be overwritten.
In the event of the successful acceptance of address
information from the map tab into the address
data tab, no house numbers are saved. Enter the
data manually. As long as you have not clicked on
‚Save‘, you can still see the house numbers in the
table overview. To this end, simply adjust the ‚Details‘ window in order to be able to see an overview.
You can find a similar function in the function View
map in the Logbook menu item. These addresses
can be used as templates when you are editing
tours.
17
11. Create journey reasons
When managing several drivers, entering pre-defined Journey reasons and making these visible
for all users is recommended. This means, for instance, that certain journeys can be entered by
users that have the same wording in all cases. This
increases the degree of clarity in the subsequent
logbook.

18
First steps
12. Back-up / restore the database
Once all of the basic settings have been completed, backing up the database prior to importing the
first data is recommended. This means you can try out all of the functions at your ease during the initial phase – when you may input test data for instance.
Note:
Only users who have been assigned administrator rights are able to backup and restore the X
database.
Open the menu item Configuration and then click on Backup database. A new window opens with
a wizard who leads you through the subsequent steps. The file ending for your back up file is *.fbk and
the file name consists of the current date and time as follows: backup_YYY YMMDDHHMMSS.
To restore a backup, a wizard is also initialised in a separate window. To carry out such a task, please
click on Restore database and follow the corresponding instructions.
Note:
The database should be backed up on a regular basis, and if possible on a separate data sto-X
rage unit.
Carrying out a back up prior to the importing of new position data is also recommended.X

Creating a driver’s logbook
19
13. Importing positional data
In the BURY Time Suite, it is possible to load positional data from three electronic driver’s logbooks.
The differing work steps are described below for all of the products. Please proceed as follows:
How to use the CC 9060 Time
1) Remove the CC 9060 Time monitor from your vehicle and note down the number of kilometres/mileage.
2) Start the BURY Time Suite on your PC.
3) Connect the CC 9060 Time monitor to your PC via USB cable.
The automatic data import will start.
4) Select a user, if several have already been created.
5) Select a vehicle if several have already been created, or create a vehicle now.
6) Now select a driver if several have already been created, or create a new driver now.
7) Enter the current number of kilometres/mileage of the vehicle.
8) Now click on Import data.
How to use the CL 1010 Time
1) Remove the CL 1010 Time from your vehicle and note down the number of kilometres/mileage.
2) Start the BURY Time Suite on your PC.
3) Connect the CL 1010 Time to your PC via USB cable.
The automatic data import will start.
4) Select a user, if several have already been created.
5) Select a vehicle if several have already been created, or create a vehicle now.
6) Now select a driver if several have already been created, or create a new driver now.
7) Enter the current number of kilometres/mileage of the vehicle.
8) Now click on Import data.

20
Creating a driver’s logbook
How to use the UNI CarTalk Time
1) Remove the Micro-SD card from the UNI CarTalk Time hang-up cup and note down the number of
kilometres/mileage.
2) Start the BURY Time Suite on your PC.
3a) Plug the Micro-SD card into a suitable card reader and connect it with your PC.
3b) Put the Micro-SD card in the SD card adaptor which is provided, plug these into a suitable card
reader and connect them with your PC.
4) Open the menu item configuration and click on Connect to UNI CarTalk Time card.
5) Select the correct card if several are displayed. Then click on Connect.
6) Select a user if several have already been created.
7) Select a vehicle if several have already been created, or create a vehicle now.
8) Now select a driver if several have already been created, or create a new driver now.
9) Enter the current number of kilometres/mileage of the vehicle.
10) Now click on Import data.

21
Notes:
The Import data field can only be clicked on when you have entered the number of kilometres/X
mileage and if this is greater than the previous number of kilometres/mileage.
If you accidentally click on X Skip import then you are able to click on Devices in the status
bar (below right). Select the connected system once again. The Data import window will then
reappear.
If you have connected several Systems (or corresponding Micro-SD cards) to your PC, the data X
import s for these systems will be initialise d immediately after the start of the BURY Time Suite
and can be processed subsequently to each other.
If positional data have already been impor ted, these cannot be imported again. A correspondi-X
ng message appears during the attempted import.
Now enter the number of kilometres/mileage of your vehicle without any decimal places (round it up
accordingly). After asking you if this is really correct, the BURY Time Suite calculates whether this value
corresponds with the number of kilometres which are saved on the BURY Time Product. In the example shown, only two kilometre has been saved on the Time Product and the entered value totals five
kilometres.
If you click on ‘yes’, then the too high value will be confirmed and an automatic tour will be generated
which incorporates the missing kilometres. If you click on ‘no’, then you return to the data import
window and you can enter the kilometres again.
The discrepancies between the number of kilometres/mileage of the vehicle and the electronic driver’s
logbook can be very big and may have differing reasons:
a) Example of a bigger number of kilometres/mileage in the vehicle
The electronic driver’s logbook was either disconnected during a tour or it was defective.
What occurs in the BURY Time Suite:
An automatic tour is generated in order to balance out the missing kilometres. As a result of this, additional tours can be created / added until the distances (the kilometres) for the automatic tour have
been completely used up.

22
In the example, at 116.73 percent, the correction factor is much too high.
After a tour of more than a kilometre has been subsequently added, the correction factor has fallen to
16.09 percent. It may not exceed seven percent if the tours are to be concluded, however. Another 0.7
kilometres from the automatic tour are available for any further tours which are to be added.
b) Example of a larger number of kilometres/mileage in the electronic driver’s logbook:
As a rule, such a case cannot occur. Exceptions are situations in which the vehicle was transported by
ferry, transported by train or transported by pick-up truck and the electronic driver’s logbook was active.
Creating a driver’s logbook
Note:
In the aforementioned situations, deactivate the electronic driver’s logbook by turning off the X
engine or the ignition or removing the device from its holder.
If the electronic driver’s logbook system in the vehicle has been connected on steady positive X
and is permanently supplied with electricity, then in the event of the UNI CarTalk Time, the power
supply is to be interrupted or the GPS antenna is to be loosened and/or covered so that it is no
longer possible to receive any GPS signals.

23
What occurs in the BURY Time Suite:
If you enter a number of kilometres/mileage which is fractionally smaller than that of the number of
kilometres/mileage which is saved in the BURY Time Product, then your tours will be created with a low
minus correction value and you can then create a driver’s logbook with it.
If the entered value deviates very much from the number of kilometres/mileage on the device, then
you will receive a corresponding message. If you read in the data in spite of this, it may be the case
that all of the tours are given a very high correction value and it is possible that the kilometres driven
can no longer be displayed. A driver‘s logbook of this kind would not be useable.
Important:
The importing of data from many tours can take a few seconds. During the importing function, X
do n ot rem ove the Micro-S D card from t he card reader or t he USB connector of the adaptor c able
from the PC or the device.
14. Changing the positional data
If the positional data has been successfully read in, the Data import window will close. The data will
now be compared with the map material stored in the BURY Time Suite and converted into exact
address data. It may occur, however, that certain positions are not recognised. These have to be added
by you manually. Open the Logbook menu item and then click on Processing routes in order to
start editing the tours.

24
The following data will then be listed for you in table form:
Tour type
Four tour types are differentiated between: business (green), trips to work (yellow), private (red), and
automatic tour (brown).
Licence
You can differentiate between the vehicles using the licence plates. This is the only column the sorting
criteria of which (ascending/descending) you are able to change.
Joined
If you have connected either two or several tours together, then a checkmark is used as a marker.
These tours can also be separated again.
Start date
Here, you are stated the date and time of the start of the tour.
Start address
Here, you are stated the address (without house numbers) at the beginning of the tour.
Start KM
Number of kilometres/mileage at the start of the tour.
End date
Here, you are stated the date and the time at the end of the tour.
Creating a driver’s logbook
Destination
Here, you are stated the address (without the house numbers) at the end of the tour.
End KM
Number of kilometres/mileage at the end of the tour.
Tour distance
The number of kilometres driven.
Correction
The current correction factor of the tour.
Duration
States the tour time in hours, minutes and seconds.
Data complete
Displays whether all the compulsory fields have been filled in and the journey can be completed.

25
Certain menu items and filter settings are provided above and below the table.
Above the table:
Refresh view
Reloads the view.
Show tour
If you have highlighted a tour (a line), you can display the tour on a map. This allows you to zoom in
and out, and you can also set the number of positional data to be displayed there (the blue arrow).
Using the ‘move arrow left’ or the ‘move arrow right’ buttons, you are able to change over to a previous
or a later tour.
Close tours
If you have finished editing your tours you can close them and transfer them to your official Driver’s
logbook. Once this has occurred it is no longer possible for the data to be edited. To be able to con-
clude a tour, the fields Start address and Destination must be completed and the Correction may
not exceed seven percent.
Connect tours
Connecting tours can make sense if you were travelling for business reasons for instance, and you
made several breaks. It is only possible to connect green and yellow tour types, all others are excluded. To mark several lines, please press and hold down the shift key and highlight the lines using the
mouse or the arrow keys.
Add tour
If an automatic tour has been generated with a positive number of kilometres/mileage, you can add
the missing tours manually. As a result of this, the correction factor of all of the tours for the vehicle in
question in this window is lowered.
Print view
If you would like to print out an overview of the tours, you are also able to initialise this function. A
separate window opens which provides a print preview for the tour lists as well as additional options.
The printout possible in this instance is not meant for official use – it isn’t the driver’s logbook.

26
Below the table:
User
Here, you are able to select either all users or only the Administrator. Accordingly, either the available
tours of all the users or only those of the Administrator will be displayed.
Tour type
Here, you are able change the display to show the four different tour types. It is possible to select
several types of tour at the same time.
Period of time
Here, you set the time period which is to be displayed for the tours.
Car
Here, you are able to sort the table according to the vehicles for which tours have already been provided.
You can open and edit a tour by double clicking on
it. Private tours and those which are created automatically are excluded. In the Tour details window you are able to fill in the compulsory fields for
the start and destination addresses if they are not
complete.
Creating a driver’s logbook
Under Tour details you can see the fields Tour
distance, Tourtyp e, Driver, Contact person,
Journey reason and Description.
If an automatic journey is generated during the data import due to kilometre deviations, you can distribute the kilometres entered there to this and, if possible, other journeys, using the Tour distance
field until the value in the automatic journey totals either 0.0 or 0.1. If no automatic journey has been
entered then this field remains inactive.
The Tourtype and the Driver can also be changed. You can also enter contact partners, select a tour
reason (if this has already been provided), and enter a description for the tour in question.
If the Tourtype is on Business (business journey), then you have to fill in the Contact person and
Journey reason fields.
Please note:
Exception: if you selected the legal regulations for the Netherlands during the installation, the-X
se two fields are not compulsory fields during business journeys either.

27
Alternatively, you can also enter additional notes concerning this journey in the description field, e.g.
information concerning passengers or an accident.
Using the ‚Show tour‘ button, you can display the tour on a map. Please click on ‚Save‘ to confirm the
information that you entered.
Notes:
If you change the existing data in the tours, this will be recorded. The old data will be crossed X
through on the printout of the driver’s logbook, but it will still be readable.
If you change business tours into private tours or to work tours, this change will also be re-X
corded.
If you select the private tour mode on your BURY Time Product, then no address data is saved X
which can subsequently be imported and displayed on the driver’s logbook.
15. Concluding tours
To be able to conclude tours, all of the start and destination addresses of the tours have to be available
and the correction factor may not total more than 7 percent. In addition to this, all compulsory fields
have to be filled in. The Data column in the overview displays in complete form as to whether the
journey can be concluded (green tick) or still requires editing (red X).
Note:
The correction factor is calculated from the information you have inputted regarding the number X
of kilometres/mileage of the vehicle and the kilometres collected in the electronic driver’s logbook. The correction factor is distributed equally across all the tours of an import time frame that
have not been concluded.
Journeys with different correction factors cannot be connected with each other.X
In the following example, all of the tours from 10.09.2009 were dealt with. To be able to conclude this
day and its tours, it is necessary for the last tour with the same date to be selected. After clicking on
‘conclude tours’, a window appears with a securit y question. After confirming the question, the tours
of the 10.09. are concluded and transferred to the driver’s logbook.

28
Creating a driver’s logbook
16. Print out the driver’s logbook
In the driver’s logbook, the tours that have been concluded appear under the corresponding vehicle
(licence). By clicking on the ‘Plus’ symbols, it is possible to display additional details. Highlight a time
period for the driver’s logbook (provided in blue) and click on the printer symbol in order to print it
out.
Similar to the list of tours, a separate window appears with a print preview. The correct nature of the
driver’s logbook is to be confirmed subsequent to printing with your signature.
The example shows an abbreviated dri ver’s logbook.

Configuring BURY Time Products
29
17. The Configuration menu item
In addition to the previously described menu items of Backup database, Restore database and
Connect to UNI CarTalk Time card, in the Configuration section you can find additional menu
items:
Device configuration
Under this menu item, it is possible to select and initialise the connected BURY Time products / SD
cards. Under FW Version, in the details which open, you are able to recognise the version of the
firmware which is installed on the selected product.
Every BURY Time product is equipped with a buzzer. In the sub-item of Volume Level, you are able
to set the intensity of the buzzer (only available for the CL 1010 Time).
Under Default mode, you set the mode which is to be active when you start the BURY Time product.
Here, the choice is between the tour types of „Private“, „To work“, „Business“ or the „Last mode“.
For the BURY Time products that are equipped with light diodes, you are able to set either permanent
or one-off Mode signalling. If this is only displayed once, the LEDs switch off after approx. 10 seconds. The LEDs only illuminate again in the event of a change to the tour type or the restarting of the
vehicle. You are able to extend the signalling phase to up to 60 seconds.
If you would like to be informed as to whether GPS signals are received at the beginning of the tour,
then you are able to activate the corresponding notification: enable sound if GPS fixed. At the same
time, you are also able to specify the time span as to from when you would like to be informed if no
GPS signal is received any more.
If you have enabled and installed the Danger zones function for the BURY Time product, then the
buzzer signalises those zones if you approach them. You are also able to deactivate the signal, however, or change the acoustic tone of the signal.
The last piece of information tells you whether the danger zones are installed on the BURY Time product and if yes, the date from which they originate.
Danger zones
If you click on this menu item, a separate window opens with a wizard who guides you through the
subsequent steps.
Important:
Please comply with the country-specific laws and regulations if you want to use this function.X

30
Factory reset
If you would like to use the BURY product in another vehicle and in so doing, assign it to another user,
then you have to reset the device to its factory settings. You also have to carry out this procedure if
you want to sell the product.
Select the corresponding product from the list and click on ‘re-set device’. If you confirm the two security questions with a ‘yes’, all of the positional data on the product will be deleted. This can take a few
seconds depending on the amount of data. A message appears when this process is complete.
If a new user uses the BURY Time product with the same BURY Suite, you must delete the allocation
of the serial number of this device to an existing vehicle in the vehicle administration. To do this, click
on the corresponding vehicle and open the vehicle details. By clicking on the minus button, it is possible to delete the allocation and to restore the product to its factory settings.
Note:
During the deletion function, make sure that you do not remove the Micro-SD card from the X
card reader or the USB-plug of the adaptor cable from the PC or the device.
Firmware update
Every now and then, you can find notifications for updates to the BURY Times Suite and the Time
Products on the internet site www.bury.com. Inputting the previously saved data is then recommended before completing an update, if you want to be able to use new functions, for example. Please
don’t hesitate to call our hotline if you have additional questions about this topic.
Configuring BURY Time Products
A firmware update for the CC 9060 Time cannot be carried out via the BURY Time Suite. To do this,
please use the BURY Update Manager, which you can also find on the BURY internet site.

Further Information
31
18. Service
In case of general or technical queries, suggestions and comments, please do not hesitate to contact
our team at any time. Suggestions and feedback are always welcomed:
Administration: Producer:
BURY GmbH & Co. KG BURY Spółka z o.o.
Robert-Koch-Straße 1-7 ul. Wojska Polskiego 4
D-32584 Löhne 39-300 Mielec
Germany Poland
Hotline: +49(0)180 5 - 842 468*
Faxline: +49(0)180 5 - 842 329*
* 0.14 €/min. Deutsche Telekom AG landline,
the costs of international telephone calls which are made from abroad can vary.
E-Mail: hotline@bury.com
Version 05/2011
25.1197.0-03-160511
Subject to change. Errors and omissions excepted.
All of the other stated brands are owned by their corresponding owner.
© 2011 by BURY. All rights reserved.

32
 Loading...