

Page 1

LinkStation User Manual
www.buffalotech.com
35011114 ver.01
Page 2

Table of Contents
Chapter 1
Using your LinkStation ....................................................4
LinkStation Conguration Utility .............................................. 4
Adding shared folders ............................................................. 7
Access Restrictions ........................................................................ 9
FTP Server ..................................................................................... 15
Direct Copy .................................................................................... 18
Users/Groups .......................................................................... 20
Adding Users ................................................................................. 20
Add users as shown below. ........................................................... 20
Adding Groups ............................................................................... 22
Admin Password ............................................................................ 23
Network ................................................................................... 24
Jumbo Frames ............................................................................... 24
System Settings ...................................................................... 26
Name, Date and Time .................................................................... 26
System-Storage ...................................................................... 28
Check Disk ..................................................................................... 28
Format a Drive ............................................................................... 30
Adding Storage .............................................................................. 32
Remove Disk .................................................................................. 36
System-Backup ....................................................................... 37
Time Machine ................................................................................ 37
System-Backup .............................................................................. 42
RAID Arrays ............................................................................ 50
System-Maintenance .............................................................. 55
E-mail Notication .......................................................................... 55
System Power Management ................................................... 57
LinkStation User Manual 1
Page 3

UPS Settings .................................................................................. 57
Sleep Timer .................................................................................... 58
Restore Factory Defaults ............................................................... 60
Format the LinkStation ................................................................... 62
Extensions ............................................................................... 63
WebAccess .................................................................................... 63
Print Server .................................................................................... 71
BitTorrent Client ............................................................................. 78
Media Server .................................................................................. 84
Using iTunes with the Media Server .............................................. 95
Web/Database Server (LS-WXL, LS-WSXL only) ................... 96
Chapter 2
NAS Navigator2 ................................................................ 98
Chapter 3
Web Administration Tool .................................................103
Home ....................................................................................... 103
Shared Folders ........................................................................ 104
Users/Groups .......................................................................... 107
Network ................................................................................... 110
System .................................................................................... 113
Extensions ............................................................................... 126
Appendix ..................................................................... 130
Default Conguration Settings ................................................ 130
Mapping Additional Shares ..................................................... 131
Windows ........................................................................................ 131
LinkStation User Manual 2
Page 4

Mac OS X ....................................................................................... 132
File Sharing Security Level Change Tool ................................ 133
Status LED (LS-XHL, LS-CHL) ............................................... 135
Status LED (LS-WXL) ............................................................. 138
Status LED (LS-WSXL) ........................................................... 142
Compliance Information .......................................................... 145
Data Backup ............................................................................ 146
GPL Information ...................................................................... 146
LinkStation User Manual 3
Page 5

Chapter 1 Using your LinkStation
LinkStation Conguration Utility
To congure your LinkStation, use the web-based conguration utility from a browser on a
computer connected to the same network.
1
2
Launch NAS Navigator2. For Windows, click on the [BUFFALO NAS Navigator2] icon on your
desktop. For Mac OS X, double-click on the [NAS Navigator2] icon in the Dock.
Right-click on the LinkStation icon (on Mac OS X,
click the icon while holding down the control key)
and select [Open Web Setting] from the menu.
Notes: If multiple LinkStations and TeraStations
are connected to the network, multiple
icons will be displayed. Click on the correct
LinkStation.
Record the LinkStation’s IP address from the
bottom right of the NAS Navigator2 window.
3
LinkStation User Manual 4
Enter your username and password, and click [Login].
Initially, use the default username and password:
Username: admin
Password: password
After you log in, change the password for security.
Page 6

Using your LinkStation
4
Note: Use Firefox, Internet Explorer, or Safari with the conguration utility. Other browsers may not
display it correctly.
The conguration utility is organized by tabs across the top. The following tabs are available.
This is the LinkStation’s conguration utility. This
page displays the LinkStation’s current status,
including name, IP address, workgroup, and hard
drive settings.
• Shared Folder
Add/delete shared folders, set access restrictions,
and congure for a direct copy.
• Users/Groups
Register and delete users/groups.
• Network
Register and delete a network or workgroup.
• System
Perform Name, time, disk check format, backup, mail notication settings, timer ON/OFF,
UPS synchronization settings, initialization, complete disk format.
• Extensions
Congure for WebAccess, Print Server, and Time Machine.
LinkStation User Manual 5
Page 7

Using your LinkStation
To open the LinkStation’s conguration utility from a dierent computer, open a browser and type the
LinkStation’s IP address into the URL eld. You recorded the LinkStation’s IP address in step 2 on page 3.
If you have a Mac, you can open the conguration utility from "Bonjour".
1 Launch Safari.
2 Select [View] - [View Bookmark Bar] from Safari’s menu.
3
Select [Bonjour] from the left-side menu, then
click on your LinkStation in the bookmark list.
4
1 Enter your username and password.
2 Click [Login].
Note:To log in as a guest, type "guest" as the
username and leave the password blank.
5
The conguration utility opens.
The LinkStation’s name, IP address and drive
information are displayed on the left.
LinkStation User Manual 6
6
Page 8

Using your LinkStation
Adding shared folders
By default, the LinkStation includes one shared folder “share”. You may add additional folders as
follows.
1
2
You have created a new share.
To protect your data from accidental deletion, you may enable a Recycle Bin for the share (not
available for Apple and FTP connections). Deleted data in a shared folder will be temporarily moved
to the [Recycle Bin] folder. To recover deleted data, open the Recycle Bin folder and move les.
In the LinkStation conguration utility, navigate
to [Shared Folders] and click [Folder Setup].
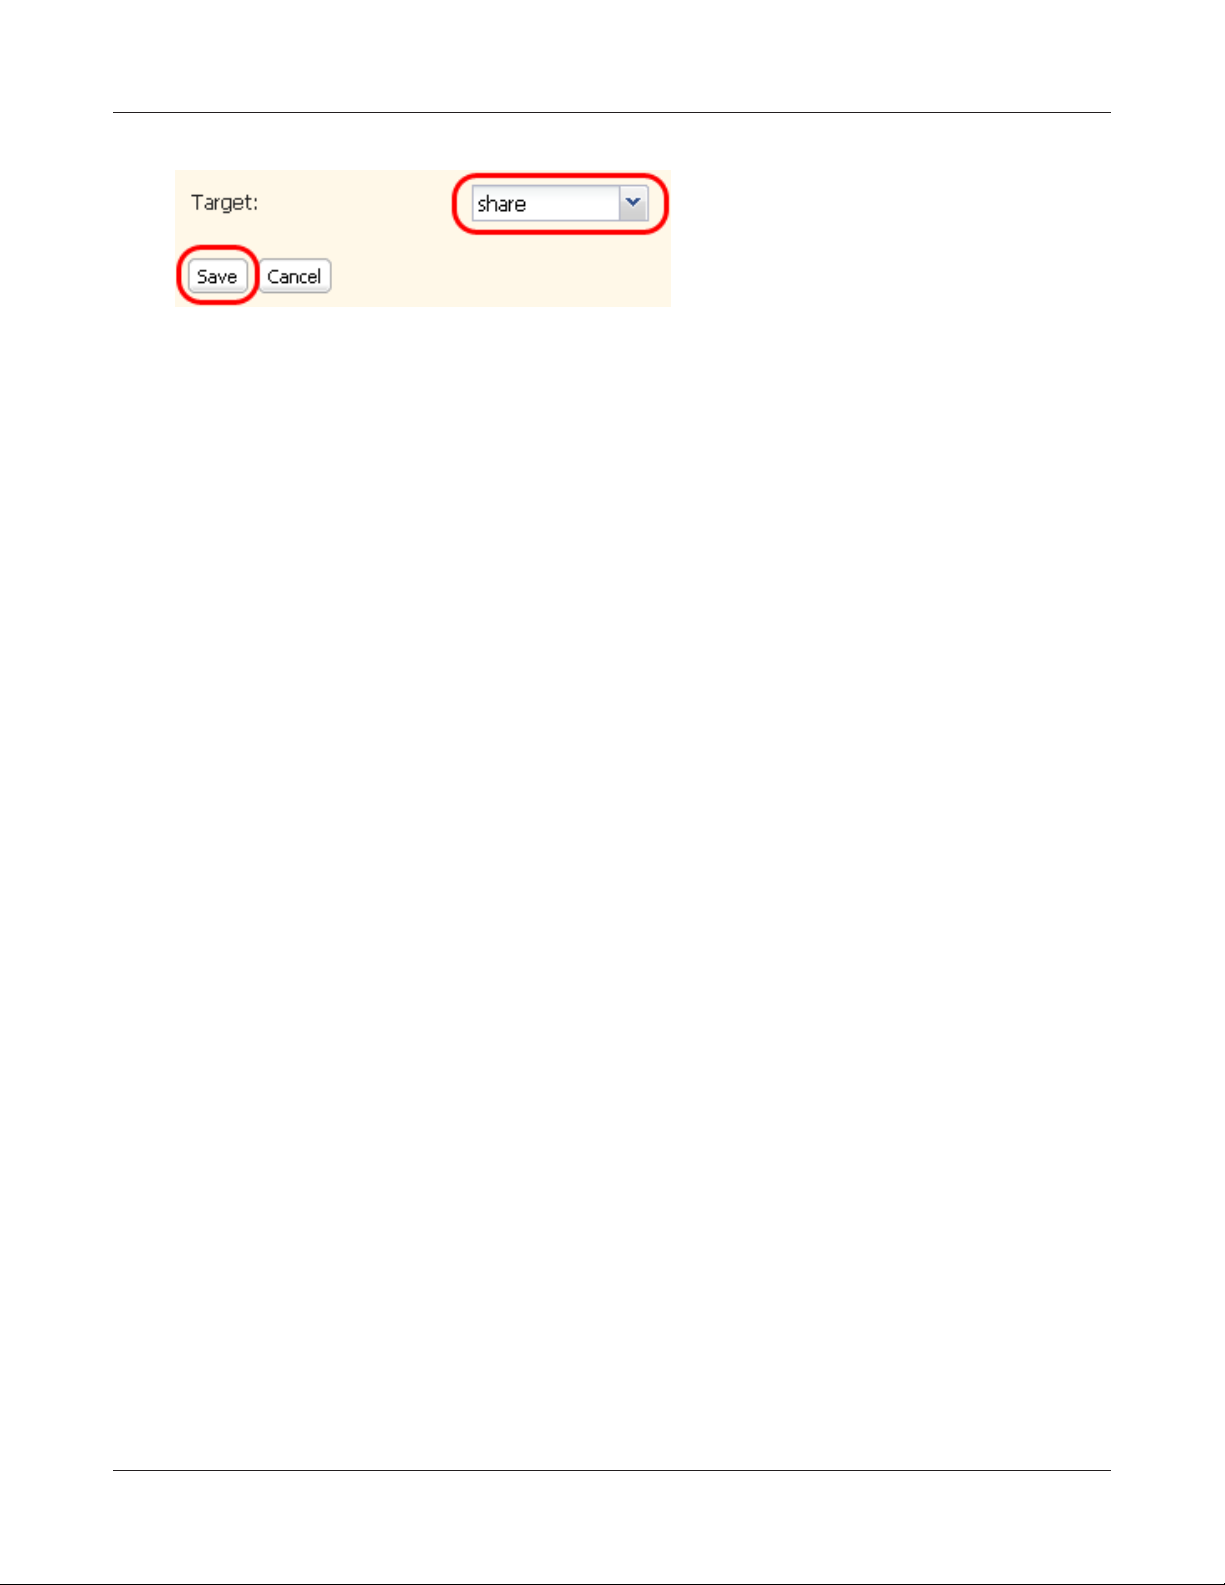
1 Enter desired characteristics for the new share.
Note: If you would like to copy the settings of an
existing folder, select a source folder from
the [Copy Settings from] dropdown.
2 Click [Save].
Read-Only shares cannot be modied or deleted. To make a Read-Only share, select [Read Only] in
the Shared Folder Conguration utility and click [Save].
Notes: • By default, shares are congured as [Read & Write].
• A shared folder set to Read Only cannot be written by any users or groups, even if they have
read and write permissions. Read-Only folders are read-only for all users.
• Read Only shares are described as (Read Only)] in the shared folder description.
LinkStation User Manual 7
Page 9

Using your LinkStation
Notes:
• Wh
en using two-byte characters (such as Japanese), make folder or le names with 80 characters or less. You
may not be able to copy a folder or a le whose name length is more than 80 characters.
• You cannot set hidden or read-only attributes to sub-folders or les on the LinkStation.
• If non-Roman alphabetical folder names or workgroup names do not display properly, rename the folder or
workgroup with Roman alphabetical characters.
• Please don’t use any of the following words as the name of a shared folder. These words are reserved for
internal use by the LinkStation:
info, spool, usbdisk1, usbdisk2, usbdisk3, usbdisk4, lost+found, global, printers, homes, lp, auth, test, ram,
disk1, disk2, disk3, disk4, array1, array2, msdfs_root, mt-daapd
• The following characters are handled dierently by Mac OS X and Windows. Avoid using these characters when sharing
data between Mac OS X and Windows:
• The following characters are not displayed correctly by Windows, or by a Mac connected to the LinkStation via SMB.
Avoid their use in le names that will be used with the LinkStation.
• Never turn o the LinkStation or unplug its network cable while data is being written. Doing so may result in an
incomplete le that cannot be opened or deleted. If this happens, restart the LinkStation, delete the le, then retry
copying the le.
• Your OS may update the date and timestamp stored on the LinkStation’s hard drive, or on a USB drive
connected to the LinkStation. This might result in inaccurate information for date-created or date-accessed
data on the LinkStation.
• In the LinkStation’s conguration utility, or from a Mac OS X 10.6 or later, drive size is displayed in gigabytes,
where 1 gigabyte = 1,000,000,000 bytes. This is also how drive capacity is expressed on your LinkStation’s
packaging. However, if you check the drive size from an older Mac, or from a Windows computer, it may
display the size of the drive in gibibytes, where 1 gibibyte = 1,073,741,824 bytes. Since a gibibyte is larger
than a gigabyte, the displayed drive capacity will be a smaller number than the actual drive size.
LinkStation User Manual 8
Page 10

Using your LinkStation
Access Restrictions
There are several ways to restrict access to users of a LinkStation.
Access restrictions for locally registered users
The next page describes how to congure access restrictions for local users.
Access restrictions by using the Delegate Authority server feature
Follow the procedure on page 11 to congure.
Notes: • Permissions are assigned to shared folders. Child folders in a shared folder inherit their
permissions from the parent folder. If a le or folder is moved into a new shared folder
with dierent permissions from the folder it was originally in, it will now have the access
restrictions from the new shared folder.
• When accessing the LinkStation from Windows via SMB, changing permissions from the
folder’s security tab in the properties screen of a folder is not supported. Access restrictions
for shared folders on the LinkStation can only be congured from within the LinkStation’s
conguration utility.
LinkStation User Manual 9
Page 11

Using your LinkStation
Restricting access for local users
You can set access restrictions for shared folders by username or group names for users that are
registered on the LinkStation.
1
2
3
Create a new user accounts and passwords in Windows, or record existing Windows
usernames and passwords. Each account on the LinkStation will have the same username
and password as the user’s Windows account.
Register users and groups on the LinkStation.
1 Add users as described on page 20.
2 Add groups as described on page 22.
Congure access restrictions for groups and/or users.
1
In the LinkStation conguration utility, navigate
to Shared Folders/Folder Setup.
2
LinkStation User Manual 10
Click a shared folder you want to set access
restrictions for.
Page 12

Using your LinkStation
3
4
Check [Access Restrictions] to enable.
Click [Add].
Note: The procedure described here shows how to
set access restrictions for users. To set access
restrictions for a group of users, click [Local
Groups] - [Add].
5
1 Check the users (or groups) that you want to
permit to access the share.
.
2 Click [Add].
6
Select the level of access for the user or group you
added.
7 Click [Save].
You have assigned access restrictions.
• If you log on from a Microsoft Network Domain, you can set the access restrictions with the users
and/or groups which are registered on the domain.
• If both read-only and read-and-write permissions are given to a user, that user will have read-only
access.
LinkStation User Manual 11
Page 13

Using your LinkStation
Access restrictions by using the Delegate Authority server feature
You may administer all user accounts and passwords centrally from a delegate server as described
below. This procedure is intended for network administrators only.
Notes: • You can set access restrictions on shared folders. You cannot set dierent restrictions on
folders in a shared folder. Child folders in a shared folder inherit their permissions from the
parent folder.
• When accessing the LinkStation from Windows via SMB, changing permissions from the
folder’s security tab in the properties screen of a folder is not supported. Access restrictions
for shared folders on the LinkStation can only be congured from within the LinkStation’s
conguration utility.
There are restrictions when administrating through a delegate authority server:.
• To access the LinkStation, you must be logged into Windows with the account registered to the
authentication server.
• If you use the Delegate Authority option, you cannot connect as a guest user via AFP.
• If you use the Delegate Authority option, you cannot connect anonymously via FTP.
Notes:
Windows Vista and Windows Server 2003/Server 2008 users need to change the security settings to
use the Delegate Authority to External SMB server feature to restrict access.
[Start] - [BUFFALO] - [File Sharing Security Level Change Tool] - [File Sharing Security Level Change
Tool], and then select [Change Security level] to change the security settings (Select "Recover
default security level" change it back to the previous setting).
For Windows Vista, the "File Security Tool" on the LinkNavigator CD will change this setting for you
automatically.
LinkStation User Manual 12
Page 14

Using your LinkStation
1
2
1 In the conguration utility, navigate to
[Network] - [Workgroup].
2 Click [Modify Settings].
1 Double click "Workgroup" (even if you are in a
domain environment).
2 Enter the workgroup name. To use a Windows
Domain Controller as an external SMB
authentication server, enter its name for the
workgroup name.
3 Select [Delegate Authority to External SMB
Server].
3
LinkStation User Manual 13
1 Enter the name or IP address of an
authentication server.
Note: When connecting with AFP or FTP, an IP
address is recommended.
2 Check [Use Windows Domain Controller as
Authentication Server], [Automatic User
Registration] and [Enable Authentication
Shared Folder].
3 Enter the shared folder name for
authentication.
4 Click [Save].
Page 15

Using your LinkStation
4
A user that has been registered to the specied authentication server will be automatically
registered as a user on the LinkStation when they open the shared folder for authentication (you can
also register users directly).
Conguration of the Authentication Server is complete.
Notes:
• A user who is automatically registered will belong to the "hdusers" group. They added to other
groups from within Group settings.
• You can restrict access to shared folders by username or group.
• The names of registered users are listed in [Users/Groups] - [External Users]. To delete an
• When connecting through AFP or FTP, always use an IP address. Using a server name may cause
The shared folder for authentication should be created on the LinkStation
automatically registered user, select that user and click [Delete].
problems with authentication.
• To specify a server from another subnet, enter its IP address.
• AFP and FTP connections don’t support delegating authority to an external SMB server.
LinkStation User Manual 14
Page 16

Using your LinkStation
FTP Server
By default, the LinkStation’s shares are only accessible by users connected to the same network
or router as the LinkStation. The optional FTP server allows users to access the LinkStation from
outside of the local network. You may enable it as follows.
1
2
3
4
In the conguration utility, navigate to [Network]
- [Settings] - [Network Services] and click [FTP].
1 Select [Enable].
2 Click [Save].
Click [Shared Folders] - [Folder Setup].
Click the folder to enable remote FTP access on.
5
The folder is now congured for FTP access. Don’t forget to give read (or write) permissions for the FTP share
to any users that will be accessing the share remotely. Folder permissions can only be changed from the
LinkStation’s conguration utility. Changing them remotely with FTP client software is not supported.
LinkStation User Manual 15
1 Select whether the shared folder is to be readonly or writable.
2 Check [FTP].
3 Click [Save].
Page 17

Using your LinkStation
To access to the LinkStation with an FTP client
Congure your FTP client software with the following settings:
• Host Name IP address of the LinkStation.
• Username Username registered on the LinkStation
• Password Password registered to the LinkStation
• Port 21
Example ftp://192.168.11.150/
• You cannot write by FTP if the shared folder is set to read-only on the LinkStation.
• Access restrictions are applied based on the settings in the LinkStation. The restrictions
aren’t displayed for users without permissions for the share.
• To access your FTP share from outside of your network, you may need to congure your
router and rewall. Consult your router documentation for more information.
• Shared folders appear as follows when connected by FTP:
- disk1 share
- usbdisk1
- info
• The internal hard drive of the LinkStation is displayed as disk1, and a USB hard drive
(optional) will be displayed as usbdisk1.
• "usbdisk1" is not displayed when the USB hard drive is not connected, or if access is
restricted.
LinkStation User Manual 16
Page 18

Using your LinkStation
Accessing the LinkStation with an Anonymous user:
To allow anonymous access to your FTP share, disable access restrictions on the FTP share.
Congure your FTP client as follows:
• Host Name IP address of the LinkStation
• Username anonymous
• Password any set of characters
• Port 21
Example ftp://192.168.11.150/
• To make your FTP share available from outside your network, you will need to congure
your router and rewall. Consult your router’s documentation for information on how to
allow FTP trac.
• If the LinkStation joins a domain, anonymous users cannot access it.
• Folders created or copied via an AFP connection may not be deleted from the AFP
connection. This is because an automatically generated ".AppleDouble" folder begins
with a dot. To delete these les, use an SMB connection.
• Do not exceed 250 characters for a le/folder name including directory path when you are
creating it by using an FTP connection. Otherwise, you cannot view or delete it in Explorer
or other applications.
LinkStation User Manual 17
Page 19

Using your LinkStation
Direct Copy
DirectCopy automatically copies movie, music, and images directly to the LinkStation from a USB
device.
You can connect many types of USB devices to the LinkStation, including USB hard drives, USB ash
drives, single-card card readers, digital cameras, and USB printers. USB hubs, mice, keyboards, and
card readers that support 2 or more cards are not supported.
1
USB
Connector
Status LED
Connect to a USB device (USB ash/digital camera/hard disk/card reader) to the LinkStation.
After the USB device is recognized, the function button is lit in
blue for 60 seconds. After the function button is lit in blue, you
can access the USB device.
If an unsupported USB memory device is connected to the
LinkStation, then the function button will not light up in blue,
and the device will not be mounted.
Function
Button
2
While the function button is blue, press it to automatically copy data from the USB device to
a shared folder on the LinkStation. The function button will ash blue during the copy. Push
the function button again to abort the copy.
LinkStation User Manual 18
Page 20
Using your LinkStation
Files are copied to the folder:
<shared folder>/pictures/yyyymmdd
yyyy: year copied
mm: month copied
dd: date copied
You may change the destination shared folder for DirectCopy in [Shared Folders] - [Direct
Copy] - [Modify Settings] in the conguration utility. Subsequent DirectCopy folders are
created at:
<DirectCopy folder>/pictures/yyyymmdd/n
yyyy: year copied
mm: month copied
dd: date copied
n: 1st time n=0, 2nd time n=1, 3rd time=2 and so on.
3
For USB Mass Storage class USB devices, les with following extensions will be copied.
avi, divx, asf, mpg, mpe, m1v, vob, mts, m2ts, m2t, mpeg, mpeg2, vdr, spts, tp, ts, 3gp, mov,
m4v, wmv, dvr-ms, xvid, mp4, jpg, jpeg, gif, png, tif, ti, yuv, bmp, mp3, mpa, wma, aac, apl,
ac3, lpcm, pcm, wav, m3u, m4a, m4b, aif, ai, ac, ogg, mp2, mp1
For digital cameras that don’t follow the USB Mass Storage Class standard, all les on the
device will be copied.
When the access LED of the USB device goes o, the copy is nished. Dismount the USB
device before unplugging it.
To dismount the USB device if the LinkStation is on, hold in the function button for 3 seconds.
The blue LED will go out, and the USB device is dismounted. You may now unplug it safely.
If you turn o the LinkStation, the USB device is already dismounted, and you can remove it
safely.
LinkStation User Manual 19
Page 21

Using your LinkStation
Users/Groups
Adding Users
Add users as shown below.
1
2
1 In the conguration utility, navigate to [Users/
Groups] - [Local Users].
2 Click [Create User].
1 Enter a name and description for the user.
2 Click [Save].
You have added a user.
Use the same username and password that the user logs into Windows with. If the username and
passwords are dierent, the user may not be able to access restricted shares.
LinkStation User Manual 20
Page 22

Using your LinkStation
Notes:
• When using access restrictions, you can register up to 300 users on the LinkStation.
• Please do not use any of the following words as a username or a group name:
root, bin, daemon, sys, adm, tty, disk, lp, sync, shutdown, halt, operator,
nobody, mail, news, uucp, ftp, kmem, utmp, shadow, users, nogroup, all,
none, hdusers, admin, guest, man, www, sshd, administrator, ftpuser, apache, mysql
• If you are using Mac OS 9 or earlier, do not use more than 9 alphanumeric characters for the
user password, the user will not be able to access shared folders on the LinkStation.
LinkStation User Manual 21
Page 23

Using your LinkStation
Adding Groups
Add groups as shown below:
1
2
1 In the conguration utility, navigate to [Users/
Groups] - [Local Groups].
2 Click [Create Group].
1 Enter a name and description for the group.
2 Select users to include in the group.
3 Click [Add], then [Save].
You have added a group.
Please do not use any of the following words as a group name:
root, bin, daemon, sys, adm, tty, disk, lp, sync, shutdown, halt, operator,
nobody, mail, news, uucp, ftp, kmem, utmp, shadow, users, nogroup, all,
none, hdusers, admin, guest, man, www, sshd, administrator, ftpuser, apache, mysql
LinkStation User Manual 22
Page 24

Using your LinkStation
Admin Password
You may change the admin password as follows.
1
2
3
In the conguration utility, navigate to [Users/
Groups - [Local Users].
Select [admin] and click [Edit User].
1 Enter a new password (twice).
2 Click [Save].
You have now changed the admin password.
Notes: • The administrator's username, "admin" cannot be changed.
• You cannot set access restrictions or use WebAccess with the admin account. Use the
admin account only to log in to the LinkStation conguration utility.
LinkStation User Manual 23
Page 25

Using your LinkStation
Network
Jumbo Frames
If your other network devices support it, you may be able to increase network performance with
jumbo frames.
1
2
In the conguration utility, navigate to [Modify
Settings] in [Network] - [Settings] - [Ethernet
Frame Size].
1 Select Ethernet Frame Size.
2 Click [Save].
LinkStation User Manual 24
Page 26

Using your LinkStation
Notes: • To use the LinkStation with jumbo frames, your router/switch/hub must support jumbo
frames. Otherwise, you will not be able to transfer data.
• To use jumbo frames (4102/7422/9694 bytes), your computer’s NICs and all switches, hubs,
and routers on the transmission route need to support jumbo frames. If any device on the
route doesn’t support jumbo frames, use standard transmission (1518 bytes) instead.
• If you are using jumbo frames and back up data from a LinkStation/TeraStation to another
LinkStation/TeraStation, set the Ethernet frame sizes of the LinkStations/TeraStations to
the same settings (or the closest available). If the Ethernet frame sizes are signicantly
dierent, the backup job may fail. If you have problems with backup jobs, select the default
frame size (1518 bytes).
Conne c t i o n Trans m i s s i o n
LinkStation
Ju mb o Fr am e
(4 10 2/ 7 422 / 96 94 )
LinkStation
Ju mb o Fr am e
(4 10 2/ 7 422 / 96 94 )
LinkStation
Ju mb o Fr am e
(4 10 2/ 7 422 / 96 94 )
LinkStation
Ju mb o Fr am e
(4 10 2/ 7 422 / 96 94 )
Ju mb o Fr am e
sup port ed
Ju mb o Fr am e
Sup port ed
Ju mb o Fr am e
not sup porte d
Ju mb o Fr am e
not sup porte d
Ju mb o Fr am e
sup port ed
Ju mb o Fr am e
not sup porte d
Ju mb o Fr am e
not sup porte d
Ju mb o Fr am e
sup port ed
Tra ns mi t
Jum bo F ra me
( 4102 /7 42 2/ 969 4)
Transmit
normally(151 8)
Transmit
normally(151 8)
No transmission
LinkStation User Manual 25
Page 27

Using your LinkStation
System Settings
Name, Date and Time
Congure the LinkStation’s host name, date, or time as follows:
1
2
3
In the conguration utility, navigate to [Modify
Settings] in [System] - [Settings] - [Name].
Enter the LinkStation’s name and description,
then click [Save].
In the conguration utility, navigate to [Modify
Settings] in [System] - [Settings] - [Date and Time].
4
LinkStation User Manual 26
1 Enter the year, month, day, and time.
2 Click [Save].
Page 28

Using your LinkStation
Click [Use Local Date/Time] to use your computer’s time settings for the LinkStation.
By default, the LinkStation adjust its clock automatically by using an NTP server.
NTP
NTP may not be usable in some networks.
The default NTP Server (ntp.jst.mfeed.ad.jp) belongs to Internet Multi Feed Inc. For more
information, please visit www.jst.mfeed.ad.jp.
Use NTP at your own risk. Bualo Technology is not responsible for any loss or damage
caused by using of this service, stopping the service, or missing service.
You’ve completed hostname and time settings for the LinkStation.
Note: The LinkStation's internal clock may run at a slightly dierent speed from other clocks on you
network, and over a long period of time your network devices may show dierent times. If
clocks on your network vary by more than 5 minutes it may cause unexpected behavior. For
best results, keep all clocks on the network set to the same time by adjusting them regularly,
or use an NTP server to correct them all automatically.
LinkStation User Manual 27
Page 29

Using your LinkStation
System-Storage
Check Disk
A disk check tests the data on a drive in the LinkStation or connected via USB. Errors are xed
automatically. A disk check may run for more than ten hours. Shared folders cannot be accessed
during the disk check. Do not turn o power to the LinkStation during the disk check.
If Auto power is set to [AUTO], then the LinkStation will turn o when the disk check is nished.
Run a disk check as follows:
1
2
3
In the conguration utility, navigate to [System] [Storage].
1 Select the hard drive to test.
2 Click [Check Disk].
Click [Check].
The Status LED on the front of the LinkStation will ash during the disk check.
Note: If a power outage disconnects the LinkStation in the middle of a disk check, then you
may not be able to access shares on the LinkStation from Mac OS. This is because the
database created by Mac OS is damaged. To resolve, navigate to [System] - [Storage]
- [Check Disk] and check [Delete any hidden, non-essential Mac OS dedicated les].
Rerun the disk check when done.
LinkStation User Manual 28
Page 30

Using your LinkStation
Note: If you access a shared folder from a Macintosh computer, information les for Macintosh may
be automatically generated. Do not delete these les from a Windows computer. Otherwise,
you may no longer be able to access folders from the Macintosh. If you cannot access them,
check [Delete any hidden, non-essential Mac OS dedicated les] in [System] - [Storage] [Check Disk].
LinkStation User Manual 29
Page 31

Using your LinkStation
Format a Drive
• A format deletes all data from a hard drive. Be careful! Back up any important data on a drive
before formatting it. It will take several minutes to format a hard drive.
• Shared folders cannot be accessed during formatting.
• Do not turn o the power switch or disconnect power while formatting a hard drive.
• If Auto power is set to [AUTO], then the LinkStation will turn o when the format is nished.
• To erase all data on a disk, choose [Disk Management] - [Erase Disk].
1
2
3
In the conguration utility, navigate to [System] [Storage].
1 Select the drive to format.
2 Click [Format Disk].
Click [Format].
4
5
LinkStation User Manual 30
The [Conrm Operation] screen will be displayed. Type the displayed number into the
[Conrmation Number] eld within 60 seconds, then click [Apply].
Follow the instructions displayed on the screen.
Page 32

Using your LinkStation
Note: • The time needed to format a hard drive varies based on the hard drive's size and format
types (a few seconds to several minutes).
• The Info LED on the front of the LinkStation will ash during formatting. The LinkStation's
shared folders cannot be accessed until the disk format is complete.
• If the hard drive is connected to the USB connector, partitions will be recreated.
LinkStation User Manual 31
Page 33

Using your LinkStation
Adding Storage
The LinkStation has a USB connector on the back. You can connect a Bualo external hard drive to the
USB port. It will appear as an additional shared folder on the LinkStation.
Connect the hard drive as shown below. If the hard disk is not formatted, format it from the
conguration utility.
Refer to page 35 when removing the hard drive from the LinkStation.
Function
Button
USB
Connector
Bualo External
Hard Drive
• Only one hard drive can be connected to the LinkStation at a time. Bus powered drives are not
supported. Always use the drive’s AC adapter.
If the drive is connected properly, [usbdisk1] will be added to the shares
under the LinkStation in Network.
Note: If the USB drive is formatted with FAT 32 (or FAT 16), les created by Mac OS X automatically (such
as .DS_Store) cannot be backed up to this drive.
LinkStation User Manual 32
Page 34

Using your LinkStation
To format a USB hard drive
For best results with the LinkStation, reformat the external USB drive from the LinkStation’s
conguration utility. Formatting will delete all data on the drive. Back up any important data
before formatting.
1
2
3
In the conguration utility, navigate to [System] [Storage].
1 Select the USB hard drive.
2 Click [Format Disk].
1 Select a format type (see next page).
2 Click [Format].
4
5
When the format is complete, create a shared folder on the drive.
LinkStation User Manual 33
The [Conrm Operation] screen will be displayed.
Enter the number shown in the [Conrmation Number] eld within 60 seconds, and click
[Apply].
Follow the instructions on the screen.
Page 35

Using your LinkStation
Note:
Format type Advantages Disadvantages
FAT 32
Drives formatted with FAT
32 can be disconnected
from the LinkStation and
connected to a Windows or
Mac computer directly. They
work well with many devices,
but do not support large
lesizes.
EXT3
This is recommended if you
may have to reconnect to
and use other LinkStation/
TeraStation.
XFS
This format is recommended
when you only use the
drive with a LinkStation or
TeraStation.
• Read/Write support with
LinkStation, PCs, and Macs.
• You can connect the hard
drive to a Windows PC or a
Mac at any time and use it
normally.
• Supports both Reading/
Writing.
• Supports Journaling File
System.
• Also available when
connecting to other
LinkStation.
• Supports both Reading/
Writing.
• Supports Journaling File
System.
• More space is available with
XFS after format.
• Cannot copy or back up les
larger than 4 GB.
• Cannot use some characters
from Mac OS X such as [:].
• It takes extra time to access
from the LinkStation’s
conguration utility or NAS
Navigator2.
• May take a while to format
(a few minutes to several
minutes).
• Less space is available than
XFS after format.
•the more files in a folder, the
slower the access.
*You cannot read data by
directly connecting a PC.
Not supported by legacy
LinkStations such as HD-LAN,
HD-HLAN, HD-HGLAN Series.
You cannot read data by
directly connecting to a PC.
• Access speed will not degrade
even though more files in 1
folder.
NTFS
NTFS works well with
Windows PCs. Read-Only
from the LinkStation.
HFS+
HFS+ works well with
Macs. Read-Only from the
LinkStation.
LinkStation User Manual 34
Can be used with Windows
Vista/XP/2000, or Windows
Server2003/Server2008.
Can be used to connect to
Mac OS X 10.3.9 or later.
• Read-only from the
LinkStation or a Mac.
• Not suitable for backup
from the LinkStation.
• Read-only from the
LinkStation.
• Not suitable for use with
Windows PCs.
Page 36

Using your LinkStation
To set access restrictions on an additional hard drive
You can set access restrictions for shares on an external USB hard drive. In the LinkStation’s
conguration utility, navigate to [Shared Folders] - [Folder Setup].
Note: Even if a shared folder is not visible, you can still format the drive, run a disk check, or back up
to the external USB hard drive.
About the USB connector on the LinkStation
• You can connect many types of USB devices to the LinkStation, including USB hard drives,
USB ash drives, single-card card readers, digital cameras, and USB printers. USB hubs, mice,
keyboards, and card readers that support 2 or more cards are not supported.
• One hard drive or other device may be connected to the LinkStation at a time. USB hubs are not
supported. Only Bualo hard drives are supported.
• Hard drives with their power mode switch set to [Auto] may not be recognized by the LinkStation.
Set the power mode switch to [Manual] for use with the LinkStation.
• Bus-powered hard drives are not supported. Always use the AC adapter for a hard disk.
• Only the primary partition of USB hard drives can be recognized. Secondary or other partitions
will not be recognized.
• If the external USB drive is formatted as FAT32 or FAT 16, you may not be able to copy or back up
les or folders from Mac OS X to it. These les may include characters that are not supported by
FAT 32 or FAT 16.
• When you back up to a FAT 32 USB hard drive with Overwrite Backup (Dierential) enabled, the
system may overwrite data even though there are no dierence in data. If the second of the date
when the le created is an odd number, an overwrite backup is performed every time regardless
of dierences in the data.
LinkStation User Manual 35
Page 37

Using your LinkStation
Remove Disk
To remove the hard drive:
If the LinkStation is powered on, dismount the USB hard drive before unplugging it. Hold in the
function button for 3 seconds. The blue LED will go out, and the drive is dismounted. You may now
unplug it safely.
If the LinkStation is o, then the USB device is already dismounted, and you can remove it safely.
Status LED
Function
Button
LinkStation User Manual 36
Page 38

Using your LinkStation
System-Backup
Time Machine
Time Machine is a backup program included with Mac OS X 10.5 and later version. It can back up to
your LinkStation if you congure the LinkStation as follows:
1
2
3
Click [AFP] on [Network] - [Settings] - [Network
Services].
Select [Enable] and click [Save].
1 Click [Shared Folders].
2 Select a shared folder to use as the backup
destination for Time Machine, or create a new
share and then select it.
LinkStation User Manual 37
Page 39

Using your LinkStation
4
5
1 Select [Apple].
2 Click [Save].
1 Click [Extensions] - [Time Machine].
2 Click [Modify Settings].
6
7
1 Select [Enable].
2 Select the shared folder that you chose in step 3.
3 Click [Save].
1 Enter the Mac’s host name.
2 Enter the Mac’s MAC address.
3 Click [Create].
LinkStation User Manual 38
Page 40

Using your LinkStation
• You can nd the Mac’s host name under [Computer Name] in [System Preferences] -
[Sharing].
e.g.) If it is displayed as "bbbbbbbbbb.local", enter
"bbbbbbbbbb" for the host name. If it is
displayed as "cccccccccc.eee-ee.local", enter
"cccccccccc" for the host name. If it is displayed
as "dddddddddd.f-.jp", enter "dddddddddd"
for the host name.
• To verify the MAC address of the Mac:
1 Open [About This Mac] from the Apple menu and
click [More Info].
2 When the System Proler is open, click [Network] on
the menu at the left of the screen.
3 Select the MAC address for the device whose BSD
Device Name is [en0] under [Active Services].
Normally this will be listed below under “Ethernet
MAC Address”. Copy and paste it to [Target MAC
address].
The folder <Macintosh host name>_<Macintosh MAC address>.sparsebundle will be created
in the selected folder of the LinkStation. Be aware that changing this folder name or deleting
this folder will prevent Time Machine from using it as a backup destination.
LinkStation User Manual 39
Page 41

Using your LinkStation
8
9
10
Select [System Preferences] from the Apple menu of Mac OS X 10.5.
Click [Time Machine].
Click [Choose Backup Disk].
11
Select the folder on the LinkStation and click [Use for
Backup].
LinkStation User Manual 40
Page 42

Using your LinkStation
12
13
Enter a username and password to access the shared
folder on the LinkStation, and click [Connect].
If you do not use access restrictions for the shared folder of the LinkStation you set as a
backup destination, enter "admin" in the username box and your password for "admin" in the
password. If you use access restrictions, enter a username and password that has read and
write access rights to the share.
Make sure that the switch for Time Machine is "on".
The number of seconds displayed in [Next Backup]
will count down and a backup job will start when it
hits zero. The backup job will run in the background,
so you can use and shut down the Mac as usual. To
recover data or set items you want to exclude from
backup, refer to Mac OS Help.
You’ve congured your LinkStation to work with Time Machine.
LinkStation User Manual 41
Page 43

Using your LinkStation
System-Backup
1 Back up data on the LinkStation
You can back up shared folders on the LinkStation from the conguration utility.
• Other LinkStation
The following sections will discuss how to:
• [Set up Backup destination]
• [Setting to set the other LinkStation/
TeraStation as a backup destination]
• [Set up Backup Source of the LinkStation]
LinkStation Other Link/TeraStation
• USB hard drive connected to the LinkStation
LinkStation USB Hard Drive
The following sections will discuss how to:
• [Set up Backup Source of the LinkStation]
LinkStation User Manual 42
Page 44

Using your LinkStation
2 Setting up the backup destination folder on LinkStation # 1
You may congure a destination folder on a LinkStation for backup jobs from a TeraStation or
another LinkStation.
1
2
3
In the conguration utility, click on [Shared
Folders].
Click the shared folder you want to set as a
backup destination.
1 Check [Disk Backup].
Note: If you enter a backup password, users of
other LinkStations (and TeraStations) will
have to enter the password before using
this LinkStation as a backup destination.
2 Click [Save].
LinkStation User Manual 43
Page 45

Using your LinkStation
3 Finding the backup destination folder from LinkStation # 2
If the password is set for the backup destination folder, you must enter the password to congure
the folder as the destination for a backup job.
1
2
3
In the conguration utility, navigate to [System] [Backup].
Click [Modify Settings] in [Search for Backup Destination by Password].
Enter the password for the folder that is the
backup destination.
The search will nd backup-enabled folders on
the network that have the same password that
you are searching for, or that have no password
set.
LinkStation User Manual 44
Page 46

Using your LinkStation
4 Conguring LinkStation # 2 to use LinkStation # 1 as a backup destination
1
2
3
In the configuration utility, navigate to [System] [Backup].
Click [View NAS Devices].
1 Check the IP address of the LinkStation you
want to specify as a backup destination from
[Local DEVICE_TYPEs].
2 Enter IP address of the LinkStation you want
to specify as a backup to [O Subnet DEVICE_
TYPEs] and click [Add].
Notes:
If LinkStation # 2 (backing up) and LinkStation # 1 (with the destination folder) are on dierent
networks, you must create a VPN connection between the two networks before the LinkStations will
be able to see or back up to each other.
If you are using jumbo frames and back up data from one LinkStation or TeraStation to another
LinkStation or TeraStation, set the Ethernet frame sizes of the LinkStations/TeraStations to the same
settings (or the closest available). If the Ethernet frame sizes are signicantly dierent, the backup
job may fail. If you have problems with backup jobs, select the default frame size (1518 bytes).
LinkStation User Manual 45
Page 47

Using your LinkStation
5 Set up a backup job on LinkStation # 2
1
2
3
In the conguration utility, navigate to [System] [Backup] - [Backup Jobs Setup].
Click [Create New Job].
Select backup options.
LinkStation User Manual 46
Page 48

Using your LinkStation
Backup operation modes
Three backup operation modes are available.
Normal Backup
All les in the source folder are backed up to the destination folder.
Overwrite Backup (Incremental Backup)
The rst time the backup runs, it backs up all les in the source folder just like a normal backup.
If later, le A is added to the backup source and le B is deleted, the next backup will add le A,
but le B will not be deleted from the backup destination. This will use more space on the backup
destination because of the les that are not deleted.
Overwrite Backup (Dierential Backup)
The rst time the backup runs, it backs up all les in the source folder just like a normal backup.
If later, le A is added to the backup source and le B is removed, the next backup will add le A
and delete le B. This uses the same space on the backup destination as a normal backup.
LinkStation User Manual 47
Page 49

Using your LinkStation
4
5
6
Click [Add] in the [Backup Folders].
Select the backup source and backup destination
folders, then click [Add].
Click [Apply].
The task added is displayed to the backup list.
You’ve now congured a backup job.
LinkStation User Manual 48
Page 50

Using your LinkStation
Notes:
• You can register up to the second level of subfolders. However, folders with more than 80
characters in their names cannot be selected.
• The backup destination device must be congured as a backup destination in advance in order to
select it.
• For best results, USB hard drives connected to the LinkStation for backup should be formatted with
XFS or EXT3. If a hard disk connected to LinkStation is formatted in FAT 32 or FAT 16, the following
restrictions apply:
You cannot back up more than 2 GB of data per le in FAT 16 and more than 4 GB of data per le
in FAT 32.
Files created by Mac OS X cannot be backed up, since they contains character not allowed by
FAT 32 or FAT 16.
• You must change the backup settings for backup if you format the hard drive after setting up
backup. If there is no shared folder at the destination, an error message will be displayed.
LinkStation User Manual 49
Page 51

Using your LinkStation
RAID Arrays
Several RAID modes are available for LS-WXL and LS-WSXL LinkStations. LinkStations with only one
hard drive do not support RAID modes.
Note:– All data is lost when the RAID mode is changed. Back up any important data before
changing RAID modes.
– In this document, “Recovery” means putting the LinkStation back to the state it was in
before the malfunction happened. It does not mean reading data from broken hard
drives.
– When the use mode of the hard disk is changed, all the data in the hard disk gets delet-
ed. Please take back-up before changing use mode so that the important data will not
be lost.
• RAID 1 mode
Uses 2 hard drives in a mirrored array. One drive’s worth of space is usable. Identical data is written to
both drives. If one drive is damaged, data can be recovered by replacing the damaged drive.
• RAID 0 mode(LS-WXL, LS-WSXL Default Settings)
Multiple hard drives are combined into a single array. The total capacity of all drives is usable. This is
the fastest of the LinkStation’s RAID modes. If any drive is damaged, all data on the array is lost.
• Normal Mode
Each drive is accessible as a separate, individual drive. The total capacity of each drive is usable.
If any drive is damaged, all data on that drive is lost.
LinkStation User Manual 50
Page 52

Using your LinkStation
• Using in RAID 1 mode
Change system to normal mode (page 54 ).
1
2
3
4
5
The confirmation screen will appear. Enter the number shown in the [Confirmation Number]
6
eld within 60 seconds, and click [Apply].
Follow the instructions displayed on the screen.
7
You have set up a RAID 1 array. Turn to page 7 to create a shared folder.
LinkStation User Manual 51
Page 53

Using your LinkStation
Note: –If power is turned o during a RAID rebuild, the RAID rebuild will continue when power
is restored. (Example: In LinkStation of 1TB when power supply is changed from OFF to
ON after lapse of 3 hours from construction of RAID then reconstruction of RAID should
start in remaining 3 hours).
Conrmation screen
When you perform any of the following tasks, a conrmation screen is
displayed . To continue, enter the displayed number within 60 seconds
and click [Apply].
• Change RAID array (Create/Delete) • Format Array or Disk
• Delete Folder • Remove Disk
• Restore Factory Defaults • Rebuild RAID array
• Format LinkStation
LinkStation User Manual 52
Page 54

Using your LinkStation
• Changing to RAID 0 mode
Change system to normal mode (page 54 ).
1
2
3
4
5
The confirmation screen will appear. Enter the number shown in the [Confirmation Number]
6
eld within 60 seconds, and click [Apply].
Follow the instructions displayed on the screen.
7
You have set up a RAID 0 array. Turn to page 7 to create a shared folder.
LinkStation User Manual 53
Page 55

Using your LinkStation
• Changing to Normal mode
1
2
Click [Create RAID Array].
3
When [Are you sure you want to change RAID mode?] is displayed, click [Apply].
4
The confirmation screen will appear. Enter the number shown in the [Confirmation Number]
5
eld within 60 seconds, and click [Apply].
Follow the instructions displayed on the screen.
6
You have set up a Normal mode. Turn to page 7 to create a shared folder.
LinkStation User Manual 54
Page 56

Using your LinkStation
System-Maintenance
E-mail Notication
Your LinkStation can send you daily email reports. It can also send you an email when settings are
changed or an error occurs.
The following things will be sent via E-mail:
• The condition of the hard drive
• Notication of completed backup jobs
• Notication of fan errors
• Notication of hard drive errors
1
2
3
In the conguration utility, navigate to [System] [Maintenance].
Click [Modify Settings] in [E-mail Notication].
1 Click [Enable] in Notication.
2 Type the SMTP server address and SMTP port
number.
Note: If using pop before smtp, enter POP3
Server address and POP3 port number.
3 Select User verication method (Disabled/pop
before smtp/login(SMTP-AUTH)/cram-md5
(SMTP-AUTH)).
4 Enter a username.
LinkStation User Manual 55
Page 57

Using your LinkStation
5 Enter a password that will be used to verify.
6 To use a secured connection, select SSL/TLS.
7 Enter the subject for notication e-mail. Click [Reset to Default] to reset the subject line to [Link-
Station Status Report].
8 Enter a receiver's e-mail address. E-mail can be sent to up to 5 addresses.
9 Select conditions for emails to be sent.
• HDD Status Report Sends status of hard drive periodically.
• Fan Trouble Sends a message when a fan error occurs.
• Disk Error Sends a message when a hard drive fails.
• Backup Complete Sends a message when the backup is complete.
10 If you have selected [HDD Status Report] for sending condition, select time to send.
11 Click [Save].
4
Click [Send Test Message] to send a test message.
LinkStation User Manual 56
Page 58

Using your LinkStation
System Power Management
UPS Settings
A UPS (uninterruptable power supply) can automatically shut down your LinkStation in case of a
power outage. To use the LinkStation with a UPS, congure the following settings:
1
2
3
4
5
Plug the power cable of UPS to a wall socket.
Connect the AC adapter of the LinkStation to the UPS.
Connect the UPS and the LinkStation with a USB cable.
Turn on the UPS, then the LinkStation.
In the LinkStation’s conguration utility,
navigate to [System] - [Power Management] [UPS Settings] and click [Modify Settings].
6
The LinkStation is now congured to work with the UPS.
Note: If the LinkStation shuts down automatically due to a power outage, make sure that the power
issue is resolved before turning it back on. If the LinkStation is turned back on while it’s still
running on the UPS battery, the UPS will not shut it down again, even if the battery runs low.
LinkStation User Manual 57
1 Check [Enable].
2 Congure settings.
3 Click [Save].
Page 59

Using your LinkStation
Sleep Timer
To save energy, you can specify times to put the LinkStation into sleep mode, where the hard disk
and LED lights are turned o. The sleep timer only works when the LinkStation's power mode switch
is “ON”. This feature cannot be used when it is set to "AUTO" or "OFF".
1
1 In the LinkStation’s conguration utility, navigate
to [System] - [Power Management] - [Sleep Timer]
2 Click [Modify Settings].
2
1 Specify a timer interval, beginning time and
ending time.
2 Click [Save] at the bottom of the screen.
* You can set up to 3 timers.
* You can set ending time from 0:00 to 27:45.
You can set beginning time from 0:00 to 23:45.
(If the ending time is 24:00 or later, the beginning time can be set from 4:00 to 23:45.)
If 24:00 is equivalent to 0:00 of the next day, and 27:00 is equivalent to 3:00 of the next day.
* You can not set the ending time before or the same time as a beginning time.
• During processing disk check, disk format, and backup jobs or when a backup job is scheduled
before and after 5 minutes of the current time, the LinkStation will not be proceeded to Standby
mode even though the end time has reached.
• If time of the timers are duplicated, the longest interval time is used to operate.
LinkStation User Manual 58
Page 60

Using your LinkStation
Examples of multiple timers:
(e.g.1) Currently the timer set on Wednesday 10:00 is working:
Timer 1 Everyday 12:00 - 24:00
Timer 2 not used
Timer 3 not used
-> Nothing happens at 12:00 and goes into sleep mode at 24:00
(e.g.2) Currently the timer set on Wednesday 10:00 is working:
Timer 1 Everyday 9:00 - 18:00
Timer 2 Day specied Wednesday 10:00 - 20:00
Timer 3 not used
-> Except on Wednesdays, the LS powers on at 9:00 and goes into sleep mode at 18:00.
On Wednesdays, it goes into sleep mode at 20:00.
(e.g.3) Currently the timer set on Wednesday 10:00 is working:
Timer 1 Everyday 9:00 - 18:00
Timer 2 Day specied Wednesday 10:00 - 25:00
Timer 3 not used
-> Except on Wednesdays, the LS powers on at 9:00 and goes into sleep mode at 18:00.
-> Except on Wednesdays, it goes into sleep mode at 1:00 of the next day.
(e.g.4) Currently the timer set on Wednesday 10:00 is working:
Timer 1 Everyday 9:00 - 18:00
Timer 2 Day specied Wednesday 07:30:00 - 22:00:00
Timer 3 not used
-> Except on Wednesdays, the LS goes into sleep mode at 18:00.
-> LS turns on Wednesday at 7:30, and goes into sleep mode at 22:00 of the next day.
In standby mode, pressing the LinkStation's function button or moving the power mode switch to
“AUTO” will turn the LinkStation on.
Sleep timer settings are now complete.
LinkStation User Manual 59
Page 61

Using your LinkStation
Restore Factory Defaults
To restore the conguration of the LinkStation, follow the procedure below.
1
2
3
Move the power switch to the “OFF” position to shut down the LinkStation.
Move the power switch to the “ON” position while holding down the function button.
The function button will ash blue for 1 minute.
Function Button
While the function button is ashing blue, press it again.
The status LED will start ashing blue. It will start ashing amber when initialization begins (2
- 3 minutes).
Notes: • When the LinkStation is initialized, an IP address, an Ethernet frame size settings, and
an administrator (admin) password are initialized. If you choose not to initialize the
administrator's password on the conguration utility, only the IP address and Ethernet
frame size settings are initialized. You can initialize other items from the conguration
utility.
• If you do not want to initialize the admin password when you initialize the LinkStation,
select [Keep current admin password] in the [System] - [Restore/Format] - [Restore Factory
Defaults] screen, and click [Save].
• If you choose to not initialize the admin password from the function button, you can no
longer congure the LinkStation if you forget the password! Write your password down and
put it in a safe place.
LinkStation User Manual 60
Page 62

Using your LinkStation
Initialization from the conguration utility
You can initialize the following settings from the conguration utility: LinkStation name,
Description, NTP settings, Workgroup settings, Shared service settings, the access restrictions of
the shared folder, User settings, User group, mail notication feature settings, UPS synchronization
settings, Backup Settings, Administrator's password, Print server function, WebAccess feature,
Language settings, Timer ON/OFF, HDD spin down, Media server, BitTorrent, and Time Machine.
1
2
3
In the LinkStation’s conguration utility, navigate
to [System] - [Restore/Format].
Click [Restore LinkStation].
The Conrm Communications Screen will appear. Enter the number shown in the
[Conrmation Number] eld within 60 seconds, and click [Apply].
4
Your LinkStation has been initialized.
LinkStation User Manual 61
Follow the instructions displayed on the screen.
Page 63

Using your LinkStation
Format the LinkStation
1
2
3
In the LinkStation’s conguration utility,
navigate to [System] - [Restore/Format].
Click [Format LinkStation].
The [Conrm Operation] screen will be displayed.
Enter the number from the [Conrmation Number] eld within 60 seconds, and click [Apply].
4
Warning: Formatting the LinkStation will erase all data on the drive! Back up any important data
before formatting.
After the format, the status of the LinkStation will be as follows:
LinkStation User Manual 62
Navigate to [System] - [Restore/Format] in conguration utility. Follow the instructions
displayed on the screen.
Hard drives in the LinkStation: Not formatted
All settings of the LinkStation: Factory Default
Page 64

Using your LinkStation
Extensions
WebAccess
WebAccess lets you access les on the LinkStation from outside you network. You can access the
LinkStation from anywhere with an Internet connection and play music, display pictures, and
download or upload data.
On the LinkStation, you can set access restrictions for each shared folder. These restrictions will
apply to users accessing the LinkStation via WebAccess as well as locally. LinkStation also supports
UPnP for conguring your router and redirects with bualonas.com (similar to Dynamic DNS).
To Congure WebAccess:
1
2
1 Click [Extensions].
2 Click [WebAccess].
Choose the folder to be shared with WebAccess.
LinkStation User Manual 63
Page 65

Using your LinkStation
3
1 Select what users will have access.
• Disabled: WebAccess is not allowed.
• Allow Anonymous: Anyone can access shared
folders.
• Allow All Groups / Users: All groups/users
that are registered on the LinkStation can
access with WebAccess.
• Use Inherited Folder Permissions: All users
have the same rights that they would
have locally. If access restrictions are not
congured, then this option is not displayed.
2 Click [Save].
4
Click [Modify Settings].
LinkStation User Manual 64
Page 66

Using your LinkStation
5
Notes: • If you want to transmit data more securely by using SSL encryption, check [HTTPS/SSL
Encryption].
• To use the generic DNS service instead of using BuffaloNAS.com, enter the host name in
[Other DNS Hostname].
1 Select [Enable].
2 Select [Enable] from [Use BualoNAS.com].
3 Enter the LinkStation name to be published in
[BualoNAS.com Name].
Note: This is the name to enter when accessing
BualoNAS.com. It does not have to be
the same name as the actual LinkStation.
4 Enter the password to save and use the name
in [BualoNAS.com Key].
5 Select [Enable] from [Auto-Congure Firewall
(UPnP)].
Note: This does not work unless the router has
UPnP enabled.
6 Click [Save].
• If configuring manually without using UPnP, enter the external port of a router side.
By default, the external port on the router side is transferred to the port 9000 of the
LinkStation (The port on the LinkStation side is set to 9000).
• If the LinkStation is left unconnected from the Internet for a certain period of time, its name
registration will be deleted on the BualoNAS.com server.
You have set up WebAccess on the LinkStation.
LinkStation User Manual 65
Page 67

Using your LinkStation
Accessing folders with WebAccess
1
Open the following URL in an Internet browser.
http://bualonas.com
To access BualoNAS.com from iPhone/iPod touch:
1 Tap [Safari] from [Home] screen, and connect to the Internet.
2 Tap the address bar on top of the [Safari] screen.
3 Enter http://bualonas.com in the address bar, and select [Go].
• The screens in step 2 and later are from a PC. They look dierent from what is displayed
on iPhone or iPod touch.
• You cannot play video les or music les for which DRM is set by using this feature.
• You cannot play video les or music les that were saved with access restrictions.
• You cannot save les from the LinkStation to the iPhone or iPod touch with WebAccess.
Video and music les are streamed, and picture les are displayed in the browser.
• Compatibility with video and music les depends on the versions of Safari and
Quicktime installed on the iPhone or iPod touch.
• To create a video le which is playable on the iPhone, use o-the-shelf software to
convert to playable formats for the iPhone or iPod touch.
• Uploading les, changing le names, and deleting les are not supported on the iPhone
or iPod touch.
• iPhone and iPod touch are trademarks of Apple Inc.
2
LinkStation User Manual 66
Enter your BualoNAS.com name and click
[Connect].
Page 68

Using your LinkStation
3
To view without using BualoNAS.com, open the following URL on the Internet browser:
http://global IP address of the LinkStation:9000
For SSL, use https://global IP address of the LinkStation:9000
To verify the IP address of your LinkStation, use NAS Navigator2.
From your browser, you can view folders and les
from the LinkStation.
LinkStation User Manual 67
Page 69

Using your LinkStation
What can you do with WebAccess?
You can perform the following operations from the WebAccess screen:
"open”, “rename”, “delete”, “Link to this le”, “mail link to this le”, “Create Folder” ,”Upload"
1 open Open a le and folder.
Clicking [open] will open the specied le/folder.
You can save a le on the local drive by right-clicking.
2 rename Change a le/folder name.
Clicking [rename] will display the following screen. Enter a le name or folder name in [File Name]
you want to change, and click [Change].
• Don’t use any of the following characters in a le name or folder name: ?????????????
• Folder and le names may contain up to 80 characters.
3 delete Delete les/folders.
Clicking [delete] will display the following screen. Click [Yes] to delete the selected le.
LinkStation User Manual 68
Page 70

Using your LinkStation
4 Link to this le Link to a le or folder.
When you click a le or folder name, a white area will be displayed. Right-click on [Link to this le]
in the white area, and select [Copy Shortcut]. It will copy an address link that can be accessed to
that le directly from outside. Use this feature when you want to give out this address link. From
the right-click menu, select [Add to Favorites] to bookmark this directly accessible address link.
5 Mail link to this le Send the address link by e-mail.
When you click a le or folder name, a white area will be displayed. Click [Mail link to this le] in
the white area, and your mail software will launch with a link address which is accessible from
outside to that le included in the mail body. Use this feature when you want to distribute this
address link by e-mail.
6 Create Folder Create a folder.
Click [Create Folder], and then the following screen will be displayed. Enter a folder name to
create in [Folder Name], and click [Make]. The new folder will be created.
• You cannot include following characters in a le name/folder name: ????????????????
• You can use up to 80 characters for a folder name or le name.
7 Upload Upload les.
Clicking [Upload] will display the following screen. Click [Browse] in the upload les area, and
select a le to be uploaded. Clicking [Upload] will start uploading the selected le.
LinkStation User Manual 69
Page 71

Using your LinkStation
Clicking [Upload Files] will display the following screen.
Select the les you want to upload in [Append les], and click [Start upload].
Notes: Files may be up to 2 GB in le size.
You may select up to 100 les per upload.
You cannot upload a le if the same le name already exists at the destination.
Delete the le with the identical name in the destination before uploading the new
le.
If a selected le is graphic data, the word [Preview] is displayed next to the le name.
Clicking [Preview] will display a preview of the le in the browser.
Click at the bottom of the image to nish displaying the preview.
Move the mouse cursor to the top right of the preview image, and will be displayed (unless
there are no more graphics les). Clicking will display the next graphic.
Move the mouse cursor to the left top of the preview image, and will be displayed (unless
there is no previous graphic le). Clicking will display the previous graphic.
LinkStation User Manual 70
Page 72

Using your LinkStation
Print Server
LinkStation is equipped with a USB connector on the back. You can connect a USB printer to the
LinkStation as shown below.
USB Connector
USB Printer
(not included)
USB Cable
(not included)
Notes: • Only one printer can be connected to the LinkStation.
• The LinkStation does not support 2-way communication. For example, it cannot tell you
the amount of ink left.
• Multi-function printers are not supported.
• Printers which only support 2-way communication or WPS (Windows Printing System) are
not supported.
• Mac OS X cannot print to a printer connected to the LinkStation.
LinkStation User Manual 71
Page 73

Using your LinkStation
Setting up a printer on Windows Vista
1
2
3
4
5
In the LinkStation’s conguration utility, navigate
to [Extensions] - [PrintServer] and click [Modify
Settings].
Select [Enable] and click [Save].
Refer to your printer's manual installation instructions. You may need to install the printer
driver from a software disk.
Click [Start] - [Network].
Double-click on the LinkStation's server name.
6
7
LinkStation User Manual 72
Double-click on the LinkStation’s printer icon
(“LP”).
Click [OK].
Page 74

Using your LinkStation
8
You have added a printer.
1 Select your printer. Choose the manufacturer
on the left and the model on the right. If
your printer is not listed, click [Have Disk] and
follow the printer manufacturer’s directions
for installation.
2 Click [OK].
LinkStation User Manual 73
Page 75

Using your LinkStation
Setting up a printer on Windows XP
1
2
3
4
5
In the LinkStation’s conguration utility, navigate
to [Extensions] - [PrintServer] and click [Modify
Settings].
1 Choose [Enable] and click [Save].
Refer to your printer’s manual installation instructions. You may need to install the printer
driver from a software disk.
Click [Start] - [Control Panel].
Click [Network and Internet Connections] icon.
6
7
8
LinkStation User Manual 74
Double-click on [View workgroup computers] - (Name of the LinkStation Server name) in this
order.
Double-click on the LinkStation’s printer icon
(“lp”).
If "The printer driver to your computer will be automatically installed. Would you like to
continue?" is displayed, click [Yes].
Page 76

Using your LinkStation
9
You have added a printer.
1 Select your printer. Choose the
manufacturer on the left and the model
on the right. If your printer is not listed,
click [Have Disk] and follow the printer
manufacturer’s directions for installation.
2 Click [OK].
LinkStation User Manual 75
Page 77

Using your LinkStation
Setting up a printer on Windows 2000
1
2
3
4
In the LinkStation’s conguration utility, navigate
to [Extensions] - [PrintServer] and click [Modify
Settings]..
1 Click [Enable].
2 Click [Save].
Refer to your printer's manual to install the printer driver.
Double-click [My Network Places (*)] -[Entire Network] - (the LinkStation Server Name).
* On Windows NT 4.0 this is [Network].
5
6
7
LinkStation User Manual 76
Double-click on the LinkStation’s printer icon
(“lp”).
Click [Yes].
Click [OK].
Page 78

Using your LinkStation
8
You have added a printer.
1 Select your printer. Choose the
manufacturer on the left and the model
on the right. If your printer is not listed,
click [Have Disk] and follow the printer
manufacturer’s directions for installation.
2 Click [OK].
LinkStation User Manual 77
Page 79

Using your LinkStation
BitTorrent Client
BitTorrent is a protocol for sharing les. You can download les quickly since les are distributed
on the network and network trac is not concentrated, even with a large le. It does not keep
anonymity, and it is easily known who publishes what les.
Warning: Do not download copyrighted les without permission from the owner.
See http://www.bittorrent.com/ for more information about BitTorrent.
Flow chart of downloading with BitTorrent:
1
Notes: • Torrents are information les with a “.torrent” extension.
• Torrents can be downloaded from BitTorrent Inc.'s website or many other websites. Follow
2
3
4
Use the following steps to download shared les to the LinkStation with BitTorrent.
Use a search engine to nd the torrent for a le that you want. Download the torrent.
the terms of use and copyright rules for each website.
Send torrent information to a server called "tracker" and receive information about a terminal
which has a le.
Start downloading based on the information received from the "tracker" server.
Download pieces of data from multiple terminals and make one le.
LinkStation User Manual 78
Page 80

Using your LinkStation
Enabling BitTorrent and selecting folders
1
2
3
1 In the LinkStation’s conguration utility,
navigate to [Extensions] - [BitTorrent].
2 Click [Modify Settings].
1 Click [Enable].
2 Select a folder for downloads from the folders
on the LinkStation.
3 Click [Save].
Click [Open Download Manager].
4
The Download Manager will open. There are
two methods for downloading: downloading by
adding torrent information from a URL or from a
le.
LinkStation User Manual 79
Page 81

Using your LinkStation
How to download from a torrent by URL
1
2
3
4
Click [Add Torrent From URL].
1 Enter the URL with Torrent Information to the
frame at the left of [Add].
2 Click [Add].
When the message [Torrent URL has been sent.]
is displayed, click [OK]. Downloading to the destination folder will begin.
When progress reaches 100%, the download is
complete.
You have downloaded a le to the download folder from a torrent by URL.
LinkStation User Manual 80
Page 82

Using your LinkStation
How to download from a torrent by adding it from a le
1
2
3
4
Click [Add Torrent From File].
1 Click [Browse...] and select the torrent le from
the LinkStation or your computer.
2 Click [Add].
Downloading to the destination folder will begin.
When progress reaches 100%, the download is
completed.
You have downloaded a le to the download folder from a torrent by adding it from a le.
LinkStation User Manual 81
Page 83

Using your LinkStation
What you can do in the download screen
1
Click a queue name and click [Stop]; this stops downloading.
2
Click [Start] to resume downloading.
3
Click a queue name and click [Remove]; the le will be deleted.
4
Enter a phrase and click Search to search for torrents at www.bittorrent.com.
5
The order of the download queue can be changed by each item. The displayed order can be
switched by clicking any of the following items.
[Name] [Size] [Progress] [Download] [Upload] [ETA]
6
Click [Settings] to display the BitTorrent conguration utility.
LinkStation User Manual 82
Page 84

Using your LinkStation
What you can do in the conguration utility
1 Port Settings
Changes the port used for BitTorrent communication. If UPnP is enabled, the LinkStation will
automatically update the connected router to match.
To set the port manually without using UPnP, enter the port number (the default setting is
[Standard Setting (6881)] on any port number on the LinkStation side.
2 Bandwidth Management
If this is set to [Automatic], transmission bandwidth of BitTorrent will be automatically set. If this
is set to [Manual], you can specify a maximum bandwidth for download, upload, and seeds. The
default setting is [Automatic].
3 Seeds
Set the seed period for a le which is nished downloading.
[Seed until removed] will continue to seed until the torrent is deleted.
[Stop seeding when ratio reaches] will stop seeding when the upload percentage (a
percentage of the number of byte downloaded against the number of byte uploaded)
achieves the pre-dened value in %.
[Stop seeding after] stops seeding automatically after the pre-dened time in minute has
passed.
The default setting is [Seed until removed].
LinkStation User Manual 83
Page 85

Using your LinkStation
Media Server
The LinkStation is equipped with a DLNA Media Server. Videos, pictures and music saved on
the LinkStation can be displayed or played on TV, audio devices, game devices and other DLNA
compatible network devices.
DLNA (Digital Living Network Alliance) denes Home Network Device Interoperability Guidelines,
which are product design guidelines in the industry's standard technology in order to achieve the
interconnecting environment for digital devices (computers, home appliance, mobile devices and so
on).
To use DLNA on the LinkStation, begin by enabling it.
1
2
3
DLNA is now enabled on the LinkStation.
Click [Save] at the bottom of the conguration utility.
In the LinkStation’s conguration utility, navigate
to [Extensions] - [Media Server] and click [Modify
Settings].
If it is set to [Disable], click [Enable].
LinkStation User Manual 84
Page 86

Using your LinkStation
Connecting to the LinkStation and playing the les
This example shows how to use DLNA compatible media players to play les on the LinkStation.
Screenshots are from a Bualo LinkTheater LT-H90 media player.
1
2
3
Connect DLNA compatible devices to the network and turn them on.
Note: Refer to the devices’ manuals for how to connect them.
Select the DLNA server of the LinkStation from the screen to select DLNA compatible
devices
Select your LinkStation from the list of available
devices. By default, its name will be its model
number followed by the last 3 digits of its MAC
address. For example, a LS-XHL LinkStation Pro
whose MAC address ends in DBB will have the
name LS-XHLDBB.
Select the contents you want to play.
Select from [Videos], [Music], or [Photos].
LinkStation User Manual 85
Page 87

Using your LinkStation
4
Select the le that you want to play, then play it.
LinkStation User Manual 86
Page 88

Using your LinkStation
Play on PSP®(Play Station Potable) *LS-CHL, LS-XHL only
Your Sony PSP® can access the LinkStation if they’re connected to the same AP or wireless router.
The PSP® can play audio les through RSS and save them to a memory stick.
1
2
Access the following URL from the PSP®’s browser:
http://(IP address of the LinkStation):9050/rss
Consult the PSP’s documentation for instructions on using the PSP’s browser. You can get the
LinkStation’s IP address with NAS Navigator2 (included on your CD)..
NAS Navigator2
The LinkStation's IP address is displayed in the
bottom right corner of NAS Navigator2.
Audio les saved in the LinkStation's media folder
can be sorted by [Playlist], [Artist], [Genre], and
[Album], or click [Folder] to access all les.
3
LinkStation User Manual 87
Select the RSS link. RSS registration will begin.
Page 89

Using your LinkStation
4
5
Notes: • To play music on the PSP®, use rmware version 2.70 or later.
• "PlayStation" and "PSP" are registered trademarks of Sony Computer Entertainment Inc.
• "Memory Stick", "Memory Stick PRO DuoTM" , "Memory Stick Pro-HG Duo
• The LinkStation is a product of Bualo Technology and is not licensed or approved by Sony
Close your browser and select the [RSS channel] from the [Network] menu. Choose the
channel you want to play.
A list of available audio les is displayed. Select the desired le to play.
Note: To save an audio le to a memory stick, push the [△] button and select [Save}.
TM
", "Memory Stick
Micro (M2)TM", and " " are trademarks of Sony Inc.
Computer Entertainment Inc.
LinkStation User Manual 88
Page 90

Using your LinkStation
Media Server Settings
By default, the LinkStation is set to allow all videos, pictures and music on the shared folder “share“
and subfolders to be played. You may congure it to only play videos, pictures and music from a
specic folder.
In the conguration utility, navigate to [Extensions]
1
- [Media Server] and click [Modify Settings].
2
3
4
Shared folders and subfolder will be displayed in
the pulldown menu of [Media Server published
folder]. Select the folder you want to publish.
Click [Save] at the bottom of the conguration utility.
Only les saved on the folder you selected in step 2 can be selected or played from DLNA
supported devices.
LinkStation User Manual 89
Page 91

Using your LinkStation
To view DLNA compatible devices connected to the LinkStation:
1
2
3
In the conguration utility, navigate to [Extensions]
- [Media Server].
Click [Authorized DLNA Media Clients].
A list of DLNA compatible devices on the network will
appear, showing MAC addresses, IP addresses and
device names.
If a DLNA device doesn’t broadcast its name or IP
address, it will be displayed as [cannot be acquired].
After connecting a new DLNA device to the network, or
changing its settings, click [Refresh client list].
LinkStation User Manual 90
Page 92

Using your LinkStation
DLNA Media List
The LinkStation will maintain a database of videos, pictures, and music saved in its media folder and
distribute a list of available media to DLNA media players on the network. This list is distributed
after each reboot and once every 60 minutes by default. Congure the database as described
below.
1
2
In the conguration utility, navigate to [Extensions]
- [Media Server] and click on [Modify Settings].
To distribute the list of available media, click [Enable]
in [Automatic update], then click [Refresh now].
Optionally, you may choose a dierent refresh
interval. To distribute the media list at a dierent
interval, enter the desired interval in minutes in the
[Refresh interval] eld.
To completely disable distribution of the media list,
click [Disable] for [Automatic Update]..
3
LinkStation User Manual 91
Click [Save] to save your settings.
Page 93

Using your LinkStation
If other DLNA media devices don’t recognize the LinkStation:
If the Media Server on the LinkStation is disabled, other DLNA devices won’t be able to see it. You
may enable the Media Server on the LinkStation as follows.
1
2
3
In the conguration utility, navigate to [Extensions]
- [Media Server] and click [Modify Settings].
Click [Enable].
Click [Save].
LinkStation User Manual 92
Page 94

Using your LinkStation
To disable to play any les from DLNA compatible devices:
By default, the LinkStation will allow playback from any compatible media player on the same
network. To prohibit playback for a specic DLNA media player, follow the directions below.
1
2
3
In the conguration utility, navigate to [Extensions]
- [Media Server] and click [Modify Settings].
Click [Authorized DLNA Media Clients].
Select [Deny] for the DLNA media player(s) that
you want to block from accessing media on the
LinkStation. Media players that are allowed to access
media on the LinkStation should be set to [Allow].
4
LinkStation User Manual 93
Click [Save].
Page 95

Using your LinkStation
Troubleshooting:
Problem: The DLNA media player can’t see media les on the LinkStation
If your DLNA media players can’t access the media les on the LinkStation, then the list of available
media les should be updated. Try the following:
1
2
3
If you cannot play certain les:
Click [Save].
In the conguration utility, navigate to [Extensions]
- [Media Server] and click [Modify Settings].
Select [Enable] for [Media Server] and [Automatic
Update]. Check [Refresh now] and [Initialize
database before refresh].
The LinkStation’s DLNA media server supports the following types of les. Only les of these types
will be available to DLNA media players on the network.
Types File Extensions
Video les
Picture les
Music les
Your media player may not support all of these letypes. Files that your media player doesn’t
support may not be visible from the media player. Check your media players documentation for a
list of the types of les that it can play.
LinkStation User Manual 94
.avi, .divx, .asf, .mpg, .mpe, .m1v, .vcb, .mts, .m2ts, .m2t, .mpeg, .mpeg2,
.vdr, .spts, .tp, .ts, .3gp, .mov, .m4v, .wmv, .dvr-ms, .xvid, .mp4, .m4v
.jpg, .jpeg, .gif, .png, .tif, .ti, .yuv, .bmp
.mp3, .mpa, .wma, .aac, .apl, .ac3, .lpcm, .pcm, .wav, .m3u, .m4a,
.mp4, .3gp, .m4b, .aif, .ai, .ac, .ogg, .mp2, .mp1, .mp4
Page 96

Using your LinkStation
Using iTunes with the Media Server
Computers on the network running iTunes can access MP3, M4A, and M4P music les from the
LinkStation’s media server. Enable the LinkStation’s media server as described below.
1
2
Note: If you add, change, or delete music les on the LinkStation, iTunes may halt playback until
the database is updated and the media list distributed. After making changes to the media
les, refresh the media list as described on the previous page and restart iTunes.
In the conguration utility, navigate to [Extensions]
- [Media Server] and click [Modify Settings].
1 Select [Enable].
2 Click [Save].
With the media server enabled, the LinkStation will appear in iTunes on computers on the network,
and music les on the LinkStation can be played normally.
LinkStation User Manual 95
Page 97

Using your LinkStation
Web/Database Server (LS-WXL, LS-WSXL only)
<Web server>
The LinkStation can be used as a Web server.
HTML, CGI scripts, images, and JavaScript are supported.
Note: – The LinkStation’s Web server is for advanced users only. Don’t enable it unless you know
what you’re doing.
Navigate to [Network] – [Web Server] in the Web Admin tool and click [Modify Settings].
1
[Enable] Web Server, choose an external port setting (81 is the default) and a Web server public
2
folder, and click [Save].
3
Edit the php.ini file to change the PHP language
interpreter settings,. Instructions are in the le.
The Web server is now congured.
LinkStation User Manual 96
Page 98

Using your LinkStation
<MySQL server>
The LinkStation can be used as a MySQL server.
A MySQL database may be installed and linked with the web server.
Note: – The LinkStation’s MySQL server is for advanced users only.
– Don’t enable it unless you know what you’re doing.
Navigate to [Network] – [MySQL Server] in the Web Admin tool and click [Modify Settings].
1
[Enable] MySQL Server, choose a port and a data folder, and click [Save].
2
The MySQL server is now congured.
LinkStation User Manual 97
Page 99

Chapter 2 NAS Navigator2
NAS Navigator2 is a utility program that makes it simple to display the LinkStation's conguration
utility, change its IP address or check its hard drive.
Windows Vista/XP/2000 and Windows Server2003/Server2008
If you set up the LinkStation with the LinkNavigator CD, NAS Navigator2 is installed and congured
to run automatically in the system tray at startup.
You can launch NAS Navigator2 in either of the following ways:
• Click the NAS Navigator icon on your Desktop.
• Click [Start] - [(All) Programs] - [BUFFALO] - [BUFFALO NAS Navigator2]-[BUFFALO NAS Navigator2].
Screen:
Clicking a LinkStation's icon will display its total capacity, capacity being used, IP address,
workgroup, subnet mask, default gateway, MAC address, and rmware version.
LinkStation User Manual 98
Page 100

Chapter2 NAS Navigator 2
Name Descriptions
Menu
Map remote default share to
Assigns the LinkStation's shared folder as a network drive.
drive letter (*)
Disconnect mapped drive letter
Removes the network drive mapping.
(*)
Map all remote shares to drive
letters
Create desktop shortcut for Tera/
LinkStation (*)
Menu
Launch NAS Navigator2 on
startup
Assigns all the LinkStation's shared folders as network
drives.
Creates a shortcut to the LinkStation's shared folder (share).
Launches NAS Navigator2 in the task tray when Windows
boots.
Display the error information If an error occurs, an error message will pop up from the
NAS Navigator2 icon in the task tray.
Using a Default Browser Uses Internet Explorer to display the LinkStation
conguration utility.
Properties (*) Opens the selected LinkStation's Properties window.
Close Closes NAS Navigator2.
View
View [Icon]: Displays icon for ease.
[Details]: Displays Name, Product Name, Workgroup, IP
Address, Subnet Mask, and Default Gateway.
Sort by Selects the sort order from following to display when
multiple LinkStations are found:
Host name, Product Name, Workgroup, IP Address,
Subnet Mask, Default Gateway
Browse(*) Opens the LinkStation’s shared folder.
Refresh Searches for NAS devices on the network again.
* not displayed unless the LinkStation's icon is clicked.
LinkStation User Manual 99
 Loading...