

Page 1

Page 2

Page 3

1
Page 4

2
Opens the menus.
Scroll down through the screens.
Dials a number
Selects a highlighted item
Starts or confirms an action.
Lets you hang up, end an action,
go back one screen, and delete
a character.
When a menu is open, press for
two seconds to go back to the
standby screen.
When editing an entry, press
for two seconds to delete all
characters.
Switches the handset ON.
(To switch the handset off,
see page 29)
Page 5

3
Charging contacts
The charging light stays on until
the handset battery is fully
recharged.It will also illuminate for
a while each time the handset is
placed in the charger,even if the
battery is fully recharged.
Page 6

4
Press book symbol
takes you straight
to Personal
Directory
Press green phone to
get dial tone
Press MENU
Scroll through
list then select
Scroll through
list then select
FIND or ADD
Scroll through
list then select
FIND or ADD Choose
directory then
press SELECT
CLEAR?
YES or NO
Select
Enter number
Select
Enter number
Scroll through
list then select
Page 7

5
Enter password
see
system manual
Press Opt
Page 8

6
The extension number
of this handset. Shortcut to the 50 name
and number directory
stored on the handset.
Shown as dots when out
of range of the controller,
and as solid lines when
in range.
Number of calls stored
in the incoming calls list.
If there is no battery in
the System Base station
this icon and a nob a t t e ry icon will flash
a l t e rn a t e l y.
Shows 3 bars when the
battery is fully charged,
Page 9

The large screen and
simple menu structure
make your Airway
handset easy to use.
Shows the status of all
the lines and allows you
to select which call to
answer.
With an Airway system
you can transfer calls
between handsets and
hold conference calls.
Just enter the phone
number and the Airway
system will choose the
first available line for you.
Store up to 50 numbers
in your personal
handset directory and
access up to 200 more
from the Airway system
directory.
Airway uses digital
technology (DECT)
ensuring much clearer
calls with encryption
for added security.
Under ideal conditions
you can use your
Airway handset up to
300 metres from the
controller outdoors and
up to 50 metres indoors.
7
Page 10
8
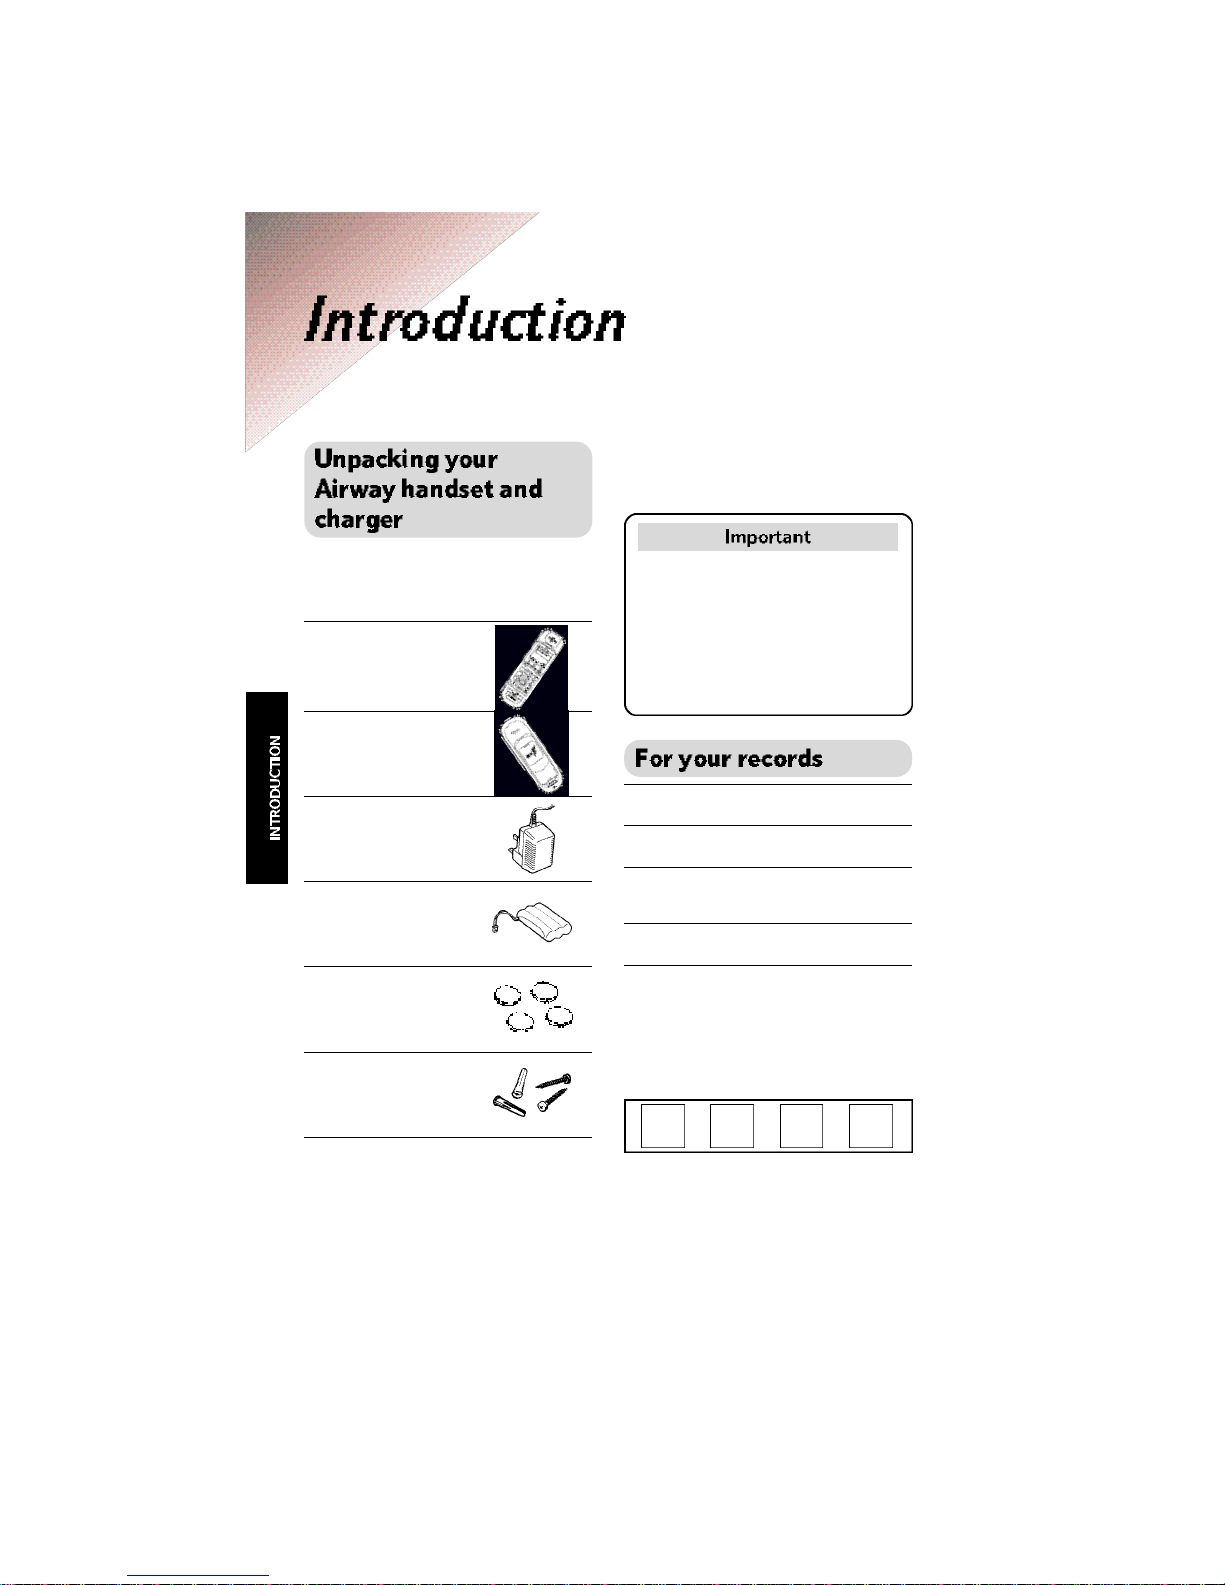
Please read the instructions
carefully before use and keep this
user guide for future reference.
If any of the parts are missing or
broken please contact your retailer.
Handset.
Charging cradle.
Plug mounted 13 amp
mains adaptor.
NiMH Battery pack.
Self-adhesive feet
for the charger.
Wall plugs and
screws for
wall mounting
Date of purchase:
Place of purchase:
Serial number:
(Inside the battery compartment)
Purchase price:
For warranty purposes, proof of
purchase is required, so please
keep your receipt.
Enter your 4 digit password here:
For details on the more advanced
settings available with your Airway
system, see the Airway System
G u i d e .
If you wear a hearing aid, please
note that Airway works by sending
radio signals between the
c o n t roller and the handset. T h e s e
signals can interf e re with hearing
aids, causing a humming noise.
Page 11

9
Use only the approved
handset battery pack
provided. Use only the
power supply provided. Using an
unauthorised power supply will
invalidate your warranty and may
damage the telephone.
Spare batteries, power supplies
and other ancillary items are
available from the Airway spares
line on .
Do not open the controller,
handsets or sockets. This could
expose you to high voltages or
other risks. Contact the Airway
Helpline for all repairs.
Do not expose to direct sunlight.
Radio signals transmitted
between the handset and base
may cause interference to
hearing aids.
This product should not
be used near
emergency/ intensive
care medical equipment and
should not be used by people
with pacemakers.
Never dispose of
batteries in a fire. There
is a serious risk of
explosion and/or the release of
highly toxic chemicals.
The product may heat
up when the batteries are
being recharged. This is
n o rmal. However, we re c o m m e n d
that you do not place the pro d u c t
on antique/veneered wood to
avoid damage.
Do not submerge any
part of your product in
water and do not use it in
damp or humid conditions, such
as in bathrooms.
Do not expose your
product to fire, explosive
or other hazardous
conditions.
There is a slight chance
that your product could
be damaged by an
electrical storm. We recommend
that you unplug the power and
telephone line cords for the
duration of the storm.
Page 12
10
The charger can be positioned
anywhere close to a power socket.
If you would like the phone to ring
w h i l s t in the charger, the controller
must be within range (50m).
If the charger is to be placed on a
desk we advise sticking the supplied
feet to the base of the charger.
For wall mounting instructions,
see page 39.
The screen on your handset may
look slightly different from the
illustrations in the manual,
depending on how many lines and
options cards your Airway system
has.
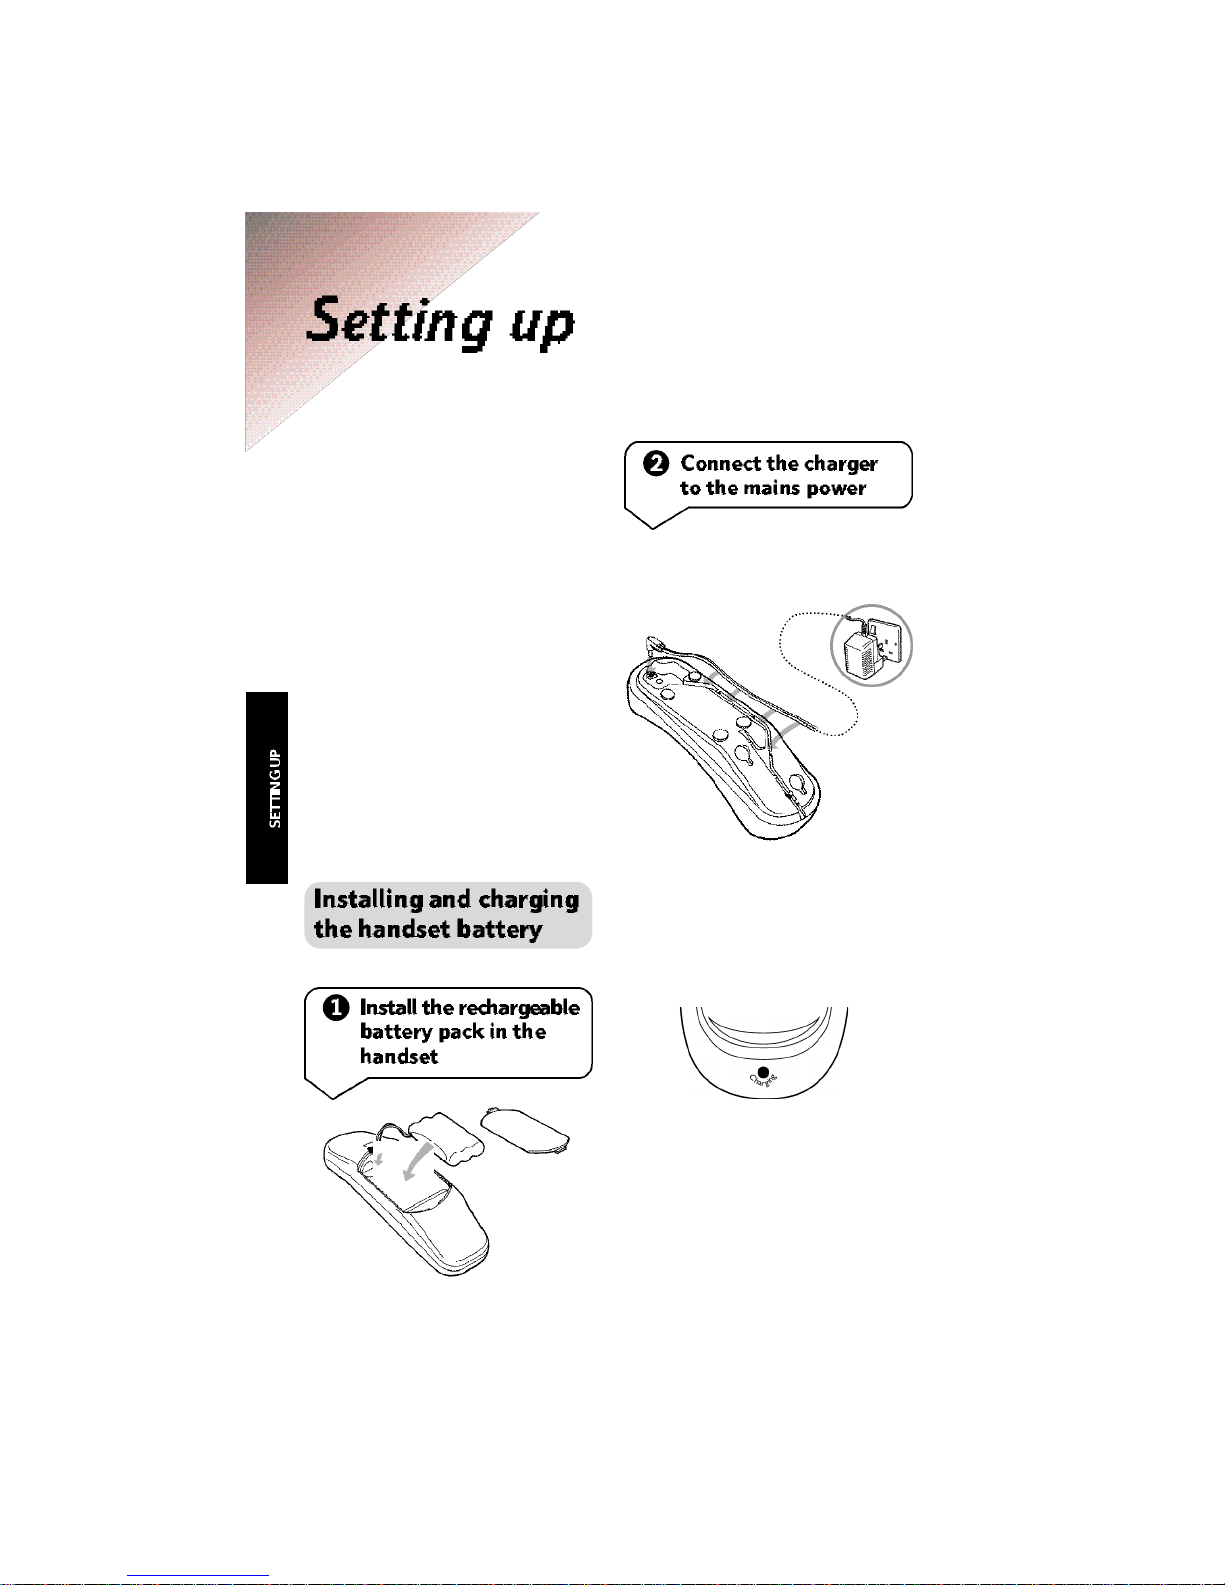
Plug the mains cable
into the charger.
Place the handset into the charger
and plug into the mains power.
When switched ON the gre e n
c h a rg i n g light comes on.
Page 13
11
Your handset is supplied with NiMH
batteries.
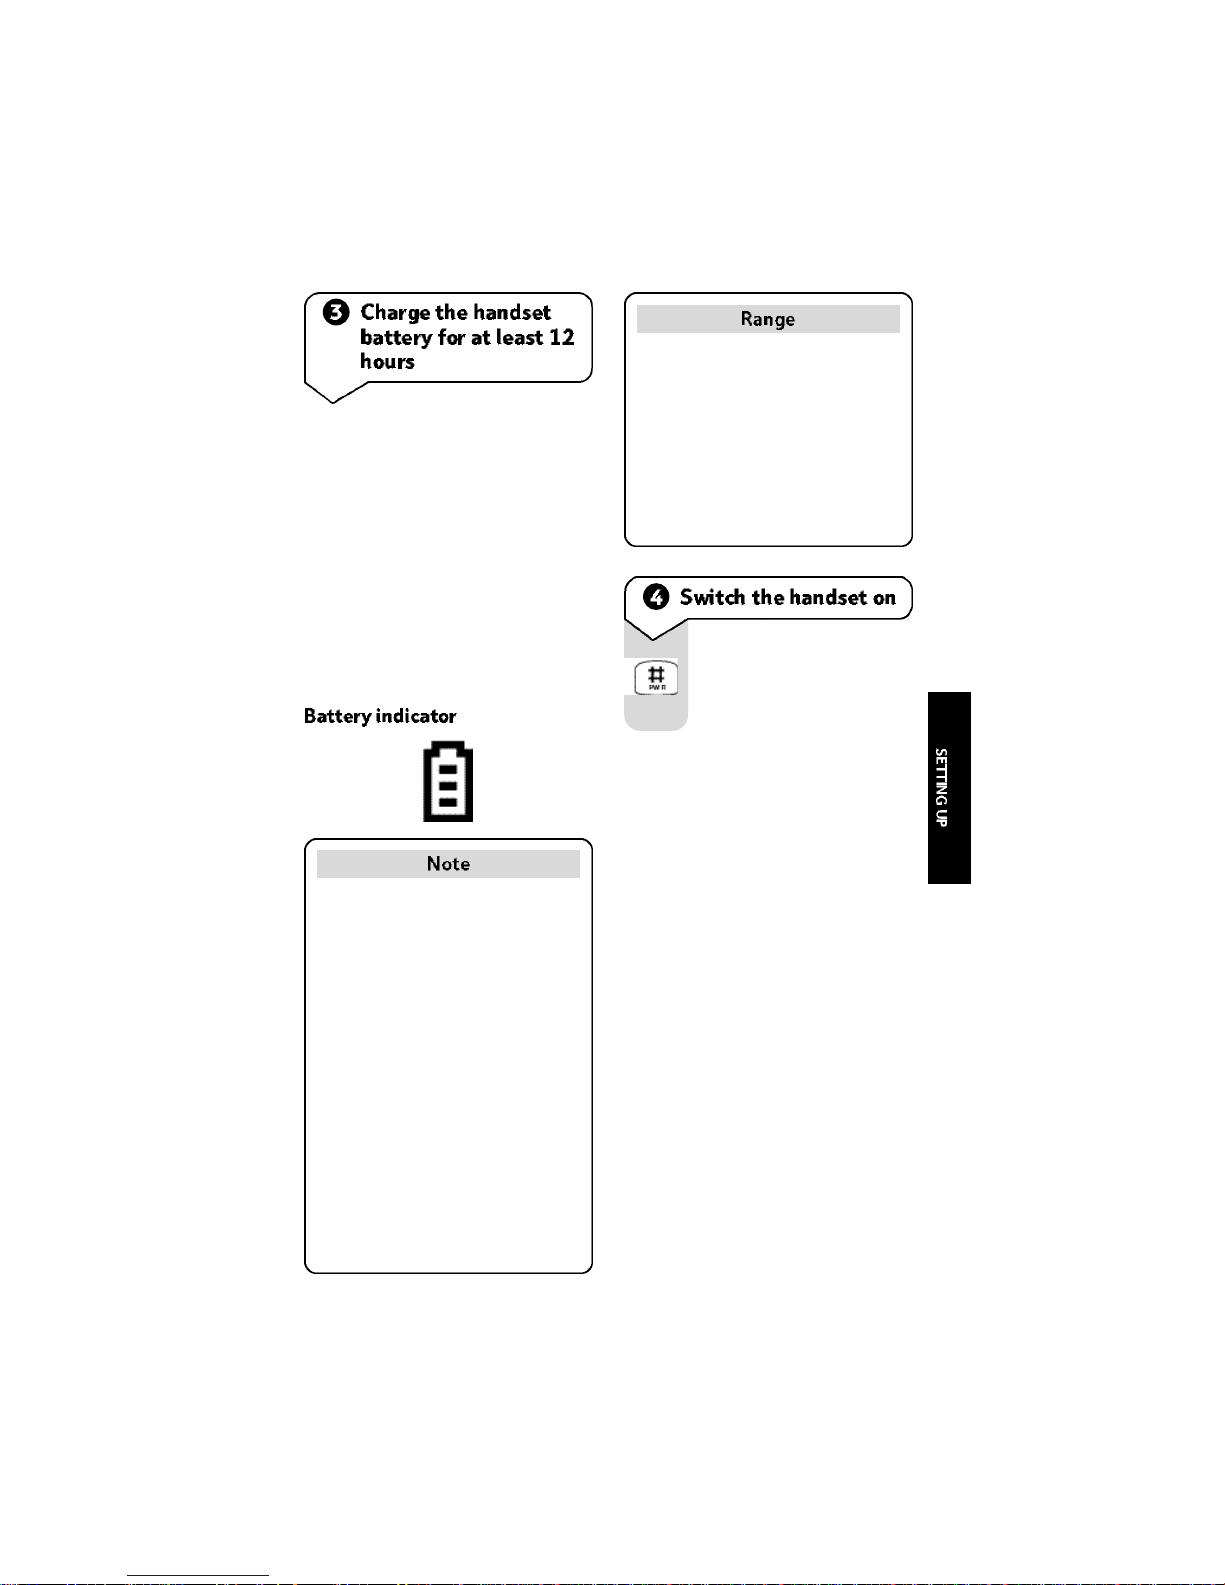
To help them last as long as possible,
we re c o m m e n d that you charge
your handset continually for a least
12 hours before use, although the
handset will work after 30 minutes.
The green light on the charger goes
o ff when the battery is fully charg e d .
Airway has a range of up to
300m outdoors and 50m indoors.
The range may be affected by
being near water (e.g. large
ponds, lakes and the sea) as well
as large metal objects (e.g.
radiators, metal partition walls
and steel girders).
Under ideal conditions the
handset battery should give about
10 hours talktime or 90 hours
standby on single charge.
The charge capacity of the batteries
will reduce with time as they
gradually wear out, so reducing the
talk/standby time of the handset.
Fully discharging the batteries at
least once a week will help them
last as long as possible.
Under no circumstances attempt
to recharge non-rechargeable
batteries.
Press and hold down for
a few seconds until the
display comes on.
Page 14

12
Your handset must be
registered with the
controller for it to work
properly.
From an already registered
handset, put the controller
into registration mode.
Press to display the main
menu.
Scroll down to
S e t t i n g s
.
Press to select.
Scroll down to
C o n t r o l l e r
.
Press to select.
Enter the system
password. (Original
password =
0 0 0 0
).
Press to confirm.
S c roll down to
R e gM o d eO n
.
If your handset came as par t
of a pack including a contro l l e r,
then it is already pre-registered
to that controller. If you are
adding a handset to an existing
A i rway system, you must re g i s t e r
the handset to your controller.
P ress to select. You now
have 90 seconds to
register the new handset.
On the new handset, press
the buttons in the order
shown below to register it.
Press to display the main
menu.
S c roll down to
S e t t i n g s
.
Press to select.
Press to select
H a n d s e t
.
S c roll down to
R e g i s t e r
.
Press to select.
Press to select
A d d
.
Enter the system
password. (Original
setting is
0 0 0 0
).
Press to confirm
Once registered the name
of the Controller is
displayed. You can change
this name.
Press to confirm
If the original system password
has been changed, ask the
person in charge of the system
for the correct password.
S e l
S e l
O K
S e l
S e l
S e l
S e l
S e l
O K
O K
If you are registering a nonAirway handset or your handset
is registered to a non-Airway
controller the display may look
different.
Page 15

13
The three function buttons
also select the o p t i o n s
p resented above them in
the display.
Opens the menus.
Scroll down through the
screens.
Dials a number.
Selects a highlighted item.
Starts or confirms an
action.
Lets you hang up, end an
action, go back one scre e n ,
and delete a character.
Press for two seconds to
go back to the standby
screen at any time.
When editing an entry,
press for two seconds to
delete all characters.
Please note that some menus will
vary depending on how your
Airway handset has been set up.
When the handset is not being
used to make a call, the standby
screen is displayed.
F rom the standby screen, press
to display the main menu.
• Directories
• Internal
• Available lines
• ISDN lines (if attached)
• Answering machine (if attached)
• Settings
Press again to scroll down to
the item you want. Then press
to select it.
Page 16

14
This menu gives you access to the
telephone directories:
• Personal
• System
• Incoming calls
• Services
• Clear Dir(ectory)
This menu lists all of the re g i s t e re d
handsets that you can call.
Lets you change the settings on
your handset or controller.
If your Airway is connected to a
s w i t c h b o a rd, you may need to dial
a number (often 9) to get an
outside line followed by the number
you want.
If you have an Airway answering
machine, you can use this menu to
check your messages.
Enter the number to be
dialled. Delete any
mistakes by pressing .
Press to call on the
first available line.
C a l l
AnsMachine
Messages
RecordMemo
Page 17

15
If all of the lines are already in
use, the handset will display
No Free L i n e
if you try to make a
call.
This allows you to keep
specific lines free for
incoming calls.
Press to display the main
menu.
Scroll down to the line
you want to use.
Press to select the line.
Dial the number you
want.
S e l
Press to hear the dial tone
The last number called is
displayed and dialled.
Press to hang up.
You can make internal
calls between handsets or
telephones connected to
A i rw a y phone sockets.
Press to display the main
menu.
Scroll down to highlight
Internal
.
Press to select.
Scroll down to the
extension you want to call.
P ress to call the extension.
S e l
S e l
E n d
R d
Page 18

16
When the telephone rings
the display shows
Press to answer the
call.
Or
If the handset is placed in
the charger, just lift it out
and talk. You do not need
to press any buttons.
If you have subscribed to Caller
Display, the screen will alternate
between the telephone number
and the caller’s information.
Internal
Line 1
Line 2
S e l
Your system administrator may
have restricted the number of
lines you can use, for instance,
in order to give each handset
their own line. If this is the case,
you can only answer incoming
calls on your line.
You may find you cannot dial
certain phone numbers because
your system administrator has
barred them, for example,
international calls.
If two calls arrive at the
same time, the display
shows
Scroll down to the line
you want to answer.
Press to answer.
Internal
Line 1
Line 2
S e l
Page 19

17
Press to display the
C a l l
O p t i o n s
menu.
Volume is highlighted.
Press to select the
Volume level you want.
Press to return to
previous screens.
S e l
While you are making a call, you
can change call settings and use
call features with this menu.
To stop a caller hearing a
conversation with someone
close by, you can mute
the call.
To display the
CallOptions
menu.
Scroll down to Mute.
Press to select.
Your caller cannot hear
you.
To speak to your caller
again.
To display the
Call Options
menu.
Scroll down to Mute.
Press to deselect.
S e l
S e l
Page 20

18
During a call:
To display the
C A L L
O P T I O N SM E N U
.
Scroll down to
H O L DC A L L
.
Press to select. Display
shows
H o l d i n g
.
To speak to your caller
again.
Scroll down to
L i n e o n
h o l d
.
Press to deselect.
S e l
S e l
Internal
Line 1
Holding
To display the
C a l lO p t i o n s
menu.
Scroll down to Transfer.
Press to select.
Scroll down to the
extension you want to
transfer the call to.
Press to select.
When the other person
answers you will be able
to speak to them.
Press to transfer the call.
Or
Press to cancel.
The length of time the caller is
kept on hold can be changed by
the system administrator. If the
caller is kept on hold too long
your handset will be called back.
Held calls can only be retrieved
from the handset that put them
on hold. All other handsets
will hear an engaged tone when
trying to use the line.
S e l
S e l
Ye s
N o
If the caller is kept waiting too
long while you are trying to
transfer their call, your handset
will be called back.
The maximum waiting time can
be changed by the person in
charge of your Airway system.
Page 21

19
You can hold a conference
call between internal and
external callers at the
same time.
Call the first person you
want and put the call on
hold when it is answered.
Call the second person
you want.
When the second person
answers:
To display the
C a l lO p t i o n s
menu.
S c roll down to
C o n f e r e n c e
.
Press to select. You can
now speak to both callers.
S e l
You may want to add
extra callers to a 3-way
conference call.
To display the
C a l lO p t i o n s
menu.
Scroll down to
H o l dC a l l
.
P ress to put the confere n c e
on hold.
Press to display the main
menu.
Now call the person you
want to add to the
conference.
When the call is answered:
To display the
C a l lO p t i o n s
menu.
S c roll down to
C o n f e r e n c e
.
Press to select. The new
person now joins the
conference.
If the person that set up the
c o n f e rence presses the
button then everyone will be
disconnected.
S e l
S e l
Page 22

20
The SYSTEM DIRECTORY can
hold up to 200 names and numbers
in the controller. All handsets can
have access to this dire c t o ry unless
call barring has been set.
Each handset also has a
PERSONAL DIRECTORY of up to
50 names and numbers. These are
only available to the handset they
are stored in.
Stored numbers can be up to 24
digits in length. Each name can be
up to 15 characters. The Director y
automatically stores names in
alphabetical order.
The
S E RVICE DIRECTORY
c o n t a i n s
pre-stored BT Select Service
numbers such as Call Forwarding
and Call My Bill. This makes it easy
for you to dial the code numbers
for each Select Service. If you need
to change these numbers, follow
the steps under ‘Editing a stored
number’ on page 22.
Press to display the main
menu.
P ress to select
D i r e c t o r i e s
.
Scroll down to the
directory you want.
Press to select.
Scroll down to
A d d
.
Press to select.
Use the keypad to enter
the name.
Press to confirm.
Enter the number.
Press to confirm. The
entry is stored, and you
can now type in the next
one.
Press and hold to return
to the standby screen.
S e l
S e l
S e l
A - Z
O K
O K
Page 23

21
Press to display the main
menu.
P ress to select
D i r e c t o r i e s
.
Scroll down to the
directory you want.
S e l
S e l
S e l
S e l
S e l
S e l
S e l
A - Z
O K
For example, to enter the
name John:
Press four times to enter
a capital .
Wait for the cursor to
move to the next space.
Press three times to
enter .
Press twice to enter .
Press twice to enter .
Press when the name is
correct.
Special characters
Once to insert a dash ( ).
Twice to insert a period
( ).
Three times to insert a
space.
To go back a space.
O K
D e l
From the standby screen, there is
a shortcut to dial out from the
Personal Directory in your
handset.
Press to go to the Personal
Directory.
Scroll down to the entry
you want.
Press to dial.
Call
Press to select.
Press to select
F i n d
.
Enter the first letter(s) of
the name, or leave blank
to start at the top of the
list.
Press to confirm.
Scroll down to the name
you want.
Press to select
To dial on the first
available line:
Press to select Dial
To dial on a specific line:
Scroll down to
L i n eD i a l
.
Press to select.
S c roll down to the line you
want.
Press to dial.
Page 24

22
Press to display the main
menu.
P ress to select
D i r e c t o r i e s
.
Scroll down to the
directory you want.
Press to select.
Press to select
F i n d
.
Enter the first letter(s) of
the name, or leave blank
to start at the top of the
list.
Press to confirm.
Scroll down to the name
you want.
Press to select.
Scroll down to
E d i t
.
Press to select.
Press to delete the name.
Enter the new name.
Press to confirm.
Press to delete the
number.
Enter the new number.
Press to confirm.
Press to display the main
menu.
P ress to select
D i r e c t o r i e s
.
Scroll down to the
directory you want.
Press to select.
Press to select
F i n d
.
Enter the first letter(s) of
the name, or leave blank
to start at the top of the
list.
Press to confirm.
Scroll down to the name
you want.
Press to select.
Scroll down to
D e l e t e
.
Press to delete.
S e l
S e l
S e l
S e l
S e l
D e l
D e l
A - Z
A - Z
O K
O K
O K
S e l
S e l
S e l
S e l
S e l
A - Z
O K
Page 25

If you are deleting from a
system directory stored in
the controller you will
need the system password .
You may need to ask the
person in charge of your
system for this inform a t i o n .
Press to display the main
menu
P ress to select
D i r e c t o r i e s
.
Scroll down to
C l e a r D i r
.
Press to select.
Scroll down to the
directory you want to
clear.
Press to select.
Enter the system
password if required and
press
O k
. Display asks
C l e a r D i r e c t o r y
.
Press to confirm.
Or
Press to cancel.
23
S e l
S e l
S e l
Y E S
N O
Page 26

24
Caller Display lets you know who’s
calling before you answer the
telephone.
With BT’s Caller Display service,
your controller receives caller
information which is transmitted
over the BT network.
If you are connected to a network
other than BT, you will first have to
subscribe to that network’s Caller
Display service. Ask your network
provider for more information.
The controller stores the call date,
time and if you have Caller Display,
the phone number of up to the last
50 incoming calls.
If you have stored the incoming
number in a dire c t o ry, your handset
will display the name of the caller.
If you are called more than once
by the same person, your Airway
handset will only store the number
once, saving you time and space in
the directory.
The following functions are only
available with Caller Display.
Press to display the main
menu.
P ress to select
D i r e c t o r i e s
.
Scroll down to
I n c o m i n g
C a l l s
.
Press to select.
The latest incoming call is
displayed.
Scroll down through the
list.
Press and hold to return
to the standby screen.
S e l
S e l
Page 27

25
Press to display the main
menu.
P ress to select
D i r e c t o r i e s
.
Scroll down to
I n c o m i n g
C a l l s
.
Press to select.
S c roll down to the number
you want.
Press to select.
Scroll down to
A d dt oD i r
.
Press to select.
Enter the new name.
Press to confirm.
To edit the number, press
to delete.
Enter a new number if
you wish.
Press to confirm.
S e l
S e l
S e l
S e l
D e l
A - Z
O K
O K
Press to display the main
menu.
P ress to select
D i r e c t o r i e s
.
Scroll down to
I n c o m i n g
C a l l s
.
Press to select.
The latest incoming call is
displayed.
S c roll down to the number
you want.
Press to select.
To dial on the first
available line:
Press to select
D i a l
.
To dial on a specific line:
Scroll down to
Line D i a l
.
Press to select.
Scroll down to the line
you want.
Press to dial.
S e l
S e l
S e l
S e l
S e l
S e l
Page 28

26
Press to display the main
menu.
P ress to select
D i r e c t o r i e s
.
Scroll down to
C l e a r D i r
.
Press to select.
Scroll down to Incoming
Calls.
Press to select. Display
asks
C l e a r D i r e c t o r y
.
Press to confirm.
Or
Press to cancel.
S e l
S e l
S e l
Ye s
N o
Press to display the main
menu.
P ress to select
D i r e c t o r i e s
.
Scroll down to
I n c o m i n g
C a l l s
.
Press to select.
S c roll down to the number
you want.
Press to select.
Scroll down to
D e l e t e
.
Press to delete.
S e l
S e l
S e l
S e l
Page 29

Press to display the main
menu.
Scroll down to
S e t t i n g s
.
Press to select.
Press to select
H a n d s e t
.
Scroll down to
R i n g e r
.
P ress to select the Vo l u m e
level you want.
P ress to re t u rn to pre v i o u s
screens.
27
Press to display the main
menu.
Scroll down to
S e t t i n g s
.
Press to select.
Press to select
H a n d s e t
.
Vo l u m e
is highlighted.
P ress to select the Vo l u m e
level you want.
P ress to re t u rn to pre v i o u s
screens.
If a call arrives when you are
changing any settings the handset
will go back to the main menu
to allow you to answer the call.
If you have not confirmed the
setting, it will be lost.
S e l
S e l
S e l
S e l
S e l
S e l
Page 30

Whenever you press a
button on your handset
you will hear a beep. You
can turn these beeps on
or off.
Dialling tones sound
when dialling telephone
numbers. Options tones
sound when pressing
keys in menus.
Press to display the main
menu.
Scroll down to
S e t t i n g s
.
Press to select.
Press to select
H a n d s e t
.
Scroll down to
To n e s
.
Press to select.
Scroll down to
D i a l l i n g
or
O p t i o n s
.
Press to turn on or off.
A tick appears when the
tones are on.
P ress to re t u rn to pre v i o u s
screens.
28
Press to display the main
menu.
Scroll down to
S e t t i n g s
.
Press to select.
Press to select
H a n d s e t
.
Scroll down to
R i n g
P a t t e r n
.
Press to select.
Scroll down to the
Tu n e
you want.
Press to hear and select.
P ress to re t u rn to pre v i o u s
screens.
S e l
S e l
S e l
S e l
S e l
S e l
S e l
S e l
Page 31

29
This will return the
handset to its factory
settings. Any settings you
have made will be lost,
including registrations to
controllers. You will have
to re-register the handset
to use it.
Press to display the main
menu.
Scroll down to
S e t t i n g s
.
Press to select.
Press to select
H a n d s e t
.
Scroll down to
R e s e t
C o n f i g
.
Press to select.
Press to confirm.
Or
Press to cancel.
See Using Additional
Controllers, page 33.
Press to display the main
menu.
Scroll down to
S e t t i n g s
.
Press to select.
Press to select
H a n d s e t
.
Scroll down to
Tu r nO ff
.
Press to select.
S e l
S e l
S e l
Ye s
N o
S e l
S e l
S e l
This shows the version
number of the handset.
The Airway Helpline may
ask you to do this if you
need to call them.
Press to display the main
menu.
Scroll down to
S e t t i n g s
.
Press to select.
Press to select
H a n d s e t
.
Scroll down to
H a n d s e t
I n f o
.
Press to select.
Press to return to the
previous menu.
S e l
S e l
S e l
O K
Page 32

30
Your Airway Controller must have
an Airway Answering Machine
card installed before you can use
the features in this section.
If your Airway Controller is
equipped with an Airway Answering
Machine card then you can use your
Airway handset to listen to any
messages that are left by callers.
In order to switch on the answer
machine or change any settings
you will need the System Password .
You may need to ask the person in
charge of the system for this
i n f o rmation. The Airway Answering
Machine User Guide describes how
to set it up in more detail.
If there are messages waiting to be
played back, an envelope appears
on the Airway handset display
along with the number of messages
that are waiting.
Airway first plays new
messages that you have
not previously listened to.
You can elect to skip back
and listen to old (pre v i o u s l y
listened-to messages) after
all new messages have
played.
Press to display the main
menu.
S c roll down to
A N S
M A C H I N E
.
P ress to select
MESSAGES
.
Press to start playback.
The answering machine
tells you how many
messages you have and
begins playing your
messages.
SATJAN1
12
(1)
.
.
.
.
.
.
.
.
.
.
.
. .
.
.
S e l
S e l
If someone else is already listening
to message, the handset will
display
AnsweringMachineBusy
.
Page 33

31
You can control the way your
messages are played back.
Press the button under the
command you displayed on the
screen.
Press to pause a message
during playback. Press
again to resume playback.
(If you do not resume
playback within 30
seconds, your handset
returns to the Answering
Machine Main Menu.)
Press once to replay the
current message.
Press twice to replay the
previous message. (You
cannot replay messages
that you have selected for
deletion. See below)
Press to skip forward to
the next message.
Press to delete the
current message.
The answering machine
selects the message for
deletion and skips
forward to the next
message. The message
will be deleted after
playback. After listening
to all messages, you are
also given the option to
delete all messages.
P a u s e /
P l a y
Previous
Next
Delete
Press to display the main
menu.
Scroll down to
S e t t i n g s
.
Press to select.
Scroll down to
C o n t r o l l e r
.
Press to select.
Enter the system
password.
Press to confirm.
S c roll down to
A N S
M A C H I N E
.
Press to select.
S c roll down to
Tu r nO n / O ff
.
Press to switch
O n
or
O ff
.
P ress to re t u rn to pre v i o u s
screens.
S e l
S e l
S e l
S e l
O K
Page 34

32
You can record memo
messages up to 3 minutes
long from a handset.
Press to display the main
menu.
S c roll down to
A n s M a c h i n e
.
Press to select.
S c roll down to
Record M e m o
.
To start recording.
To stop recording.
The memo is time-stamped
and can be played back
and deleted in the same
way as a normal message.
S e l
S e l
E n d
During a call, you can use
the answering machine’s
recording capacity to
record the conversation.
You should inform the
other person that you are
recording the call. A beep
sounds at the beginning
of the recording session
and every 30 seconds until
recording stops or the
recording memory is full.
To display the
Call O p t i o n s
menu.
S c roll down to
R e c o r d C a l l
.
Press to start recording.
Press to stop recording.
The re c o rded conversation
is time-stamped and can
be played back and deleted
the same as a regular
message.
O P T
S e l
E n d
Page 35

33
• Handsets that come with the
controller are pre-registered to
it. If you buy a handset separately
you will need to register it with
the controller.
• Your handset may be registered
with up to 10 diff e rent contro l l e r s .
However, you can only connect
to one controller at a time. If you
move to another controller you
must set your handset to select
the new controller.
You can register your Airway
handset with any DECT (GAPcompatible) controller.
When using an Airway handset
with another non-Airway base,
not all of its features will work.
Put the new base into
Registration mode. You
may need to consult the
user guide for your base.
From the Airway handset:
Press to display the main
menu.
Scroll down to
S e t t i n g s
.
Press to select.
Press to select
H a n d s e t
.
Scroll down to
R e g i s t e r
.
Press to select
A d d
.
Enter the password for
your base.
Press to confirm.
Edit the name of the base
if you wish
P ress to delete the existing
name.
Enter the new name.
Press to confirm.
S e l
S e l
S e l
O K
O K
D e l
A - Z
Page 36

34
Press to display the main
menu.
Scroll down to
S e t t i n g s
.
Press to select.
Press to select
H a n d s e t
.
Scroll down to
R e g i s t e r
.
Press to select.
You will see a list of the
available controllers.
The one you are cur rently
using is shown with a tick.
Scroll down to the
controller you want.
Press to select.
Scroll down to
U s e
.
Press to select.
The handset will now
search for a signal from
the controller.
S e l
Press to display the main
menu.
Scroll down to
S e t t i n g s
.
Press to select.
Press to select
H a n d s e t
.
Scroll down to
R e g i s t e r
.
Press to select.
Scroll down to the
controller you want.
Press to select.
Press to select
E d i tN a m e
.
Press to delete the
existing name.
Enter the new name.
Press to confirm.
S e l
S e l
S e l
S e l
S e l
D e l
A - Z
O K
S e l
S e l
S e l
S e l
Page 37

35
Simply clean your product with a
damp (not wet) cloth, or an antistatic
wipe. Never use household polish
as this may damage the product.
Never use a dry cloth as this may
cause static shock.
Within the 1 year guarantee period
If you experience a problem with
your Airway product you should
contact the Airway Helpline on
. Calls are charged
at local rates.
Outside the 1 year guarantee period
If your Airway product needs re p a i r
after the warranty period has ended,
the repair must meet the approval
requirements for connection to the
telephone network. We re c o m m e n d
that you call the Airway Helpline
and ask for details of our
recommended repair agents.
If you have to return your Airway
product
Contact the Airway Helpline. They
will arr a n g e for collection of your
product and the delivery of any
replacement items whilst within
the guarantee period or extended
Helpline scheme. Pack the item to
be re t u rned secure l y, preferably in
t h e original packaging. All parts
must be returned including line
cords, power supplies and original
batteries. (Please note that we can
not take responsibility for goods
damaged in transit.)
Spare batteries and other
ancillaries are available from the
Airway spares line on 0845 130
1321
Page 38

36
Emergency calls
The emergency services can be
contacted in the UK by dialling
or which is valid in any
country that is a member of the
European Community.
Solving problems
If you are having problems with
your Airway handset, please check
the following simple solutions:
The battery is too low.
Try recharging the battery.
After a time you may find that the
handset battery is running out of
charge more quickly. This is a
standard sign of wear and the
battery will need replacing. Spare
batteries are available from the
A i rw a ys p a res lineon
.
BT accepts no responsibility for
damage caused to your Airway
handset by using any other type of
battery.
Try pressing the button on
the handset.
The battery may be dead.
Recharge or replace the batter y.
If the display shows
N O T S U B
the
handset must be registered with
the controller. See page 12.
Are you within range of the
controller ?
If your handset is registered to
more than one controller, check
that your handset is set to use the
correct one.
Check that the ringer volume is
not turned down too low.
Page 39

37
If there is someone else in charge
of your Airway system, ask them
to check your handset. They may
have set up call barring or set your
handset to a particular line, and
will also have access to further
information in the Airway System
User Guide.
If you are still having problems
call the Airway Helpline on
. Please have the
serial number of your handset and
controller available when you call.
Page 40

38
Page 41

39
• Choose a suitable position for
the charger.
• Hold the template against the
wall and mark through the centre
of each cross with a pencil.
• Insert wall plugs and mounting
screws into the wall, leaving
enough of the screw out to hold
the charger.
• Connect the mains adaptor to
the charger.
• Put the charger on the wall so
the mounting screws align with
the holes on the underside of
the charger.
• Slide the charger into position.
Use this template when mounting
the charger on to the wall.
Page 42

40
dditional controllers 33-34
Answering machine 30-32
new message alert 30
on/off 31
playback messages 30
record a call 32
record memo 32
atteries
charging 10-11
indicator 11
installing 10
aller display 24-26
Calls
answer 16
choose line 15
end 15
external 14
hold 18
internal 15
mute 17
redial 15
three-way conference 19
transfer 18
volume 17
Calls list
clear 26
copy number into directory 25
delete 26
dial 25
display 24
Cleaning 35
elete
all entries from directory 23
entry from director y 22
number from calls list 26
Directory 20-23
delete all entries 23
delete entry 22
dial stored number 21
edit entry 22
enter name 21
store name and number 20
Display information 6
andset
earpiece volume 27
function buttons 13
menus 13-14
on 11
register to controller 12
reset 29
ringer pattern 28
ringer volume 27
tones 28
Help 36
Hold a call 18
eneral information 35
Page 43

41
Guarantee 35
aking a call 14
Memo 32
Menu structure 4-5
Mute a call 17
n/off
answering machine 31
handset 11, 29
handsfree tones 28
Optional settings 27-29
layback messages 30
ange 11
Record
a call 32
a memo 32
Redial 15
Register
another controller or base 33
handset to controller 12
Reset 29
Returning your product 35
afety instructions 9
Setting up 10
Service 35
Store name and number 20
echnical specifications 38
Three-way conference call 19
Transfer a call 18
olume
call 17
earpiece volume 27
ringer volume 27
all mounting 39
Page 44

42
Declaration of Conformity
AirWay
TM
This product is intended for use within the UK for
connection to the analogue and ISDN2/2e public
telephone networks and compatible switchboards.
This equipment complies with the essential
requirements for the Radio Equipment and
Telecommunications Terminal Equipment Directive
(1995/5/EC).
In demonstration with the Essential Requirements
for efficient use of the radio spectrum, the product
complies with TBR6.
For a copy of the Declaration of Conformity please
contact the Airway Helpline.
Page 45

The telecommunications services described in this publication
are subject to availability and may be modified from time to time.
Services and equipment are provided subject to British
Telecommunications plc’s respective standard conditions of contract.
Nothing in this publication forms any part of any contract.
© British Telecommunications plc 2000.
Registered Office: 81 Newgate Street, London EC1A 7AJ.
Registered in England No. 1800000.
Airway handset and charger (3/00) 2
Designed by: The Art & Design Partnership Limited.
Printed in UK.
CE compliant to 89/336/EEC
(EMC Directive) & 73/23/EEC
(Low Voltage Directive)
 Loading...