

Page 1
1950
USER’S GUIDE
MODE D’EMPLOI
• Read this User’s Guide before you start using your P-touch.
• Keep this User’s Guide in a handy place for future reference.
• Lisez attentivement ce guide avant d’utiliser le P-touch pour la première fois.
• Conservez ce guide dans un lieu sûr en vue de référence ultérieure.
Page 2
INTRODUCTION
Thank you for purchasing the P-touch 1950!
Your new P-touch will allow you to create labels for any need. Its versatility enables
you to design custom labels by choosing from a variety of frame designs and from many
character sizes and styles. In addition, the four tape widths (1/4” (6 mm), 3/8” (9 mm), 1/2”
(12 mm) and 3/4” (18 mm)) and variety of tape colors allow you to print personalized
labels, useful for color-coded filing.
You no longer have to worry about urgent tasks that require professional printing. In the office,
the factory, the lab and the home, the quality and performance of the P-touch 1950 makes it
an extremely practical machine.
Finally, as you may want to occasionally refer to this User’s Guide we suggest that you keep it
in a handy place.
This Class B digital apparatus complies with Canadian ICES-003.
Cet appareil numérique de la classe B est conforme à la norme NMB-003 du Canada.
1. Erase all of the text in the display either with * or by holding down c and pressing *.
2. Hold down c and press F to display the current language setting (“ENGLISH”
or “FRANÇAIS”).
3. Keep c held down and press F again until the desired setting appears in the dis-
play, then release the keys.
Use only the adaptor designed exclusively for this machine. See “GENERAL PRECAUTIONS”
on page 3.
IBM is a trademark of International Business Machines, Inc.
Microsoft and Windows are registered trademarks of Microsoft Corporation, USA.
The names of other software or products used in this document are trademarks or registered
trademarks of the respective companies that developed them.
Tested to Comply with FCC Standards for Home or Office Use
Switching the language of the messages between English and French
The default setting is English.
Turning off the machine does not change the language setting.
The language cannot be changed if some text remains in the display.
Page 3

CONTENTS
Getting Started
GENERAL DESCRIPTION ....................................................................................1
GENERAL PRECAUTIONS................................................................................... 3
BATTERIES ..........................................................................................................3
AC ADAPTOR .....................................................................................................4
TAPE CASSETTE ..................................................................................................5
ATTACHING LABELS ..........................................................................................6
PRINT HEAD & ROLLERS.................................................................................... 7
USING WITH A PERSONAL COMPUTER ...........................................................8
For Your Information
POWER KEY...................................................................................................... 10
CURSOR KEYS ..................................................................................................10
CODE, ALT & SHIFT KEYS ................................................................................11
SPACE KEY ........................................................................................................14
RETURN KEY..................................................................................................... 14
TAB FUNCTION ...............................................................................................15
DELETE KEY ......................................................................................................17
LINE OUT FUNCTION...................................................................................... 18
CLEAR FUNCTION ...........................................................................................19
ACCENT FUNCTION ........................................................................................21
SYMBOL FUNCTION........................................................................................ 22
AUTO FORMAT FUNCTION ............................................................................24
FONT FUNCTION ............................................................................................26
SIZE & WIDTH FUNCTIONS............................................................................. 27
STYLE FUNCTION ............................................................................................29
UNDERLINE FUNCTION ..................................................................................31
FRAME FUNCTION........................................................................................... 32
TAPE MARGIN FUNCTION ..............................................................................33
HORIZONTAL ALIGNMENT FUNCTION .........................................................34
MIRROR PRINTING FUNCTION....................................................................... 35
LENGTH FUNCTION ........................................................................................36
AUTO CUT FUNCTION.................................................................................... 38
i
Page 4

PRINT KEY ........................................................................................................39
FEED & CUT FUNCTION ..................................................................................40
NUMBERING FUNCTION ................................................................................40
REPEAT PRINTING FUNCTION ........................................................................42
MEMORY FUNCTIONS..................................................................................... 43
TROUBLESHOOTING....................................................................................... 47
ERROR MESSAGE LIST ......................................................................................48
SPECIFICATIONS ..............................................................................................51
ACCESSORIES ...................................................................................................52
INDEX ...............................................................................................................55
ii
Page 5

Getting Started
GENERAL DESCRIPTION
TOP VIEW
Keyboard
Tape compartment
cover
AC adaptor
connector
USB port
LCD display
BOTTOM VIEW
Tape exit slot
Battery compartment cover
1
Page 6
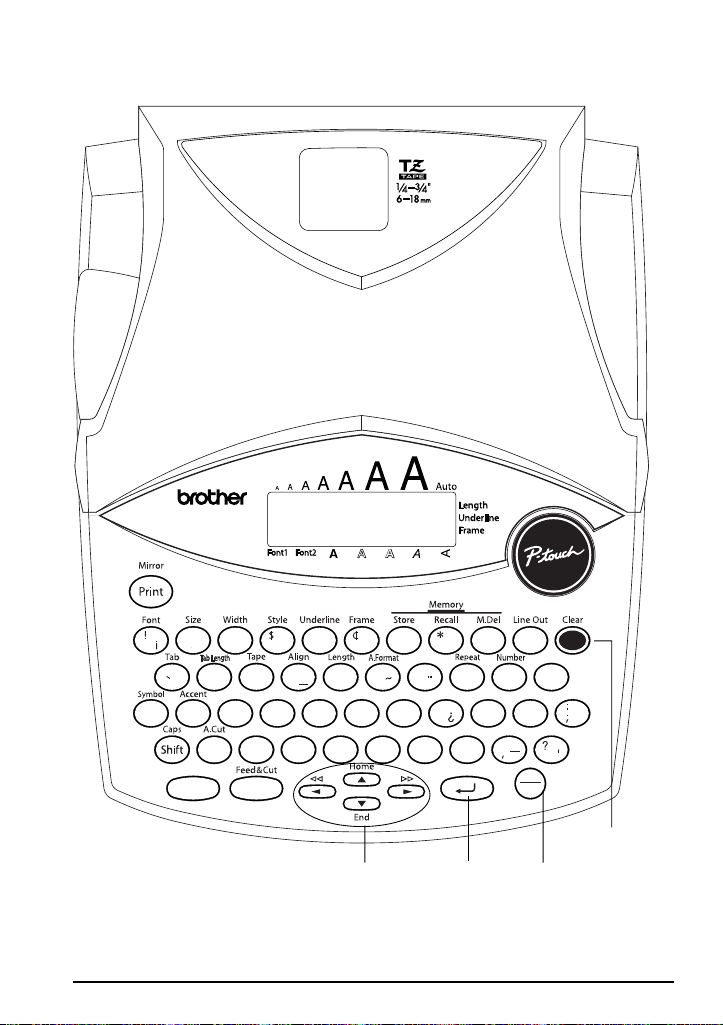
KEYBOARD & LCD DISPLAY
(
#
@
134567890
2
W
O
Alt
Code Space
A
E
S
Z
XC VB NM
%
R
T
DFGHJ KL
Ç
&
UI P
Y
/
ç
u
Ñ
(
BS
O
í
é
ñ
á
ó
ú
"
/
.
On
Off
Delete key
Cursor keys
Return key
Power key
2
Page 7

1
2
3
4
GENERAL PRECAUTIONS
To avoid injuries, do not touch the cutter’s edge.
●
●
Use only Brother TZ tapes with this machine to avoid damage. Do not use tapes that do
not have the mark. Brother cannot be held responsible for trouble or damage by the
use of unauthorized supplies.
●
Do not pull on the tape being fed from the P-touch. This may damage the tape cassette.
●
Do not use the machine in dusty places, and keep it out of both direct sunlight and rain.
Do not expose the machine to high temperatures or high humidity. Never leave it on the
●
dashboard or in the back of your car.
●
Do not leave any rubber or vinyl on the machine for an extended period of time. Doing
so may cause staining.
●
Do not clean the machine with alcohol or other organic solvents. Use a soft, dry cloth only.
●
Do not put any foreign objects into or anything on the machine.
●
Use only the AC adaptor (model AD-60) designed exclusively for this machine. Use of
any other adaptor may void the warranty.
Do not try to disassemble the AC adaptor.
●
●
When the machine is not being used for a long period of time and it is not necessary to
keep the text files stored in the memory, disconnect the AC adaptor, and remove the batteries to prevent them from leaking and damaging the machine.
●
When the AC adaptor is connected, unplugging the adaptor from the electrical outlet
before unplugging it from the machine can delete all text files in the memory, even if batteries are installed.
●
Use six AA alkaline batteries in this machine.
●
If the batteries are not installed with their positive and negative poles pointing in the correct direction, the batteries may leak, overheat or burst, or the print head may overheat.
BATTERIES
This portable machine can be used anywhere by installing six (6) AA alkaline batteries .
you change the batteries, always replace all six at the same time.
To change the batteries:
Remove the battery compartment cover on the back of the machine.
If batteries are already installed, remove them.
Insert six new AA alkaline batteries, making sure that their poles point in the correct direction.
Attach the battery compartment cover.
☞
Be sure to insert the new batteries within five minutes of removing the old ones,
otherwise the text shown in the display and any text files stored in the memory will
be lost (unless the machine is plugged into an AC outlet with the AC adaptor).
When
3
Page 8
4
1
2
Remove the batteries and disconnect the AC adaptor if you do not intend to use this
machine for an extended period of time. When the power is disconnected, all text
shown in the display and stored in the memory will be lost.
If the batteries are not installed with their positive and negative poles pointing in
the correct direction, the batteries may leak, overheat or burst, or the print head
may overheat.
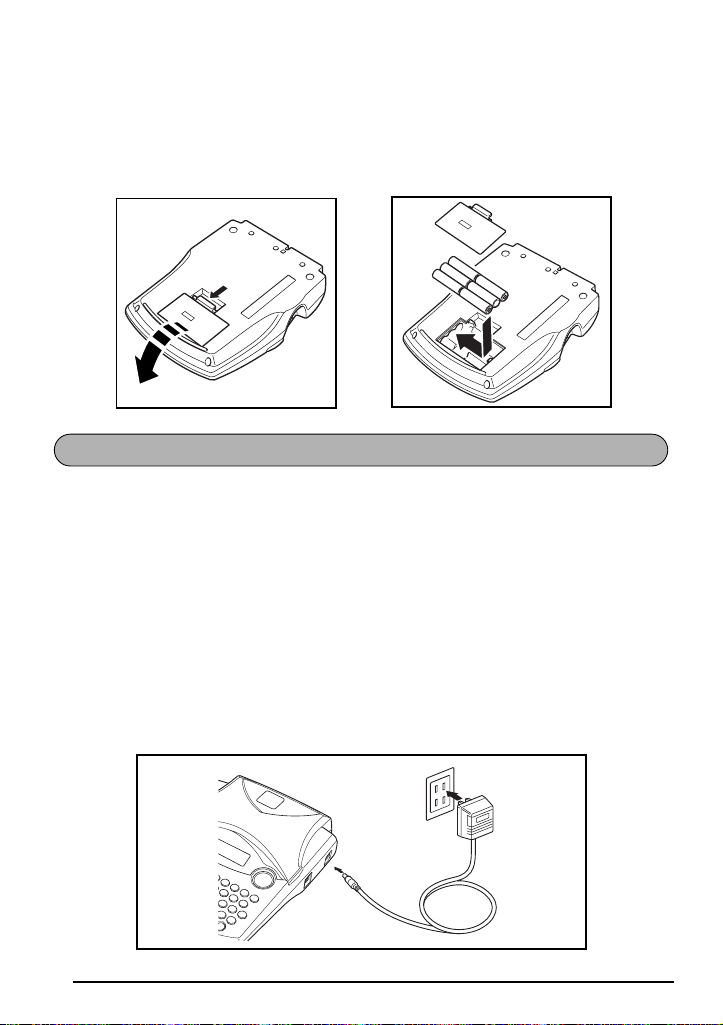
AC ADAPTOR
The AC adaptor (model AD-60) allows you to use this machine wherever there is an electrical outlet.
To connect the AC adaptor:
Insert the plug on the adaptor cord into the connector marked DC IN 9.5V on the right
side of the machine.
Insert the plug on the adaptor into the nearest standard electrical outlet.
☞
Only use the AC adaptor designed exclusively for this machine.
Remove the batteries and disconnect the AC adaptor if you do not intend to use this
machine for an extended period of time. When the power is disconnected, all text
shown in the display and stored in the memory will be lost.
When the AC adaptor is connected, unplugging the adaptor from the electrical outlet before unplugging it from the machine can delete all text files in the memory,
even if batteries are installed.
Page 9
2
3
4
5
6
1
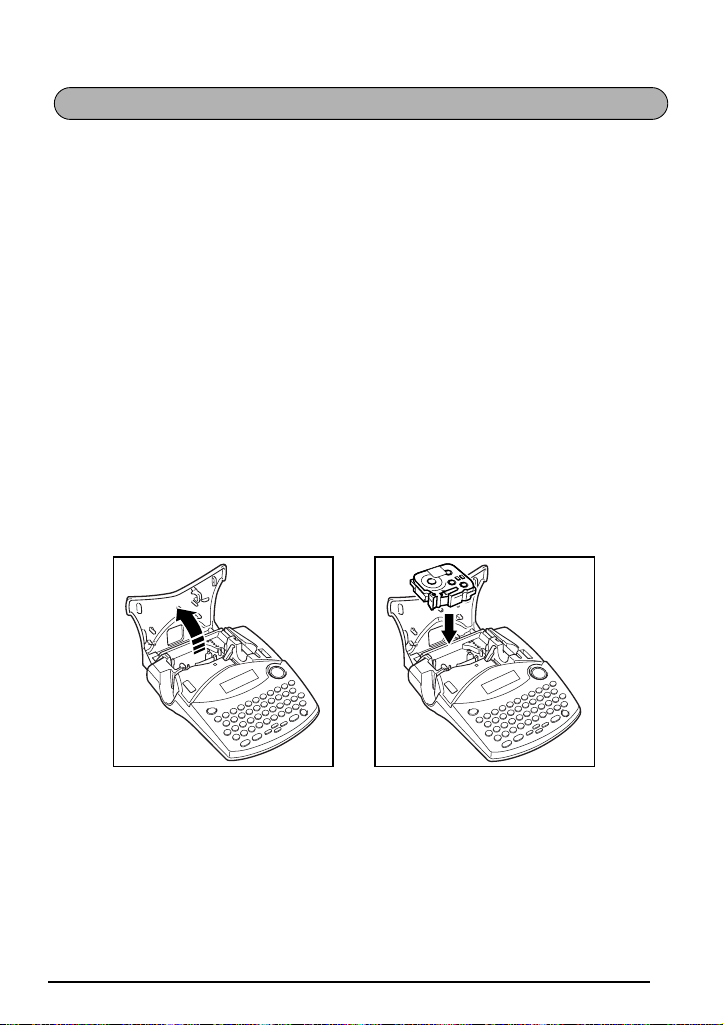
TAPE CASSETTE
TZ tape cassettes are available for this machine in a wide variety of colors and sizes. It is possible to make distinctive color-coded and stylized labels.
In addition, this machine has been designed to allow you to change the tape cassettes quickly
and easily.
To change the tape cassette:
Lift open the tape compartment cover. The installed cassette is also released.
If a tape cassette is already installed, remove it by pulling it straight up.
If the ink ribbon in the tape cassette to be installed is loose, use your finger to wind the
toothed wheel in the direction of the arrow on the cassette until there is no slack in the
ribbon. Also, make sure that the end of the tape feeds under the tape guides.
If you are using a new tape cassette provided with a stopper, be sure to remove the
☞
stopper.
Insert the tape cassette firmly into the tape compartment, making sure that the entire back
of the cassette touches the bottom of the compartment.
☞
When inserting the tape cassette, make sure that the inner ribbon does not catch on
the corner of the metal guide.
Close the compartment cover, and then turn on the machine, if it is off.
Hold down
c
and press
_
once to advance the tape and remove any slack.
☞
This machine does not support stamp tapes (SK-MB/SH-MB).
5
Page 10
ABCDEF
1
2
3
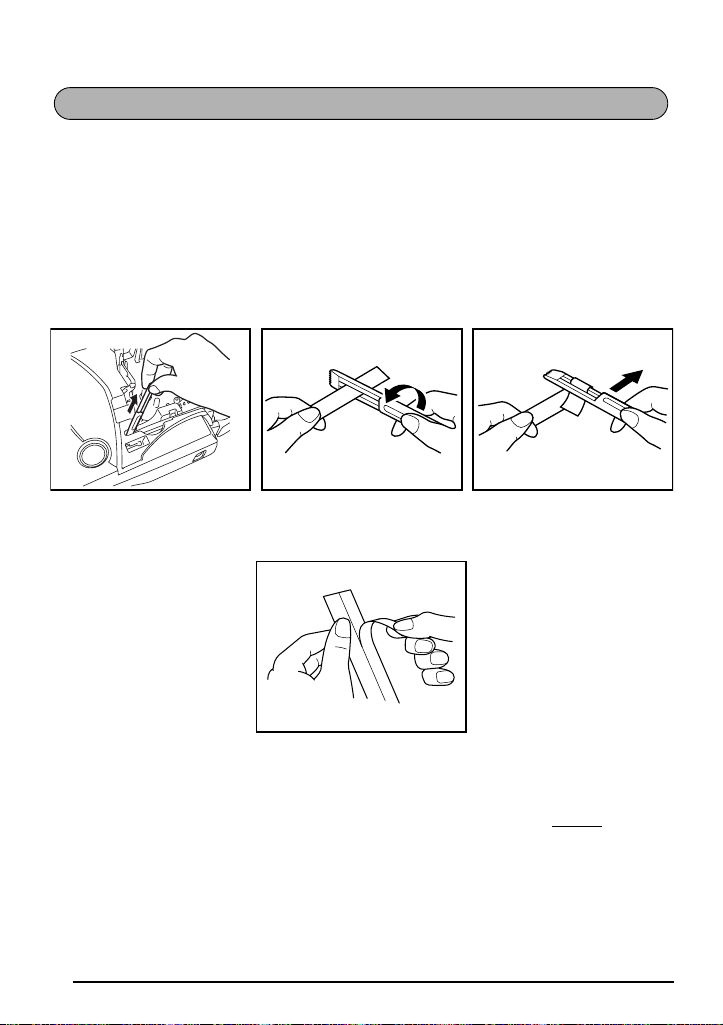
ATTACHING LABELS
LAMINATED TAPE
The enclosed stick enables you to easily remove the backing from labels printed on laminated tapes.
Hold the tape in your left hand, with the printed surface facing up, and hold the stick in
your right hand.
Pass the tape halfway through the long narrow hole in the stick.
Turn the stick three-quarters of a turn towards you and pull the stick away from you as
shown below.
Peel off the label backing.
GH
ABCDEF
Some tapes can be folded in half so that the inside edges of the two backing pieces come off
the label, enabling the backing to be peeled off easily.
4
FABRIC TAPE
Fabric tape is used to attach a piece of fabric printed with your text onto garments using an
iron. After printing the text onto fabric tape and cutting off the label using scissors
label on an ironed garment at the location where you wish to attach it in such a way that the
printed text can be read correctly. Cover the label with another piece of cloth and use an iron
set to a medium-high temperature (320 to 356 ˚F (160 to 180 ˚C)) to press down firmly for 15
to 30 seconds. For more details, refer to the instructions included with the fabric tape cassette.
6
, place the
Page 11
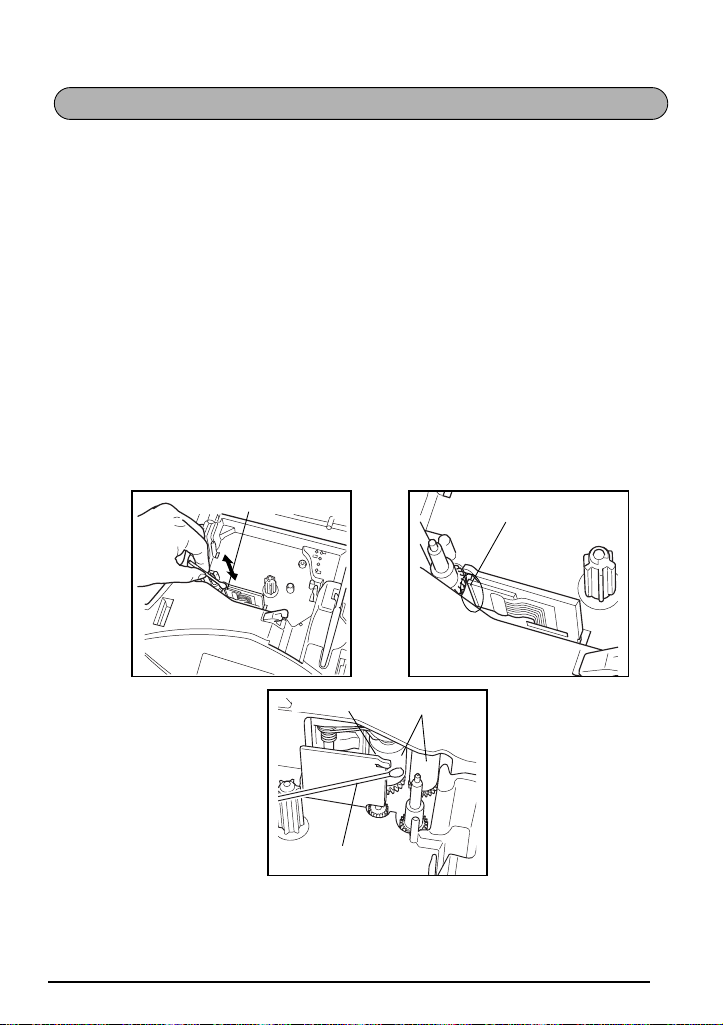
PRINT HEAD & ROLLERS
Print head
Occasionally, specks of dust or dirt become attached to the machine’s print head and rollers.
This is particularly likely when you are using the unit outdoors or in a very dusty environment.
If a section of the print head is covered with dust, a white horizontal streak may appear
through the label text. Therefore, as with a tape recorder, the machine’s head may need to be
cleaned from time to time.
To clean the print head and rollers:
1 Turn off the machine. Remove the batteries and disconnect the AC adaptor.
2 Open the tape compartment cover, and then remove the tape cassette if one is installed.
The print head and rollers are located in the tape compartment.
3 Print head: Use a dry cotton swab to gently wipe the print head with an up-and-down
motion.
Rollers: Use a dry cotton swab to wipe each roller with an up-and-down motion while
rotating them with your finger.
4 Install a tape cassette, close the tape compartment cover, and then try printing again.
5 If a blank streak still appears in the label, repeat steps 1 to 4.
If none of the above works, contact your service representative.
Print head
Print head
☞ The print head can be cleaned more easily if the optional print head cleaning cassette
(TZ-CL4) is used.
Cotton swab
Rollers
7
Page 12
USING WITH A PERSONAL COMPUTER
By installing the P-touch Editor, Quick Editor and Printer driver, you can easily print labels
from your personal computer. Various auto format templates are available in the software
for easy label making.
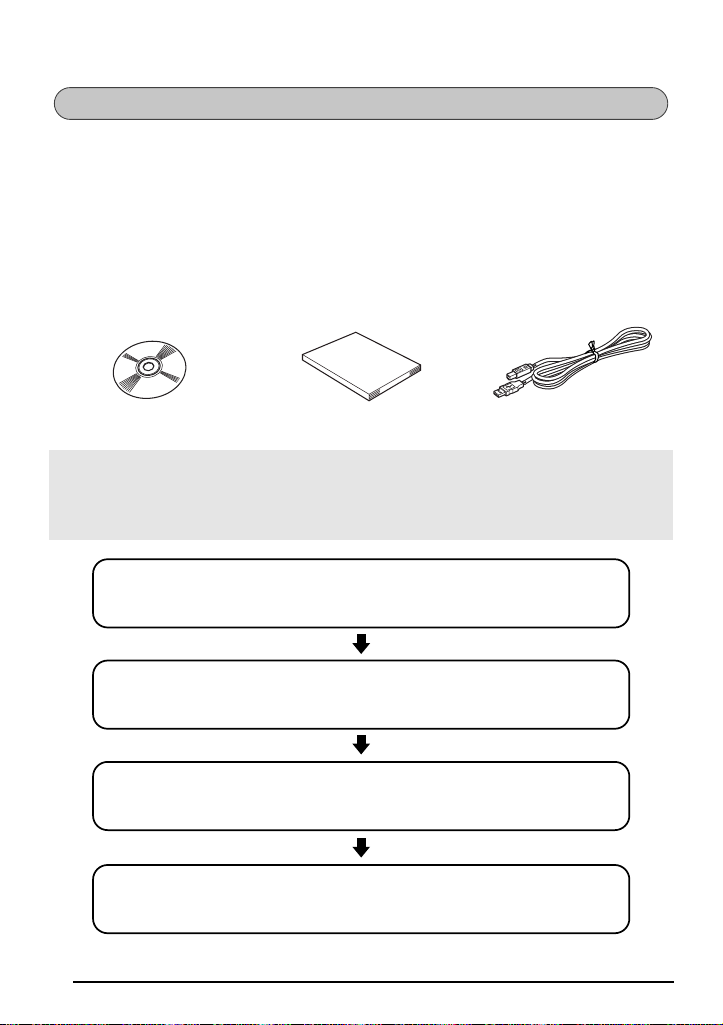
What you’ll need:
■ CD-ROM
The CD-ROM contains software, etc., to install on a
personal computer.
Procedure :
NOTE :
• Do not connect the USB interface cable to a personal computer until the software has
been installed.
• Be sure to refer to the “Software Installation Guide” to install the software properly.
1 Start the personal computer, and then insert the CD-ROM into the CD-
ROM drive.
2 Install the software by following the instructions that appear on PC dis-
play. Refer to “Software Installation Guide” for detail.
■ Software Installation Guide
Keep for future reference.
■ USB interface cable
(not included)
Make sure that your USB
cable is of high quality construction.
3 When P-touch Editor and P-touch Quick Editor is installed, connect the
P-touch to your personal computer by using the USB cable and then
turn on the P-touch.
4 The Printer Driver will be installed automatically after you have con-
nected the P-touch to your personal computer.
8
Page 13

Notes on using with a personal computer
● When connected to the personal computer, the machine will automatically turn off if no
operation is performed within 60 minutes.
● The label length can be set up to 12.2” (310 mm) long.
About CHAIN print mode :
When printing labels continuously, you can reduce the margin size by selecting the “Chain
Printing” option on the computer. The Auto cut function will be off in Chain printing, so you
will need to press c + _ when finally cutting the tape.
☞ Please use scissors to cut off Fabric Tapes or Strong Adhesive Tapes.
System Requirements :
Check that your system configuration meets the following requirements.
● Operating system : Pre-installed with Microsoft
XP Pro or XP Home
●
Memory : 64MB or more
● Hard disk free space: 50MB or more
● Interface : USB 1.1 or later specification
● Monitor : 800 x 600 dot (SVGA / Higher color or higher graphics card)
● Other : CD-ROM drive for installation
®
Windows® 98, 98SE, Me, 2000
Pro
,
9
Page 14
For Your Information
POWER KEY
The Power key ( o ) is located in the lower-right corner of the keyboard. If batteries have
been installed or the machine has been plugged in using the AC adaptor, the previous session’s information is displayed when the machine is turned on.
The machine will automatically turn off if no operation is performed within the selected time.
See below chart for detail.
Power Supply Non-PC use PC use
Six AA batteries 5 minutes 60 minutes
AC adaptor 5 minutes 60 minutes
To turn on the machine:
● Press o. The previous session’s information appears in the LCD display.
To turn off the machine:
● Press o. The current session’s information is stored in the internal memory.
CURSOR KEYS
The machine’s LCD display shows two rows of 9 characters; however, the text that you create
can be up to 99 characters long. You can review and edit different parts of the left by moving
the cursor backward and forward.
LEFT CURSOR KEY
To move the cursor one character to the left:
● Press f once.
☞ If this key is pressed when the cursor is at the beginning of a line following another
line, the cursor moves to the end of the previous line.
To move the cursor several characters to the left:
● Hold down f until the cursor moves to the desired position.
To move the cursor to the beginning of the current line:
● Hold down c and press f.
10
Page 15

RIGHT CURSOR KEY
To move the cursor one character to the right:
● Press w once.
☞ If this key is pressed when the cursor is at the end of a line followed by another
line, the cursor moves to the beginning of the next line.
To move the cursor several characters to the right:
● Hold down w until the cursor moves to the desired position.
To move the cursor to the end of the current line:
● Hold down c and press w.
UP CURSOR KEY
To move the cursor up to the previous line:
● Press h once.
☞ If the cursor is in the first line of text, it will move to the beginning of the line.
To move the cursor up several lines:
● Hold down h until the cursor moves to the desired line.
To move the cursor to the beginning of the entire text:
● Hold down c and press h.
DOWN CURSOR KEY
To move the cursor down to the following line:
● Press e once.
☞ If the cursor is in the last line of text, it will move to the end of the line.
To move the cursor down several lines:
● Hold down e until the cursor moves to the desired line.
To move the cursor to the end of the entire text:
● Hold down c and press e.
CODE, ALT & SHIFT KEYS
Most characters can be entered simply by pressing their keys. However, to use special functions or to enter capital letters, accented characters and some symbols, the following special
keys are necessary.
CODE KEY
To use a function printed above a key:
● Hold down c and press the key immediately below the desired function.
11
Page 16
EXAMPLE
1:
DANGER_
ÆæÃã
Ü
To start the Symbol function:
● Hold down c and press a once.
ALT KEY
To type in characters printed in color on the right-hand side of the keys:
● Hold down a and press the key of the desired character written in color. The Alt indi-
cator on the left side of the display comes on while a is held down.
EXAMPLE
To type in “–”:
● Hold down a and press / once. The Alt indicator comes on while a is held
down.
Alt
12
1:
012_
1:
012–_
Page 17
SHIFT KEY
1:
5 _
1:
5%_
To type in an uppercase letter or a symbol printed in the top left-hand corner of a key:
● Hold down s and press the key of the desired letter or symbol.
EXAMPLE
To type in “%”:
● Hold down s and press 5.
The Caps mode is similar to holding down s. It allows you to type capital letters continu-
ously.
To type in many capital letters:
1 Hold down c and press s. The Caps indicator on the left side of the display
comes on.
Caps
1:
_
2 Press the keys of the desired letters or symbols.
3 To exit Caps mode, hold down c and press s. The Caps indicator goes off.
13
Page 18

SPACE KEY
1:
J._
1:
J. _
The Space key ( _ ) lets you add blank spaces between characters in your text. It is different from the right cursor key ( w ), which just moves the cursor without adding blank
spaces.
To add a space:
● Press _.
EXAMPLE
To add a space:
● Press _.
RETURN KEY
As on a typewriter or word processor, this machine’s Return key ( r ) is used to end a line
of text and start another one. When you have finished entering one line, press the return key to
make a new line and move the cursor to it.
☞ The text can only contain a maximum of five lines. If you press r when five text
lines already exist, the error message “5 LINE LIMIT!” will appear.
14
Page 19
Tape widths Maximum number of lines that can be printed
1/4" (6 mm) 2
3/8" (9 mm) 2
1/2" (12 mm) 3
3/4" (18 mm) 5
The return key can also be used to select an item from a list (e.g., add a symbol or accented
character to the text) or to apply a selected setting.
Some questions asking you to confirm a command may appear on the LCD display, especially
when the function that you have chosen will delete or affect files. In these cases, pressing
r is like answering “yes”.
☞ To answer “no”, press *. Refer to DELETE KEY on page 17.
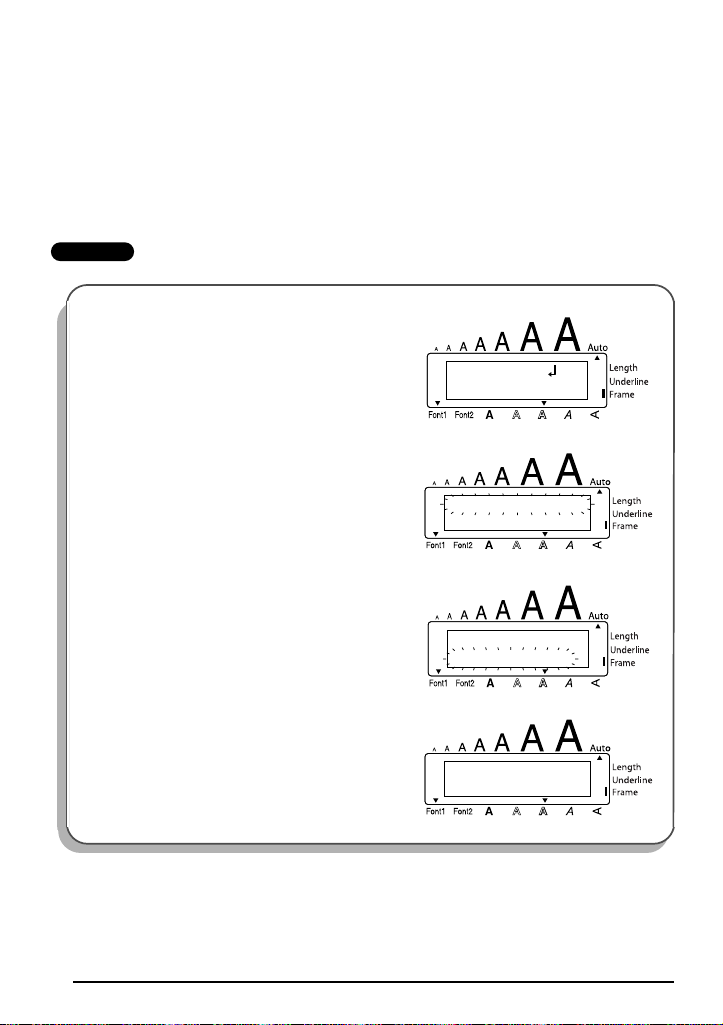
To add a new line:
● Press r. The return mark ( ) appears to indicate the end of the line.
To select an item from a list:
● Press r.
To answer “yes”:
● Press r.
TAB FUNCTION
This function allows you to separate sections of a line of text by adding tabs. This enables you
to create perfectly aligned columns without having to type in several spaces. All tabs have the
same length and are measured from either the beginning of the line or the previous tab, if there
is more than one. The tab length can be set between 0.0” and 11.8” (0.0 and 30.0 cm).
☞ The text cannot contain more than 50 tabs. If the maximum number of tabs has already
been added to the text when c is held down and Q is pressed, the error message
“TAB LIMIT!” appears.
15
Page 20
To set the tab length:
2.0inch
TAB LENGTH
1 Hold down c and press W once. The current tab length is displayed.
2 Press h or e until the desired length is displayed or use the number keys to type in
the length.
☞ To change the units (inches or centimeters) used to display the tab lengths, press
M until the desired units are displayed.
3 Press r.
To add a tab:
● Hold down c and press Q once. The tab mark ( ) appears in the text to indi-
cate the position of the tab.
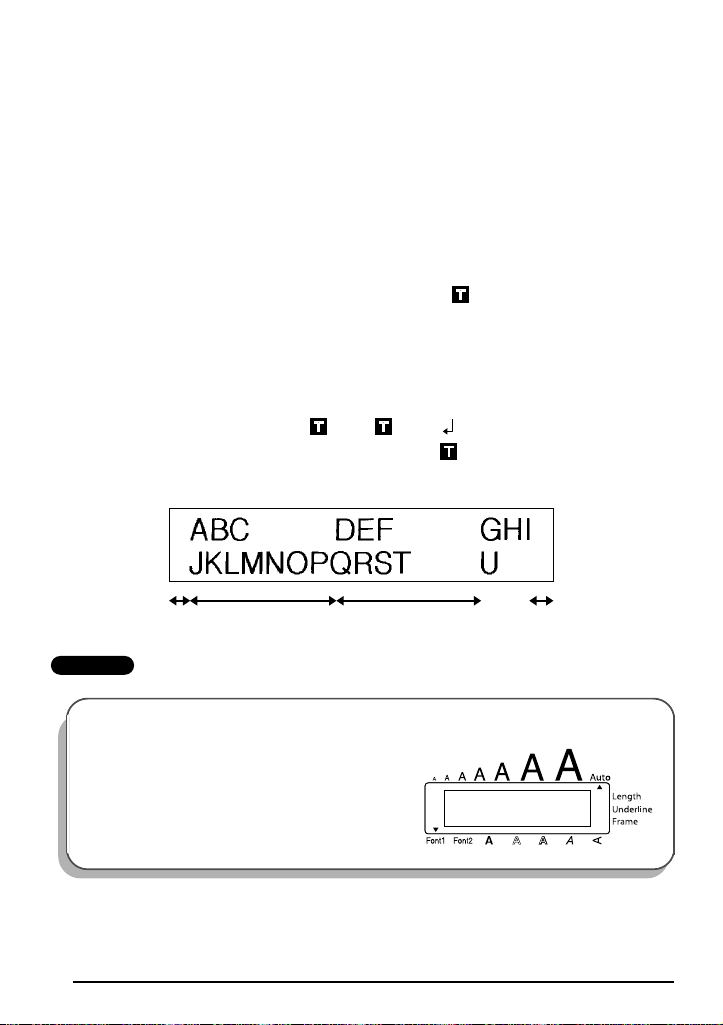
☞ If the text in front of a tab extends past the point where the next section of text
should start, the text will instead start at the following tab position.
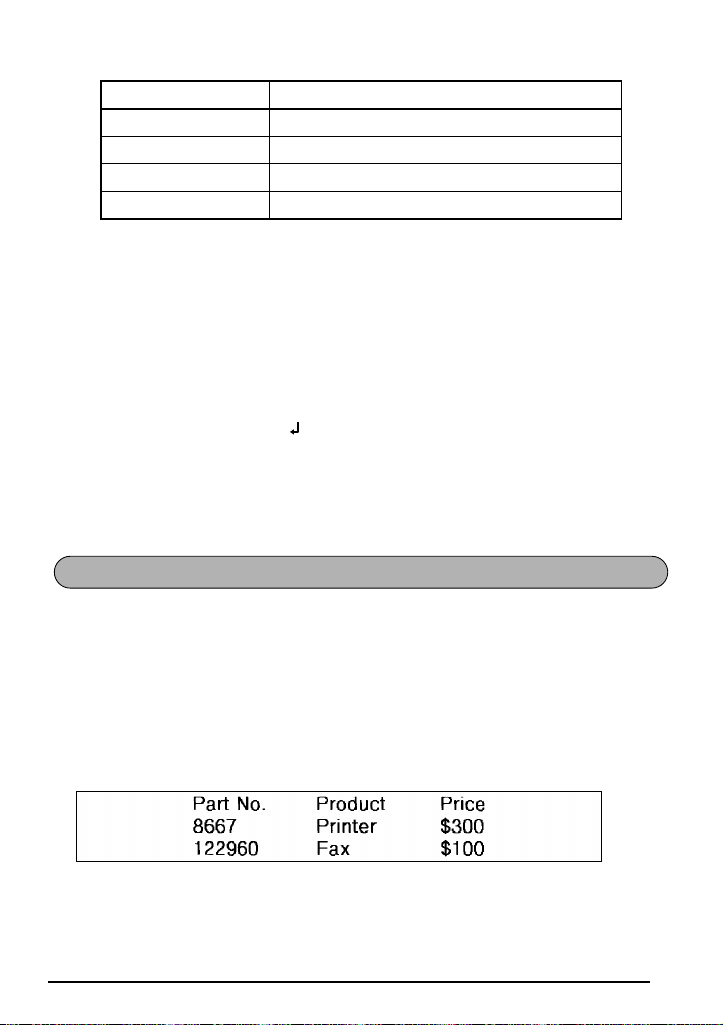
For example, if the tab length is set to 1.2” (3.0 cm) and the following text is typed
in:
1:
ABC DEF GHI
2:
JKLMNOPQRST U
The label shown below will be printed.
Margin Tab (1.2” (3.0 cm)) Tab (1.2” (3.0 cm)) Margin
EXAMPLE
To set the tab length to 1”:
Hold down c and press W once.
1
16
Page 21
Press e until 1.0 is displayed.
1.Oinch
TAB LENGTH
1:
art NO. _
2
3 Press r.
To add a tab:
● Hold down c and press Q once.
DELETE KEY
The Delete (backspace) key ( * ) allows you to remove characters to the left of the cursor’s
current position. It differs from the left cursor key ( f ), which only moves the cursor with-
out deleting any characters.
The delete key can also be used to quit most functions and return to the previous display without changing the text.
Some questions asking you to confirm a command may appear on the LCD display, especially
when the function that you have chosen will delete or affect files. In these cases, pressing *
is like answering “no”.
☞ To answer “yes”, press r. Refer to RETURN KEY on page 14.
To delete one character:
1 Press f, w, h or e to position the cursor below the character immediately to
the right of the character that you wish to delete.
2 Press * once.
17
Page 22
To delete a sequence of characters:
2:
345–6789_
1:
Garden
2:
_
1:
K’s Garde
1 Press f, w, h or e to position the cursor below the character immediately to
the right of the last character that you wish to delete.
2 Hold down * until all of the characters that you wish to delete are deleted.
To quit a function without changing your text:
● Press * to return to your text.
To answer “no”:
● Press *.
LINE OUT FUNCTION
With the Line Out function, you can easily remove an entire line of text.
To delete a line of text:
1 Press f, w, h or e to position the cursor within the line of text that you wish
to delete.
2 Hold down c and press 0 once.
☞ Each time 0 is pressed while c is held down, one line of text is deleted.
EXAMPLE
To delete “012-345-6789”:
● Hold down c and press 0 once.
18
Page 23
CLEAR FUNCTION
2:
345–6789_
1:
Garden
TEXT ONLY
TXT&FORMAT
TEXT ONLY
TXT&FORMAT
1:
_
When clearing the display before entering new text, the Clear function can be used to choose
whether all of the text is erased and all format functions (Font, Size, Width, Style, Underline,
Frame, Tape margin, Alignment, Tab length, Mirror printing, and Length) are returned to their
default settings, or whether just the text is erased.
To delete all of the text and return all formats to their default settings:
1 Hold down c and press *.
2 Press h or e until TXT&FORMAT is selected (flashing).
☞ To return to the text without erasing anything, press *.
3 Press r.
EXAMPLE
To clear the text and formats:
Hold down c and press *.
1
2 Press h until TXT&FORMAT is flashing.
3 Press r.
19
Page 24
To delete just the text:
TEXT ONLY
TXT&FORMAT
TEXT ONLY
TXT&FORMAT
1:
_
1 Hold down c and press *.
2 Press h or e until TEXT ONLY is selected (flashing).
☞ To return to the text without erasing anything, press *.
3 Press r.
EXAMPLE
To clear just the text:
Hold down c and press *.
1
2 Press e until TEXT ONLY is flashing.
1:
Garden
2:
345–6789_
3 Press r.
20
Page 25
ACCENT FUNCTION
The Accent function can also be used to add accented characters to your text. Many of these
characters can also be typed in using the Symbol function.
The accented characters are grouped according to the capital or small letter that they are combined with. The following accented characters are available:
Letters Accented characters Letters Accented characters
A À Á Ä Â Ã Æ i í ï î
a à á ä â ã æ N Ñ
C Ç n ñ
c ç O Ó Ö Ô Õ
E È É Ë Ê Eo ó ö ô õ
e è é ë ê e˜ U Ù Ú Ü Û
I Í Ï Î u ù ú ü û
To type in an accented character:
1 Hold down c and press A. The message “ACCENT a – u / A – U?” appears on the
display.
2 Press the key of the letter in the desired accented character.
☞ To type a capital letter, hold down s (or hold down c and press s to turn
on Caps mode) before pressing the letter key.
3 Press f or w until the desired accented character appears enlarged within the frame
in the middle of the display.
4 Press r. The accented character is added to the text.
☞ To type in a series of accented characters, hold down c before pressing r.
Then, continue adding accented characters by selecting them as explained in steps
2
and
3
, and holding down c while pressing r. Press just r after
selecting the last character in the series.
˜
21
Page 26
EXAMPLE
a–u/A–U?
ACCENT
ÉËÊE
È
˜
È ËÊE
É
˜
1:
RESUMÉ_
To add the accented character “É”:
1
Hold down c and press A.
2 Hold down s and press E.
3 Press w until É appears in the frame.
4 Press r.
SYMBOL FUNCTION
In addition to the letters, symbols and numerals on the key tops, there are 53 additional marks
available with the Symbol function.
The following symbols are available:
22
Page 27
Group Symbol
☞
ÆæÃã
Ü
☞
˜
E
23
R C
234
1 ÜÆæà ã e˜Õõ °
2+×÷= §
3
TM
[]
4
5
♥ ★
To type in a symbol:
1 Hold down c and press a. A row of symbols appears in the display.
2 Press h or e to display different rows of symbols and press f or w until the
desired symbol appears enlarged within the frame in the middle of the display.
3 Press r. The symbol is added to the text.
☞ To type in a series of symbols, hold down c before pressing r. Then, con-
2
tinue adding symbols by selecting them as explained in steps
ing down c while pressing r. Press just r after selecting the last
symbol in the series.
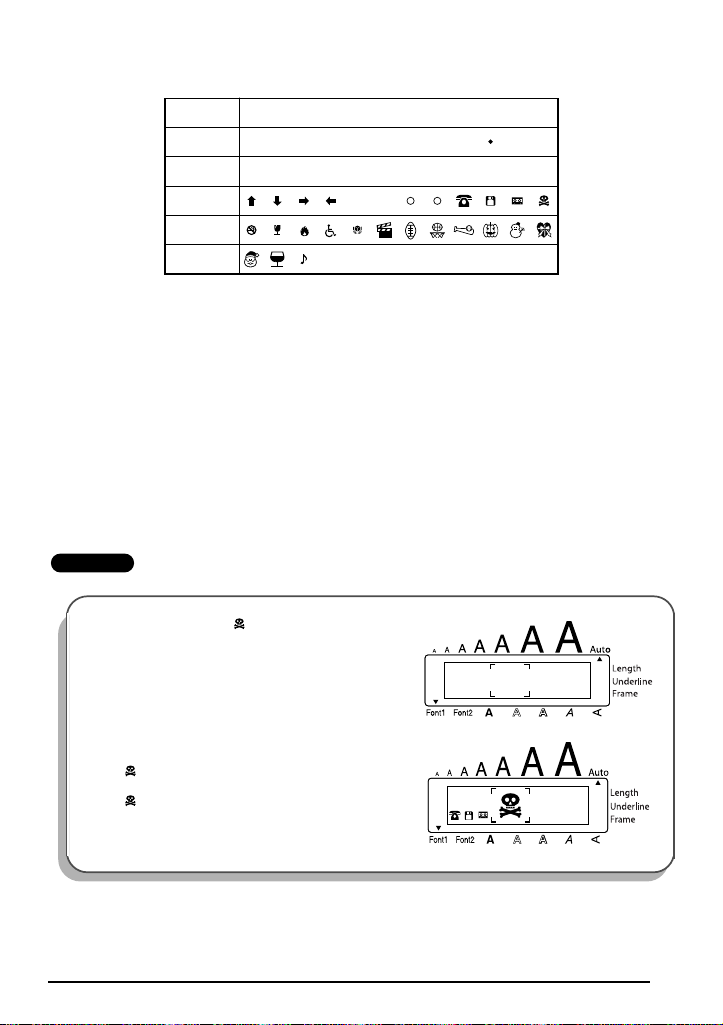
EXAMPLE
To add the symbol “ ”:
1
Hold down c and press a.
and 3, and hold-
2 Press h or e until the row containing
“ ” appears, and then press
“ ” appears in the frame.
f or w until
23
Page 28
3
1:
DANGER _
Press r.
AUTO FORMAT FUNCTION
With the Auto Format function, you can select from a variety of preset formats perfect for your
specific need. This function automatically adjusts the label length, tape margins and horizontal alignment without changing the text or any other formats, allowing you to create labels
faster and easier.
The following preset formats are available:
Auto Format Setting
DEFAULT OFF FULL LEFT
3.5" FLOPPY 2.8" (7.0 cm) NARROW CENTER
miniDV 1.7" (4.3 cm) NARROW CENTER
VHS SPINE 5.5" (14.0 cm) NARROW CENTER
VHS 3.0" (7.7 cm) NARROW CENTER
VCR8mm CASE 3.6" (9.2 cm) NARROW CENTER
VCR8mm 2.9" (7.3 cm) NARROW CENTER
VHS-C SPINE 1.8" (4.5 cm) NARROW CENTER
VHS-C 2.3" (5.8 cm) NARROW CENTER
AUDIO CASSETTE 3.5" (8.9 cm) NARROW CENTER
DAT CASSETTE 2.2" (5.6 cm) NARROW CENTER
MINI DISK 2.0" (5.2 cm) NARROW CENTER
ORGANIZER L 3.2" (8.2 cm) NARROW CENTER
ORGANIZER S 2.6" (6.5 cm) NARROW CENTER
FILE LONG 7.2" (18.3 cm) NARROW CENTER
FILE SHORT 3.7" (9.4 cm) NARROW CENTER
Label Length
Setting
Tape Margin
Setting
Horizontal
Alignment Setting
24
Page 29

To select a preset format:
DEFAULT
CASSETTE
AUDIO
1 Hold down c and press Y once. The currently selected setting appears in the dis-
play.
2 Press h or e to select the desired setting.
☞ To return to default settings, press _.
3 Press r to apply the selected setting.
☞ The Length indicator comes on if any setting other than DEFAULT is selected.
EXAMPLE
To select the AUDIO CASSETTE setting:
Hold down c and press Y.
1
2 Press h or e until the AUDIO CASSETTE
setting is displayed.
3 Press r.
25
Page 30
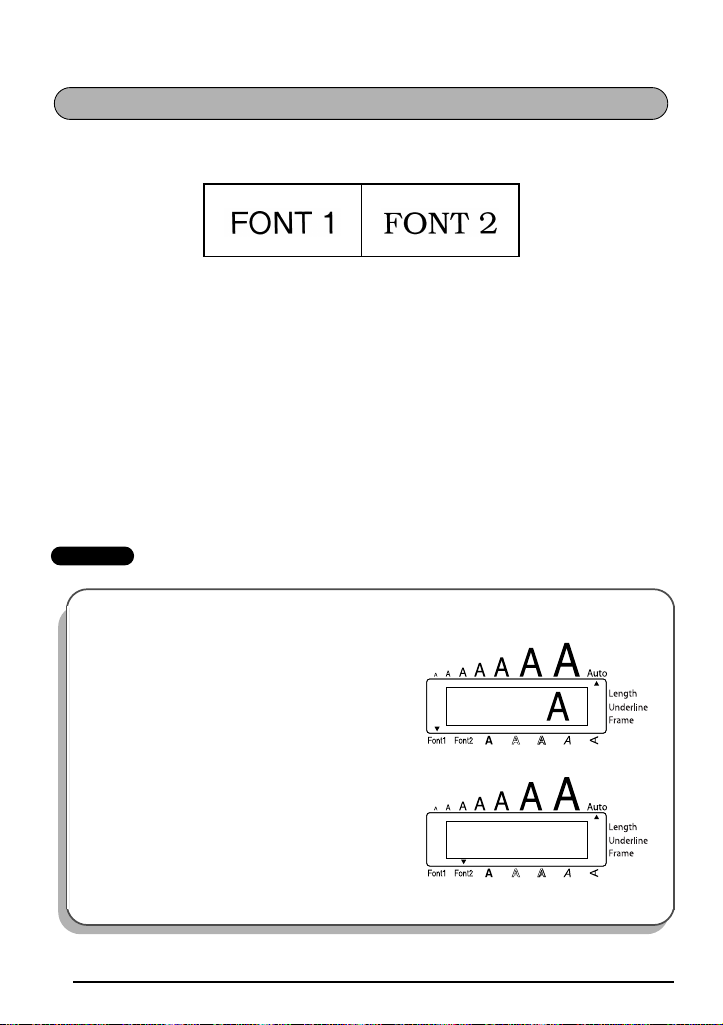
FONT FUNCTION
1
FONT
2
FONT
A
With the Font function, you can choose one of two fonts for your text.
The following font settings are available:
The default font setting is FONT 1. The font indicator at the bottom left of the display shows
the currently selected font setting.
To change the font setting:
1 While holding down c, press 1 once, and keep c held down to display the
current font setting.
2 While still holding down c, continue pressing 1 until the desired font setting is
displayed.
☞ The current font setting is shown by the font indicator at the bottom left of the dis-
play.
3 Release c to apply the selected font setting to the entire text.
EXAMPLE
To select the FONT 2 font setting:
1
While holding down c, press 1 once,
and keep c held down.
26
2 While still holding down c, continue pressing
1 until FONT 2 is displayed.
3 Release c.
Page 31

SIZE & WIDTH FUNCTIONS
The character size can be adjusted using both the Size and Width functions. Since the character size that can be used depends on the width of the tape, the following table shows the character sizes that can be used with each tape width.
Tape Widths Sizes (in points)
1/4" (6 mm) 6, 9, 12
3/8" (9 mm) 6, 9, 12, 18
1/2" (12 mm) 6, 9, 12, 18, 24
3/4" (18 mm) 6, 9, 12, 18, 24, 36, 42
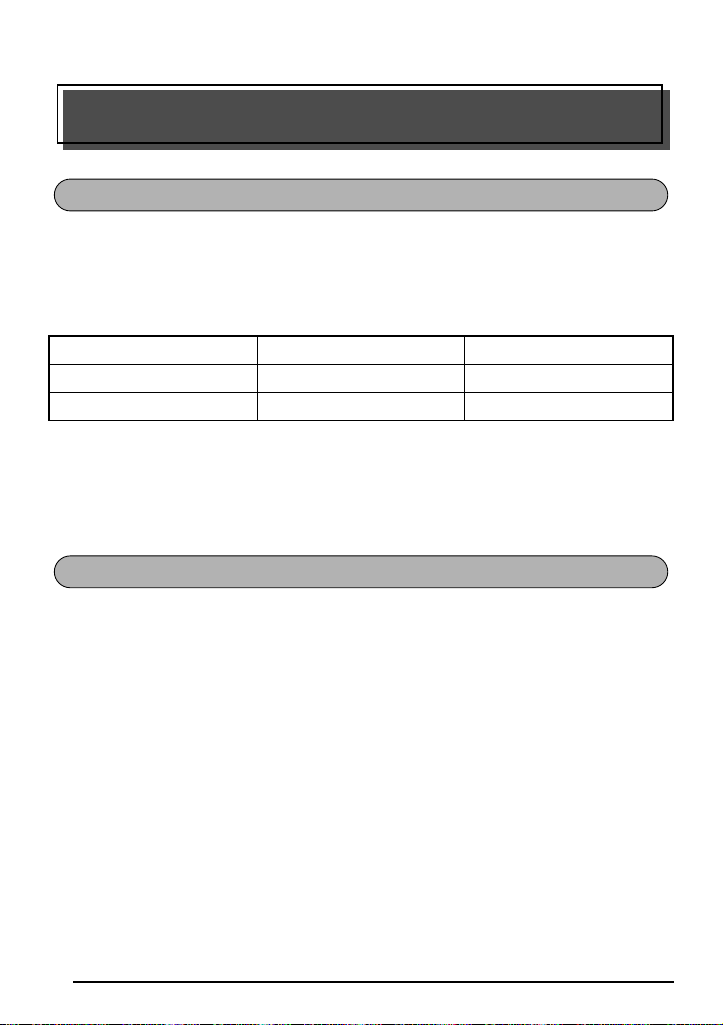
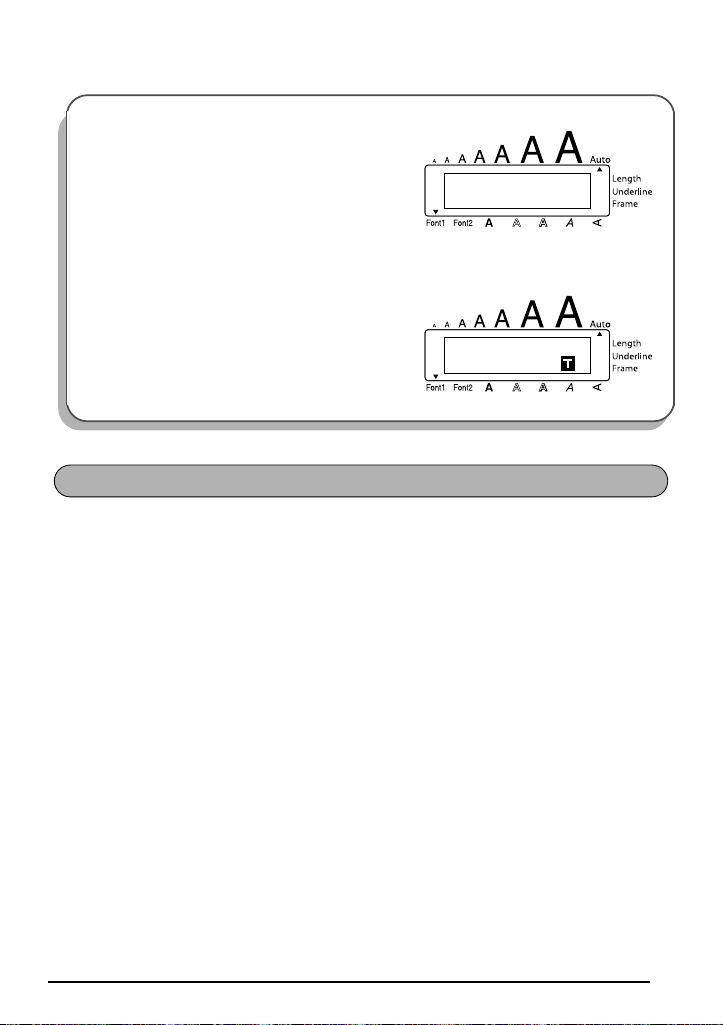
The default size setting is AUTO and the default width setting is OFF. The currently selected
size setting is always shown by the indicator above the display.
With the AUTO size setting, the machine compares your text with the width of the installed
tape and automatically adjusts the characters to the largest possible size. However, seven other
point sizes are also available, and each can be printed with either of the two width settings.
☞
With the AUTO setting selected and 1/2" (12-mm) or 3/4" (18-mm) wide tape installed,
text consisting of just one line of only uppercase letters (and no accented characters)
will be printed with a character size slightly larger than a similar sentence also containing lowercase letters (i.e., 29 points for 1/2" (12-mm) wide tape and 52 points for 3/4"
(18-mm) wide tape).
Size Setting
(in points)
6
9
12
Width Setting
Off
Width Setting
On
18
24
36
42
27
Page 32

To change the size setting:
AUTO
SIZE
24
SIZE
1 While holding down c, press 2 once, and keep c held down to display the
current size setting.
2 While still holding down c, continue pressing 2 until the desired size setting is
displayed.
☞ The current size setting is shown by the size indicator at the top of the display.
3 Release c to apply the selected size setting to the entire text.
EXAMPLE
To select the 24 point size setting:
While holding down c, press 2 once,
1
and keep c held down.
2 While still holding down c, continue pressing
2 until 24 is displayed.
3 Release c.
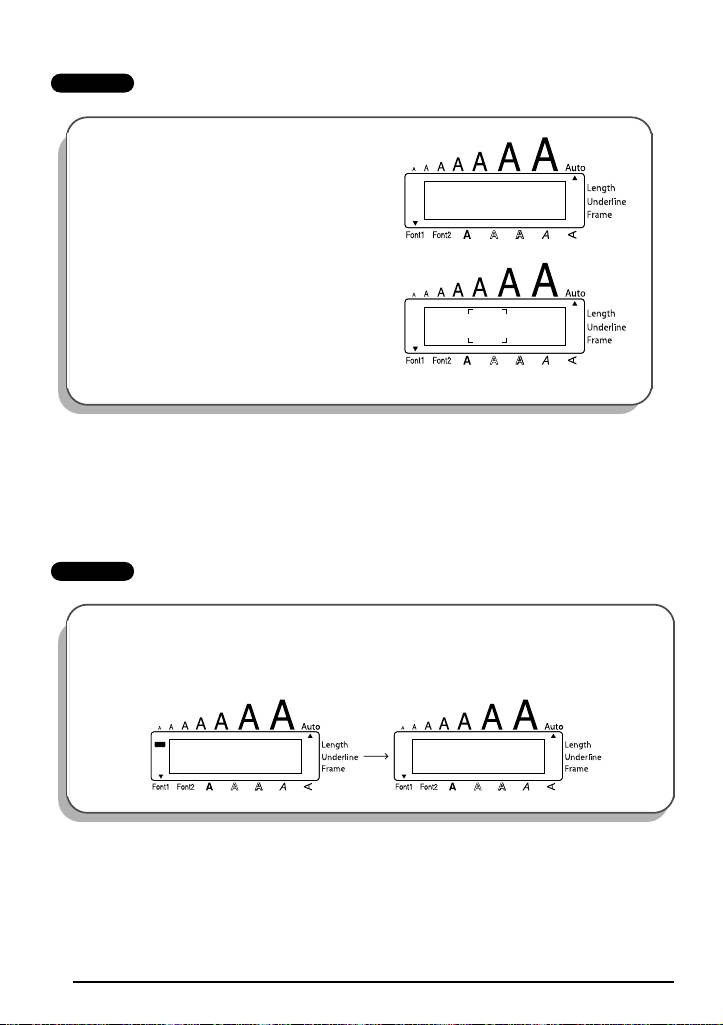
To change the width setting:
1 While holding down c, press 3 once, and keep c held down to display the
current width setting.
2 While still holding down c, continue pressing 3 until the desired width setting is displayed.
3 Release c to apply the selected width setting to the entire text.
28
Page 33

EXAMPLE
OFF
WIDE
ON
WIDE
To select the ON width setting:
While holding down c, press 3 once,
1
and keep c held down.
2 While still holding down c, continue pressing
3 until ON is displayed.
3 Release c.
STYLE FUNCTION
You can choose from nine different character styles to apply to your text.
☞ Characters printed using the smaller sizes may be difficult to read if certain style settings
(e.g., I+SHAD) are selected.
The following style settings are available:
NORMAL, BOLD, OUTLINE, SHADOW, ITALIC, I+BOLD (italic & bold), I+OUTL (italic
& outline), I+SHAD (italic & shadow), VERT (vertical)
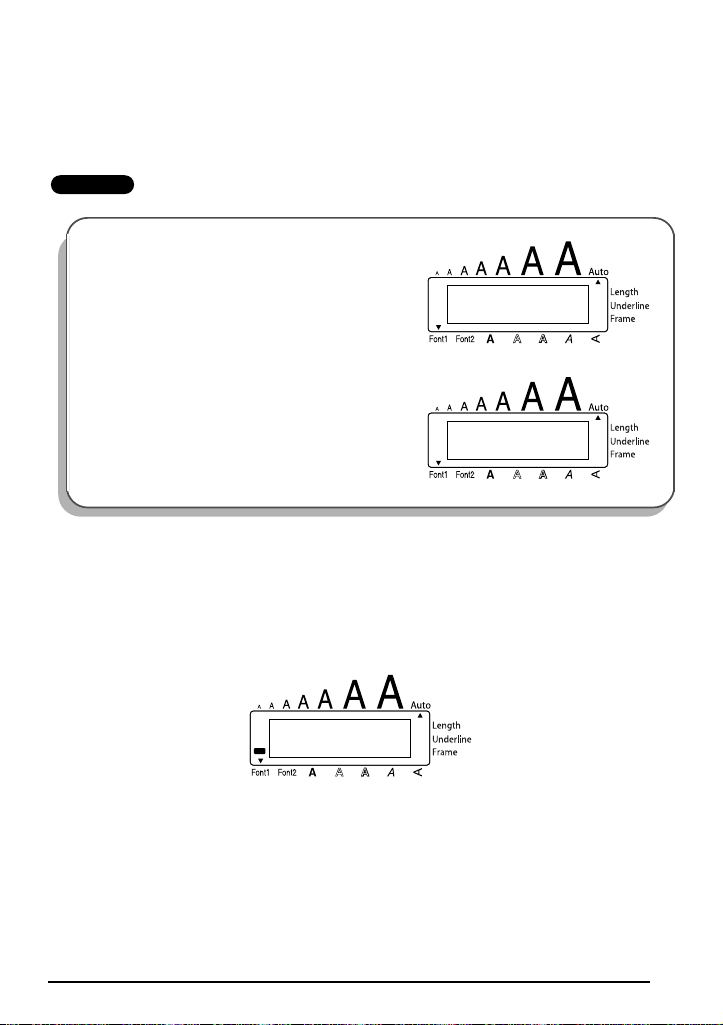
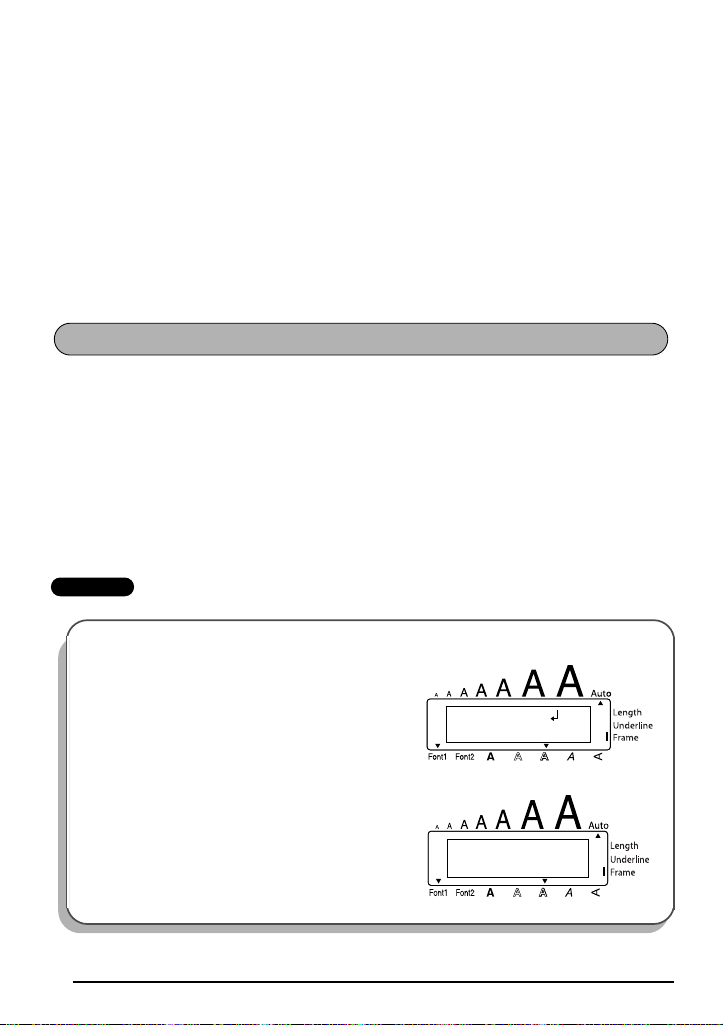
The default style setting is NORMAL. The style indicator at the bottom of the display shows the
current style setting when any setting other than NORMAL is selected.
Refer to Reference at the end of this section for samples of the available settings.
To change the style setting:
1 While holding down c, press 4 once, and keep c held down to display the
current style setting.
2 While still holding down c, continue pressing 4 until the desired style setting is
displayed.
☞ The current style setting is shown by the style indicator at the bottom of the display.
3 Release c to apply the selected style setting to the entire text.
29
Page 34

EXAMPLE
NORMAL
STYLE
I+SHAD
STYLE
To select the I+SHAD style setting:
While holding down c, press 4 once,
1
and keep c held down.
2 While still holding down c, continue pressing
4 until I+SHAD is displayed.
3 Release c.
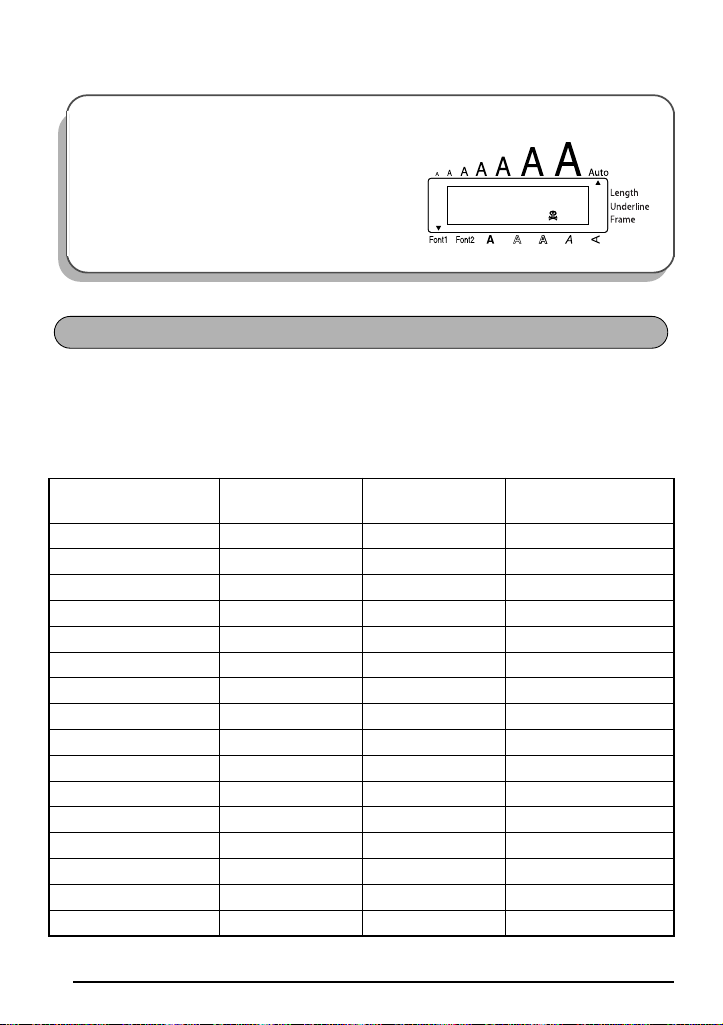
REFERENCE
REFERENCE
Font
Setting
FONT 1
FONT 2
Font
Setting
FONT 1
FONT 2
30
Style Setting
NORMAL BOLD OUTLINE SHADOW ITALIC
Style Setting
I+BOLD I+OUTL I+SHAD
VERT
Page 35

UNDERLINE FUNCTION
OFF
UNDL
ON
UNDL
You can emphasize your text by underlining it.
The default underline setting is OFF. When the Underline function is set to ON, the Underline
indicator on the right side of the display comes on.
UNDL
ON
To turn the Underline function on or off:
1 While holding down c, press 5 once, and keep c held down to display the
current underline setting.
2 While still holding down c, continue pressing 5 until the desired underline set-
ting is displayed.
☞ The Underline indicator comes on when the ON setting is selected.
3 Release c to apply the selected underline setting to the entire text.
EXAMPLE
To select the ON underline setting:
While holding down c, press 5 once,
1
and keep c held down.
(Sample)
2 While still holding down c, continue pressing
5 until ON is displayed.
3 Release c.
31
Page 36

FRAME FUNCTION
OFF
FRAME
With the Frame function, you can choose from various frames and highlights to design a more
decorative or emphasized label.
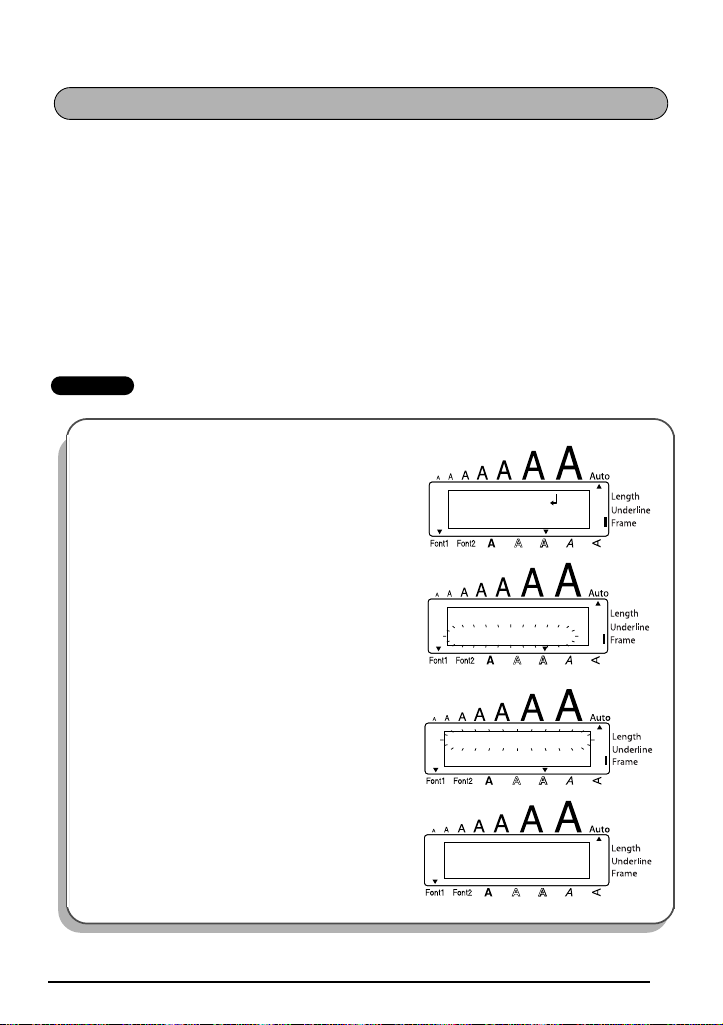
The default setting is OFF; however, the following five settings are also available.
When any setting other than OFF is selected, the Frame indicator on the right side of the display comes on.
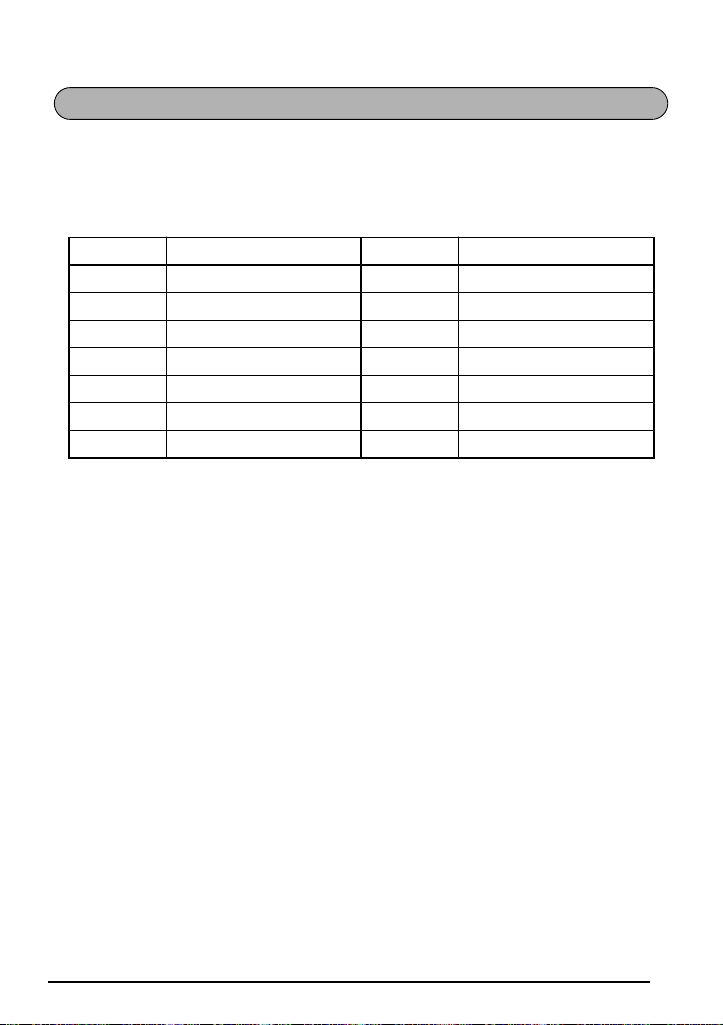
To change the frame setting:
1 While holding down c, press 6 once, and keep c held down to display the
current frame setting.
2 While still holding down c, continue pressing 6 until the desired frame setting is
displayed.
☞ The Frame indicator comes on when any setting other than OFF is selected.
3 Release c to apply the selected frame setting to the entire text.
EXAMPLE
32
To select the candy frame setting:
While holding down c, press 6 once,
1
and keep c held down.
Page 37

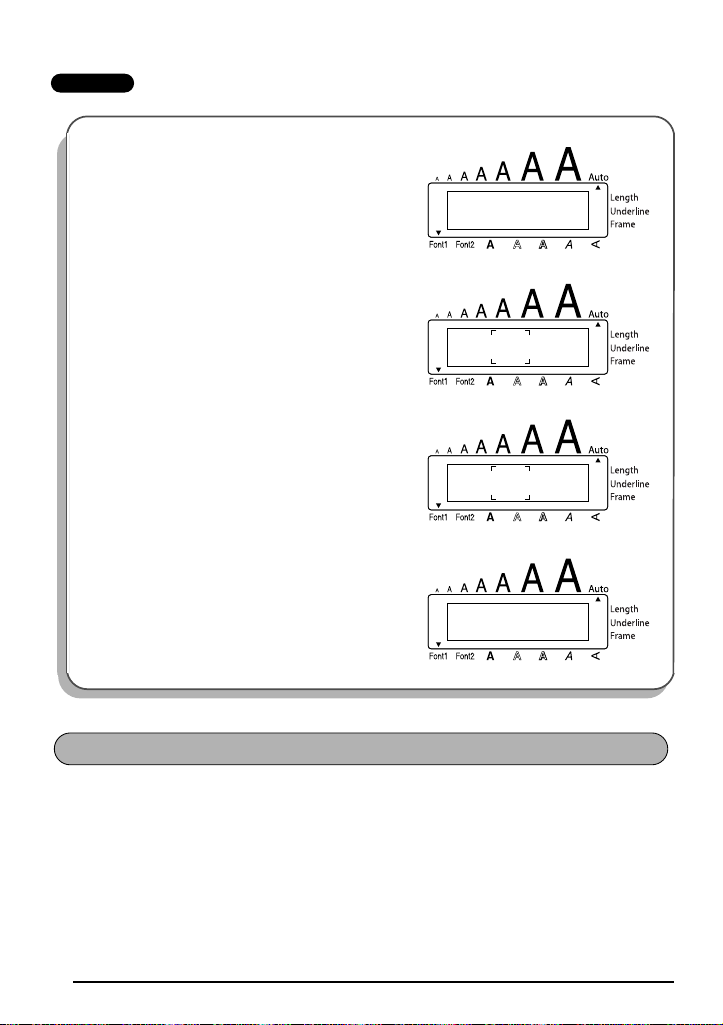
EXAMPLE
2
While still holding down c, continue pressing 6 until the candy frame is displayed.
3 Release c.
TAPE MARGIN FUNCTION
The Tape margin function allows you to adjust the size of the margins on the left and right
sides of your text.
The default tape margin setting is FULL; however, three other settings are also available.
FULL
(1" (24 mm) margins)
NONE
(5/64" (2 mm) margins)
NARROW
(1/6" (4 mm) margins)
HALF
(1/2" (12 mm) margins)
☞ When a setting other than FULL is selected, extra tape is fed out before printing starts.
☞ After printing using the NARROW and HALF tape margin settings, use scissors to cut
along the cutting guide (:) to center the text within the label.
33
Page 38

To change the tape margin setting:
FULL
MARGIN
HALF
MARGIN
1 While holding down c, press E once, and keep c held down to display the
current tape margin setting.
2 While still holding down c, continue pressing E until the desired tape margin set-
ting is displayed.
3 Release c to apply the selected tape margin setting to the entire text.
EXAMPLE
To select the HALF tape margin setting:
1
While holding down c, press E once,
and keep c held down.
2 While still holding down c, continue press-
ing E until HALF is displayed.
3 Release c.
HORIZONTAL ALIGNMENT FUNCTION
You can choose to align the text in one of three ways. In addition, if the Length function was
used to set the length of the label, the text will align within the label according to the selected
horizontal alignment setting.
The default setting is LEFT; however, two other settings are also available.
LEFT RIGHT
CENTER
34
Page 39

To change the horizontal alignment setting:
LEFT
ALIGN
RIGHT
ALIGN
1 While holding down c, press R once, and keep c held down to display the
current horizontal alignment setting.
2 While still holding down c, continue pressing R until the desired horizontal align-
ment setting is displayed.
3 Release c to apply the selected horizontal alignment setting to the entire text.
EXAMPLE
To select the RIGHT horizontal alignment setting:
1
While holding down c, press R once,
and keep c held down.
2 While still holding down c, continue press-
ing R until RIGHT is displayed.
3 Release c.
MIRROR PRINTING FUNCTION
This function prints your label so that the text can be read from the adhesive side of the tape. If
mirror-printed labels are attached to glass or some other transparent material, they can be read
correctly from the opposite side.
☞ When using the Mirror printing function, the text should be printed on clear tape.
The default mirror printing setting is OFF.
ON
35
Page 40

To turn the mirror printing setting on or off:
OFF
MIRROR
ABC
ON
MIRROR
ABC
1 While holding down c, press p once, and keep c held down to display the
current mirror printing setting.
2 While still holding down c, continue pressing p until the desired mirror printing
setting is displayed.
3 Release c to apply the selected mirror printing setting to the entire text.
EXAMPLE
To select the ON mirror printing setting:
1
While holding down c, press p once,
and keep c held down.
2 While still holding down c, continue press-
ing p until ON is displayed.
3 Release c.
LENGTH FUNCTION
Although the length of the printed label automatically adjusts to fit the length of the entered
text, there may be times when you will want to make a label with a specific length. The
Length function allows you to set the label length between 1.6” and 11.8” (4.0 cm and 30.0
cm).
The default length setting is OFF. When the Length function is set to ON, the Length indicator
on the right side of the display comes on.
36
Page 41

To turn the Length function on or off:
ON
LENGTH
4.0inch
LENGTH
1 While holding down c, press T once, and keep c held down to display the
current length of the label (the text and both margins). Then the display will show the current label length setting (ON or OFF).
2 While still holding down c, continue pressing T until the desired label length set-
ting is displayed.
☞ The Length indicator comes on when ON is selected.
3 Release c. If ON was selected, the current label length setting is displayed.
4 Press h or e to select the desired length or use the number keys to enter a length.
☞ To change the units (inches or centimeters) used to display the label length, press
M until the desired units are displayed.
To change the length in 1” (1.0-cm) steps, hold down either h or e, and then
release the key when the desired setting is displayed.
5 Press r.
EXAMPLE
To select a label length of 5”:
While holding down c, press T once, and keep c held down.
1
2 While still holding down c, continue press-
ing
3 Release c.
LENGTH
5.3inch
T until ON is displayed.
LENGTH
OFF
37
Page 42

Press h until 5.0 inch is displayed.
5.0inch
LENGTH
OFF
AUTO CUT
4
5 Press r.
AUTO CUT FUNCTION
The Auto cut function allows you to set whether or not the machine will automatically cut
each label after it is printed. Turn on the Auto cut function before starting to print in order to
cut the labels automatically after printing them.
☞ After printing a label with the Auto cut function set to OFF, hold down c and press
_ once to feed the tape, then cut it.
☞ Please use scissors to cut off Fabric Tapes or Strong Adhesive Tapes.
To turn the Auto cut function on or off:
1 While holding down c, press Z once, and keep c held down to display the
current auto cut setting.
2 While still holding down c, continue pressing Z until the desired auto cut setting
is displayed.
3 Release c to apply the selected auto cut setting.
EXAMPLE
To turn the Auto cut function on:
While holding down c, press Z once,
1
and keep
38
c held down.
Page 43

2
1/ 1
COPIES
While still holding down c, continue pressing
Z until ON is displayed.
3 Release c.
AUTO CUT
ON
PRINT KEY
After you have entered your text and chosen the desired format settings, you are ready to print.
☞ If the Auto cut function is set to ON, the label will automatically be cut after it is
printed.
To print a label:
● Press p once. The message “COPIES” followed by the number of the label being
printed is displayed.
☞ If the selected character size is too large for the width of the installed tape cassette,
the message “CHR SIZE AUTO?” appears. To allow the text size to automatically be
adjusted, press p or r. To stop the text size from being changed, press *.
EXAMPLE
To print and cut a label:
● Press p once.
39
Page 44

FEED & CUT FUNCTION
The Feed & Cut function is used to feed out 1” (24 mm) of tape and automatically cut it off.
For example, after printing with the Auto cut function set to OFF or when printing has been
interrupted.
To feed and cut off 1” (24 mm) of tape:
● Hold down c and press _ once. 1” (24 mm) of tape is fed out and cut off.
☞ Please use scissors to cut off Fabric Tapes or Strong Adhesive Tapes.
NUMBERING FUNCTION
This function can be used to print many copies of the same text while increasing a certain
number in the text by 1 after each label is printed.
To use the Numbering function:
1 Press f, w, h or e to position the cursor below the number that you wish to
increase.
2 Hold down c and press O. The message “NUMBER UNTIL” appears in the display
with the current setting.
☞ To cancel the Numbering function at any time, hold down c and press O (or
press just * ).
3 Use the number keys to type in the last number to be printed.
☞ The last number to be printed can also be selected by pressing h or e.
A number lower than the one that was selected cannot be entered.
4 Press p (or r) to begin printing the labels. The number of each copy is displayed
while it is being printed.
☞ If the Tape margin function is set to any setting other than NONE, a cutting guide (:)
is printed between each label so the tape can be cut to the correct size.
40
Page 45

EXAMPLE
UNTIL
1
NUMBER
UNTIL
3
NUMBER
To print three labels with numbers 1, 2 and 3:
Position the cursor below “1”.
1
1:
STUDIO _
1
2 Hold down c and press O.
3 Press 3.
4 Press p (or r ).
COPIES
1/ 3
COPIES
3/ 3
COPIES
2/ 3
☞ If the Tape margin function is set to any setting other than NONE, a cut-
ting guide (:) is printed between each label so the tape can be cut to the
correct size.
✂
✂
41
Page 46

REPEAT PRINTING FUNCTION
1
COPIES
3
COPIES
This function allows you to print up to 9 copies of the same text.
To use the Repeat printing function:
1 Hold down c and press I. The message
default setting 1, which will need to be changed, as necessary.
☞ To cancel the Repeat printing function at any time, hold down c and press I
(or press just * ).
2 Press h or e until the desired number of copies is displayed, or use the number
keys to type in the number.
3 Press p (or r ) to begin printing the labels. The number of each copy is displayed,
while it is being printed.
☞ If the Tape margin function is set to any setting other than NONE, a cutting guide (:)
is printed between each label so the tape can be cut to the correct size.
EXAMPLE
To print three copies of a label:
Hold down c and press I.
1
“COPIES” appears in the display with the
42
2 Press 3.
Page 47

Press p (or r ).
3
COPIES
1/ 3
COPIES
3/ 3
COPIES
2/ 3
☞ If the Tape margin function is set to any setting other than NONE, a cut-
ting guide (:) is printed between each label so the tape can be cut to the
correct size.
✂
✂
MEMORY FUNCTIONS
You can use the Memory to store your most frequently used text files. The text remains in the
memory, along with its formatting, even after all characters are removed from the display
using the Clear function (holding down c and pressing * ).
When each file is stored, it is given a number to make recalling it easier. Up to 10 text files or
approximately 300 characters can be stored in the memory. (A single text file can have a maximum of 91 characters.)
Since a copy of the stored text file is recalled when the Recall function is used, the text can be
edited or printed without changing the originally stored file. When a file is no longer needed
or more space is necessary, the Memory delete function can be used to delete it.
☞ When inserting new batteries, be sure to insert the new ones within five minutes of
removing the old ones, otherwise any text files stored in the memory will be lost (unless
the machine is plugged into an electrical outlet with the AC adaptor).
STORING TEXT
To store a text file:
1 Hold down c and press 7. The message “STORE” appears on the display with the
currently selected file number.
43
Page 48

☞ To quit the Store function without storing the text, hold down c and press 7
(or press just * ).
2 Press a number key (or press h or e) to select the file number where you wish to
store the text.
3 Press r. The text is stored under the selected file number and the text previously
shown in the display reappears.
☞ If a file is already stored under the selected file number, the message “OVER-
WRITE?” appears in the display and you must decide whether or not to overwrite it
(delete it from the memory and store the new one).
If the maximum number of characters has already been stored, the error message
“MEMORY FULL!” appears in the display. If this occurs, an existing text file must be
deleted before the new one can be stored.
To overwrite the stored file with the new one:
● Press r to delete the previously stored file and store the new one under the selected
number.
☞ To go back and choose another file number without overwriting the text file, press
*, and then select a different file number.
RECALLING TEXT
To recall a text file:
1 Hold down c and press 8. The message “RECALL” appears on the display with
the file number and beginning of the most recently stored or recalled text.
☞ To quit the Recall function without recalling text, hold down c and press 8
(or press just * ).
2 Press a number key (or press h or e) to select the file number containing the text
that you wish to recall. The text stored under the selected file number is shown.
☞ To see other parts of the selected text file, press f or w.
To display the text stored under other file numbers, press h or e, or the key of
a different file number.
3 Press r. Any text previously entered in the display is erased and the text stored under
the selected file number is recalled into the display.
DELETING A FILE
To delete a text file:
1 Hold down c and press 9. The message “CLEAR” appears on the display with the
file number and beginning of the most recently stored or recalled text.
44
Page 49

☞ To cancel the Memory delete function without deleting the text file, hold down
STORE
[1]
STORE
[4]
1:
J. Smith_
c and press 9 (or press just * ).
2 Press a number key (or press h or e) to select the file number containing the text
that you wish to delete. The text stored under the selected file number is shown.
☞ To see other parts of the selected text file, press f or w.
To display the text stored under other file numbers, press h or e, or the key of
a different file number.
3 Press r. The message “OK TO CLEAR?” appears.
☞ To go back and select a different text file, press *.
4 Press r to delete the text file that was selected.
EXAMPLE
To store text under file number 4:
1 Hold down c and press 7.
2 Press 4.
3 Press r.
45
Page 50

To recall the text from file number 1:
RECALL
[4]J. Smit
RECALL
[1]Bill Re
1:
_ill Reyn
B
CLEAR
[1]Bill Re
CLEAR
[4]J. Smit
OK TO
CLEAR?
1:
_ill Reyn
B
1
Hold down c and press 8.
2 Press 1.
3 Press r.
To delete the text stored under file number 4:
1
Hold down c and press 9.
2 Press 4.
3 Press r.
4 Press r.
46
Page 51

TROUBLESHOOTING
Problem Remedy
1. The display stays blank after you have
turned on the machine.
2. The machine does not print or the
printed characters are blurred.
3. The text files that you stored in the memory are no longer there.
4. The printed characters are not formed
properly.
5. A blank horizontal line appears through
the printed label.
6. Striped tape appears. • You have reached the end of the tape.
7. The machine has “locked up” (i.e., nothing happens when a key is pressed).
• Check that the AC adaptor is connected
correctly.
• If you are using alkaline batteries, check
that they are correctly inserted.
• If the batteries are low, replace them
with new ones.
• Check that the tape cassette has been
inserted properly.
• If the tape cassette is empty, replace it
with a new one.
• Make sure that the tape compartment
cover has been closed.
• If the batteries are low, replace them
with new ones.
• If you are using alkaline batteries, they
may be low. Try using the AC adaptor or
replace the batteries with new ones.
• Clean the print head as explained on
page 7.
Replace the tape cassette with a new
one.
• Turn off the machine, and then while
holding down c and R, turn the
machine back on.
The text and formats in the display and
all text files stored in the memory are
erased.
47
Page 52

ERROR MESSAGE LIST
Error Message Cause Remedy
5 LINE
LIMIT!
BATTERIES
WEAK!
BUFFER
EMPTY!
BUFFER
FULL!
CAN’T
HERE!
CASSETTE
CHANGED!
CHANGE
ADAPTOR!
CUTTER
ERROR!
This message appears if five lines
already exist when you press r.
This message appears when the
installed alkaline batteries become
weak.
• This message appears if you hold
down c and press T, but
no text has been entered in the display.
• This message appears if you try to
print, but no text has been entered
in the display.
This message appears if you try to
enter a character, symbol, return or
space after the maximum number of
characters has already been entered.
This message appears if the cursor is
at the end of the text when you hold
down c and press O.
This message appears if the tape cassette is changed while the P-touch is
receiving data from the computer.
This message appears if a high-voltage adaptor is being used.
This message appears if the tape cutter is closed when you try to print or
feed the tape.
Limit the number of lines to five.
Replace the batteries or use the
AC adaptor.
• Enter some text before starting
this function.
• Enter text before printing.
Delete some existing text so that
more text can be entered.
Move the cursor below a
number before holding down
c and pressing O.
Cancel the print job, install the
correct tape cassette, and then
try printing again.
Remove the high-voltage adaptor and connect the adaptor
designed exclusively for this
machine.
Turn the P-touch off, then on
again.
48
Page 53

Error Message Cause Remedy
EEPROM
ERROR!
INTERFACE
ERROR!
INVAL.
CHRS!
LENGTH
LIMIT!
LINE
LIMIT!
MEMORY
FULL!
NO
FILES!
NO
TAPE!
This message appears if a checksum
error occurred when the P-touch was
turned on or if the keyword was damaged and it failed to initialize.
This message appears if an error
occurs while data is being sent from
the computer to the P-touch.
This message appears if the cursor is
not below a number when you hold
down c and press O.
• This message appears if the text is
longer than 3’ 3 1/3” (1 meter) when
you try to print.
• This message appears if the Length
function is used to set a label
length that is less than 1.6” (4.0
cm) or more than 11.8” (30.0 cm).
• This message appears if the Tab
Length function is used to set a tab
length that is more than 11.8”
(30.0 cm).
This message appears if the number
of lines in the text is greater than the
maximum number of lines possible
for the installed tape.
This message appears if you try to
store a text file after the maximum
number of characters has already
been stored in the memory.
This message appears if you try to
recall or delete a text file from the
memory when none are stored.
This message appears if you try to print
a label or feed the tape when no tape
cassette is installed.
Contact your service representative.
Cancel the print job, and then
try printing again.
Move the cursor below a number before holding down
c and pressing O.
• Shorten the text to less than 3’
3 1/3” (1 meter) before trying
to print.
• Set the label length between
1.6” (4.0 cm) and 11.8” (30.0
cm).
• Set the tab length so that it is
less than 11.8” (30.0 cm).
Reduce the number of lines or
install a tape of greater width.
Delete an unwanted file to make
room for the new one.
Store a text file first.
Install a tape cassette and try
again.
49
Page 54

Error Message Cause Remedy
REPLACE
BATTERIES!
ROM
PROBLEM!
TAB
LIMIT!
TEXT
TOO HIGH!
TEXT
TOO LONG!
This message appears if the installed
alkaline batteries are about to run
out.
This message appears if there is a
problem with the machine’s read
only memory.
This message appears if the maximum
number of tabs has already been added
to the text when you hold down c
and press Q.
This message appears if the size of
the text is larger than the width of the
installed tape.
This message appears if the length of
the text is longer than the label length
that has been set using the Length
function.
Replace the batteries or use the
AC adaptor.
Turn off the machine, and then
while holding down c and
R, turn the machine back on.
Contact your service representative.
Limit the number of tabs in the
text to 50.
Reduce the size of the characters
or install a wider tape.
Delete some of the text, reduce
the character width or increase
the set label length.
SHOULD YOU ENCOUNTER ANY PROBLEMS WITH YOUR PRODUCT,
PLEASE DO NOT RETURN YOUR
PRODUCT TO THE STORE!
After referring to this User’s Guide, if you still need assistance, refer to the Brother Contact
information in this guide.
50
Page 55

SPECIFICATIONS
HARDWARE
Input Device: Keyboard - 51 keys
LCD: 10 characters × 2 lines
20 indicators (including Alt and Caps)
Print Tape: Pressure-sensitive, Adhesive-based
26’ 3” (8 m) long
Four widths available:
1/4” (6 mm)
3/8” (9 mm)
1/2” (12 mm)
3/4” (18 mm)
Power Supply: Six AA alkaline batteries (AM3, LR6) or AC adaptor
(model AD-60)
Print Head: 112 dot / 180 dpi
Dimensions: 7.1” (W) × 9.2” (D) × 2.4” (H)
(181.4 × 232.5 × 61.4 mm)
Weight: 1.68 lbs (760 g) (without a tape cassette and batteries installed)
SOFTWARE
Buffer Size: Maximum 99 characters
Maximum five lines
Memory Size: Approximately 300 characters
Character Size: Seven sizes (6, 9, 12, 18, 24, 36 and 42 points) + 52 point (one line of
capital letters only on 3/4" (18-mm) wide tape)
All are available in normal and wide widths
Availability depends on tape width.
Print Styles: Normal, Bold, Outline, Shadow
(each can be combined with Italic), and Vertical
IMPORTANT WARRANTY IMFORMATION
Thank you for purchasing this Brother product.
We hope that you will enjoy using it. We suggest you keep all packing and other materials.
Consult your product’s warranty for details.
51
Page 56

ACCESSORIES
● Supplies
Obtain tape cassettes from your nearest authorized dealer.
Use only Brother TZ tapes with this machine. Brother cannot be held responsible for trouble
caused by the use of unauthorized supplies. Do not use tapes that do not have the mark.
Stock No. Description
3/4” (18 mm)-wide laminated tapes
TZ-141 Black characters on clear adhesive 1 $22.99
TZ-M41 Black characters on clear (mat) adhesive 1 $24.99
TZ-241 Black characters on white adhesive 1 $24.99
TZ-242 Red characters on white adhesive 1 $24.99
TZ-243 Blue characters on white adhesive 1 $24.99
TZ-344 Gold characters on black adhesive 1 $28.99
TZ-345 White characters on black adhesive 1 $28.99
TZ-545 White characters on blue adhesive 1 $28.99
TZ-641 Black characters on yellow adhesive 1 $24.99
*TZ-B41 Black characters on fluorescent orange adhesive 1 $29.99
TZ-S141
TZ-S241
TZ-S641
TZ-SM941
TZ-FX241 Black characters on white flexible ID tape 1 $27.99
1/2” (12 mm)-wide laminated tapes
TZ-131 Black characters on clear adhesive 1 $19.99
TZ-132 Red characters on clear adhesive 1 $19.99
TZ-133 Blue characters on clear adhesive 1 $19.99
TZ-135 White characters on clear adhesive 1 $23.95
TZ-231 Black characters on white adhesive 1 $20.99
TZ-232 Red characters on white adhesive 1 $20.99
TZ-233 Blue characters on white adhesive 1 $20.99
TZ-334 Gold characters on black adhesive 1 $24.99
TZ-335 White characters on black adhesive 1 $24.99
TZ-431 Black characters on red adhesive 1 $20.99
TZ-435 White characters on red adhesive 1 $24.99
TZ-531 Black characters on blue adhesive 1 $20.99
TZ-631 Black characters on yellow adhesive 1 $20.99
TZ-731 Black characters on green adhesive 1 $20.99
* 5 meter long
52
Industrial (strong adhesive) black characters on clear adhesive
Industrial (strong adhesive) black characters on white adhesive
Industrial (strong adhesive) black characters on yellow adhesive
Black characters on matte silver strong adhesive tape
QTY/
PACKAGE
1 $27.99
1 $27.99
1 $27.99
1 $31.99
PRICE**
Page 57

Stock No. Description
TZ-M31 Black characters on clear (mat) adhesive 1 $20.99
TZ-S131
TZ-S231
TZ-S631
TZ-FX231 Black characters on white flexible ID tape 1 $23.99
3/8” (9 mm)-wide laminated tapes
TZ-121 Black characters on clear adhesive 1 $16.99
TZ-221 Black characters on white adhesive 1 $19.99
TZ-222 Red characters on white adhesive 1 $19.99
TZ-223 Blue characters on white adhesive 1 $19.99
TZ-325 White characters on black adhesive 1 $22.99
TZ-S221
1/4” (6 mm)-wide laminated tapes
TZ-111 Black characters on clear adhesive 1 $14.99
TZ-211 Black characters on white adhesive 1 $16.99
TZ-315 White characters on black adhesive 1 $20.99
TZ-S211
Non-laminated tapes
Stock No. Description
3/4” (18 mm)
TZ-N641 Black characters on yellow adhesive 1 $21.99
TZ-N541 Black aharacters on blue adhesive 1 $21.99
TZ-NF41 Black characters on purple adhesive 1 $21.99
1/2” (12 mm)
TZ-N631 Black characters on yellow adhesive 1 $17.99
TZ-N531 Black characters on blue adhesive 1 $17.99
TZ-NF31 Black characters on purple adhesive 1 $17.99
Industrial (strong adhesive) black characters on clear adhesive
Industrial (strong adhesive) black characters on white adhesive
Industrial (strong adhesive) black characters on yellow adhesive
Industrial (strong adhesive) black characters on white adhesive
Industrial (strong adhesive) black characters on white adhesive
QTY/
PACKAGE
1 $23.99
1 $23.99
1 $23.99
1 $21.99
1 $19.99
QTY/
PACKAGE
PRICE**
PRICE**
Instant lettering tape
Stock No. Description
3/4” (18 mm)
TZ-L041 Black characters 1 $24.99
QTY/
PACKAGE
PRICE**
53
Page 58

Iron on transfer tape
Stock No. Description
3/4” (18 mm)
TZ-IY41 Black characters 1 $29.99
Security tape
Stock No. Description
3/4” (18 mm)
TZ-SE4 Black Ccharacters on white adhesive 1 $49.95
Fabric tape
Stock No. Description
1/2” (12 mm)
TZ-FA3 Blue characters on white adhesive 1 $34.95
Options
Stock No. Description
TZ-CL4 Cleaning Tape 1 $20.99
TR-9 Lettering Stick 1 $2.99
AD-60 AC adapter 1 $34.95
** Prices and availability of accessories subject to change without notice.
QTY/
PACKAGE
QTY/
PACKAGE
QTY/
PACKAGE
QTY/
PACKAGE
PRICE**
PRICE**
PRICE**
PRICE**
54
Page 59

INDEX
A
AC adaptor............................................... 4
Accented characters............................... 21
Adding
spaces ................................................ 14
tabs .................................................... 16
Aligning ................................................. 34
Alt key ................................................... 12
Automatic formatting ............................. 24
Automatic tape-cutting........................... 38
B
Backing label ........................................... 6
Backspace key ....................................... 17
Batteries ................................................... 3
C
Capital letters ......................................... 13
Caps mode............................................. 13
Cleaning
machine ............................................... 3
print head............................................. 7
rollers................................................... 7
Clearing
text and formats.................................. 19
text only ............................................. 20
Code key................................................ 11
Confirming............................................. 15
Cursor keys ............................................ 10
D
Deleting
characters........................................... 17
text and formats.................................. 19
text lines............................................. 18
text only ............................................. 20
Deleting stored files ............................... 44
E
Entering
accented characters...................... 12, 21
capital letters...................................... 13
spaces ................................................ 14
symbols.................................. 12, 13, 22
tabs .................................................... 16
Error messages ....................................... 48
F
Fabric tape ............................................... 6
Feeding & cutting................................... 40
Fonts ...................................................... 26
Frames ................................................... 32
I
Incrementing.......................................... 40
K
Keyboard ................................................. 2
L
Label length ........................................... 36
Laminated tape ........................................ 6
M
Margins.................................................. 33
Memory ................................................. 43
Mirror printing ....................................... 35
Multiple copies ...................................... 42
N
New lines............................................... 14
Numbering function............................... 40
O
Overwriting stored files .......................... 44
55
Page 60

P
Power .................................................... 10
Preset formatting .................................... 24
Print head ................................................ 7
Printing .................................................. 39
R
Recalling stored files .............................. 44
Repeat printing function......................... 42
Return key.............................................. 14
S
Shift key ................................................. 13
Size........................................................ 28
Spaces.................................................... 14
Specifications......................................... 51
Storing files ............................................ 43
Style....................................................... 29
Symbols ................................................. 22
T
Tab length.............................................. 16
Tabs ....................................................... 15
Tape cassettes .......................................... 5
Tape length ............................................ 36
Text
alignment ........................................... 34
framing............................................... 32
margins .............................................. 33
size .................................................... 28
style ................................................... 29
underlining......................................... 31
width.................................................. 28
Text lines ............................................... 14
Troubleshooting ..................................... 47
U
Underlining............................................ 31
Uppercase letters ................................... 13
W
Width..................................................... 28
56
Page 61

ACCESSORY ORDER FORM
This order form is provided for your convenience should your retailer not stock the item(s)
needed or if you prefer to order by telephone. To order by phone, please call Brother International at 1-877- BROTHER (1-877-276-8437) and have your Visa or MasterCard available.
Stock No. Description Price Quantity Total
TOTAL
Prices subject to change without notice.
Before calling:
1. Review the reverse side of this form and select the desired items.
2. Complete the order form, indicating the quantity of each item (for your records).
3. Enter the total on the “Supply/Accessory Total” line below (for your records).
4. Add appropriate sales tax and shipping/handling costs (for your records).
5. Have your Visa or MasterCard number and expiration date available.
Supply/Accessory Total $
All Residents of Canada: Please add
applicable sales taxes (G.S.T. & P.S.T.).
Shipping/Handling $5.00
TOTAL DUE $
G.S.T. # R100663764
P.S.T. # 100100117TQ0001
* Prices subject to change without notice.
G.S.T $
P.S.T. $
✂
Page 62

Page 63

ACCESSORY ORDER FORM
✂
This order form is provided for your convenience should your retailer not stock the item(s)
needed or if you prefer to order by telephone. To order by phone, please call Brother International at 1-877-BROTHER (1-877-276-8437) and have your Visa or MasterCard available.
Stock No. Description Price Quantity Total
TOTAL
Prices subject to change without notice.
Before calling:
1. Review the reverse side of this form and select the desired items.
2. Complete the order form, indicating the quantity of each item (for your records).
3. Enter the total on the “Supply/Accessory Total” line below (for your records).
4. Add appropriate sales tax and shipping/handling costs (for your records).
5. Have your Visa or MasterCard number and expiration date available.
Supply/Accessory Total $
All Residents of Canada: Please add
applicable sales taxes (G.S.T. & P.S.T.).
Shipping/Handling $5.00
TOTAL DUE $
G.S.T. # R100663764
P.S.T. # 100100117TQ0001
* Prices subject to change without notice.
G.S.T $
P.S.T. $
Page 64

Page 65

MODE
D’EMPLOI
Page 66

INTRODUCTION
Nous vous remercions d’avoir choisi le P-touch 1950!
Votre nouveau P-touch vous permettra de créer des étiquettes pour tous vos besoins. La vaste
gamme de rubans en cassette disponible vous offre de nombreuses possibilités de création
d’étiquettes personnalisées en choisissant parmi une variété d’encadrements et de tailles et
styles de caractères. Vous disposez de quatre largeurs de ruban (6 mm (1/4 po), 9 mm (3/8 po),
12 mm (1/2 po) et 18 mm (3/4 po) ainsi que de nombreuses couleurs, particulièrement utiles
pour établir un système à codes de couleur.
Le P-touch 1950 – c’est la garantie d’un travail d’aspect professionnel en un tour de main.
Que ce soit au bureau, à l’usine, au laboratoire ou à la maison, la qualité, les possibilités et les
performances du P-touch n’arrêteront pas de vous étonner.
Puisque ce guide est susceptible de servir de référence ultérieure, gardez-le à portée de la
main.
Avis de conformité aux normes FCC pour un usage domestique ou de bureau
Cet appareil numérique de la classe B est conforme à la norme ICES-003 du Canada.
Cet appareil numérique de la classe B est conforme à la norme NMB-003 du Canada.
Sélection de la langue d’affichage des messages (français ou anglais):
1. Effacez l’intégralité du texte affiché à l’aide de la touche
c
et sur la touche
2. Maintenez la touche
tre la langue sélectionnée (“ENGLISH” ou “FRANÇAIS”).
3. Maintenez la touche
pour modifier, si nécessaire, la langue d’affichage des messages.
Relâchez ensuite les touches.
☞
La langue sélectionnée par défaut est l’anglais.
La mise hors tension de l’appareil ne modifie pas le réglage de la langue.
Il n’est pas possible de modifer la langue lorsque du texte est affiché à l’écran.
Utilisez exclusivement l’adaptateur conçu pour cet appareil (voir la section “PRÉCAUTIONS
IMPORTANTES” à la page 3).
*
.
c
enfoncée et appuyez sur la touche
c
enfoncée et appuyez une nouvelle fois sur la touche
*
ou en appuyant sur
F
pour faire apparaî-
F
IBM est une marque de International Business Machines, Inc.
Microsoft et Windows sont des marques déposées de Microsoft Corporation, USA.
Les noms des autres logiciels et produits utilisés dans ce document sont des marques ou des
marques déposées des sociétés respectives qui les ont développés.
Page 67

SOMMAIRE
Préliminaires
PRÉSENTATION DE L’APPAREIL......................................................................... 1
PRÉCAUTIONS IMPORTANTES ..........................................................................3
PILES ...................................................................................................................3
ADAPTATEUR SECTEUR..................................................................................... 4
RUBANS EN CASSETTE....................................................................................... 5
APPLICATION DES ÉTIQUETTES ........................................................................6
TÊTE D’IMPRESSION ET ROULEAUX.................................................................. 7
UTILISATION AVEC UN ORDINATEUR PERSONNEL ........................................8
Référence
TOUCHE D’ALIMENTATION............................................................................ 10
TOUCHES DE DÉPLACEMENT DU CURSEUR.................................................. 10
TOUCHES CODE, ALT ET MAJUSCULES ..........................................................11
BARRE D’ESPACE.............................................................................................. 14
RETOUR À LA LIGNE........................................................................................ 14
TABULATION ...................................................................................................15
TOUCHE DE CORRECTION .............................................................................17
EFFACEMENT DE LIGNE................................................................................... 18
EFFACEMENT INTÉGRAL.................................................................................. 19
CARACTÈRES ACCENTUÉS............................................................................... 21
SYMBOLES........................................................................................................ 23
FORMATAGE AUTOMATIQUE.........................................................................24
POLICES............................................................................................................ 26
TAILLE ET LARGEUR......................................................................................... 27
STYLE................................................................................................................ 30
SOULIGNEMENT.............................................................................................. 31
ENCADREMENT................................................................................................32
MARGES ...........................................................................................................33
ALIGNEMENT HORIZONTAL........................................................................... 35
IMPRESSION MIROIR .......................................................................................36
LONGUEUR D’ÉTIQUETTE...............................................................................37
FONCTION COUPURE AUTOMATIQUE .........................................................38
I
Page 68

IMPRESSION..................................................................................................... 39
AVANCE ET COUPURE.....................................................................................40
NUMÉROTATION AUTOMATIQUE .................................................................40
IMPRESSION MULTIPLE....................................................................................42
MÉMOIRE .........................................................................................................43
DÉTECTION DE PANNES.................................................................................. 48
LISTE DES MESSAGES D’ERREUR......................................................................49
FICHE TECHNIQUE ..........................................................................................52
ACCESSOIRES ...................................................................................................53
INDEX............................................................................................................... 56
II
Page 69

Préliminaires
PRÉSENTATION DE L’APPAREIL
FACE AVANT
Clavier
Couvercle du compartiment à
cassette
Prise pour
l’adaptateur
secteur
Port USB
Écran à cristaux
liquides
FACE ARRIÈRE
Fente de sortie
du ruban
Couvercle du compartiment
des piles
1
Page 70

CLAVIER ET ÉCRAN
(
#
@
134567890
2
W
O
A
Alt
Code Space
E
S
Z
XC V B NM
%
R
T
DFGHJ K
Ç
&
UI
Y
/
ç
u
Ñ
(
BS
P
O
í
é
ñ
á
ó
L
ú
"
/
.
On
Off
Touche d’effacement
Touches de déplacement du curseur
Touche de retour
Touche d’alimentation
2
Page 71

1
2
3
4
PRÉCAUTIONS IMPORTANTES
Ne touchez pas la lame du coupe-ruban, sous peine de vous blesser.
●
Utilisez uniquement des rubans en cassette de type TZ de Brother. N’utilisez pas de casset-
●
tes ne portant pas la marque . Brother ne peut pas être tenu responsable des problèmes ou dommages résultant de l’emploi de fournitures non préconisées.
Ne tirez pas sur le ruban, vous risqueriez de l’endommager.
●
●
N’utilisez pas votre appareil dans un endroit poussiéreux, et protégez-le de la lumière
directe du soleil et de la pluie.
●
N’installez pas votre appareil à des endroits surchauffés ou humides. Si vous le déposez
dans une voiture, veillez à ne jamais le laisser sur le tableau de bord ni sur la plage arrière.
Ne laissez pas de caoutchouc ni de vinyle sur la machine pendant trop longtemps.
●
Ces matières pourraient déteindre.
●
N’utilisez ni alcool, ni solvant organique pour nettoyer l’appareil. Servez-vous d’un chiffon sec et doux.
Ne déposez rien sur ou dans l’appareil.
●
Sous peine d’annuler la garantie, utilisez uniquement l’adaptateur secteur spécialement
●
conçu pour l’appareil (modèle AD-60).
●
Ne jamais démonter un adaptateur secteur.
●
Si vous savez que vous n’utiliserez pas votre appareil pendant une période prolongée et
qu’il n’est pas indispensable de conserver les textes mémorisés, débranchez l’adaptateur
secteur et/ou retirez les piles afin d’éviter qu’elles ne fuient.
●
Si l’adaptateur secteur est débranché et aucune pile n’est en place, tous les fichiers texte
en mémoire risquent d’être effacés.
●
Utilisez six piles alcalines AA.
Si les piles ne sont pas installees avec leurs polarites positive et negative orientees dans le
●
bon sens, les piles risquent de fuir, de surchauffer ou d’exploser, ou la tete d’impression risque de surchauffer.
PILES
Cet appareil portatif peut fonctionner n’importe où si vous l’alimentez sur six (6) piles alcali-
. Remplacez toujours les six piles à la fois.
nes AA
Changer les piles :
Retirez le couvercle du compartiment des piles, situé à l’arrière de l’appareil.
Retirez les piles se trouvant dans l’appareil.
Insérez six piles alcalines AA neuves, en veillant à orienter les polarités correctement.
Remettez le couvercle du compartiment des piles en place.
☞
Veillez à effectuer le remplacement des piles en moins de cinq minutes. En effet, si
vous dépassez ce laps de temps sans brancher l’adaptateur, tous vos messages seront
perdus, même vos messages mémorisés.
3
Page 72

4
1
2
Retirez les piles et déconnectez l’adaptateur secteur si vous savez que vous n’utiliserez pas votre appareil pendant une période prolongée. Veuillez noter que tous vos
messages, y compris ceux mémorisés, seront perdus.
Si les piles ne sont pas installées avec leurs polarités positive et négative orientées
dans le bon sens, les piles risquent de fuir, de surchauffer ou d’exploser, ou la tête
d’impression risque de surchauffer.
ADAPTATEUR SECTEUR
L’adaptateur secteur (modèle AD-60) vous permet d’utiliser votre appareil à tout endroit
pourvu d’une prise de courant.
Brancher l’adaptateur secteur :
Insérez le petit connecteur dans la prise DC IN 9,5V, située sur le côté droit de l’appareil.
Branchez la fiche secteur dans la prise de courant la plus proche.
Retirez les piles et déconnectez l’adaptateur secteur si vous savez que vous n’utilise-
☞
rez pas votre appareil pendant une période prolongée. Veuillez noter que le texte
affiché ainsi que tous vos textes en mémoire seront perdus.
Si l’adaptateur secteur est raccordé, le fait de le débrancher de la prise secteur avant
de le débrancher de l’appareil risque d’effacer tous les fichiers de la mémoire, même
s’il y a des piles dans l’appareil.
Page 73

2
3
1
RUBANS EN CASSETTE
Sachez qu’il existe un vaste choix de rubans TZ de couleurs et largeurs diverses. Mettez cette
diversité au profit de votre créativité en produisant des étiquettes de couleurs et de styles
adaptés à vos besoins.
L’appareil est conçu de sorte à faciliter et accélérer le changement de cassettes.
Installer une cassette de ruban :
Soulever le couvercle du compartiment à cassette afin de l’ouvrir. Ceci libère également
toute cassette installée.
Si une cassette se trouve dans le compartiment, retirez-la en la soulevant vers le haut.
Si le ruban de la cassette à installer est lâche, tournez la roue dentée dans le sens de la
flèche indiquée sur la cassette à l’aide du doigt, jusqu’à ce qu’il soit bien tendu. Veillez
aussi à faire passer l’extrémité du ruban sous les guides.
☞
Si vous utilisez une cassette neuve munie d’un dispositif de blocage, n’oubliez pas
d’enlever celui-ci.
Installez correctement une cassette de ruban dans son compartiment en veillant à ce que
toute la surface de la cassette touche le fond du compartiment.
Lorsque vous introduisez une cassette, veillez à ce que le ruban ne se coince pas sur
☞
le coin du support métallique de sécurité.
Refermez le couvercle du compartiment et, si nécessaire, mettez l’appareil sous tension.
6 Maintenez c enfoncé et appuyez une fois sur _ pour faire avancer le ruban et
pour le tendre.
4
5
☞ La machine ne supporte pas les rubans pour cachet (SK-MB/SH-MB).
5
Page 74

APPLICATION DES ÉTIQUETTES
ABCDEF
RUBAN LAMINÉ
En procédant de la façon suivante, le bâtonnet fourni vous permet de retirer aisément le support du ruban laminé.
1 Tenez le ruban d’une main, la surface imprimée vers le haut, et le bâtonnet de l’autre
main.
2 Faites passer la moitié du ruban dans la fente du bâtonnet.
3 Retournez le bâtonnet de trois quarts de tour vers vous, puis tirez-le en sens inverse,
comme illustré.
4 Décollez le support du ruban.
GH
ABCDEF
Certains rubans peuvent se scinder au milieu et être aisément retirés, car leurs coins intérieurs
se décollent.
RUBAN D’ÉCUSSONS
Vous pouvez également imprimer vos textes sur un ruban d’écussons. Ceux-ci s’appliquent
sur les vêtements au fer à repasser. Après avoir imprimé l’écusson et l’avoir découpé à l’aide
d’une paire de ciseaux
viette mouillée sur l’écusson et repassez pendant 15 à 30 secondes à une température moyennement élevée (160 à 180 ˚C ou 320 à 356 ˚F) en appuyant fermement sur le fer. Pour plus de
détails, veuillez consulter la notice d’instructions fournie avec la cassette de ruban d’écussons.
☞ Sur des tissus de couleur, l’étiquette apparaîtra sur fond blanc.
6
, placez-le sur le vêtement, face imprimée sur le tissu. Placez une ser-
Page 75

TÊTE D’IMPRESSION ET ROULEAUX
Tête d’impression
À la longue, poussière et autres impuretés risquent d’encrasser la tête d’impression et les rouleaux, surtout si l’appareil est utilisé à l’extérieur ou dans des endroits fort poussiéreux. Quand
la poussière s’est accumulée au point d’obstruer partiellement la tête d’impression, des lignes
non-imprimées pourraient traverser les caractères. Il est donc nécessaire, comme pour un
magnétoscope, de nettoyer de temps à autre la tête d’impression.
Nettoyer la tête d’impression et les rouleaux :
1 Éteignez l’appareil. Retirez les piles et débranchez l’adaptateur secteur.
2 Ouvrez le couvercle du compartiment de cassette et s’il y a une cassette, retirez-la. La
tête d’impression et les rouleaux se trouvent dans le compartiment de la cassette.
3 Tête d’impression : essuyez-la doucement, de haut en bas, à l’aide d’un coton-tige sec.
Rouleaux : nettoyez-les à l’aide d’un coton-tige en les essuyant de haut en bas, tout en les
tournant du doigt.
4 Installez une cassette, refermez le couvercle du compartiment de cassette, puis essayez
d’imprimer de nouveau.
5 S’il y a toujours des poussières blanches sur l’étiquette, répétez les étapes 1 à 4.
Si aucune amélioration n’a lieu, consultez votre revendeur.
Tete d’impressionTête d’impression
Tête d’impression Rouleaux
☞ La tête d’impression se nettoiera plus facilement si vous utilisez une cassette de net-
toyage pour tête d’impression (TZ-CL4) en option.
Coton-tige
7
Page 76

UTILISATION AVEC UN ORDINATEUR PERSONNEL
L’installation de P-touch Editor, de Quick Editor et du pilote d’imprimante vous permettra
d’imprimer des étiquettes depuis votre ordinateur personnel en toute facilité. Divers modèles
de formats automatiques sont proposés dans le logiciel en vue de faciliter la création d’étiquettes.
Que faut-il préparer :
■ CD-ROM
Le CD-ROM contient le
logiciel, etc. à installer dans
l’ordinateur personnel.
■ Guide d'installation du
logiciel
Conservez-le pour pouvoir
vous y reporter.
Marche à suivre :
REMARQUE :
• Ne raccordez pas le câble d'interface USB à l’ordinateur personnel avant d’avoir installé le logiciel.
• Pour effectuer l’installation correctement, reportez-vous au “Guide d'installation du
logiciel”.
1 Démarrez l’ordinateur personnel, puis insérez le CD-ROM dans le lec-
teur de CD-ROM.
■ Câble d’interface USB
(non fourni)
Veillez à ce que le câble USB
soit de très haute qualité.
2 Installez le logiciel en suivant les instructions qui s’affichent à l’écran du
PC. Pour les détails, reportez-vous au “Guide d’installation du logiciel”.
3 Lorsque P-touch Editor et P-touch Quick Editor sont installés, raccordez
la P-touch à l’ordinateur personnel à l’aide du câble USB, puis allumez
la P-touch.
4 Le pilote d'imprimante s’installe automatiquement quand vous raccor-
dez la P-touch à l’ordinateur personnel.
8
Page 77

Remarques sur l’utilisation avec un ordinateur personnel
● Lorsque vous raccordez la machine à un ordinateur personnel, elle s’éteint automatique-
ment si vous restez 60 minutes sans effectuer d’opérations.
● Vous pouvez régler la longueur d’étiquette jusqu’à 310 mm (12,2 po) maximum.
À propos du mode d’impression CHAIN :
Lorsque vous imprimez des étiquettes de façon continue, vous pouvez réduire la taille de la
marge en sélectionnant l’option “Impression en chaîne” sur l’ordinateur. La fonction de coupure automatique se désactive lors d’une impression en chaîne, de sorte que vous devrez
appuyer sur c + _ pour couper le ruban.
☞ Utilisez des ciseaux pour couper des rubans en tissu ou des rubans de forte adhérence.
Configuration système :
Vérifiez que votre configuration système respecte bien les exigences suivantes.
● Système d’exploitation : Pré-installé avec Microsoft
XP Pro ou XP Home
● Mémoire : 64 Mo ou plus
● Espace libre sur le disque dur : 50 Mo ou plus
● Interface : USB 1.1 ou spécification ultérieure
● Écran : Définition 800 × 600 (SVGA / Carte vidéo avec 16 bits de profondeur de codage ou
supérieure)
● Autres : Lecteur de CD-ROM pour l’installation
®
Windows® 98, 98SE, Me, 2000 Pro,
9
Page 78

Référence
TOUCHE D’ALIMENTATION
La touche d’alimentation ( o ) est située au coin inférieur droit du clavier. Quand vous
mettez l’appareil sous tension, celui-ci affiche les données de la séance de travail précédente.
En effet, la mémoire interne conserve le dernier texte créé avant la mise hors tension, du
moins si des piles sont installées ou si l’appareil est raccordé au secteur.
La machine se met automatiquement hors tension si vous restez sans effectuer d’opérations
pendant l’intervalle de temps réglé. Pour les détails, voyez le tableau ci-dessous.
Alimentation électrique Utilisation sans PC Utilisation avec PC
Six piles AA 5 minutes 60 minutes
Adaptateur secteur 5 minutes 60 minutes
Mettre l’appareil sous tension :
● Appuyez sur o. Le texte affiché au moment de la dernière mise hors tension de l’appa-
reil s’affiche.
Mettre l’appareil hors tension :
● Appuyez sur o. Le texte affiché est conservé dans la mémoire interne de l’appareil.
TOUCHES DE DÉPLACEMENT DU CURSEUR
L’écran de l’appareil permet d’afficher deux lignes de texte de 9 caractères chacune. Vous
pouvez néanmoins créer des textes beaucoup plus longs. En effet, le nombre maximum de
caractères par texte s’élève à 99 caractères. Les touches de déplacement du curseur vous permettent d’afficher rapidement toute partie de votre texte en vue de sa révision.
TOUCHE DE DÉPLACEMENT VERS LA GAUCHE
Déplacer le curseur d’un caractère vers la gauche :
● Appuyez une fois sur f.
☞ Si vous appuyez sur cette touche quand le curseur est au début d’une nouvelle ligne,
il se déplacera à la fin de la ligne précédente.
Déplacer le curseur de plusieurs caractères vers la gauche :
● Appuyez sur f jusqu’à ce que le curseur soit à la position voulue.
Déplacer le curseur jusqu’au début de la ligne :
● Maintenez c enfoncée et appuyez sur f.
10
Page 79

TOUCHE DE DÉPLACEMENT VERS LA DROITE
Déplacer le curseur d’un caractère vers la droite :
● Appuyez une fois sur w.
☞ Si vous appuyez sur cette touche quand le curseur est à la fin d’une ligne suivie
d’une autre ligne, il se déplacera au début de la ligne suivante.
Déplacer le curseur de plusieurs caractères vers la droite :
● Appuyez sur w jusqu’à ce que le curseur soit à la position voulue.
Déplacer le curseur jusqu’à la fin de la ligne :
● Maintenez c enfoncée, puis appuyez sur w.
TOUCHE DE DÉPLACEMENT VERS LE HAUT
Déplacer le curseur d’une ligne vers le haut :
● Appuyez une fois sur h.
☞ Si le curseur se trouve sur la première ligne, il va se placer au début de celle-ci.
Déplacer le curseur de plusieurs lignes vers le haut :
● Maintenez h enfoncée jusqu’à ce que le curseur arrive à la ligne souhaitée.
Déplacer le curseur jusqu’au début du texte :
● Maintenez c enfoncée, puis appuyez sur h.
TOUCHE DE DÉPLACEMENT VERS LE BAS
Déplacer le curseur d’une ligne vers le bas :
● Appuyez une fois sur e.
☞ Si le curseur se trouve sur la dernière ligne, il va se placer à la fin de celle-ci.
Déplacer le curseur de plusieurs lignes vers le bas :
● Maintenez e enfoncée jusqu’à ce que le curseur arrive à la ligne souhaitée.
Déplacer le curseur jusqu’à la fin du texte :
● Maintenez c enfoncée, puis appuyez sur e.
TOUCHES CODE, ALT ET MAJUSCULES
La plupart des caractères peuvent être entrés en appuyant sur la touche correspondante du
clavier. Pour sélectionner certaines fonctions, pour taper des majuscules, certains caractères
accentués et certains symboles courants, vous aurez toutefois besoin des touches spéciales.
TOUCHE CODE
Accéder aux fonctions figurant au-dessus de certaines touches :
● Maintenez c enfoncée, puis appuyez sur la touche se trouvant immédiatement sous le
nom de la fonction désirée.
11
Page 80

EXEMPLE
1:
DANGER
ÆæÃã
Ü
Accéder au mode Symbole :
● Maintenez c enfoncée, puis appuyez
une fois sur a.
TOUCHE ALT
Entrer les caractères de couleur figurant sur le côté droit de certaines touches :
● Maintenez a enfoncée et appuyez sur la touche du caractère coloré de votre choix.
L’indicateur Alt à gauche de l’afficheur reste allumé pendant que a est enfoncée.
EXEMPLE
Entrer “–”:
● Maintenez a enfoncée, puis appuyez sur /. L’indicateur Alt est allumé tant que
aest enfoncée.
12
Alt
1:
012
1:
012-_
Page 81

TOUCHES DES MAJUSCULES
1:
5_
1:
5%_
Taper une minuscule ou le symbole imprimé dans le coin supérieur gauche d’une touche :
● Maintenez s enfoncée, puis appuyez sur la touche où figure le caractère ou le symbole
de votre choix.
EXEMPLE
Entrer “%”:
● Maintenez s enfoncée, puis appuyez sur 5.
Le mode Majuscules est similaire à une pression maintenue de s. Il permet de taper des
majuscules de façon continue.
Entrer une série de lettres majuscules :
1 Maintenez c enfoncée, puis appuyez sur s. L’indicateur Caps à la gauche de
l’écran s’allume.
Caps
1:
_
2 Appuyez sur les touches des caractères ou symboles de votre choix.
3 Pour quitter le mode Caps, maintenez c enfoncée, puis appuyez sur s. L’indica-
teur Caps s’éteint.
13
Page 82

BARRE D’ESPACE
1:
J._
1:
J. _
Comme sur une machine à écrire, la barre d’espace ( _ ) vous permet d’ajouter un espace
dans votre texte. Elle se différencie de la touche de déplacement du curseur ( w ), qui elle,
déplace le curseur vers la droite sans ajouter d’espace.
Pour ajouter un espace :
● Appuyez sur _.
EXEMPLE
Entrer un espace :
● Appuyez sur _.
RETOUR À LA LIGNE
Comme la touche de retour de chariot d’une machine à écrire ou d’un système de traitement
de texte, la touche ( r ) de cet appareil permet de terminer une ligne et d’en commencer
une nouvelle. En tapant votre texte, quand vous avez terminé une ligne et souhaitez en créer
une autre, appuyez sur la touche de retour à la ligne. Le curseur passe à la ligne suivante.
☞ Une étiquette ne peut contenir que cinq lignes de texte. Si vous appuyez sur r alors
qu’il y a déjà cinq lignes, le message d’erreur “TROP DE LIGNES!” apparaît.
14
Page 83

Largeur de ruban Nombre maximum de lignes imprimées
6 mm (1/4 po) 2
9 mm (3/8 po) 2
12 mm (1/2 po) 3
18 mm (3/4 po) 5
La touche de retour sert également à sélectionner un article d’une liste (par ex., à ajouter un
symbole ou un caractère accentué au texte) ou à appliquer un réglage sélectionné.
Des “messages de contrôle” sous forme de question s’affichent parfois, notamment lorsque
vous commandez à l’appareil d’effacer ou de modifier des fichiers. Dans pareils cas, une pres-
sion sur la touche r équivaut à une réponse affirmative.
☞ Pour annuler, par contre, appuyez sur la touche *. Veuillez vous référer à la section
TOUCHE DE CORRECTION à la page 17.
Aller à la ligne :
●
Appuyez sur r. Le repère de retour de chariot ( ) s’affiche et signale une fin de ligne.
Sélectionner au texte :
● Appuyez sur r.
Confirmer :
● Appuyez sur r.
TABULATION
Cette fonction vous permet de séparer les parties d’une ligne de texte en ajoutant des tabulations. Vous pouvez ainsi créer des colonnes parfaitement alignées sans avoir à retaper plu-
sieurs espaces. Toutes les tabulations ont la même longueur et sont mesurées à partir du début
de la ligne ou des tabulations précédentes s’il y en a plus d’une. La longueur de tabulation
peut être réglée entre 0,0 et 30,0 cm (0,0 et 11,8 po).
☞
Le texte ne peut pas contenir plus de 50 tabulations. Si le nombre maximum de tabulations a
déjà été ajouté au texte quand vous maintenez
Q
, le message d’erreur “TABULATION MAXI!” apparaît.
c
enfoncée et que vous appuyez sur
15
Page 84

Pour régler la longueur de tabulation :
LONG TAB
2,0po
1 Maintenez c enfoncée, puis appuyez une fois sur W. La longueur de tabulation
actuelle s’affiche.
2 Appuyez sur h ou e jusqu’à ce que la longueur souhaitée soit affichée ou utilisez
les touches numériques pour entrer la longueur.
☞ Pour changer les unités de mesure (pouces ou centimètres) utilisées pour afficher les
longueurs de tabulation, appuyez sur M jusqu’à ce que les unités souhaitées
soient affichées.
3 Appuyez sur r.
Ajouter une tabulation à un texte :
●
Maintenez c enfoncée, puis appuyez une fois sur Q. Le repère de tabulation ( )
apparaît dans le texte pour indiquer la position de la tabulation.
☞
Si le texte avant une tabulation dépasse le point où la partie suivante de texte devrait commencer, le texte commencera à la position de tabulation suivante.
Par exemple, si la longueur de tabulation est réglée sur 3,0 cm (1,2 po) et le texte suivant est
entré :
1:
ABC DEF GHI
2:
JKLMNOPQRST U
L’étiquette ci-dessous sera imprimée.
EXEMPLE
Régler la longueur de tabulation sur 1,0 po :
Maintenez c enfoncée et appuyez une fois
1
sur W.
16
Marge
Tabulation (3,0 cm (1,2 po)) Tabulation (3,0 cm (1,2 po))
Marge
Page 85

Appuyez sur e jusqu’à ce que 1,0 po s’affiche.
LONG TAB
1,0po
art NO. _
1:
2
3 Appuyez sur r.
Ajouter une tabulation à un texte :
● Maintenez c enfoncée et appuyez une fois
sur Q.
TOUCHE DE CORRECTION
La touche de correction ( * ) vous permet d’effacer les caractères indésirés d’un texte. Elle
se différencie de la touche ( f ) par le fait qu’elle efface le caractère précédent, alors que la
touche de déplacement ne fait que reculer le curseur, sans modifier le texte.
La touche de correction sert également de touche d’annulation et vous permet de quitter la plupart des
fonctions ou modes et de retourner à l’affichage du texte précédent sans effectuer de changement.
Des “messages de contrôle” sous forme de question s’affichent parfois, notamment lorsque
vous tentez d’effacer ou de modifier des fichiers. Dans pareils cas, le fait d’appuyer sur la tou-
che * équivaut à une réponse négative.
☞ Pour confirmer, par contre, il faut appuyer sur r. Reportez-vous à RETOUR À LA
LIGNE à la page 14.
Effacer un caractère :
1 Appuyez sur f, w, h ou e de sorte à positionner le curseur sous le caractère
immédiatement à la droite du caractère à effacer.
2 Appuyez une fois sur *.
Effacer une série de caractères :
1 Appuyez sur f, w, h ou e de sorte à positionner le curseur sous le caractère
immédiatement à la droite du dernier caractère à effacer.
2 Maintenez * enfoncée jusqu’à ce que tous les caractères de votre choix soient effacés.
17
Page 86

Quitter un mode sans modifier le texte :
et Ann
345-6789_
1:
2:
Paul et A
_
1:
2:
● Appuyez sur * pour afficher votre texte.
Annuler une commande :
● Appuyez sur *.
EFFACEMENT DE LIGNE
La fonction d’effacement de ligne permet d’effacer une ligne complète d’un texte.
Effacer une ligne de texte :
1 Appuyez sur f, w, h ou e de sorte à positionner le curseur sur la ligne de
texte à effacer.
2 Maintenez c enfoncée, puis appuyez une fois sur 0.
☞ Chaque fois que vous appuyez sur 0 pendant que c est maintenue enfoncée,
une ligne de texte s’efface.
EXEMPLE
Effacer “012-345-6789”:
● Maintenez c enfoncée, puis appuyez une
fois sur 0.
18
Page 87

EFFACEMENT INTÉGRAL
et Ann
345-6789_
1:
2:
TXT+FORMAT
TEXT UNIQU
TXT+FORMAT
TEXT UNIQU
1:
_
Quand vous initialisez l’écran avant d’entrer un nouveau texte, cette fonction peut être utilisée
pour choisir d’effacer la totalité d’un texte et remettre tous les réglages de format (Police,
Taille, Largeur, Style, Soulignement, Encadrement, Marge, Alignement, Longueur de tabulation, Impression miroir et Longueur) à leur valeur par défaut, ou d’effacer seulement le texte.
Effacer intégralement un texte et retourner à la valeur par défaut de tous les réglages :
1 Maintenez c enfoncée, puis appuyez sur *.
2 Appuyez sur h ou e jusqu’à ce que TXT+FORMAT soit sélectionné (clignotement).
☞ Pour revenir au texte sans rien effacer, appuyez sur *.
3 Appuyez sur r.
EXEMPLE
Pour supprimer l’affichage du texte et des formats
1
Maintenez c enfoncée, puis appuyez sur
*.
2 Appuyez sur h jusqu’à ce que TXT+FORMAT
clignote.
3 Appuyez sur r.
:
19
Page 88

Pour effacer seulement le texte :
TXT+FORMAT
TEXT UNIQU
TXT+FORMAT
TEXT UNIQU
1:
_
1 Maintenez c enfoncée, puis appuyez sur *.
2 Appuyez sur h ou e jusqu’à ce que TEXT UNIQU soit sélectionné (clignotement).
☞ Pour revenir au texte sans rien effacer, appuyez sur *.
3 Appuyez sur r.
EXEMPLE
Pour supprimer seulement l’affichage du texte :
et Ann
1:
345-6789_
2:
1 Maintenez c enfoncée, puis appuyez sur
*.
2 Appuyez sur e jusqu’à ce que TEXT UNIQU
clignote.
3 Appuyez sur r.
20
Page 89

CARACTÈRES ACCENTUÉS
La fonction Accent peut également être utilisée pour ajouter des caractères accentués à votre
texte. Vous pouvez aussi entrer une grande partie de ces caractères au clavier en utilisant la
fonction Symbole.
Les caractères accentués sont regroupés en fonction de la majuscule ou de la minuscule à
laquelle ils se combinent. Les caractères accentués suivants sont disponibles :
Lettres Caractères accentués Lettres Caractères accentués
A Á À Ä Â Ã Æ i í ï î
a à á ä â ã æ N Ñ
CÇn ñ
c ç O Ó Ö Ô Õ
E È É Ë Ê E o ó ö ô õ
e è é ë ê e U Ù Ú Ü Û
I Í Ï Î u ù ú ü û
Entrer un caractère accentué :
1 Maintenez c enfoncée et appuyez sur A. Le message “ACCENT a - u / A - U?” apparaît sur
l’afficheur.
2 Appuyez sur la touche alphabétique correspondant au caractère que vous désirez obte-
nir.
☞ Si vous désirez obtenir une majuscule, maintenez s enfoncée (OU maintenez
c enfoncée et appuyez sur s pour activer le mode Caps) avant d’appuyer sur
la touche alphabétique.
3 Appuyez sur la touche de la lettre du caractère accentué de votre choix, puis appuyez sur
f ou w jusqu’à ce que le caractère accentué souhaité apparaisse agrandi dans le
cadre au milieu de l’afficheur.
˜
˜
21
Page 90

4 Appuyez sur r. Le caractère accentué est ajouté au texte.
ACCENT
a-u/A-U?
Ł E
È
Ø Ł E
É
1:
RESUMÉ_
☞ Si vous désirez entrer plusieurs caractères accentués à la suite, maintenez c
enfoncée avant d’appuyer sur r. Puis, continuez à ajouter des caractères accen-
2
tués en les sélectionnant de la façon indiquée aux étapes
c enfoncée tout en appuyant sur r. Appuyez sur r après avoir sélec-
tionné le dernier caractère de la série.
EXEMPLE
Entrer le caractère accentué “É” :
Maintenez c enfoncée, puis appuyez sur
1
A.
2 Maintenez s enfoncée, puis appuyez sur
E.
3 Appuyez sur w jusqu’à ce que É apparaisse
dans le cadre.
et 3, et en maintenant
4 Appuyez sur r.
22
Page 91

SYMBOLES
☞
fi
Ü
En plus des symboles représentés sur les touches du clavier, de nombreux autres, 53 au total,
sont disponibles en mode Symboles.
Les symboles disponibles sont les suivants :
Group Symbol
☞
˜
E
23
R C
234
1ÜÆæÃã e˜Õõ °
2+×÷=§
3
4
5
♥ ★
Entrer un symbole :
1 Maintenez c enfoncée et appuyez sur a. Une rangée de symboles apparaît sur l’affi-
cheur.
2 Appuyez sur h ou e pour sélectionner la rangée de symboles de votre choix et
f
appuyez sur
ou w pour sélectionner les différents symboles jusqu’à ce que le sym-
bole de votre choix apparaisse agrandi dans le cadre au milieu de l’afficheur.
3 Appuyez sur r. Le symbole est ajouté au texte.
☞ Si vous désirez entrer plusieurs symboles à la suite, maintenez c enfoncée avant
d’appuyer sur r. Puis, continuez à ajouter des symboles en les sélectionnant de
la façon indiquée aux étapes
2
et
3
, et en maintenant c enfoncée tout en
appuyant sur r. Appuyez sur r après avoir sélectionné le dernier symbole
de la série.
TM
[]
EXEMPLE
Entrer le symbole “ ”:
Maintenez c enfoncée et appuyez sur a.
1
23
Page 92

2
1:
DANGER _
Appuyez sur h ou e jusqu’à ce que la ran-
gée contenant “ ” apparaisse, puis appuyez sur
f ou w jusqu’à ce que “ ” apparaisse
dans le cadre.
3 Appuyez sur r.
FORMATAGE AUTOMATIQUE
Avec la fonction Formatage automatique, vous pouvez sélectionner plusieurs formats préréglés, ce qui vous permet de créer, rapidement et en toute facilité, une étiquette parfaitement
adaptée à vos besoins. Il vous suffit de sélectionner l’une des mises en page préformatées, et la
longueur de l’étiquette, la marge et l’alignement horizontal se règlent automatiquement, sans
modifier le texte ni aucun autre des paramètres de formatage.
Les pages pré-formatées suivantes sont disponibles:
Automatiquement
DÉFAUT NON GRANDE GAUCHE
DISQ. 3,5 po 7,0 cm (2,8 po) ÉTROITE CENTRE
mini VHSN 4,3 cm (1,7 po) ÉTROITE CENTRE
VHS-TRANCHE 14,0 cm (5,5 po) ÉTROITE CENTRE
VHS 7,7 cm (3,0 po) ÉTROITE CENTRE
VCR8mm-BOÎTE 9,2 cm (3,6 po) ÉTROITE CENTRE
VCR8mm 7,3 cm (2,9 po) ÉTROITE CENTRE
VHSC-TRANCHE 4,5 cm (1,8 po) ÉTROITE CENTRE
VHSC 5,8 cm (2,3 po) ÉTROITE CENTRE
AUDIO 8,9 cm (3,5 po) ÉTROITE CENTRE
CASSETTE-DAT 5,6 cm (2,2 po) ÉTROITE CENTRE
Longueur de
l’étiquette
Marge
Alignement
horizontal
24
Page 93

Automatiquement
DÉFAUT
AUDIO
Longueur de
l’étiquette
Marge
Alignement
horizontal
MINI-DISQUE 5,2 cm (2,0 po) ÉTROITE CENTRE
ORGANISER L 8,2 cm (3,2 po) ÉTROITE CENTRE
ORGANISER S 6,5 cm (2,6 po) ÉTROITE CENTRE
FICH. LONG 18,3 cm (7,2 po) ÉTROITE CENTRE
FICH. COURT 9,4 cm (3,7 po) ÉTROITE CENTRE
Sélectionner une mise en page pré formatée :
1 Maintenez c enfoncée et appuyez sur Y. Le réglage actuellement sélectionné est
affiché.
2 Appuyez sur h ou e pour sélectionner le format de votre choix.
☞ Le réglage par défaut (DÉFAUT) peut être sélectionné en appuyant sur _.
3 Appuyez sur r pour sélectionner le format de votre choix.
☞ L’indicateur Length s’allume si vous sélectionnez un paramètre autre que DÉFAUT.
EXEMPLE
Sélection du paramètre FICH. COURT:
Maintenez c enfoncée et appuyez sur Y.
1
2 Appuyez sur h ou e jusqu’à ce que le for-
3 Appuyez sur r.
mat AUDIO s’affiche.
25
Page 94

POLICES
1
POLICE
2
POLICE
A
Avec la fonction Police, l’appareil vous offre le choix entre deux polices pour votre texte.
Les polices disponibles sont les suivantes :
(Helsinki) (Brussels)
La police par défaut est la police POLICE 1. L’indicateur de police en bas et à gauche de
l’écran indique la police actuellement sélectionnée.
Modifier un réglage de police :
1 Maintenez c enfoncée, appuyez une fois sur 1 et maintenez c enfoncée pour
afficher la police actuelle.
2 Avec la touche c toujours enfoncée, appuyez de façon répétée sur 1 jusqu’à ce
que le réglage de police souhaité s’affiche.
☞ Le réglage actuel de la police est indiqué par l’indicateur de police en bas et à
gauche de l’écran.
3 Relâchez c pour appliquer le réglage de police sélectionné au texte tout entier.
EXEMPLE
Sélectionner la police POLICE 2 :
Maintenez c enfoncée, appuyez une fois sur
1
1.
2 Avec la touche c, toujours enfoncée, appuyez
de façon répétée sur 1 jusqu’à ce que POLICE 2
s’affiche.
3 Relâchez c.
26
Page 95

TAILLE ET LARGEUR
L’appareil offre deux paramètres de réglage de la taille des caractères : Taille et Largeur. Le
tableau suivant reprend les tailles de caractères que vous pouvez sélectionner pour les diverses largeurs de ruban.
Largeur de ruban Tailles (en points)
6 mm (1/4 po) 6, 9, 12
9 mm (3/8 po) 6, 9, 12, 18
12 mm (1/2 po) 6, 9, 12, 18, 24
18 mm (3/4 po) 6, 9, 12, 18, 24, 36, 42
Le réglage par défaut de la taille est AUTO et celui de la largeur est NON. Les réglages actuellement sélectionnés sont toujours signalés par des indicateurs en haut de l’écran. De plus,
quand le réglage de la largeur est autre que NON, l’indicateur Largeur s’allume.
Si la taille est réglée sur AUTO, l’appareil compare la largeur du texte avec celle du ruban installé et il règle automatiquement les caractères sur la taille la plus grande possible. Toutefois,
vous pouvez également sélectionner sept autres tailles de points, qui pourront chacune être
imprimées avec les deux réglages de largeur.
☞ Si vous avez sélectionné le réglage AUTO avec un ruban de 12 mm (1/2 po) ou 18 mm
(3/4 po) de largeur, un texte composé d’une seule ligne uniquement de majuscules (et
sans caractères accentués) sera imprimé avec une taille de caractère légèrement plus
grande que le nombre de points maximum possible (29 points pour un ruban de 12 mm
(1/2 po) de largeur et 52 points pour un ruban de 18 mm (3/4 po) de largeur).
27
Page 96

Réglages
AUTO
TAILL
de la Taille
(en points)
LARGEUR
NON
LARGEUR OUI
6
9
12
18
24
36
42
Modifier la taille :
1 Maintenez c enfoncée, appuyez une fois sur 2 et maintenez c enfoncée pour
afficher la taille actuelle.
2 Avec la touche c toujours enfoncée, appuyez de façon répétée sur 2 jusqu’à ce
que le réglage de taille souhaité s’affiche et l’indicateur de taille s’affiche sous la taille.
☞ Le réglage actuel de la taille est indiqué par la taille de l’indicateur en haut de
l’afficheur.
3 Relâchez c pour appliquer le réglage de taille sélectionné au texte tout entier.
EXEMPLE
28
Sélectionner la taille de 24 points :
Maintenez c enfoncée, appuyez une fois sur
1
2.
Page 97

2
24
TAILL
NON
LARGEUR
OUI
LARGEUR
Avec la touche c toujours enfoncée, appuyez
de façon répétée sur 2 jusqu’à ce que 24
s’affiche.
3 Relâchez c.
Modifier le paramètre Largeur :
1 Maintenez c enfoncée, appuyez une fois sur 3, et maintenez c enfoncée
pour afficher le réglage Largeur actuel.
2 Avec la touche c toujours enfoncée, appuyez de façon répétée sur 3 jusqu’à ce
que le réglage Largeur souhaité s’affiche.
3 Relâchez c pour appliquer le réglage Largeur sélectionné au texte tout entier.
EXEMPLE
Pour régler Largeur sur OUI :
Maintenez c enfoncée, appuyez une fois sur
1
3.
2 Avec la touche c toujours enfoncée, appuyez
de façon répétée sur
s’affiche.
3 jusqu’à ce que OUI
3 Relâchez c.
29
Page 98

STYLE
NORMAL
STYLE
IT+O
STYLE
Vous avez le choix entre neuf styles typographiques différents que vous pouvez appliquer au
texte.
☞ Combiner une petite taille de caractères et certains styles de caractères (ex. IT+O) risque
de réduire la lisibilité.
Les styles disponibles sont les suivants :
NORMAL, GRAS, CONTOUR, OMBRE, ITA, IT+G (italique et gras), IT+C (italique et contour), IT+O (italique et ombre), VERT (vertical)
Le réglage par défaut du style est NORMAL. L’indicateur de style en bas et à droite de l’écran
indique le style actuel lorsque vous réglez un style autre que NORMAL.
Reportez-vous à RÉFÉRENCE à la fin de ce chapitre pour des échantillons des réglages disponibles.
Modifier le style :
1 Maintenez c enfoncée, appuyez une fois sur 4 et maintenez c enfoncée pour
afficher le style actuel.
2 Avec la touche c toujours enfoncée, appuyez de façon répétée sur 4 jusqu’à ce
que le réglage de style souhaité s’affiche et l’indicateur de style s’affiche sous le style.
☞ Le réglage actuel du style est indiqué par l’indicateur de style en bas et à droite de
l’écran.
3 Relâchez c pour appliquer le réglage de style sélectionné au texte tout entier.
EXEMPLE
Sélectionner le style IT+O :
Maintenez c enfoncée, appuyez une fois sur
1
4.
2 Avec la touche c toujours enfoncée, appuyez
3 Relâchez c.
30
de façon répétée sur 4 jusqu’à ce que IT+O
s’affiche.
Page 99

REFERENCE
RÉFÉRENCE
Polices
NORMAL GRAS CONTOUR OMBRE ITA
POLICE 1
POLICE 2
Polices
IT+G IT+C IT+O
POLICE 1
POLICE 2
Styles
Styles
VERT
SOULIGNEMENT
Vous pouvez mettre en valeur une partie du texte en le soulignant.
Le réglage par défaut du soulignement est NON. Quand la fonction Soulignement est réglée
sur OUI, l’indicateur de soulignement (Underline) à droite de l’écran s’allume.
SOULIGN
OUI
Modifier le réglage de soulignement :
1 Maintenez c enfoncée, appuyez une fois sur 5 et maintenez c enfoncée pour
afficher le soulignement actuel.
2 Avec la touche c toujours enfoncée, appuyez de façon répétée sur 5 jusqu’à ce
que le réglage de soulignement souhaité s’affiche et l’indicateur de soulignement s’affiche
sous le soulignement.
☞ L’indicateur de soulignement (Underline) s’allume lorsque vous sélectionnez le
réglage OUI.
3
Relâchez c pour appliquer le réglage de soulignement sélectionné au texte tout entier.
(Exemple)
31
Page 100

EXEMPLE
SOULIGN
NON
SOULIGN
OUI
Pour sélectionner le paramètre de soulignement OUI :
1
Maintenez c enfoncée, appuyez une fois sur
5.
2 Avec la touche c toujours enfoncée, appuyez
de façon répétée sur
OUI s’affiche.
3 Relâchez c.
5 jusqu’à ce que
ENCADREMENT
La fonction d’encadrement offre un vaste choix de cadres vous permettant de mettre votre
texte en valeur.
Le réglage par défaut est NON ; néanmoins, 5 réglages de cadre sont également disponibles.
REFERENCE
RÉFÉRENCE
L’indicateur Frame s’affiche à la droite de l’écran dès que vous sélectionnez un réglage autre
que NON.
Sélectionner un cadre :
1 Maintenez c enfoncée, appuyez une fois sur 6 et maintenez c enfoncée pour
afficher le cadre actuel.
32
 Loading...