


2420PC
Quick Reference
Guide de référence rapide
Kurzanleitung
Beknopte bedieningsgids
Snabbguide
Hurtigreferense
Guida di riferimento rapido
Referencia rápida
Hurtig reference

E N G L I S H
Quick Reference
IMPORTANT
The correct procedure for installing your PT-2420PC is as follows:
1.Start label editing software installation.
2.When prompted, connect the P-touch to the USB port of the PC.
Under no circumstances connect the P-touch to the PC before installing the software.

Thank you for purchasing the P-touch 2420PC!
With your new Brother label printer, you can print personalised labels for any purpose. Simply insert a label cassette into the PT-2420PC, design your label with the enclosed P-touch label-designing software, and then print it out. Your customised label prints out in seconds. Label tape cassettes are available in various sizes and colours—ideal for colour-coded labelling or any other special labelling needs.
Two label-designing applications are available on the enclosed CD-ROM. The easy-to-use P-touch Quick Editor software allows text to be entered and formatted quickly so that simple labels can be printed instantly. The more advanced P-touch Editor Ver. 3.1 application not only automates complex layout functions, but it also includes a variety of pre-formatted templates for immediate use.
|
Declaration of Conformity |
We, |
Brother Industries Ltd. |
|
15-1, Naeshiro-cho, Mizuho-ku, |
|
Nagoya 467-8561, Japan |
declare that this product conforms with the following normative documents:
Safety: |
EN 60950 |
(AC adapter) |
EMC: |
EN 55022 |
1998 Class B |
|
EN 55024 |
1998 |
|
EN 61000-3-2 1995 |
|
|
EN 61000-3-3 1995 |
|
following the provisions of the Electromagnetic Compatibility Directive 89/336/EEC (as amended by 91/263/EEC and 91/31/EEC).
This system also follows the provisions of the Low Voltage Directive 73/23/EEC.
Issued by: |
Brother Industries Ltd. |
The enclosed interface cables should be used in order to ensure compliance with the limits for EMC.
Table of contents |
|
Unpacking ............................................................................................................................. |
2 |
General description ............................................................................................................... |
2 |
General precautions .............................................................................................................. |
2 |
Tape cassettes ........................................................................................................................ |
3 |
Changing the tape caessette .................................................................................................. |
4 |
Connecting the AC adapter ................................................................................................... |
4 |
Power/Feed key ..................................................................................................................... |
5 |
Connecting the USB interface cable ...................................................................................... |
5 |
Software and printer driver ................................................................................................... |
5 |
For PC-compatible users (Windows® 98/98SE/Me/2000/XP) ................................................... |
6 |
Before installation .......................................................................................................... |
6 |
Installing P-touch Quick Editor ....................................................................................... |
6 |
Installing P-touch Editor Ver. 3.1 .................................................................................... |
8 |
Installing the printer driver ............................................................................................. |
9 |
Reading the User’s Guide ............................................................................................. |
10 |
Uninstalling the software and printer driver .................................................................. |
11 |
Replacing, deleting or adding another printer driver ..................................................... |
11 |
For Macintosh users ............................................................................................................. |
14 |
Before installation ........................................................................................................ |
14 |
Installing P-touch Quick Editor ..................................................................................... |
14 |
Installing P-touch Editor Ver. 3.1 ................................................................................... |
15 |
Selecting the driver ...................................................................................................... |
16 |
Reading the User’s Guide ............................................................................................. |
16 |
Uninstalling the software and printer driver .................................................................. |
16 |
Using P-touch Quick Editor ....................................................................................... |
17 |
Starting up P-touch Quick Editor ......................................................................... |
17 |
Specifying a label size ........................................................................................ |
17 |
Entering text ........................................................................................................ |
17 |
Importing text ..................................................................................................... |
18 |
Using the Text History list ................................................................................... |
18 |
Adding a symbol ................................................................................................. |
18 |
Changing the background color .......................................................................... |
18 |
Viewing the text .................................................................................................. |
18 |
Printing ............................................................................................................... |
19 |
Hiding/displaying P-touch Quick Editor (Windows® only) ................................... |
19 |
Quitting P-touch Quick Editor ............................................................................ |
19 |
Using P-touch Editor Ver. 3.1 ..................................................................................... |
20 |
Starting up P-touch Editor Ver. 3.1 ....................................................................... |
20 |
Displaying the Properties .................................................................................... |
20 |
Creating a new layout ......................................................................................... |
21 |
Printing a label .................................................................................................................... |
22 |
Removing the label backing ................................................................................................. |
22 |
Maintenance ........................................................................................................................ |
23 |
Cleaning the print head and roller ................................................................................ |
23 |
Cleaning the tape cutter ............................................................................................... |
23 |
Troubleshooting ................................................................................................................... |
24 |
Monitoring the P-touch status ....................................................................................... |
24 |
Problem-solving ........................................................................................................... |
25 |
Machine specifications ........................................................................................................ |
25 |
Accessories .......................................................................................................................... |
26 |
1
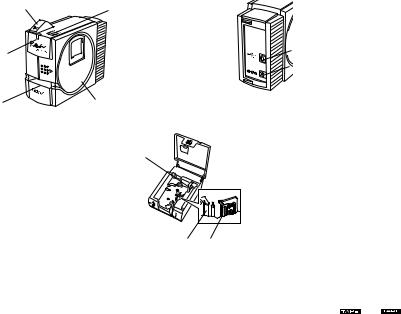
Unpacking
•PT-2420PC
•24 mm Direct Thermal Paper tape cassette (black characters on white tape; 7 meters)
•AC adapter (Model J; for plugging the PT-2420PC into the AC outlet)
•USB Interface cable (for connecting the PT-2420PC to either an IBM PC-compatible or Macintosh computer)
•Quick Reference
•CD-ROM containing the PC and Mac software and their manuals
•Tape separator
General description
Tape cutter button
Power/Feed key
Status indicator
DC IN 9.5V
Tape exit slot |
Tape compartment cover |
|
Release lever
USB port
AC adapter connector
Cutter Print head
General precautions
• Use only Brother TZ tapes and AL tapes with this machine. Do not use tapes that do not have the  and
and  mark.
mark.
•Do not pull on the tape being fed from the P-touch. Otherwise, the tape cassette may be damaged.
•Avoid using the machine in extremely dusty places, and keep it out of both direct sunlight and rain.
•Do not expose the machine to high temperatures or high humidity.
•Do not leave any rubber or vinyl objects on the machine for an extended period of time. Doing so may cause staining.
•Do not clean the machine with alcohol or other organic solvents. Use a soft, dry cloth only.
•Do not put any foreign objects into or anything on the machine.
•To avoid injures, do not touch the cutter’s edge.
•Do not touch the print head, which becomes very hot when the P-touch is used. Even after the machine is turned off, the print head remains hot for some time.
•Use only the enclosed AC adapter (Model J) designed exclusively for this machine. Use of any other adapter will void the warranty.
•Use only the enclosed USB interface cable. Use of any other cable will void the warranty.
•When the machine is not being used for a long period of time, disconnect the AC adapter.
•Do not try to disassemble the P-touch.
•IBM® is a trademark of International Business Machines, Inc.
•Microsoft® and Microsoft Windows® are registered trademarks of Microsoft Corp. in the US and other countries.
•Macintosh and Power Macintosh are registered trademarks of Apple Computer, Inc.
•All other software and product names mentioned are trademarks or registered trademarks of their respective companies.
2
Tape cassettes
•Do not pull on the tape being fed from the machine, otherwise the tape cassette may be damaged.
•If the label is attached to a wet or dirty surface, it may easily peel off. Before affixing the label, clean the surface where it will be attached.
•Depending on the environmental conditions and the material, condition, roughness, and shape of the affixing surface, the label may move out of place or peel off. In order to test the label’s adhesive strength or before using this label where safety is a particular concern, test the label by affixing a small piece of it to a hidden area of the intended surface.
•Sunlight, wind and rain may cause the colour of the label to fade or the label to peel off.
•Markings made with oil-based or water-based ink may be visible through a label affixed over them. To hide the markings, use two labels layered on top of each other, or use tape with a dark background.
•This tape may not be adequate in cases where liabilities may result due to damage or injuries.
•AL tape is a thermal tape that is not suitable for use outside or for an extended period of time since it may become discolored. In addition, depending on the environmental conditions and the material of the surface where this tape is attached, the tape may peel or fall off.
3
Changing the tape cassette
1Lift open the tape compartment cover. The installed cassette is also released.
2If a tape cassette is already installed, remove it by pulling it straight up.
3If the ink ribbon in the tape cassette to be installed is loose, use your finger to wind the toothed wheel in the direction of the arrow on the cassette until there is no slack in the ribbon. Also, make sure that the end of the tape feeds under the tape guide.
If you are inserting a new tape cassette provided with a stopper, be sure to remove the stopper.
4Insert the tape cassette firmly into the tape compartment, making sure that the entire back of the cassette touches the bottom of the compartment.
When inserting the tape cassette, make sure that the ink ribbon does not catch on the corner of the metal guide.
5 Securely close the tape compartment cover.
Tape cassette
Connecting the AC adapter
Connect the AC adapter to the PT-2420PC as described below.
1Insert the plug on the adapter cord into the connector marked DC IN 9.5V on the PT2420PC.
2Insert the plug on the adapter into the nearest standard electrical outlet. The status indicator lights up in green to indicate that the machine is on.
To turn off the PT-2420PC, press the Power/Feed key so that the status indicator goes off.
Status indicator
AC adapter
DC IN 9.5V
4

Power/Feed key
The power/feed key ( ) can be used both for turning on and off the PT-2420PC and for feeding out tape.
•To turn the PT-2420PC on or off:
Press  once.
once.
•To feed out some tape:
Hold down  for at least two seconds.
Connecting the USB interface cable
Connect the PT-2420PC to the computer as described below.
When connecting the PT-2420PC to an IBM PC-compatible computer, label-designing software and the printer driver must be installed before the PT-2420PC is connected to the computer and plugged in using the AC adapter. Follow the installation procedures on pages 6 through 11 to install the software and the printer driver, and then connect the PT-2420PC to the computer when you are instructed to do so.
1 Insert the flat connector on the enclosed USB |
|
|
interface cable into the USB port on the |
|
|
computer. |
|
|
2 Insert the square connector on the enclosed |
|
|
USB interface cable into the USB port |
|
|
( |
) on the PT-2420PC. |
|
When making a USB connection through |
USB port USB interface cable |
|
|
a hub, a proper connection may not be |
|
|
possible due to the type of hub used. If |
|
|
printing is not possible with a hub |
|
|
connection, try connecting the PT- |
|
|
2420PC directly to the computer using |
|
|
the USB interface cable. |
|
Software and printer driver
Brother Co., Ltd. and its suppliers possess all rights and copyrights to this software (including, but not limited to, the programming, images, clip art, templates, and text incorporated into the software), the text in the enclosed manuals, and duplicates of the software. This software, either in part or in whole, may not be duplicated, modified, reverse-engineered, disassembled or decompiled without permission.
With the enclosed CD-ROM, the following can be installed:
•P-touch Quick Editor
•P-touch Editor Ver. 3.1
•PT-2420PC printer driver
5
For Windows®
For PC-compatible users (Windows® 98/98SE/Me/2000/XP)
Before labels can be printed on the PT-2420PC, label-designing software and the PT-2420PC printer driver must be installed. In order to design labels that can be printed on the PT-2420PC, two applications are available on the enclosed CD-ROM: P-touch Quick Editor and P-touch Editor Ver. 3.1
Before installation
Check that your system configuration meets the following requirements. Computer: IBM PC or compatible
Operating system: Pre-installed with Microsoft® Windows® 98, 98SE, Me, 2000 Professional or XP
Hard disk free space: At least 20 MB Available memory: Minimum 32 MB
Monitor: VGA or higher graphics card USB port (installed as standard equipment)
CD-ROM drive
Do not connect the PT-2420PC to the computer before installing the label-designing software, otherwise it may not be installed correctly. Be sure not to connect the PT-2420PC until you are instructed to do so.
For installation on Windows® 2000, administrator privileges are required. In addition, printing requires power user or administrator privileges.
This software cannot be operated in Users groups.
This software is not compatible with the Windows® 2000 Server operating system.
With Windows® XP, printing and installation is only possible from an account with administrator privileges. These operations cannot be performed from an account with limited privileges.
Installing P-touch Quick Editor
The P-touch Quick Editor software provides quick access to the more simple label-designing features for easy text input and instant printing of labels. Install the P-touch Quick Editor software on a PC as described below.
1Insert the enclosed CD-ROM into the computer’s CD-ROM drive. A dialogue box automatically appears, allowing you to select the language.
If the dialog box does not automatically appear, click “My Computer” on the desktop, and then double-click the CD-ROM drive containing the CD-ROM.
(For Windows® XP, click “My Computer” in the Start menu, and then double-click the CD-ROM drive containing the CD-ROM.)
Next, double-click “Setup.exe” to display the dialog box.
2Select the language for the Windows® operating system that you are using, and then click the OK button. A dialogue box appears, allowing you to select what to install.
To install just the printer driver, click the bottom button (Driver) on the right side. The first Driver Setup dialogue box appears, informing you that the PT-2420PC printer driver will be installed.
Continue with the procedure in Installing the printer driver on page 9.
6
To install the P-touch Editor Ver. 3.1 software, click the top button (P-touch Editor) on the right side. Then, continue with the procedure in Installing P-touch Editor Ver. 3.1 on page 8.
3Click the left button (P-touch Quick Editor). The InstallShield® Wizard for installing the P-touch Quick Editor software starts up, and then the Welcome dialogue box appears.
4Carefully read the contents of the dialogue box, and then click the Next button to continue. The User Information dialogue box appears.
5Type the necessary information into the appropriate boxes (If the information has already been registered in Windows®, it will automatically appear.), and then click the Next button. A dialogue box appears, asking for confirmation of the entered information.
6Click the Yes button to register the entered information.
To change the information, click the No button, and then return to step 4.
The Choose Destination Location dialogue box appears.
7 Click the Next button to begin installation.
8After P-touch Quick Editor is installed, a dialogue box appears, allowing you to select where the shortcut to P-touch Quick Editor will be added (page 17).
9Select the desired location for the shortcut, and then click the Next button. A dialogue box appears, allowing you to select whether or not to install the printer driver.
To install the printer driver, click the Yes button. The first Driver Setup dialogue box appears, informing you that the PT-2420PC printer driver will be installed.
Continue with the procedure in Installing the printer driver on page 9.
If the printer driver is already installed, click the No button. A dialogue box appears, showing that installation is finished.
Select “Yes, I want to restart may computer now.”, click the Finish button to restart the computer, and then remove the CD-ROM from the CD-ROM drive.
For Windows®
7
|
Installing P-touch Editor Ver. 3.1 |
|
|
The P-touch Editor Ver. 3.1 software includes a vari- |
|
|
ety of more complex functions for printing barcodes |
|
Windows® |
and images, enabling you to design just about any |
|
computer’s CD-ROM drive. A dialogue box |
||
|
label that you can imagine. Install the P-touch Edi- |
|
|
tor Ver. 3.1 software on a PC as described below. |
|
For |
1 Insert the enclosed CD-ROM into the |
|
automatically appears, allowing you to select |
||
|
||
|
the language. |
|
|
If the dialog box does not automatically appear, click |
|
|
||
|
“My Computer” on the desktop, and then double-click |
|
|
the CD-ROM drive containing the CD-ROM. |
|
|
(For Windows® XP, click “My Computer” in the Start |
|
|
menu, and then double-click the CD-ROM drive |
|
|
containing the CD-ROM.) |
|
|
Next, double-click “Setup.exe” to display the dialog box. |
|
|
2 Select the language for the Windows® |
|
|
operating system that you are using, and then |
|
|
click the OK button. A dialogue box appears, |
|
|
allowing you to select what to install. |
To install just the printer driver, click the bottom button (Driver) on the right side. The first Driver Setup dialogue box appears, informing you that the PT2420PC printer driver will be installed.
Continue with the procedure in Installing the printer driver on page 9.
To install the P-touch Quick Editor software, click the left button (P-touch Quick Editor). Then, continue with the procedure in Installing P-touch Quick Editor on page 6.
3Click the top button (P-touch Editor) on the right side. The InstallShield® Wizard for installing the P-touch Editor Ver. 3.1 software starts up, and then the Welcome dialogue box appears.
4Follow the instructions that appear and continue with the installation. During installation, the following installation methods will be available.
Typical
All of the basic options (P-touch Editor Ver. 3.1, Clip art, Auto Format templates, Help, and 13 fonts) are installed.
Compact
Only P-touch Editor Ver. 3.1 is installed.
Custom
Editor: P-touch Editor Ver. 3.1
Clip Art: Illustrations for the P-touch Editor Ver. 3.1 Clip Art function Fonts: 13 fonts
Auto Format Templates: Templates for the Auto Format function
User’s Guide: User’s Guide (HTML) for the P-touch Editor Ver. 3.1
The User’s Guide can also be viewed from the CD-ROM without installing it onto the computer.
Help: Help files for P-touch Editor Ver. 3.1
If the Change button can be clicked while an option is selected, sub-components can be selected. Click the Change button to display the Select Sub-components dialogue box, and then select the subcomponents that you wish to install by putting a check mark beside them. If certain options or sub-components are not installed, some P-touch Editor Ver. 3.1 functions may not be available. After selecting the desired sub-components, click the Continue button.
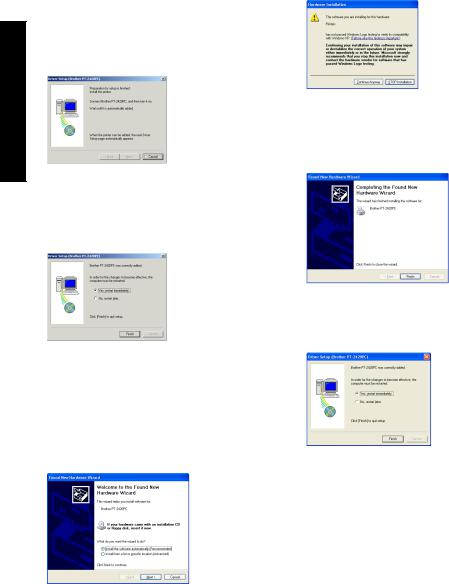
5After P-touch Editor Ver. 3.1 is installed, a dialogue box appears, allowing you to select whether or not to install the printer driver.
To install the printer driver, click the Yes button. The first Driver Setup dialogue box appears, informing you that the PT-2420PC printer driver will be installed.
8
Continue with the procedure in Installing the printer driver below.
If the printer driver is already installed, click the No button. A dialogue box appears, showing that installation is finished.
Select “Yes, I want to restart may computer now.”, click the Finish button to restart the computer, and then remove the CD-ROM from the CD-ROM drive.
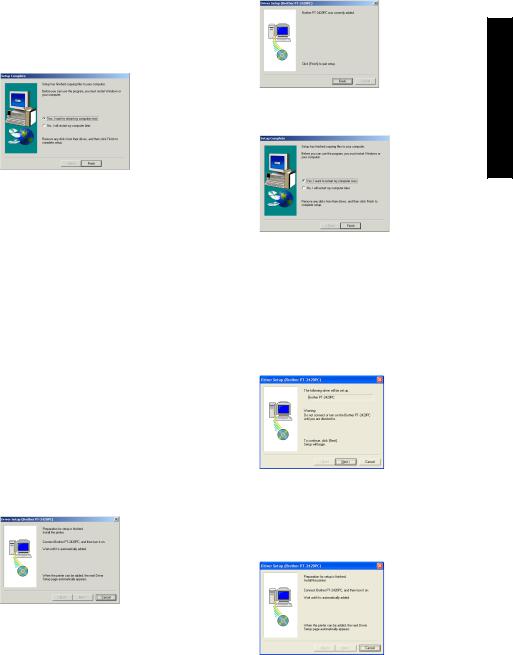
Installing the printer driver
With Plug-and-Play, new devices connected to the system are detected, and their drivers are automatically installed. Since the PT-2420PC will be connected through the USB port, its driver will be installed with Plug-and-Play. Be sure to read the installation instructions described below before installing the printer driver supplied on the CDROM.
Do not connect the P-touch 2420PC to the computer until you are instructed to do so, otherwise the PT-2420PC printer driver may not be installed correctly.
With Windows® 98/98SE/Me/2000:
1Click the Next button. A dialogue box appears, instructing you to connect the PT2420PC to the computer.
2Connect the PT-2420PC to the computer using the enclosed USB interface cable as described on page 5, and then turn on the PT-2420PC. A dialogue box appears, showing that the printer driver has been installed.
3Click the Finish button. A dialogue box appears, showing that installation is finished.
4Select “Yes, I want to restart my computer now.”, click the Finish button to restart the computer, and then remove the CD-ROM from the computer.
With Windows® XP:
1In the dialog box that appears, informing you that the PT-2420PC printer driver will be installed, click the Next button.
2After the dialog box appears, instructing you to connect the P-touch 2420PC and turn it on, connect the P-touch 2420PC to the computer using the enclosed USB interface cable as described on page 5, and then turn on the P-touch 2420PC.
For Windows®
9
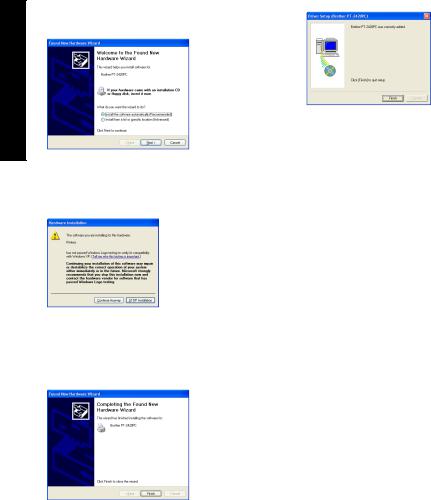
3In the first Found New Hardware Wizard dialog box that appears, select “Install the software automatically (Recommended)”, and then click the Next button.
For Windows®
4If a dialog box warning appears indicating that the software has not passed Windows Logo testing, simply continue with the installation.
5In the Found New Hardware Wizard dialog box that appears, indicating that installation of the PT-2420PC and the Found New Hardware Wizard are finished, click the Finish button.
6Click the Finish button. A dialog box appears, showing that installation is finished.
7 Remove the CD-ROM from the computer.
Reading the User’s Guide
The P-touch Editor User’s Guide can be viewed either by inserting the CD-ROM into the drive each time you wish to refer to it or by installing it onto your hard disk so that it is quickly available at any time. Since the User’s Guide is an HTML document, a browser is needed to read it.
•From the CD-ROM:
1 Start up Windows® Explorer.
2 Select the CD-ROM drive.
3 Double-click “Main.htm” in the Manual folder within the Ptouch folder on the CD-ROM.
•From the P-touch Editor 3.1 group window:
Double-click The User’s Guide P-touch Editor Ver3.1 icon.
•With the Start button:
1Click the Start button in the taskbar to display the Start menu.
2 Select “Programs”.
3 Select “P-touch Editor 3.1”.
4Click “The User’s Guide P-touch Editor Ver3.1”.
10
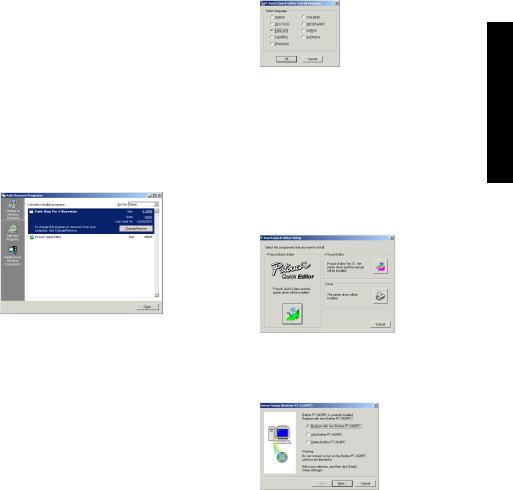
Uninstalling the software and printer driver
Uninstall the P-touch Editor Ver. 3.1/P-touch Quick Editor software from a PC as described below.
1 Start up Windows® 98/98SE/Me/2000/XP.
2Click the Start button in the taskbar, select “Settings”, and then click “Control Panel”. With Windows® XP, click the Start button in the taskbar, and then click “Control Panel”.
3In the Control Panel window, double-click “Add/Remove Programs”.
*The dialog box that appears may differ depending on the operating system being used.
4In the Add/Remove Programs Properties dialogue box, select "P-touch Quick Editor" (to delete the P-touch Quick Editor software) or “P-touch Editor 3.1” (to delete the P-touch Editor Ver. 3.1 software), and then click the Add/Remove button.
5A message appears, asking if you wish to delete the selected application. Click the Yes button to delete the application.
If you do not wish to delete the application, click the No button.
6In the dialogue box that appears, indicating that the application is deleted, click the OK button.
Replacing, deleting or adding another printer driver
1Turn off the PT-2420PC, and then disconnect it from the computer.
2Insert the enclosed CD-ROM into the computer’s CD-ROM drive. A dialogue box automatically appears, allowing you to select the language.
If the dialog box does not automatically appear, click “My Computer” on the desktop, and then double-click the CD-ROM drive containing the CD-ROM.
(For Windows® XP, click “My Computer” in the Start menu, and then double-click the CD-ROM drive containing the CD-ROM.)
Next, double-click “Setup.exe” to display the dialog box.
3Select the language for the Windows® operating system that you are using, and then click the OK button. A dialogue box appears, allowing you to select what to install.
4Click the bottom button (Driver) on the right side. The first Driver Setup dialogue box appears, allowing you to select whether to replace, delete or add another PT-2420PC printer driver.
5Select the desired operation, and then click the Next button.
If “Replace with new Brother PT-2420PC” is selected, the previously installed printer driver is deleted, and replaced with a new one. Select this option when upgrading the printer driver, or when running Windows® 2000/XP and changing to a PT-2420PC with a different serial number.
If “Add Brother PT-2420PC” is selected, a new printer driver is added. With USB on Windows® 98/Me, only a port is added without adding the PT-2420PC as a new printer. Select this option when connecting and using multiple PT-2420PCs with the same computer.
For Windows®
11
For Windows®
6If “Replace with new Brother PT-2420PC” or “Add Brother PT-2420PC” was selected:
With Windows® 98/98SE/Me/2000:
A dialogue box appears, instructing you to connect the PT-2420PC to the computer.
Connect the PT-2420PC to the computer using the enclosed USB interface cable as described on page 5, and then turn on the PT-2420PC. A dialogue box appears, showing that the printer driver has been installed.
Select “Yes, restart immediately.”, and then click the Finish button to restart the computer.
With Windows® XP:
In the first Found New Hardware Wizard dialog box that appears, select “Install the software automatically (Recommended)”, and then click the Next button.
If a dialog box warning appears indicating that the software has not passed Windows Logo testing, simply continue with the installation.
In the Found New Hardware Wizard dialog box that appears, indicating that installation of the PT-2420PC and the Found New Hardware Wizard are finished, click the Finish button.
In the dialog box that appears, indicating that installation is finished, select “Yes, restart immediately.”, and then click the Finish button. The computer is restarted.
Remove the CD-ROM from the computer.
12
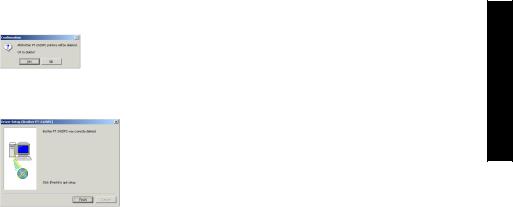
If “Delete Brother PT-2420PC” was selected:
A dialogue box appears, asking for confirmation to delete all PT-2420PC printer drivers.
Click the Yes button. A dialogue box appears, showing that the printer drivers have been deleted.
Click the Finish button. If a dialogue box appears, explaining that the computer should be restarted, select the option for restarting the computer, and then click the Finish button.
For Windows®
13
For Macintosh
For Macintosh users
Before labels can be printed on the PT-2420PC, label-designing software and the PT-2420PC printer driver must be installed. In order to design labels that can be printed on the PT-2420PC, two applications are available on the enclosed CD-ROM: P-touch Quick Editor and P-touch Editor Ver. 3.1
Before installation
Check that your system configuration meets the following requirements.
Computer: Macintosh
Operating system: Mac OS 8.6 or later
*This software can only run on Mac OS X in the Classic environment. However, the Mac OS X v10.2 Classic environment is not supported.
The Mac version of the software is for a Mac with an English operating system. If the software is installed on a Mac with an operating system in a different language, the software may not run properly.
Hard disk free space: At least 30 MB
A few hundred megabytes of additional free space may be needed when printing long labels or large amounts of data.
Available memory free space: Minimum 24 MB
USB port (installed as standard equipment)
CD-ROM drive
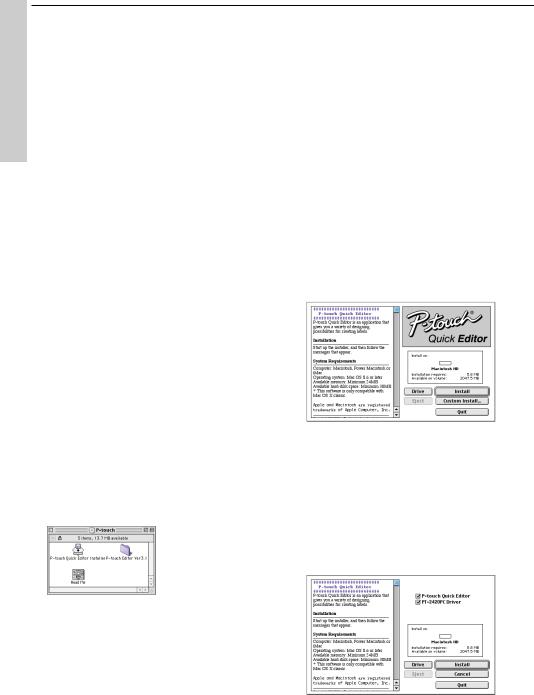
Installing P-touch Quick Editor
The P-touch Quick Editor software provides quick access to the more simple label-designing features for easy text input and instant printing of labels. Install the P-touch Quick Editor software on a Mac as described below.
1With the PT-2420PC and computer turned off, connect the PT-2420PC to the Macintosh using the enclosed USB interface cable. Be sure to leave the PT-2420PC off.
2 Turn on the Macintosh.
3Insert the enclosed CD-ROM into the computer’s CD-ROM drive. A folder opens, allowing you to view the contents of the CD-ROM.
4Double-click the P-touch Quick Editor Installer icon in the folder that appears. The installer starts up.
5Select the installation method.
Clicking the Install button immediately starts installing the most basic options.
About 30 MB of available hard-disk space is needed to begin installation. If enough harddisk space is available, click the Install button.
Clicking the Custom Install button displays a dialogue box that allows you to select which options to install.
14
Only the options with a check mark beside them are installed. Select the options that you wish to install, and then click the Install button to begin installation.
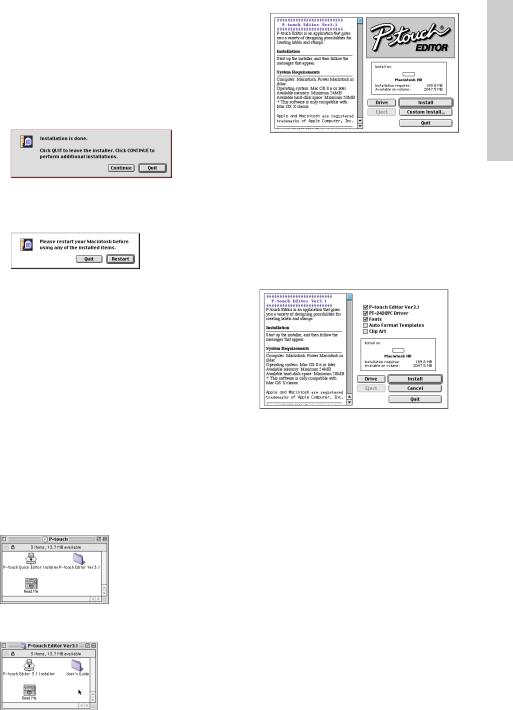
In order to print from the PT-2420PC, “PT-2420PC Driver” must be selected for installation.
6When the installation is finished and the following dialogue box appears, click the Quit button.
7When the dialogue box appears asking if you wish to restart the computer, click the Restart button to restart the computer.
Installing P-touch Editor Ver. 3.1
The P-touch Editor Ver. 3.1 software includes a variety of more complex functions for printing barcodes and images, enabling you to design just about any label that you can imagine. Install the P-touch Editor Ver. 3.1 software on a PC as described below.
1With the PT-2420PC and computer turned off, connect the PT-2420PC to the Macintosh using the enclosed USB interface cable. Be sure to leave the PT-2420PC off.
2 Turn on the Macintosh.
3Insert the enclosed CD-ROM into the computer’s CD-ROM drive. A folder opens, allowing you to view the contents of the CDROM.
4Double-click the P-touch Editor Ver3.1 folder to open it.
5Double-click the P-touch Editor 3.1 Installer icon in the folder. The installer starts up.
For Macintosh
6Select the installation method.
If “Install” is selected, the installation of all components begins.
About 120 MB of available hard-disk space is needed to begin installation.
If enough hard-disk space is available, click the Install button.
Clicking the Custom Install button displays a dialogue box that allows you to select which options to install.
Only the options with a check mark beside them are installed. Select the options that you wish to install, and then click the Install button to begin installation.
To install the minimum necessary components, select only the following components, and then start the installation.
•P-touch Editor Ver3.1
•PT-2420PC Driver
•Fonts
In this case, about 30 MB of free space on the hard disk is required.
In order to print from the PT-2420PC, “PT-2420PC Driver” must be selected for installation.
15
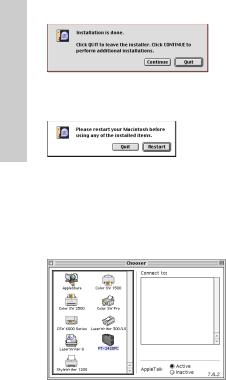
7 When the installation is finished and the following dialogue box appears, click the Quit button.
Macintosh |
8 When the dialogue box appears asking if you |
|
|
||
For |
wish to restart the computer, click the Restart |
|
button to restart the computer. |
||
|
Selecting the printer
1Pull down the Apple menu and select “Chooser” to display the Chooser window.
2In the list on the left, click the PT-2420PC icon.
3Close the Chooser window to confirm your settings.
Reading the User’s Guide
The P-touch Editor User’s Guide can be viewed either by inserting the CD-ROM into the drive each time you wish to refer to it or by installing it onto your hard disk so that it is quickly available at any time. Since the User’s Guide is an HTML document, a browser is needed to read it.
•From the CD-ROM:
Double-click “Main.htm” in the User’s Guide folder within the P-touch Editor Ver3.1 folder on the CD-ROM.
•With the Start button:
Double-click “Main.htm” in the User’s Guide folder within the P-touch Editor Ver3.1 folder installed on the hard disk.
Uninstalling the software and printer driver
Uninstall P-touch Quick Editor, P-touch Editor Ver3.1 and the printer driver as described below.
When deleting the printer driver, be sure that the P-touch is turned off and unplugged.
1Drag the following folder to the Trash icon:
•P-touch Quick Editor folder (for the P- touch Quick Editor software)
•P-touch Editor Ver3.1 folder (for the P- touch Editor Ver. 3.1 software)
2In the System Folder, open the Extensions folder.
3 Drag the following icons to the Trash icon:
•PT-2420PC and USB PT-2420PC Extension
4In the System Folder, open the Preferences folder.
5Drag the following icons to the Trash icon:
• P-touch Quick Editor Prefs, P-touch Editor 3.1 Prefs, and PT-2420PC Prefs
The software and the printer driver are now deleted.
16
Using P-touch Quick Editor
The P-touch Quick Editor enables you to design a simple label layout quickly and easily. In addition to the various functions available through the buttons in the toolbar, right-clicking (Windows®) or holding down the Control key and clicking (Macintosh) in the label view displays a pop-up menu containing more commands.
Starting up P-touch Quick Editor
When P-touch Quick Editor is installed on a PC, you can choose to add shortcuts to the desktop, the StartUp menu, and to the Quick Launch toolbar.
On an IBM PC-compatible computer:
•If a shortcut was added to the StartUp menu:
P-touch Quick Editor automatically starts up when the computer is started up.
•If a shortcut was added to the desktop:
Double-click the P-touch Quick Editor icon on the desktop.
•If a shortcut was added to the Quick Launch toolbar:
Double-click the P-touch Quick Editor icon in the Quick Launch toolbar.
•If no shortcuts were added:
1 Click the Start button in the taskbar to display the Start menu.
2 Select “Programs”.
3 Click “P-touch Quick Editor”.
After P-touch Quick Editor is started, the following window is displayed.
Toolbar
Label view
P-touch Quick Editor can be hidden or displayed by clicking its icon in the system tray, at the right of the taskbar.
On a Macintosh computer:
•Double-click the P-touch Quick Editor icon in the P- touch Quick Editor folder installed on the computer.
After P-touch Quick Editor is started, the following window is displayed.
Toolbar
Label view
Specifying a label size
Before entering text, the label size must be set. A selection of preset layout sizes is available for a variety of needs.
1Click the arrow beside the Properties button (  ) to display a drop-down menu.
2Click [Tape Settings] to display various label format settings.
The Tape Settings can also be displayed by selecting [View Properties], then clicking [Tape Settings] in the pop-up menu, displayed by right-clicking (Windows®) or holding down the Control key and clicking (Macintosh) in the label view.
3In the Format list, click the desired label format.
The size of the label layout can also be set by specifying the Length and Width settings or by dragging the edges of the label view until the layout is the desired size.
Entering text
The entire text can quickly be formatted by specifying the font, size, style and alignment. In addition, a frame can be drawn around the text.
1Click the arrow beside the Properties button (  ) to display a drop-down menu.
2Click [Text Settings] to display various text format settings.
The Text Settings can also be displayed by selecting [View Properties], then clicking [Text Settings] in the pop-up menu, displayed by right-clicking (Windows®) or holding down the Control key and clicking (Macintosh) in the label view.
17

3In the Text Settings Properties, select the desired text formats.
4Click in the label view, and then type or import the text.
Typing in the label view shows the text as it will appear when it is printed. However, by clicking the Change View button
(  ), the text is displayed in the text box, giving you a clearer view of the entered text.
Importing text
Text that has already been typed in another application can easily be imported into the label.
1 Select the desired text in the other application.
2Import the text into the label layout either by pressing the designated shortcut keys (Windows® only) or by dragging it from the other application.
(Windows® only) To specify the shortcut keys used to import text, right-click in the label view (or text box), and then click [Options] in the menu that appears. In the Options dialogue box that appears, select the desired shortcut keys for importing text. Depending on the combination of specified shortcut keys and the application software being used, this function may not work properly.
Using the Text History list
The 10 most recently printed texts are automatically stored for future use.
1Click the Text History button (  ) to display the Text History list.
2Click the desired text.
Text selected from the Text History list replaces all text already entered in the layout.
Adding a symbol
A symbol from the various installed symbol fonts can be added at the left side of the label text.
1(Windows®) Right-click in the label view (or text box), select [Symbols] in the menu that appears, and then click [Insert/Change]. The Input Symbol dialogue box appears.
(Macintosh) Hold down the Control key and click in the label view (or text box), select [Symbols] in the menu that appears, and then click [Insert/Change]. A dialogue box displaying symbols appears.
2In the Symbol Font list, select the desired symbol font.
3 In the Symbol List view, select the desired symbol.
4Click the OK button. The selected symbol is added at the left of the text.
If a symbol has already been added to the text, it will be replaced by the newly selected symbol.
Changing the background colour
The background colour of the layout can be changed to suit your preference.
•(Windows®) Right-click in the label view (or text box), select [Background Colour] in the menu that appears, and then click the desired colour from the list.
(Macintosh) Hold down the Control key and click in the label view (or text box), select [Background Color] in the menu that appears, and then click the desired colour from the list.
To select a colour other than those listed, select [User Settings] (Windows®) or [User Settings] (Macintosh) from the Background Colour submenu, create the desired colour in the dialogue box that appears, and then click the OK button.
Viewing the text
Layouts that are too long to fit in the screen can be scrolled by clicking the Arrange button (  ) to view the left, the center, then the right side of the layout with each click of the button.
If the label view (or text box) has been moved away from the tool bar, it will be docked before scrolling.
18
Printing
Before printing labels, certain print options can be selected.
1 Click the arrow beside the Print button (  ) to display a drop-down menu.
2Click [Print Options]. The Print dialogue box appears.
3Select the desired print settings.
Cut Marks: This option allows you to select whether or not to print cut marks (:), which indicate where to cut the label so that the left and right margins are equal.
Mirror Printing: This option allows you to print the text in reverse so it’s perfect for applying to the inside of windows.
Copies: This option allows you to enter the number of copies to be printed.
4(Windows®) Click the OK button to start printing.
(Macintosh) Click Print button. The layout is printed.
If you want to start printing without changing the print options simply click
the Print button (  ) or click the arrow beside the Print button and click [Print].
Hiding/displaying P-touch Quick Editor (Windows® only)
P-touch Quick Editor can be hidden by clicking the Hide button (  ). Re-display P-touch Quick Editor by clicking its icon in the system tray, at the right of the taskbar.
Quitting P-touch Quick Editor
•(Windows®) Do either of the following:
Right-click the P-touch Quick Editor icon in the system tray, and then click [Exit] in the menu that appears.
Right-click in the label view (or text box), and then click [Exit] in the menu that appears.
(Macintosh) Do either of the following:
Click [Quit] in the [File] menu
Hold down the Control key and click in the label view (or text box), and then click [Quit] in the menu that appears.
19

Using the P-touch Editor Ver. 3.1
The P-touch Editor Ver. 3.1 application makes it easy for anyone to design more complex labels and print them for almost any need imaginable.
Starting up P-touch Editor Ver. 3.1
On an IBM PC-compatible computer:
•By clicking the P-touch Editor icon:
Double-click the P-touch Editor 3.1 icon in the P-touch Editor 3.1 group window.
•With the Start button:
1 Click the Start button in the taskbar to display the Start menu.
2 Select “Programs”.
3 Select “P-touch Editor 3.1”.
4 Click “P-touch Editor 3.1”.
After P-touch Editor Ver. 3.1 is started, the following window is displayed.
Menu bar Standard toolbar Title bar
Property
dock
Rulers
Cursor
Draw toolbar
Object
dock
Status
bar
Layout area |
Print area |
On a Macintosh computer:
•Double-click the P-touch Editor Ver3.1.7 icon in the P-touch Editor Ver3.1 folder installed on the computer.
After P-touch Editor Ver. 3.1 is started, the following window is displayed.
For more details on the functions of P-touch Editor Ver. 3.1, refer to the User’s Guide, which can either be installed on the computer or viewed from the CD-ROM .
Rulers Layout area Print area Title bar
Menu bar
Draw toolbar
Print toolbar
Database
toolbar
Status bar
Object dock Property dock
Displaying the Properties
Although the screens shown in the following explanations are for Windows® 95/98/98SE/Me, the operations for Windows® NT4.0/2000/XP and Macintosh are the same unless specifically mentioned.
The desired Properties can be displayed by clicking the icon in the property dock.
Page Properties |
|
|
|
Text Properties |
|
|
|||
icon |
|
|
|
icon |
Font Properties |
|
|
|
Database |
|
|
|
||
icon |
|
|
|
Properties icon |
|
|
|
|
(not available on |
Layout |
|
|
|
the Macintosh |
|
|
|
version of the |
|
Properties icon |
|
|
|
|
|
|
|
software) |
|
|
|
|
|
Click an icon to display its Properties.
• Page Properties (  )
)
Click this button to hide the Properties.
When using the P-touch 2420PC
20
Creating a new layout
Although the screens shown in the following explanations are for Windows® 95/98/98SE/Me, the operations for Windows® NT4.0/2000/XP and Macintosh are the same unless specifically mentioned.
• Entering text
1Click  (Text button) on the draw toolbar. Text can be typed in, and the pointer changes
from  (selection pointer) to
  (I-beam pointer).
2Move the I-beam pointer to the position in the layout area where you wish to type in text, and then click the left mouse button.
3The cursor flashes in the layout area to indicate that you can now type in text.
4Use the computer keyboard to type in the text.
5To create a new line of text, press the keyboard’s Enter key.
With P-touch Editor version 3.1, text is always typed in using the insert mode. The overwrite mode cannot be used to type in text.
To change the font and text size, click the appropriate icon in the property dock, and then select the desired settings from the Properties that appear.
For details, refer to Reading the User’s Guide on page 10 for Windows® and on page 16 for Macintosh computers.
21

Printing a label
1 Turn on the PT-2420PC and start up the computer.
2Start up either P-touch Quick Editor or P-touch Editor Ver. 3.1, and make sure that the PT-2420PC is selected as the printer.
3 Design your label.
4 Start printing the label. The status indicator of the PT-2420PC flashes while it is receiving the data. After the label is printed, press in on the tape cutter button to cut off the label.
While printing multiple copies, the PT2420PC may stop printing for a short while in order for the print head to cool down. Printing will continue once the print head has sufficiently cooled down.
To feed out extra tape, hold down the Power/Feed key for a few seconds.
Removing the label backing
The enclosed tape separator enables you to easily remove the backing from labels printed on laminated tape.
1Hold the tape in your left hand, with the printed surface facing up, and hold the stick in your right hand.
2Pass the tape halfway through the long narrow hole in the stick.
GH ABCDEF 
3Turn the stick three-quarters of a turn towards you, and then pull the stick away from you as shown in the illustration.
4 Peel off the label backing.
ABCDEF
22
Maintenance
Cleaning the print head and roller
A blank horizontal line appearing through the printed label indicates that the print head and roller are dirty. Clean the print head and roller according to the following procedure.
1 Turn off the PT-2420PC.
2 Open the tape compartment cover.
3 Remove the tape cassette if one is installed.
4Use a dry cotton swab to gently wipe up and down along the print head and roller.
Caution: Be careful not to touch the cutter near the print head and roller while cleaning them. In addition, do not try to clean the print head immediately after printing, otherwise you may be burned.
5Insert the tape cassette, and then close the tape compartment cover.
*Cleaning can easily be done using the optional print head cleaning cassette (TZ-CL4).
Print head
Cotton swab
Roller
(area to be cleaned)
Cotton swab
Print head  (area to be cleaned)
Cleaning the tape cutter
After a while, adhesive may accumulate on the cutter, preventing it from cutting or resulting in the tape being jammed. Once a year, use a cotton swab dipped in isopropyl (rubbing) alcohol to clean off the cutter.
Do not touch the cutter’s edge, otherwise you may be injured.
Cotton swab
Tape cutter
23
Troubleshooting
Monitoring the P-touch Status
You can determine the status of the PT-2420PC from the status indicator.
Status Indicator |
Cause → Remedy |
|
|
Lights up |
• The P-touch is operating normally and is in stand-by. |
|
|
Flashes a few times |
• The P-touch is receiving data from the computer correctly. |
|
|
Flashes quickly |
• The cassette is not installed. → Install a cassette. |
|
• A transmission error occurred. → Press the power/feed key to turn |
|
the PT-2420PC off, then on again. |
|
• The tape cutter button was pressed while printing → Try printing again. |
|
|
Flashes, staying off |
• An EEPROM error occurred. → Contact your service representative. |
longer that it is on |
|
|
|
Flashes slowly |
• The print head is cooling down. → Wait until printing continues. |
|
|
24
Problem-solving
If you think the P-touch is not printing correctly, but you cannot determine the problem with the status indicator, refer to the following list of possible problems, and then perform the necessary operations.
Problem |
Cause |
Solution |
|
|
|
|
|
The P-touch does |
• The interface cable is not |
Check that the interface cable is correctly |
|
not print. A |
correctly connected. |
connected, the tape cassette is correctly in- |
|
printing error is |
• The tape cassette is not in- |
stalled, and that the tape compartment cover |
|
indicated. |
serted correctly. |
is closed. |
|
|
|
• The tape compartment |
|
|
|
cover is open. |
|
|
|
|
|
While |
printing, |
There is no more tape in the |
Insert a new tape cassette, and then either |
striped |
tape ap- |
tape cassette. |
press the Power/Feed key or turn the P-touch |
pears. |
|
|
off, then on again. |
|
|
|
|
The status indica- |
The AC adapter in not cor- |
Check that the AC adapter is correctly connected. If |
|
tor does |
not light |
rectly connected. |
the power button still does not light up or flash, con- |
up or flash. |
|
tact your service representative. |
|
|
|
|
|
A blank horizontal |
The print head and roller are |
Clean the print head and roller according to |
|
line appears through |
dirty. |
the procedure in Cleaning the print head and |
|
the printed label. |
|
roller on page 23. |
|
|
|
|
|
A data transmis- |
The wrong port is selected. |
Windows® |
|
sion error appears |
|
Under “Print to the following port” in the |
|
on the computer. |
|
printer Properties dialogue box, select |
|
|
|
|
“PTUSB:” for the USB connection.* |
|
|
|
Mac |
|
|
|
Select in the Chooser the PT-2420PC where the |
|
|
|
P-touch is connected. |
|
|
|
|
*If two or more of the same P-touch models are connected through their USB ports, select “PTUSB (PT-2420PC-XXXXXXXXX):” (where XXXXXXXXX is the serial number) instead of “PTUSB:”. The serial number is written above the barcode on the silver label attached to the bottom of the P-touch.
|
Machine specifications |
|
|
Power supply: |
AC 230 V, 50 Hz (AC adapter model J) |
Label tape: |
5 widths available: |
|
6 mm, 9 mm, 12 mm, 18 mm, 24 mm |
Print head: |
128 dots |
|
180 dpi |
Maximum printing length: 279 mm |
|
Port: |
USB |
Dimensions: |
66 × 123 × 145 mm |
Weight: |
400 g |
|
|
25

Accessories
•Supplies
Obtain tape cassettes from your nearest authorized dealer. Brother cannot be held responsible for trouble caused by the use of unauthorized supplies.
Use only Brother TZ tapes and AL tapes with this machine. Do not use tapes that do not have the
 and
and mark.
mark.
Stock No. |
Description |
24 mm laminated tapes |
|
TZ-151 |
Black characters on clear adhesive |
TZ-251 |
Black characters on white adhesive |
TZ-451 |
Black characters on red adhesive |
TZ-551 |
Black characters on blue adhesive |
TZ-651 |
Black characters on yellow adhesive |
TZ-751 |
Black characters on green adhesive |
TZ-951 |
Black characters on silver adhesive |
TZ-A51 |
Black characters on grey adhesive |
TZ-B51 |
Black characters on fluorescent orange adhesive |
TZ-C51 |
Black characters on fluorescent yellow adhesive |
TZ-D51 |
Black characters on fluorescent green adhesive |
TZ-M51 |
Black characters on clear (matt) adhesive |
TZ-152 |
Red characters on clear adhesive |
TZ-252 |
Red characters on white adhesive |
TZ-153 |
Blue characters on clear adhesive |
TZ-253 |
Blue characters on white adhesive |
TZ-354 |
Gold characters on black adhesive |
TZ-155 |
White characters on clear adhesive |
TZ-355 |
White characters on black adhesive |
TZ-455 |
White characters on red adhesive |
TZ-555 |
White characters on blue adhesive |
TZ-655 |
White characters on orange adhesive |
TZ-755 |
White characters on green adhesive |
TZ-M951 |
Black characters on silver (matt) adhesive |
18 mm laminated tapes |
|
TZ-141 |
Black characters on clear adhesive |
TZ-145 |
White characters on clear adhesive |
TZ-241 |
Black characters on white adhesive |
TZ-242 |
Red characters on white adhesive |
TZ-243 |
Blue characters on white adhesive |
TZ-344 |
Gold characters on black adhesive |
TZ-345 |
White characters on black adhesive |
TZ-441 |
Black characters on red adhesive |
TZ-541 |
Black characters on blue adhesive |
TZ-641 |
Black characters on yellow adhesive |
TZ-741 |
Black characters on gree adhesive |
12 mm laminated tapes |
|
TZ-131 |
Black characters on clear adhesive |
TZ-132 |
Red characters on clear adhesive |
TZ-133 |
Blue characters on clear adhesive |
TZ-135 |
White characters on clear adhesive |
TZ-231 |
Black characters on white adhesive |
TZ-232 |
Red characters on white adhesive |
TZ-233 |
Blue characters on white adhesive |
TZ-334 |
Gold characters on black adhesive |
26
 Loading...