

Page 1
Please visit us at http://solutions.brother.com/ where you can get product support and answers to
frequently asked questions (FAQs).
Read this guide before using your P-touch.
Keep this guide in a handy place for future reference.
H500
Page 2

INTRODUCTION
Thank you for purchasing the P-touch model H500.
Your new P-touch is an easy to operate, feature packed labelling system that makes
creating professional, high quality labels a breeze.
This manual contains various precautions and basic procedures for using this labeller.
Read this manual carefully before using and keep in a handy place for future reference.
Declaration of Conformity (Europe Only)
We, Brother Industries, Ltd.
declare that this product and AC adapter are in conformity with the essential requirements
of all relevant directives and regulations applied within the European Community.
The Declaration of Conformity (DoC) can be downloaded from the Brother Solutions
Center.
Visit http://solutions.brother.com/ and:
• select "Europe"
• select your country
• select your model
• select "Manuals" and your language, then click "Search"
• select "Declaration of Conformity"
• click "Download"
Your Declaration will be downloaded as a PDF file.
Compilation and Publication Notice
Under the supervision of Brother Industries, Ltd., this manual has been compiled and published,
covering the latest product’s descriptions and specifications.
The contents of this manual and the specifications of this product are subject to change without
notice.
If new versions of the
features. Therefore, you may find that the software and the contents in this manual are different.
Any trade names and product names of companies appearing on Brother products, related
documents and any other materials are all trademarks or registered trademarks of those
respective companies.
15-1, Naeshiro-cho, Mizuho-ku,
Nagoya 467-8561 Japan
H500
software become available, this manual may not reflect the updated
2
Page 3

Trademarks and Copyrights
The Brother logo is a registered trademark of Brother Industries, Lt d.
Brother is a registered trademark of Brother Industries, Ltd.
© 2013 Brother Industries, Ltd. All rights reserved.
Microsoft, Windows Vista, and Windows are registered trademarks of Microsoft Corporation
in the United States and other countries.
Apple, Macintosh and Mac OS are trademarks of Apple Inc., registered in the United States
and other countries.
The names of other software or products used i n this document are trademarks or registered
trademarks of the respective companies that devel oped them.
Each company whose software title is mentioned in this manual has a Software Licence
Agreement specific to its proprietary programs.
Any trade names and product names of companies appearing on Brother products, related
documents and any other materials are all trademarks or registered trademarks of those
respective companies.
3
Page 4

INTRODUCTION
Contents
Safety Precautions .........................................................................................................5
General Precautions ....................................................................................................12
Symbols Used in this Guide .........................................................................................13
How to use the P-touch................................................................................................14
GETTING STARTED............................................................................. 16
Unpacking Your P-touch ..............................................................................................16
General Description .....................................................................................................17
LCD Display & Keyboard .............................................................................................18
LCD Display...........................................................................................................18
Key Names and Functions.....................................................................................19
Power Supply ...............................................................................................................21
Battery ...................................................................................................................21
AC Adapter (AD-E001: Optional on the H500) ......................................................22
Using the Rechargeable Li-ion Battery (BA-E001: Optional on the H500) ............22
Inserting a Tape Cassette ............................................................................................25
Turning Power On/Off ..................................................................................................26
Auto Power-Off Time .............................................................................................26
Feeding Tape ...............................................................................................................27
Feed & Cut.............................................................................................................27
Feed Only ..............................................................................................................28
LCD Display .................................................................................................................28
LCD Contrast .........................................................................................................28
Back Light ..............................................................................................................28
Setting Language and Unit...........................................................................................29
Language ...............................................................................................................29
Unit ........................................................................................................................29
Using P-touch Software ...............................................................................................29
Features.................................................................................................................30
System Requirements ...........................................................................................30
Installing the Software and Printer Driver ..............................................................30
Uninstalling the Printer Driver ................................................................................33
Uninstalling the Software .......................................................................................35
4
Page 5
Safety Precautions
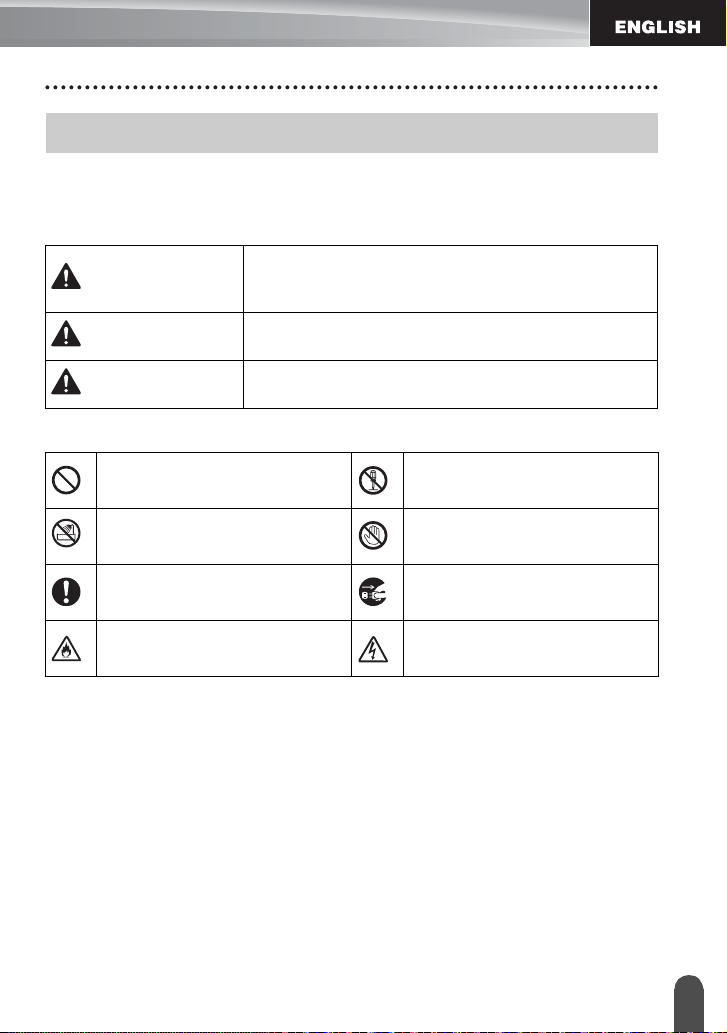
To prevent injury and damage, important notes are explained using various symbols.
The symbols and their meanings are as follows:
Indicates an imminently hazardous situation which, if the
DANGER
WARNING
CAUTION
The symbols used in this manual are as follows:
Indicates a prohibited action.
product is handled without following the warnings and
instructions, will result in death or serious injuries.
Indicates a potentially hazardous situation which, if not
avoided, could result in death or serious injuries.
Indicates a potentially hazardous situation which, if not
avoided, may result in minor or moderate injuries.
Indicates that disassembly is
prohibited.
INTRODUCTION
Indicates that exposure to water is
prohibited.
Indicates an action that must be
done.
Indicates a risk of fire under
certain circumstances.
Indicates a part of the machine
that should not be touched.
Indicates that you should unplug
the machine.
Indicates the possibility of an
electrical shock.
Safety Preca utions
5
Page 6
INTRODUCTION
DANGER
Rechargeable Li-ion Battery (Li-ion battery optional with the H500)
Carefully observe the following precautions for the rechargeable Li-ion battery (hereafter
referred to as "rechargeable battery"), If these precautions are not followed, overheating,
leaking, or cracks in the battery may result in an electrical short, explosion, smoke, fire,
electric shock, injury to yourself or others, or damage to the product or other property.
Use the rechargeable battery only for its
intended purpose. The P-touch and
rechargeable battery are designed to
function exclusively with each other. Do not
insert a different rechargeable battery into
the P-touch or insert the rechargeable
battery into a different P-touch, otherwise
fire or damage may result.
To charge the rechargeable battery,
insert the rechargeable battery into
the P-touch, and then use the AC
adapter designed specifically for this
P-touch.
DO NOT charge the rechargeable battery
near a fire or in direct sunlight. This could
activate the protection circuitry, which is
designed to prevent danger from high heat.
Activation of the protection circuitry could
cause charging to stop, charging to occur
with excessive current or voltage if the
protection circuitry fails, or an abnormal
chemical reaction within the battery.
When charging the rechargeable
battery, use only a battery charger
designed specifically for the
rechargeable battery.
DO NOT allow wires or other metal
objects to come into contact with the
terminals of the rechargeable battery. Do
not carry or store the rechargeable
battery with metal objects such as
necklaces or hairpins. This could cause
an electrical short, and could cause metal
objects to overheat, such as wires,
necklaces, or hairpins to overheat.
DO NOT use or leave the
rechargeable battery near fire,
heaters, or other high temperature
(above 80°C) locations.
DO NOT allow the rechargeable
battery to come into contact with or to
be immersed in water.
DO NOT use the rechargeable battery
in corrosive environments, such as
areas where salty air, salt water,
acids, alkalis, corrosive gases,
chemicals, or any corrosive liquid are
present.
DO NOT use the rechargeable battery
if it is damaged or leaking.
DO NOT directly solder any
connections to the rechargeable
battery. This could cause internal
insulation to melt, gas to be emitted,
or safety mechanisms to fail.
DO NOT use the rechargeable battery
with the polarity (+) (-) reversed.
Check the orientation of the
rechargeable battery before inserting
it, and do not try to force the
rechargeable battery into the P-touch.
Charging the rechargeable battery
with the polarity reversed could cause
an abnormal chemical reaction within
the rechargeable battery or abnormal
current flow during discharge.
DO NOT directly connect the
rechargeable battery to a household
electrical supply.
Safety Precautions
6
Page 7
DANGER
Rechargeable Li- ion Battery (Li-ion battery optional with the H500)
Liquid (electrolyte) leaking from the
P-touch or rechargeable battery may
indicate that the rechargeable battery is
damaged. If the rechargeable battery
leaks, immediately stop using the
P-touch, unplug the AC adapter, and
isolate the P-touch by putting it in a bag.
Do not touch the electrolyte. If
electrolyte gets in the eyes, do not rub
the eyes. Immediately rinse liberally
with tap water or other clean water and
seek the advice of a medical
professional. If left alone, the electrolyte
could cause eye damage. If electrolyte
contacts your skin or clothing,
immediately rinse them with water.
DO NOT put the rechargeable battery, or
a P-touch with the rechargeable battery
installed, into a microwave oven or a
high pressure container.
DO NOT leave the rechargeable
battery without power in the main unit
for a long period of time. This could
shorten the life of the rechargeable
battery or lead to an electrical short.
If the P-touch can only be used for a
short period of time, even though the
rechargeable battery is fully charged,
the rechargeable battery may have
reached the end of its service life.
Replace the rechargeable battery with
a new one. When removing and
replacing the rechargeable battery,
cover the terminals of the old
rechargeable battery with tape to
avoid creating a short in the battery.
DO NOT disassemble, modify, or
attempt to repair the rechargeable
battery.
DO NOT dispose of the rechargeable
battery in fire or intentionally overheat.
This could cause the internal
insulation to melt, gas to be emitted,
or safety mechanisms to fail.
Additionally, the electrolyte solution
could catch fire.
DO NOT puncture the rechargeable
battery with any objects, subject it to
severe shocks or throw it. Damage to
the rechargeable battery's protection
circuit could cause the rechargeable
battery to be recharged at an
abnormal current/voltage or cause an
abnormal chemical reaction within the
rechargeable battery.
DO NOT incinerate the rechargeable
battery or dispose of it with household
waste.
INTRODUCTION
Safety Preca utions
7
Page 8
INTRODUCTION
WARNING
P-touch
Follow these guidelines to avoid fire, electric shock, the risk of injury to yourself or others,
and/or damage to the P-touch or other property.
DO NOT disassemble the P-touch.
For inspection, adjustment, and repair of
the P-touch, contact the retail outlet
where the P-touch was purchased or
your local authorised service center.
Plastic bags are used in the packaging
DO NOT allow the P-touch to get wet or
use the P-touch in areas that may
become wet, such as bathrooms or near
sinks.
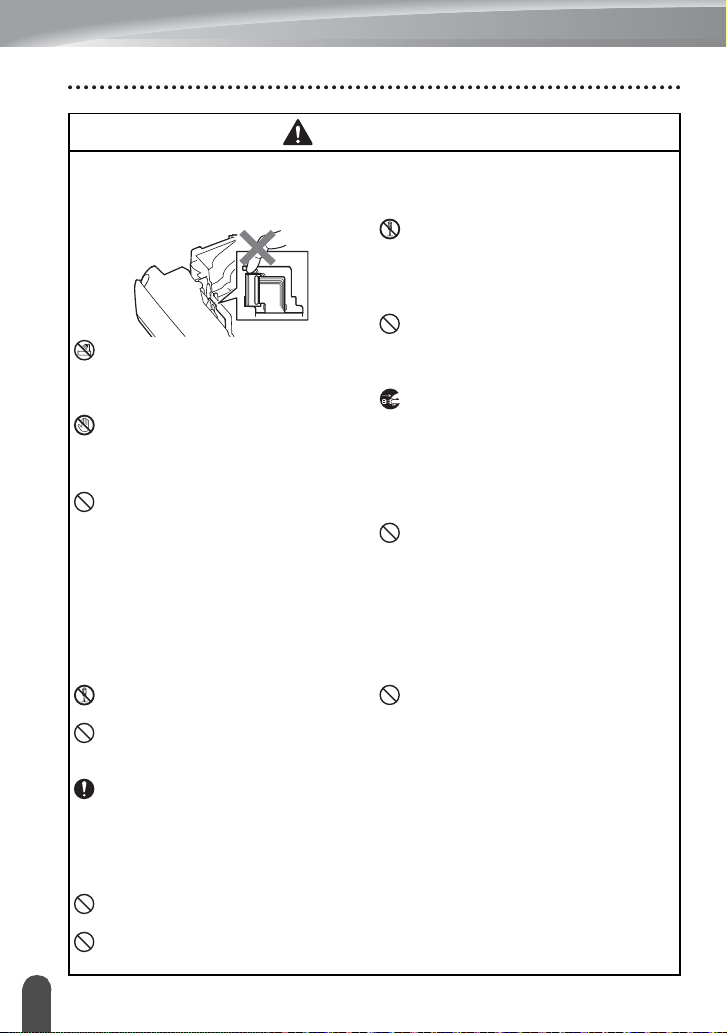
DO NOT touch any metal parts near the print
head. The print head becomes very hot during
use and remains very hot immediately after
use. Do not touch it directly with your hands.
DO NOT use the P-touch with a foreign object
in it. If water, a metallic substance, or any other
foreign object enters the P-touch, disconnect
the AC adapter and remove batteries, and
contact the retail outlet where the P-touch was
purchased or your local authorised service
center.
Alkaline batteries/Ni-MH rechargeable batteries
Follow these guidelines to avoid liquid leakage, heat, rupture of the battery and cause personal injury.
DO NOT throw into fire, heat up, shortcircuit, recharge, or disassemble the battery.
DO NOT allow batteries to get wet, for
example, by handling them with wet
hands or spilling beverages onto them.
If fluid leaked from the batteries gets into
your eyes, immediately rinse your eyes
with a large amount of clean water, and
then seek medical attention. If leaked
fluid enters your eyes, loss of eyesight
or other damage to the eyes may result.
DO NOT allow a metal object to contact
both the plus and minus ends of a battery.
DO NOT use sharp objects, such as tweezers or
a metallic pen, to remove or replace the batteries.
Safety Precautions
8
of your P-touch. To avoid danger of
suffocation, keep these bags away from
babies and children.
If you notice heat, an abnormal odour,
discolouration of the P-touch,
deformation, or anything else unusual
while using or storing the P-touch,
immediately stop using the P-touch,
disconnect the AC adapter, and remove
the batteries.
To prevent damage, do not drop or hit
the P-touch.
DO NOT use a damaged, deformed, or
leaking battery, or a battery whose label
is damaged. Doing so may result in
generating excessive heat. Use of a
damaged or leaking battery may also
lead to battery fluid getting on your
hands. If fluid leaked from the batteries
gets onto your hands, there is a
possibility of chemical burns. If leaked
fluid gets onto your hands and you rub
your eyes, loss of eyesight or other
damage to the eyes may result.
Immediately rinse your hands with a
large amount of clean water, and then
seek medical attention.
Page 9
WARNING
AC Adapter (AC Adapter optional with the H500)
Follow these guidelines to avoid fire, damage, electric shock, failure or the risk of
injury.
Make sure that the plug is fully
inserted in the power outlet. Do not
use an outlet that is loose.
Always use the specified AC adapter,
and always plug the AC adapter into
an electrical outlet with the specified
voltage (220 - 240V). Failure to do so
may result in injury to yourself or
others, or damage to the P-touch or
other property. Brother does not
assume, any responsibility for any
accident or damage resulting from not
using the specified AC adapter and
adapter cord.
DO NOT connect the AC adapter or
adapter cord to other products.
DO NOT touch the AC adapter and
the P-touch during an thunderstorm.
There may be a remote risk of electric
shock from lightning when the P-touch
is used during a thunderstorm.
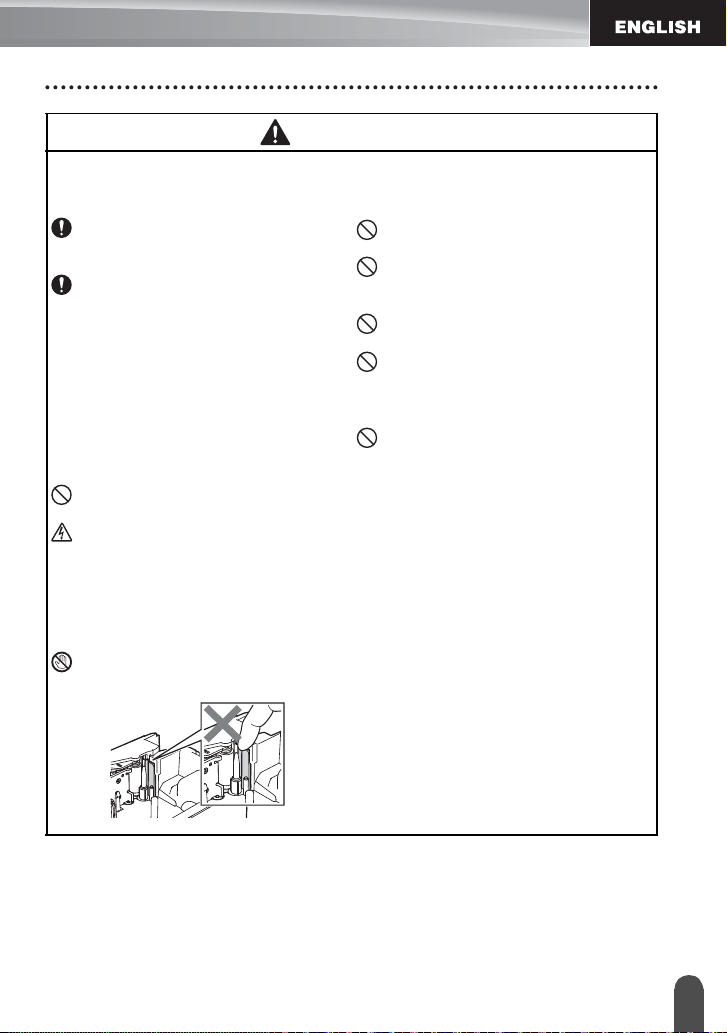
Tape Cutter
DO NOT touch the blade of the cutter
unit.
DO NOT touch the AC adapter or
power plug with wet hands.
DO NOT use the AC adapter in places
with high humidity or moisture, such
as bathrooms.
DO NOT use a damaged adapter cord
or power plug.
DO NOT place heavy objects on,
damage, or modify the adapter cord or
plug. Do not forcibly bend or pull the
adapter cord.
DO NOT drop, hit, or otherwise
damage the AC adapter.
INTRODUCTION
Safety Preca utions
9
Page 10
INTRODUCTION
CAUTION
Alkaline batteries/Ni-MH rechargeable batteries
Follow these guidelines to avoid liquid leakage, overheating or rupture of the battery.
DO NOT use a battery other than the
one specified for use with your
P-touch. Do not use combinations of
old and new batteries or combinations
of different types, different charging
levels, different manufacturers or
different models. Do not insert a
battery with the polarity (+ and -)
reversed.
If fluid leaked from the battery gets on
your skin or clothes, immediately rinse
them with clean water.
Remove the batt eries if you do not
intend to use the P-touch for an
extended period of time.
AC Adapter (AC Adapter optional with the H500)
If you do not intend using the P-touch
for an extended period of time,
disconnect the AC adapter from the
power outlet.
When disconnecting the AC adapter
from the power outlet, always hold the
AC adapter.
DO NOT use the AC adapter in places
of high humidity such as bathrooms.
Tape Cutter
Follow these guidelines to avoid minor personal injury and damage to the P-touch.
DO NOT open the tape compartment
cover when operating the cutter unit.
Before using Ni-MH rechargeable
batteries, carefully read the
instructions for the batteries and
battery charger, and be sure to use
them correctly.
When using Ni-MH rechargeable
batteries, charge the batteries with the
appropriate, specialized battery
charger.
DO NOT disassemble or modify the
batteries.
DO NOT expose the batteries to heat
or dispose of the batteries in a fire.
DO NOT overloading electrical circuit
the power cord.
DO NOT disassemble or modify the
AC adapter.
DO NOT allow the AC adapter/power
plug to get wet, for example, by
handling them with wet hands or
spilling beverages on to them.
DO NOT apply excessive pressure to
the cutter unit.
10
Safety Precautions
Page 11
CAUTION
P-touch
Follow these guidelines to avoid minor personal injury and damage to the P-touch.
Store the P-touch on a flat, stable
surface such as a desk or in a drawer.
DO NOT leave the P-touch or any
tape within the reach of young
children.
DO NOT place any heavy objects on
top of the P-touch.
Always use the suggested AC adapter
(AD-E001) for the P-touch and plug it
into an outlet with the specified
voltage. Failure to do so could result in
damage or failure of the P-touch.
DO NOT use the P-touch in places
with moisture or high humidity, such
as bathrooms.
DO NOT allow the P-touch to get wet,
for example, by handling it with wet
hands or spilling beverages onto it.
DO NOT disassemble or modify the
P-touch.
If you notice heat, an abnormal odour,
discolouration of the P-touch,
deformation, or anything else unusual
while using or storing the P-touch,
immediately discontinue use of the
P-touch, disconnect the AC adapter,
and remove the batteries.
INTRODUCTION
Safety Preca utions
11
Page 12

INTRODUCTION
General Precautions
Rechargeable Li-ion battery
• At the time of purchase, the rechargeable Li-ion battery is slightly charged so that the
operation of the P-touch can be verified; however, the rechargeable Li-ion battery should
be fully charged with the AC adapter before the P-touch is used.
• If the P-touch will not be used for a long period of time, remove the rechargeable Li-ion
battery from the P-touch, and then store it in a location where it is not exposed to static
electricity, high humidity, or high temperatures (temperatures between 15
and 40% to 60% humidity are recommended). In order to maintain the efficiency and life
of the Li-ion rechargeable battery, charge it at least every six months.
• If there is anything unusual about the Li-ion rechargeable battery the first time it is used,
for example, if it appears rusted or if it overheats, do not use the Li-ion rechargeable
battery. Contact the retail outlet where the P-touch was purchased.
P-touch
• DO NOT install P-touch near any device that will cause electromagnetic interference.
P-touch may malfunction if left near a television, radio, etc.
• DO NOT use the P-touch in any way or for any purpose not described in this guide. Doing
so may result in injury or damage the P-touch.
• DO NOT put any foreign objects into the tape exit slot, AC adapter connector, or any other
part of the P-touch.
• DO NOT touch the print head (refer to page 8) with your fingers. Use the optional print
head cleaning cassette (TZe-CL4), the self-cleaning function of the P-touch, or a soft wipe
(e.g. a cotton swab) when cleaning the print head (refer to “Cleaning the Unit” in the
User’s Guide.).
• DO NOT clean any part of the P-touch with alcohol or other organic solvents. Only use a
soft, dry cloth.
• DO NOT place the P-touch in direct sunlight, near heaters or other hot appliances, or in
any location exposed to extremely high or low temperatures, high humidity, or dust. The
standard operating temperature range of the P-touch is 10
• DO NOT leave any rubber or vinyl, or products made of rubber or vinyl, on the P-touch
for an extended period of time, otherwise the P-touch may become marked.
• Depending on the environmental conditions and the applied settings, some characters or
symbols may be difficult to read.
• Use Brother TZe tapes with P-touch.
• DO NOT pull or apply pressure to the tape in the cassette. Otherwise the tape cassette
or P-touch may be damaged.
• DO NOT try to print labels using an empty tape cassette or without a tape cassette in the
P-touch. Doing so will damage the print head.
• DO NOT attempt to cut the tape while printing or feeding since this will damage the tape.
• Depending on the location, material, and environmental conditions, the label may unpeel
or become irremovable, and the colour of the label may change or be transferred to other
objects.
General Pr ecautions
12
°
C to 35°C.
°
C and 25°C
Page 13

• DO NOT expose the tape cassettes to direct sunlight, high temperatures, high humidity,
or dust. Store tape cassettes in a cool, dark place. Use the tape cassettes soon after
opening the tape cassette package.
• Markings made with oil-based or water-based ink may be visible through a label affixed
over them. To hide the markings, use two labels layered on top of each other or use a
dark-coloured label.
• Any data stored in memory will be lost due to failure or repair of the P-touch, or if the
battery expires.
• When power is disconnected for more than two minutes, all text and format settings will
be cleared. Any text files stored in the memory will also be cleared.
• A protective clear plastic sticker is placed over the display during manufacturing and
shipping. This sticker should be removed prior to use.
• You can also use Heat Shrink Tube in this model. Please check our website for further
information. You cannot print frames, label collections, block layouts, templates pre-set in
the P-touch, and some font settings when using Heat Shrink Tube. The printed characters
may be smaller than when using TZe tape.
• The P-touch is not equipped with a charging feature for Ni-MH rechargeable batteries.
• The printed label may differ from the image that appears on the LCD.
• Note that Brother Industries, Ltd. does not assume responsibility for any damage or injury
arising from the failure to follow the precautions listed in this manual.
• We strongly recommend that you read this User’s Guide carefully before using your
P-touch, and then keep it nearby for future reference.
CD-ROM
• DO NOT scratch the CD-ROM, expose it to extremely high or low temperatures, pl ace
heavy objects on top of it, or bend it.
• The software on the CD-ROM is intended for use with the P-touch and may be installed
on more than one computer.
INTRODUCTION
Symbols Used in this Guide
The following symbols are used throughout this guide to indicate additional information.
This symbol indicates information or directions that may result in damage or injury
:
if ignored, or operations that will result in errors.
This symbol indicates information or directions that may help you understand and
:
use the P-touch more efficiently.
Symbols Used in this Guide
13
Page 14

INTRODUCTION
• Prepare the P-touch.
P. 16
In addition to entering text, the P-touch
has a large range of formatting options.
Create labels like these :
• Entering and Editing text.
• Entering Symbols and Icons.
• Entering Accented Characters.
• Using Templates and Block
Layouts.
Editing a Label in the User's Guide
Before printing, you can check the layout
of your label using the preview function.
Create labels like these :
• Printing a Label.
• Setting Tape Cutting Options.
• Printing from the Label collection.
Label Printing in the User's Guide
How to use the P-touch
Create a label with the P-touch
1
GETTING STARTED
2
CREATING A LABEL
3
LABEL PRINTING
14
• Remove the labels soon after they are cut so that they do not remain in the tape exit
slot.
• Do not position the P-touch vertically when using it. Otherwise, the cut labels could
fall into the P-touch and cause a malfunction.
How to use the P-t ouch
Page 15

• Prepare the P-touch.
• Prepare the computer.
P. 29
2
• Launch the P-touch Editor
Software.
Enter the label text using P-touch
Editor.
Editing a Label in the User's Guide
Software Help
Create labels like these:
• Print the label
Label Printing in the User's Guide
Software Help
Create a label by connecting your P-touch to a computer
1
GETTING STARTED
Your P-touch can be used as a stand alone handheld labeller,or it can be
connected to a PC or Mac and used with the included P-touch Editor software
to create more elaborate labels.
To use your P-touch connected to a computer, attach your P-touch to a
computer via the included USB cable and install the P-touch Editor software
and drivers.
CREATING A LABEL
3
LABEL PRINTING
INTRODUCTION
• Remove the labels soon after they are cut so that they do not remain in the tape exit
slot.
• Do not position the P-touch vertically when using it. Otherwise, the cut labels could
fall into the P-touch and cause a malfunction.
Printing from the Label Collection
Using the Label Collection function, labels can be created easily by selecting and then
printing designs already built into the P-touch.
How to use the P-to uch
15
Page 16

GETTING STARTED
Unpacking Your P-touch
Check that the package contains the following before using your P-touch:
H500
P-touch
USB cable
Strap
Starter Tape Cassette
Unpacking Your P-touch
16
CD-ROM Quick Setup
Guide
Page 17

GETTING STARTED
1
2
3
4
5
General Description
2
1
6
7
4
3
5
8
1. Cover latch
2. Tape exit slot
3. LCD display
4. Mini-USB port
6. Tape cutter
7. Tape cassette compartment
8. Release lever
9. Print head
5. Keyboard
When shipped from the factory, the LCD display is covered with a protective
sheet to prevent damage. Remove this sheet before using the P-touch.
9
1. Tape viewer
2. Rear cover
3. AC adapter connector
4. LED lamp
5. Battery compartment
General De scripti on
17
Page 18

GETTING STARTED
616
91011 131415
5
23 4 8127
1
-Full
-Half
-Low
-Empty
LCD Display & Keyboard
LCD Display
17
19
1. Line number
Indicates line number within the label
layout.
2. Shift Mode
Indicates shift mode is on.
3. Start Line / 4. End Line
18
The area between the start and end line
will be printed.
The short lines extending from the start/
end lines show the end of the label layout.
LCD Display & Keyboard
18
5. Block Separator Line
Indicates the end of a block.
6. Cursor
Characters are entered to the left of the
cursor. Indicates the current data input
position.
7. Return mark
Indicates the end of a line of text.
8. Battery Level
Indicates remaining battery level. It
displays only when using the Li-ion battery.
9. Caps mode
Indicates that the Caps mode is on.
10. -15. Style guidance
Indicates the current font (10), character
size (11), character style (12), frame
(13), character width (14) and alignment
(15) settings.
16. Tape size
Indicates the tape size as follows for the
text entered:
Tape width x Label length
If the label l ength has been specified, also
appears on the right side of the tape size.
17. Cursor selection
Use the and keys to select menu
items and the and keys to change
the settings.
18. Counter
Indicates currently selected number/
selectable number.
19. Block Number
Indicates the block number.
Refer to "LCD Display" on page 28 for
changing.
Page 19

Key Names and Functions
The default language is "English".
GETTING STARTED
1. Power
Turns the P-touch on and off.
2. Print Options
Enables Numbering or Mirror to be
selected and printed.
3. Preview
Displays a preview of the label.
4. Feed & Cut
Feeds 24.5mm of blank tape then cuts
the tape.
5. Print
Prints the current label design onto the
tape.
6. Font
• Enables character attributes for the
label to be set.
• Character attributes can be set for
each line of the label when the Text
menu is opened in combination with
Shift
key.
the
7. Label
Enables label attributes for the label to
be set.
8. Frame
Use this key to create a label with a
frame around the text.
9. Symbol
Use this key to select and enter a symbol
from a list of available symbols.
10. Icon
Use this key to select and enter an icon
from a list of available icons.
11. Label Collection
Enables label collections to be selected
and printed.
12. Menu
Enables operating preferences
(Language, etc.) for the P-touch to be
set.
LCD Display & Keyboard
19
Page 20

GETTING STARTED
13. Esc (Escape)
Cancels the current command and
returns the display to the data entry
screen or the previous step.
14. Clear
Clears all text entered, or all text and
current label settings.
15. OK
Selects the displayed option.
16. Cursor ( )
Moves the cursor in the direction of the
arrow.
17. Letter
• Use these keys to type letters or
numbers.
• Uppercase letters and symbols can be
entered using these keys in
Caps
combination with the
or
key.
18. Backspace
Deletes the character to the left of the
cursor.
19. Shift
Use this key in combination with the
letter and number keys to type
uppercase letters or the symbols
indicated on the number keys.
20. Caps
Turns Caps mode on and off.
21. Enter
• Enters a new line when entering text.
• Enters a new block when used in
Shift
combination with the
key.
22. Accent
Use this to select and enter an accented
character.
23. Space
• Enters a blank space.
• Returns a setting to the default value.
24. Template
Use this key to select a layout from the
templates layout.
Shift
25. Block Layout
Use this key to select a layout from the
block layout.
26. File
Enables frequently used labels in the file
memory to be printed, opened, saved, or
deleted.
27. Bar Code
Opens Bar Code Setup screen.
28. Adjustment
Adjusts the length of the printed label
and LCD contrast.
29. Backlight
Changes the backlight setting either to
on or off.
LCD Display & Keyboard
20
Page 21

Power Supply
1
2
3
Battery
After making sure that the power is off, remove the
rear cover on the back of the P-touch. If the batteries
are already in the P-touch, remove them.
Make sure that the power is turned off
when replacing batteries.
Insert six new AA-size alkaline batteries (LR6), or fully
charged Ni-MH rechargeable batteries (HR6), making
sure that the positive (+) and negative (-) ends of the
batteries match the positive (+) and negative (-) marks
inside the battery compartment.
Users of alkaline batteries
23
Always replace all six batteries at the
same time using brand new ones.
Users of Ni-MH rechargeable batteries
Always replace all six batteries at the
same time with fully charged ones.
Visit us at http://solutions.brother.com/
for the latest information about the
recommended batteries.
GETTING STARTED
Attach the rear cover by inserting the three hooks at
the bottom into the slots on the P-touch, then pushing
down firmly until it snaps into place.
If you cannot attach the rear cover, check
to ensure the white lever is in the up
position. If not, lift the lever, and then
attach the cover.
Remove the batteries if you do not intend to use the P-touch for an extended period of
time.
Powe r Su ppl y
21
Page 22

GETTING STARTED
1
2
1
2
AC Adapter (
Use AD-E001 (AC adapter) for the P-touch. AD-18 or AD-24ES cannot be used.
Connect the AC adapter directly to the P-touch.
Insert the plug on the AC adapter cord into the connector marked DC IN 12V on the
P-touch.
Insert the AC adapter plug into a standard electrical outlet.
• Turn the P-touch off before disconnecting the AC adapter.
• Do not pull or bend the AC adapter cord.
To safeguard and backup the P-touch's memory, when the AC adapter is unplugged it
is recommended to have AA-size alkaline batteries (LR6) or Ni-MH rechargeable
batteries (HR6) installed into the P-touch.
AD-E001:
Optional on the H500)
Using the Rechargeable Li-ion Battery (BA-E001: Optional on the H500)
Installing the Rechargeable Li-ion Battery
Open the rear cover by pressing the cover latch.
1. Rear cover
2. Cover latch
1
2
Insert the rechargeable Li-ion battery into the
battery compartment.
Power Supply
22
Page 23

Confirm that the hooks on the edge of the rear cover are inserted correctly, and then
3
1
2
3
reattach the cover.
If you cannot attach the rear cover, check to ensure the white lever is in the up
position. If not, lift the lever, and then attach the cover.
Removing the Rechargeable Li-ion Battery
Remove the battery cover and the rechargeable Li-ion battery, and then reattach the battery
cover.
Charging the Rechargeable Li-ion Battery
The rechargeable Li-ion battery can be charged while it is inserted in the P-touch. Perform
the following procedure to charge the rechargeable Li-ion battery.
• Before using the rechargeable Li-ion battery, use the following procedure to charge it.
• Up to 360 minutes is needed to fully charge a rechargeable Li-ion battery.
Make sure that the P-touch is turned off. If the P-touch is turned on, press the
(Power) button to turn it off.
Make sure that the rechargeable Li-ion battery is installed in the P-touch.
Use the AC adapter and AC power cord to connect the P-touch
to an AC power socket.
The LED next to the adapter connector turns on during
charging, it goes off when the rechargeable Li-ion battery is
fully charged. The battery level indicator on the display will fill
with three bars .
GETTING STARTED
Stopping Rechargeable Li-ion Battery Charging
To stop rechargeable Li-ion battery from charging, disconnect the AC adapter cord.
Tips on Using the Rechargeable Li-ion Battery
• Charge the rechargeable Li-ion battery before use. Do not use it before it is charged.
• The rechargeable Li-ion battery charging can take place in 5°C-35°C environments.
Charge the rechargeable Li-ion battery in an environment in this temperature range.
If the surrounding temperature is out of this range, the rechargeable Li-ion battery
will not be charged, and the battery indicator will remain lit.
• If the P-touch is used when both the rechargeable Li-ion battery is installed and the
AC adapter is connected, the battery indicator may turn off and charging may stop
even if the rechargeable Li-ion battery has not been fully charged.
Powe r Su ppl y
23
Page 24

GETTING STARTED
Rechargeable Li-ion Battery Characteristics
Understanding the properties of the rechargeable Li-ion battery will allow you to
optimise its usage.
• Using or storing the rechargeable Li-ion battery in a location exposed to high or low
temperatures may accelerate its deterioration. In particular, using a rechargeable Liion battery with a high charge (charged 90% or more) in a location exposed to high
temperatures will considerably accelerate battery deterioration.
• Using the P-touch while the rechargeable Li-ion battery is installed and charging
may accelerate the battery’s deterioration. If using the P-touch when the
rechargeable Li-ion battery is installed, disconnect the AC adapter.
• If the P-touch will not be used for longer than one month, remove the rechargeable
Li-ion battery from the P-touch, and then store the battery in a cool place away from
direct sunlight.
• If the rechargeable Li-ion battery will not be used for a long period of time, we
recommend charging it every 6 months.
• If you touch a part of the device while a Li-ion battery is charging, the device may
feel warm. This is normal, and the device may be used safely. If the P-touch becomes
extremely hot, discontinue use.
Rechargeable Li-ion Battery Specifications
• Charging time: Approximately 6 hours when charged by a AC adapter (AD-E001).
• Nominal Voltage: DC 7.2 V
• Nominal Capacity: 1850 mAh
24
Power Supply
Page 25

Inserting a Tape Cassette
1
2
1
2
3
2
Tape cassettes of 3.5mm, 6mm, 9mm, 12mm, 18mm or 24mm width can be used in your
P-touch. Use Brother tape cassettes with the mark.
If the new tape cassette has a cardboard stopper, be sure to
remove the stopper before inserting the cassette.
Check that the end of the tape is not bent and that it passes
through the tape guide. If the tape is not passed through,
pass it through the tape guide referring to the illustration.
1. End of tape
2. Tape guide
After making sure that the power is off, open the rear cover. If
there is already a tape cassette in the P-touch, remove it by
pulling it straight up.
Insert the tape cassette into the tape
compartment, with the end of the tape facing the
P-touch tape exit slot, and press firmly until you
hear a click.
1. Tape exit slot
1
• When inserting the tape cassette, make sure that the tape and ink ribbon do not
catch on the print head.
• Make sure that there is no slack in the tape,
and then carefully insert the tape cassette.
If there is slack in the tape, the tape will
catch on the protrusion (2) when the
cassette is inserted and become bent or
wrinkled, causing the tape to jam.
GETTING STARTED
To fix the slack in the tape, pull the tape
through the tape guide referring to the
illustration in the step 1.
Inserting a Tape Cassette
25
Page 26

GETTING STARTED
4
1
2
3
Close the rear cover.
If you cannot attach the rear cover, check to ensure
the white lever is in the up position. If not, lift the
lever, and then attach the cover.
• Do not pull the label coming out of the tape exit slot. Doing so will cause the ink
ribbon to be discharged with the tape. The tape may no longer be functional
after the ink ribbon discharges.
• Store tape cassettes in a cool dark location, away from direct sunlight and high
temperature, high humidity, or dusty locations. Use the tape cassette as quickly as
possible after opening the sealed package.
Extra Strength Adhesive Tape:
• For textured, rough, or slipping surface, we recommend using Extra Strength Adhesive Tape.
• Although the instruction sheet included with the Extra Strength Adhesive Tape
cassette recommends cutting the tape with scissors, the tape cutter that this P-touch
is equipped with is able to cut Extra Strength Adhesive Tape.
Turning Power On/Off
Press the
Press the
Power
key to turn the P-touch on.
Power
key again to turn the P-touch off.
• Your P-touch has a power saving function that automatically turns itself off if no key
is pressed within a certain time, under certain operating conditions. Refer to the
“Auto Power-Off Time” for details.
• If the batteries are installed or the P-touch is connected to an electrical outlet by the
AC adapter, the previous session’s information is displayed when the power is turned
on.
Auto Power-Off Time
If you use the AC adapter or Li-ion battery, you can change the setting of the auto power-off time.
When you use alkaline batteries or Ni-MH batteries, the auto power-off time cannot be
changed. (The time is fixed to 20 minutes.)
Press the
the
Select the battery shown on the LCD display by using the or key and set the
value using the or key.
“AC Adapter” or “Li-ion Battery” can be selected.
Press the OK or
Turning Power On/Off
26
OK
or
Menu
key, select “Auto Power Off” using the or key, and then press
Enter
key.
Enter
key.
Page 27

Auto Power-Off Time
1
2
Attribute Value Attribute Value
AC Adapter Off Li-ion Battery Off
10min. 10min.
20min. 20min.
30min.
40min. 40min.
50min. 50min.
1hr.
2hr.
4hr.
8hr.
12hr.
• If you connect the AC adapter to the P-touch after you specified “Auto Power Off”,
the setting for “AC Adapter” becomes valid.
• If you disconnect the AC adapter from the P-touch after you specified “Auto Power Off”:
• When alkaline batteries are used, the auto power-off time is fixed to 20 minutes.
• When the Li-ion battery is used, the power turns Off immediately.
• The default value is "1hr." for the AC Adapter and "30min." for the Li-ion battery.
30min.
1hr.
Feeding Tape
• Be sure to feed tape to remove any slack in the tape and ink ribbon after inserting the
tape cassette.
• Do not pull the label coming out of the tape exit slot. Doing so will cause the ink
ribbon to be discharged with the tape. The tape may no longer be functional
after the ink ribbon discharges.
• Do not block the tape exit slot during printing or when feeding tape. Doing so will
cause the tape to jam.
GETTING STARTED
Feed & Cut
The Feed & Cut function feeds 24.5mm of blank tape, and then cuts the tape.
Press the
"Feed & Cut?" will appear on the LCD display.
Using the or key to select the "Feed & Cut", and then press either OK or
key. The message "Feeding Tape... Please Wait" appears while the tape is fed, and
then the tape is cut.
Feed & Cut
To exit or cancel this function press
key.
Esc
.
Enter
Feeding Tape
27
Page 28

GETTING STARTED
1
2
1
2
3
Feed Only
This function will advance the tape approximately
sticking out of the tape cassette. This action is recommended when using Fabric tapes,
which should be cut using scissors.
Press the
"Feed & Cut?" will appear on the LCD display.
Using the or key to select the "Feed Only", and then press either OK or
key.
The message "Feeding Tape... Please Wait" appears while the tape is fed.
Feed & Cut
key.
24.5mm
resulting in a blank label
Enter
To exit or cancel this function press
Esc
.
LCD Display
LCD Contrast
You can change the contrast setting of the LCD display to one of five levels (+2, +1, 0, -1,
-2) to make the screen easier to read. The default setting is “0”.
Press the
Select "LCD Contrast" using or key and set the value using or key.
Press the OK or
•Press the Esc key to return to the previous step.
• Pressing the Space key on the contrast setting screen sets the contrast to the default
value “0”.
Back Light
Press the
When the
The display is easier to see with the backlight on. The default setting is on.
• Power can be saved when the backlight is turned off.
• The backlight is turned off automatically if there is no operation for more than 10
seconds. It can be turned back on by pressing any key. The backlight turns off when
printing.
Adjustment
Backlight
backlight
key.
Enter
key.
key to turn the backlight on.
is turned on, press the
Backlight
key again to turn the light off.
LCD Display
28
Page 29

Language
1
2
3
1
2
3
GETTING STARTED
Setting Language and Unit
Press the
OK
Select a language for menu commands and messages shown on the LCD display by
using the or key.
The language can be selected from "Čeština", "Dansk", "Deutsch", "English",
"Español", "Français", "Hrvatski", "Italiano", "Magyar", "Nederlands", "Norsk", "Polski",
"Português", "Português (Brasil)", "Română", "Slovenski", "Slovenský", "Suomi",
"Svenska" or "Türkçe".
Press the OK or
Press the Esc key to return to the previous step.
or
Enter
Menu
key, select " Language" using the or key, and then press the
key.
Enter
key.
Unit
Press the
Enter
Select a unit for dimensions shown on the LCD display by using the or key.
Either "inch" or "mm" can be selected.
Press the OK or
The default setting is "mm".
Press the Esc key to return to the previous step.
key.
Menu
key, select "Unit" using the or key, and then press the OK or
Enter
key.
Using P-touch Software
This P-touch is equipped with a USB port, allowing you to connect it to a computer. You will
need to install P-touch Editor and printer driver to use your P-touch with your computer.
When you use Windows
Software from the enclosed CD-ROM.
When you use Macintosh, you can download the driver, software and manuals by visiting
the Brother Solutions Center at http://solutions.brother.com/
®
, install P-touch Editor, the printer driver and P-touch Update
.
Setting Langua ge and Unit
29
Page 30

GETTING STARTED
Features
P-touch Editor
Printer Driver
P-touch Update
Software
Makes it easy for anyone to create a wide variety of custom
labels in complex layouts by using fonts, templates, and clip art.
Lets you print labels from the connected P-touch when using
P-touch Editor on your computer.
Label collections can be downloaded and new label designs
added to the P-touch or P-touch Editor.
In addition, the software can be upgraded to the latest version.
System Requirements
Before installation, check that your system configuration meets the following requirements.
OS Windows
Macintosh
Hard disk
Windows
Macintosh
Memory
Windows
Macintosh
Monitor
Windows
Macintosh
Others
®
Windows Vista®/Windows® 7/ Windows® 8
Mac OS X v10.6.8 / OS X v10.7.x / OS X v10.8.x
®
Disk space : 70 MB or more
Disk space : 500 MB or more
®
Windows Vista® : 512 MB or more
Windows
Windows
®
7 : 1 GB or more (32-bit) or 2 GB or more (64-bit)
®
8 : 1 GB or more (32-bit) or 2 GB or more (64-bit)
Mac OS X v10.6.8 : 1 GB or more
OS X v10.7.x : 2 GB or more
OS X v10.8.x : 2 GB or more
®
SVGA, high colour or higher graphics card
256 colours or more
CD-ROM drive
Installing the Software and Printer Driver
The procedure for installing the software varies depending on the OS of the
computer. To download the latest driver and software, please visit the Brother
Solutions Center website:
http://solutions.brother.com
For details on how to update the software, please refer to the User's Guide.
The P-touch names in the following screens may differ from your purchased
P-touch name.
• DO NOT connect the P-touch to the computer until directed to do so.
• DO NOT use a USB hub.
Using P-touch Software
30
Page 31

1
2
For Windows
• The installation procedure may change depending on the Operating System on your
PC. Windows
• If you are using Windows
CD-ROM.
If Adobe
association to "Adobe
®
®
7 is shown here as an example.
®
Reader® is installed but cannot open the files, change the ".pdf" file
®
8, use Adobe® Reader® to open the PDF manuals on the
®
Reader®" from the control panel before using the CD-ROM.
Insert the installer CD-ROM into your CD-ROM drive.
If the language screen appears, choose your language.
• For Windows Vista®/Windows® 7:
If the installer screen does not automatically appear, display the contents of the
CD-ROM drive folder, and then double-click [start.exe].
• For Windows
®
8:
If the installer screen does not automatically appear, click [Run start.exe] in the
[Start] screen, or display the contents of the CD-ROM drive folder from the
desktop, and then double-click [start.exe].
Click [Standard Installation].
1
2
3
4
GETTING STARTED
1. Standard Installation
Installs P-touch Editor, the printer driver, P-touch Update Software and the User's
Guide.
2. User’s Guides
Displays or installs the User's Guide.
3. Custom Installation
Allows P-touch Editor, the printer driver, P-touch Update Software to be individually
selected for installation.
4. Brother Support
Displays the support website (Brother Solutions Center).
Using P-touch Software
31
Page 32

GETTING STARTED
3
4
5
6
7
Follow the on-screen instructions to complete setup.
The P-touch Update Software can be used to check for updates. If [OK to use P-touch
Update Software to update the software to the newest version? (An Internet
connection is required to update.)] appears, click [Yes] or [No].
To check for new versions of the software and to update them, click [Yes], and
then go to step 5.
To not check for new software versions or update them, click [
step 6.
If you click [No] here, you can run the P-touch Update Software at a more
convenient time to check for new software versions and update them. Doubleclick the P-touch Update Software icon on the desktop. (Your computer must be
connected to the Internet.)
The P-touch Update Software starts up.
If an application appears under [File list],
there is a new version of the application. If the
check box is selected and [Install] is clicked,
that application can be installed. Wait until a
message appears indicating that the
installation has finished.
If no application appears under [File list], the
application currently installed on the
computer is the newest version. There is no
need to update. Click [Close].
No
], and then go to
When the screen for the online user registration
appears, click [OK] or [Cancel].
If you clicked [OK], you will go to the online user registration page before finishing
the installation (recommended).
If you clicked [
Click [Finish].
The installation is now complete.
When you are asked to restart the computer, click [Restart].
Using P-touch S oftware
32
Cancel
], installation continues.
Page 33

1
1
2
3
4
5
6
7
1
2
3
For Macintosh
GETTING STARTED
Start your Macintosh, and download the driver, software and manuals from the Brother
Solutions Center (http://solutions.brother.com
Macintosh users can access this URL directly by clicking the icon found on your
CD-ROM.
).
Uninstalling the Printer Driver
For Windows Vista
If the P-touch is connected to the computer and is turned on, press and hold the
(Power) button to turn it off.
Click - [Control Panel] - [Hardware and Sound] - [Printers].
Select [Brother xx-xxxx] and click [Delete this printer], or right-click the icon and click
[Delete].
Right-click the [Printers] window, and then click [Run as administrator] - [Server
Properties...].
If the authorisation confirmation window appears, click [Continue].
If the [User Account Control] window appears, type in the password, and then
click [OK]. The [Print Server Properties] window appears.
Click the [Drivers] tab, select [Brother xx-xxxx], and then click [Remove...].
Select [Remove driver and driver package], and then click [OK].
Close the [Print Server Properties] window.
The printer driver has been uninstalled.
®
For Windows® 7
If the P-touch is connected to the computer and is turned on, press and hold the
(Power) button to turn it off.
Click - [Devices and Printers].
Select [Brother xx-xxxx] and click [Remove device], or right-click the icon and click
[Remove device].
If a User Account Control message appears, type in the password, and then click
[Yes].
Using P-touch Software
33
Page 34

GETTING STARTED
4
5
6
7
1
2
3
4
5
6
7
Select [Fax] or [Microsoft XPS Document Writer] in the [Devices and Printers] window,
and then click [Print server properties], which appeared on the menu bar.
Click the [Drivers] tab, and then click [Change Driver Settings].
If a User Account Control message appears, type in the password, and then click
[Yes]. Select [
Select [Remove driver and driver package], and then click [OK].
Follow the on-screen instructions.
Close the [Print Server Properties] window.
The printer driver has been uninstalled.
For Windows® 8
If the P-touch is connected to the computer and is turned on, press and hold the
(Power) button to turn it off.
Click [Control Panel] in [Apps] screen - [Hardware and Sound] - [Devices and
Printers].
Select [Brother xx-xxxx] and click [Remove device], or right-click the icon and click
[Remove device].
If a User Account Control message appears, type in the password, and then click
[Yes].
Select [Fax] or [Microsoft XPS Document Writer] in the [Devices and Printers] window,
and then click [Print server properties], which appeared in the menu bar.
Click the [Drivers] tab, and then click [Change Driver Settings].
If a User Account Control message appears, type in the password, and then click
[Yes]. Select [
Select [Remove driver and driver package], and then click [OK].
Follow the on-screen instructions.
Close the [Print Server Properties] window.
The printer driver has been uninstalled.
Brother xx-xxxx
Brother xx-xxxx
], and then click [Remove...].
], and then click [Remove...].
Using P-touch S oftware
34
Page 35

1
2
3
4
For Mac OS X v10.6.8 - OS X v10.8.x
Turn off the P-touch.
Click [Apple menu] - [System Preferences], and click [Print & Fax] (Mac OS X v10.6.8)
/ [Print & Scan] (OS X v10.7.x / OS X v10.8.x).
Choose [Brother xx-xxxx], and click [-].
Close the [Print & Fax] (Mac OS X v10.6.8) / [Print & Scan] (OS X v10.7.x / OS X
v10.8.x) window.
The printer driver has been uninstalled.
Uninstalling the Software
Perform this procedure only if the software is no longer necessary or when reinstalling the
software.
To uninstall the software, follow the usual steps for your operating system.
GETTING STARTED
Using P-touch Software
35
Page 36

Printed in China
LAD9260 01
 Loading...