

Page 1
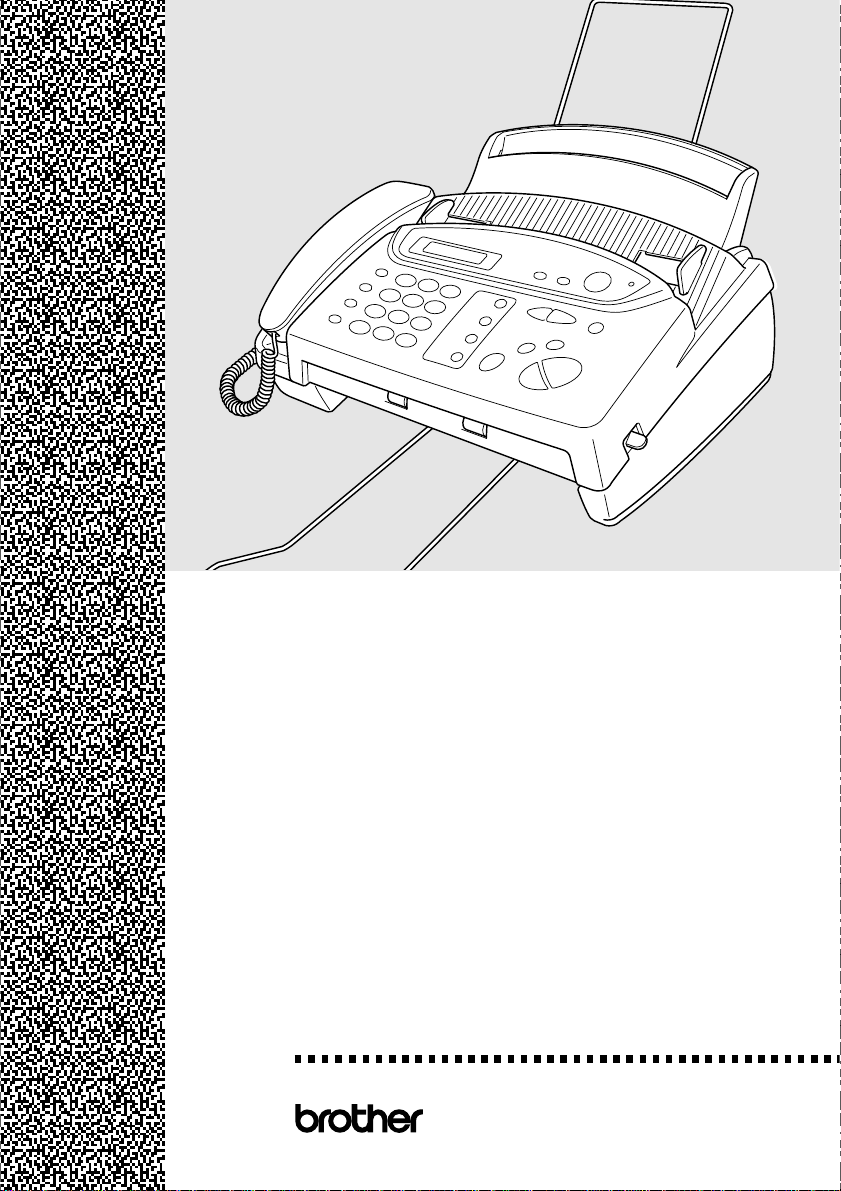
FAX-645
FAX-685MC
MFC-960MC
OWNER’S MANUAL
®
Page 2
If You Need to Call Customer Service
Please complete the following information for future
reference:
Model: FAX-645 FAX-685MC MFC-960MC
(Circle your model number)
Serial Number:*
Date of Purchase:
Place of Purchase:
* The serial number is on the underside of the unit.
Retain this Owner's Manual with your sales receipt
as a permanent record of your purchase, in the event
of a warranty service.
WARNING
Failure to use only GENUINE brother
damages will not be covered under warranty.
supplies will damage the machine and such
®
Page 3

Table of Contents
1
2
Introduction..................................................................................... 1-1
Using This Manual..................................................................... 1-1
Finding Information............................................................. 1-1
About FAX/MFC ....................................................................... 1-1
Fax Tones and Handshake................................................... 1-2
ECM (Error Correction Mode)............................................ 1-2
FAX-645 Control Panel Overview............................................. 1-3
FAX-685MC Control Panel Overview
(MFC-960MC panel keys are same as FAX-685MC)............. 1-5
Location and Connections.............................................................. 2-1
Caution....................................................................................... 2-1
Packing List................................................................................ 2-1
Choosing a Location................................................................... 2-2
Remove Ribbon Protection Sheet .............................................. 2-2
Assembly.................................................................................... 2-3
Attach the paper wire extension.......................................... 2-3
Attach the paper tray ........................................................... 2-3
Attach the output paper support .......................................... 2-3
Loading the Paper................................................................ 2-4
Acceptable Paper................................................................. 2-4
Connections................................................................................ 2-5
Connecting the Machine...................................................... 2-5
Multi-Line Connections (PBX)........................................... 2-6
If you are installing the FAX/MFC to work with
a PBX:........................................................................... 2-6
Connecting an External Telephone Answering
Device (TAD).................................................................... 2-7
Connections..................................................................... 2-7
Outgoing Message (OGM) of External TAD...................... 2-8
Sequence of External TAD Reception ................................ 2-8
Connecting an External Telephone ............................................ 2-9
3
On-Screen Programming ............................................................... 3-1
User-Friendly Programming ...................................................... 3-1
Function Mode..................................................................... 3-1
Alternating Displays............................................................ 3-1
i
Page 4

Menu Selection Table..........................................................3-2
4
5
Initial Setup...................................................................................... 4-1
Getting Started............................................................................ 4-1
Setting the Dialling Mode (Tone/Pulse)..............................4-1
Setting Date and Time......................................................... 4-1
Setting the Station ID .......................................................... 4-2
Details for Entering Text................................................. 4-2
Inserting spaces............................................................... 4-3
Making corrections ......................................................... 4-3
Repeating letters.............................................................. 4-3
Special characters and symbols....................................... 4-3
Setting Beeper Volume........................................................ 4-4
PABX and TRANSFER ...................................................... 4-4
Setting PABX...................................................................... 4-4
Setting the Speaker Volume................................................ 4-5
Setting the Ring Volume ..................................................... 4-5
Memory Storage.................................................................. 4-5
Setup Receive................................................................................... 5-1
Basic Receiving Operations ....................................................... 5-1
Select Answer Mode............................................................ 5-1
To select or change your Answer Mode ......................... 5-2
Setting Ring Delay .............................................................. 5-3
Setting F/T Ring Time (Only for F/T receiving mode)....... 5-3
Record FAX/TEL Outgoing Announcement
(FAX/TEL OGM)
(For FAX-685MC and MFC-960MC only)...................... 5-3
Fax Detect (set ON by default)............................................ 5-4
Printing a Reduced Incoming Document ............................ 5-4
Reception into Memory if: .................................................. 5-5
1
If the MEMORY RECEPTION switch is ON
at this time..................................................................... 5-5
2
If the MEMORY RECEPTION switch is OFF
at this time..................................................................... 5-5
Advanced Receiving Operations................................................ 5-6
Operation from an External or Extension Telephone.......... 5-6
For F/T (FAX/TEL) Mode Only..................................... 5-6
Remote Call Transfer...................................................... 5-6
To transfer telephone call to the FAX/MFC................... 5-7
ii
Page 5

Changing Remote Codes................................................. 5-7
Printing a FAX in Memory (For FAX-645 only)................ 5-8
Telephone Services .................................................................... 5-8
Caller ID (Caller IDentification)......................................... 5-8
Advantages of Caller ID ................................................. 5-8
For Business.................................................................... 5-8
At Home.......................................................................... 5-8
How Does the Caller ID Work? .......................................... 5-9
The Caller ID Appears on the Display When Your
Telephone Rings........................................................... 5-9
Helpful Hints................................................................... 5-9
The Caller ID is Stored in Your Machine’s Memory ..... 5-9
Selecting a Caller ID from the Memory for Call Reply...... 5-9
Clearing the Caller ID Stored in Memory
(Only for FAX-685MC and MFC-960MC)................ 5-10
Printing Caller ID List .................................................. 5-10
Distinctive Ringing (Telstra™ Fax Stream Duet
Set the Distinctive Ringing to ON..................................... 5-11
Polling ...................................................................................... 5-11
Secure Polling.................................................................... 5-11
Set for Polling Receive...................................................... 5-12
Setup for Polling Receive with Secure Code .................... 5-12
Setup Delayed Polling Receive......................................... 5-12
Sequential Polling.............................................................. 5-13
Cancelling a Scheduled Job............................................... 5-13
Setting PC Interface Mode (Only for MFC-960MC or
With Multi-Function Link option) .................................. 5-14
®
) .......... 5-10
6
Setup Send ....................................................................................... 6-1
Automatic Document Feeder (ADF).......................................... 6-1
Manual Transmission .......................................................... 6-2
Automatic Transmission...................................................... 6-2
Manual and Automatic Fax Redial...................................... 6-2
Memory Transmission......................................................... 6-2
Basic Sending Operations .......................................................... 6-3
Composing Electronic Cover Page...................................... 6-3
Cover Page for Next Fax Only............................................ 6-4
Always Send Cover Page .................................................... 6-5
Using a Printed Cover Page................................................. 6-5
Cover Page Message............................................................ 6-6
iii
Page 6

Composing Your Own Comments ...................................... 6-6
Contrast................................................................................ 6-6
Resolution............................................................................6-6
Advanced Sending Operations................................................... 6-7
Overseas Mode.................................................................... 6-7
Call Reservation .................................................................. 6-7
Print Sample Call Back Message ........................................ 6-8
Delayed Transmission (Timer)............................................ 6-8
Next-Fax Reservation.......................................................... 6-9
Multiple Resolution Transmission ...................................... 6-9
Setup for Polling Transmit ................................................ 6-10
Setup for Polling Transmit with Secure Code................... 6-10
Interrupting Timer and Polling Transmit Jobs .................. 6-11
7
8
Automatic Dial Numbers and Dialing Options ............................ 7-1
Storing Numbers for Easy Dialing............................................. 7-1
Storing One Touch Dial Numbers....................................... 7-1
Storing Speed Dial Numbers............................................... 7-2
Changing One Touch and Speed Dial Numbers.................. 7-2
Setting Up Groups for Broadcasting ................................... 7-3
Dialing Options .......................................................................... 7-4
Manual Dialing.................................................................... 7-4
One Touch Dialing .............................................................. 7-4
Speed Dialing ...................................................................... 7-5
Search .................................................................................. 7-5
Redial................................................................................... 7-6
Answering Calls with the Speakerphone
(For FAX-685MC and MFC-960MC Only) ..................... 7-6
Broadcasting........................................................................ 7-6
Mute..................................................................................... 7-7
Pause....................................................................................7-7
F/T (FAX/TEL) Mode......................................................... 7-7
On Hook Dialling
(For FAX-685MC and MFC-960MC Only) ..................... 7-7
Remote Fax Options (For FAX-645 Only)....................................8-1
Fax Forwarding .......................................................................... 8-1
Programming a Fax Forwarding Number............................ 8-1
Setting Fax Storage .................................................................... 8-1
Changing Remote Retrieval Access Code.................................. 8-2
iv
Page 7

Remote Retrieval........................................................................ 8-2
Using Remote Retrieval Access Code................................. 8-2
Remote Commands ............................................................. 8-3
Retrieving Memory Status List ........................................... 8-4
Retrieving Fax Messages..................................................... 8-4
Changing Fax Forwarding Number..................................... 8-5
9
Message Centre (For FAX-685MC and MFC-960MC Only) ..... 9-1
Message Centre Mode................................................................ 9-1
Flexible Memory Settings (Message Storage) .................... 9-1
Setting Up the Message Centre ........................................... 9-2
Setting Message Storage...................................................... 9-2
Recording Message Centre Outgoing Message................... 9-2
Listening to Outgoing Message (OGM)......................... 9-3
Erasing Outgoing Message (OGM)................................ 9-3
Activating Message Centre Mode....................................... 9-3
Message Indicator................................................................ 9-3
What Happens When the Memory is Full........................... 9-4
Playing Voice Messages...................................................... 9-4
Printing a Fax Message ....................................................... 9-4
Backup Printing Option....................................................... 9-5
Erasing Messages ................................................................ 9-5
To erase voice messages individually............................. 9-5
To erase messages all at once ......................................... 9-5
Setting Maximum Time for Incoming Messages................ 9-6
Setting Toll Saver................................................................ 9-6
ICM Recording Monitor...................................................... 9-6
Recording a Conversation ................................................... 9-6
Fax Forwarding/Paging....................................................... 9-7
Programming a Fax Forwarding Number....................... 9-7
Recording the Paging Outgoing Message (OGM).......... 9-8
Programming the Paging Number .................................. 9-8
Remote Retrieval........................................................................ 9-9
Using Remote Retrieval Access Code................................. 9-9
Changing Remote Retrieval Access Code........................... 9-9
Remote Commands ........................................................... 9-10
Retrieving Memory Status List ......................................... 9-12
Retrieving Fax Messages................................................... 9-12
Changing Fax Forwarding Number................................... 9-13
v
Page 8

10
11
12
13
Making Copies...............................................................................10-1
Copy Functions......................................................................... 10-1
Making a Single Copy....................................................... 10-1
Copy Options: Single or Multiple Copies,
Reduce/Enlarge, Sort/Stack............................................. 10-1
Printing Reports............................................................................ 11-1
FAX/MFC Settings and Activity.............................................. 11-1
To Print a Report ............................................................... 11-1
Transmission Verification (Xmit) Report.......................... 11-2
Journal Period.................................................................... 11-2
Important Information................................................................. 12-1
Important Safety Instructions ............................................ 12-1
Troubleshooting and Routine Maintenance ............................... 13-1
Troubleshooting........................................................................ 13-1
Error Messages.................................................................. 13-1
If You Are Having Difficulty with Your FAX/MFC........ 13-4
Printing or Receiving Faxes.......................................... 13-4
Phone Line or Connections........................................... 13-4
Sending Faxes............................................................... 13-5
Handling Incoming Calls.............................................. 13-5
Routine Maintenance................................................................ 13-6
Cleaning the Scanner......................................................... 13-6
Cleaning the Print Head..................................................... 13-6
Changing the Ribbon......................................................... 13-7
vi
14
Multi-Function Link
Specifications...................................................................................S-1
Glossary........................................................................................... G-1
Index..................................................................................................I-1
Accesssory List ............................................................................... R-1
®
(option) .................................................... 14-1
Page 9
1
1
Introduction
Using This Manual
Thank you for purchasing a Brother FAX/MFC. This FAX/MFC has been designed to
be simple to use, with LCD screen prompts to guide you through functions. However,
you can use your FAX/MFC to its fullest potential by taking a few minutes to read this
manual.
Additionally, your FAX/MFC has a Help Key. Press Copy/Help and then press
Start to print a list of basic operational steps and functions.
Finding Information
All chapter headings and subheadings are listed in the Table of Contents. You will be
able to find information about a specific feature or function by checking the Index at
the back of this manual. Also, throughout this manual, you’ll see special symbols
alerting you to important information, cross-references, and warnings. Illustrations of
some screen displays also help you choose the correct key-presses.
About FAX/MFC
If you’re a first-time FAX/MFC user, fax operation might seem a little mysterious.
You’ll soon get used to the unusual fax tones on your phone line, and be able to send
and receive faxes easily.
INTRODUCTION
1 - 1
Page 10

Fax Tones and Handshake
When someone is sending a fax, the FAX/MFC sends fax calling tones (CNG tones)—
soft, intermittent beeps at 4-second intervals. You’ll hear them when you dial and
press
Start
, and they continue for about 40 seconds after dialing. During that time, the
sending machine must begin the “handshake” with the receiving machine. Each time
you use automatic procedures to send a fax, you are sending CNG tones over the
phone line. You’ll soon learn to listen for these soft beeps each time you answer a
phone on your fax line, so you know if you are receiving a fax message.
The receiving fax responds with fax receiving tones—loud, chirping sounds. A
receiving fax chirps for about 40 seconds over the phone line, and the screen displays
RECEIVE. If your FAX/MFC is set to the FAX ONLY Mode, it will answer every
call automatically with fax receiving tones. Even if the other party hangs up, your
FAX/MFC continues to send the “chirps” for about 40 seconds, and the screen
continues to display “RECEIVE”. To cancel the receiving mode, press
When your FAX/MFC answers in FAX/TEL (F/T) Mode, the FAX/MFC listens for
CNG tones and then responds with receiving tones. This mode is best suited to
conditions where you want to man the FAX/MFC.
The fax “handshake” is the time in which the sending machine’s CNG tones and the
receiving machines “chirps” overlap. This must be for at least 2 to 4 seconds, so the
machines can understand how each is sending and receiving the fax. The handshake
cannot begin until the call is answered, and the CNG tones only last for about 40
seconds after the number is dialed. Therefore, it’s important for the receiving machine
to answer the call in as few rings as possible.
When you have an external telephone answering device (TAD) on your fax line, your
TAD will determine the number of rings before the call is answered. Pay special
attention to the directions in the Installation chapter for connecting a TAD to your
FAX/MFC.
Stop
.
ECM (Error Correction Mode)
The Error Correction Mode (ECM) is a way for the FAX/MFC to check the integrity
of a fax transmission while it is in progress. ECM transmissions are possible only
between machines that both have the ECM feature. If they do, you may send and
receive fax messages that are continuously checked for their integrity. ECM by default
is set ON.
Sufficient memory must be available in your FAX/MFC for this feature to work.
1 - 2
INTRODUCTION
Page 11
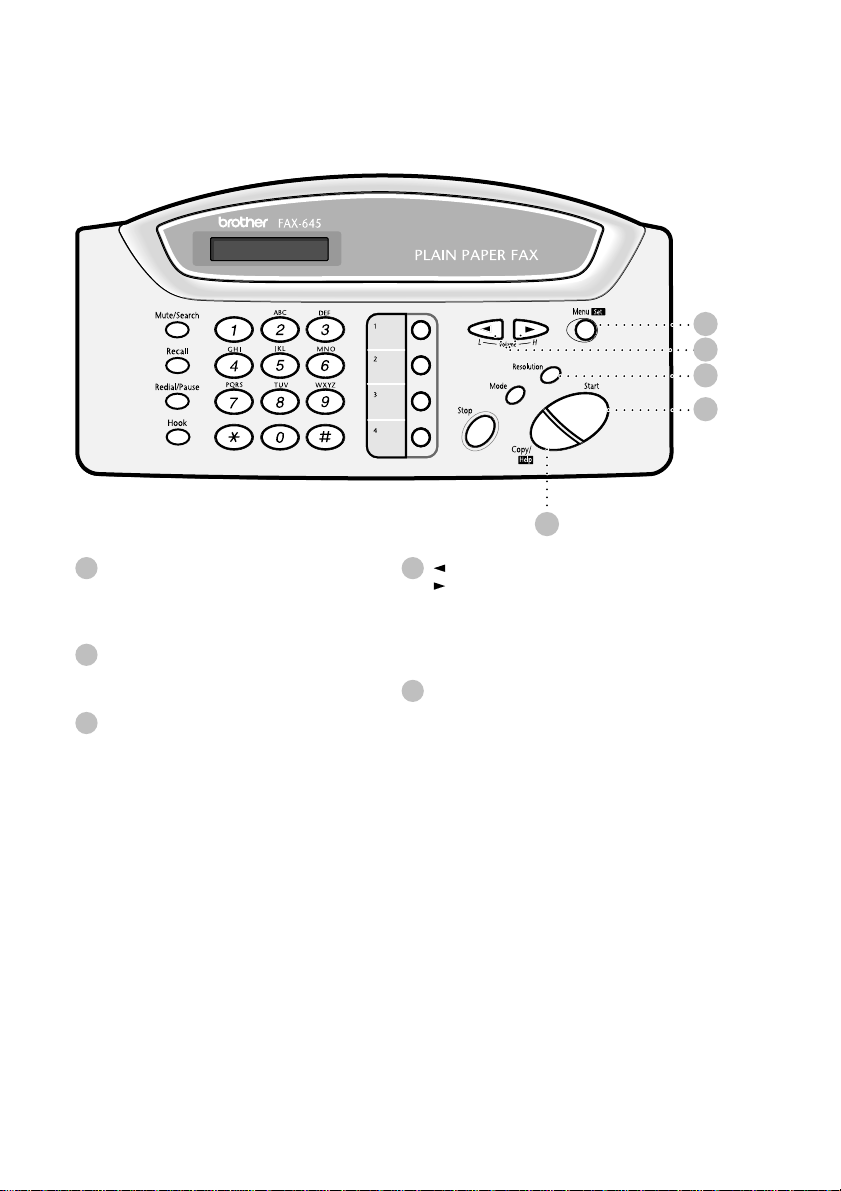
FAX-645 Control Panel Overview
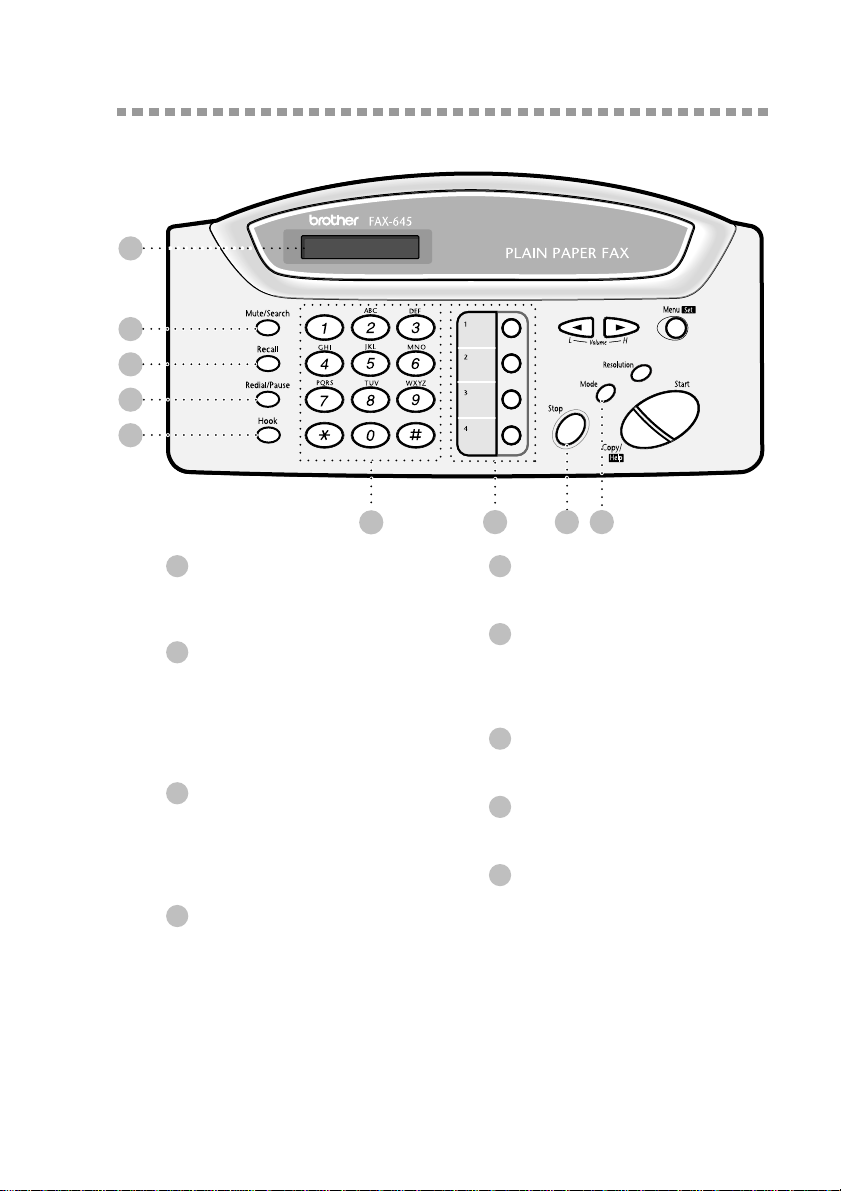
1
2
3
4
5
6
1
Liquid Crystal Display
The LCD displays messages to help
you set up and operate your
FAX/MFC.
2
Mute/Search
Lets you put calls on hold. Also,
lets you dial stored phone numbers
by pressing # and a two-digit
number. Also lets you look up
numbers stored in the dialing
memory.
3
Recall
Use this key to gain access to an
outside line and/or to recall the
operator or transfer a call to another
extension when it is connected to
a PABX.
4
Redial/Pause
Redials the last number called. Also
inserts a pause in autodial numbers.
7
5
6
7
8
9
8 9
Hook
Lets you dial telephone and fax
numbers without lifting the handset.
Dial Pad
Dials phone and fax numbers, and
can be used as a keyboard for
entering information into the
FAX/MFC.
One Touch Dial Keys
These 4 keys give you access to 4
previously stored phone numbers.
Stop
Stops a fax, cancels an operation,
or exits from function menu mode.
Mode
Use to select how FAX/MFC will
handle incoming calls.
INTRODUCTION
1 - 3
Page 12
10
14
13
12
11
10
Copy/Help
Makes a copy. If no originals are in
the ADF, it prints a quick reference
Help List.
11
Start
Starts an operation, such as sending
a fax.
12
Resolution
Sets the resolution when you send a
fax or make a copy.
13
(Left Arrow)
(Right Arrow)
(Volume)
Moves the LCD cursor to the left
or right. Adjusts speaker and ring
volume.
14
Menu/Set
Lets you access the function menu
and programming mode. Also,
stores a function setting into the
FAX/MFC.
1 - 4
INTRODUCTION
Page 13
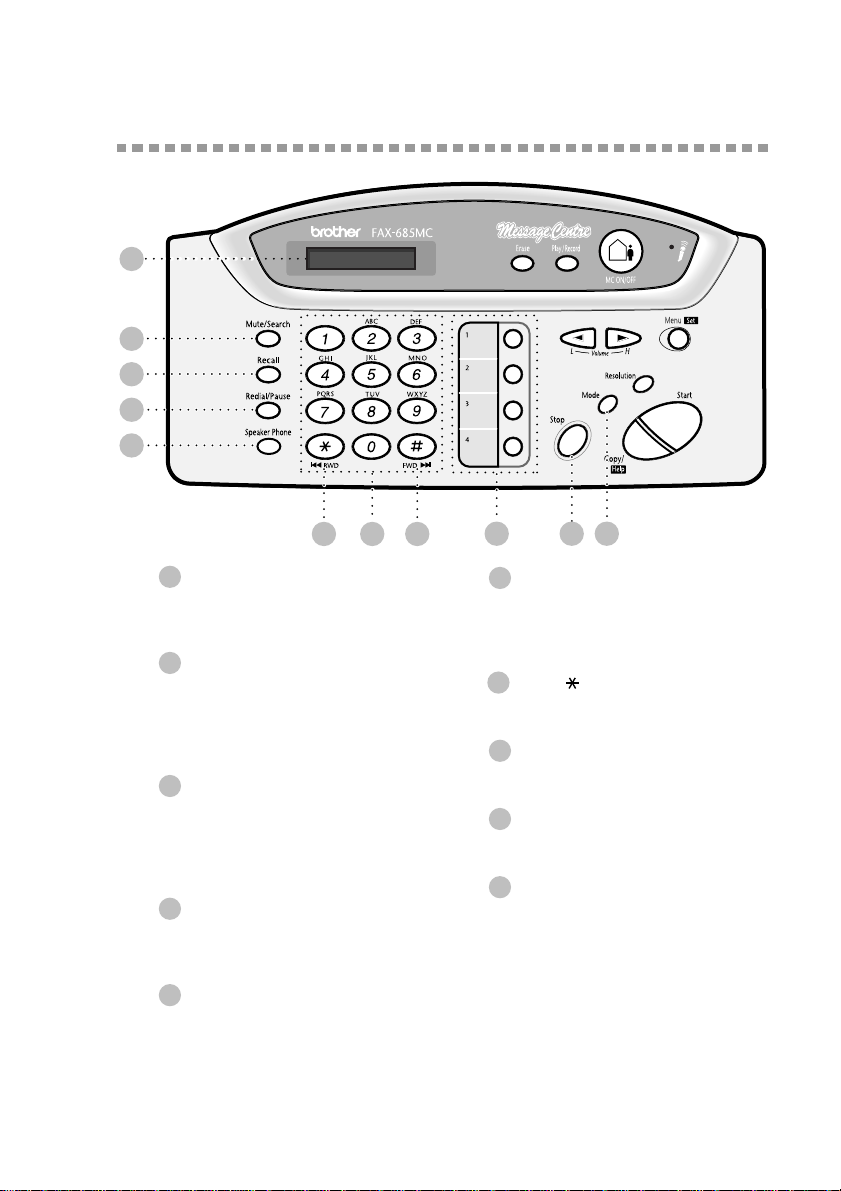
FAX-685MC Control Panel Overview
(MFC-960MC panel keys are same as FAX-685MC)
1
2
3
4
5
67 7
1
Liquid Crystal Display
The LCD displays messages to help
you set up and operate your
FAX/MFC.
2
Mute/Search
Lets you put calls on hold. Also, lets
you dial stored phone numbers by
pressing # and a two-digit number.
Also lets you look up numbers
stored in the dialing memory.
3
Recall
Use this key to gain access to an
outside line and/or to recall the
operator or transfer a call to another
extension when it is connected to
a PABX.
4
Redial/Pause
Redials the last number called. Also
inserts a pause in autodial numbers.
5
Speaker Phone
Lets you speak to the person at the
other end and dial telephone and fax
numbers without lifting the handset.
8
6
7
8
9
10
9
10
Dial Pad
Dials phone and fax numbers, and
can be used as a keyboard for
entering information into the
FAX/MFC.
RWD ( ) FWD (
Use to repeat or skip to the next
voice message during playback.
One Touch Dial Keys
These 4 keys give you access to 4
previously stored phone numbers.
Stop
Stops a fax, cancels an operation,
or exits from function menu mode.
Mode
Use to select how FAX/MFC will
handle incoming calls.
#
)
INTRODUCTION
1 - 5
Page 14
19
18
17
16
15
14
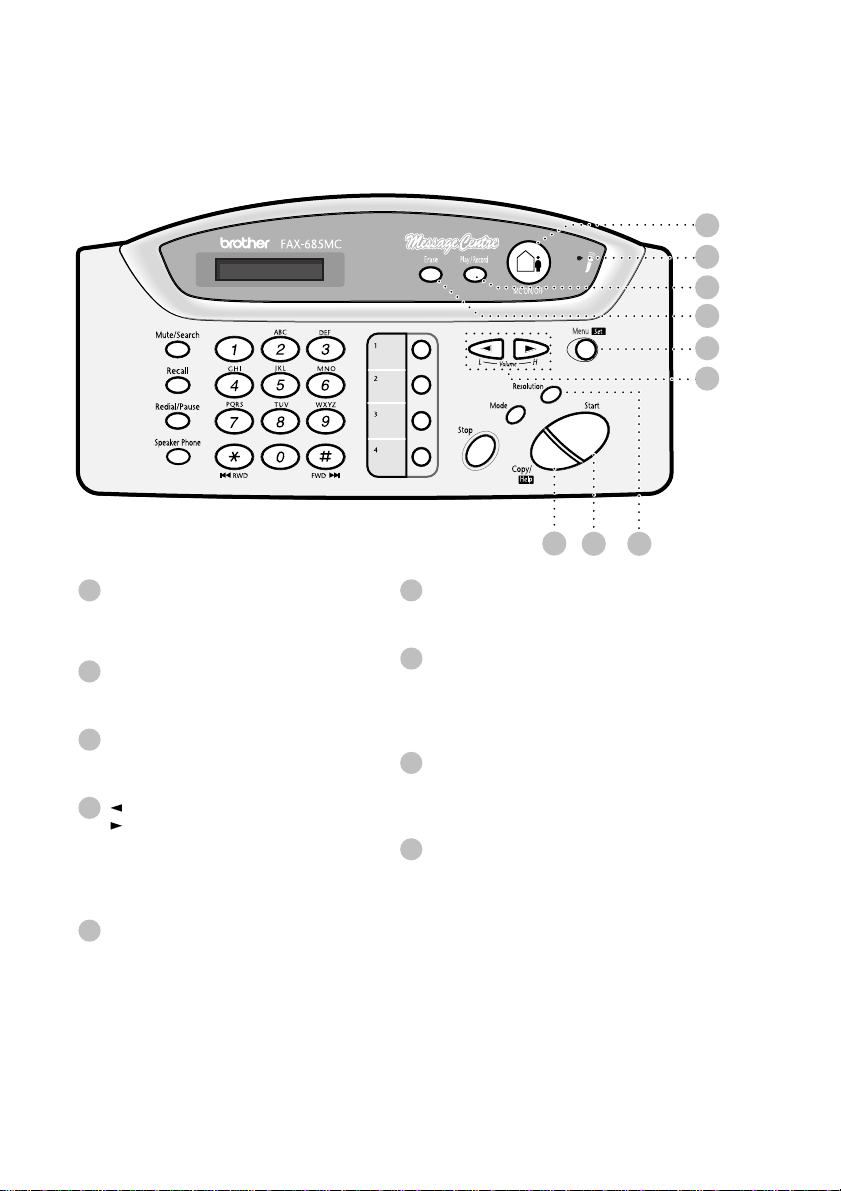
11
Copy/Help
Makes a copy. If no originals are in
the ADF, it prints a quick reference
Help List.
12
Start
Starts an operation, such as
sending a fax.
13
Resolution
Sets the resolution when you send
a fax or make a copy.
14
(Left Arrow)
(Right Arrow)
(Volume)
Moves the LCD cursor to the left
or right. Adjusts speaker and ring
volume.
15
Menu/Set
Lets you access the function menu
and programming mode. Also,
stores a function setting into
the FAX/MFC.
11
12
16
Erase
Lets you delete voice messages,
fax messages or all messages.
17
Play/Record
Lets you listen to voice messages
and print fax messages stored in
memory. Also, lets you record
telephone calls.
18
MIC (Microphone)
Picks up your voice when you
speak to another party using
Speaker Phone.
19
MC ON/OFF
Lets you activate Message Centre.
Also, notifies you that you have
voice or fax messages in the
memory.
13
1 - 6
INTRODUCTION
Page 15
2
2
Location and Connections
Caution
Never install telephone wiring during a lightning storm.
1
We recommend that this product be used with a surge protection device to protect the
2
product against lightning storms.
3
Never install a telephone jack in a wet location unless the jack is specifically designed
for a wet location.
Never touch telephone wires or terminals that are not insulated unless the telephone
4
line has been disconnected at the network interface.
5
Use caution when installing or modifying telephone lines.
6
Avoid using a telephone (other than a cordless type) during an electrical storm. There
may be a remote risk of electric shock from lightning.
Do not use the telephone to report a gas leak in the vicinity of the leak.
7
For PLUGGABLE EQUIPMENT, the socket-outlet should be installed near the
8
equipment and should be easily accessible.
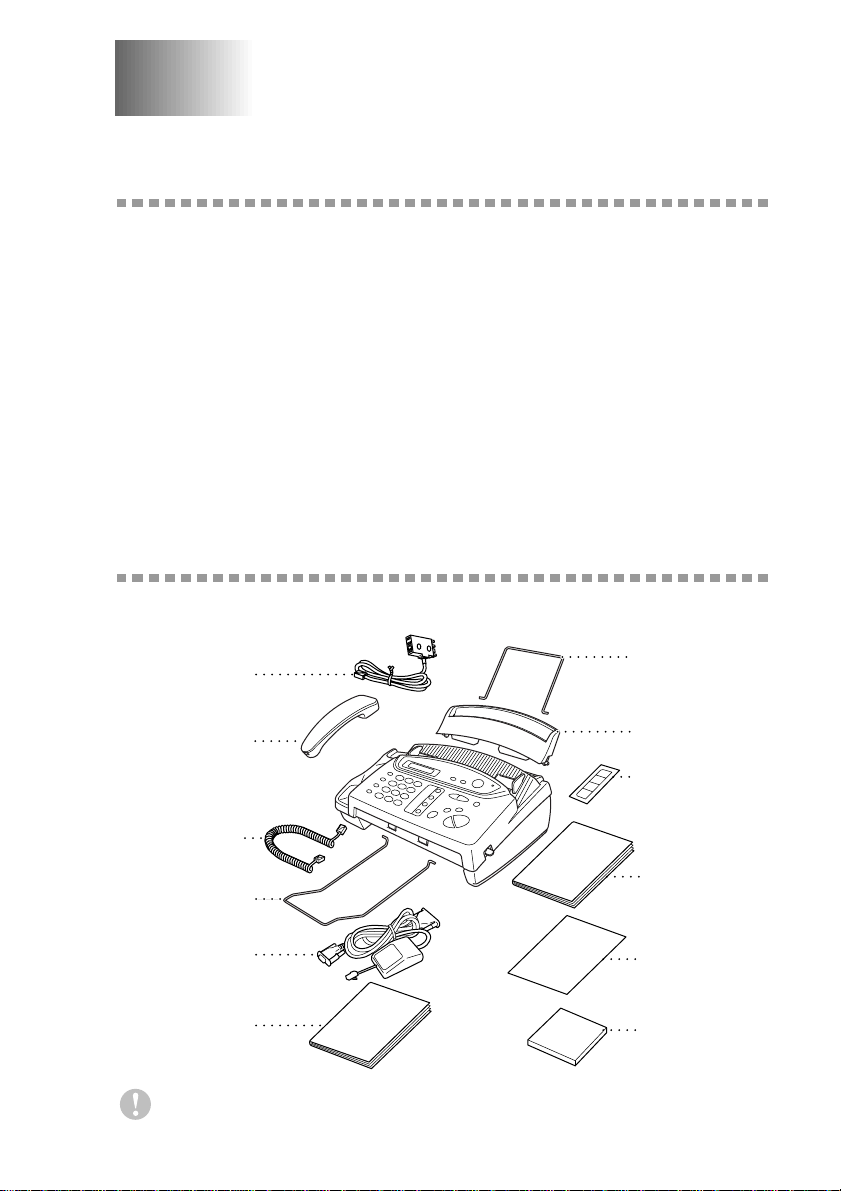
Packing List
Check that you have the following items:
Paper
Telephone
Line Cord
Telephone
Handset
Handset
Curled Cord
Output Paper
Support
Cable and
PC/IF Box
(For MFC-960MC Only)
Muiti-Function Link
Owner's Manual
(For MFC-960MC Only)
Keep the packing materials for possible future transport. If you do not pack the
machine properly, such damage will not be covered under warranty.
LOCATION AND CONNECTIONS
Wire Extension
Paper T ray
One Touc h
Name Label
Owner’s
Start Guide
Multi-Function
Link CD-ROM
(For MFC-960MC Only)
Manual
2 - 1
Page 16
Choosing a Location
Place your FAX/MFC on a flat, stable surface, such as a desk. Select a place that is
free of vibration and shocks. Locate the FAX/MFC near a telephone jack and a
standard, grounded power outlet.
Avoid placing your machine in a high-traffic area. Do not place near heaters, air
conditioners, water, chemicals or refrigerators. Do not expose the FAX/MFC to direct
sunlight, excessive heat, moisture or dust. Do not connect your machine to electrical
outlets controlled by wall switches or automatic timers. Disruption of power can wipe
out information in the unit’s memory. Do not connect your machine to electrical
outlets on the same circuit as large appliances or other equipment that might disrupt
the power supply. Avoid interference sources, such as speakers or the base units of
cordless phones.
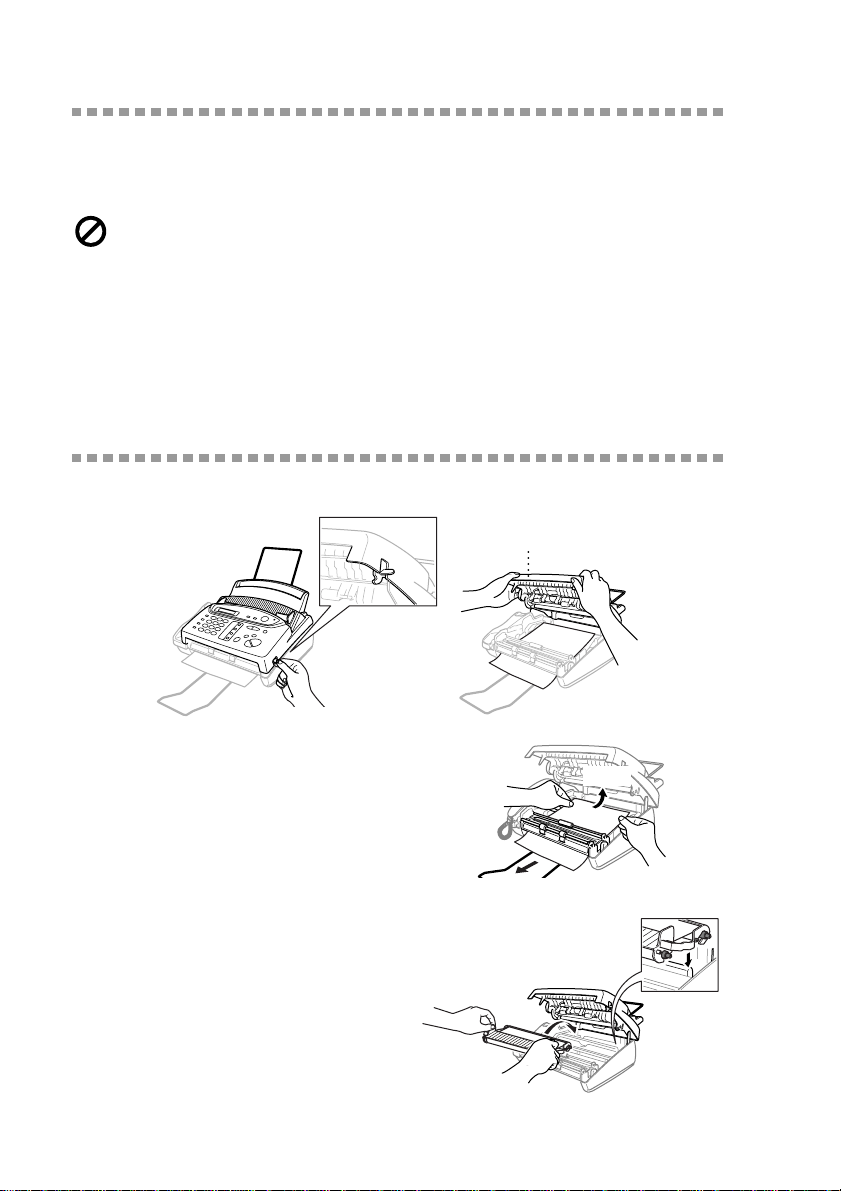
Remove Ribbon Protection Sheet
1
Open the top cover by lifting the gray lever on the right side of the top cover.
Top Cover
2
Remove the ribbon protection sheet.
3
Remove the print cartridge and notice
how the ribbon is wound on the print
cartridge frame.
4
Re-install cartridge.
5
Close the top cover.
2 - 2
LOCATION AND CONNECTIONS
YES!
NO!
Page 17
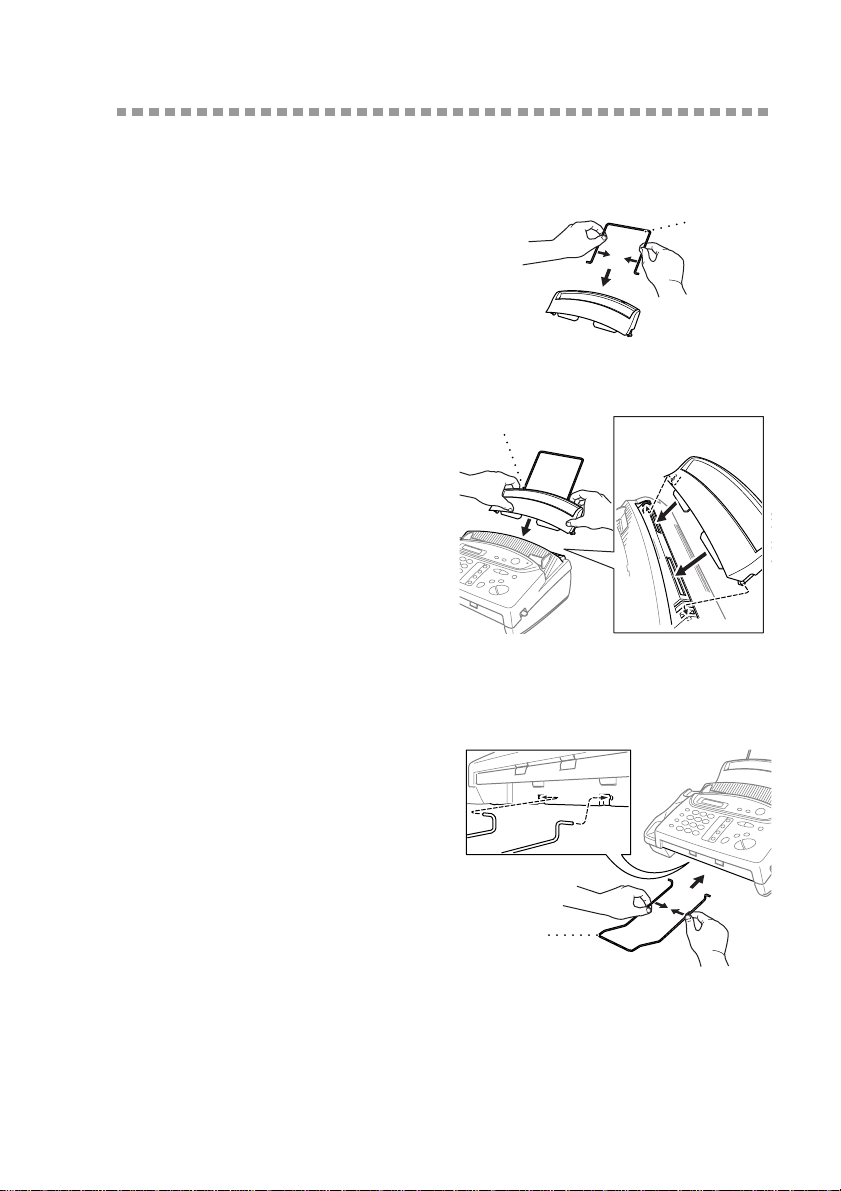
Assembly
Attach the paper wire extension
Attach the paper wire extension as shown
in the illustration below.
Attach the paper tray
Attach the paper tray. Make sure the wide
pins on the paper tray are inserted firmly
into the pockets on the top edge of the
machine.
Paper Wire
Extension
Paper T ray
Attach the output paper support
Attach the output paper support.
Output
Paper
Support
LOCATION AND CONNECTIONS
2 - 3
Page 18
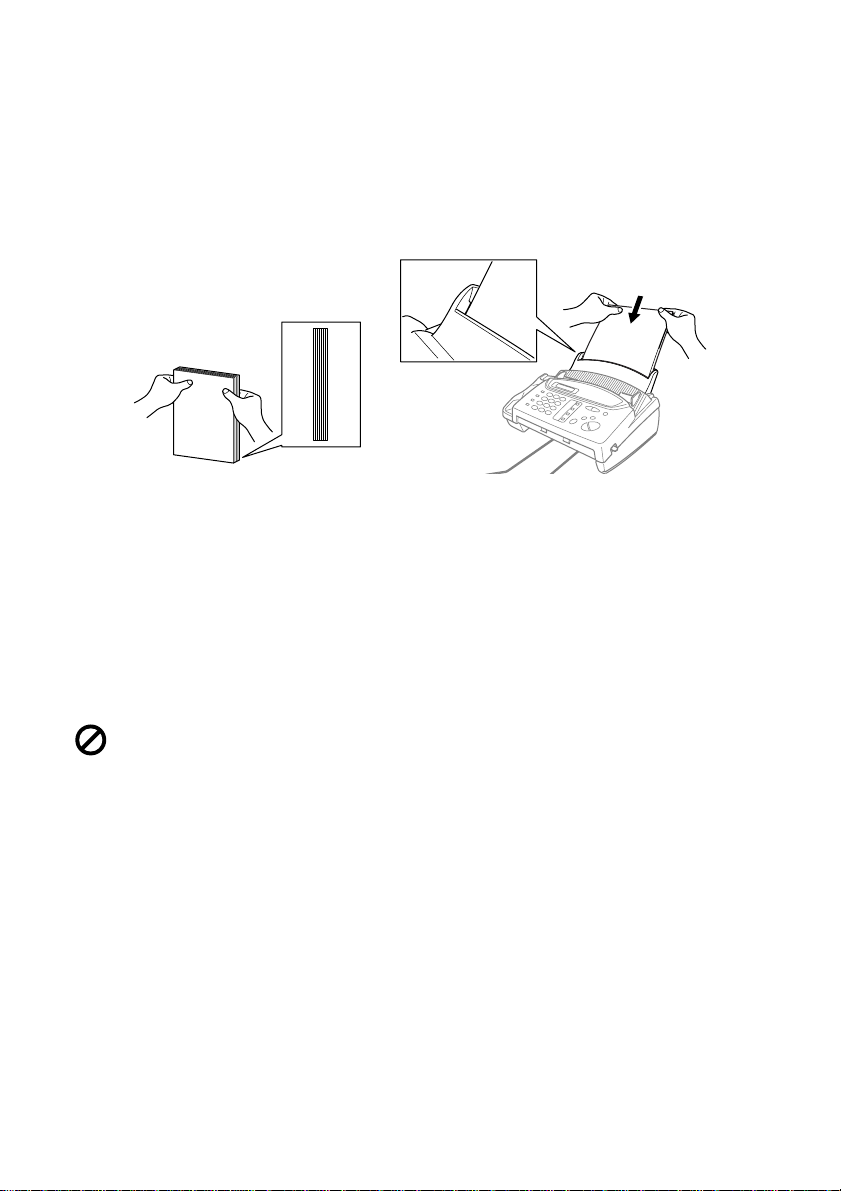
Loading the Paper
The paper tray can hold about 30 sheets of paper.
Temperature: 20˚C (68˚F)
Humidity: 60%
1
Place paper in the paper tray.
Tap the stack of paper
so the edges are even.
Acceptable Paper
Size: A4
Weight: 64gsm-90gsm (17 lb. – 24 lb.)
Thickness: 0.08 – 0.10mm
DO NOT use curled, wrinkled, folded or ripped paper, or paper with staples, paper
clips, paste or tape attached. DO NOT use cardboard, newspaper or fabric.
2 - 4
LOCATION AND CONNECTIONS
Page 19
Connections
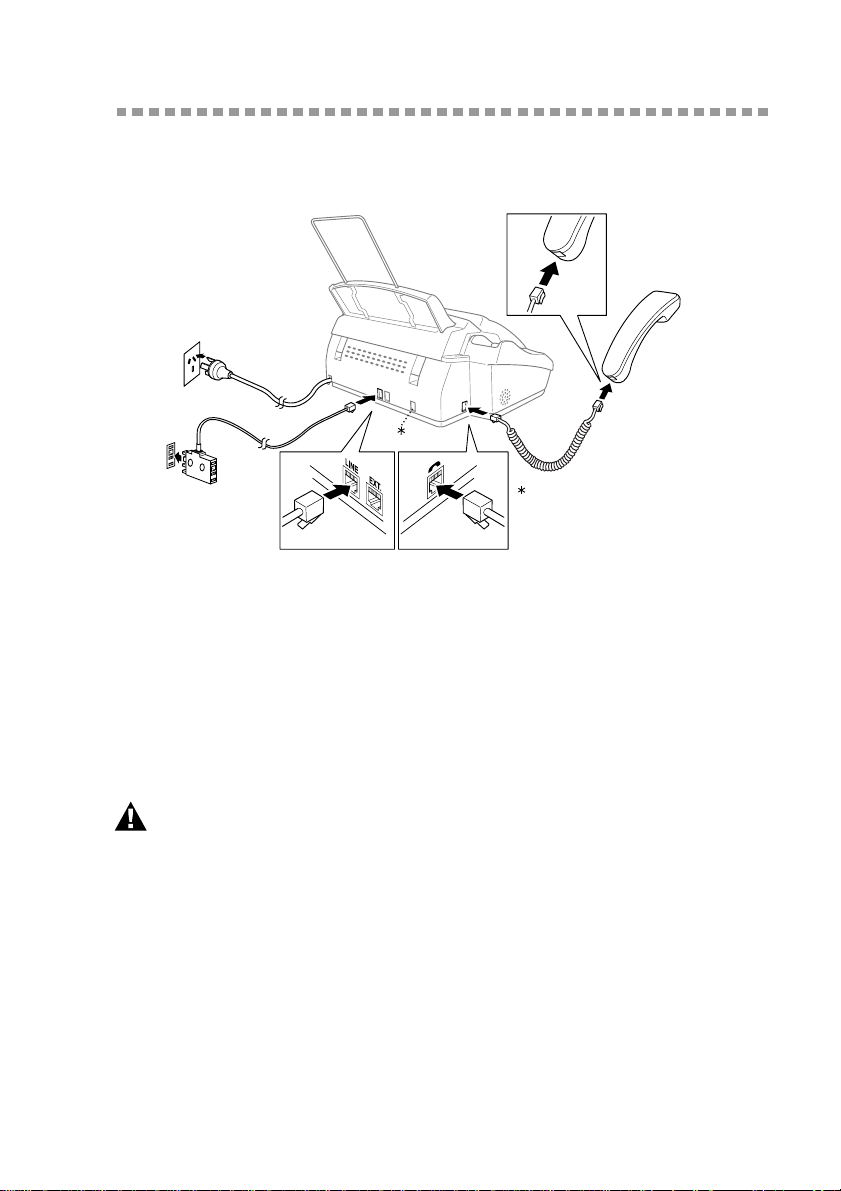
Connecting the Machine
Connect the handset, power cord, and telephone line cord.
PC I/F jack is for Use with the
Brother Multi-Function Link option.
If you have not purchased this
option then ignore this part.
1
Connect the Handset.
Connect the curled handset cord to the bottom of the handset and the back of the
machine.
2
Connect the power cord.
3
Connect the telephone line cord.
Connect one end of the telephone line cord to the jack labeled LINE on the back of
the machine. Connect the other end to a modular wall jack.
WARNING
■ This machine must be grounded using a three-prong plug.
■ Since the machine is grounded through the power outlet, you can protect yourself from
potentially hazardous electrical conditions on the telephone line by keeping the power
to your machine on when you connect it to a telephone line. When you want to move
your machine, protect yourself by disconnecting the telephone line first, and then the
power cord.
■ Lightning and power surges can damage this product! We recommend that you use a
quality surge protection device on the AC power line as well as on the telephone line,
or unplug the lines during a lightning storm.
LOCATION AND CONNECTIONS
2 - 5
Page 20

Multi-Line Connections (PBX)
Most offices use a central telephone system. While it is often relatively simple to
connect the FAX/MFC to a key system or a PBX (Private Branch Exchange), we
suggest that you contact the company that installed your telephone system and ask
them to connect the FAX/MFC for you. It is advisable to have a separate line for the
FAX/MFC. You can then leave the FAX/MFC in FAX ONLY Mode to receive faxes
any time of day or night.
If the FAX/MFC is to be connected to a multi-line system, ask your installer to connect
the unit to the last line on the system. This prevents the unit from being activated each
time a telephone call is received. (See Fax Detect (set ON by default), page 5-4.)
As with all fax units, this machine must be connected to a two wire system. If your
line has more than two wires, proper connection of the FAX/MFC cannot be made.
If you are installing the FAX/MFC to work with a PBX:
1
It is not guaranteed that the unit will operate correctly under all circumstances with a
PBX. Any cases of difficulty should be reported first to the company that handles your
PBX.
2
If all incoming calls will be answered by a switchboard operator, it is recommended
that the Answer Mode be set to MANUAL. All incoming calls should initially be
regarded as telephone calls.
3
The unit may be used with either pulse or tone dialing telephone service.
2 - 6
LOCATION AND CONNECTIONS
Page 21
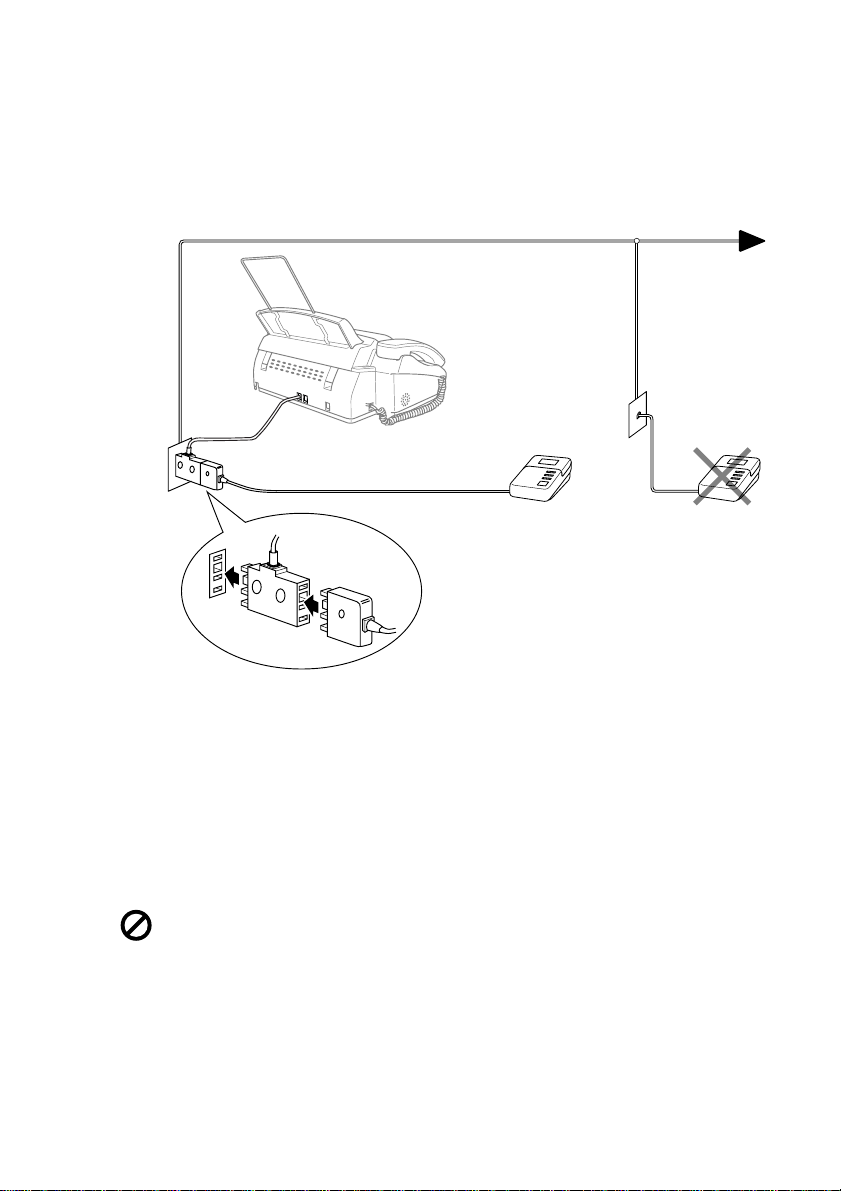
Connecting an External Telephone Answering Device (TAD)
Connections
1
You may connect an external TAD to your machine, as shown below.
TAD TAD
2
Set the number of rings to one or two on your external TAD.
(The FAX/MFC’s Ring Delay setting does not apply.)
3
Record the outgoing message on your external TAD (see below).
4
Set the external TAD to answer calls.
5
Set MESSAGE STORE (Function menu 8-1) to VOICE:EXT.
(Only for FAX-685MC and MFC-960MC)
6
Set the Answer Mode to TAD:ANSWER MACH. (Only for FAX-645)
On the FAX-685MC and MFC-960MC, set the Answer Mode to MC:MSG CTR.
Do not connect a TAD elsewhere on the same phone line––your machine and TAD
will both try to control the line.
LOCATION AND CONNECTIONS
2 - 7
Page 22
Outgoing Message (OGM) of External TAD
Timing is important in recording this message.
1
Record four seconds of silence at the beginning of your message. (This allows your
machine time to listen for the fax CNG tones of automatic transmissions before they
stop.)
2
Try to record the shortest possible message on your telephone answering device
(ideally less than 10 seconds).
3
End your message by giving your Remote Activation Code for people sending manual
faxes. For example:
“After the beep, leave a message or send a fax manually by pressing
5 1.”
Please note that some faxes that are sent manually cannot be received automatically
because some FAX/MFCs do not send a fax tone in manual mode. In these cases you
must inform callers that they must enter the remote activation code to send a fax.
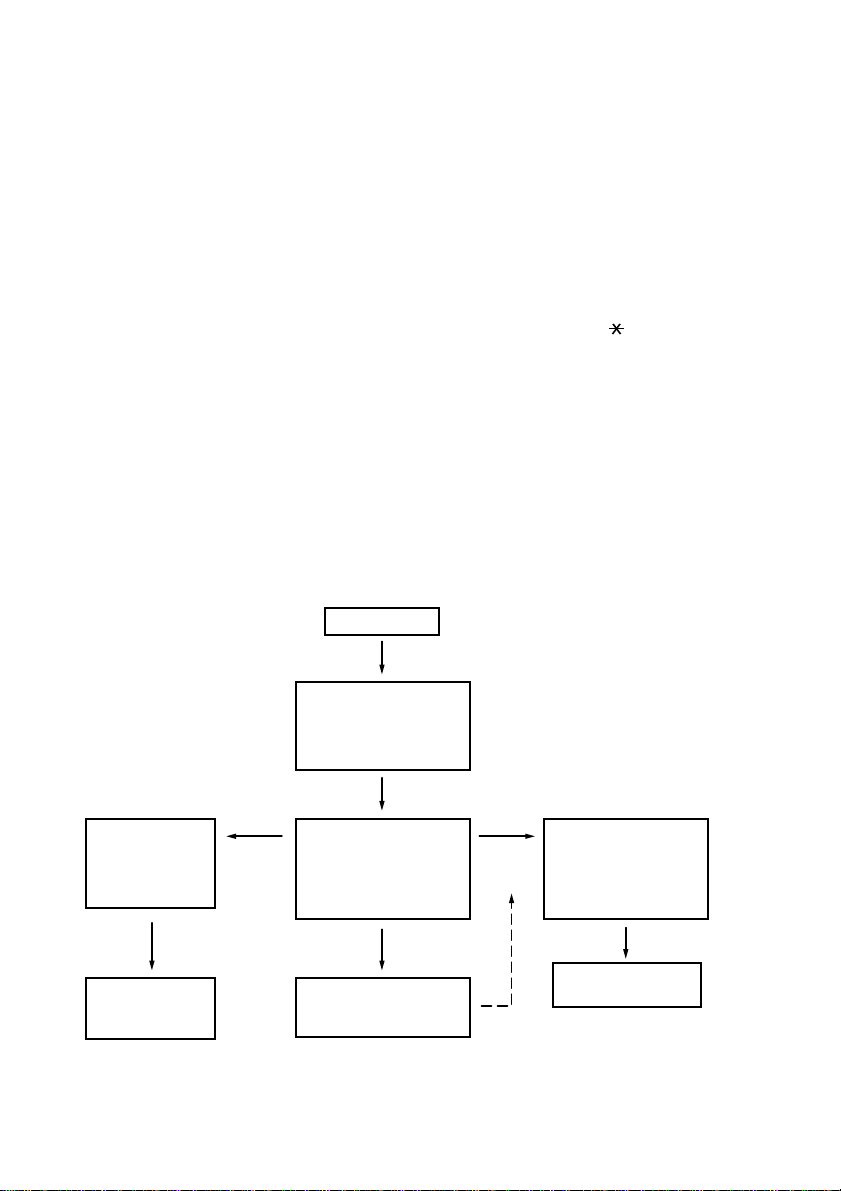
Sequence of External TAD Reception
When you leave your machine set in TAD mode, all calls will be answered by the
externally connected telephone answering device, and fax calls will be received
automatically provided they come from a machine which sends standard CalliNG tone
(CNG).
Incoming Call
The call is picked up
by the TAD.
(Recommended short
TAD ring delay such
as 1 or 2 rings.)
Fax reception is
automatically
activated by
fax tone.
The fax message
is received on
paper.
2 - 8
LOCATION AND CONNECTIONS
Auto dial
fax call
The external TAD
outgoing message
begins (recommended
length of 10 seconds
or less).
Voice call
The caller leaves a
voice message on the
external TAD.
The caller must press
Manual
fax call
The caller can also
send a fax message
after the voice message.
Start, or enter your
remote activation
code to activate the
machine and then
press Start.
The fax message is
received on paper.
Page 23
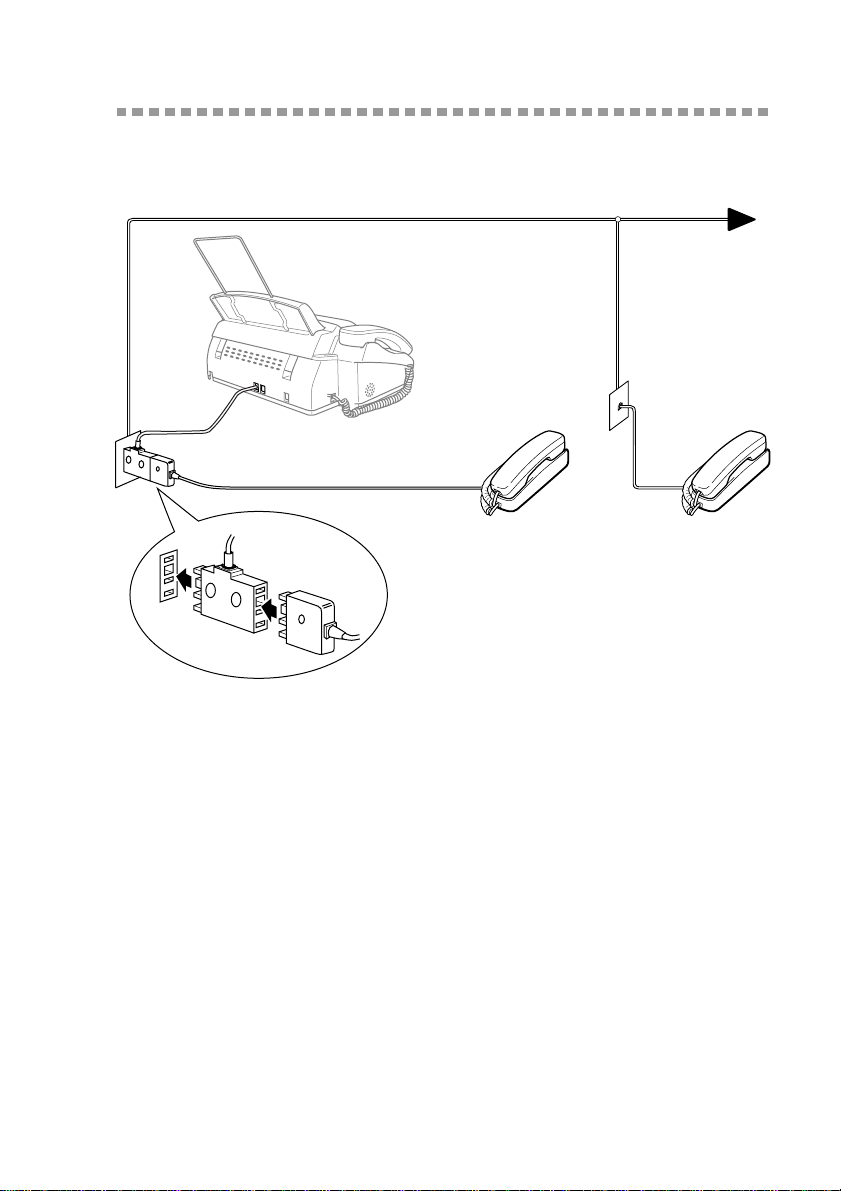
Connecting an External Telephone
Your machine is equipped with a handset that you can use as a regular phone.
However, you can also connect a separate telephone to your machine, as shown below.
External
Telephone
Whenever this external phone (or TAD) is in use, the screen displays EXT. TEL IN
USE, and, if the fax handset is lifted, an alarm sounds.
To disconnect the call on the external phone and switch to the fax, press Hook or
Speaker Phone.
Extension
Telephone
LOCATION AND CONNECTIONS
2 - 9
Page 24

3
3
On-Screen Programming
User-Friendly Programming
We have designed your FAX/MFC with on-screen programming and a Help key.
User-friendly programming helps you take full advantage of all the functions your
FAX/MFC has to offer. (See Using This Manual, page 1-1.)
Since your fax programming is done on the LCD, we created step-by-step on-screen
prompts to help you program your FAX/MFC. All you need to do is follow the
prompts as they guide you through the function menu selections and programming
options and settings.
Function Mode
You can access the function mode by pressing Menu/Set. When you enter the
function mode, your FAX/MFC displays a list of main menu options from which you
can choose. These options appear one after the other on the display. Select a menu
option by pressing Menu/Set when the option appears on the screen. The display will
scroll the options within that menu.
You can “scroll” more quickly through options by pressing . When the screen
displays your selection, press Menu/Set. (Press to scroll backward if you passed
your choice or to save key strokes. Both arrow keys show all options, in the opposite
order.)
Before you press Menu/Set after entering information in a field using the dial pad,
you can correct a mistake. Use to back up and then type over the incorrect
characters.
When you finish a function, the screen displays ACCEPTED.
If you want to exit the Function mode, press Stop.
Alternating Displays
When you see alternating displays, the LCD sometimes alternates between the
currently selected option, and a help message giving brief instructions about how to
proceed. The display you’ll probably see most often is shown below, showing you,
when you place an original in the ADF, that you can dial a number and send a fax, or
you can make a copy.
FAX: NO. & START
COPY: PRESS COPY
3 - 1
ON-SCREEN PROGRAMMING
Page 25
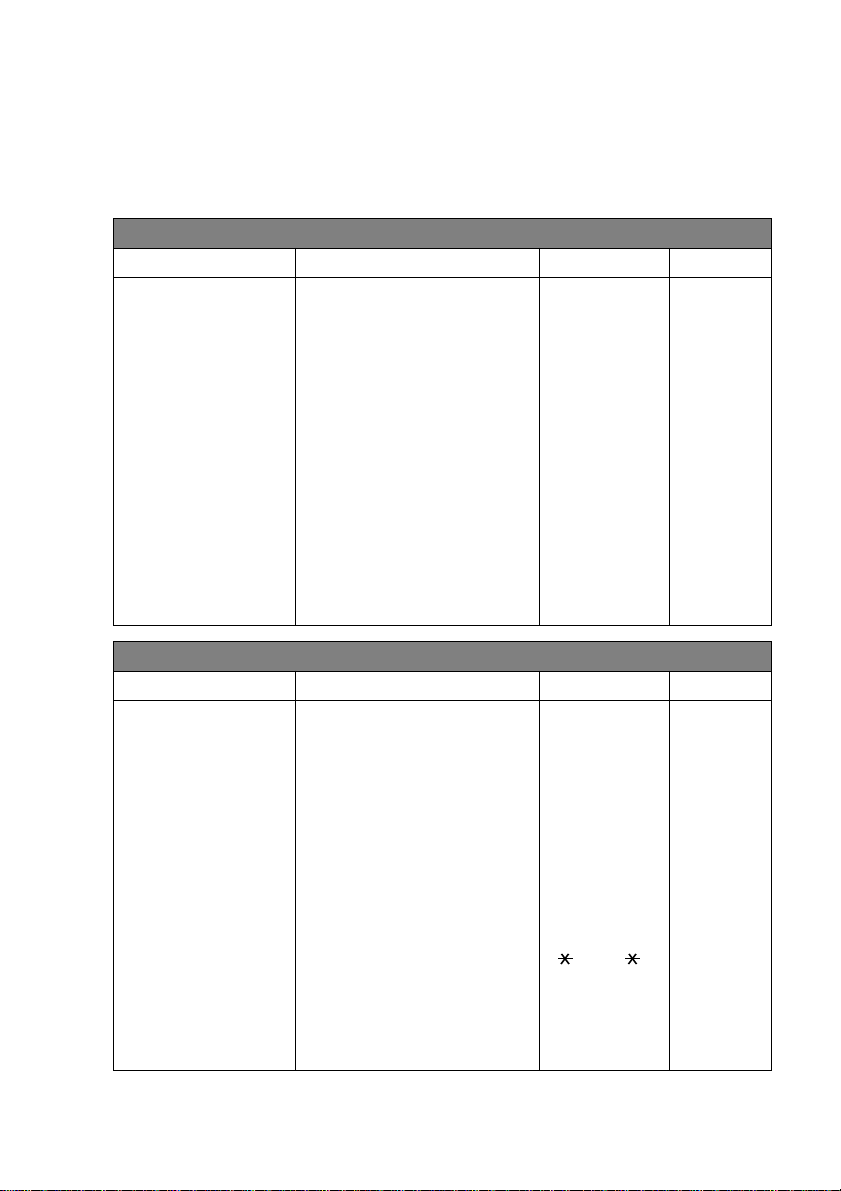
Menu Selection Table
If you have a basic understanding of how to program your FAX/MFC, you can
perform most of the programming settings without the Owner’s Manual. To help you
understand the function selections, options, and settings that are found in your fax
programs, use the Menu Selection Table below.
1. INITIAL SETUP
Function Description Factory Set More Info
1. TONE/PULSE
2. DATE/TIME
3. STATION ID
4. BEEPER
5. PBX
2. SETUP RECEIVE
Function Description Factory Set More Info
1. RING DELAY
2. F/T RING TIME
3. FAX DETECT
4. REMOTE CODE
5. REDUCTION
Selects the dialling mode. TONE 4-1
Enter date and time for LCD
— 4-1
display and to print on
transmissions.
Program the name, fax number
— 4-2
and telephone number to appear
on each transmitted page.
Adjust the volume level of the
LOW 4-4
beeps when you press a key, an
error occurs or a document is
sent or received.
Turn on if PABX (Private
OFF 4-4
Automatic Branch Exchange) is
connected to your machine.
Number of rings before the
machine answers in F/T, FAX,
or MC (Message Centre) mode.
RING DELAY:02
TOLL
SAVER:OFF
5-3, 9-6
(FAX-685MC and
MFC-960MC Only)
Sets the time for “F/T pseudo-
30 5-3
ring” in F/T mode.
Receive fax messages without
ON 5-4
pressing the Start key.
Enter code to activate or
deactivate machine from a
ON
( 51, # 51, 81)
5-7
remote location or to transfer
voice call from DECT cordless
phone to the machine.
Reduces size of image. AUTO 5-4
ON-SCREEN PROGRAMMING
3 - 2
Page 26
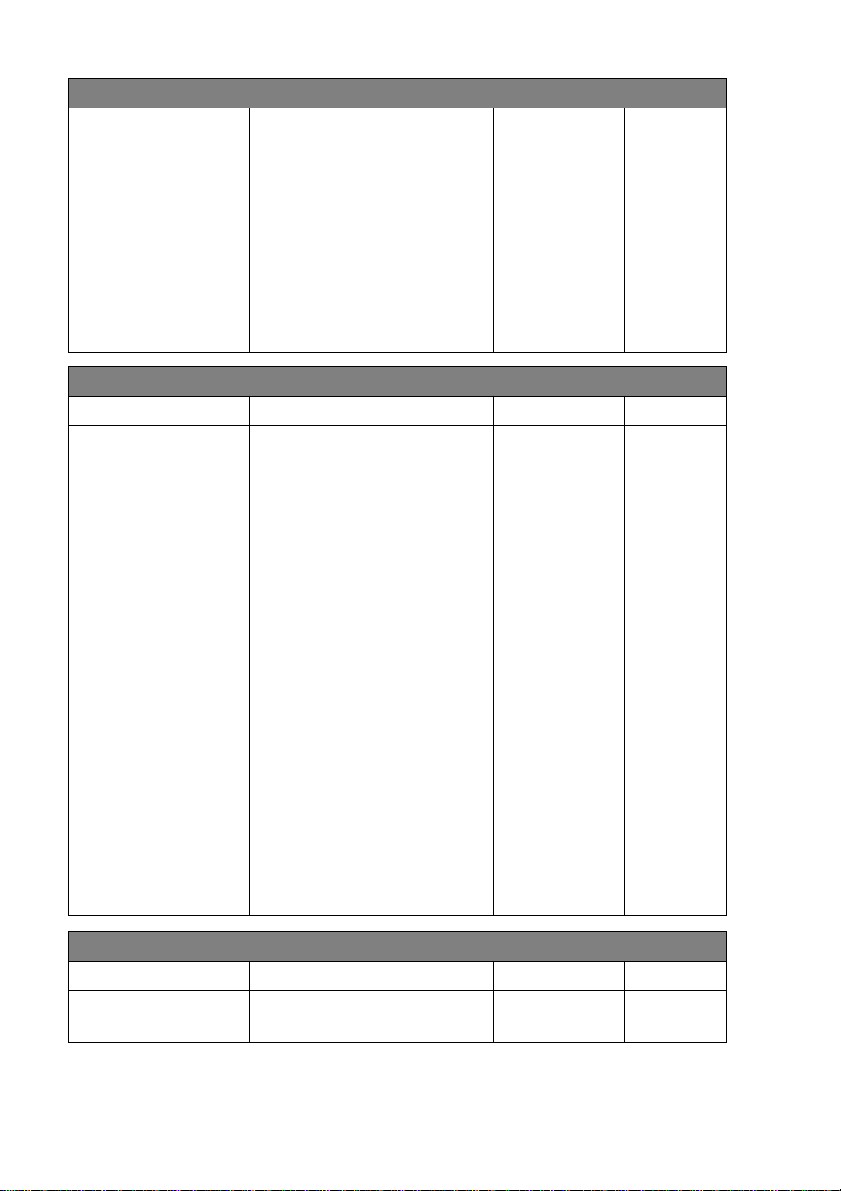
2. SETUP RECEIVE
6. MEM.RECEIVE
Automatically stores any
ON 5-5
incoming faxes in its memory
if it runs out of paper.
7. POLLING RX
You call another FAX/MFC to
— 5-12, 5-13
receive a fax from it.
8. PC INTERFACE
(Only for
MFC-960MC or with
Multi-Function Link
for FAX)
Fax Receive Only/PC
Priority/PC Receive Only.
PC PRIORITY See Multi-
Function
Link
Owner’s
manual
3. SETUP SEND
Function Description Factory Set More Info
1. COVERPG SETUP
Automatically sends a cover
OFF 6-4, 6-5
page you program or prints a
sample coverpage.
2. COVERPAGE
NOTE
3. CONTRAST
Program customized message
for fax cover page.
Change lightness or darkness of
— 6-6
AUTO 6-6
a fax you are sending.
4. RESOLUTION
Allows you to change
STANDARD 6-9
resolutions page by page.
5. OVERSEAS MODE
Adjusts for sometimes difficult
OFF 6-7
overseas transmissions
6. CALL RESERVE
You can send a fax, then speak
OFF 6-7, 6-8
or print a sample call back
message.
7. TIMER
8. POLLED TX
Send documents later. — 6-8
Set Polled Transmission for
— 6-10
someone to poll your fax
machine to receive a fax.
9. MEMORY TX
You can send faxes from memory
. OFF 6-2, 7-6
4. CANCEL JOB
Function Description Factory Set More Info
Cancel a delayed fax or polling
5-13
job.
3 - 3
ON-SCREEN PROGRAMMING
Page 27
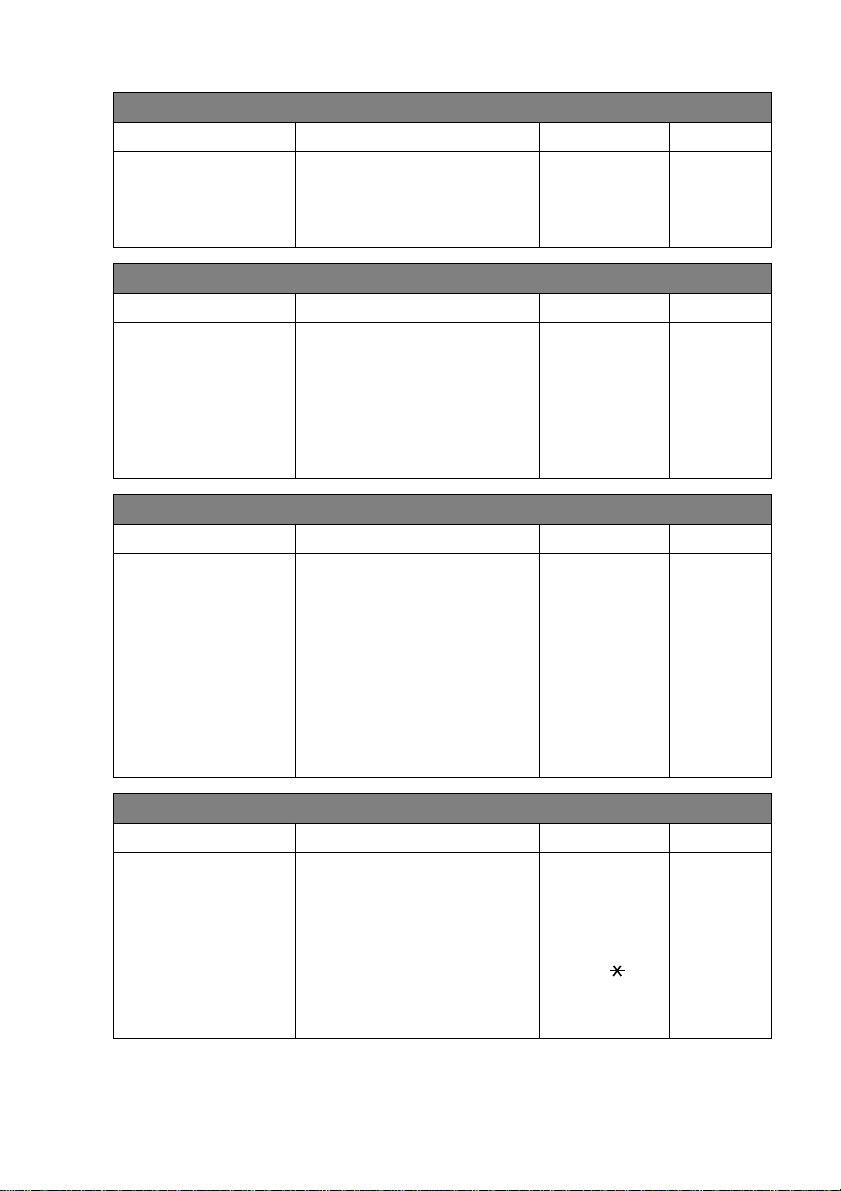
5. INTERRUPT
Function Description Factory Set More Info
Send a fax now, even if you
6-11
have the machine set to send a
fax later, or if you have it set for
Polling.
6. SET QUICK-DIAL
Function Description Factory Set More Info
1. ONE-TOUCH DIAL
Dial numbers stored in memory
— 7-1
by pressing only one key.
2. SPEED-DIAL
Dial numbers stored in memory
— 7-2
by pressing only four keys.
3. SETUP GROUPS
Set up a Group number for
— 7-3
broadcasting.
7. PRINT REPORTS
Function Description Factory Set More Info
1. TRANSMIT REPOR
2. JOURNAL
OFF 11-1, 11-2
JOURNAL:
11-1, 11-2
OFF
3. QUICK-DIAL
Print lists and reports of
— 11-1
activity. (Details in chapter 11)
4. TEL.INDEX
5. SYSTEM SETUP
6. MEMORY STATUS
— 11-1
— 11-1
— 11-1
8. REMOTE FAX OPT (FAX-645 Only)
Function Description Factory Set More Info
1. FAX FWD
Set your FAX/MFC to forward
OFF 8-1
faxes.
2. FAX STORAGE
Store incoming faxes in
OFF 8-1
memory for remote retrieval.
3. REMOTE ACCESS
4. PRINT DOCUMENT
Set code for retrieving faxes. 159 8-2
Print incoming faxes stored in
— 5-8
the memory.
ON-SCREEN PROGRAMMING
3 - 4
Page 28
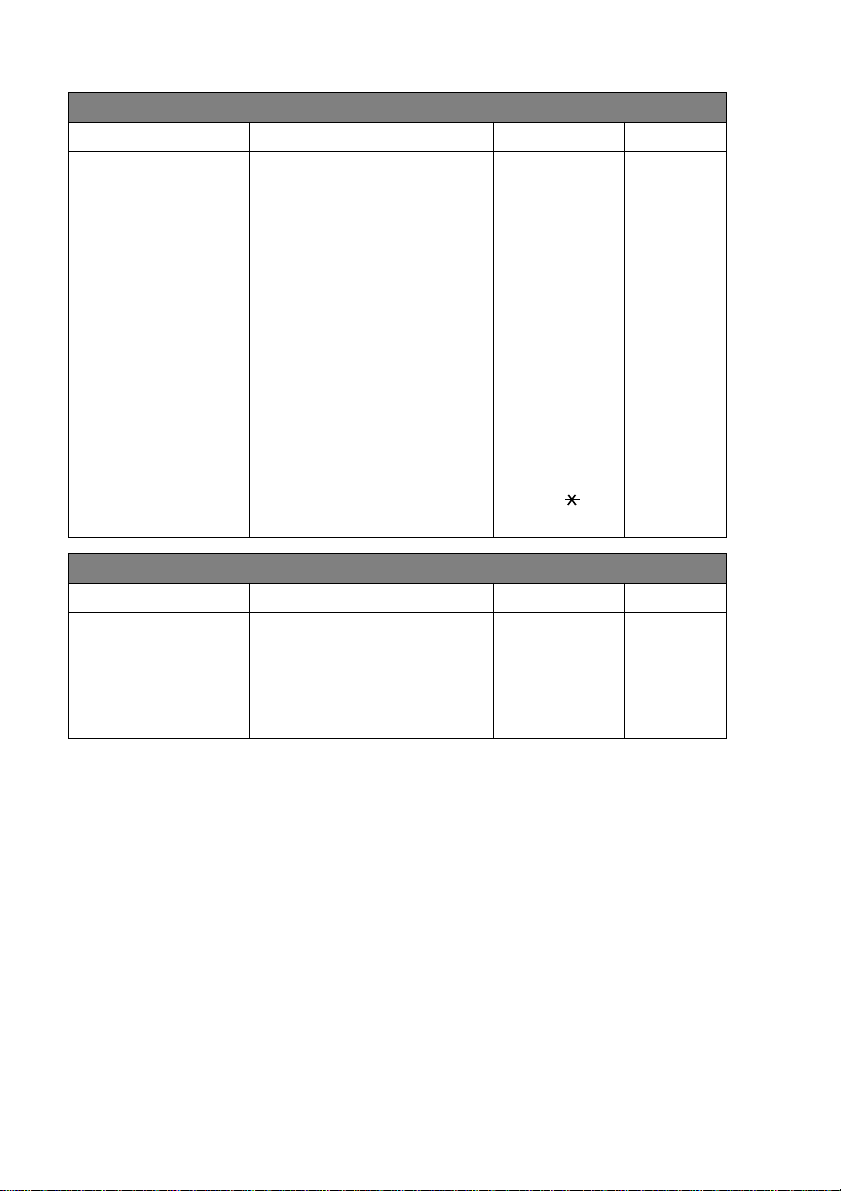
8. SETUP MSG CTR (FAX-685MC and MFC-960MC Only)
Function Description Factory Set More Info
1. MESSAGE STORE
2. BACKUP PRINT
Select if memory will store fax,
voice or both.
Automatically prints a copy of
DOC:OFF
VOICE:ON
ON 9-5
9-2
faxes received into memory.
3. OGM
4. ICM MAX. TIME
Select/Record outgoing
message.
Select maximum length of
MSG CTR
5-3, 9-8
OGM
30 seconds 9-6
incoming messages.
5. ICM REC. MONITR
Select ON or OFF for voice
ON 9-6
messages as they come in.
6. FAX FWD/PAGING
Set FAX/MFC to forward
OFF 9-7, 9-8
fax/message—OR—to call
your pager.
7. REMOTE ACCESS
Set code for retrieving
159 9-9
messages.
0. TEL SERVICE
Function Description Factory Set More Info
1. CALLER ID
View and dial back, or print a
— 5-9, 5-10
list of the last 30 Caller IDs
stored in memory.
2. DISTINCTIVE
Use with phone company
OFF 5-10
distinctive ringing service.
3 - 5
ON-SCREEN PROGRAMMING
Page 29
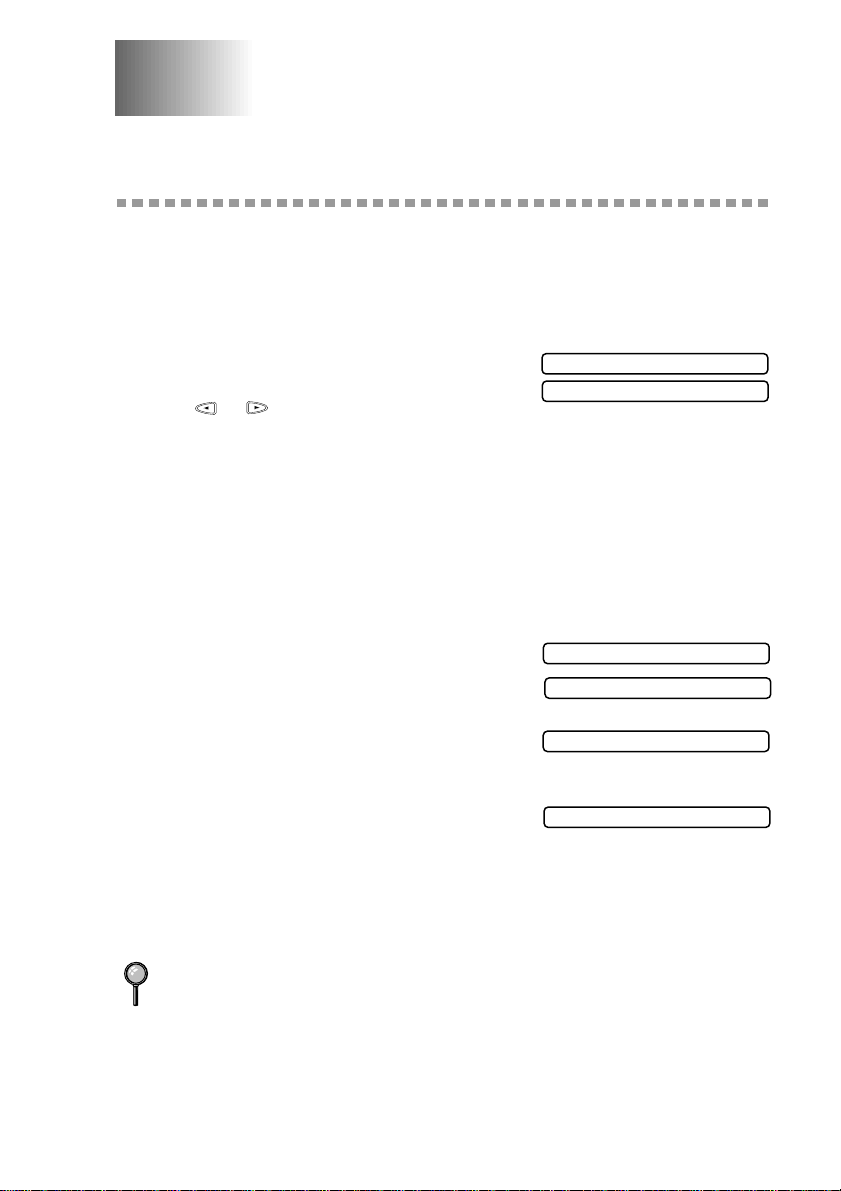
4
4
Initial Setup
Getting Started
Setting the Dialling Mode (Tone/Pulse)
Your machine is initially set to TONE. If you are using a PULSE dial line, you can
change the setting to PULSE by following the steps below.
1
Press Menu/Set, 1, 1 The screen prompts you to
select TONE or PULSE.
2
Use or to select the dialling mode.
3
Press Menu/Set when the screen displays the dialling mode you want.
4
Press Stop to exit.
Setting Date and Time
Your FAX/MFC displays the date and time, and prints it on every fax you send.
In the event of a power failure, the FAX/MFC maintains date and time information for
up to 48 hours. All other settings remain unaffected.
1
Press Menu/Set, 1, 2.
2
Enter the last two digits of the year and press
Menu/Set.
3
Enter two digits for the month and press
Menu/Set. (For example, enter 09 for September,
or 10 for October)
4
Enter two digits for the day and press Menu/Set.
(For example, 06)
5
Enter the time in 24-hour format and press Menu/Set. (For example, enter 15:25 for
3:25 PM)
6
Press Stop. The screen now displays the date and time you set, and displays it
whenever the FAX/MFC is in Standby mode.
Display shows DAY/MONTH/YEAR.
DIALLING:TONE
DIALLING:PULSE
ENTER YEAR:XX
ENTER MONTH:XX
ENTER DAY:XX
ENTER TIME:XX:XX
INITIAL SETUP
4 - 1
Page 30
Setting the Station ID
You can store your name, fax number, and telephone number to be printed on all fax
pages.
It is important that you enter the fax numbers in the internationally standardised
format, i.e. in accordance with the following strict sequence:
- The “+” (plus) character
- Your Country Code (e.g. “61” for Australia)
- Your local area code minus any leading “0” (e.g. “2” not “02” for Sydney)
- A space ( press twice)
- Your number on the local exchange, using spaces to aid readability as appropriate.
As an example, your machine is installed in Australia and your national telephone
number is 02 9887 4344, then you must set the fax number part of your station ID as:
+61 2 9887 4344
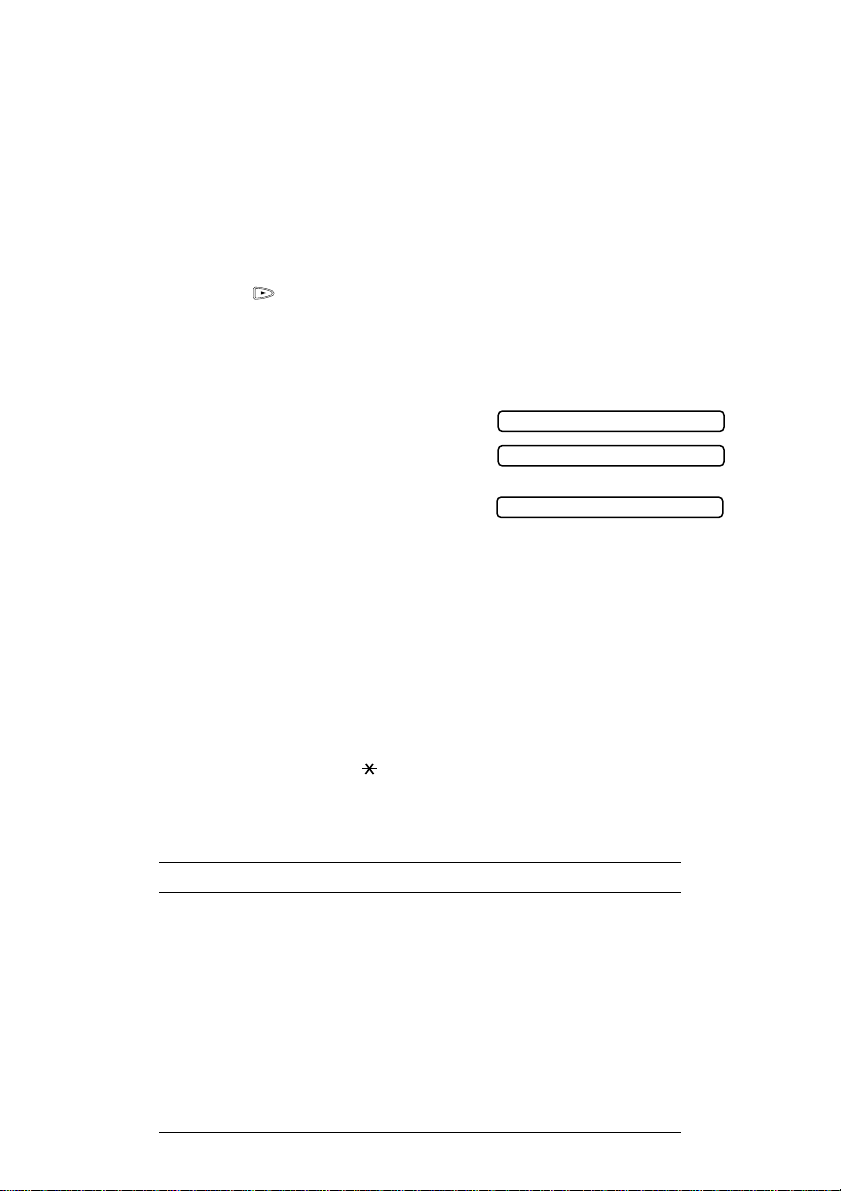
1
Press Menu/Set, 1, 3.
2
Enter your fax number (up to 20 digits) and press
Menu/Set.
3
Enter your telephone number (up to 20 digits) and
press Menu/Set. If your telephone number and fax
number are the same, enter the same number again.
The screen displays your entry.
4
Use the dial pad to enter your name (up to 20 characters) and press Menu/Set. (You
can use the chart on next page to help you enter letters.)
5
Press Stop. The screen returns to the date and time.
FAX:
TEL:
NAME:
Details for Entering Text
When you are setting certain functions, such as the Station ID, you may need to enter
text into the FAX/MFC. Most keys on the dial pad have three or four letters printed
above them. The keys for 0, # and don’t have printed letters because they are used
for special characters or operations.
By pressing the appropriate number on the dial pad the correct number of times, you
can access the character you want.
Press Key one time two times three times four times
2 ABC2
3 DEF3
4 GH I 4
5 JKL5
6 MNO6
7 PQRS
8 TUV8
9 WXYZ
4 - 2
INITIAL SETUP
Page 31
Inserting spaces
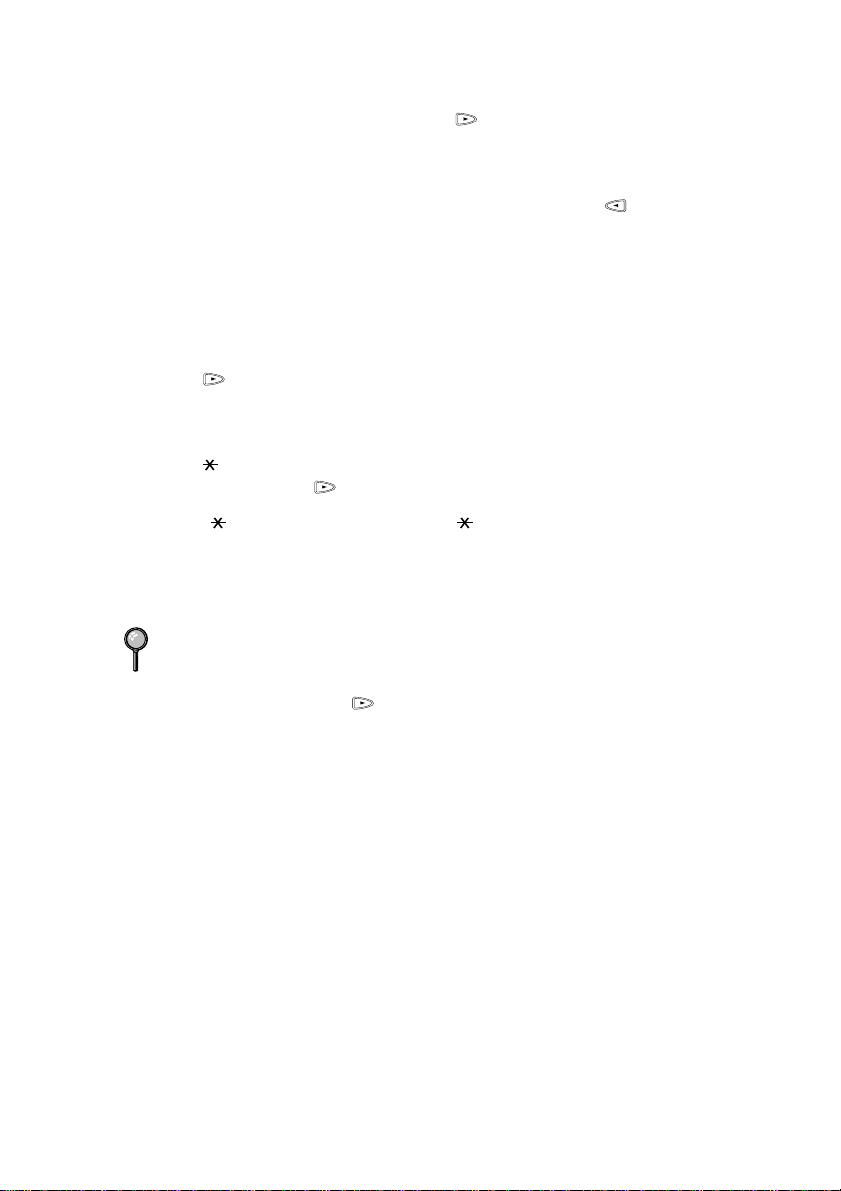
If you want to enter a blank space, press twice.
Making corrections
If you entered a letter incorrectly and want to change it, press to move the cursor
after the last correct letter. Then press Stop; the letters above and to the right of the
cursor are deleted. Re-enter the correct text and/or digits. You can also back up and
type over incorrect letters.
Repeating letters
If you need to enter a character assigned to the same key as the previous character,
press to move the cursor to the right.
Special characters and symbols
Press , #, or 0 repeatedly to move the cursor under the special character or symbol
you want, then press to select it.
Press for (space) ! ” # $ % & ’ ( ) + , - . /
Press # for : ; < = > ? @ [ ] ^ _
Press 0 for Ä Ë Ö Ü À Ç È É 0
■ The telephone number you enter is used only for Call Back Message and Cover
Page features.
■ If you do not enter a fax number, no additional information can be entered.
■ To enter a space, press once between numbers and twice between characters.
■ If your Station ID has already been programmed, the screen prompts “1” to make
a change, or “2” to exit without changing.
INITIAL SETUP
4 - 3
Page 32
Setting Beeper Volume
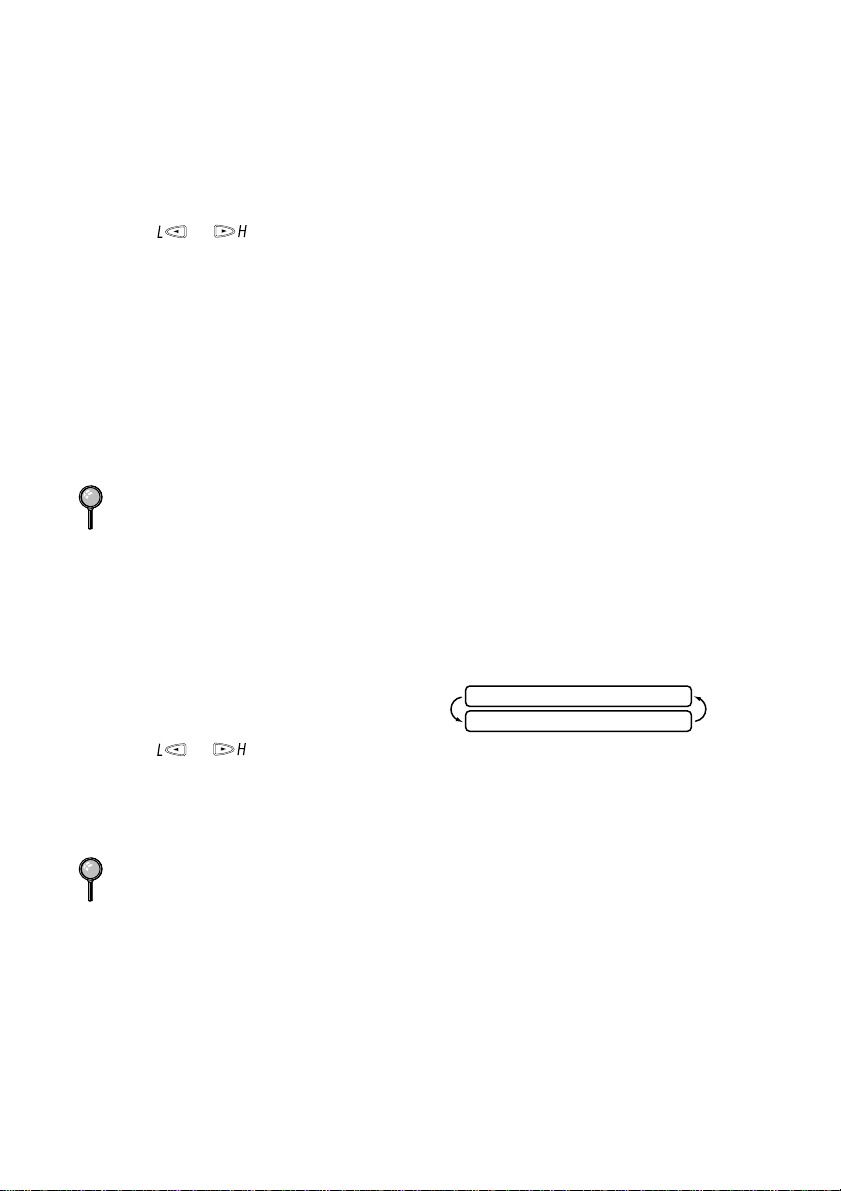
You can set the beeper to LOW, HIGH or OFF. The default setting is LOW. When
the beeper is set to LOW or HIGH, the FAX/MFC beeps every time you press a key
or make an error, and at the end of fax sending or receiving.
1
Press Menu/Set, 1, 4.
2
Press or to select your setting and press Menu/Set.
3
Press Stop to exit.
PABX and TRANSFER
Your machine is initially set to be connected with PSTN (Public Switched Telephone
Network) lines. However many offices use a central telephone system or Private
Automatic Branch Exchange (PABX). Your fax can be connected to most types of
PABX. You can gain access to the outside line from your fax connected to PABX by
just pressing Recall.
You can transfer a call to another extension by pressing Recall.
If your FAX/MFC is connected to a PABX, you may need to insert an additional
number prefix (e.g. “9”) and a “pause”, not press Recall, before each fax or
telephone number, in order to again access to the outside line.
Setting PABX
If your machine is connected to a PABX system, set PBX:ON. If not, set OFF.
1
Press Menu/Set, 1, 5. The screen displays
2
Press or to select ON (or OFF).
3
Press Menu/Set when the screen displays your selection.
4
Press Stop to exit.
PBX:OFF
SELECT <- -> & SET
You can program an Recall keypress as part of a number stored in a One Touch or
Speed Dial location. When programming the One Touch or Speed Dial number
(Function menu 7-1 or 7-2) press Recall first (the screen displays “!”), then enter the
telephone number. If you do this, you do not need to press Recall each time before
you dial using a One Touch or Speed Dial location. (See chapter 7.) However, if PBX
is set to OFF, you can’t use the One Touch or Speed Dial number that an Recall
keypress is programmed into.
4 - 4
INITIAL SETUP
Page 33

Setting the Speaker Volume
You can adjust the speaker volume when your FAX/MFC is on hook (after you
pressed Hook or Speaker Phone), by selecting a speaker volume level.
Press or to adjust the volume level. The display shows the setting you are
choosing. Each key press changes the volume to the next setting. The new setting will
remain until you change it again.
If you have FAX-685MC and MFC-960MC, you can adjust the speaker volume while
you are listening to your OGM (Outgoing Message) and ICMs (incoming messages).
If you turn Incoming Recording Monitor to OFF (Menu/Set, 8, 5) on the
FAX-685MC and MFC-960MC, the Speaker for screening calls will be disabled and
you won’t hear callers leaving messages. The volume for other operations can still be
controlled using and .
Setting the Ring Volume
You can adjust the ring volume when your FAX/MFC is idle. You can select a ring
volume level or press until the ring is off.
Press or to adjust the volume level. With each key press, the FAX/MFC
rings so you can hear the current setting and the display shows the setting you are
choosing. Each key press changes the volume to the next setting. The new setting will
remain until you change it again.
Memory Storage
In the event of a power failure, all settings in the INITIAL SETUP, SETUP
RECEIVE, SET QUICK DIAL, REMOTE FAX OPT and SETUP MSG CTR plus the
COVERPG SETUP and COVERPAGE MSG (from SETUP SEND) functions are
stored permanently. You may have to reset the date and time.
INITIAL SETUP
4 - 5
Page 34

5
5
Setup Receive
Basic Receiving Operations
This fax machine was designed to accomodate different applications. There are four
receiving modes the FAX/MFC can operate in. Please choose one the most
appropriate for you.
Select Answer Mode
MANUAL—You must answer all calls yourself. If you hear fax tones, press Start to
begin receiving the fax, then hang up. You can use this mode with Distinctive Ringing.
(See Distinctive Ringing (Telstra™ Fax Stream Duet®), page 5-10.) Use this mode
for Fax Stream Duet
FAX ONLY—The FAX/MFC automatically answers every call as a fax call. You
cannot receive a voice call, but you can dial out and make a voice call.
FAX/TEL—The FAX/MFC automatically answers every call. If the call is a fax, it
prints the fax. If the call is not a fax, it signals you with a F/T pseudo-ring, different
from the phone company ringing, to alert you to pick up the call. If you select this
setting, you’ll need to set the Ring Delay and F/T Ring Time features (on the following
pages). (See For F/T (FAX/TEL) Mode Only, page 5-6.) This mode is not
recommended if extensions are in use.
TAD (For FAX-645 only)—This is the only setting in which you can use an external
answering machine. Your telephone answering device is connected to your FAX, and
answers every call. Once the TAD answers, the FAX listens for fax tones. If it detects
fax tones, it prints the fax.
The TAD setting works only with an external telephone answering device (TAD); it
does not work with telephone company voice mail. Ring Delay and F/T Ring Time
do not work in this setting.
MSG CTR (For FAX-685MC and MFC-960MC only)—The FAX/MFC provides
you with a built-in digital Message Centre for fax and voice. When you set the
machine to answer calls, it will record up to 15 minutes of messages. You will need to
record a MSG CTR OGM before this feature is available to you. For more information
about Message Centre (MSG CTR) operation, please see Chapter 9.
®
.
If you have not recorded the Outgoing Message for Message Centre mode, your FAX/
MFC does not receive the voice call. (See chapter 9).
5 - 1
SETUP RECEIVE
Page 35
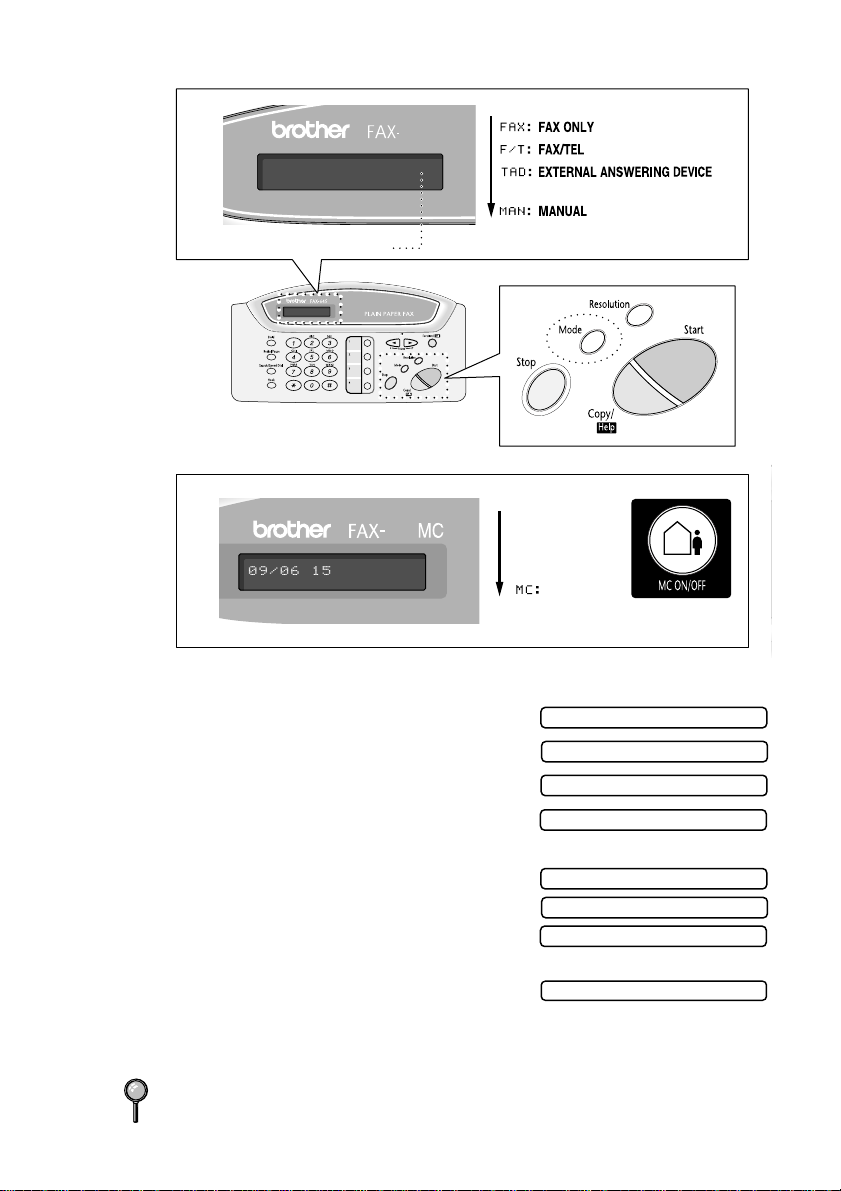
09/06 15:25 FAX
Current Answer Mode
645
(For FAX-645 only)
685
09/06 15:25 FAX
SIXINONE
MSG CTR
(For FAX-685MC and
MFC-960MC only)
To select or change your Answer Mode
1
Press Mode. The screen displays your current
selection.
The options on the FAX-645 are:
FAX ONLY
FAX/TEL
TAD:ANSWER MACH.
MANUAL
The options on the FAX-685MC and
MFC-960MC are:
FAX ONLY
FAX/TEL
MANUAL
Or, if Message Centre Mode is ON, it overrides
your Answer Mode Setting, so the display shows
2
Continue to press Mode until your new selection appears. After 2 seconds, the screen
returns to the date and time display, along with your new Answer Mode setting.
If you’re changing Answer Mode while in another operation, the screen returns to the
current operation display.
MC:MSG CTR
SETUP RECEIVE
5 - 2
Page 36

Setting Ring Delay
The Ring Delay setting determines the number of times the FAX/MFC rings before it
answers. (See Fax Detect (set ON by default), page 5-4 and Operation from an
External or Extension Telephone, page 5-6 and For F/T (FAX/TEL) Mode Only, page
5-6.)
1
Press Menu/Set, 2, 1. If you have a FAX-645, go to Step 3.
2
Press or to select Ring Delay and press Menu/Set.
3
Press or to select how many times the line rings before the FAX/MFC
answers (02 - 10) and press Menu/Set.
4
Press Stop to exit.
Setting F/T Ring Time (Only for F/T receiving mode)
You need to determine how long the FAX/MFC will notify you with its special F/T
pseudo-ring when you have a voice call. It will ring after the initial ringing from the
phone company. Only the FAX/MFC rings for 20, 30, 40 or 70 seconds (depends on
settings) ; no other phones on the same line ring the special F/T pseudo-ring. However,
you can answer the call on any phone (in a separate wall jack) on the same line as the
FAX/MFC.
1
Press Menu/Set, 2, 2.
2
Press or to select how long the FAX/MFC
will ring to alert you that you have a voice call and
press Menu/Set.
3
Press Stop to exit.
Now, when a call comes in and the machine is set to FAX/TEL Mode, all phones on
this line will ring the number of times you selected in Ring Delay.
You can let the FAX/MFC pick up and detect if it’s a fax or voice call. If it’s a fax call,
the machine prints the fax automatically. You do not have to pick up the handset to
receive a fax. If it’s a voice call, the machine signals you with a F/T pseudo-ring for
the length of time you selected in F/T Ring Time.
Even if the caller hangs up during the F/T pseudo-ring, the FAX/MFC continues for
the set time.
RING TIME:30 SEC
Record FAX/TEL Outgoing Announcement (FAX/TEL OGM) (For FAX-685MC and MFC-960MC only)
This is the announcement played by your FAX/MFC (not an external TAD) when
someone calls and your machine is set to F/T mode. Although callers hear your
announcement, they cannot leave a message. To erase the announcement, follow the
directions on 9-3.
5 - 3
SETUP RECEIVE
Page 37

1
Press Menu/Set, 8, 3. The screen prompts you to choose FAX/TEL OGM, MSG
CTR OGM or PAGING OGM.
2
Press or to select FAX/TEL OGM and press Menu/Set.
3
Press or to select RECORD OGM? and press Menu/Set.
Then pick up the handset to record a message.
4
Replace the handset. Your OGM is played.
5
Press Stop to exit.
It is not necessary to have an outgoing message. The F/T mode will work fine without
one. It is only to help the caller understand the status of your machine.
For example, you can leave a message that says:
“Hello, you have reached an automatic answer phone. Please hold the line, we will be
with you shortly. If you wish to send a fax, press 5 1 (your three-digit activation
code) and press the Start key now.”
Fax Detect (set ON by default)
When you use this feature, you don’t have to press Start when you answer a fax call
and hear calling beeps. Just hold the handset and wait a few seconds. When you see
RECEIVE on the fax screen or when you hear “chirps” through the handset of an
extension phone connected to another wall jack, just hang up the handset, and your
machine does the rest. Selecting ON allows the FAX/MFC to receive fax calls
automatically, even if you lift the handset of an extension or external phone. Selecting
SEMI lets the machine receive the call only if you’ve answered it at the FAX/MFC.
Selecting OFF means you’ll have to activate the FAX/MFC yourself, by pressing
Start or by pressing 5 1 if you are not at your machine. (See Operation from
External or Extension Telephone, and For F/T (FAX/TEL) Mode Only, page 5-6.)
In case Fax Detect does not work, because of a poor phone line connection, just press
Start or press the Activation Code 5 1.
This feature works best with Manual, F/T or MC mode.
If you’ve set the feature to ON, but your FAX/MFC doesn’t automatically connect a
fax call when you lift an external or extension phone handset, press the Fax Receive
code 5 1. At the FAX/MFC, lift the handset and press Start.
1
Press Menu/Set, 2, 3.
2
Press or to select ON, SEMI or OFF and press Menu/Set.
3
Press Stop to exit.
Printing a Reduced Incoming Document
You can always reduce the size of an incoming fax to a fixed percentage with your
machine. If you choose AUTO, the machine chooses the level of reduction for you
regardless of the original size of the incoming document.
SETUP RECEIVE
5 - 4
Page 38

1
Press Menu/Set, 2, 5. The screen displays:
2
Use or to select the reduction ratio you want–AUTO, 100%, 93%, 87%, or
75%. Choose 100% if you don't want a reduction.
3
Press Menu/Set when the screen displays your selection.
4
Press Stop to exit.
If you receive faxes that are split on two pages, change the reduction to AUTO
—OR—choose a lower reduction percentage.
■ When you use Auto Reduction to reduce incoming documents to fit on one page of
recording paper, you can do so only as long as the original document is not longer
than 35 cm. If the original is lomger than 35 cm, the data will not be reduced and
will carry over to print on a second page.
■ When you are Auto Reduction and you receive an incoming document that is
smaller than your recording paper, no reduction will take place, and you will get
the same size recorded as the original.
5.REDUCTION
Reception into Memory if:
As soon as the paper cassette becomes empty during fax reception, the screen will
display “CHECK PAPER”; please put some paper in the paper cassette (see chap. 1).
1111
If the MEMORY RECEPTION switch is ON at this time...
The current fax reception will continue, with the remaining page(s) being stored in
memory, subject to available memory. Subsequent incoming faxes will also be stored
into memory until the memory is full, following which no further incoming fax calls
will be automatically answered;all data will be printed as soon as fresh paper is put in
the paper cassette.
2222
If the MEMORY RECEPTION switch is OFF at this time...
The current fax reception will continue, with the remaining page(s) being stored in
memory, subject to available memory. Subsequent incoming fax calls will not be
automatically answererd until fresh paper is put in the paper cassette. The last fax
received will be printed as soon as fresh paper is put in the cassette.
1
Press Menu/Set, 2, 6. The screen displays:
2
Use or to select ON or OFF.
3
Press Menu/Set when the screen displays your selection.
4
Press Stop to exit.
5 - 5
SETUP RECEIVE
6.MEM.RECEIVE
Page 39

Advanced Receiving Operations
Operation from an External or Extension Telephone
If you answer a fax call on an external or an extension phone, you can make your fax
machine take over the call by using the Activation Code. When you press the
Activation Code 5 1, the machine starts to receive a fax. (only in F/T mode)
If the machine answers a voice call and F/T pseudo-rings for you to take over, use the
Deactivation Code # 5 1 to take the call at an extension phone. The Deactivation Code
is used only in F/T mode. (See Setting F/T Ring Time (Only for F/T receiving mode),
page 5-3.)
If you answer a call, and no one is on the line, assume you’re receiving a fax. At the
machine phone, press Start, then hang up. At an extension phone, press 5 1, wait
for fax receiving tones (chirps), then hang up. At an external phone, press
5 1 and wait for the phone to be disconnected (the screen displays RECEIVE)
before you hang up. (Your caller will have to press Start to send the fax.)
If you accidentally pick up an extension phone when a fax message is being received,
you may disrupt the transmission or render some portions unreadable.
Extension telephones are not permitted in some countries, in such a case the
deactivation code will not work. It works in Australia.
The Remote Activation Code also can be used by your callers. When you are using
an external TAD, your outgoing message (OGM) should end with the statement “to
send a fax, press 5 1”. (See Outgoing Message (OGM) of External TAD, page 2-8.)
For F/T (FAX/TEL) Mode Only
When the FAX/MFC is in F/T mode, it will use the F/T Ring Time (F/T pseudo-ring)
to alert you to a voice call. If you’re at the FAX/MFC, you can lift the handset to
answer the call.
If you’re at an extension phone, you’ll need to lift the handset during the F/T Ring
Time and press # 5 1 between the F/T pseudo-ring. If no one is on the line, or if
someone wants to send you a fax, send the call back to the FAX/MFC by pressing
5 1.
Remote Call Transfer
This function works when you receive the incoming Voice call at the remote DECT
cordless phone externally connected to the FAX/MFC. You can transfer voice call to
the FAX/MFC. But you can not transfer the incoming voice call from the FAX/MFC
to the DECT cordless phone.
SETUP RECEIVE
5 - 6
Page 40
To transfer telephone call to the FAX/MFC
When you pick up the voice call at remote DECT cordless phone and would like to
transfer it to the FAX/MFC,
1
Press Activation Voice Code 8 1 at remote cordless phone.
2
The FAX/MFC rings (pseudo-ring same as current F/T ring) and the display shows
“PICK UP PHONE”.
3
Pick up the handset and press Hook or Speaker Phone—OR—just press
Speaker Phone at the FAX/MFC in order to transfer the voice call to the FAX/
MFC.
Don’t hang up the call from the cordless phone until the voice call has been
transferred to the FAX/MFC. You will know when this is because you will no longer
be able to hear or talk to the caller via the cordless phone. If you do not wait until this
point before hanging up from the cordless phone, the call will be lost.
If nobody answers at the FAX/MFC, pseudo-ringing stops after 30 seconds. In that
case, it may still be possible to speak with the caller from the cordless phone. Speech
between the FAX/MFC and the cordless phone (= intercom) is not possible.
Changing Remote Codes
Remote Codes might not work with some telephone systems. The preset Activation
Code is 5 1. The preset Deactivation Code is # 5 1. The present Activation Voice
Code is 8 1.
If you are always disconnected when accessing your external TAD remotely, try
changing the Activation Code from 5 1 to # # # and the Deactivation Code from
# 5 1 to 1 1 1. You cannnot use the same number for the Activation Code, the
Deactiation Code and Activation Voice Code.
1
Press Menu/Set, 2, 4.
2
Press or to select ON (or OFF) and press
Menu/Set.
3
If you want to, enter a new Remote Activation
Code, then press Menu/Set.
4
If you want to, enter a new Remote Deactivation
Code, then press Menu/Set.
5
If you want to, enter a new Activation Voice Code,
then press Menu/Set.
6
Press Stop to exit.
5 - 7
SETUP RECEIVE
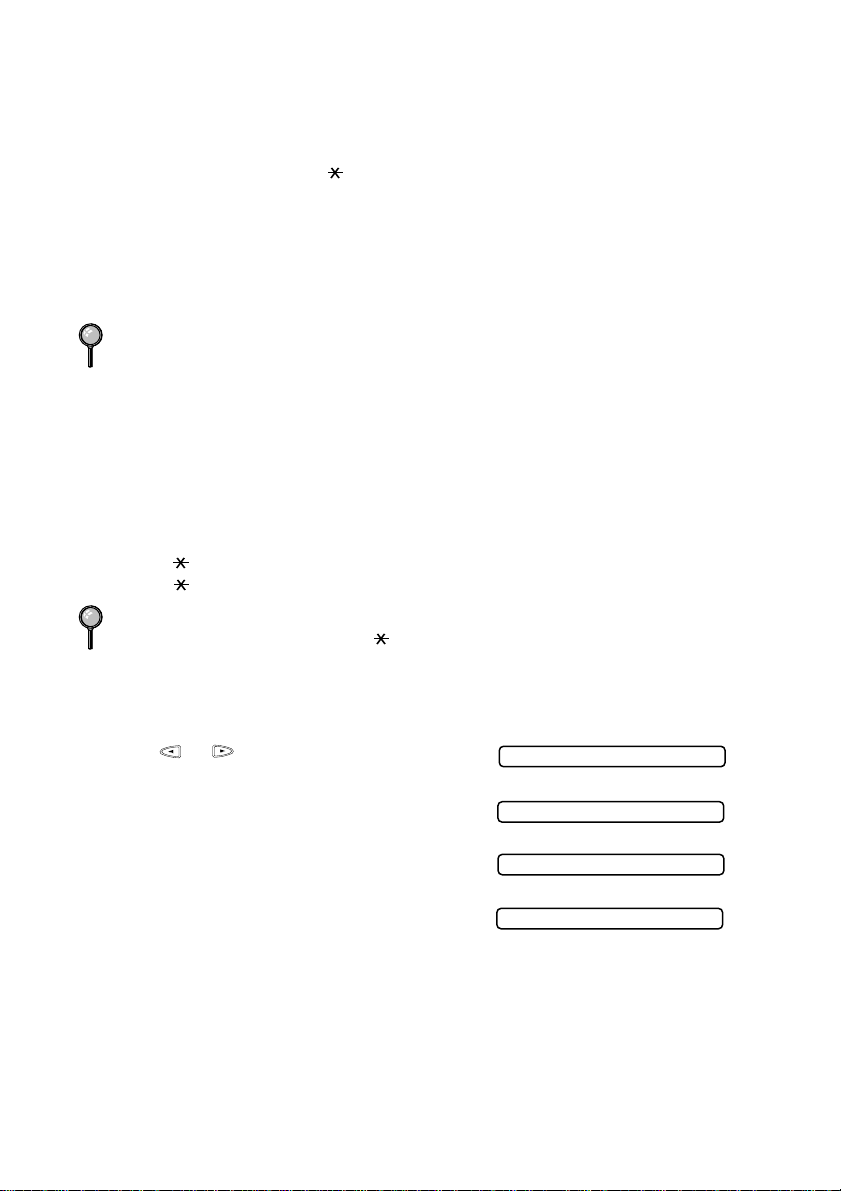
REMOTE ACT.:ON
ACT.CODE:*51
DEACT.CODE:#51
ACT.VOICE:_81
–
–
*
Page 41

Printing a FAX in Memory (For FAX-645 only)
If you have Fax Storage ON for remote retrieval, you can still print a fax in the
memory when you are at your machine:
1
Press Menu/Set, 8 , 4.
2
Press Start.
3
Press Stop. (See Setting Fax Storage, page 8-1.)
Telephone Services
Your FAX/MFC supports the Distinctive Ring and Caller ID telephone services
offered by some telephone companies.
Caller ID (Caller IDentification)
Caller ID is a telephone service that allows the subscriber to see a display of the
caller’s phone number or name as the telephone rings. It is a fast way to screen your
calls. You can respond quickly to calls you missed, because Caller IDs are received
and stored in your machine’s memory. In addition to the standard Caller ID features,
you can select a Caller ID and have your machine dial the number for you.
■ To get the Caller ID Service: apply for the Caller ID service at your local telephone
company, if available.
■ To PABX Users :
Calling line identification signals are not generally delivered to your Brother FAX/
MFC if it is connected behind a private branch exchange (PBX) system or other
call routing device.
Advantages of Caller ID
For Business
All businesses profit from a quicker response to customer calls. Businesses that
provide mail order services, money-lending services or provide confidential
information, can protect themselves from false orders or acceptance of false
identification.
At Home
Residential customers can protect themselves from unwanted calls.
SETUP RECEIVE
5 - 8
Page 42

How Does the Caller ID Work?
The Caller ID Appears on the Display When Your Telephone Rings
As your telephone rings, the display shows you the caller’s phone number or name.
Once you pick up the handset, the caller’s ID disappears. You will see up to the first
16 characters of the number on the display.
Helpful Hints
• If “OUT OF AREA” appears on the display, it means that the call came from outside
your caller ID service area. *
• If “PRIVATE CALL” appears on the display, it means the caller intentionally
blocked the transmission of his/her ID. *
• If no caller ID was transmitted to your FAX/MFC, “PICK UP PHONE” will remain
on the display.
* Depends on network Function.
The Caller ID is Stored in Your Machine’s Memory
The machine can store a maximum of the last 30 incoming caller IDs in the memory,
along with the time and date of reception. The 31st call will cause the oldest ID to be
erased.
The Caller ID information stored in the memory can be used for the following.
• Selecting a Caller ID from the Memory for Call Reply.
You can scroll through the Caller IDs on the display and select one for your machine
to dial.
• Printing the Caller ID List.
You can review calls you received by checking the Caller IDs in memory. This report
will list the Date, Time, Phone Number (Caller ID), and type of call (Comment).
Selecting a Caller ID from the Memory for Call Reply
You can display the caller IDs that are stored in the memory and select the caller you
want your machine to dial. Call Reply is a convenient feature whereby your Brother
fax can dial back a voice/fax call “on-hook” to the opposite party associated with a
Caller ID number which has been captured into memory. This saves you from having
to copy and dial back to that number manually.
1
Press Menu/Set, 0, 1. The screen displays:
2
Press or select DISPLAY#.
5 - 9
SETUP RECEIVE
DISPLAY#
SELECT <- -> & SET
Page 43

3
Press Menu/Set. The caller ID of the last call will appear on the display.
If no ID is stored, the beeper will sound and “NO CALLER ID” will appear on the
display.
4
Press or to scroll through the Caller
IDs in the memory.
5
Press Menu/Set To automatically dial the
Caller ID number, wait until the screen
prompts you to press the Start key.
6
Press Start.
If you wish to send a fax, insert a document
into the feeder.
Then press Start.
To cancel the Call Reply (for example, when you selected the Wrong Caller ID),
simply press Stop and begin again ; the Caller ID will not be lost.
25)98874344
25)09/11 15:25
DIAL:PRESS START
DIALING
TELEPHONE
Clearing the Caller ID Stored in Memory (Only for FAX-685MC and MFC-960MC)
For the effective use of the memory, it is recommended that you should clear the
Caller ID stored into memory by pressing Erase when the display shows the number.
Printing Caller ID List
1
Press Menu/Set, 0, 1.
2
Press or to select PRINT REPORT.
3
Press Menu/Set.
4
Press Start.
Distinctive Ringing (Telstra™ Fax Stream Duet®)
Your machine has a Distinctive Ringing function, allowing you to dedicate one phone
number just for receiving faxes.
This machine feature lets you use the Distinctive Ringing subscriber service offered
by Telstra’s FaxStream
telephone numbers on the phone line. Each phone number has its own Distinctive
Ringing pattern, so you know which phone number is ringing. This is one way you can
have a separate phone number for your machine.
You can switch it off temporarily, then turn it back on. When you get a new fax
number, make sure you reset this function.
®
Duet, which allows you to have at least two separate
SETUP RECEIVE
5 - 10
Page 44
■ To have your TAD answer only the main number, the machine must be in Manual
Mode.
■ In FAX/TEL mode or FAX ONLY, the machine will answer all numbers on the
phone line.
Set the Distinctive Ringing to ON
1
Disconnect the machine from any TAD or telephone company voice mail.
2
Set the machine to MANUAL mode.
3
Press Menu/Set, 0, 2. The screen displays the current setting of this feature.
4
Press or select ON (or OFF).
5
Press Menu/Set.
6
Press Stop to exit.
Polling
Polling is the process of retrieving faxes from another FAX/MFC. You can use your
FAX/MFC to “poll” other machines, or you can have someone poll your machine. All
parties involved in polling need to set up their FAX/MFCs to accommodate polling.
When someone polls your machine to receive a fax, they pay for the call; if you poll
someone’s FAX/MFC to receive a fax, you pay for the call.
(See Cancelling a Scheduled Job, page 5-13.)
Secure Polling
Secure Polling is a way to keep your documents and others’ from falling into the
wrong hands while the FAX/MFCs are set up for polling. You can use Secure Polling
only with another Brother FAX/MFC. Your four-digit ID number must be entered on
the FAX/MFC that polls for your documents.
Some FAX/MFCs do not respond to the polling function.
5 - 11
SETUP RECEIVE
Page 45
Set for Polling Receive
Polling Receive is when you call another FAX/MFC to receive a fax from it.
1
Press Menu/Set, 2, 7.
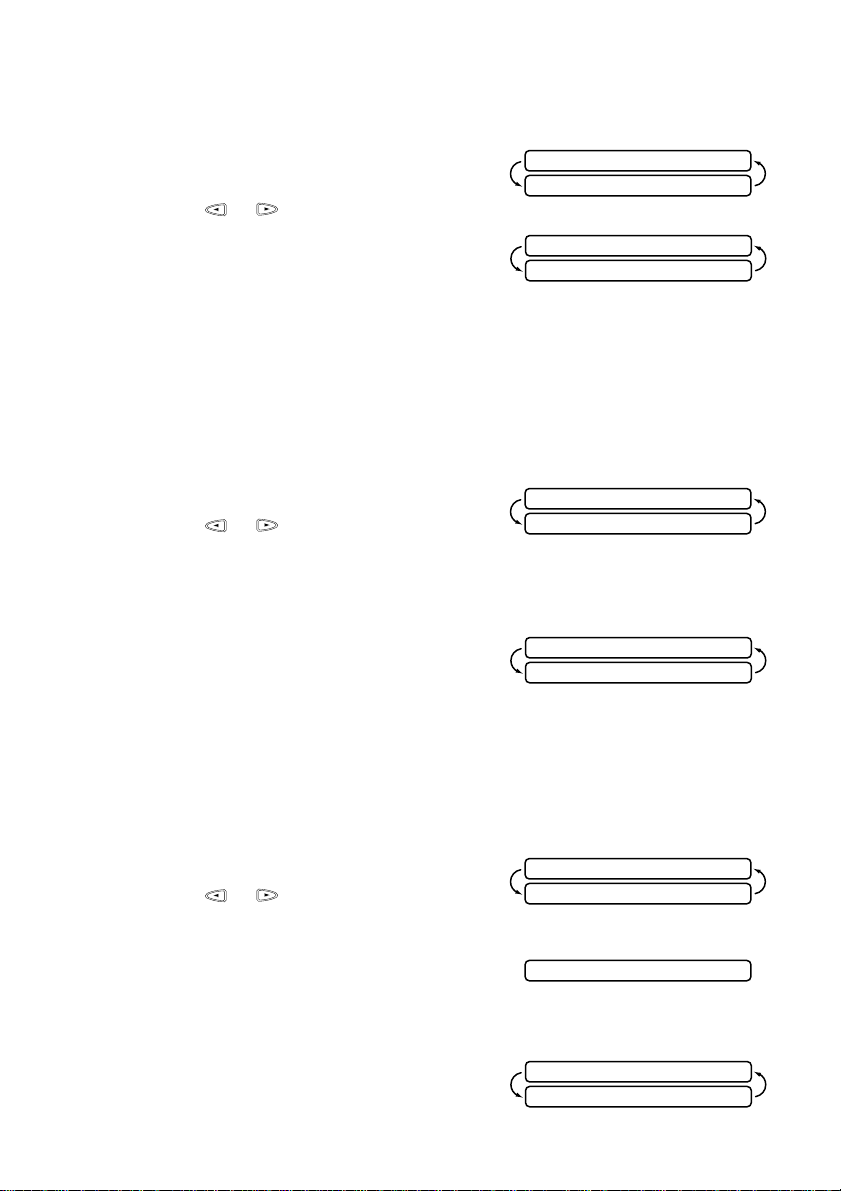
The screen displays
2
Press or to choose STANDARD.
3
Press Menu/Set.
The screen prompts you to enter the fax
number you want to poll, and then to press
Start.
4
Enter the fax number you are polling.
5
Press Start. The screen displays DIALING.
POLLING:STANDARD
SELECT <- -> & SET
ENTER FAX NO.
THEN PRESS START
Setup for Polling Receive with Secure Code
You need to make sure you are using the same ID number as the other party.
1
Press Menu/Set, 2, 7. The screen displays:
2
Press or to choose SECURE.
3
Press Menu/Set.
4
Enter a four-digit number.
This is the same as the security code of the FAX/MFC you are polling.
5
Press Menu/Set.
The screen prompts you to enter the fax
number you want to poll, and then to press
Start.
6
Press Start.
POLLING:STANDARD
SELECT <- -> & SET
ENTER FAX NO.
THEN PRESS START
Setup Delayed Polling Receive
You can set your machine to begin polling Receive at a later time.
1
Press Menu/Set, 2, 7. The screen displays:
2
Press or to choose TIMER.
3
Press Menu/Set.
4
The screen prompts you to enter the time you
want to begin polling.
5
Enter the time (in 24-hour format) you want to begin polling. For example, enter 21:45
for 9:45 PM.
6
Press Menu/Set. The screen prompts you to
enter the fax number you are polling.
POLLING:STANDARD
SELECT <- -> & SET
SET TIME=15:25
ENTER FAX NO.
THEN PRESS START
SETUP RECEIVE
—
5 - 12
Page 46
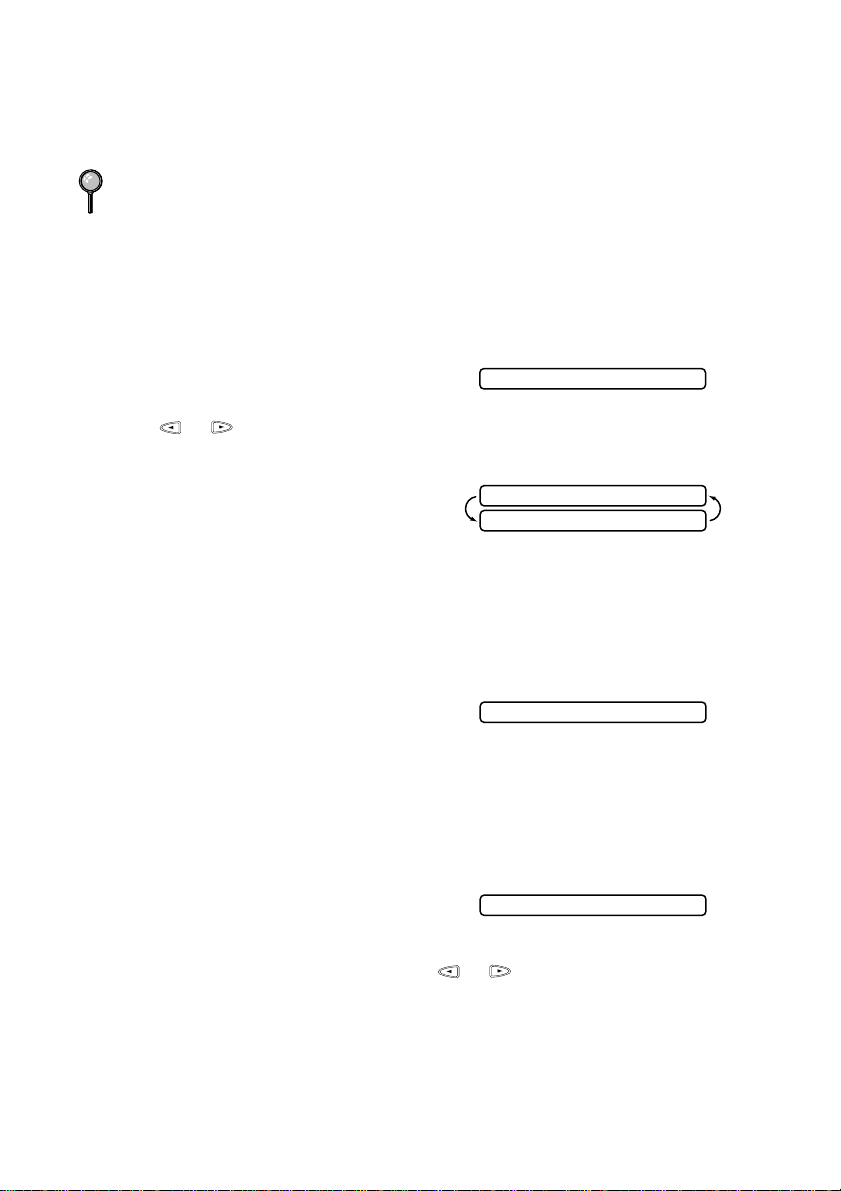
7
Enter the fax number (you can use One Touch or Speed Dial, or dial manually.
8
Press Start. The machine makes the polling call at the time you entered.
You can set up only one Delayed Polling.
Sequential Polling
Your FAX/MFC can request documents from several fax units in a single operation.
You just specify several destinations in Step 6. Afterward, a Sequential Polling Report
will be printed.
1
Press Menu/Set, 2, 7.
The screen displays:
2
Press or to choose STANDARD, SECURE or TIMER.
3
Press Menu/Set when the screen displays the setting you want.
4
If you selected STANDARD, the screen
prompts you to enter the fax number you want
to poll, and then to press Start.
• If you selected SECURE, enter a four-
digit number and press Menu/Set.
• If you selected SECURE, enter a four-digit number and press Set.
5
Specify the destination FAX/MFCs, which you wish to poll by using One Touch,
Speed Dial or a Group.
6
Press Start.
Your FAX/MFC will poll each number or
group member in turn for an document.
POLLING:STANDARD
ENTER FAX NO.
THEN PRESS START
DIALING
Cancelling a Scheduled Job
You can cancel tasks you’ve scheduled such as Delayed Fax, Delayed Polling Receive
or Polling Transmit.
1
Press Menu/Set, 4. Any waiting jobs appear
on the display. If nothing is waiting, the screen
displays NO JOB WAITING.
2
If you have more than two jobs waiting, use or to select the job you want to
cancel. Press Menu/Set when the screen displays your selection.—OR—
If you have only one job waiting, go to Step 3.
3
Press 1 to cancel—OR—Press 2 to exit without cancelling.
4
Press Stop to exit.
5 - 13
SETUP RECEIVE
8.CANCEL JOB
Page 47

Setting PC Interface Mode
(Only for MFC-960MC or With Multi-Function Link option)
If you connect your FAX/MFC to your PC, you can receive faxes into your PC. See
the Multi-function Link Manual. After completing the setup for Multi-Function Link,
you can select PC INTERFACE Mode (PC PRIMARY/PC RECEIVE ONLY/FAX
RECEIVE ONLY) for routing incoming faxes.
1
Press Menu/Set, 2, 8.
2
Press or to select PC PRIMARY, PC
RECEIVE ONLY or FAX RECEIVE ONLY.
3
Press Menu/Set when the screen displays your selection.
4
Press Stop to exit.
8.PC INTERFACE
SETUP RECEIVE
5 - 14
Page 48
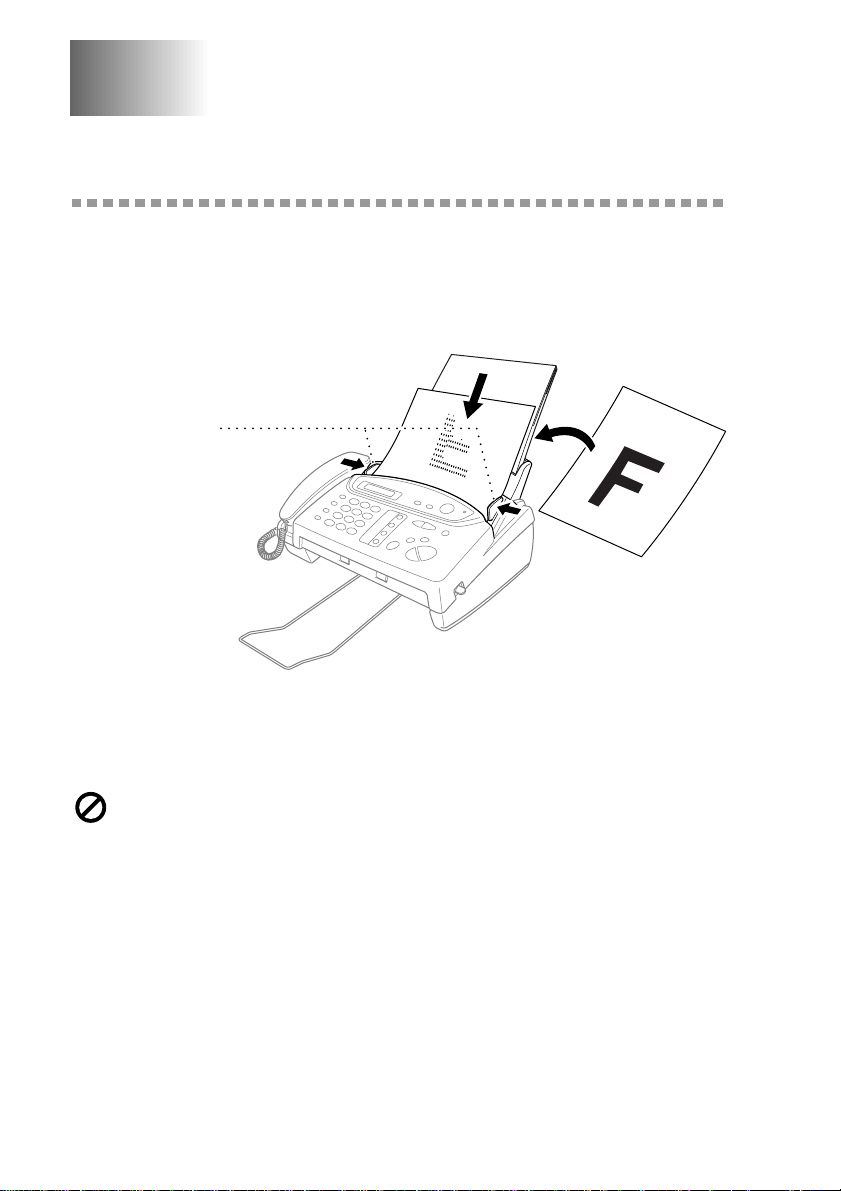
6
6
Setup Send
Automatic Document Feeder (ADF)
■ Originals must be between 14.8 and 21.6 cm wide, and 15 and 60 cm long. Your FAX/
MFC can only scan an image 20.8 cm wide, regardless the paper width.
■ Make sure you place the original face down, top edge first.
■ Adjust the paper guides to fit the width of your original.
aper Guides
■ The automatic document feeder (ADF) can hold up to 10 pages, feeding each one
individually through the FAX/MFC. Use standard (64 gsm–90 gsm) paper when using
the ADF; if you’re using heavier paper, feed each sheet individually to prevent paper
jams.
DO NOT use curled, wrinkled, folded or ripped paper, or paper with staples, paper
clips, paste or tape attached. DO NOT use cardboard, newspaper or fabric. DO NOT
use paper on which correction fluid has been used.
■ Make sure originals written with ink are completely dry.
■ Press Resolution (before you send the fax) to select the resolution for the document
you’re sending. (See Resolution, page 6-6.)
6 - 1
SETUP SEND
Page 49

Manual Transmission
Manual transmission lets you hear the dial tone, ringing and fax receiving tones before
sending the fax.
1
Place the original face down in the ADF.
2
Pick up the handset and listen for a dial tone
—OR—press Hook or Speaker Phone and listen for a dial tone.
3
Enter the fax number you want to call. (You can enter the digits using the dial pad, or
you can enter a One Touch or Speed Dial number or you can call using
Mute/Search.) (See One Touch Dialing, page 7-4 and Search, page 7-5.)
4
When you hear the fax tone, press Start.
5
If you’re using the handset, hang up.
Automatic Transmission
This is the easiest way to send a fax.
IMPORTANT: Do not pick up the handset, or press Hook or Speaker Phone.
1
Place the original face down in the ADF.
2
Enter the fax number using One Touch, Speed Dial, Search or the dial pad. (See One
Touch Dialing, Speed Dialing and Search, page 7-4 to 7-5.)
3
Press Start.
Manual and Automatic Fax Redial
If you’re sending a fax manually and the line is busy, press Redial/Pause to retry the
number.
If you’re sending a fax automatically and the line is busy, the FAX/MFC will redial
automatically up to twice at 2 minute intervals.
Memory Transmission
This feature allows your machine to scan a fax into its memory and send it as soon as
the scan is complete. This way, you don’t have to wait for the entire fax to be
transmitted before you retrieve your original.
1
Place the original face down in the ADF.
2
Press Menu/Set, 3, 9.
3
To change the default setting, press or
to select ON (or OFF) and press
Menu/Set. Go to Step 5—OR—For the next
fax transmission only, press or to
select NEXT FAX ONLY and press Menu/Set.
4
For the next fax only, press or to select ON (or OFF) and
press Menu/Set.
9.MEMORY TX
MEMORY TX:ON?
SELECT <- -> & SET
SETUP SEND
6 - 2
Page 50
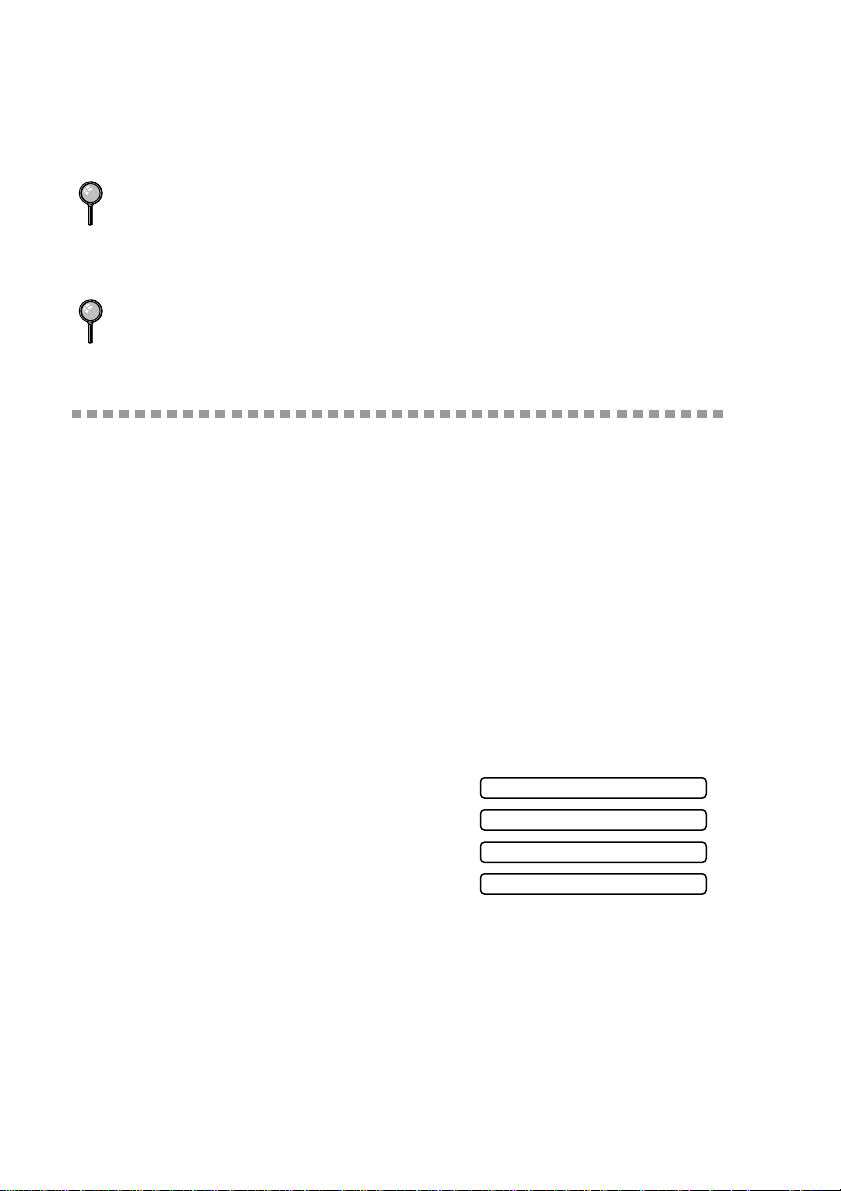
5
Press 1 to select additional settings. The display returns to the
SETUP SEND menu—OR—Press 2 if you are finished choosing settings
and go to Step 6.
6
Enter fax number and press Start.
If you get a MEMORY FULL message while scanning the first page of a fax, press
Stop to cancel the scan. If you get a MEMORY FULL message while scanning in a
subsequent page, you’ll have the option to press Start to transmit the pages scanned
so far, or to press Stop to cancel the operation. In this case, send the fax by the
Manual Transmission.
Depending on your typical faxes, MEMORY FULL errors can occur frequently. If
this happens, change the Memory Transmission setting back to OFF.
Basic Sending Operations
Composing Electronic Cover Page
The cover page is generated at the receiving party’s machine. Your cover page
includes the name stored in the One Touch or Speed Dial memory. If you’re dialing
manually, the name is left blank. (See One Touch Dialing, page 7-4, Speed Dialing,
page 7-5.)
The cover page indicates the fax is from your Station ID, and the number of pages
you’re sending. If you have Coverpage Setup set to ON (Menu/Set 3 1), the number
of pages remains blank. (See Setting the Station ID, page 4-2.)
Most of the SETUP SEND functions are temporary settings that allow you to make
adjustments for each original you send. However, so that you can set up your cover
page and cover page comments in advance, the Cover Page Setup and Cover Page
Message functions will change their default settings.
You can select a comment to include on your
cover page.
Instead of using one of the comments above,
you can enter up to two customized messages,
each 27 characters long. Use the chart on page
4-2 to help enter characters.
1.NOTE OFF
2.PLEASE CALL
3.URGENT
4.CONFIDENTIAL
6 - 3
SETUP SEND
Page 51
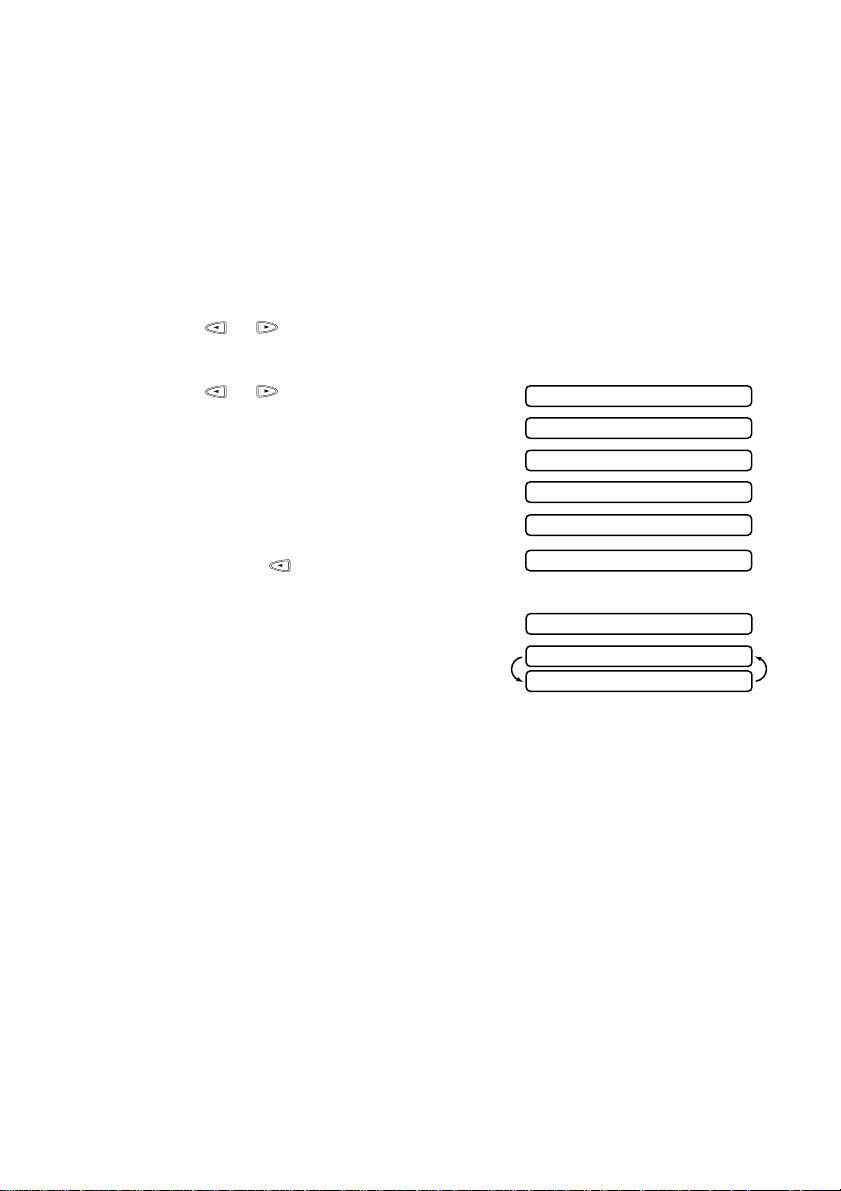
Cover Page for Next Fax Only
Make sure the Station ID is set up. (See Setting the Station ID, page 4-2.) This feature
does not work without the Station ID.
You can set the fax to send a cover page with a particular original. This cover page
will include the number of pages in your original.
1
Place the original in the ADF.
2
Press Menu/Set, 3, 1.
3
When the screen displays NEXT FAX ONLY?, press Menu/Set.
4
Press or to select ON.
5
Press Menu/Set.
6
Press or to view the comment
selections.
7
Press Menu/Set when the screen displays
your selection.
8
Enter two digits to indicate the number of
pages your are sending. (Enter 0 0 to leave the
number of pages blank.) If you make a
mistake, press to back up and reenter the
number of pages.
9
Press Menu/Set. The screen displays:
10
Press 1 if you want to select additional
settings. The display returns to the Setup Send
menu—OR—Press 2 if you are finished
choosing settings, and go to Step 11.
11
Enter the fax number you’re calling.
12
Press Start.
1.NOTE OFF
2.PLEASE CALL
3.URGENT
4.CONFIDENTIAL
5.(USER DEFINED)
6.(USER DEFINED)
ACCEPTED
NEXT
1.YES 2.NO
SETUP SEND
6 - 4
Page 52
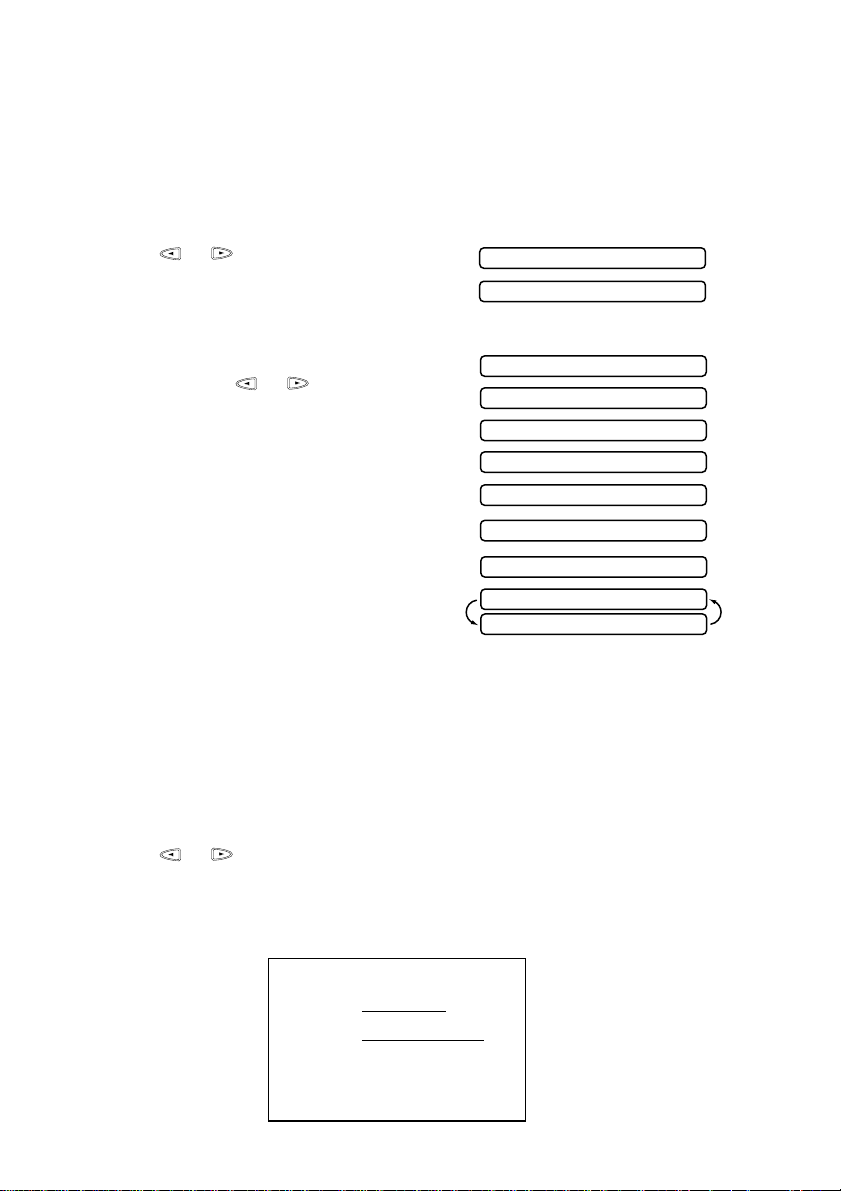
Always Send Cover Page
Make sure Station ID is set up. (See Setting the Station ID, page 4-2.) This feature does
not work without the Station ID.
You can set the FAX/MFC to send a cover page whenever you send a fax. The number
of pages in your fax is not included when you use this setting.
1
Press Menu/Set, 3, 1.
2
Press or to select.
3
Press Menu/Set when the screen displays
COVERPAGE:ON. (If you select ON, a
coverpage is always sent when you send a fax.)
4
If you selected ON, you must select a
comment. Press or to view possible
selections. (You can select your custom
comment.)
5
Press Menu/Set when the screen displays
your selection. The screen displays:
6
Press 1 if you want to select additional
settings. The display returns to the Setup Send
menu—OR—Press 2 to exit if you are finished
choosing settings.
COVERPAGE:OFF
COVERPAGE:ON
1.NOTE OFF
2.PLEASE CALL
3.URGENT
4.CONFIDENTIAL
5.(USER DEFINED)
6.(USER DEFINED)
ACCEPTED
NEXT
1.YES 2.NO
Using a Printed Cover Page
If you prefer using a printed cover page that you can write on, you can print the sample
page and attach it to your fax.
1
Press Menu/Set, 3, 1.
2
Press or to select PRINT SAMPLE.
3
Press Menu/Set when the screen displays your selection.
4
Press Start. Your FAX/MFC prints a copy of your cover page.
6 - 5
SETUP SEND
TO:
FROM:
FAX:
TEL:
COMMENT:
- - -
COVER PAGE
- - -
PAGE[S] TO FOLLOW
- - -
- - -
Page 53
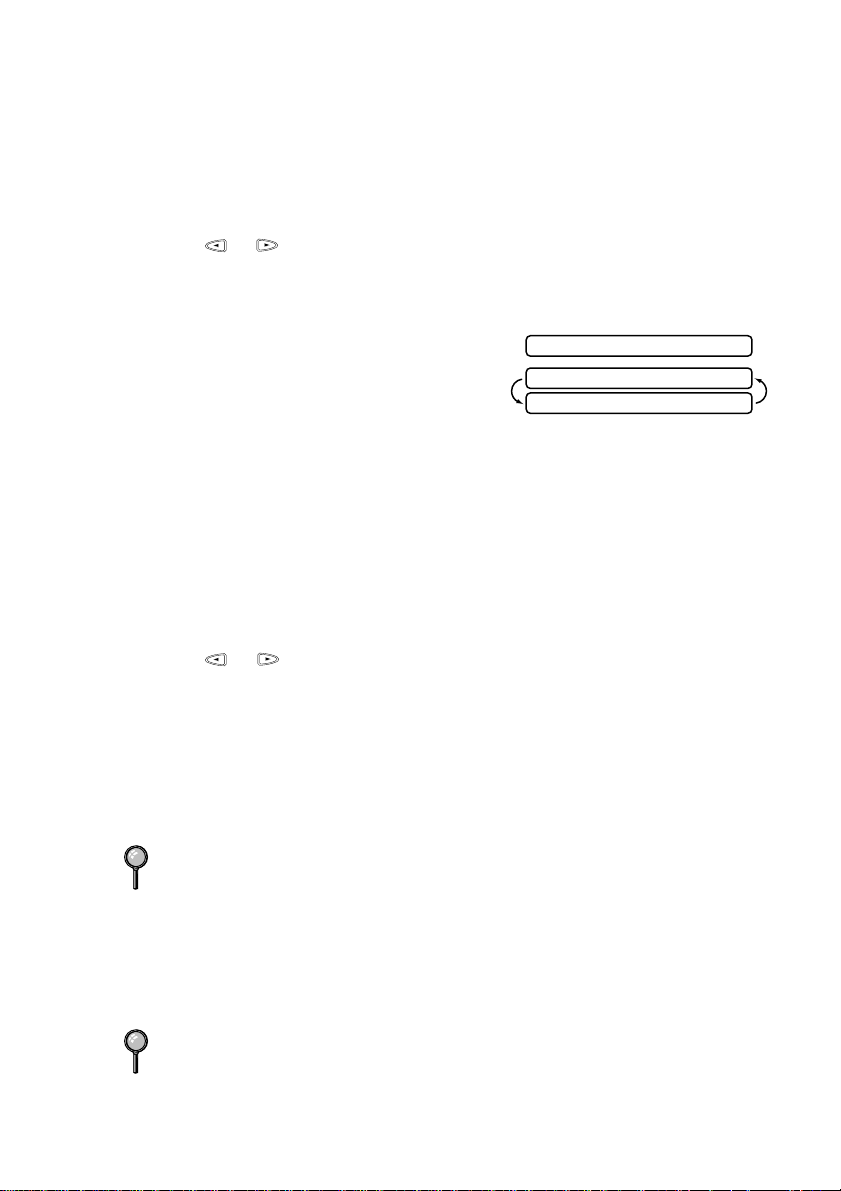
Cover Page Message
You can set up two custom comments.
Composing Your Own Comments
1
Press Menu/Set, 3, 2. The screen displays: COVERPAGE NOTE.
2
Press or to choose position 5 or 6 for your customized comment.
3
Press Menu/Set.
4
Use the dial pad to enter your customized comment (up to 27 characters).
5
Press Menu/Set. The screen displays:
6
Press 1 if you want to select additional
settings. The display returns to the Setup Send
menu—OR—Press 2 to exit.
ACCEPTED
NEXT
1.YES 2.NO
Contrast
If your original is very light or very dark, you might want to set the contrast
accordingly. Use LIGHT to send a very light original. Use DARK to send a very dark
original.
1
Place the original face down in the ADF.
2
Press Menu/Set, 3, 3.
3
Press or to select AUTO, LIGHT or DARK and press Menu/Set.
4
Press 2 if you have finished choosing settings, and go to Step 5—OR—Press 1 if you
want to select additional settings. The display returns to the Setup Send menu.
5
Enter a fax number and press Start to send a fax—OR—Press Copy/Help to make
a copy.
Resolution
You must press Resolution (before you send the fax) to select the resolution for the
type of original you’re sending.
Standard—suitable for most typed originals.
Fine—good for small print; transmits a little slower than standard resolution.
Super Fine—good for small print or artwork; transmits slower than fine resolution.
Photo—use when original has varying shades of gray; slowest transmission time.
If the receiving FAX/MFC does not have the resolution you select, the transmission
will fall back to the next available resolution on receiving machine.
SETUP SEND
6 - 6
Page 54
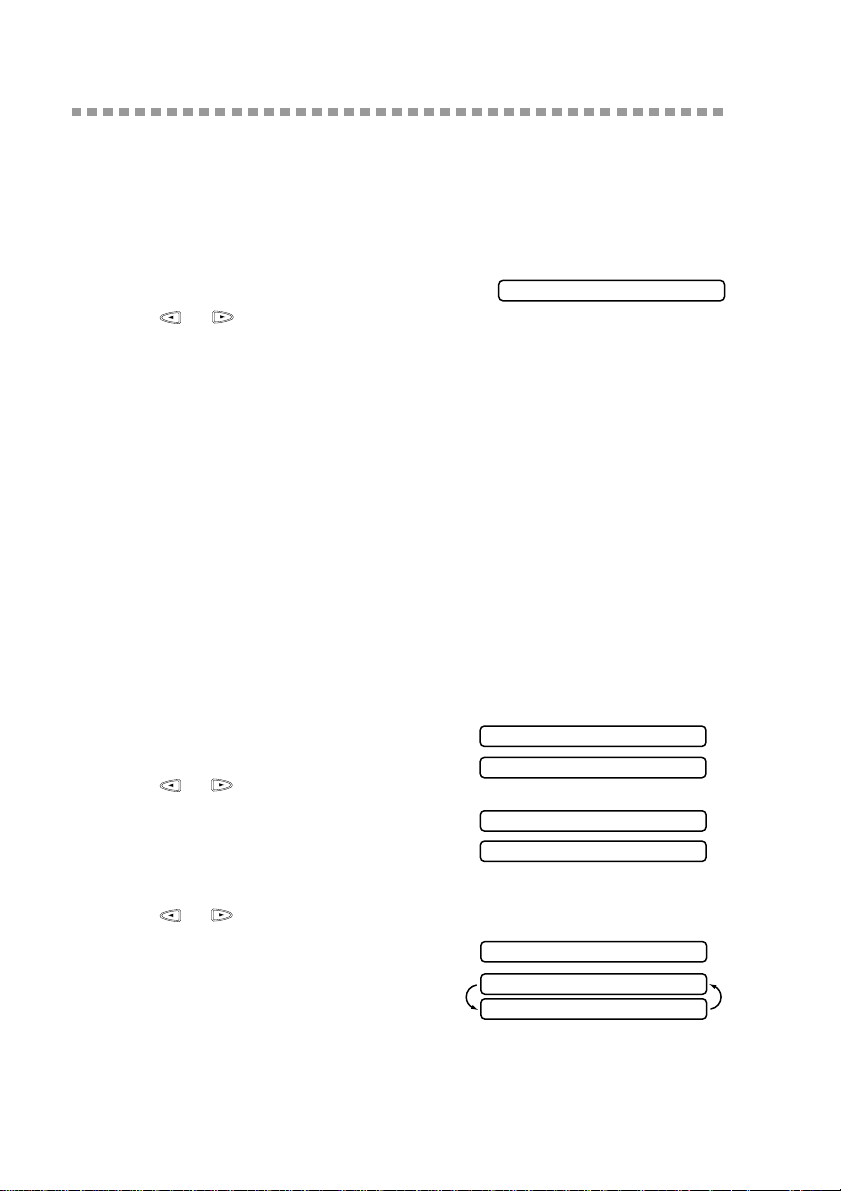
Advanced Sending Operations
Overseas Mode
If you have difficulty sending a fax overseas, use the Overseas mode.
After you send a fax using this feature, the feature turns itself off.
1
Place the original face down in the ADF.
2
Press Menu/Set, 3, 5.
3
Press or to select ON (or OFF) and press
Menu/Set.
4
Press 1 if you want to select additional settings. The display returns to the Setup Send
menu—OR—Press 2 if you have finished choosing settings and go to Step 5.
5
Enter the fax number you’re calling.
6
Press Start.
Call Reservation
You can send a fax and let the other party know that you want to have a conversation
after the fax transmission is complete. The other FAX/MFC will ring as if it were
receiving a telephone call; if the other party picks up the handset, your FAX/MFC will
ring. Lift the handset to speak.
If you set Call Reservation and Call Back message to ON, your FAX/MFC leaves a
message if the other party does not answer.
1
Place the original in the ADF.
2
Press Menu/Set, 3, 6. The screen displays the
current setting for Call Reservation.
3
Press or to select ON (or OFF).
4
If you set Call Reservation to ON, press
Menu/Set when the screen displays your
selection. The screen displays the current
setting for Call Back Message.
5
Press or to select ON (or OFF).
6
Press Menu/Set when the screen displays
your selection. The screen displays
5.OVERSEAS MODE
CALL RESERVE:OFF
CALL RESERVE:ON
CALL MESSAGE:OFF
CALL MESSAGE:ON
ACCEPTED
NEXT
1.YES 2.NO
7
Press 1 if you want to select additional settings. The display returns to the Setup Send
menu—OR—Press 2 if you are finished choosing settings, and go to Step 8. The
screen prompts you to enter the fax number you want to call.
6 - 7
SETUP SEND
Page 55

8
Enter the fax number.
9
Press Start.
10
If you’ve set Call Reservation to ON, pick up your handset if the FAX/MFC rings.
You cannot use automatic redial with Call Reservation. You cannot use Call
Reservation with Delayed Transmission or with Polling. You must register your
Station ID to set Call Back Message to ON.
Print Sample Call Back Message
1
Press Menu/Set, 3, 6.
2
Press or to select PRINT SAMPLE.
3
Press Menu/Set.
4
Press Start.
Delayed Transmission (Timer)
You can use this function to send a fax up to 24 hours later.
1
Place the original face down in the ADF.
2
Press Menu/Set, 3, 7.
3
Enter the time, in 24-hour format, that you want the fax to be sent, in 24-hour format
and press Menu/Set. (For example, enter 19:45 for 7:45 PM)
4
Press 1 to leave the originals waiting in the
ADF—OR—Press 2 to scan the original into
memory.
(See Interrupting Timer and Polling Transmit Jobs, page 6-11.)
5
Press 1 to select additional settings.
The display returns to the SETUP SEND menu—OR—Press 2 if you have finished
choosing settings and go to Step 6.
6
Enter the fax number.
7
Press Start. The machine will wait to send the fax at the time you set up.
1.DOC 2.MEMORY
SETUP SEND
6 - 8
Page 56
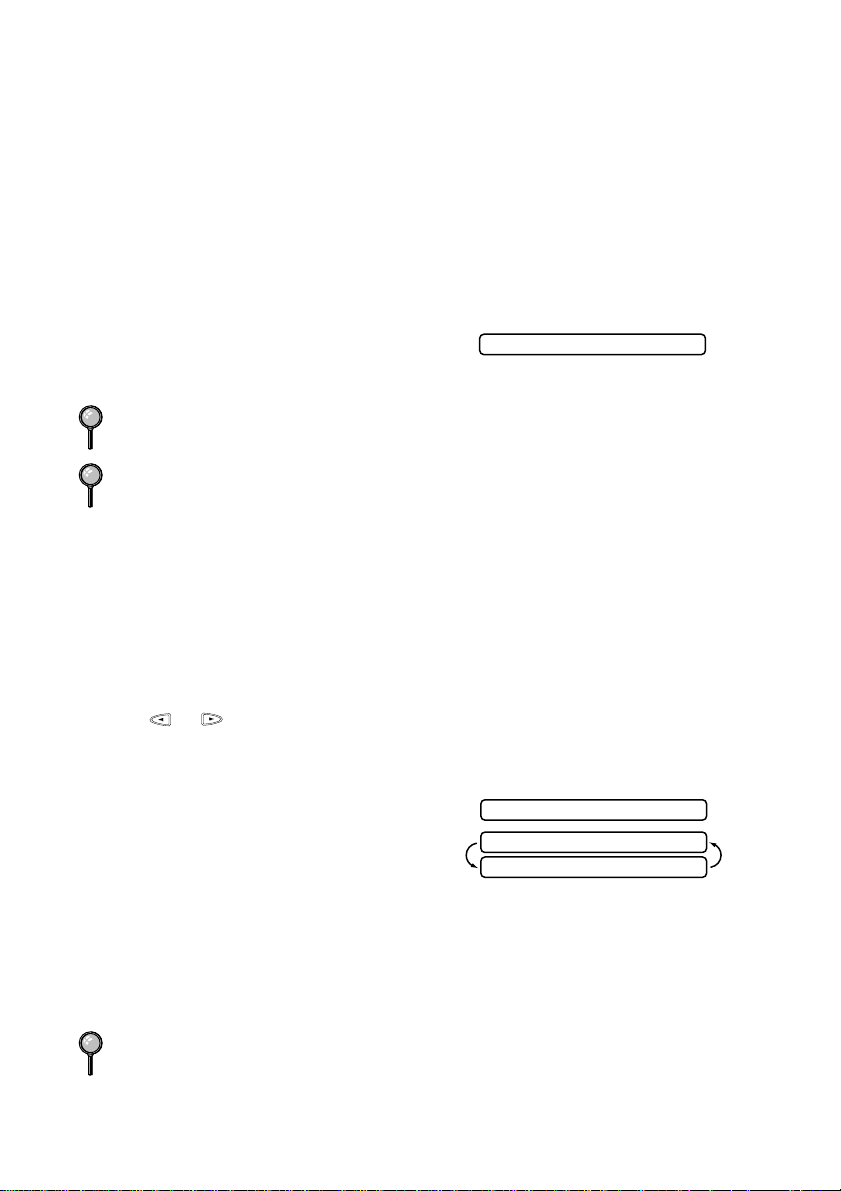
Next-Fax Reservation
Even if your FAX/MFC is receiving another fax, you can set your machine to send
your fax next. This way, you don’t have to wait for it to finish sending or receiving the
other fax. You can dial this fax call manually, or by using Redial, One Touch, Speed
Dial, or Chain dialing. (When you use One Touch and Speed Dial, only the memory
location—not the name of the person you’re calling—is displayed.)
1
Place the originals in the ADF. If necessary, press Resolution to adjust resolution.
2
Enter the fax number.
3
Press Start.
4
Press Menu/Set. The screen displays:
5
To cancel the reservation, remove the originals
and press Stop.
You can’t use this feature if there is an original waiting in the ADF (possibly for
Delayed Transmission or Polled Transmit).
If you use Next-Fax Reservation , the machine will send an original without storing
it in memory.
NEXT-FAX RESERVD
Multiple Resolution Transmission
Use this feature to select separate resolution settings for each page of the fax you’re
sending. This could be useful if you’re sending a fax with photos and letters, or some
pages with small print and others with normal print. Resolution settings return to
STANDARD after the fax is sent. (See Resolution, page 6-6.)
1
Insert the originals in the feeder, then press Menu/Set, 3, 4.
2
Use or to select resolution for page 1, then press Menu/Set.
3
Repeat Step 2 for subsequent pages.
4
Press Stop when you’re finished.
The screen displays:
5
Press 1 if you want to select additional
settings. The display returns to the Setup Send
menu—OR—Press 2 if you are finished
choosing settings, and go to Step 6. The screen
prompts you to enter the fax number you want
to call.
6
Enter the fax number you’re calling.
7
Press Start.
To copy an original using multiple resolutions, press Copy/Help in Step 6.
ACCEPTED
NEXT
1.YES 2.NO
6 - 9
SETUP SEND
Page 57
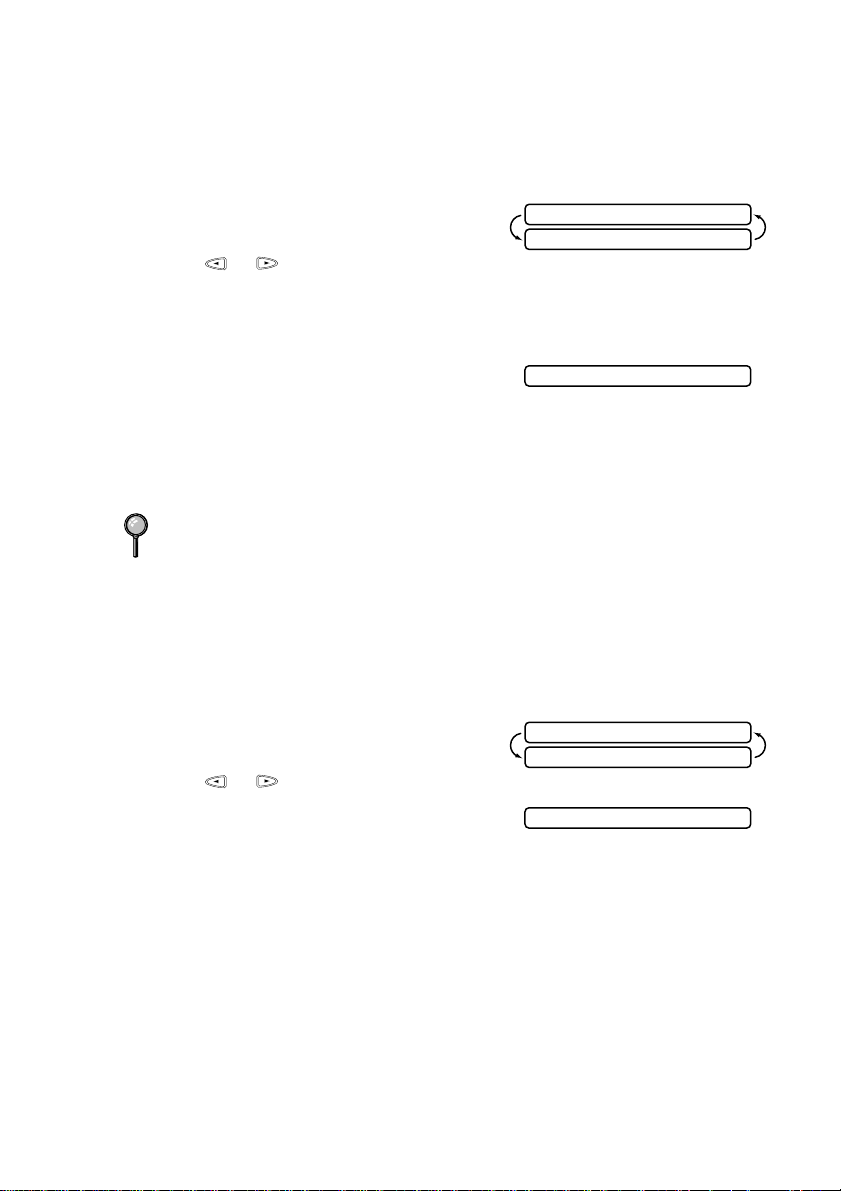
Setup for Polling Transmit
Polled Transmit is when you set up your FAX/MFC to wait with a document so
another FAX/MFC can retrieve it.
1
Place document to be retrieved in feeder.
2
Press Menu/Set, 3, 8.
The screen displays:
3
Press or to choose STNDARD and
press Menu/Set.
4
Press 1 to select DOC if you want your machine to scan the printed document at the
time it is polled—OR—Press 2 to select MEMORY.
5
Press 1 if you want to select additional
settings. The display returns to the Setup Send
menu—OR—Press 2 if you are finishing
choosing settings and go to Step 6.
6
Press Start. The screen displays POLLED WAITING.
If you pressed 1 in Step 4, the printed document remains in the ADF until your
machine is polled. However, you can “interrupt” it to send another fax.
POLLING:STANDARD
SELECT <- -> & SET
1.DOC 2.MEMORY
Setup for Polling Transmit with Secure Code
When you set POLLED:SECURE to on, anyone who polls your machine must enter
the polling ID number.
1
Place document in feeder.
2
Press Menu/Set, 3, 8.
The screen displays
3
Press or to choose SECURE.
4
Press Menu/Set.
5
Enter a four-digit number and press
Menu/Set.
6
Press 1 to select DOC if you want your machine to scan the printed document at the
time it is polled—OR—Press 2 to select MEMORY.
7
Press 1 if you want to select additional settings. The display returns to the Setup Send
menu—OR—Press 2 if you are finished choosing settings and go to Step 8.
8
Press Start and wait for the fax to be polled.
POLLING:STANDARD
SELECT <- -> & SET
1.DOC 2.MEMORY
SETUP SEND
6 - 10
Page 58
Interrupting Timer and Polling Transmit Jobs
You can send a fax or make a copy now, even if you have the machine set to send a
fax later, or if you have it set to be polled. However, you cannot use automatic redial
or the function mode.
1
Press Menu/Set, 5.
2
Wait 2 seconds, then remove the documents that
are waiting in the feeder.
3
Place the document you want to send now in the
feeder.
4
Enter the number for the fax you want to send now.
5
Press Start.
6
After the transmission is finished, return the first document to the feeder.
7
Press Menu/Set, 5 to restore the timer.
If you have set up a Timer or Polling Transmit job in memory, you don’t have to
interrupt it to send a fax or make a copy.
If you have set up a Timer or Polling Transmit job, the machine will send an original
without storing it in memory.
INSERT DOCUMENT
6 - 11
SETUP SEND
Page 59
7
Automatic Dial Numbers
7
and Dialing Options
Storing Numbers for Easy Dialing
You can set up your FAX/MFC to do three types of easy dialing:
One Touch, Speed Dial, and Groups for Broadcasting of faxes.
If you lose electrical power, automatic dial numbers in memory will not be lost.
Storing One Touch Dial Numbers
You can store four fax/phone numbers that you can dial by pressing one key (and
Start). You also can store names with these numbers. When you press a One Touch
dial location, the screen displays the name or number as the call is dialed. (See One
Touch Dialing, page 7-4.)
One Touch keys are not the dial pad keys. They are the four keys (numbers 1–4)
located in the middle of the control panel.
1
Press Menu/Set, 6, 1.
2
Press the One Touch key where you want to store a number. The screen displays the
location you selected.
The screen displays the location you selected.
3
Enter a number (up to 20 digits) and press
Menu/Set.
If you want to enter a pause in the dialing sequence (to wait for an “outside line,” for
example), press Redial/Pause as you’re entering digits. Pressing Redial/Pause
enters a 3.5-second pause when the number is dialed, and a dash appears on the
screen.
4
Use the dial pad to enter the name or company (up to 15 characters) and press
Menu/Set. You can use the chart on page 17 to help you enter letters—OR—To store
the number without a name, press Menu/Set. (See
5
Press or to select the type of number and press Menu/Set.
FAX a fax only number
TEL a telephone (voice) number
F/T both a fax and telephone (voice) number
AUTOMATIC DIAL NUMBERS AND DIALING OPTIONS
NAME:
Details for Entering Text
, page 4-2.)
7 - 1
Page 60
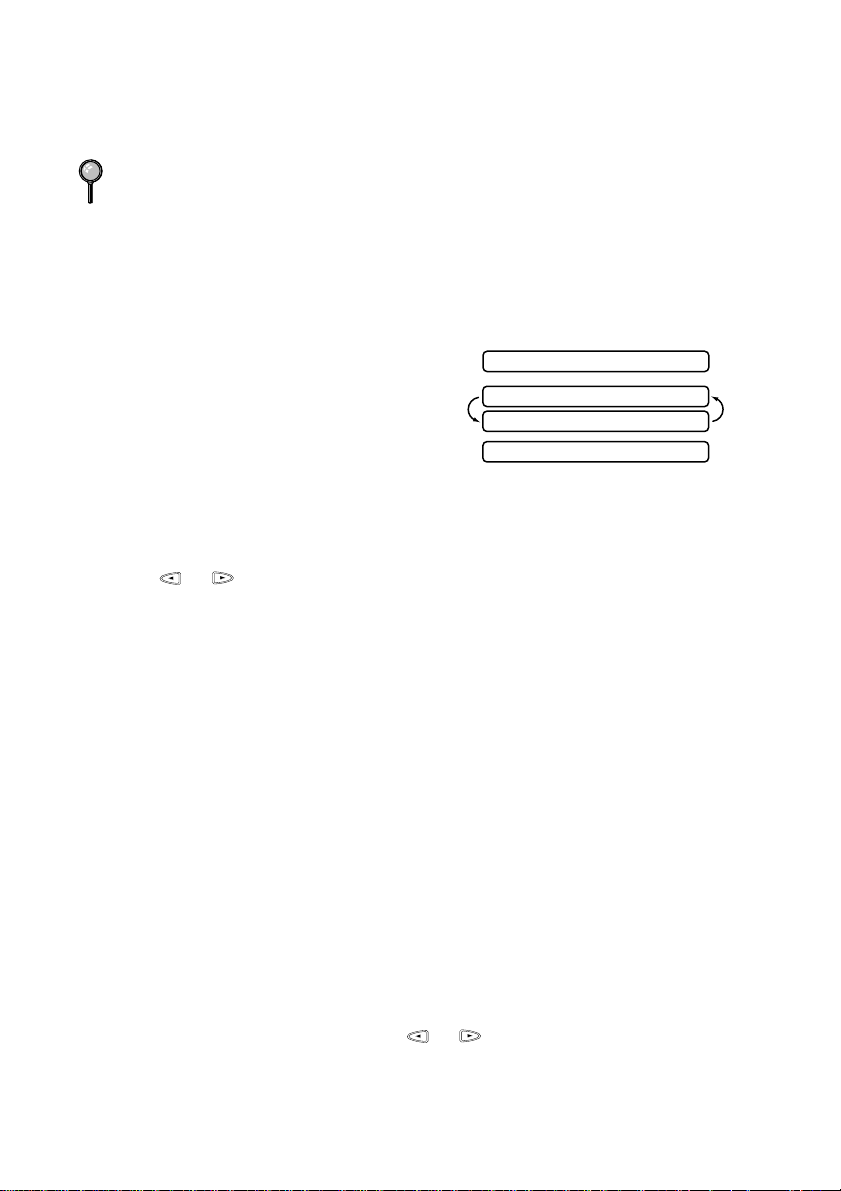
6
Press to Step 2 to store another One Touch number—OR—Press Stop to exit.
When you dial an ALL DIAL number, the screen displays the name you’ve stored, or,
if you haven’t stored a name, the number you’ve stored.
If you must wait for another dial tone at any point in the dialing sequence, store a
pause at that place in the number by pressing Redial/Pause. Each key press adds a
3.5 second pause.
Storing Speed Dial Numbers
You can store Speed Dial numbers, when you dial by pressing only four keys. There
are 50 Speed Dial locations.
1
Press Menu/Set, 6, 2.
2
Use the dial pad to enter a two-digit location
(01–50) and press Menu/Set.
3
Enter the number (up to 20 digits) and press
Menu/Set.
4
Use the dial pad to enter the name or company (up to 15 characters) and press
Menu/Set—OR—Press Menu/Set to store the number without a name. (See Details
for Entering Text, page 4-2.)
5
Press or to select the type of number and press Menu/Set.
FAX a fax only number
TEL a telephone (voice) number
F/T both a fax and telephone (voice) number
SPEED-DIAL? #
#05:
ENTER & SET
NAME:
6
Return to Step 2 to store another Speed Dial number—OR—Press Stop to exit.
Changing One Touch and Speed Dial Numbers
If you try to store a One Touch or Speed Dial number in a location where a number is
already stored, the screen displays the current name stored there, then prompts you to
either
1. CHANGE—OR—2. QUIT.
1
Press 1 to change the number stored, or press 2 to exit without making a change.
2
Enter a new number.
• If you want to erase the entire number, press Stop when the cursor is to the left
of the digits. The letters above and to the right of the cursor are deleted.
• If you want to change a digit, use or to position the cursor under the
digit you want to change, then type over it.
3
Follow the directions from Step 3 in Storing One Touch Numbers or Storing Speed
Dial Numbers.
7 - 2
AUTOMATIC DIAL NUMBERS AND DIALING OPTIONS
Page 61
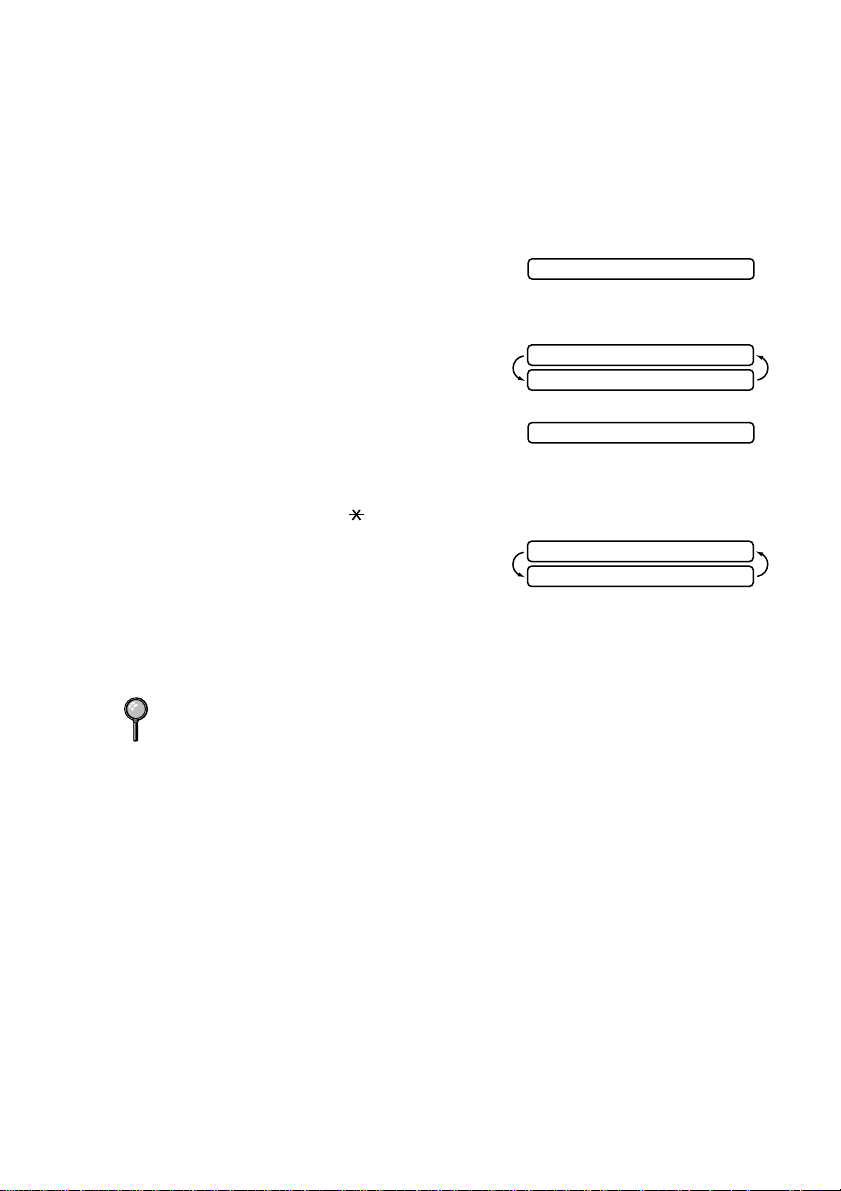
Setting Up Groups for Broadcasting
Groups allow you to send the same fax message to many fax numbers by pressing only one
One Touch key (Broadcasting).
Touch or Speed Dial number.
uses up a One Touch key
assign up to 53 numbers to one large Group. (See
7-1,
Storing Speed Dial Numbers
1
Press Menu/Set, 6, 3.
2
Select a One Touch key where you wish to store
the number. (For example, press One Touch key 2 to store a Group.)
3
Use the dial pad to identify the Group with a
number and press Menu/Set. (For example,
press 1 for Group 1.)
4
To include One Touch or Speed Dial numbers
in the Group, enter them as if you were dialing.
For example, for One Touch key 3, press One
Touch key 3. For Speed Dial location 09, press Mute/Search, then press 0, 9 on the
dial pad. The LCD shows 03, #09.
5
Press Menu/Set to accept the numbers for this
group.
6
Use the dial pad to enter a name for the group
and press Menu/Set. (For example, NEW CLIENTS) (See Details for Entering Text,
page 4-2.)
7
Press Stop to exit.
You can print a list of all One Touch and Speed Dial numbers. See Printing Reports,
Chapter 11.
Then
.
Finally
First
, you’ll need to store each fax number as a One
, you can combine them into a Group.
, you can have up to four small Groups, or you can
Storing One Touch Dial Numbers
, page 7-2 and
Broadcasting
, page 7-6.)
Each Group
, page
SELECT ONE-TOUCH
SETUP GROUP:GO
ENTER & SET
G01:*O3#O9_
NAME:
ENTER & SET
AUTOMATIC DIAL NUMBERS AND DIALING OPTIONS
7 - 3
Page 62

Dialing Options
You can use your FAX/MFC to make voice telephone calls, by dialing manually, or
by using Search, One Touch or Speed Dial memory. You can use the handset or, if you
have FAX-685MC and MFC-960MC, you can use the Speaker Phone to make and
receive calls.
The Speakerphone allows you to operate the phone hands free, or allows more than
one person in the room to participate in a two-way phone conversation.When using
the Speakerphone, make sure to speak clearly and close to the microphone .
When you dial an automatic dial number, the screen displays the name you’ve stored,
or, if you haven’t stored a name, the fax number you’ve stored.
Manual Dialing
Manual dialing is simply pressing all of the digits of the phone number.
1
Pick up the handset—OR—Press Hook or Speaker Phone.
2
When you hear a dial tone, dial the number using the dial pad.
3
If you pressed Hook to dial the call, pick up the handset when the other party answers.
(The speaker works only one way; the other party won’t be able to hear you unless you
pick up the handset.)
On the FAX-685MC and MFC-960MC, you can switch from handset to
Speakerphone by pressing Speaker Phone, then replacing the handset.You can
switch from Speakerphone to handset by lifting the handset.
4
To hang up, replace the handset—OR—Press Speaker Phone.
One Touch Dialing
1
Pick up the handset—OR—Press Hook or Speaker Phone. (See Storing One
Touch Dial Numbers, page 7-1.)
2
When you hear a dial tone, press the One Touch key of the location you want to call.
3
If you pressed Hook to dial the call, pick up the handset when the other party answers.
(The speaker works only one way; the other party won’t be able to hear you unless you
pick up the handset.)
4
To hang up a voice call, replace the handset—OR—Press Speaker Phone.
If you try to use a One Touch location with no number stored in it, you hear a warning
sound, and screen displays NOT REGISTERED. The display returns to normal after
2 seconds.
If you are sending a fax, press Start after pressing the One Touch key. If you picked
up the handset, press Start when the receiving FAX/MFC answers with fax tones.
7 - 4
AUTOMATIC DIAL NUMBERS AND DIALING OPTIONS
Page 63

Speed Dialing
1
Pick up the handset—OR—Press Hook or Speaker Phone. (See Storing Speed
Dial Numbers, page 7-2.)
2
When you hear a dial tone, press Search/Speed Dial, press #, then press the twodigit Speed Dial number.
3
If you pressed Hook to dial the call, pick up the handset when the other party answers.
(The speaker works only one way; the other party won’t be able to hear you unless you
pick up the handset.)
4
To hang up a voice call, replace the handset—OR—Press Speaker Phone.
If you are sending a fax, press Start after entering the Speed Dial number. If you
picked up the handset, press Start when the receiving FAX/MFC answers with fax
tones.
Search
You can search for names you have stored in One Touch and Speed Dial memories.
Names are shown alphabetically. (See Storing One Touch Dial Numbers, page 7-1 and
Storing Speed Dial Numbers, page 7-2.)
1
Press Search/Speed Dial, then enter the first letter of the name you’re looking for.
2
Press or to search the memory.
3
When the screen displays the name you want to call, pick up the handset or press
Hook or Speaker Phone for a voice call.
4
Press Start to begin dialing.
5
If you pressed Hook to dial the call, pick up the handset when the other party answers.
(The speaker works only one way; the other party won’t be able to hear you unless you
pick up the handset.)
6
When the call is over, hang up—OR—Press Speaker Phone to cancel the call.
AUTOMATIC DIAL NUMBERS AND DIALING OPTIONS
7 - 5
Page 64

Redial
If the last number you dialed was busy, press Redial/Pause for easy dialing.
Answering Calls with the Speakerphone (For FAX-685MC and MFC-960MC Only)
When the FAX/MFC rings, instead of lifting the handset, press Speaker Phone.
Speak clearly, toward the microphone . To end the call, press Speaker Phone.
If you have a bad telephone line connection, the other party might hear your voice
echoed during the call. Hang up and try the call again—OR—Pick up the handset.
Broadcasting
Using the numbers you have stored in Groups, One Touch and Speed Dial memory,
you can “broadcast” faxes automatically to a maximum of 54 different locations in a
few simple steps. (See Setting Up Groups for Broadcasting, page 7-3.) To Broadcast,
you must set MEMORY TX to either ON or NEXT FAX ONLY.
After the Broadcast is completed, a Broadcast Report will be printed automatically to
let you know the results.
1
Place the original face down in the ADF.
2
Press Menu/Set, 3, 9 to select ON or NEXT FAX ONLY and press
Menu/Set.
3
Enter the One Touch and Speed Dial numbers (one after the other) or a Group Number
you have stored.
4
Press Start. The FAX/MFC stores the original in memory, then transmits it to all the
numbers you entered.
Press Stop during transmission to cancel the current fax broadcast.
7 - 6
AUTOMATIC DIAL NUMBERS AND DIALING OPTIONS
Page 65

Mute
1
Press Mute/Search to put a call on Hold.
2
You can put down the handset without disconnecting the call.
3
Pick up the machine’s handset or press Speaker Phone to release the call from hold.
Pause
Press Redial/Pause to insert a pause between digits to be dialled.
If your FAX/MFC is connected to a PABX, you may need to insert an additional
number prefix (e.g.“9”) and a “pause” before each fax or telephone number to gain
access to the outside line. When you press Redial/Pause, a dash “_” will appear on
the display. By storing a pause, you can create a delay of 3.5 seconds.
F/T (FAX/TEL) Mode
When you share one line for your telephone and FAX/MFC, in the F/T (FAX/TEL)
mode, the FAX/MFC can determine whether an incoming call is a fax or a telephone
call. (See Select Answer Mode, page 5-1.)
On Hook Dialling (For FAX-685MC and MFC-960MC Only)
1
Dial the number by using the dial pad or Quick-Dial keys.
2
The number you are dialling, or the name you have stored for One Touch or Speed
Dial is displayed on the LCD.
3
Press Start.
4
Pick up the handset when you hear the other end from the monitor speaker. If you press
Hook before lifting the handset, the call will be disconnected. (Only for FAX-645).
On the FAX-685MC and MFC-960MC, you can now speak to the party at the other
end without lifting the handset when you hear the other end from the speaker. Press
Speaker Phone when you finish the conversation.
AUTOMATIC DIAL NUMBERS AND DIALING OPTIONS
7 - 7
Page 66
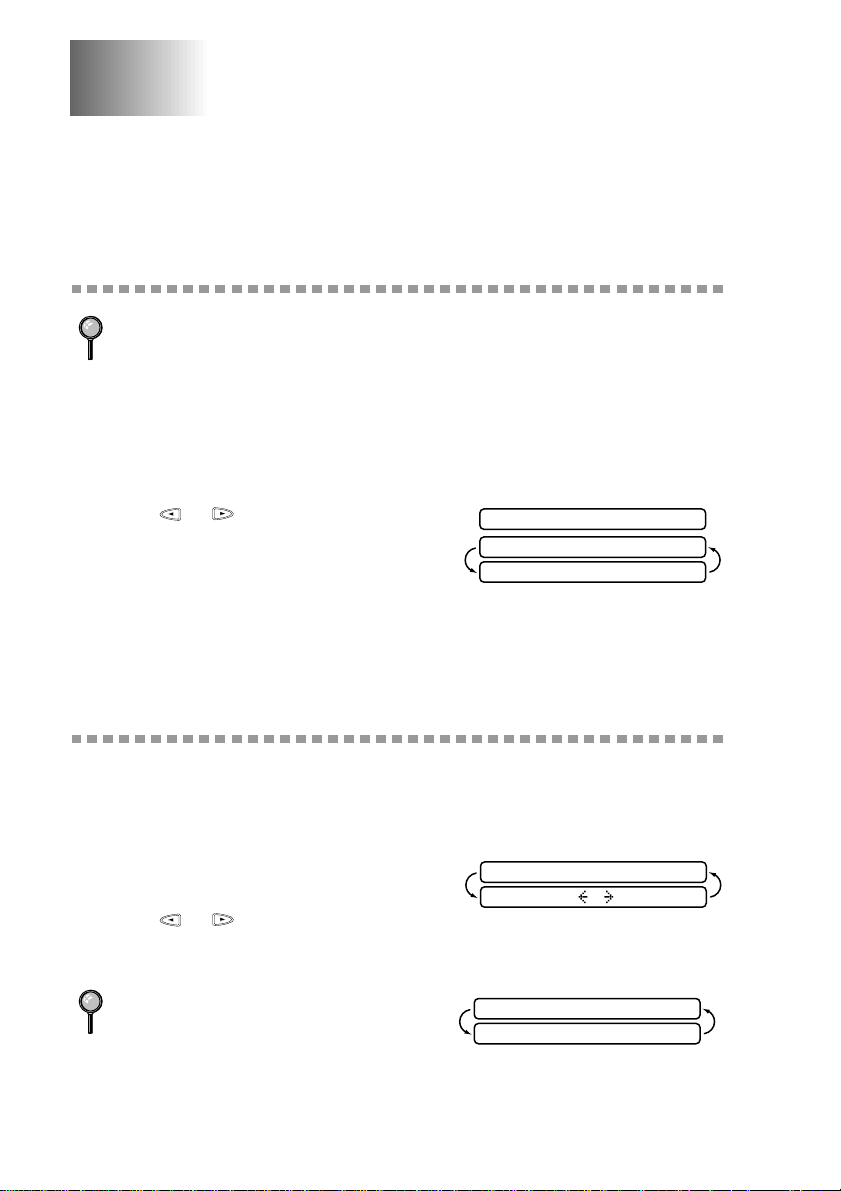
8
Remote Fax Options
8
(For FAX-645 Only)
This chapter is for Model FAX-645. If you have model FAX-685MC or
MFC-960MC your remote fax options are handled by the Message Centre. Please see
chapter 9, Message Centre.
Fax Forwarding
You can not use Fax Forwarding when “Fax Storage” is set to OFF.
Programming a Fax Forwarding Number
When Fax Forwarding is set to ON, your FAX/MFC stores the received fax in
memory, then dials the FAX/MFC phone number you’ve programmed, and forwards
the fax message.
1
Press Menu/Set, 8, 1.
2
Press or to select ON (or OFF).
3
Press Menu/Set. The screen prompts you to
enter the number of the FAX/MFC where
faxes will be forwarded.
4
Enter the forwarding number (up to 20 digits).
5
Press Menu/Set.
6
Press Stop to exit.
FAX FWD:ON
FWD#:
ENTER & SET
Setting Fax Storage
If you set Fax Storage to ON, you will be able to retrieve fax messages from another
location, using Fax Forwarding, or Remote Retrieval functions. The screen will
indicate when you have a fax stored in memory.
(See Remote Retrieval, page 8-2.)
1
Press Menu/Set, 8, 2.
2
Press or to select ON (or OFF) and
press Menu/Set.
3
Press Stop to exit.
If there are faxes in memory when you turn
Fax Storage OFF, the screens prompts you to
erase any faxes in memory.
If you press 1, all fax data is erased and Fax Storage is turned off. If you press 2, data
is not erased, and Fax Storage remains on. (See Printing a FAX in Memory (For FAX-
645 only), page 5-8.)
8 - 1
REMOTE FAX OPTIONS (FOR FAX-645 ONLY)
FAX STORAGE:OFF?
SELECT & SET
ERASE ALL DOC?
1.YES 2.NO
Page 67
Changing Remote Retrieval Access Code
Enter your Remote Retrieval Access Code when the FAX/MFC picks up your call, so
you can access features remotely. The access code is preset to 1 5 9 , but you can
change this. (See Changing Remote Codes, page 5-7.)
1
Press Menu/Set, 8, 3.
2
Enter a three-digit number from 000 to 999 and press Menu/Set.
Do not use the same digits that appear in your Remote Activation Code or
Deactivation Code.
3
Press Stop to exit.
Remote Retrieval
You can call your FAX/MFC from any FAX/MFC using touch tone and use a Remote
Access Code and other button presses to retrieve fax messages. Cut out the Remote
Retrieval Access Card on the last page of this manual and keep it in your wallet as an
aid. (See Changing Remote Retrieval Access Code, page 8-2.)
Using Remote Retrieval Access Code
1
Dial your fax number from a FAX/MFC using touch tone.
2
When your FAX/MFC answers and beeps, immediately enter your Remote Retrieval
Access Code (1 5 9 ).
3
The FAX/MFC signals the kinds of messages received:
1 long beep—Fax message(s)
No long beeps—No messages
4
The FAX/MFC then prompts you with two short beeps to enter a command. If you
wait longer than 30 seconds to enter a command, the FAX/MFC hangs up. If you enter
an invalid command, the FAX/MFC beeps three times.
5
Press 9 0 to reset the FAX/MFC when you finish.
6
Hang up.
If your FAX/MFC is set to MANUAL mode, you can access your machine remotely
by phoning it and letting it ring for about 50 seconds. Your FAX/MFC will answer
the phone after 50 seconds of ringing, and you then have 30 seconds to enter your
Remote Access Code.
REMOTE FAX OPTIONS (FOR FAX-645 ONLY)
8 - 2
Page 68
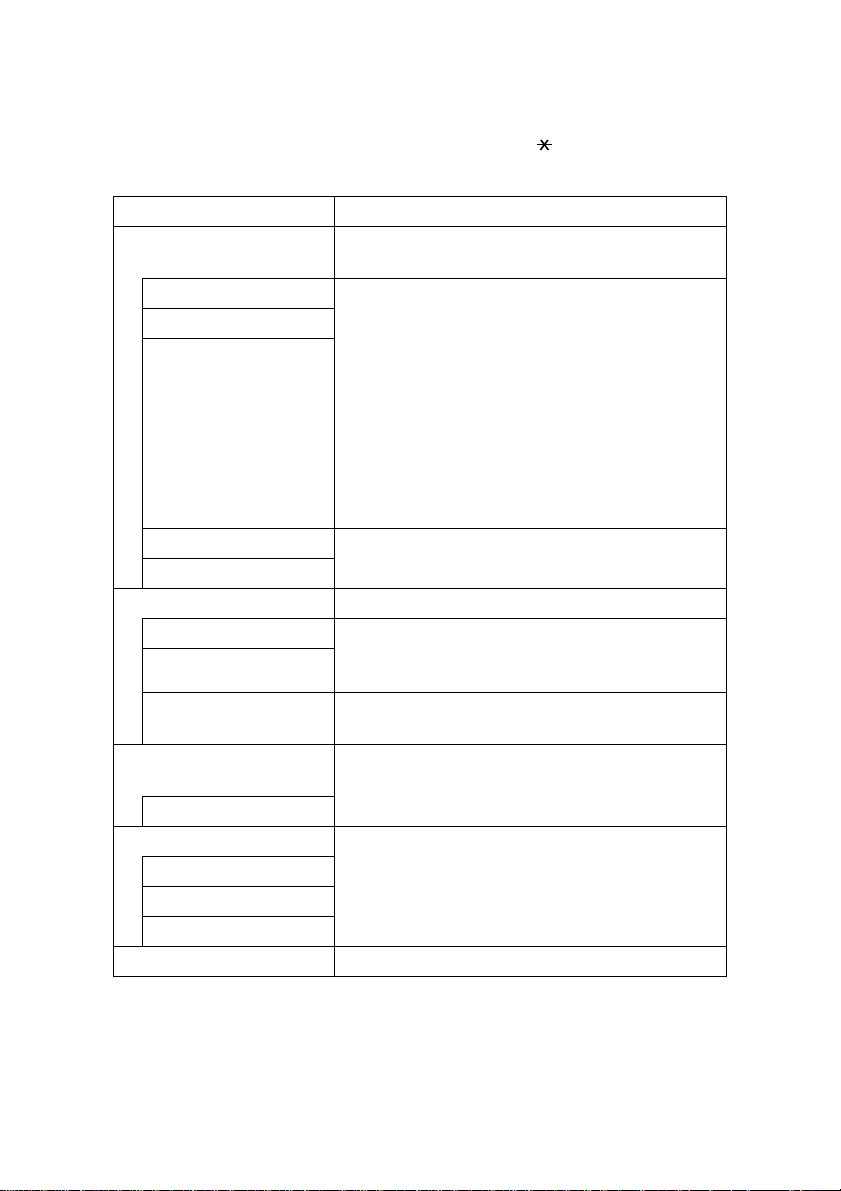
Remote Commands
Follow the commands below to access features remotely. When you call the FAX/
MFC and enter your Remote Retrieval Access Code (1 5 9 ), the system will signal
you with two short beeps to enter a remote command.
Remote Commands
95 Changing Fax
Forwarding setting
1 OFF If you hear one long beep, the change is accepted. If
2 Fax Forwarding
4 FAX FWD No.
6 Fax Storage ON You can set FAX STORAGE to ON or OFF.
7 Fax Storage OFF
96 Retrieve a fax
1 Memory Status List Enter the number of a remote FAX/MFC to receive
2 Retrieve all faxes
3 Erase fax from the
memory
97 Check the Receiving
Status
1 FAX
98 Change Receive Mode If you hear one long beep, you can change the
1 TAD
2 F/T
3 FAX
90 Exit After a long beep, you can exit remote access.
you hear three short beeps, you cannot change it
because the conditions have not been met (Example:
registering fax forwarding). You can register your
fax forwarding number by using 4. FAX FWD NO
(see p. 8-1). Once you have registered the number,
the FAX/MFC will change automatically to
FAXFWD:ON mode. Then retrieve a Memory
Status List by entering 961 (see p. 8-4) to make sure
that the Fax Forwarding number you registered is
correct in the List.
the Memory Status List or stored fax message(s).
(See p. 8-4)
If you hear one long beep, you can erase fax
message(s) from the memory.
You can check whether your FAX/MFC has
received any faxes. If yes, you will hear one long
beep. If no, you will hear three short beeps.
Receive Mode. If you hear three short beeps, you
cannot change it.
Operation Details
8 - 3
REMOTE FAX OPTIONS (FOR FAX-645 ONLY)
Page 69
Retrieving Memory Status List
You can retrieve the Memory Status List from a remote FAX/MFC to see if you have
any fax messages.
1
Dial your fax number.
2
When you hear the beep, immediately enter your Remote Retrieval Access Code
(1 5 9 ).
3
When you hear two short beeps, use the dial pad to press 9 6 1.
4
Using the dial pad, enter the number of the remote FAX/MFC where you want the
Memory Status List forwarded (up to 20 digits), and then press # #.
You can not use and # as dial numbers. However, if you want to store a pause,
press #.
5
After you hear your FAX/MFC beep, hang up and wait.
Your FAX/MFC calls the remote FAX/MFC. The remote FAX/MFC prints the
Memory Status List.
Retrieving Fax Messages
1
Dial your fax number.
2
When you hear the beep, immediately enter your Remote Retrieval Access Code
(1 5 9 ).
3
As soon as you hear two short beeps, use the dial pad to press 9 6 2.
4
Using the dial pad, enter the number of the remote FAX/MFC where you want your
fax messages forwarded (up to 20 digits), then press # #.
You can not use and # as dial numbers. However, if you want to store a pause,
press #.
5
After you hear your FAX/MFC beep, hang up and wait.
Your FAX/MFC calls the remote FAX/MFC. The remote FAX/MFC prints your fax
messages.
REMOTE FAX OPTIONS (FOR FAX-645 ONLY)
8 - 4
Page 70

Changing Fax Forwarding Number
You can change the default setting of your fax forwarding number from a remote
FAX/MFC.
1
Dial your fax number.
2
When you hear the beep, immediately enter your Remote Retrieval Access Code
(1 5 9 ).
3
When you hear two short beeps, enter 9 5 4.
4
Enter the new number of the remote FAX/MFC where you want your fax messages
forwarded (up to 20 digits), then press # #.
You can not use and # as dial numbers. However, if you want to store a pause,
press #. Also, if your FAX/MFC is connected to a PABX, you can press # first before
the FAX/MFC’s number. The # works as well as Recall key.
5
To retrieve the Memory Status List, when you hear two short beeps, use the dial pad
to press 9 6 1.
6
Use the dial pad to enter the number of the remote FAX/MFC (up to 20 digits), and
then press # #.
7
After you hear your FAX/MFC beep, hang up and wait.Your FAX/MFC calls the
remote FAX/MFC. The remote FAX/MFC prints the Memory Status List showing the
new forwarding number.
8
Check the forwarding number.
If the forwarding number is incorrect, return to Step 1 and reset it.
8 - 5
REMOTE FAX OPTIONS (FOR FAX-645 ONLY)
Page 71

9
Message Centre
9
(For FAX-685MC and MFC-960MC Only)
Message Centre Mode
Message Centre Mode allows you to store incoming fax and voice messages in a
flexible memory. The memory stores 15 minutes of voice messages, or up to 20 pages
of fax memory. Any voice or fax message can be retrieved remotely. Memory is
shared between fax and voice messages, which are stored on a “first-come, firstserved” basis.
You must record an outgoing message in order to use the Message Centre Mode. (See
Recording Message Centre Outgoing Message, page 9-2.)
Flexible Memory Settings (Message Storage)
Message Centre Mode offers you six flexible memory settings, so you can decide the
kinds of messages you want to receive.
1.DOC:ON VOICE:ON Both voice and fax messages are stored. You can use
the Fax Forwarding or Paging features and retrieve
voice and fax messages remotely.
2.DOC:ON VOICE:EXT You need an external answering machine connected to
the EXT jack for this setting. Fax messages are stored
in the message centre memory, but voice messages are
stored in your external answering machine. Retrieve
messages from the external answering machine. You
cannot use the Paging feature for voice messages with
this setting.
3.DOC:ON VOICE:OFF All memory is used to store fax messages— no voice
messages will be stored.
4.DOC:OFF VOICE:ON All memory is used to store voice messages—no fax
messages will be stored. Incoming faxes will print on
paper. You can use the Paging feature, and retrieve
voice messages remotely.
5.DOC:OFF VOICE:EXT You need an external answering machine connected to
the EXT jack for this setting. Incoming faxes are not
stored in memory, but will print on paper. Voice
messages are stored in the external answering
machine.
6.DOC:OFF VOICE:OFF Incoming faxes are not stored in memory, but will
print on paper. Voice calls are not stored in memory.
MESSAGE CENTRE (FOR FAX-685MC AND MFC-960MC ONLY)
9 - 1
Page 72
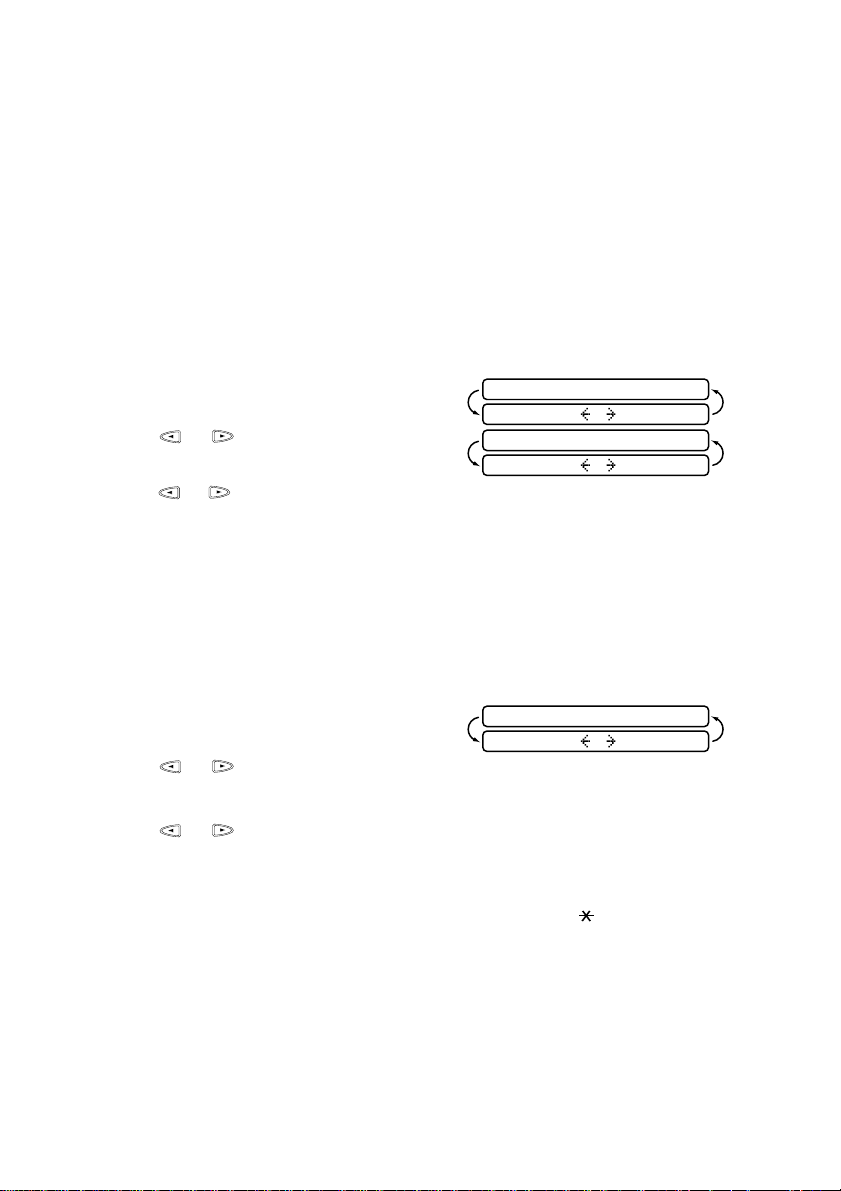
Setting Up the Message Centre
You must set up the Message Centre in the following order:
1
Setting Message Storage. (See Setting Message Storage, page 9-2.)
2
Record Message Centre Outgoing Message (MSG CTR OGM). (See Recording
Message Centre Outgoing Message, page 9-2.)
3
Activate Message Centre Mode. (See Activating Message Centre Mode, page 9-3.)
Setting Message Storage
Read the Flexible Memory Setting descriptions on page 9-1 before you select the DOC
and VOICE settings below.
1
Press Menu/Set, 8, 1.
2
Press or to select ON (or OFF)
and press Menu/Set.
3
Press or to select your setting from the list on pages Flexible Memory Settings
(Message Storage), page 9-1 (ON, OFF, EXT) and press Menu/Set.
4
Press Stop to exit.
DOC:OFF?
SELECT & SET
VOICE:ON?
SELECT & SET
Recording Message Centre Outgoing Message
Recording the Message Centre Outgoing Message (MSG CTR OGM) is the second
step you need to follow before you can turn on the Message Centre. Make sure your
OGM is less than 20 seconds long.
1
Press Menu/Set, 8, 3.
The screen prompts you to choose an OGM.
2
Press or to select MSG CTR OGM (not F/T OGM) and press Menu/Set.
This is the only setting you can select if you want to turn the Message Centre on.
3
Press or to select RECORD OGM and press Menu/Set.
4
Pick up the handset to record a message.
For example: Hello. We are unable to take your call at this time. Please leave a
message after the signal. If you wish to send a fax, please press 5 1, wait for fax
tones, then press the Start button.
5
Replace the handset. The Message Centre will play your OGM.
6
Press Stop to exit.
MSG CTR OGM
SELECT & SET
9 - 2
MESSAGE CENTRE (FOR FAX-685MC AND MFC-960MC ONLY)
Page 73
Listening to Outgoing Message (OGM)
1
Press Menu/Set, 8, 3.
2
Press or to select MSG CTR OGM (or FAX/TEL OGM or PAGING OGM)
and press Menu/Set.
3
Press or to select PLAY OGM and press Menu/Set. Adjust volume by
pressing Volume or .
4
Press Stop to exit.
Erasing Outgoing Message (OGM)
1
Press Menu/Set, 8, 3.
2
Press or to select MSG CTR OGM (or FAX/TEL OGM or PAGING OGM)
and press Menu/Set.
3
Press or to select ERASE OGM and press Menu/Set.
4
Press 1 to erase the OGM—OR—Press 2 to exit without erasing.
5
Press Stop to exit.
Activating Message Centre Mode
Press and hold until it lights and
the screen displays
When light is out, the Message Centre is off. (See Setting Up the Message Centre,
page 9-2.)
MC:MSG CTR
Message Indicator
The light flashes when you have new messages or faxes waiting for your review.
The LCD screen displays the total number of voice
and fax messages stored in the Message Centre
memory.
If you press the flashing to turn off the
Message Centre before getting your new
messages, they won’t be lost. The new messages
will be played automatically and the LCD will ask you to acknowledge the new faxes:
Press 1 to print (and automatically delete) the faxes from memory—OR—Press 2 to
save the faxes in memory until printing is convenient.
MESSAGE CENTRE (FOR FAX-685MC AND MFC-960MC ONLY)
VOICE:03 DOC:02
PRINT DOC?
1.YES 2.NO
9 - 3
Page 74
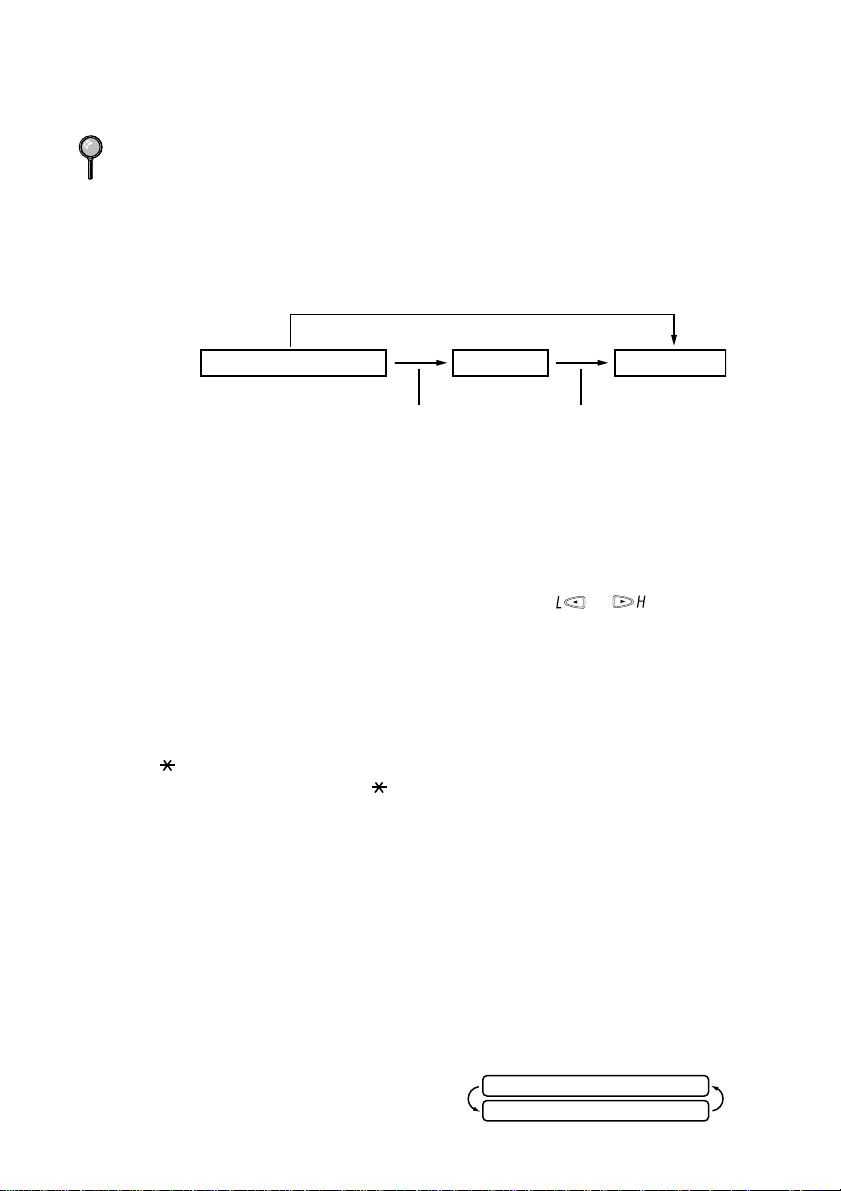
What Happens When the Memory is Full...
If the memory becomes full when you have set your machine to Message Centre
mode, the machine will change to F/T mode automatically. In this mode, the machine
can accept incoming faxes automatically. Then, if your machine should run out of
paper, the answer mode will shift automatically to manual mode. In manual mode the
call is not answered, so your caller will know to try again later.
Print the Memory Status List and select the item to be cleared. This will clear space for
new messages and faxes to be stored in memory. (See Printing Reports, Chapter 11
Out of Recording Paper and Memory Full
.)
Answer Mode] Manual Mode
Print the Memory Status List and select the item to be cleared. This will clear space
for new messages and faxes to be stored in memory.
Message Centre Mode F/T Mode
Memory Full
Out of Recording Paper
and Memory Full
Playing Voice Messages
Follow the steps below to listen to voice messages.
1
Press Play/Record. Adjust Volume by pressing arrow keys or .
All messages are played in the order they were recorded. The display shows the
number of the current message, and the total number of messages.
If Caller ID information was received, the FAX/MFC beeps during the message and
displays the Caller ID information for one second.
During playback, the screen displays the time and date the message was recorded.
2
Press (RWD) at the end of the message to repeat a message. Press # (FWD) to skip
to the next message. You can press and # repeatedly until you reach the message
you want to play.
3
Press Stop to exit.
Printing a Fax Message
Once you print a new fax message stored in memory, it is erased from the memory
automatically.
1
Press Play/Record. After two seconds, the FAX/MFC begins to play voice
messages.
2
If there are fax messages in memory,
the LCD displays:
3
To print the faxes, press 1—OR—Press 2 to
exit without printing.
PRINT DOC?
1.YES 2.NO
9 - 4
MESSAGE CENTRE (FOR FAX-685MC AND MFC-960MC ONLY)
Page 75
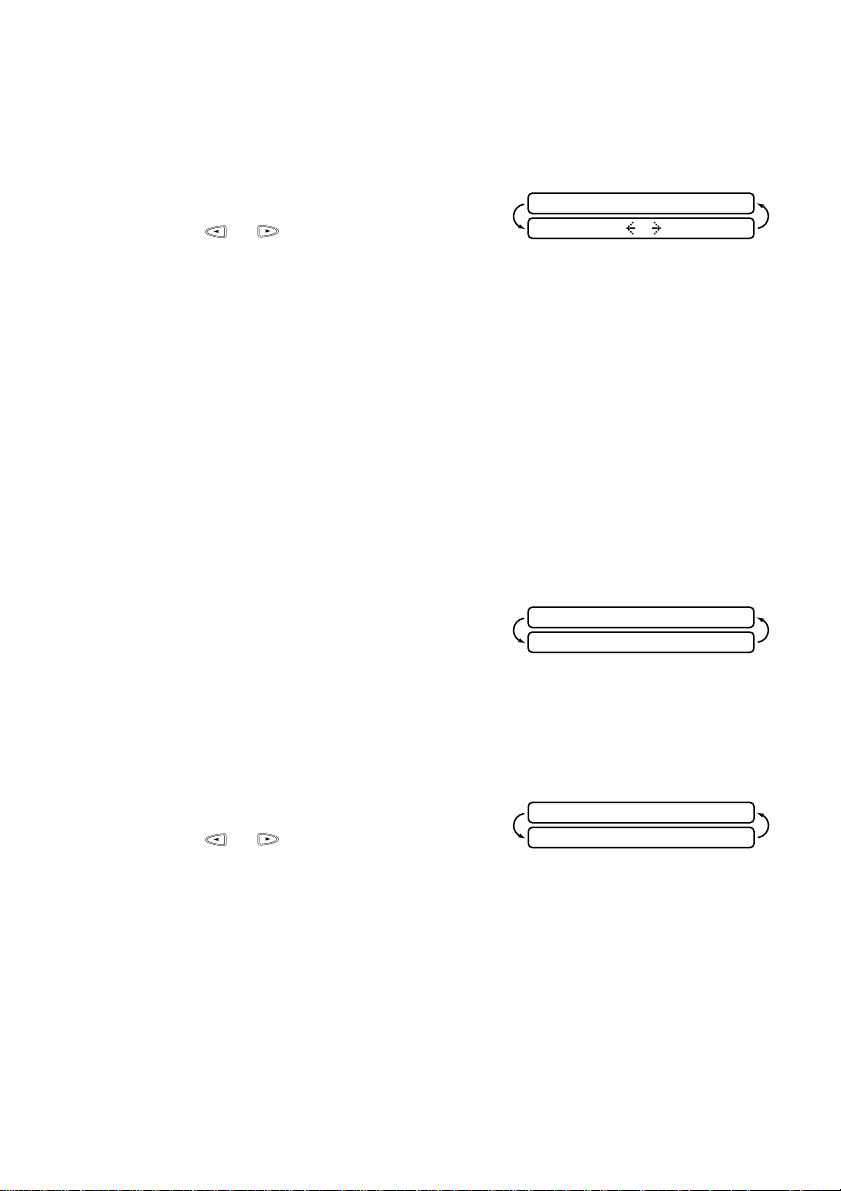
Backup Printing Option
When you choose DOC: ON in the Message Centre mode, all incoming fax messages
are stored in the available memory for retrieval. To print a backup copy automatically,
turn this option on.
1
Press Menu/Set, 8, 2.
2
Press or to display ON (or OFF) and
press Menu/Set.
3
Press Stop to exit.
BACKUP PRINT:ON
SELECT & SET
Erasing Messages
If you choose to erase all fax messages, the FAX/MFC will print any previously
unprinted faxes before erasing them from memory. Fax messages cannot be erased
individually.
You can erase voice messages individually, or all at once.
To erase voice messages individually
1
Press Play/Record. The FAX/MFC sounds a two-second beep and begins message
playback. Each message is preceded by one long beep, and followed by two short
beeps.
2
To erase a specific message, press Erase
immediately after the two short beeps, or while
the message is playing. The screen prompts
3
Press 1 to erase the message—OR—Press 2 to cancel.
4
Press Stop to exit.
ERASE THIS MSG.?
1.YES 2.NO
To erase messages all at once
1
Press Erase.
2
Press or to select erasing all voice
messages (ALL VOICE), all document
messages (ALL DOC), or all messages—both voice and fax—(ALL MSG) and press
Menu/Set.
3
Press 1 to erase—OR—Press 2 to cancel.
4
Press Stop to exit.
MESSAGE CENTRE (FOR FAX-685MC AND MFC-960MC ONLY)
ERASE ALL VOICE?
SELECT <- -> & SET
9 - 5
Page 76
Setting Maximum Time for Incoming Messages
Your FAX/MFC comes set to receive voice messages up to 30 seconds long. You can
change this setting to any length from 20 seconds to 60 seconds, in 5-second
increments.
1
Press Menu/Set, 8, 4.
2
Press or to select the maximum time
setting for incoming messages and press
Menu/Set.
3
Press Stop to exit.
MESSAGE 30 SEC?
SELECT & SET
Setting Toll Saver
When you set the toll saver feature, the FAX/MFC answers after four rings if you
don’t have messages, and after two rings if you do have messages. This way, when
you call the FAX/MFC, if it rings three times, you know you have no messages, and
can hang up, to avoid a toll charge.
When Toll Saver is ON, it overrides your Ring Delay setting. Toll Saver must be off
for the FAX/MFC to operate using your Ring Delay setting. (See Setting Ring Delay,
page 5-3.)
1
Press Menu/Set, 2, 1.
2
Press or to select the TOLL SAVER (or RING DELAY) and press
Menu/Set.
3
Press or to select ON and press Menu/Set.
4
Press Stop to exit.
ICM Recording Monitor
This feature lets you turn the speaker volume for voice messages ON or OFF. When
you turn the monitor OFF, you will not hear messages as they come in.
1
Press Menu/Set, 8, 5.
2
Use or to select OFF (or ON) and press Menu/Set.
3
Press Stop to exit.
Recording a Conversation
You can record a telephone conversation by pressing Play/Record during the
conversation. Your recording can be as long as the Incoming Message Maximum
Time. You and the other party will hear a beep every 15 seconds while recording. To
stop recording, press Stop. You cannot record a conversation using Speaker Phone.
9 - 6
MESSAGE CENTRE (FOR FAX-685MC AND MFC-960MC ONLY)
Page 77
Fax Forwarding/Paging
When Paging is set to ON, your machine dials the pager number you have
programmed and, when connected, plays the Paging OGM that you have recorded.
This activates your pager and let you know you have a fax or voice message in the
Message Centre memory.
When Fax Forwarding is set to ON, your FAX/MFC dials the FAX/MFC phone
number you’ve programmed, and forwards any faxes you’ve received.
You can not use Paging and Fax Forwarding at the same time.
Programming a Fax Forwarding Number
1
Press Menu/Set, 8, 6.
2
Press or until the LCD displays FAX FORWARD and press Menu/Set.
3
Enter the number of the FAX/MFC where faxes
will be forwarded (up to 20 digits) and press
Menu/Set.
4
Press Stop to exit.
You can change a Fax Forwarding number remotely. (See page 9-13.)
You can not use Paging and Fax Forwarding at the same time.
FWD#:
ENTER & SET
MESSAGE CENTRE (FOR FAX-685MC AND MFC-960MC ONLY)
9 - 7
Page 78
Recording the Paging Outgoing Message (OGM)
Before paging can work, you should first record the Paging OGM.
1
Press Menu/Set, 8, 3. The screen prompts you
to choose an OGM.
2
Press or to reach PAGING MSG. and press Menu/Set.
3
Press or to Select RECORD OGM? and press Menu/Set.
Then pick up the handset to record a message.
4
Replace the handset. Your OGM is played.
5
Press Stop.
Programming the Paging Number
1
Press Menu/Set, 8, 6.
2
Press or until the screen displays
3
Press Menu/Set. The screen prompts you to
enter your pager number.
4
Entert your paging number up to 20 digits. This
is the telephone number which your machine must call.
5
Press Menu/Set.
6
Press Stop to exit.
MSG CTR OGM
SELECT & SET
PAGING?
PAG#:
ENTER & SET
You cannot change a Paging number remotely.
9 - 8
MESSAGE CENTRE (FOR FAX-685MC AND MFC-960MC ONLY)
Page 79
Remote Retrieval
Using Remote Retrieval Access Code
1
Dial your fax number from a touch tone phone.
2
When your FAX/MFC answers, immediately enter your Remote Retrieval Access
Code.
3
The FAX/MFC signals the kinds of messages received:
1 long beep—Fax message(s)
2 long beeps—Voice message(s)
3 long beeps—Fax and Voice message(s)
No beeps—no messages
4
The FAX/MFC then prompts you with two short beeps to enter a command. If you
wait longer than 30 seconds to enter a command, the MFC hangs up. If you enter an
invalid command, the FAX/MFC beeps three times.
5
Press 9 0 to reset the FAX/MFC when you finish.
6
Hang up.
If your FAX/MFC is set to MANUAL mode, you can access your machine remotely
by phoning it and letting it ring for about 50 seconds. Your FAX/MFC will answer
the phone after 50 seconds of ringing, and you then have 30 seconds to enter your
Remote Access Code.
Changing Remote Retrieval Access Code
Enter your Remote Retrieval Access Code when the FAX/MFC picks up your call, so
you can access features remotely. The access code is preset to 159 , but you can
change it.
1
Press Menu/Set, 8, 7.
2
Enter a three-digit number from 000 to 999 and press Menu/Set. The “ ” cannot be
changed.
Do not use the same digits that appear in your Remote Activation or Deactivation
Code.
3
Press Stop to exit.
When you call machine and enter the Remote Access Code, you must press the fourth
digit (three-digit number plus ).
MESSAGE CENTRE (FOR FAX-685MC AND MFC-960MC ONLY)
9 - 9
Page 80
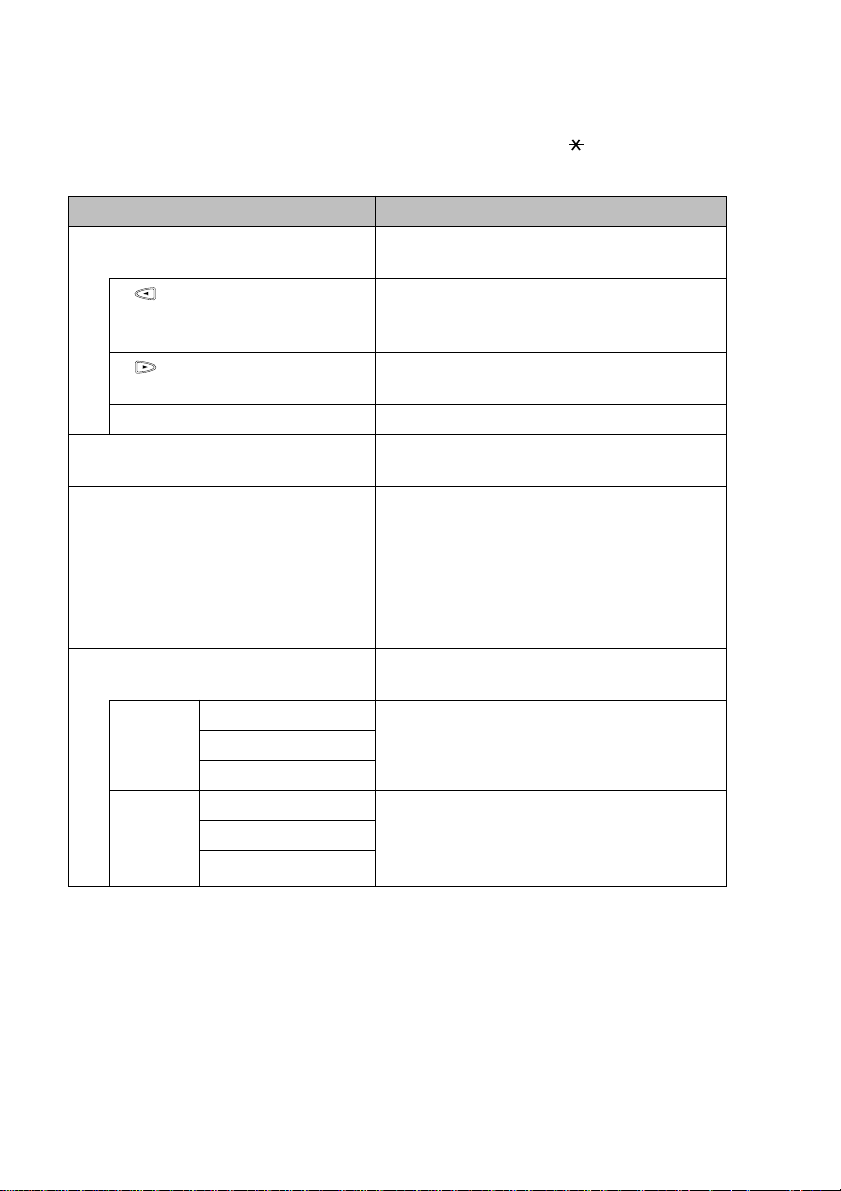
Remote Commands
Follow the commands below to access features remotely. When you call the
FAX/MFC and enter your Remote Retrieval Access Code (159 ), the system will
signal you with two short beeps to enter a remote command.
Remote Commands Operation Details
91 Playing Voice Messages After one long beep, the FAX/MFC plays In
Coming Message.
1 (go back) Press 1 while listening to an ICM to repeat it.
If you press 1 before a message, you will hear
the previous message.
2 (Skip to next) While playing the ICM, you can skip to the
next message.
9 STOP Playing Stop playing the ICM.
92 Record Memo After one long beep, you can record a memo.
To stop recording, press 9.
93 Erase all ICM If you hear one long beep, the erase is
accepted. If you hear three short beeps, you
cannot erase because all voice messages have
not been played, or there is no voice message
to erase.
*This code erases all recorded messages, not
one at a time.
94 Play and Record OGM in
memory
1 Play 1 MSG CTR OGM The FAX/MFC plays the selected OGM. You
2 FAX/TEL OGM
3 PAGING OGM
2 Record 1 MSG CTR OGM After one long beep, you can record the
2 FAX/TEL OGM
3 PAGING OGM
can stop playing OGMs by pressing 9.
selected OGM. You will hear the message
played once. You can stop recording the
message by pressing 9.
9 - 10
MESSAGE CENTRE (FOR FAX-685MC AND MFC-960MC ONLY)
Page 81
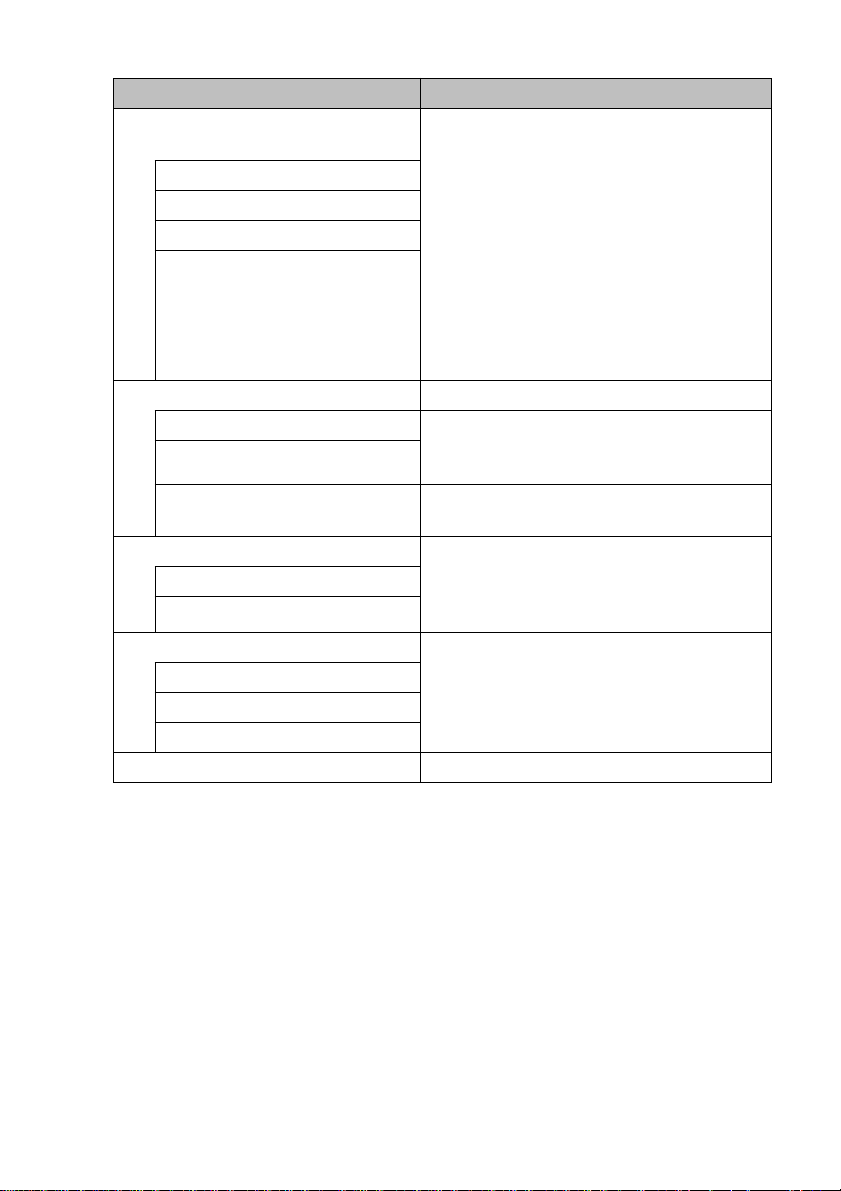
Remote Commands Operation Details
95 Changing Fax Forwarding/
Paging Setting
1 OFF
2 Fax Forwarding
3 Paging
4 FAX FWD NO.
If you hear one long beep, the change is
accepted. If you hear three short beeps, you
cannot change it because the conditions have
not been met (Example: registering paging
number). You can register your fax forwarding
number by using 4. FAX FWD NO. (See page
9-13.) Once you have registered the number,
the FAX/MFC will change automatically to
FAXFWD:ON mode. Then retrieve a Memory
Status List by entering 9 6 1 (See page 9-12.)
to make sure that the Fax Forwarding number
you registered is correct in the List.
96 Retrieve a fax
1 Memory Status List Enter the number of a remote FAX/MFC to
2 Retrieve all faxes
receive a report or stored fax messages. (See
page 9-12.)
3 Erase fax in the memory If you hear one long beep, you can erase the fax
message from the memory.
97 Check the receiving status You can check whether your FAX/MFC has
1 Document
2 VOICE
received any Document or VOICE messages.
If yes, you will hear one long beep. If no, you
will hear three short beeps.
98 Change Answer Mode If you hear one long beep, you can change the
1 MSG CTR
2 F/T
3 FAX
answer mode. If you hear three short beeps,
you cannot change it. (Example: There is no
MSG CTR OGM when you want to change to
MSG CTR mode.)
90 Exit After a long beep, you can exit remote control.
MESSAGE CENTRE (FOR FAX-685MC AND MFC-960MC ONLY)
9 - 11
Page 82
Retrieving Memory Status List
You can retrieve the Memory Status List from a remote FAX/MFC to see if you have
any fax messages.
1
Dial your fax number.
2
When you hear the beep, immediately enter your Remote Retrieval Access Code
(1 5 9 ).
3
When you hear two short beeps, use the dial pad to press 9 6 1.
4
Using the dial pad, enter the number of the remote FAX/MFC (up to 20 digits) where
you want the Memory Status List forwarded, and then press # #.
You can not use or # as dial numbers. However, if you want to store a pause, press #.
5
After you hear your FAX/MFC beep, hang up and wait.
Your FAX/MFC calls the remote FAX/MFC. The remote FAX/MFC prints the
Memory Status List.
Retrieving Fax Messages
1
Dial your fax from a remote telephone or FAX/MFC using touch tone.
2
When you hear the beep, immediately enter your Remote Retrieval Access Code
(1 5 9 ).
3
As soon as you hear two short beeps, use the dial pad to press 9 6 2.
4
Using the dial pad, enter the number of the remote FAX/MFC (up to 20 digits) where
you want your fax messages forwarded, and then press # #.
You can not use or # as dial numbers. However, if you want to store a pause, press #.
5
After you hear your FAX/MFC beep, hang up and wait.
Your FAX/MFC calls the remote FAX/MFC. The remote FAX/MFC prints your fax
messages.
9 - 12
MESSAGE CENTRE (FOR FAX-685MC AND MFC-960MC ONLY)
Page 83

Changing Fax Forwarding Number
You can change the default setting of your fax forwarding number from a remote
FAX/MFC.
1
Dial your fax number.
2
When you hear the beep, immediately enter your Remote Retrieval Access Code
(1 5 9 ).
3
When you hear two short beeps, use the dial pad to press 9 5 4.
4
Enter the new number of the remote FAX/MFC where you want your fax messages
forwarded, then press # #.
You can not use or # as dial numbers. However, if you want to store a pause, press
#. Also, if your FAX/MFC is connected to a PABX, you can press # first before the
FAX/MFC’s number. The # works as well as Recall key.
5
To retrieve the Memory Status List, when you hear two short beeps, use the dial pad
to press 9 6 1.
6
Use the dial pad to enter the number of the remote FAX/MFC (up to 20 digits), then
press # #.
7
After you hear your FAX/MFC beep, hang up and wait.
Your FAX/MFC calls the remote FAX/MFC. The remote FAX/MFC prints the
Memory Status List showing the new forwarding number.
8
Check the forwarding number.
If the forwarding number is not correct, return to Step 1 to reset it.
There are some FAX/MFCs which, having completely received the MEMORY
STATUS LIST from your machine, will give an audible “HANDSET UP” or similar
alarm, if you keep the line held in readiness for the next command.
In such cases, it may be possible to clear the alarm and enter the next command (e.g.
“962” for the RETRIEVE), by pressing the Stop once or twice on the receiving
machine during the alarm beeping time. If this doesn’t work, simply replace the
handset, pause, and redial the call, using then the “962” command after your machine
answers and accepts your remote access code.
MESSAGE CENTRE (FOR FAX-685MC AND MFC-960MC ONLY)
9 - 13
Page 84
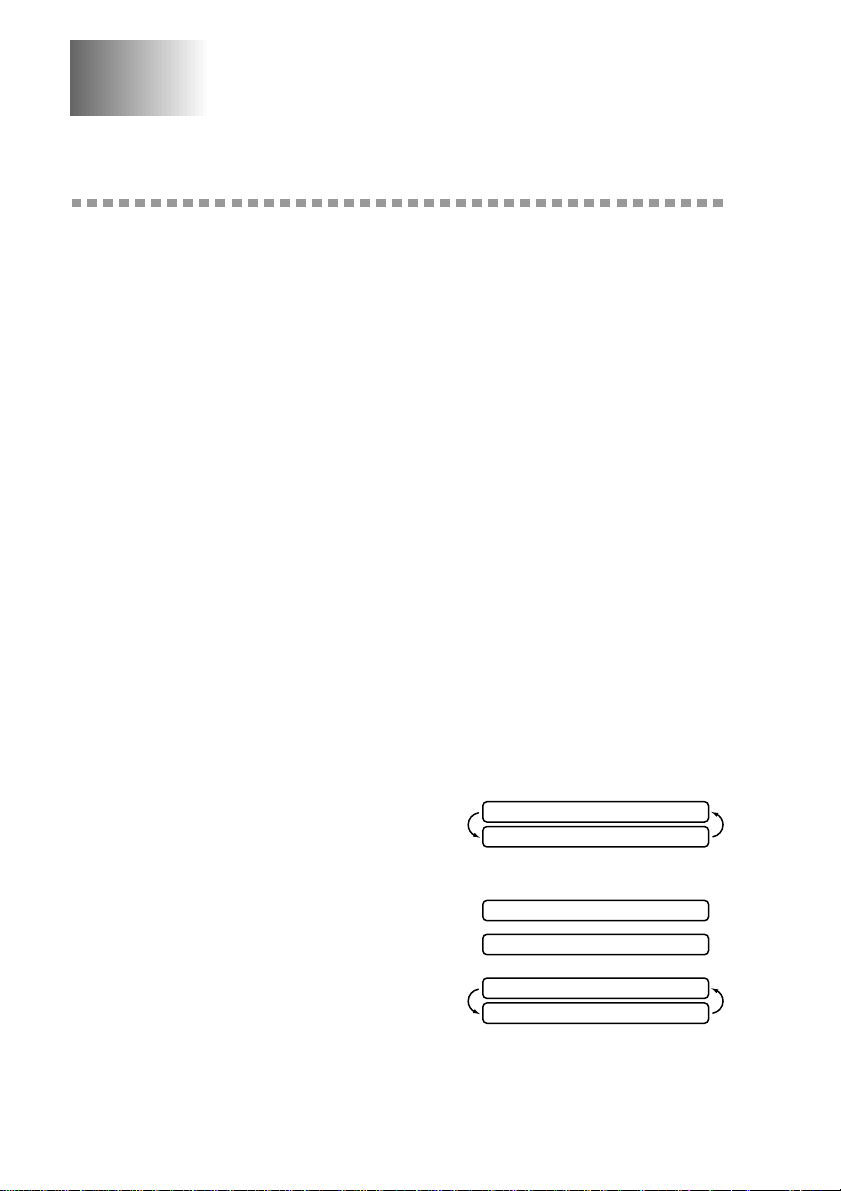
10
10
Making Copies
Copy Functions
To make a single copy that is not reduced, enlarged or sorted, you only have to press
one key. The default resolution for a single copy is Super Fine. Set the resolution to
PHOTO for photographs. Remember, your machine cannot scan anything closer than
4 mm from the edge of the paper.
Making a Single Copy
1
Place the original face down in the ADF.
2
Press Copy/Help twice.
To cancel, press Stop.
Do NOT pull on the paper while copying is in progress.
Copy Options: Single or Multiple Copies, Reduce/Enlarge, Sort/Stack
You can choose additional copy options. First, you can select the number of copies.
Next, you can choose whether multiple copies will be STACKED (all copies of page 1,
then all copies of page 2, etc.) or SORTED (collated). Finally, you can choose an
enlargement or reduction ratio. To automatically reduce the copy to the paper size you
have set for the paper tray, select AUTO. To reduce the copy by a fixed percentage,
choose 93%, 87%, 75% or 50%. Or, to enlarge the copy, select 150%, 125% or
120%. To copy a document at its original size, select 100%.
1
Place the original face down in the ADF.
2
Press Copy/Help.
NO.OF COPIES:01
THEN COPY OR SET
3
Enter the number of copies you want (1-99).
For example, press 9 for nine copies.
To start copying now, press Copy/Help.
If you would like to select additional copy
options, like SORT, ENLARGE or
REDUCE, press Menu/Set.
10 - 1
MAKING COPIES
NO.OF COPIES:09
STACK P.01 FNE
MULTI COPY:STACK
THEN COPY OR SET
Page 85
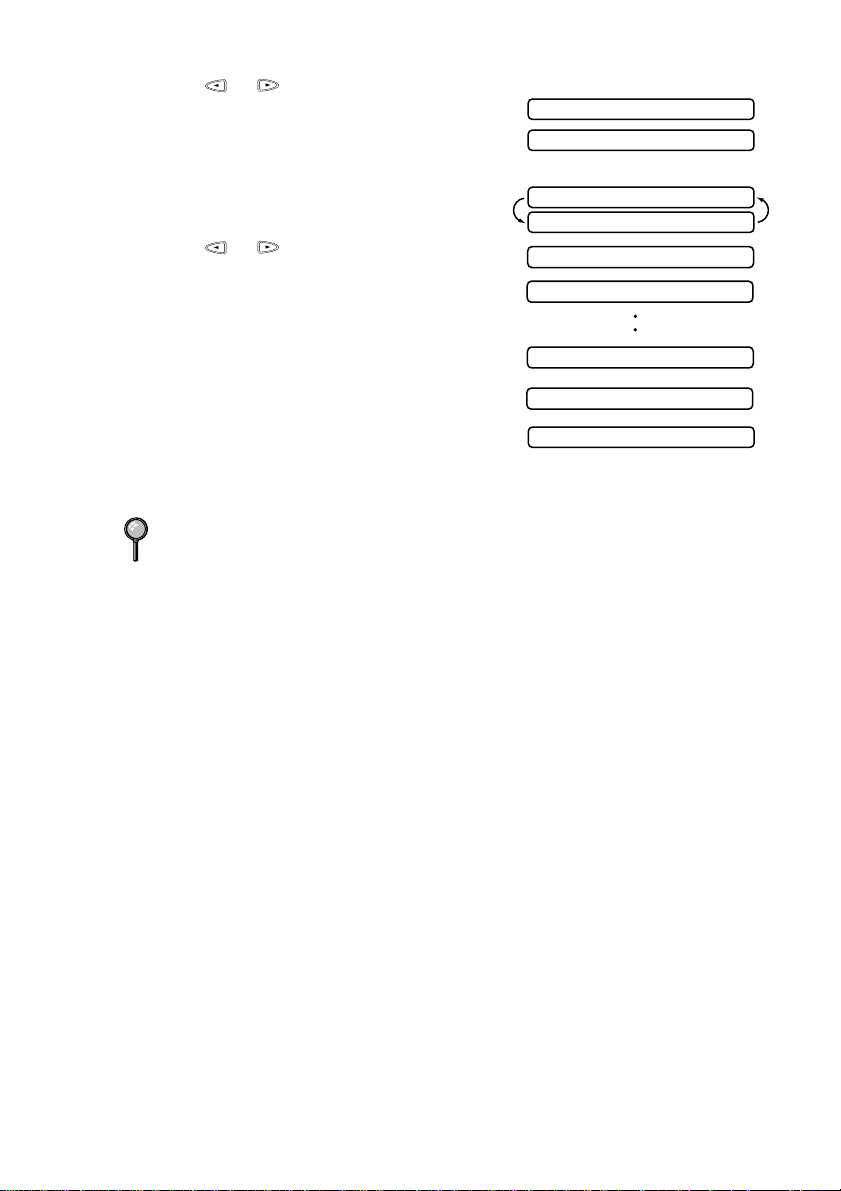
4
Press or to select SORT or STACK.
For example, select SORT.
To start copying now without enlarging or
reducing, press Copy/Help.
To reduce or enlarge the image, press
Menu/Set.
5
Press or to select an enlargement or
reduction ratio.
MULTI COPY:SORT
SORT P.01 FNE
ELG/RDC:100% ?
THEN COPY OR SET
ELG/RDC:100% ?
ELG/RDC:120% ?
ELG/RDC: 93% ?
For example, 75 %.
6
Press Copy/Help.
If you are making multiple copies and get a MEMORY FULL message while you
are scanning the first page, press Stop to cancel the job. Then make a single copy.
If you selected SORT and the MEMORY FULL message appears while scanning
subsequent pages, you can press Copy/Help to copy the portion that is in memory,
or press Stop to cancel. To restart the copy job using less memory, press Copy/Help
for stacked copies.
ELG/RDC: 75% ?
SORT P.01 FNE
MAKING COPIES
10 - 2
Page 86
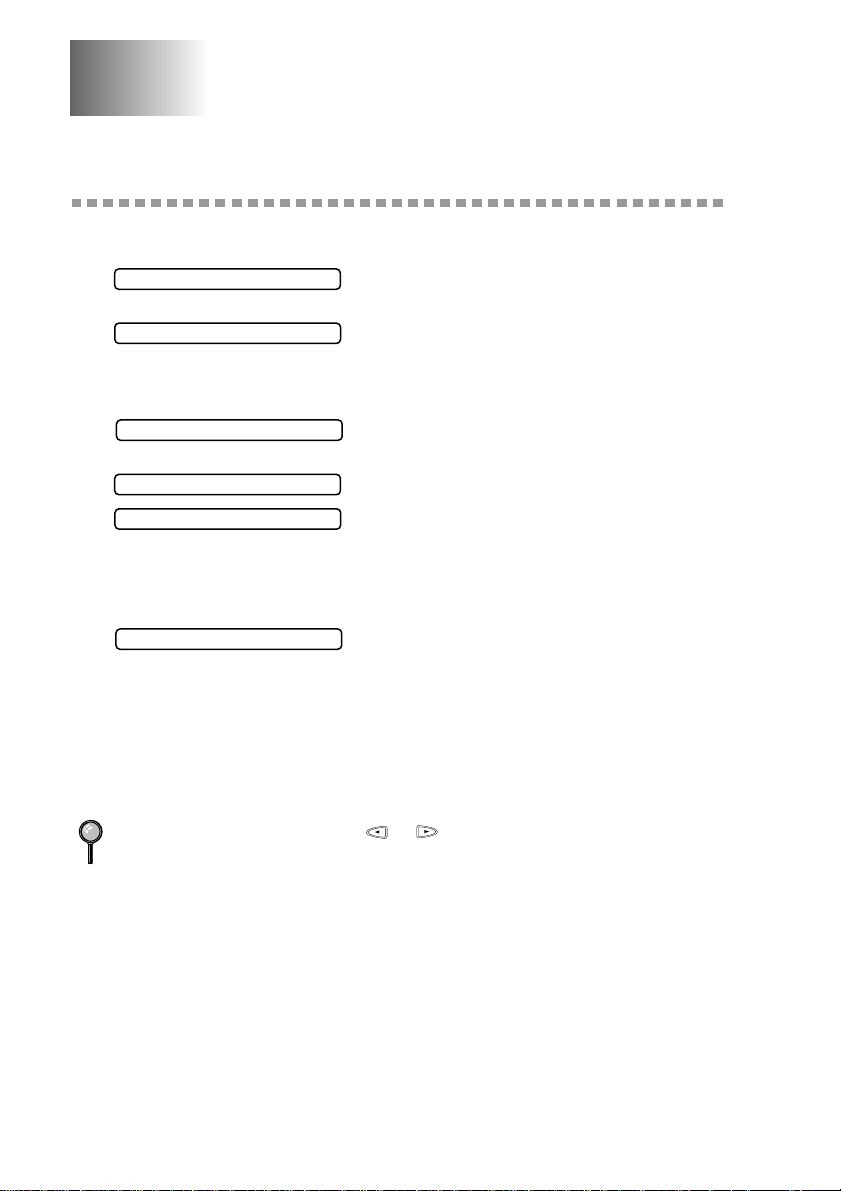
11
11
Printing Reports
FAX/MFC Settings and Activity
You can print the following lists and reports:
1.TRANSMIT REPOR
2.JOURNAL
3.QUICK-DIAL
4.TEL.INDEX
5.SYSTEM SETUP
6.MEMORY STATUS
Choose to print a Transmission Verification
Report after each fax you send.
Journal lists infomation about the last 15
(FAX-645), 30 (FAX-685MC and MFC-960MC)
incoming and outgoing faxes. TX means
Transmit, RX means Receive.
Lists names and numbers stored in One Touch and
Speed Dial memory, in numerical order.
Quick-dial list (above), alphabetically.
Lists settings for INITIAL SETUP, SETUP
RECEIVE, SETUP SEND, PRINT REPORTS,
TEL SERVICE, REMOTE FAX OPT (for
FAX-645 only) and SETUP MSG CTR (for
FAX-685MC and MFC-960MC only).
Lists summary information and amount of
memory in use.
To Print a Report
1
Press Menu/Set, 7.
2
Enter the number (see list above) of the report you want to print. For example, press
4 to print the SYSTEM SETUP.
For Journal, press 2 and also press or to select PRINT JOURNAL and press
Menu/Set.
3
Press Start.
4
Press Stop to exit.
11 - 1
PRINTING REPORTS
Page 87
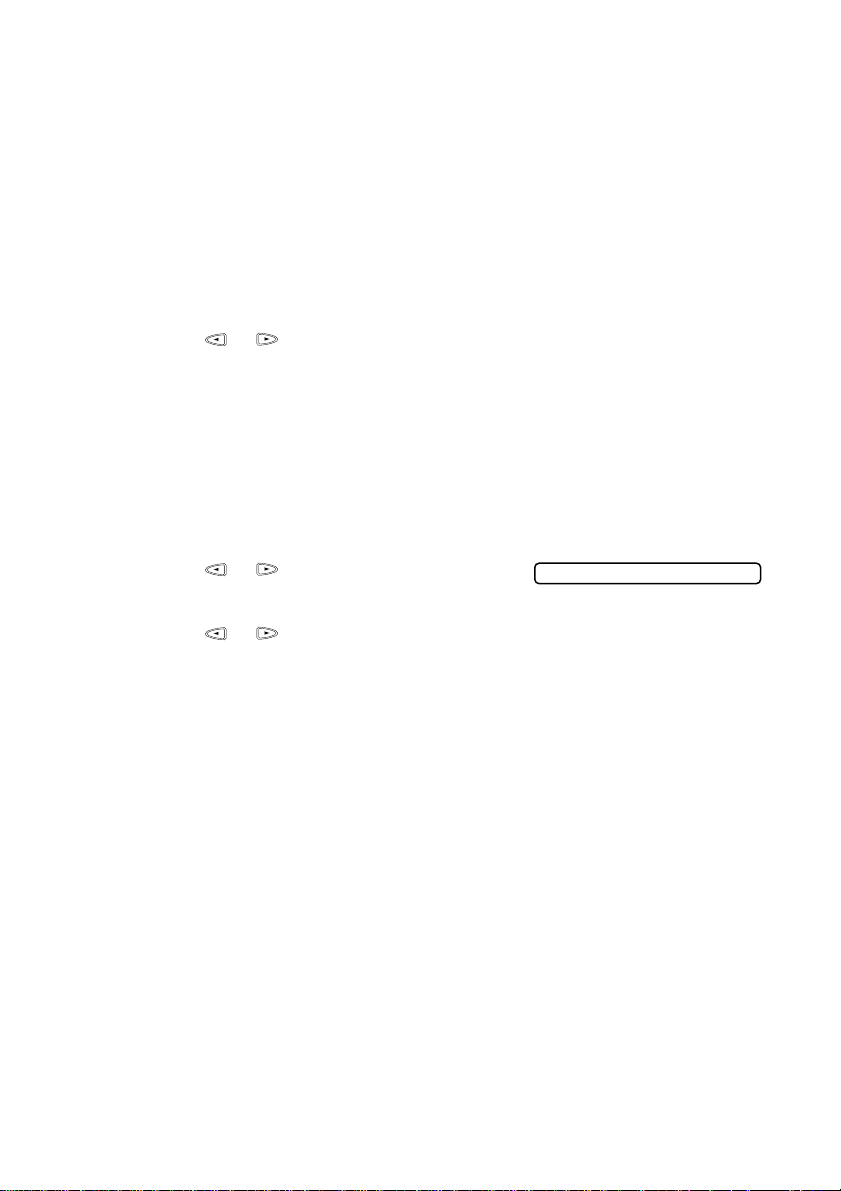
Transmission Verification (Xmit) Report
You can use the Xmit Report as a proof that you sent a fax. This report lists the name
or fax number of the receiving party, the time and date of transmission, and whether
the transmission was successful.
When the feature is OFF, the report is printed automatically only if there’s an error
during transmission. If the report indicates ERROR, send the original again. If the
report indicates you should check the readability of certain pages, resend those pages.
When the feature is ON, the report is printed with every fax you send.
1
Press Menu/Set, 7, 1.
2
Press or to select ON (or OFF) and press Menu/Set.
3
Press Stop to exit.
Journal Period
You can set the FAX/MFC to print Journal at specific intervals (1, 3, 6, 12, 24 hours,
2, 4 or 7 days). If you set the interval to OFF, you can print the report by following
the steps in the previous section.
1
Press Menu/Set, 7, 2.
2
Press or to display:
3
Press Menu/Set.
4
Press or to choose your setting . If you choose 7 days, the screen prompts
you to choose a day at which to begin the 7-day countdown.
5
When the screen displays the setting you want, press Menu/Set.
6
Enter the time in 24-hour format, that printing will begin and press Menu/Set.
(For example, enter 19:45 for 7:45 PM).
7
Press Stop to exit.
JOURNAL PERIOD
PRINTING REPORTS
11 - 2
Page 88

12
12
Important Information
Important Safety Instructions
1
Read all of these instructions.
2
Save them for later reference.
3
Follow all warnings and instructions marked on the product.
4
Unplug this product from the wall outlet before cleaning. Do not use liquid or aerosol
cleaners. Use a damp cloth for cleaning.
5
Do not use this product near water.
6
Do not place this product on an unstable cart, stand, or table. The product may fall,
causing serious damage to the product.
7
Slots and openings in the cabinet and the back or bottom of the machine are provided
for ventilation; to ensure reliable operation of the product and to protect it from
overheating, these openings must not be blocked or covered. The openings should
never be blocked by placing the product on a bed, sofa, rug, or other similar surface.
This product should never be placed near or over a radiator or heater. This product
should never be placed in a built-in installation unless proper ventilation is provided.
8
This product should be operated from the type of power source indicated on the label.
If you are not sure of the type of power available, consult with your dealer or local
power company.
9
This product is equipped with a 3-wire earthed plug. This plug will fit into only an
earthed socket. This is a safety feature. If you are unable to insert the plug into the
outlet, contact your electrician to replace your obsolete socket. Do not defeat the
purpose of an earthed plug.
10
Do not allow anything to rest on the power cord. Do not place this product where
people can walk on the cord.
11
If an extension cord is used with this product, make sure that the total ampere ratings
on the products plugged into the extension cord do not exceed ampere rating of the
extension cord ampere rating. Also, make sure that the total of all products plugged
into the wall or floor socket does not exceed the socket rating.
12
Do not place anything in front of the machine that will block received faxes. Do not
place anything in the path of received faxes.
13
Do not touch a document during printing.
14
Never push objects of any kind into this product through cabinet slots, since they may
touch dangerous voltage points or short out parts resulting in a risk of fire or electric
shock. Never spill liquid of any kind on the product.
12 - 1
IMPORTANT INFORMATION
Page 89

15
Do not attempt to service this product yourself, as opening or removing covers may
expose you to dangerous voltage points and/or other risks. Refer all servicing to
service personnel.
16
This product has no mains ON/OFF switch. It is therefore highly important that access
to the mains plug and the mains socket to which the plug is connected, is never
obstructed, in case for some reason the mains power to the machine must be quickly
disconnected.
17
Unplug this product from the mains power and telephone line sockets, and refer
servicing to qualified Service Personnel under the following conditions:
A:When the power cord is damaged or frayed.
B:If liquid has been spilled into the product.
C:If the product has been exposed to rain or water.
D:If the product does not operate normally when the operating instructions are
followed. Adjust only those controls that are covered by the operating instructions.
Improper adjustment of other controls may result in damage and will often require
extensive work by a qualified technician to restore the product to normal operation.
E:If the product has been dropped or the cabinet has been damaged.
F:If the product exhibits a distinct change in performance, indicating a need for
service.
18
To protect your product against power surges, we recommend the use of a power
protection device (Surge Protector).
IMPORTANT INFORMATION
12 - 2
Page 90
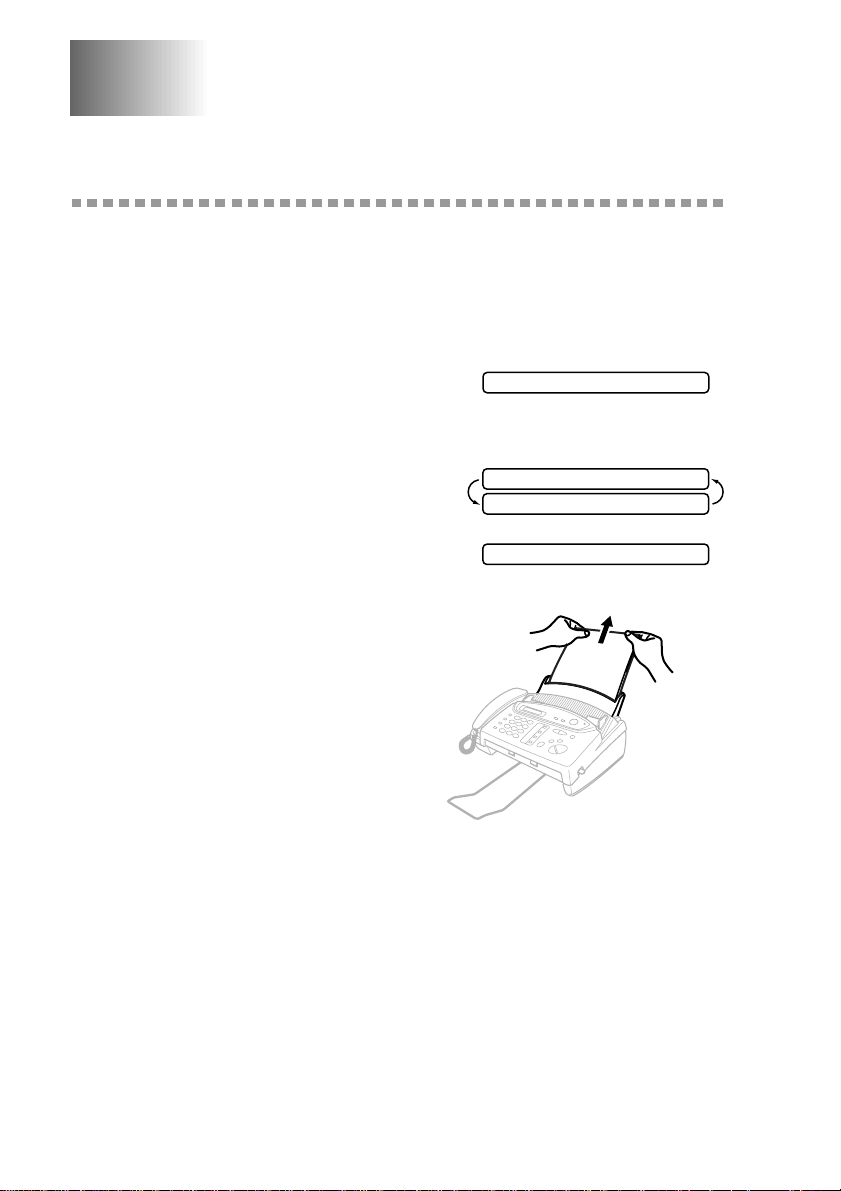
13
Troubleshooting and
13
Routine Maintenance
Troubleshooting
Error Messages
You may occasionally encounter a difficulty with your FAX/MFC or telephone line.
If this happens, your FAX/MFC often identifies the problem and displays an error
message. The list below explains the most common error messages.
The ribbon is used up and printing is not
possible. Replace the ribbon or the ribbon
cartridge with a new one. (See Changing the
Ribbon, page 13-7.)
The FAX/MFC is out of paper, or the paper is
not properly loaded. After you load paper,
press Start key.
The paper is jammed in the FAX/MFC.
1
Remove any paper that is not jammed.
CHANGE CARTRIDGE
CHECK PAPER
PRESS START KEY
CHECK PAPER
13 - 1
TROUBLESHOOTING AND ROUTINE MAINTENANCE
Page 91
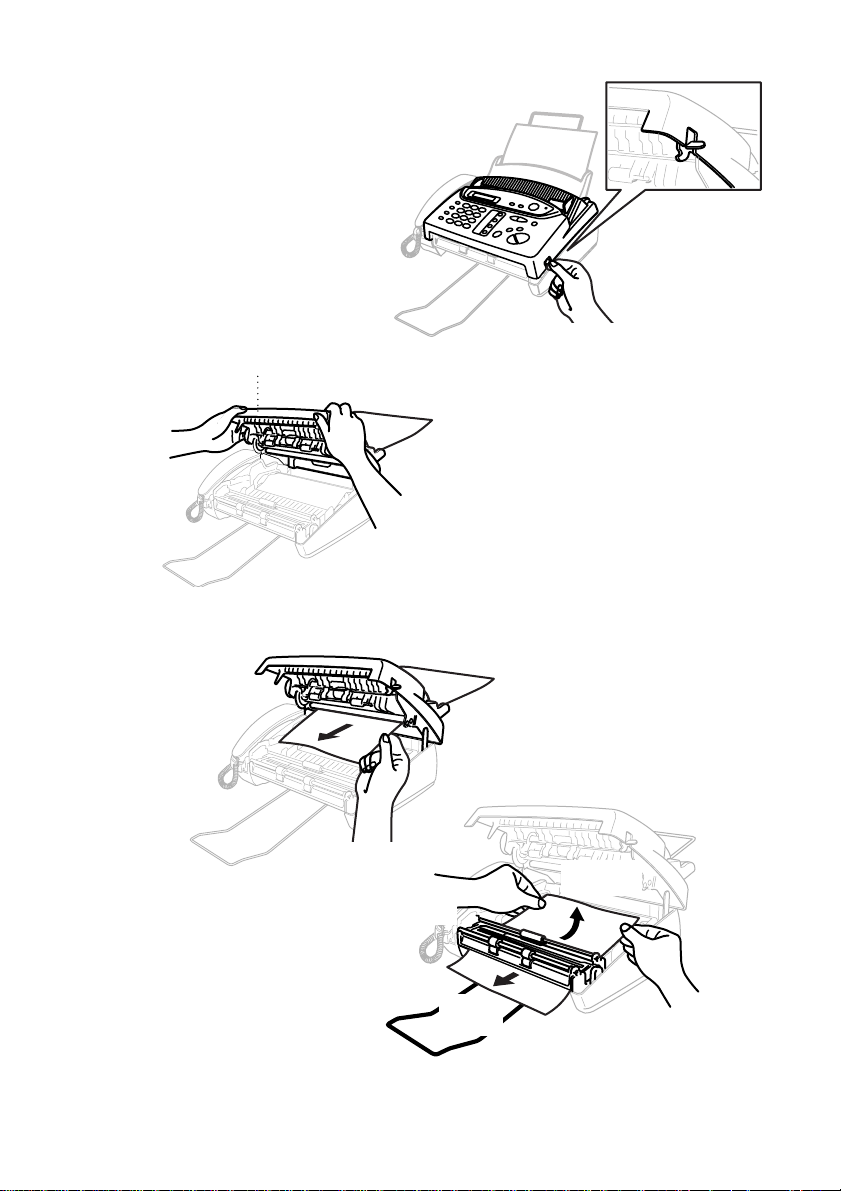
2
Open the top cover by lifting
the gray lever on the right side
of the top cover.
Top Cover
3
Pull the jammed printout gently from the paper tray toward the front of the machine.
If the printout is jammed, then pull it toward the back of the machine.
YES!
Printout is jammed
NO!
TROUBLESHOOTING AND ROUTINE MAINTENANCE
13 - 2
Page 92
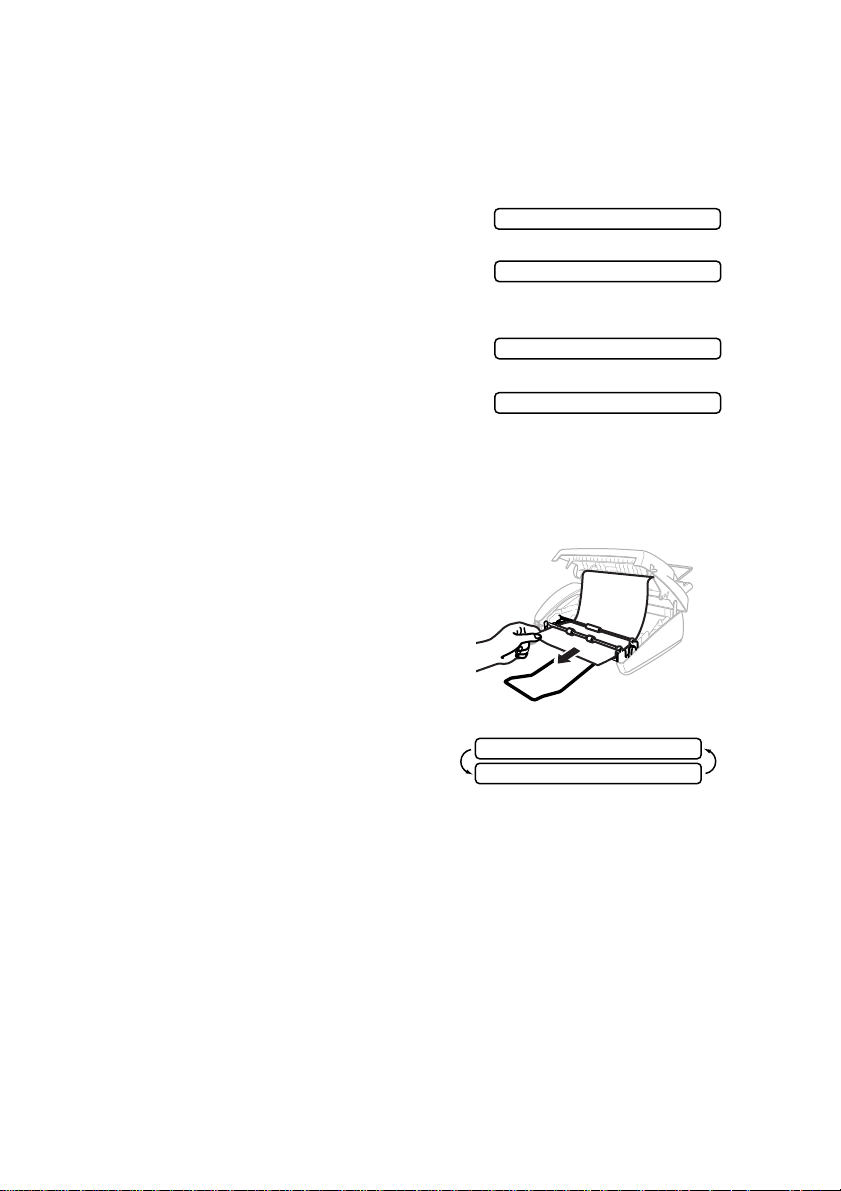
4
Remove the print cartridge and turn the spool to tighten the ribbon.
5
Install the cartridge. (See page 13-7.)
6
Close the top cover.
7
Load the paper.
A poor quality phone line resulted in a
communications error. Try the call again.
You have requested a polling call from another
party, but the other FAX/MFC is not in Poll
Waiting mode.
The other party has disconnected during a fax. Try
calling the other party.
The documents were not inserted or fed properly,
or were too long or too short.
1
Remove any paper that is not jammed from the ADF.
2
Open the top cover.
3
Pull the original toward the front of the machine.
4
Close the cover.
COMM.ERROR
CONNECTION FAIL
DISCONNECTED
DOCUMENT JAM
Original is jammed
Contact the shop where you purchased or your
Brother Dealer for service.
13 - 3
TROUBLESHOOTING AND ROUTINE MAINTENANCE
MACHINE ERROR XX
PRESS STOP KEY
Page 93

The number you called does not answer or is busy.
You may also have reached a number not
connected to a fax. Check the number and call
again.
You’ve tried accessing a One Touch or Speed Dial
location with no number assigned to it. See pages
7-1 to 7-2 for information about storing One
Touch or Speed Dial numbers.
The print head has overheated. Unplug the FAX/
MFC and wait 30 minutes for it to cool.
NO RESPONSE/BUSY
NOT REGISTERED
PRINTER FAULT
The top cover is not closed completely.
TOP COVER OPEN
If You Are Having Difficulty with Your FAX/MFC
If you think there is a problem with your FAX/MFC, make a copy first. If the copy
looks good, the problem is probably not your FAX/MFC. Check the difficulties below
and follow the troubleshooting tips.
Printing or Receiving Faxes
Condensed Print and Horizontal Streaks;
Top and Bottom of Sentences Cut Off
If your copy looks good, you probably had a bad connection, with static or
interference on the phone line.
Vertical Black Lines When Receiving
The sender’s scanner may be dirty. Ask the sender to make a copy to see if the
problem is with the sending machine. Try receiving from another FAX/MFC.
Phone Line or Connections
FAX/MFC Does Not Answer When Called
Make sure the FAX/MFC is in the correct receiving mode for your setup (either
FAX, F/T (FAX/TEL), TAD or MSG CTR). Check for dial tone. If possible,
call your FAX/MFC to hear it answer. If there is still no answer, check the
telephone line cord connection. (See Connecting the Machine, page 2-5 and
Connect the telephone line.) Connect a standard telephone handset to the FAX/
MFC telephone jack. If there is no ringing when you call your FAX/MFC, call
your Telephone Company to check the line.
Telephone Answering Device (TAD) Does Not Answer When Called
Connect the telephone line cord from your TAD to the back of the FAX/MFC,
in the jack labeled EXT. Make sure the TAD is set to answer calls. (See
Connecting an External Telephone Answering Device (TAD), page 2-7.)
TROUBLESHOOTING AND ROUTINE MAINTENANCE
13 - 4
Page 94

No Dial Tone on the Handset
Press Hook or Speaker Phone—OR—Lift the handset. If you don’t hear a
dial tone, check telephone line cord connections at the FAX/MFC and wall jack.
Check that the handset is connected to the FAX/MFC’s handset jack. Test the
wall jack with another single line telephone. If there is no dial tone at the wall
outlet, call your Telephone Company.
Sending Faxes
Poor Transmitting Quality
Try changing your resolution to FINE or SUPERFINE. (See Resolution, page
6-6.) Make a copy to verify the FAX/MFC’s scanner operation.
Dialing Does Not Work
Check for a dial tone. Check all line cord connections, and make sure the curled
handset cord is not in the EXT jack.
Check power cord connection.
Send a manual fax by pressing Speaker Phone—OR—Lifting the handset,
and dialing the number. Wait to hear fax receiving tones before pressing Start.
Vertical Black Lines When Sending
Use your FAX/MFC to make a copy. If the copy shows the same problem, the
scanner area is dirty. Lift the top cover and check the original path. Clean the
scanner’s white tape and the glass strip under the tape using isopropyl alcohol
and a lint-free cloth. (See page 13-6.)
Handling Incoming Calls
F/T pseudo-ring in FAX/TEL Mode
The FAX/MFC knows the incoming call is not a fax so it is signaling you to
answer the telephone call. Pick up the FAX/MFC handset or answer from an
extension phone and press your FAX/MFC’s Telephone Answer Code (default
setting is #51). (See For F/T (FAX/TEL) Mode Only, page 5-6.)
Transferring a Call to the FAX/MFC
If you have answered the FAX/MFC handset, press Start, and hang up
immediately.
If you answered at an extension phone, press your three-digit Fax Receive Code
(the factory setting is 51). When your FAX/MFC answers, hang up.
FAX/MFC “Hears” Voice as CNG Tone
If your FAX/MFC is set to Fax Detect ON, and it answers voice calls by trying
to receive a fax, try turning Fax Detect to OFF. (See Fax Detect (set ON by
default), page 5-4.)
Transmission Verification Report Prints “Result: ERROR”
There is probably temporary noise or static on the phone line. Try sending the
fax again. If the problem continues, call the Telephone Company to check your
phone line.
13 - 5
TROUBLESHOOTING AND ROUTINE MAINTENANCE
Page 95
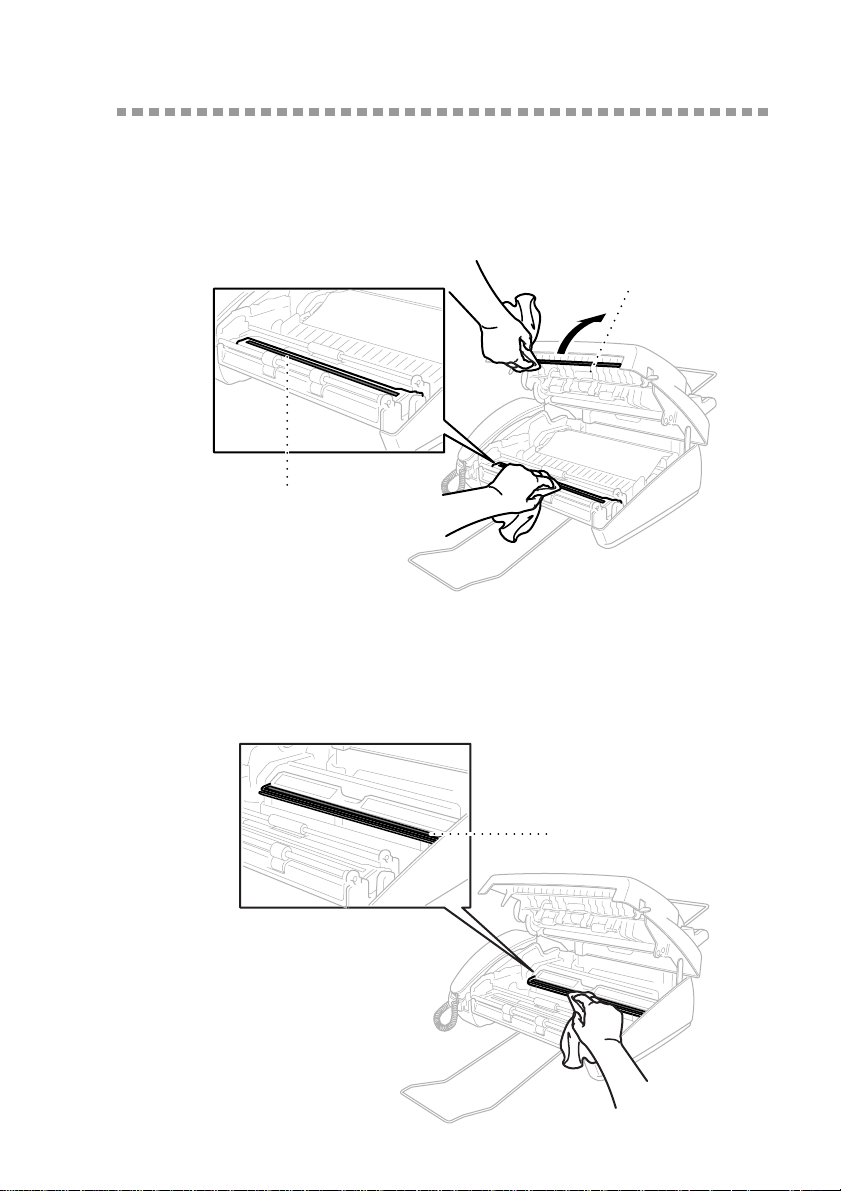
Routine Maintenance
Cleaning the Scanner
Before cleaning, unplug the power cord for safety. Clean the white bar and the glass
strip under the bar with isopropyl alcohol on a lint-free cloth. Be careful not to bend
the spring plate or drop anything into the FAX/MFC.
White Bar
Glass Strip
Cleaning the Print Head
Before cleaning, unplug the power cord for safety. To clean the FAX/MFC print head,
wipe the print head with a lint-free cloth that is dry or lightly moistened with isopropyl
alcohol.
Print Head
TROUBLESHOOTING AND ROUTINE MAINTENANCE
13 - 6
Page 96
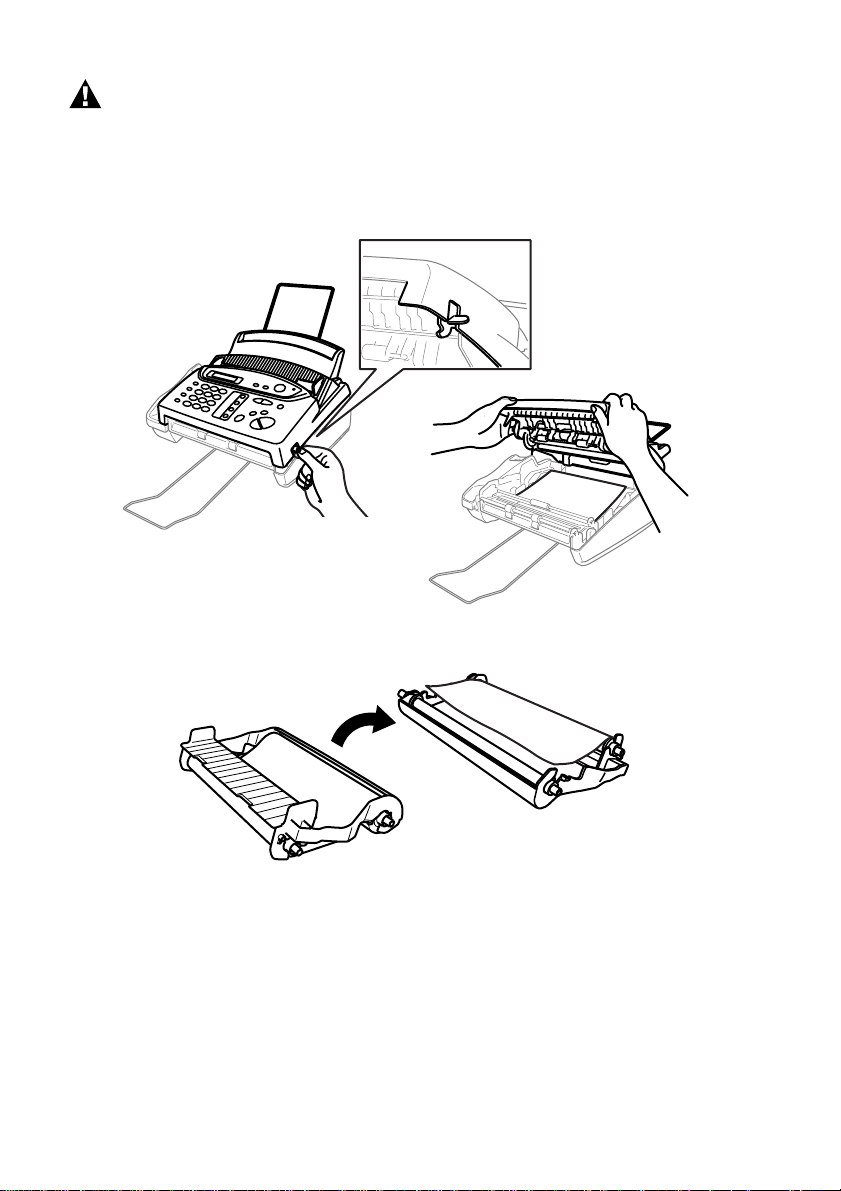
WARNING
Just after you have used the machine, the print head is extremely HOT!
Changing the Ribbon
1
Open the top cover by lifting the gray lever on the right side of the top cover.
2
Remove the print cartridge containing the used ribbon and set it upside—down with
the blue gear in the upper left corner.
13 - 7
TROUBLESHOOTING AND ROUTINE MAINTENANCE
Page 97
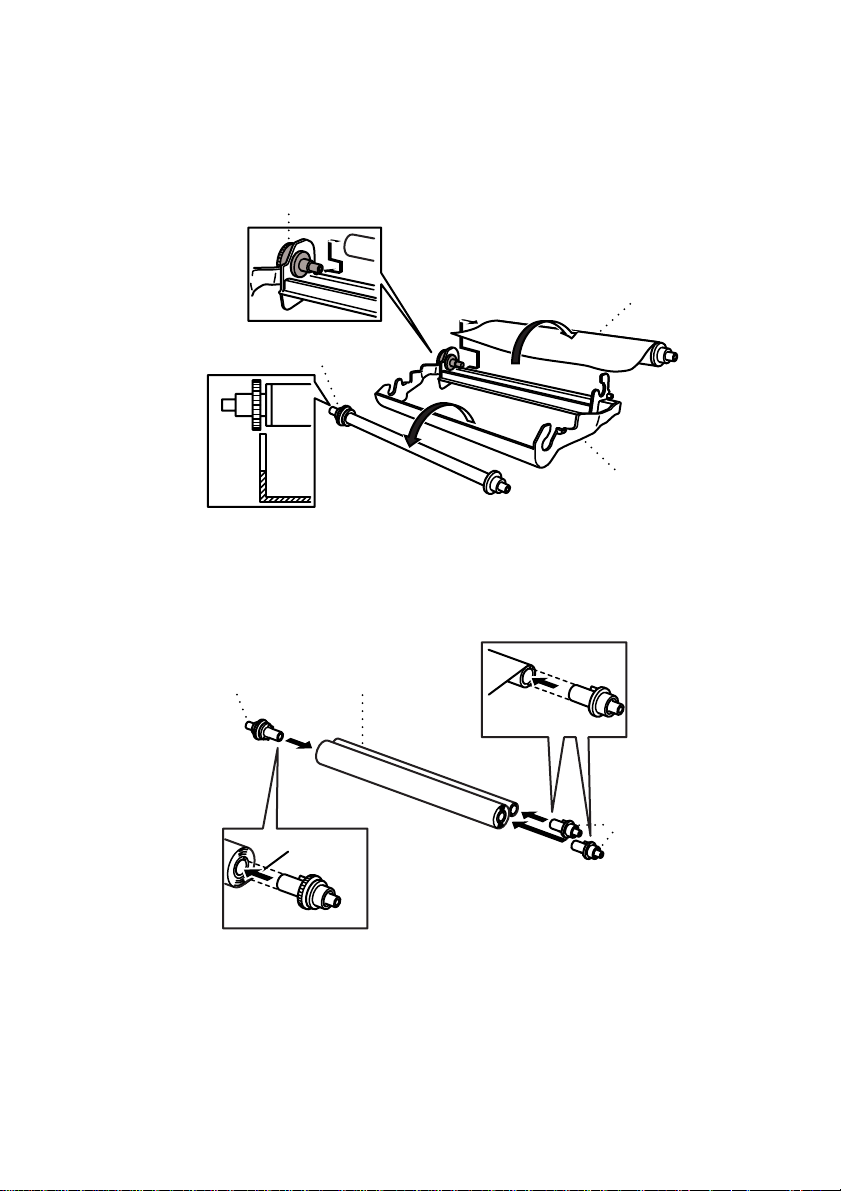
3
Take the used ribbon out of the cartridge:
a. Snap out the upper white spool and slide the roll off the blue gear. (Do not remove
the blue gear)
b. Lift out the lower roll.
Blue Gear
Used Ribbon
White Gear
Cartridge
4
Slide the white elastic off the new refill rolls and set them down with the full roll in
the lower position. (The ribbon’s shiny side is facing down.)
5
Remove the white gear and spools from the ends of the used cardboard cores. Then
insert them into the same positions in the new cores.
White Gear
TROUBLESHOOTING AND ROUTINE MAINTENANCE
New Ribbon
White Spool
13 - 8
Page 98
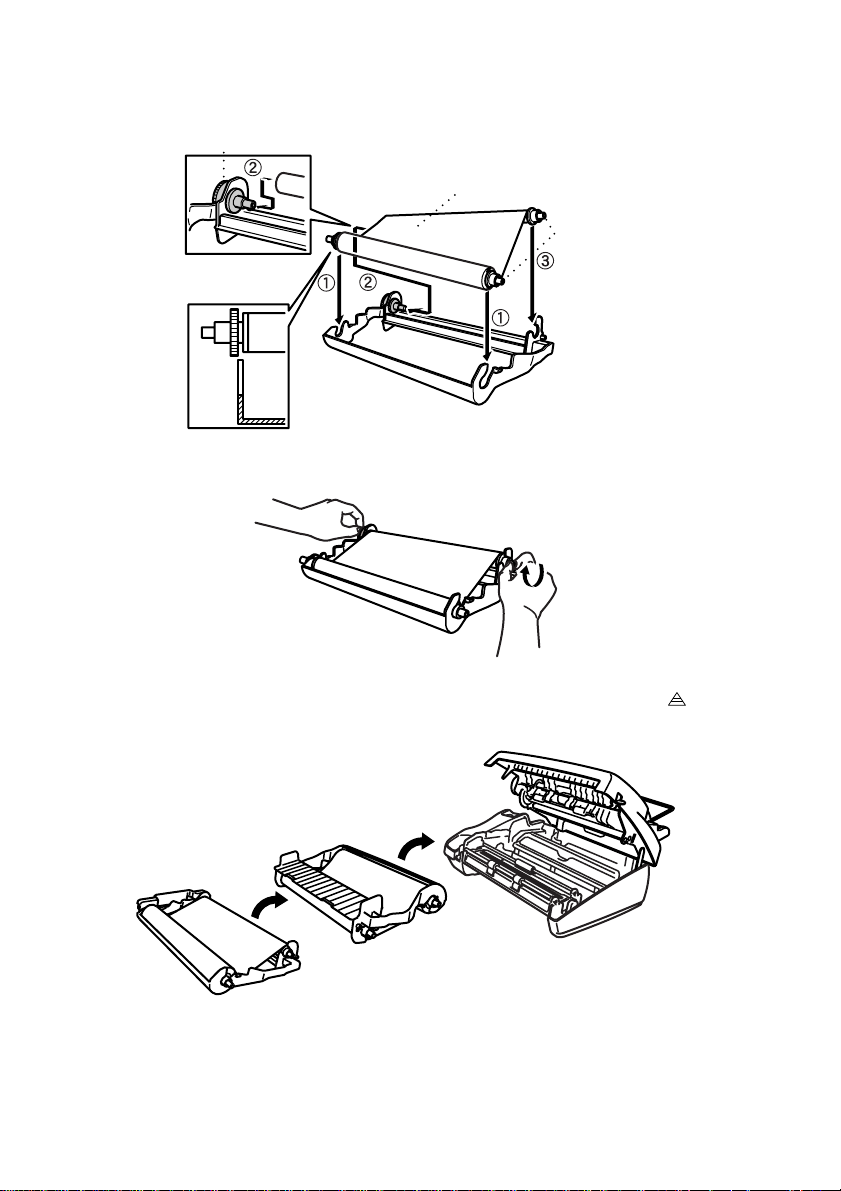
6
Slip the upper left cardboard core onto the blue gear of the cartridge and insert the rolls
into the cartridge holders.
Blue Gear
Shiny side is face down
White Spool
7
Turn the upper right white spool clockwise to tighten the ribbon, as shown.
8
Turn the cartridge over and re-install it into the machine: Insert the recessed first
and place the cartridge into its four holders.
13 - 9
TROUBLESHOOTING AND ROUTINE MAINTENANCE
Page 99
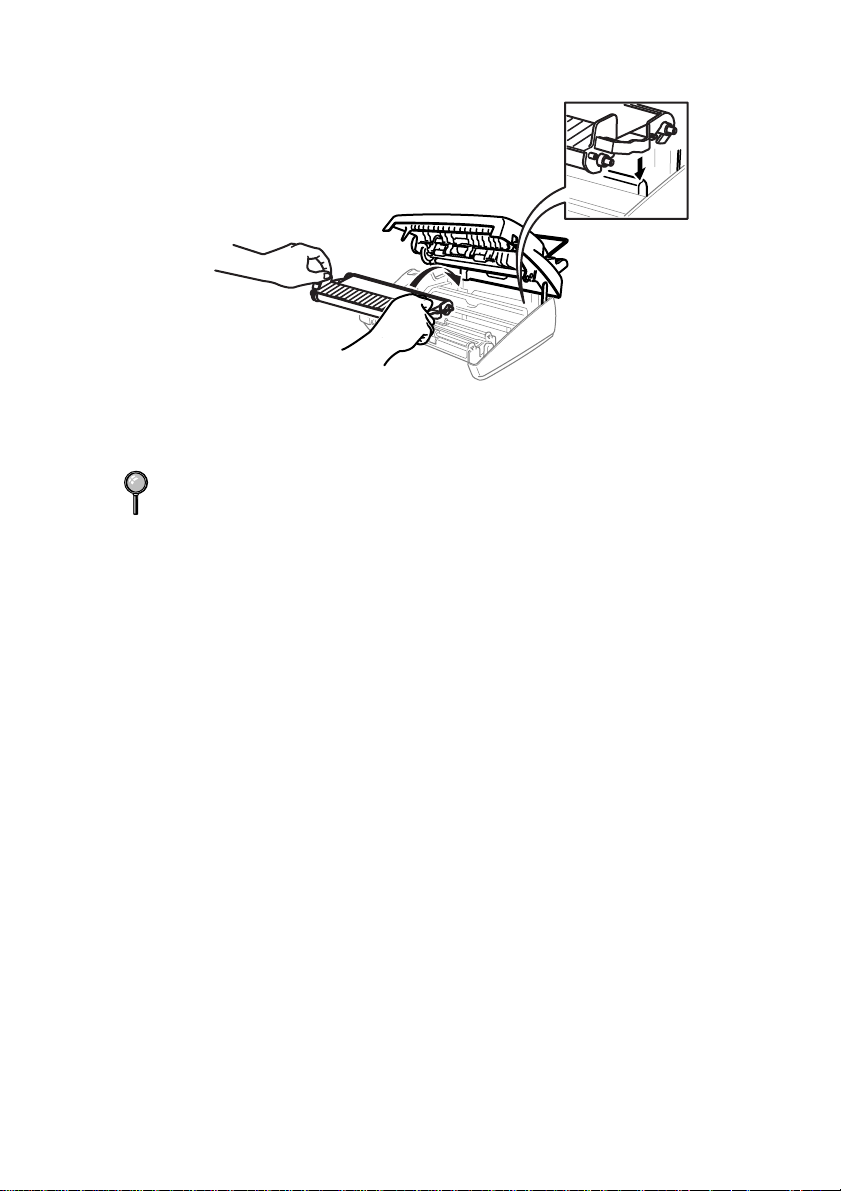
9
Press down on both sides of the top cover to close it securely.
You can save money by purchasing the Refill Ribbon Rolls.
(Installation instructions will be included.) If you handle the print cartridge (frame)
carefully, you can reuse it until it breaks.
TROUBLESHOOTING AND ROUTINE MAINTENANCE
13 - 10
Page 100

14
14
Multi-Function Link® (option)
You can purchase the optional Multi-Function Link package. Multi-Function Link
turns your FAX into a Multi-Function Centre, by enabling you to use your FAX as a
printer and a scanner and to use it to fax messages from Windows applications in your
computer.
Multi-Function Link is available at most Brother dealers and retailers.
Installation instructions will be included with the Multi-Function Link package.
However, it is important that you hook up your FAX to your computer before you
install the software.
14 - 1
MULTI-FUNCTION LINK® (OPTION)
 Loading...