

Page 1
brothec
FAX
0
Owner's Manual
Page 2

This unit generates, uses and can radiate radio frequency energy and if not
instalied and used in accordance with the Owner's Manual, may cause inter
ference to radio and television reception. It has been tested and found to
comply with the limits for a Class B computing device in accordance with the
specifications of Subpart J of Part 15 of the FCC rules, which are designed to
provide reasonable protection against such interference in a residential
installation. However, there is no guarantee that interference will not occur
in a particular installation. If this unit does cause interference (such as
static) to radio or television reception, which can be determined by turning
the unit off and on, the user is encouraged to try to correct the interference
by employing one or more of the following measures:
- change the location of the receiving antenna (indoor type)
- move the unit away from the radio or TV
- plug the unit into a different outlet so that the unit and the radio or TV are
on different branch circuits.
If necessary, the user should consult the dealer or an experienced radio/TV
technician for additional suggestions. The user may find the following booklet
prepared by the Federal Communications Commission helpful: "How to Identify
and Resolve Radio-TV Interference Problems". This booklet is available from
the U.S. Government Printing Office, Washington, D.C., 20402, Stock No.
004-000-00345-4.
Brother cannot accept any financial or other responsibilities that may be the result of your use
of this information, including direct, indirect, special or consequential damages. There are no
warranties extended or granted by this document.
The serial number may be found on the label affixed to the rear of the unit.
For your convenience, note this number below and retain this Owner's Manual
to serve as a permanent record of your purchase, in the event of a theft or
fire or for future reference.
MODEL NO. FAX-60
NAME OF DEALER .
DATE OF PURCHASE
SERIAL NO.
Page 3

This equipment complies with Part 68 of the FCC Rules. On the rear panel of this
equipment is a label that contains, among other information, the FCC Registration
Number and Ringer Equivalence Number (REN) for this equipment. You must, upon
request, provide this information to your telephone company.
Ask your telephone company or installer to install the jack suitable for your device if
such is not available.
The REN is useful to determine the quantity of devices you may connect to your
telephone line and still have those devices ring when your telephone number is called.
In most, but all areas, the sum of the RENs of all devices connected to one line should
not exceed five (5.0). To be certain of the number of devices you may connect to your
line, as determined by the REN, you should contact your local telephone company to
determine the maximum REN for your calling area.
If your telephone equipment causes harm to the telephone network, the Telephone
Company may discontinue your service temporarily. If possible, they will notify you in
advance. But if advanced notice isn't practical, you will be notified as soon as possible.
You will be informed of your right to file a complaint with the FCC.
Your Telephone Company may make changes in its facilities, equipment, operations or
procedures that could affect the proper functioning of your equipment. If they do, you
will be notified in advance to give you an opportunity to maintain uninterrupted
telephone service.
If you experience trouble with this telephone equipment, please contact the
manufacturer's authorized service agency for information on obtaining service or
repair. The telephone company may ask that you disconnect this equipment from the
network until the problem has been corrected or until you are sure that the equipment
is not malfunctioning.
WARNING:
For protection against the risk of electrical shock, always disconnect all cables from
the wall outlet before servicing, modifying or installing the equipment.
This equipment may not be used on coin service provided by the Telephone Company nor
connected to party lines.
Page 4

NON-HEARING AID-COMPATIBILITY
The telephone with this equipment is not hearing aid-compatible.
FCC rules prohibit the use of non-hearing aid-compatible telephones in the following locations or
applications:
Ail public or semi-public coin-operated or credit card telephones.
1.
2.
Elevators, highways and tunnels (automobile, subway, railroad or pedestrian) where a person
with impaired hearing might be isolated in an emergency.
Places where telephones are specifically installed to alert emergency authorities such as fire,
3.
police or medical assistance personnel.
Hospital rooms, residential health care facilities, convalescent homes, and prisons.
4.
5.
Workstations for hearing-impaired personnel.
6.
Hotel, motel, apartment lobbies; in stores where telephones are used by patrons to order
merchandise: in public transportation terminals where telephones are used to call taxis, or
to reserve lodging or rental.
7.
Hotel and motel rooms. (At least ten percent of the rooms must contain hearing aid-compatible
telephones; or contain jacks for plug-in hearing aid-compatible telephones which will be provided
to hearing-impaired customers upon request.)
Page 5

IV
TABLE OF CONTENTS
Contents
INTRODUCTION
PRE-INSTALLATION INSTRUCTIONS
Before removing the unit from the packing carton
Contents of the packing carton
Procedures for removing the unit from the packing carton
INSTALLING THE UNIT
I. Single-line telephone connections
II. Multi-line teiephone connections
III. Electrical connection
IV. Inserting the recording paper roll into the unit
GETTING FAMILIAR WITH THE UNIT
HOW TO USE THE UNIT AS A CONVENIENCE COPIER
BASIC FACSIMILE FUNCTIONS - TRANSMISSION AND RECEPTION
I. Transmission of documents
II. Reception of documents
FACSIMILE-RELATED PROGRAMMING OPERATIONS
Page
1
2
2
2
2
3
4
4
4
6
7
8
8
10
11
I. Setting the RTI/TTI
II. User-selectable switche
TELEPHONE AND ANSWERING MACHINE FEATURES
I. How to use the FAX-60 as a telephone
II. The MEMO feature
III. Using the Telephone Answering Device
IV. Enhanced recording mode
SYSTEM CONFIGURATION LIST
CARING FOR YOUR FAX-60
TROUBLESHOOTING
SPEED-DIAL DIRECTORY
SPECIFICATIONS
12
13
15
15
17
18
22
23
24
25
27
28
Page 6

Definitions and explanations of certain terms which vou will encounter in the Owner's Manual
CCITT GROUP 3 A standard for facsimile transmission established by the CCITT -
the International Telegraph and Telephone Consultative
Committee. Machines meeting this standard can tarnsmit a
standard page at speeds under 60 seconds.
CONVENIENCE COPIER
DIGITAL FACSIMILE
FINE RESOLUTION
GREY SCALE
ICM
KEY SYSTEM
OFF-HOOK
OGM
ON-HOOK
PBX
A copier used to make occasional copies.
Facsimile that transmits images in the form of discrete data bits.
203 X 196 lines per inch - a transmission mode used by facsimile
to transmit images containing a great deal of fine detail.
Shades of grey (8 in the case of your unit) that is used to provide
a faithful reproduction of photographic images.
Incoming message - the telephone message that is recorded on
the TAD (see below) of your facsimile unit.
A standard office-type telephone system where the telephone
sets have keys for selecting linesand functions.
A condition where your handset is off the hook (not in the
cradle).
Outgoing message - the message which you record on your
TAD and which is heard by the caller when he calls your unit
(when the TAD is on).
A condition where your unit is on the hook (in the cradle).
Private Branch Exchange - a computerized telephone switch
usually found in large organization which accepts calls from the
outside and transfers them to various extensions inside and
which routes calls from the inside to the outside.
PSTN
PULSE / TONE
Public Switched Telephone Network - the public lines of the
telephone company.
Types of dialing; Pulse is the rotary rnethod, where the phone
system counts pulses (clicks) to determine the number you are
dialing. Tone is the audio method where the system listens to
the tones to determine the number you are dialing.
STANDARD RESOLUTION 203x98 lines per inch - the transmission mode used by facsimile
to transmit images containing typewritten or printed matter and
less-involved drawings.
TAD
USOC RJ11C JACK
Telephone Answering Device - the built-in answering machine
of your facsimile unit.
The standard modular single-line phone jack.
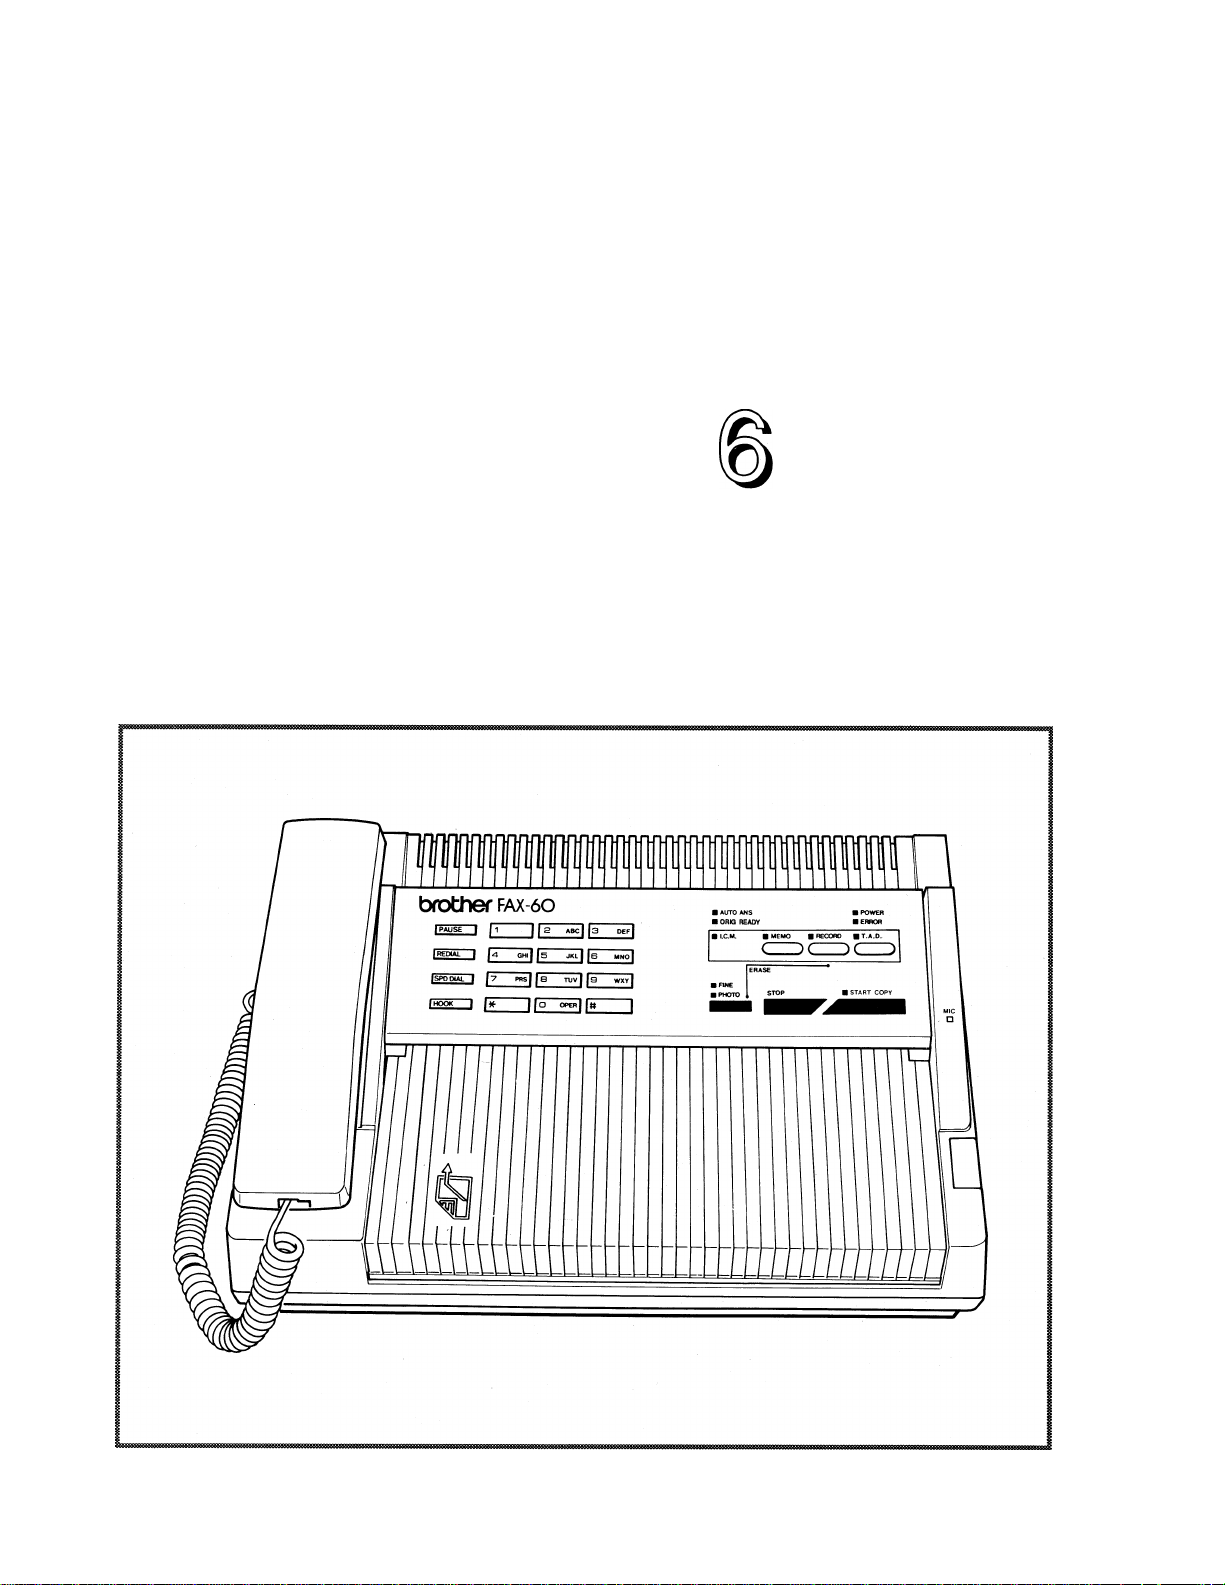
Page 7

INTRODUCTION
Thank you for purchasing the Brother FAX-60. This Owner's Manual will help you derive the
fullest benefits from this powerful, compact and feature-rich facsimile transceiver.
The Brother FAX-60 is a modern, compact desktop digital facsimile unit. Its performance is
compatible with CCITT Group 3. Therefore, your new FAX-60 is compatible with most modern
facsimile units.
The FAX-60 is the ideal low-volume stand-alone unit or a satellite unit in a larger facsimile
network. Furthermore, the unit can be used as a convenience copier, a sophisticated business
teiephone and as a teiephone answering device (TAD) with remote capabilities.
All of the Brother FAX-60 features can be easily learned by following step-by-step procedures
listed on the following pages. As you become familiar with the features and operation of the
unit, keep the Owner's Manual handy for quick reference and reminders.
The Owner's Manual provides a step-by-step description of the procedures you should employ
in unpacking, installing and learning the operation of your Brother FAX-60 unit. If you follow
these instructions, you will have no problem with either the installation or the operation of the
unit.
To facilitate your understanding of the material, the Owner's Manual deals with each major
concept and function pertinent to the installation and operation of the FAX-60 unit in a
separate section. First, you will read the pre-instaiiation instructions. Then, you will be shown
how to instaii the unit. Next, we will show you how to use the unit as a convenience copier.
Although copying is not a major function, it is an easy one to learn and allows you to make sure
that the unit is operating properly. Then, we will explain how to use the facsimile functions -
transmission and reception of documents and how to program your telephone/fax number into
the unit (the RTI/TTI). Next, we will explain the operation of the telephone and the answering
device features of the FAX-60, along with the phone-and-TAD-related programming operations.
The Owner's Manual will be concluded by troubieshooting hints and a speed-dialing directory,
as well as the unit's specifications.
Now, open the Owner's Manual to PRE-INSTALLATION INSTRUCTIONS (next page) and
read the material carefully.
Page 8

PRE-INSTALLATION INSTRUCTIONS
BEFORE REMOVING THE UNIT FROM THE PACKING CARTON
The Brother FAX-60 is designed to operate in an office environment or at home. It is rugged,
reiiable and virtuaiiy maintenance-free. However, to ensure years of troubie-free performance,
piease observe the foliowing precautions:
• Do not locate the unit near heaters, air conditioners, in direct sunlight or in extremely
dusty environments.
• Install the unit on a flat level surface, such as a desk, a table, a typewriter or computer
stand.
• Do not locate the unit where water or chemicals are likely to splash on it.
• Select a vibration-free area of your office.
• Locate the unit within 3 feet from a telephone wall jack.
• Locate the unit within 3 feet of a standard, grounded outlet.
• Avoid plugging in the unit into an outlet which is on the same line as an air conditioners
refrigeration unit, a copier, an electric typewriter or any other device that draws a lot of
current in a relatively short period of time.
CONTENTS OF THE PACKING CARTON
The packing carton contains:
1. The Brother FAX-60 unit
2. One roll of Brother thermal recording paper
3. Telephone handset
4. Handset curled cord
5. Telephone line cord
6. Owner's Manual
7. Wallet size function card
8. Warranty card
9. Test Sheet
10. AC power cord (permanently attached to the unit)
PROCEDURES FOR REMOVING THE UNIT FROM THE PACKING CARTON
1. Carefully open the carton (see the appropriate inscription on the carton)
2. Pull out the FAX-60 and the other devices together with the packing trays
3. Remove all packing trays and plastic from the unit
4. Take out the telephone line cord from the plastic packaging
5. Take out the telephone handset and the curled cord
6. Locate and take out the paper roll
Page 9

INSTALLING THE UNIT
I. SINGLE-LINE TELEPHONE CONNECTIONS
The simplest way to connect the Brother FAX-60 unit to the public switched telephone network
(phone company lines) is to use a single telephone line. The connection is particularly simple if
you have a modular wall jack. The most common modular jack is referred to as the USOC
RJ11C jack. If you have such a jack, follow the instructions below. If your wall jack is not
modular, it is very easy to convert the wall plug to a modular form. Conversion kits are available
from your local phone company, an electronics / computer store (e.g.. Radio Shack) or the AT&T
Phone Center stores.
To connect your FAX-60 to the telephone line, follow these steps:
• Connect one end of the curled handset cord to the handset and the second end to the
jack on the side of the facsimile unit.
• Take the telephone cord which is also included in the carton and connect one of its plugs
to the jack in the back of the FAX-60 unit and the second plug to your modular wall jack
(USOC RJ11C). Now, the FAX-60 is connected to the telephone network.
Please see the illustration below for the telephone connections.
NOTE: If you have a MODULAR PHONE JACK (USOC RJ11C), simply plug the supplied
phone cord into the wall jack.
If you have the older 4-PRONG JACK, you must use a modular 4-prong adapter USOC RJA1X.
Plug the adapter into the wall jack and then plug the phone cord into the adapter. This is
illustrated below.
MODULAR
PLUG
Page 10

II. MULTI-LINE TELEPHONE CONNECTIONS
Most offices have key systems or PBXs. While in many cases it is relatively easy to connect the
FAX-60 to a key system or a PBX, we suggest that you contact the organization which installed
your company's telephone system and ask them to connect the FAX-60 to the system. If the
FAX-60 is connected to a multi-line system, ask your installer to connect the FAX-60 to the last
line on the system. This way, the FAX-60 will not be activated by every phone call coming into
your office. The preferred solution is to ask the phone company to assign a separate line to the
facsimile unit. In this case, you can leave the unit in Automatic Answer Mode 24 hours a day and
derive full benefits from its automatic, unattended operations capabilities.
III. ELECTRICAL CONNECTION
The FAX-60 can be plugged into any standard power (110 VAC) outlet. Simply make sure that
the outlet is grounded and that it is not on the same line as appliances or office machines which
tend to draw a lot of power In a very short period of time, such as refrigerators, copiers, etc.
The FAX-60 power requirements are listed in the SPECIFICATIONS.
"CAUTION: BOTH ICM AND OGM MESSAGES WILL BE ERASED IN THE EVENT OF A
POWER INTERRUPTION. CARE SHOULD BE EXERCISED WHEN UNPLUGGING THE UNIT
OR TURNING OFF THE UNIT'S MAIN POWER SWITCH."
IV. INSERTING THE RECORDING PAPER ROLL INTO THE UNIT
Before reading the instructions for inserting the recording paper into the unit, please consider
these important notes:
NOTE 1: The recording paper is heat-sensitive. Avoid exposure to high temperature, high
humidity or direct sunlight. Keep the received documents (or copied documents) away from
high temperature, direct sunlight, high humidity, alcohol, blueprints. Otherwise the documents
may become discolored.
NOTE 2: The use of Brother Recording Paper is specifically recommended for this unit. The
use of paper not authorized by Brother may adversely affect the unit's performance and may
void Brother's product warranty.
Brother Recording paper has a red stripe indicator. Its appearance on your received or copied
documents is a warning that the paper roll will be running out shortly. Replace the paper roll
when you see the red stripe. Furthermore, Brother Recording paper has a black stripe at the
end of the roll. If you had not changed the paper at the appearance of the red stripe, the unit
will auto-matically stop when the black stripe appears. This feature works only with Brother
Recording paper on Brother facsimile units. Please note that Brother recording paper rolls are
overwound (i.e., contain extra paper) so that you are not wasting paper when you remove the
roll when the indicator appears.
"CAUTION: BOTH ICM AND OGM MESSAGES WILL BE ERASED IN THE EVENT OF A
POWER INTERRUPTION. CARE SHOULD BE EXERCISED WHEN UNPLUGGING THE UNIT
OR TURNING OFF THE UNIT'S MAIN POWER SWITCH."
Page 11
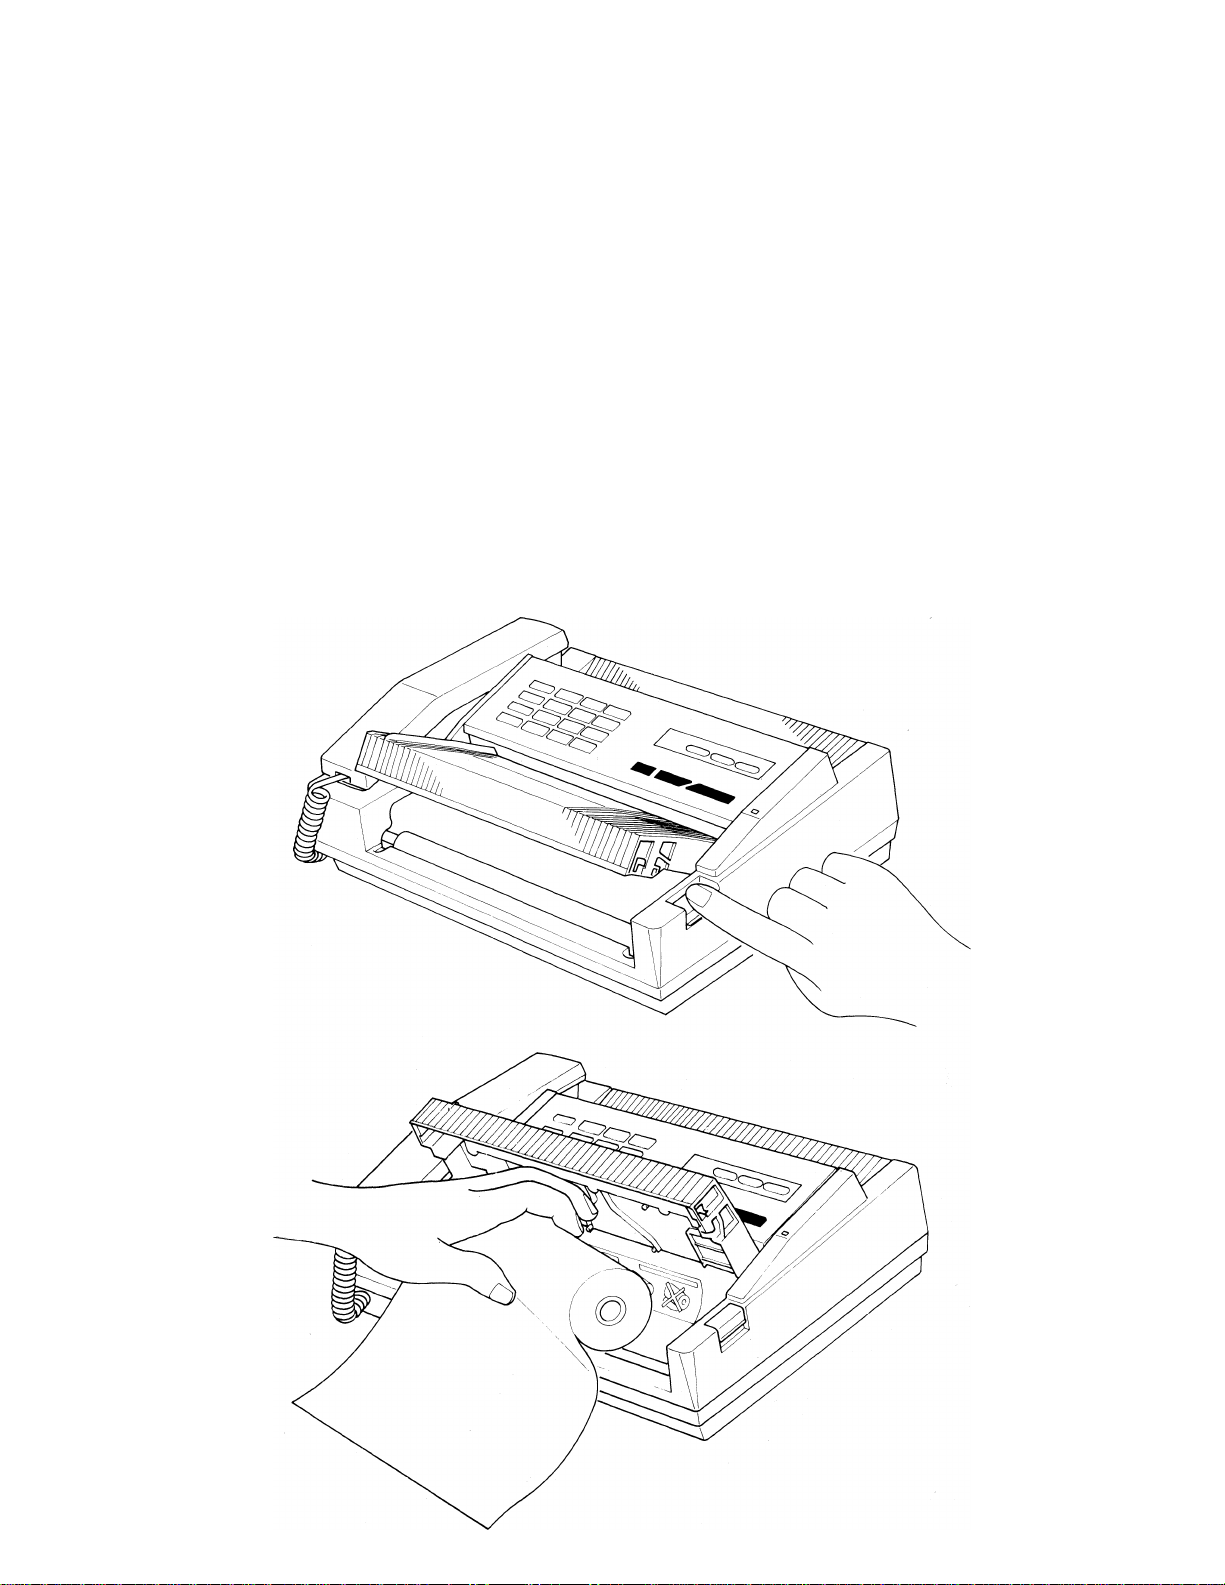
To insert the paper roll, follow these directions:
1. Press the recording paper cover button which is located at the right edge of the top of
the machine. This opens the cover.
2. Hold the recording paper roll so that the free end of the paper points towards you from
the top of the roll.
Be sure not to set the recording paper upside-down. If this happens, you will not get
any images on reception or copying.
3. Simply drop In the paper Into the unit. There is no need to thread paperl Make sure
that approximately 4 inches (10 cm) of paper protrudes from the unit.
4. Push the cover shut until you hear a click.
5. Cut off excess paper pulled out from the unit by tearing it off in one smooth movement
against the cutting edge of the paper cover.
This process is illustrated below.
Page 12

VO
Z
Z)
m
X
H-
tr
<
<
Li.
O
H
1“
LU
<D
CO
CD
+-*
3
c
5
CD
**—
05
CD
05
CD
0
CL
CD
5 CÒ
?§
1 =
S 05
g CO
^ 0)
Q. (O
O
0
CD
x:
■O 03
o +_
+-«
o c
c 0
o s
o ^
0 £
3 §
■»- CO
.c ^
5 E
^ O
Z
O ~o
0 3
o8
c
CONTROL PANEL
AU TO A N S
OF F O N
I. C .M .
16 28
CO NT R AS T
D N L
“1 1 r~
THE CONTROLS ON THE LOWER FRONT OF THE UNIT ARE:
Page 13

HOW TO USE THE UNIT AS A CONVENIENCE COPIER
1. Insert the original document face down into the unit's scanner, aligning the document's
left edge with the document guide.
2. Set the contrast switch (bottom front of the unit) to match the image density of the
original (D for dark original, N for normal original and L for light original).
3. The FAX-60 offers three levels of RESOLUTION - STANDARD (used for
typewrittenand typeset text and line drawings), FINE (used for newprint and detailed
drawings and PHOTO (for photographs). The PHOTO mode offers eight (8) levels of
grey scale for excellent reproduction of photographs. Please note that the use of the
PHOTO mode, while yielding superior quality copies of photographs, is quite a bit slow.
Use this mode only when warranted.
4. Press the START/COPY button on the front panel. The START/COPY lamp will
light. The unit will automatically select the FINE mode (the FINE lamp will light), unless
you've pressed the FINE/PHOTO button to achieve the eight (8 )levels of grey scale
reproduction (in this case, the PHOTO and FINE lamps will light). The unit will
automaticallty start drawing the original through the scanner and the copy will start
emerging from the slot in the front of the unit. After the copying is completed, the unit
will emit a beep and you can tear off the copy. The original will have by now emerged on
the other side of the scanner.
Do not cut the recording paper whiie copying because you may affect the copied image.
IMPORTANT COPYING INFORMATION:
• Copy one document at a time! If you wish to copy more than one page, wait until you
hear the short beep after the previous document has been copied. Insert the new
document and press the START/COPY button again.
• Do not copy very thick pages (over 0.15mm thick).
• Do not copy wrinkled, wet, curled or torn documents.
• Do not copy documents printed on thick photographic paper, metal or textile.
• Do not copy documents that are too thin (tissue paper, tracing paper, etc.)
• Remove all staples and paper clips from the documents to be copied.
• Do not copy documents heid together by scotch tape.
• Do not copy carbon paper.
• Do not copy documents whose surface is slippery.
• Use copies dupiicated by this machine as temporary copies only. (If it is necessary to
store a copy for a long time, use a copier to reproduce the original document or the copy
made by this machine).
NOTE: The FAX-60 can function as a telephone while copying is in progress.
Page 14

8
BASIC FACSIMILE FUNCTIONS -
TRANSMISSION AND RECEPTION
I. TRANSMISSION OF DOCUMENTS
1. Insert the original document face down into the unit's scanner, aligning the document's
left edge with the document guide. The unit will pull the original partly into the scanner.
Insert one original sheet at a time! (see 4-f below).
2. Set the contrast switch (bottom front of the unit) to match the image density of the
original (D for dark, N for normal, L for light original, respectively).
3. Specify the FINE or PHOTO mode by pressing the FINE/PHOTO button. Unless you
specify either of these modes, the unit will automatically select the NORMAL modePlease
note that NORMAL offers the fastest transmission speed, followed by FINE and then
the PHOTO (the slowest).
4. Pick up the handset. After you hear the dial tone, dial the other party's number.
(a) If a voice answers, ask the other party to activate manual fax reception (if the
other unit is a Brother unit, the other party will push the START/COPY button;
if it is not a Brother unit, the other party may have to follow a different
procedure).
(b) If the other unit is set to automatic facsimile reception, you will hear the fax ready
tone. Press the START/COPY button. The START/COPY lamp will light up.
As the transmission starts, the lamp will stay on until completion.
(c) When the transmission is underway, replace the handset in its cradle.
(d) The original document will be pulled through the scanner.
(e) When a page is transmitted, the unit will emit a short beep.
(f) To transmit more than one page, wait for the short beep referred to in (e) and
putting out of the ORIGINAL READY Lamp which indicates that the first page
was transmitted, then place the second page into the unit immediately. The
document will be transmitted to the same telephone number as the original one.
You may continue to send additional documents in the same manner. If no new
document is fed into a scanner following the short beep, a long beep will sound
signifying the termination of the transmission mode. The unit will release the
phone line.
You can use the REDIAL button for automatically redialing the last number dialed (if, for
instance, it was busy when you first tried transmitting the document). To use this feature,
simply press the REDIAL button.
You may dial a number with the handset in its cradle. This can be done by pressing the HOOK
button and then dialing the number.
Page 15

IMPORTANT TRANSMISSION INFORMATION:
Transmit papers one at a time.
Do not transmit very thick pages (over 0.15mm thick). If you have to transmit such
pages, use a photocopier (not the FAX-60) to make a copy and transmit the copy
instead.
Do not transmit wrinkled, wet, curled or torn documents. Make a photocopy and
transmit it instead.
Do not transmit documents printed on thick photographic paper, metal or textile. Make a
photocopy and transmit it instead.
Do not transmit documents that are too thin (tissue paper, tracing paper, etc.) The
thinnest paper suitable for transmission is 0.055mm. Make a photocopy and transmit it
instead.
Remove all staples and paper clips from the documents to be transmitted.
Do not transmit documents held together by scotch tape. Photocopy them and transmit
the photocopy.
Do not transmit carbon papers. Make a photocopy and transmit it instead.
Do not transmit documents with slippery surfaces. Make a photocopy and transmit it.
Page 16

10
II. RECEPTION OF DOCUMENTS
The FAX-60 can receive manually or automatically. The choice is made by using the switch
marked AUTO ANS (lower front end of the unit). The OFF position switches the unit to manual
reception and the ON position ailows automatic reception.
A. Manual Reception
When the AUTO ANS switch is in the OFF position, the following should be done when the
phone rings:
1. Lift the handset.
2. If you hear a series of fax beeps, you'll know that a fax message is coming in.
3. Press the START/COPY button. The START/COPY lamp will light up. As the
reception gets underway, the lamp will stay on. You may replace the handset in its
cradle. The paper will start coming out of the slot.
4. When the reception is completed, the unit will emit a long beep.
5. Cut the recording paper with the received image. Make sure to do so only after the
long beep so as not to affect the quality of the received image.
B. Automatic Reception
When the AUTO ANS switch is in the ON position, the following will occur:
1. The unit wiil receive the fax message automatically after one (1) ring. If you wish the
unit to receive the fax message after six (6) rings, use the switch on the back of the
control panel (NO OF RINGS switch) to affect this change.
2. The START/COPY lamp will light up. As the reception gets underway, the lamp will
stay on. The paper will start coming out of the slot.
3. When the reception is completed, the unit will emit a long beep.
4. Cut the recording paper with the received image. Make sure to do so only after the
long beep so as not to affect the quality of the received image.
NOTE: Remove a jammed document from the machine by opening the recording paper cover.
Otherwise the receive operation will fail.
Page 17

11
FACSIMILE-RELATED PROGRAMMING OPERATIONS
Unlike most other facsimile units in this class and price range, the FAX-60 allows the user to
program certain facsimile functions and parameters. These are:
I. Remote Terminal Identification (RTI) / Transmit Terminal Identification (TTI) telephone
number. This is the number that appears on the top of the page when the other party
receives your message.
II. User-selectable parameter settings (User-selectable Switches)
Telephone and TAD (Telephone Answering Device)-related programming is discussed in the
subsequent section.
The programming is done using one or more of the following buttons:
HOOK
FINE/PHOTO
START/COPY
STOP
Initiates parameter-setting operation
Selects numbers from 1 to 9
Enters (registers) numbers selected by the FINE button
Lists parameter set status after setting
Selects the number 0
Completes or interrupts the programming/selection
process
The general programming procedure
The general procedure for setting any parameters (programming the functions) is:
1. Turn the power OFF (the switch is in the back of the unit)
"CAUTION: BOTH ICM AND OGM MESSAGES WILL BE ERASED IN THE EVENT
OF A POWER INTERRUPTION. CARE SHOULD BE EXERCISED WHEN
UNPLUGGING THE UNIT OR TURNING OFF THE UNIT'S MAIN POWER SWITCH."
2. Press the HOOK button and keep it depressed (until the FINE lamp blinks) as you turn
the power back ON .
3. Press the FINE/PHOTO button
1 time
2 times
NOT USED FOR FAX-60
To select the RTI/TTI SET mode
3 times
4 times
5 times
Then, the START/COPY lamp starts to blink.
NOT USED FOR FAX-60
To select the TAD SECURITY CODE SET mode*
NOT USED FOR FAX-60
NOTE: The unit will go back into the stand-by (idle) status if any of the above buttons are not
pushed within 60 seconds.
* This operation is related to the telephone and TAD operations and is discussed in a subsequent
section.
Page 18

12
I. SETTING THE RTI/TTI
A brand-new unit does not come with a pre-registered Remote Terminal Identification (RTI) /
Transmit Terminal Identification (TTI) number. You can register your own number of up to
twenty (20) digits. Here is an example of how you can register "201 981 0300".
As shown on page 11, the process of registering the RTI/TTI starts by pressing FINE/PHOTO
button twice in step 3. The following steps are:
4. Press the START/COPY button to print out the RTI/TTI number currently registered in
the unit. The unit will print out the following:
********************Qljpp^j^1- pyi/yyi number ********************
* *
* RTI/TTI NUMBER:
************************** **************************
BROTHER FAX-60
5. Press FINE/PHOTO button twice to select the first digit "2".
6. Press START/COPY button to register this selection.
7. To register the second digit - "0" - press START/COPY button. This both selects and
registers a "0".
8. Press FINE/PHOTO button once to select the third digit - "1".
9. Press START/COPY button to register this digit.
10. Press FINE/PHOTO button ten (10) times to select a space.
11. Press START/COPY button to register this space.
12. Continue this operation until you have selected and registered the final digit.
13. Press the STOP button to initiate the automatic printing of:
*** DO YOU WISH TO MAKE THE FOLLOWING CHANGE? ***
* *
* NEW RTI/TTI NUMBER: 201 981 0300
* *
************************** g pQ-y|_||^p p^^_0Q**************************
The START/COPY lamp will start to blink when the printout is finished.
14. If your entries are incorrect, press the STOP button and then the START/COPY
button. The FINE lamp will blink. This will bring you back to step 3 where you can select
this procedure all over again by pressing the FINE/PHOTO button twice and going
through the subsequent steps.
If your entries are correct, press the START/COPY button to complete the selection of
numbers. Now you have two choices. Choice (1) allows you to continue with
registration of other parameters. To do so, you press START/COPY button again
which will bring you back to step 3 above and where you can use the FINE/PHOTO
button to select the desired parameter. Choice (2) is to terminate the registration
process by pressing the STOP button.
Page 19

13
II. USER-SELECTABLE SWITCH
The FAX-60 offers a number of user-selectable functions via the User Selectable Switches
which are initially programmed as 00000001 by the factory. Each of these digits is a "switch"
that controls a specific parameter of the facsimile machine.
Plaits Parameters they control
Digit 1:
Digit 2:
Digits 3 and 4:
Digit 5:
Digit 6;
Digit 7:
Digit 8;
The following table summarizes the digits, the items they control, the factory settings, the
optional settings and the new codes for the optional settings.
Digit No.
1
2
3 & 4
5
6
7
8
For example, when the factory selected for digits 3 and 4 the setting of 00, the FAX-60 will
automatically select the NORMAL mode as the "home position". However, if most of your
transmissions are of photographs, you may wish to change the "home position" to PHOTO (by
setting the digits 3 and 4 to 11. See below for the procedure.
Item controlled
G3 transmission speed
Audible tone Present (0)
Resolution mode
OGM recording mode
End-of-page mark Present (0)
NOT USED
MEMO recording mode
The transmission speed
The presence or absence of audible tone
The resolution mode - NORMAL, FINE, PHOTO
The OGM recording mode
The presence or absence of end-of-page mark
NOT USED
The MEMO recording mode
Factory Set & Code
4800 bps (0) 2400 bps (1)
NORMAL (00) FINE (10)
Enhanced (0)
Standard (1) Enhanced (0)
Optional Setting & Code
Absent (1)
PHOTO (grey scale) (11)
Standard (1)
Absent (1)
To set a user-selectable function:
1. Turn the power OFF.
"CAUTION: BOTH ICM AND OGM MESSAGES WILL BE ERASED IN THE EVENT
OF A POWER INTERRUPTION. CARE SHOULD BE EXERCISED WHEN
UNPLUGGING THE UNIT OR TURNING OFF THE UNIT'S MAIN POWER SWITCH."
2. Turn the power ON again while depressing the FINE/PHOTO button.
3. The unit will automatically print out;
****************Qypp^l^j jjg^p SWITCH SETTING*“**************
* *
* USER SWITCHES: 00000001
* *
**************************PyQ^^_0Q****************************
The FINE lamp will blink.
4. Select the digit you wish to change and press the FINE/PHOTO button the appropriate
number of times. For example, to select digit 2, press FINE/PHOTO button twice.
Page 20

14
5. Press START/COPY button to enter the selection.
6.
Now, you can change the factory setting of "0" to the optional setting of "1". To enter
"1",press FINE button once. Press START/COPY button to register this choice.
(Note that pressing theSTART/STOP button without pressing FINE/PHOTO button
beforehand, selects and registers a "0"). The unit will automatically print out:
**** DO YOU WISH TO MAKE THE FOLLOWING CHANGE?
* *
* NEW USER SWITCHES: 01000001
* *
*****************************gP^Q-|-j_|^ py|^^_0Q*****************************
The START/COPY lamp will start to blink.
7. If your entries are incorrect, press the STOP button and then the START/COPY
button. The FINE lamp will start to blink. This will bring you back to step 4 where you
can select this procedure all over by pressing the FINE/PHOTO button five (5) times
and then going throrough the rest of the procedure.
If your entries are correct, press the START/COPY button to complete the selection of
numbers. Now you have fwo choices. Choice (1) allows you to continue with
registration of other switches. To do so, you press START/COPY button again which
will bring you back to step 4 above and where you can use the FINE/PHOTO button to
select the desired switch. Choice (2) is to terminate the registration process by
pressing the STOP
button.
********
NOTE: Your entries, e.g., the RTI/TTI and user switch, etc. can be verified by printing out the
SYSTEM CONFIGURATION LIST. We will explain how to do this in a later section.
Page 21

15
TELEPHONE AND ANSWERING MACHINE FEATURES
I. HOW TO USE THE FAX-60 AS A TELEPHONE
The FAX-60 possesses very sophisticated telephone capabilities. Yet, these capabilities are easy
to use.
Please note that the FAX-60 can be used for voice conversation even when the unit is set to
automatic facsimile reception mode or when the unit is copying a document.
A. Telephone Controls
All numbers are dialed from the numeric key pad on the control panel of the FAX-60. This pad is
identical to the standard touch-tone telephone dial.
The four buttons to the left of the telephone key pad are used (from the top) as follows:
• PAUSE - When pressed, a 3.7 second pause is generated. This
buttonhas other uses in telephone-related programming
(see below).
• REDIAL - Pressing this button makes the phone automatically redial
thelast number dialed. This button has additional uses (see
below).
• SPEED DIAL -
HOOK
Presssing this button initiates speed dial calls. This key is
alsoused to program the speed dial numbers into the unit’s
memory.
Pressing this button allows you to initiate phone and fax
calls while the handset is on-hook. The built-in speaker
(under the handset) allows hands-off operation of the
FAX-60 while dialing. This button has other uses (as
we've discussed in facsimilerelated programming). Please
note, however, the FAX-60 is NOT a "speaker phone!"
The other telephone-reiated controls are located at the back of the unit:
• PULSE/TONE Selects rotary vs. tone mode of operation
• RINGER VOLUME Offers three settings - High, Medium, Low
• SPEAKER VOLUME A rotary switch provides continuous volume control from
HIGH (H) to LOW (L).
B. Using the handset
The handset of the FAX-60 is used just like any other handset of a standard telephone. Please
note the volume adjustment switch on the inside of the handset.
Page 22

16
C. Standard dialing
There are two ways to dial a telephone call or a fax call:
1. OFF-HOOK — Lift the handset, dial the number after hearing the dial tone.
2. ON HOOK — Make sure that the unit's power is ON. Press the HOOK button and you
can dial with the handset in its cradle after hearing the dial tone from the speaker. The
speaker is located under the handset.
D. Using the redial function
Redialing can be performed only immediately following a dialing (i.e., after you've dialed using
OFF-HOOK, ON-HOOK or Speed Dialing). The redial memory accepts up to 31 digits in TONE
mode or 32 digits in PULSE mode. If the number you've dialed has more than these numbers
of digits, redial will not work.
If you wish to keep the number you are dialing confidential and do not wish anyone to call it
after you leave the office or your desk unattended, simply press the redial buttom twice after
completion of dialing. The redial function will not function.
E. Speed Dialing
The FAX-60 allows you to program and use up to ten (10) pre-recorded numbers of 16 digits (in
pulse mode) or 15 digits (in the tone mode) each. If you need more digits, say for credit card
calls or international calls, you can program and use more than one location for this longer
number because the FAX-60 allows "chain dialing" (i.e., pressing several speed-dial codes in
sequence).
To program your most frequently-used telephone and fax numbers follow this procedure:
1. With the handset ON HOOK (in the cradle), press the SPEED DIAL button.
2. Dial the desired telephone or fax number (up to 15 digits in TONE mode, up to 16 digits
in PULSE mode).
3. Press the SPEED DIAL button again.
4. Assign this number a two-digit code, starting with 00 and going up to 09 (this covers
the entire 10 allowable numbers). Dial in this 2-digit code.
5. You can stop now or continue inputting the remainder of your frequently-used numbers
by returning to Step 1.
To use the speed-dialing feature of this unit, follow this procedure:
1. Lift the handset or press the HOOK button.
2. Press the SPEED DIAL button after hearing the dial tone.
3. Dial the 2-digit code for the desired number.
To erase a programmed speed-dial number, follow this procedure:
1. Press the SPEED DIAL button twice.
2. Press the 2-digit code for the number you wish to erase from thememory.
Page 23

17
F. Using the PAUSE button
If communicating from a PBX extension, the PAUSE button should be used. Pressing PAUSE
key between the numbers builds in 3.7 seconds delay needed to access the PBX's second dial
tone. If a longer time is needed, such as in case of overseas calls, pressing the PAUSE button
several times can stack a number of pauses (e.g., pressing it twice will give you 3.7 sec. x 2 =
7.4 sec. delay).
Pressing the PAUSE button, the REDIAL button or flipping the PULSE/TONE switch during a
redial operation or a speed-dialing operation releases the pause. Using the same controls once
can also release a multiple stacked pause.
li.
THE MEMO FEATURE
Your FAX-60 provides you with an ability to record a voice memo which can be used by you as a
memory-jogger or be accessed by a member of your family or a co-worker when you are out.
A. Recording the memo
To record a memo follow these steps:
1. Make sure that the TAD (Telephone Answering Device) is OFF (check this by looking at
the TAD lamp to make sure it is OFF).
2. Press the MEMO and RECORD buttons simultaneously. A short beep (1 sec.) will be
heard and the MEMO and RECORD lamps will flash. You may release the MEMO
button but keep the RECORD button depressed while you are recording the memo. If
the message memory is full (see the section on ICM below), you will hear an alarm.
3. When you hear a beep, you can start recording your memo (without releasing the
RECORD button). The recording time available for messages is variable (see thesection
on ICM below). Five seconds before your allotted time runs out both the MEMO and
the RECORD lamps will start flashing faster.
B. Accessing the memo
Since the memo and the telephone messages recorded by the TAD utilize the same memory, the
method of retrieving a recorded memo is identical to that of retrieving a telephone message.
This procedure is described below (lll-C).
Please note that the ICM and MEMO lamp provides the following information:
No callers' messages or memos recorded
Memo(s) recorded
Callers' messages recorded
ICM memory is full
Both ICM and MEMO lamps are OFF.
ICM lamp is OFF, MEMO lamp is ON.
ICM lamp is ON, MEMO lamp is OFF.
Both ICM and MEMO lamps are flashing.
Page 24

18
ill. USING THE TELEPHONE ANSWERING DEVICE (TAD)
A. Recording the Outgoing Message (OGM)
• Press the TAD button
• Press the RECORD button. You will hear a short beep. This button must be held
depressed for the entire time while you are recording the outgoing message. The
RECORD iamp will start blinking. You have 16 seconds in which to record the OGM
(outgoing message). During the last 5 seconds the lamp will blink rapidly. After the 16
seconds the unit will beep again and will stop recording the message. Of course, the
recording will stop prior to 16 seconds if you release the RECORD button.
The FAX-60 is unique among facsimile machines in that a caller, even with a fax message can
hear your voice (provided the TAD is ON). This is illustrated in the sample OGM below:
"This is (your name / company name). Sorry, we are not available now. Leave a message
after the tone. You have 16 seconds for your message. If you wish to send us a
facsimile message, push the STAR (*) button on your telephone keypad when you hear
our message."
NOTE: The OGM should say "28 seconds" instead of "16 seconds" if you've used the switch on
the lower front of the unit. The timing (i.e., 28 seconds or 16 seconds) refers to the length of
the ICM - the incoming message, i.e., the message left by a caller on your TAD. See below for
more details on the ICM.
When the caller presses the STAR (^) button within five (5) seconds after hearing your OGM,
the FAX-60 will change from TAD mode to facsimile mode. If the STAR (*) button is not
pushed, the unit will beep and the caller can record a message. After the caller's message is
recorded, the unit beeps again and the FAX-60 releases the phone line.
If you are present while all of the above is going on, you can hear the entire above operation
using the monitor mode through the speaker.
B. Playback of the OGM
To verify that you've recorded an appropriate message, press the TAD button. The TAD lamp
will light. The OGM message will be heard over the unit's speaker. If you are dissatisfied with
the message, simply press the RECORD button and the unit will be available for re-recording of
the message.
C. Playing back the callers' messages and voice memos
If someone called your unit and left a message or you and/or a member of your family or
someone in your office left a voice memo, the ICM lamp or the MEMO lamp will light. To
retrieve the message, disengage the TAD by pressing the TAD button (top check this, see
whether the TAD lamp is OFF). Then press the MEMO button. You will hear the recorded
message through the unit's speaker. If there is more than one message, the unit will emit a 3-
second beep between messages.
Page 25

19
To skip to the next message, press the MEMO button while a message is playing. The unit will
emit a 1 -second beep before the next message.
if you need to stop the playback of a caller's message or a memo, press MEMO and STOP
buttons during the playback or during the beeping between the messages or memos.
If you had to stop listening to recorded messages during a message-separating beep, and you
now wish to resume listening, you can do so in two different ways:
1. Pressing the MEMO button once will play back the messages from the top of the very
first message.
2. Pressing the MEMO and START/COPY buttons together will let you resume the
playback just before the point where you've stopped earlier.
If you had to stop listening to playback in the middle of a message —
1. Pressing the MEMO button will start you off at the very beginning of the recorded
messages.
2. Pressing the MEMO and the START/COPY buttons will start you off with the
message which was interrupted.
D. Erasing the messages/memos
Make sure that the TAD switch is OFF.
To erase a message or a memo press the FINE/PHOTO and RECORD buttons simultaneously
while the message or memo is playing or during the beep following this message. You will hear a
1 -second beep and the message or memo will be erased.
To erase all messages or memos, press FINE/PHOTO and RECORD buttons when the message
or memo is not playing. You will hear a 3-second beep.
E. Remote operation of the TAD
The messages recorded on your FAX-60 TAD can be retrieved from any touch-tone telephone,
provided, you know the security code (to be described below in F). This is how the remote
operation works:
1. Dial the telephone number of your FAX-60 unit.
2. When you hear the OGM (your Outgoing Message), press the # button repeatedly until
you hear a short beep (1 second).
3. Dial in the 3-digit Security Code within 15 seconds of hearing the beep. If the code is
correct, you will hear a short beep (1 second). If the code is incorrect, you will hear a
series of short beeps. Try again!
IMPORTANT NOTE: If there are no messages on your TAD, you will hear a series of short
beeps.
Now, you are ready to request the FAX-60's TAD to perform some functions. These functions
and the remote commands needed to activate them are shown in the table below.
Page 26

20
FUNCTION
Play back message/memo # 1 0 All messages
• Pressing * while message/memo is playing will bring you forward to the following
message/memo.
Erase message/memo #20 All messages
• You may continue this until #24 if the ICM switch (iower front of the unit) is set for four
(4) 28-second messages.
• You may continue this until #27 if the ICM switch (lower front of the unit) is set for
seven (7) 16-second messages.
Record message/memo
Record/Change OGM
Playback OGM
NOT USED
NOT USED
TAD OFF
COMMAND DESCRIPTION
# 2 1 First message
#22 Second message
#23 Third message
#30
#40
# 4 1
#50
#60
#70
Record new message at once
Turns the TAD off.
TAD ON
NOT USED
Terminate Remote Control
# 7 1
# 8 0 & #81
#90
Turns TAD on.
Terminates the operation. If you do not
order this termination, the unit will cut
the connection automatically in 30
seconds unless you issue another
command.
NOTE: A short beep is heard repeatedly for 30 seconds when each function has been
completed. To continue with another function, press # within 30 seconds after a 1 sec. beep.
F. Setting the TAD security code
The TAD security code is a three digit number that is designed to prevent unauthorized remote
access to the messages recorded on your TAD. The factory setting is 000. To set your own
code, follow this procedure:
1. Turn the power OFF.
"CAUTION: BOTH ICM AND OGM MESSAGES WILL BE ERASED IN THE EVENT
OF A POWER INTERRUPTION. CARE SHOULD BE EXERCISED WHEN
UNPLUGGING THE UNIT OR TURNING OFF THE UNIT'S MAIN POWER SWITCH."
2. Press the HOOK button and keep it depressed until FINE lamp blinks as you turn the
power back ON.
3. Press the FINE/PHOTO button four (4) times to select the TAD Security Code Set
Mode.
Page 27

21
4. Press the START/COPY button to print out the current security code. You will see:
**************,
CURRENT TAD SECURITY CODE****************
*
TAD SECURITY CODE: 000
*************************
BROTHER FAX-60
************************
5. To register a new TAD Security Code, say, 104, press FINE/PHOTO button once to
select the first digit "1".
6. Press START/COPY button to register this digit.
7. Press START/COPY button (don't touch the FINE/PHOTO button) to register "0".
8. Press FINE/PHOTO button four (4) times to select the final digit "4"
9. Press START/COPY button to register this final digit and the FAX-60 will
automatically print out:
**** DO YOU WISH TO MAKE THE FOLLOWING CHANGE?
*
* NEW TAD SECURITY CODE: 104
*
***************************FAX“60^
■\******************************
The START/COPY lamp will start to blink when the printout is finished.
*******
10. If your entries are incorrect, press the STOP button and then the START/COPY
button. The FINE lamp will start to blink. This will bring you back to step 3 where you
can select this procedure all over again.
If your entries are correct, press the START/COPY button to complete the selection of
numbers. Now you have two choices. Choice (1) allows you to continue with
registration of other parameters. To do so, you press START/COPY button again
which will bring you back to step 3 above and where you can use the FINE/PHOTO
button to select the desired parameter. Choice (2) is to terminate the registration
process by pressing the STOP button.
G. How to change the number of ICM
The unit is capable of recording a total of 112 seconds worth of messages and memos. You
have a choice of seven (7) 16-second message or four (4) 28-second messages. This choice is
made by the switch on the lower front of the control panel.
H. The TAD and the auto-recelve functions
If you have not set both, the TAD and the AUTO RECEPTION functions on your unit and
some-one is calling your unit, these units will, after fifteen (15) rings:
• Enter the TAD mode after 15 rings if the OGM is recorded and the ICM is not full. The
OGM will start after 15 rings. After completion of this call, the unit will revert to its
original status - no TAD and no AUTO RECEPTION.
or
Enter the AUTO RECEPTION mode if the OGM is not recorded or the ICM is full.
Page 28

22
The toll-saver feature
This function works on the FAX-60 in the TAD mode as follows. The unit's TAD will answer
your call on:
• 5 rings if there is no message - then, after 5 rings the OGM will go on. Thus, unless you
wish to record a message on your unit via the remote TAD feature, you can hang up
before the 5-th ring and save the cost of a completed phone call.
• 2 rings if there is a message or messages. The OGM will start after 2 rings and you can
use remote control procedures to pick up the message.
• 2 rings if the ICM is full. Then, after 2 rings. Auto Reception will go on.
IV. ENHANCED RECORDING MODE
Use enhanced recording mode when using your FAX-60 under adverse telephone line
conditions or if OGM and/or MEMO recording seem unclear during playback.
A. OGM recording
If enhanced mode is used for OGM recording, ICM message capability will be slightly reduced as
shown below:
ICM MESSAGE
SELECTION
4
7
ICM TIME PER MESSAGE
STANDARD OGM ENHANCED OGM
28 Seconds
16 Seconds
24 Seconds
14 Seconds
B. MEMO recording
In standard recording mode the available recording time is the same as the ICM recording time.
In enhanced recording mode the available recording time is equal to 1/2 the ICM recording time.
If you unit is set for 4 24 seconds ICMs for example, then the memo recording time would equal
12 seconds.
C. How to change recording modes
You can change the recording modes for either OGM or MEMO through user selectable switch
setting as shown below:
DIGIT FACTORY SETTING
5 OGM standard recording (1)
8 MEMO standard recording (1)
Refer to page 13 for a detailed description of how to set the user selectable switches.
OPTIONAL SETTING
OGM enhanced recording (0)
MEMO enhanced recording (0)
Page 29

23
SYSTEM CONFIGURATION LIST
Earlier in this Manual we have shown you how to program certain facsimile, telephone and TADrelated fucntions. You can print out a report — the SYSTEM CONFIGURATION LIST that will
summarize every parameter which you may have changed.
To print out the SYSTEM CONFIGURATION LIST follow this procedure;
1. Turn the power OFF.
"CAUTION: BOTH ICM AND OGM MESSAGES WILL BE ERASED IN THE EVENT
OF A POWER INTERRUPTION. CARE SHOULD BE EXERCISED WHEN
UNPLUGGING THE UNIT OR TURNING OFF THE UNIT’S MAIN POWER SWITCH."
2. Press and hold the START/COPY button and turn the power back ON.
3. The unit will print out the SYSTEM CONFIGURATION LIST.
The list for the FAX-60 is, for example:
**********************************
*
*
*
*
*
*
*
*
*
*
*
*
*
*
*
*******************************************
PARAMETER
1.
NOT USED
2.
RTI AND TTI
NOT USED
3.
4.
TAD SECURITY CODE;
NOT USED
5.
USER
SWITCHES
1.
TRANSMISSION SPEED
2.
AUDIBLE TONE
3,4.
RESOLUTION MODE
5.
OGM RECORDING MODE
6. END OF PAGE MARK
7. NOT USED
8.
MEMO RECORDING MODE
SYSTEM CONFIGURATION LIST
BROTHER FAX-60
**********************************
: 201 981 0300
; 104
: 0: 4800 bps
: 0: PRESENT
: 00: NORMAL
: 0: ENHANCED
: 0: PRESENT
: 1: STANDARD
*****************************************
*
*
*
*
*
*
*
*
*
*
*
*
*
*
*
Page 30

24
CARING FOR YOUR FAX-60
Optimum print quality can be maintained if the scanning and printing area are cleaned after using
three or four rolls of recording paper. The procedure is explained below:
I. CLEANING THE PRINTING AREA
• Remove the recording paper roll from the unit.
• Using an applicator or a soft cloth soaked In alcohol, gently remove any dirt from the
printing head. Do not use organic solvents, such as benzene or thinner.
• Use a dry cloth to gently wipe off any dirt from the rubber roller and the recording paper
holder.
CLEANING THE SCANNING AREA
Using an applicator or a soft cloth soaked in alcohol, gently remove any dirt from the
scanner and the document pressure bar. Do not use organic solvents, such as benzene
or thinner.
III. CLEANING THE BODY OF THE UNIT
• Use a dry cloth to gently wipe off any dirt from the body of the unit. Remove visible dirt
and dust.
Do not use water, alcohol, thinner or any other organic solvent.
Page 31

25
TROUBLESHOOTING
If you are having trouble with the image quality in TRANSMIT or RECEIVE modes, try the unit in
the COPY mode. If this test gives you a good reproduction, the problem is not with your unit
but with the other unit or the telephone lines.
If this GUIDE does not help you in solving a problem with your unit, please call our service at:
1-800-284-4FAX.
I.
TRANSMITTING
SYMPTON
No lamp indications on
cover. Power switch is
turned on but power lamp
does not light.
Faint drawings or charac
ters are not reproduced when
sending or copying.
Document jam
POSSIBLE CAUSE
Is the power cord plugged in?
Contrast switch set wrong.
Document jammed in trans
mitting section.
ACTION
Plug in power cord
Change Contrast switch on
the front of the unit to "L"
(Light setting).
1. Turn the power off.
"CAUTION: BOTH ICM AND
OGM MESSAGES WILL BE
ERASED IN THE EVENT OF A
POWER INTERRUPTION. CARE
SHOULD BE EXERCISED WHEN
UNPLUGGING THE UNIT OR
TURNING OFF THE UNIT'S MAIN
POWER SWITCH."
2. Pull up on the control panel
to open it up.
3. Remove the jammed
document.
4. Close cover making sure
that you hear it click into
place.
5. Do not retransmit this
document but make a copy
of it first.
Error indicator is lit Communications error has
occured - this is usually caused
by a bad phone line.
1. Redial and try transmission
again.
2. If you get failure again, call
the distant location and
verify if their unit is
functioning and that it is a
Group 3 fax terminal. If it is
not working, have them call
their service. If it is not a
Group 3, then you cannot
transmit to them at all.
Page 32

RECEIVING
26
SYMPTOM
Received copies are blank 1. The paper roll is In
The telephone rings 1. Auto answer Is turned off.
continuously
Recording paper is jammed
POSSIBLE CAUSE
backwards.
2. Wrong type of paper. 2. Replace with proper thermal
2. No power.
3. No recording paper roll
Paper is jammed in receiving
section.
ACTION
1. Reload the paper roll
correctly.
recording paper.
1. Turn atuo answer switch
ON. It is located on the
front of the unit.
2. Check outlet voltage.
3. Load the new paper roll.
1. Turn the power off.
"CAUTION: BOTH ICM AND
OGM MESSAGES WILL BE
ERASED IN THE EVENT OF A
POWER INTERRUPTION. CARE
SHOULD BE EXERCISED WHEN
UNPLUGGING THE UNIT OR
TURNING OFF THE UNITS MAIN
POWER SWITCH."
2. Press the recording paper
cover button to open the cover.
3. Remove the paper roll and tear
off the jammed paper.
4. Reload the paper roll.
5. Close the cover making sure
you hear it click into place.
6. Tear off excess paper.
Error Indicator is lit
Communications error has occuredthis us usually caused by a bad
phone line.
1.
Ask the transmitting unit to
re-send the document.
2.
Make sure the other unit is a
Group 3 compatible machine.
3.
Make sure your unit is properly
connected to the phone line.
4. Make sure the other unit Is
working properly.
Page 33

27
SPEED-DIAL DIRECTORY
Speeddial No.
00
01
02
03
04
05
06
07
08
09
Telephone
Number
Name
Page 34

28
SPECIFICATIONS
Type:
Compatibility:
Coding method:
Modulation:
Transmission time:
Document input size:
Recording paper size:
Recording paper type:
Effective scanning width:
Effective recording width:
Scanner type:
Recorder type:
Resolution:
Document feeder:
Gray scale:
Telephone function:
Dialing method:
Station memory:
Speaker type:
Power source:
Communications source:
Connection requirements:
Power consumption:
Operating environment:
Dimensions:
Weight:
Telephone Answering Device:
Desktop facsimile transceiver
CCITT Group 3
Modified Huffman (MH)
CCITT V.27 ter (4800/2400 bps), CCITT V.21
45 seconds (8.5"xir)
8.5"
8.5"x98'
Thermal roll
8.2"
8.2"
Optical fiber
Line, thermal
Standard Mode - 203x98 lines/inch;
Fine Mode - 203x196 lines/inch
1 page
8 shades
Built-in handset
Selectable tone/pulse
10 numbers
Monitor
110-120 VAC, 60Hz
Public Switched Telephone Network
USOC RJ11C modular jack or equivalent
Standby - under 12 W; Peak - under 150 W
4Tto 95 degrees (F)
13.0"(W) X 9.4"(D) X 4.7"(H)
10.6 lb
OGM Type/Capacity - D*RAM/16 sec.
ICM Type/Capacity - D*RAM/ 7x16 sec. or 4x28 sec. messages
(selectable)
Specifications are subject to change without notice
Page 35

Page 36

(FAX-60) 5X1-113
U83547001
8810 (Ш
Printed in Japan
 Loading...