

Page 1
Quick Setup Guide
FAX-575
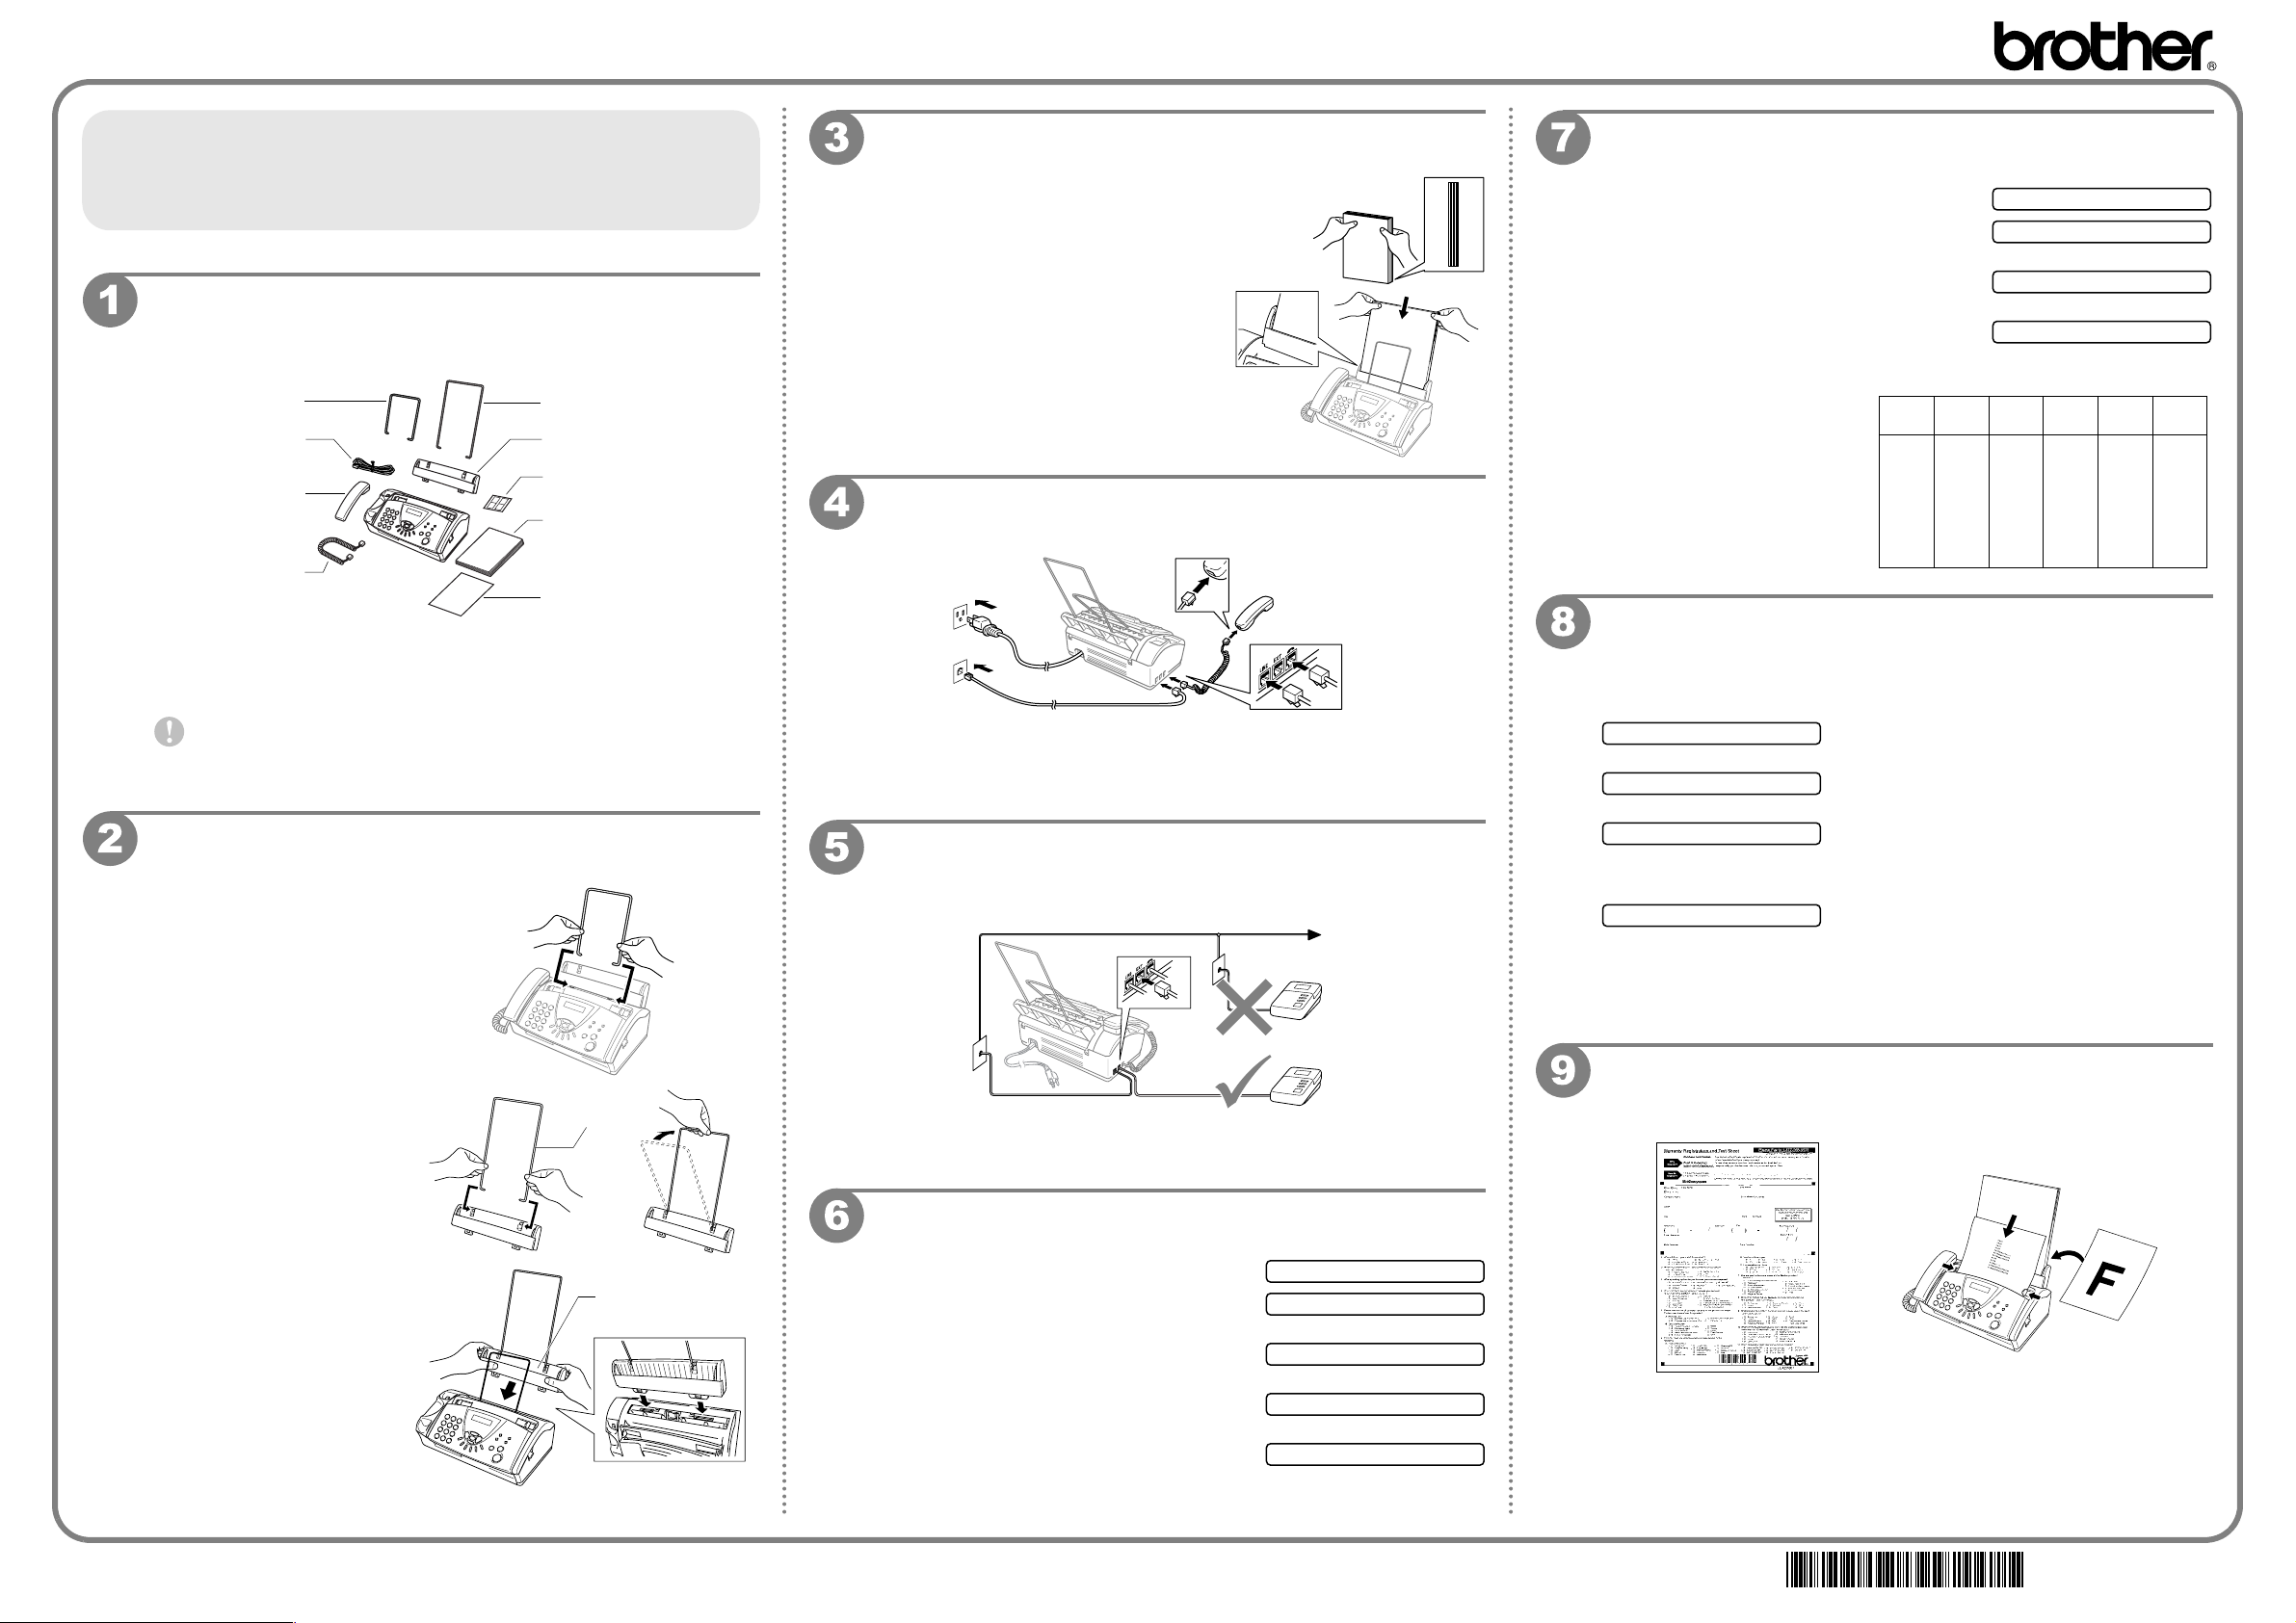
Packing List
Make sure you have the items shown below.
Document Support
Telephone Line Cord
Telephone Handset
Handset Curled Cord
To help you get your fax machine working from the outset, we have
included a free starter ribbon (print cartridge) giving you up to 30 pages
of print.
Keep the packing materials for possible future transport. If you do
not pack the machine properly, it could damage your fax and may
void your warranty.
Attach the paper wire extension and paper tray
Please insert the
1.
document support into
the openings of the
machine as shown in
the illustration.
Paper Wire Extension
Paper Tray
One Touch Name Label
User’s Guide
Quick Setup Guide
Load the Paper
Place up to 50 (17 - 24 lb) sheets of
paper in the paper tray.
Gently insert paper.
The side to be printed on must be face
down.
Acceptable Paper
Size: Letter, Legal
Weight: 17 to 24 lb (64 to 90 g/m
Thickness: 0.003 to 0.0039 in.
(0.08 to 0.10 mm)
Tap the stack of paper
so the edges are even.
2
)
Connect the handset, power cord and telephone
line cord
Connect the handset.
1.
Connect the power cord.
2.
Connect the telephone line cord to the jack on the Fax marked LINE.
3.
If you are sharing one phone line with an
external telephone answering device, connect it
now as shown below.
TAD
Set Station ID
Press
1.
2.
3.
Menu/Set, 1, 2
Enter your fax number (up to 20 digits),
and then press
Enter your telephone number (up to 20
Menu/Set
digits), and then press
Enter your name (up to 20 characters)
4.
using the dial pad and the chart, and
then press
Menu/Set
To enter a space press
twice.
Press
5.
Stop/Exit
.
.
.
Menu/Set
.
▲
Press
Key
2
3
4
5
6
7
8
9
.
once twice
W
2.STATION ID
FAX:
TEL:
NAME:
A
B
D
E
G
H
J
K
M
N
P
Q
T
U
X
three
times
C
F
I
L
O
R
V
Y
four
times
2
3
4
5
6
S
8
Z
five
times
A
D
G
J
M
7
T
9
Select Receive Mode
Choose the mode that best suits your needs by pressing
repeatedly until the screen displays the setting you want to use.
Mode
FAX ONLY
For use with a dedicated fax line. Every call
is answered as a fax.
FAX/TEL
Use this mode if you expect to receive lots of
fax messages and few telephone calls.
TAD:ANSWER MACH.
For use with an external answering device.
The TAD answers every call and stores
voice messages. Fax messages are printed.
MANUAL
For receiving fax and voice calls on one line.
You control the phone line and must answer
every call yourself.
For more details, see Chapter 5, “Choosing the Receive Mode” in the
User’s Guide.
Receive
Attach the paper wire
2.
extension to the paper
tray.
Attach the paper tray.
3.
Make sure the wide pins
on the paper tray are
inserted firmly into the
pockets on the top edge
of your machine.
Paper Wire
Extension
Paper Tray
TAD
For more details, see Chapter 1, “Connecting an External Telephone
Answering Device (TAD)” in the User’s Guide.
Set Date and Time
Press
1.
2.
3.
4.
5.
6.
Menu/Set, 1, 1
Enter the last two digits of the year, and
then press
Enter two digits for the month, and then
press
Enter two digits for the day, and then
press
Enter the time in 24-hour format, and
then press
Press
Menu/Set
Menu/Set
Menu/Set
Menu/Set
Stop/Exit
.
1.DATE/TIME
ENTER YEAR:20--
.
ENTER MONTH:--
.
ENTER DAY:--
.
ENTER TIME:--:--
.
.
For the USA only, complete the Warranty
Registration and Test Sheet...
Face down
...and fax it to Brother at 1-877-268-9575
US/CAN
LF3931001
Printed in Malaysia
 Loading...