

Page 1
Page 2

Page 3

TELEPHONE
TELEPHONE
SYMPTOM
One touch and speed
dialing don't work
No sound is
produced when you
press HOOK
COPYING
SYMPTOM
Nothing comes out
of the slot
No image appears on
the paper
Print quahty of the
copy is poor
POSSIBLE CAUSE
• Power cord is disconnected
• Numbers have been
registered incorrectly
• Your telephone has been set
to the wrong PULSE/TONE
setting
• Numbers have been
registered as chain dial.
• The power cord is
disconnected
• The monitor switch is set low.
• The telephone line is not
connected
POSSIBLE CAUSE
• The paper roll is not inserted
properly
• Recording paper jam
• Cover not closed properly
• The paper roll is loaded
upside down
• The document is upside
down in the feeder
• The wrong recording paper is
being used
ACTION
• Plug the cord into the power
outlet
• Check and (if necessary)
correct the registration
• Check and (if necessary)
correct the PULSE/TONE
setting
• Check and (if necessary)
correct the registration
• Plug the cord into the power
outlet
• Turn the monitor switch high.
• Connect the fax unit to the
telephone line
ACTION
• Reload the paper correctly
• Open the recording cover and
remove the jammed paper.
Make sure the paper is loaded
correctly
• Push the cover closed until
you hear a click
• Reload the paper correctly and
make another copy
• Load the document in the
feeder face down and make
another copy
• Use Brother thermal recording
paper
cf.
riI-6-l
III-6-1
II- 3-3
III- 7-1
cL
riI-5-1
VI-5
III-5-1
VI-3
Page 4

OTHERS
OTHERS
SYMPTOM POSSIBLE CAUSE
Cover cannot be
closed properly
• Release levers have fallen into
lower position
ACTION
■ Pull up bolh release levers
and close the cover again
cf.
VI-6
VI-4
Page 5

ERROR MESSAGES
<MACHINE ERRORS>
ER RO R M ES SA G E S
An error message is displayed on the LCD when a malfunction
occurs or when an operation has been done incorrectly. When some
of the error messages described below appear on the screen^ an
alarm will sound continuously for 4 seconds.
CHECK RECORDING PAPER
DOCUMENT JAM
PRESS STOP KEY
RFCDRniNG PAPER JAM
spray will appeal lu iiuurin you uiai tne uiiii i
paper. This message may also appear if the paper
been loaded properly.
This indicates a document paper jam inside the machine or
the feeder. Open the panel cover to remove the jammed
document. When the jam has been corrected, close the
cover. If this does not correct the error, contact your Brother
service center and inform them of the situation.
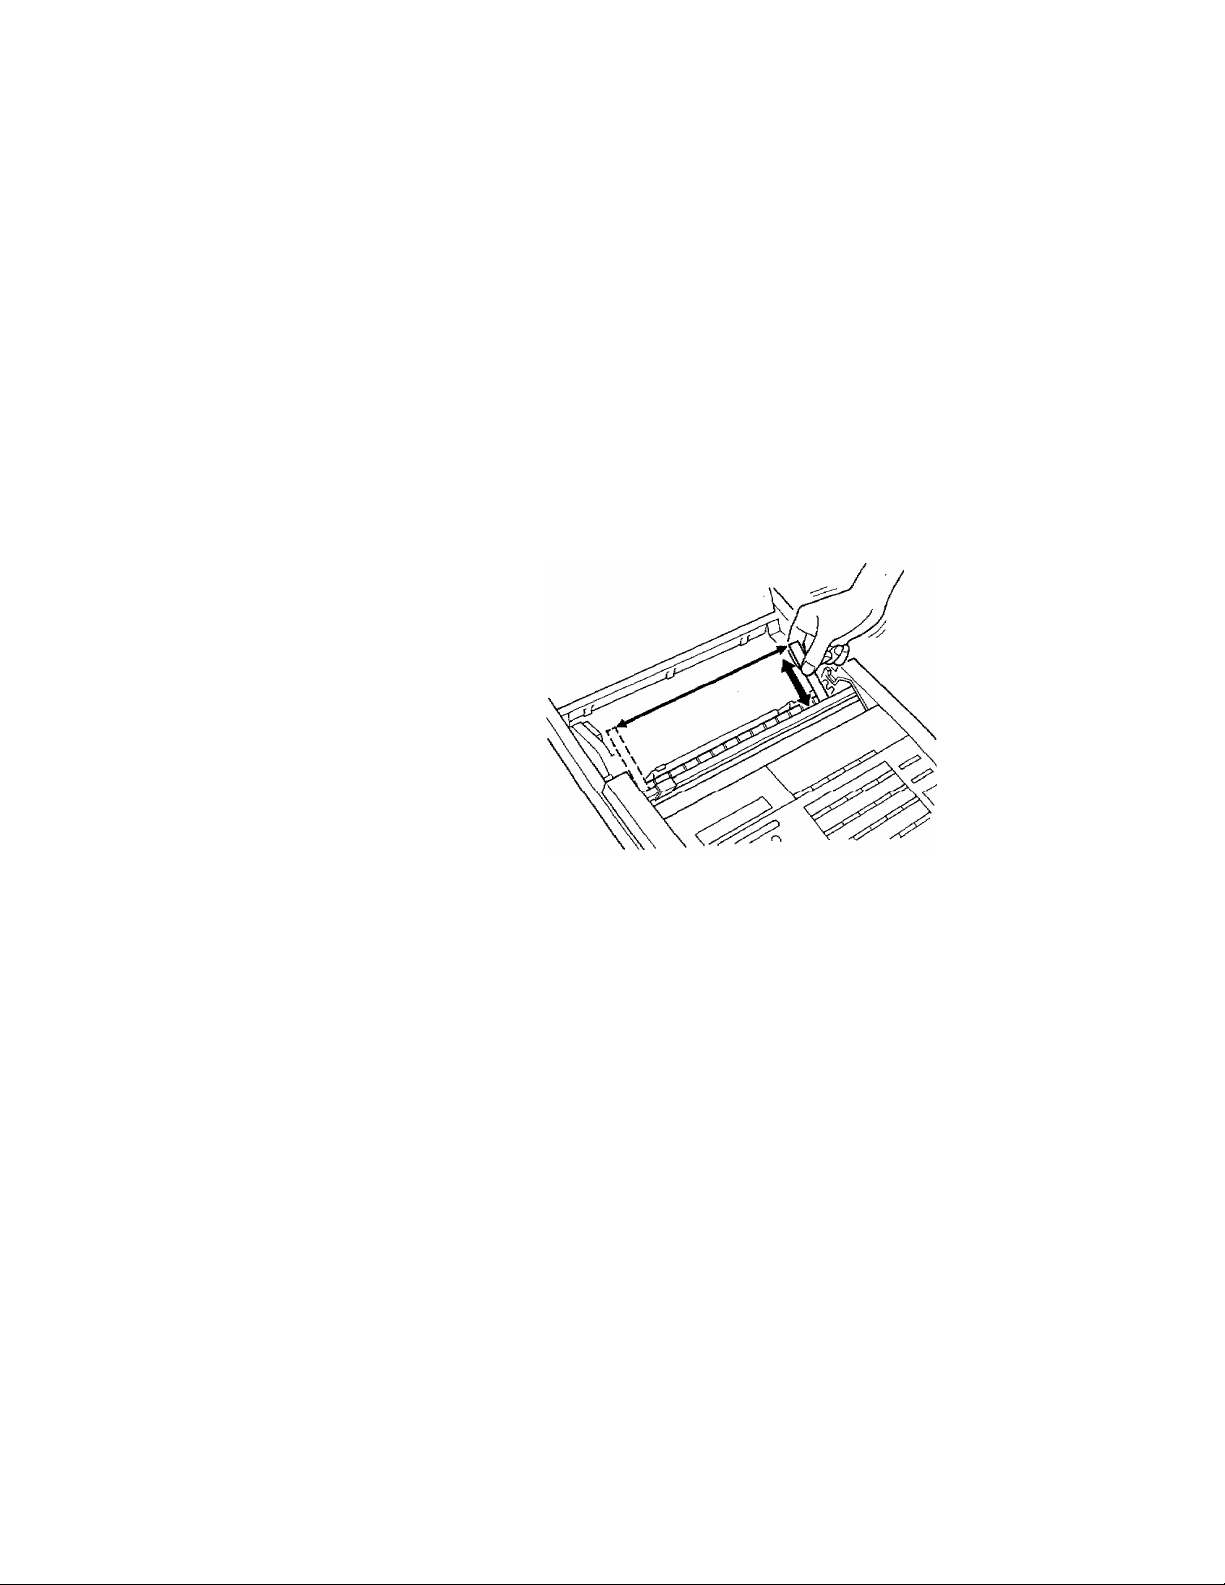
This indicates a recording paper jam inside the machine.
Open the recording cover to pull the jammed paper out of
the recording paper guide, as shown in the illustration
below. When the jam has been corrected, cut the edge of the
recording paper with a pair of scissors, and reset it properly
in the guide. Then close the cover of the machine.
Vl-5
Page 6
ER RO R M ES SA G E S
This indicates that the cutter is not at the home position
because a recording paper jam is obstructing the movement
of the cutter inside the machine. First, unplug the machine.
Then open the cover to remove the jammed paper. (Use
caution when handling the paper, as the cutter is quite
sharp.) After the paper jam has been corrected, reset the
paper roll in position, and close the cover. Finally, plug in
the machine again. The cutter will return to the home
position automatically.
PRINTER ERROR
PRESS STOP KEY
This may indicate overheating due to a problem with the
printing head. Let the unit cool down for one hour or more.
If this does not correct the error, contact your Brother
service center and inform them of the situation.
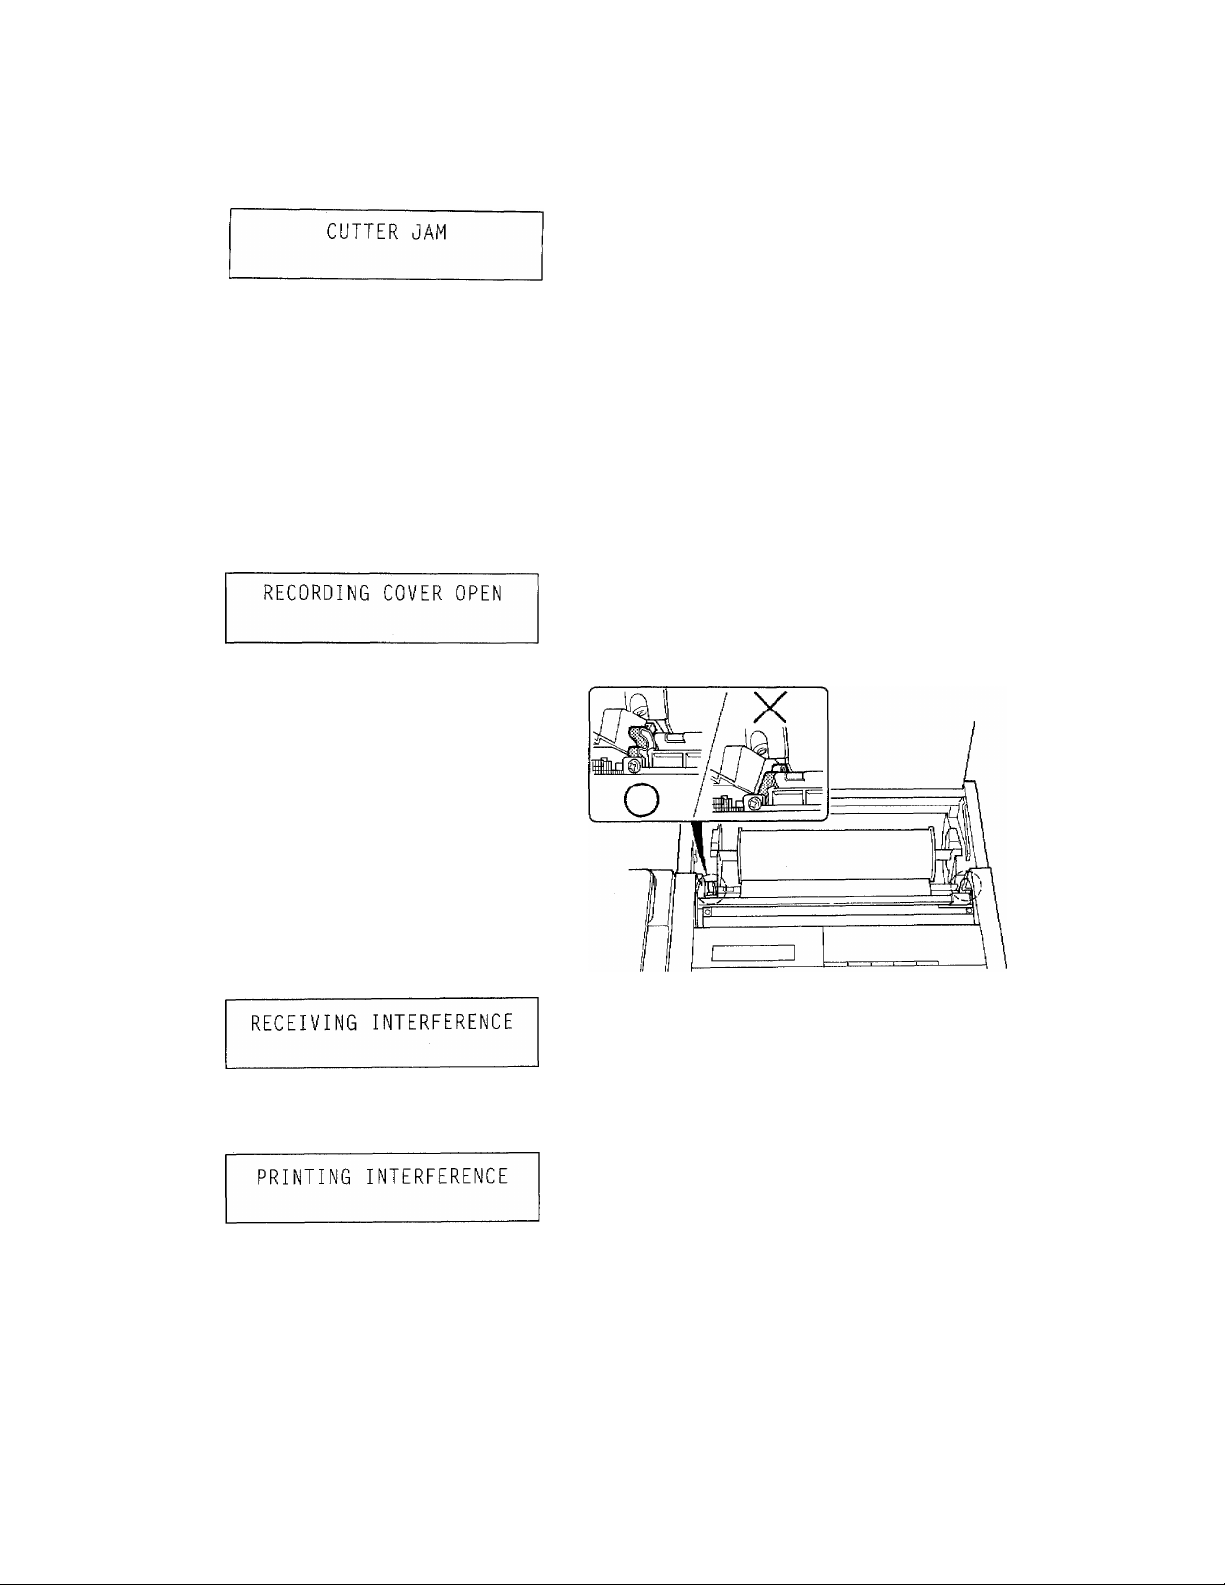
The cover has not been closed properly. Check the position
of the release levers on both sides inside the unit, and
return them to the upper position, as shown in the
illustration below. Then close the cover.
This may indicate some error related to the recording
paper at manual reception or polling operation. Hang up
the handset when manual reception. Information about
correcting the situation will then appear on the LCD.
MACHINE ERROR XX
PRESS STOP KEY
VI- 6
This may indicate an error related to the recording paper.
Press the STOP key or remove the document, and
information about the situation will appear on the LCD.
This may indicate overheating due to overuse. Let the unit
cool down for one hour or more. If this does not correct the
error, contact your Brother service center and inform them
of the situation.
If the error message on the LCD reads "MACHINE ERROR
EA", this may indicate that the document was removed
from the feeder while transmission was still taking place.
Page 7

<COMMUNICATION ERRORS>
ER RO R M ES S AG E S
NO RESPONSE OR BUSY
NO CONNECTABILITY
ID MISMATCH
LINE DISCONNECTED
When you are making a transmission this message indicates
that either the other party is busy or that no response has
been received. If you have turned the Auto Redial function
ON (see page IV-1-10), the machine will automatically try
the number again after a few minutes. If you have selected
to turn the Auto Redial function OFF, this transm^sion
will be unsuccessful and transmission verification report
(busy) will be printed out.
When you are the receiving party, this message will indicate
that certain functions—password cannot be enabled
because the sending party's machine is not a Brother
machine.
This may indicate that the incorrect ID number (for
password, password plus, and secure polling) was used
when the sender made his transmission. Contact the sender
to verify that your ID codes match up correctly. A
transmission verification report (error) will be printed out.
This message may indicate that either the sending or the
receiving party has interrupted the fax transmission (or
reception) operation. If you are the sender, this may also
indicate a missed telephone line connection due to an ID
mismatch or the receiving party being unprepared for
polling, and so on. In such circumstances, check with the
receiving party to learn what is happening at the other end
of the line.
COMM ERROR XX YY
This message indicates that some communication error has
taken place. "XX YY" represents the error codes used to
provide more detailed information about the error. Refer
to the list shown below.
Error Codes
40 06 — This indicates that a unit which has not been set up
for polling has been polled by another unit.
40 13 — This indicates that the machine has been set up for
secure polling, but the polling request has come
from a unit which is not a Brother machine.
AO 01 — This indicates poor telephone line conditions.
If any error code other than those listed here appears on the
LCD, contact your Brother service center and inform them of
the situation.
Vl-7
Page 8

ER RO R M ES SA G E S
<OTHER ERRORS>
NOT REGISTERED
NOT REGISTERED
STATION ID
NO DOCUMENT IN FEEDER
SET DOCUMENT(S)
This message indicates that you have attempted to reach a
one-touch or speed dialing number that has not yet been
registered. (See page IV-4-1 and IV-5-1)
This indicates that you have attempted to use the super
COVERPAGE function before registering your station ID.
Register the station ID (see page IV-1-2) first and then try
the operation again.
This indicates that no document(s) has been set into the
document feeder^ when you have tried to select contrast
change or multiple resolution setting.
VI- 8
Page 9

VU. Cleaning
To ensure a long and useful life for your machine, regular cleaning
is essential. For best results clean the scanning and printing areas of
your machine every time you use up a roll of recording paper. The
following points should be borne in mind.
1) To avoid the risk of an electric shock, unplug the machine
2) Do not use water or organic solvents of any kind (thinners, for
3) Use a slightly damp cloth to wipe any dirt off the surface of the
To clean the working parts of the machine follow the steps described
below.
before cleaning.
example) to clean the machine.
machine.
VII -1
Page 10
CLE A N IN G TH E P RI NT IN G A RE A
CLEANING THE PRINTING AREA
First, unplug the machine. Open the unit, and remove the roll of
recording paper from inside the machine.
When cleaning the printing head, use the cleaning slip provided
with the machine. Wet one end of the paper slip with isopropyl
alcohol, and insert it under the guide until it will enter no further.
Then continue across the unit as shown in the illustration, inserting
the paper so the entire head is cleaned with the alcohol. (Either side
and both ends of the paper slip can be used for cleaning the printing
area.)
VII -2
Page 11
CLEANING THE SCANNER
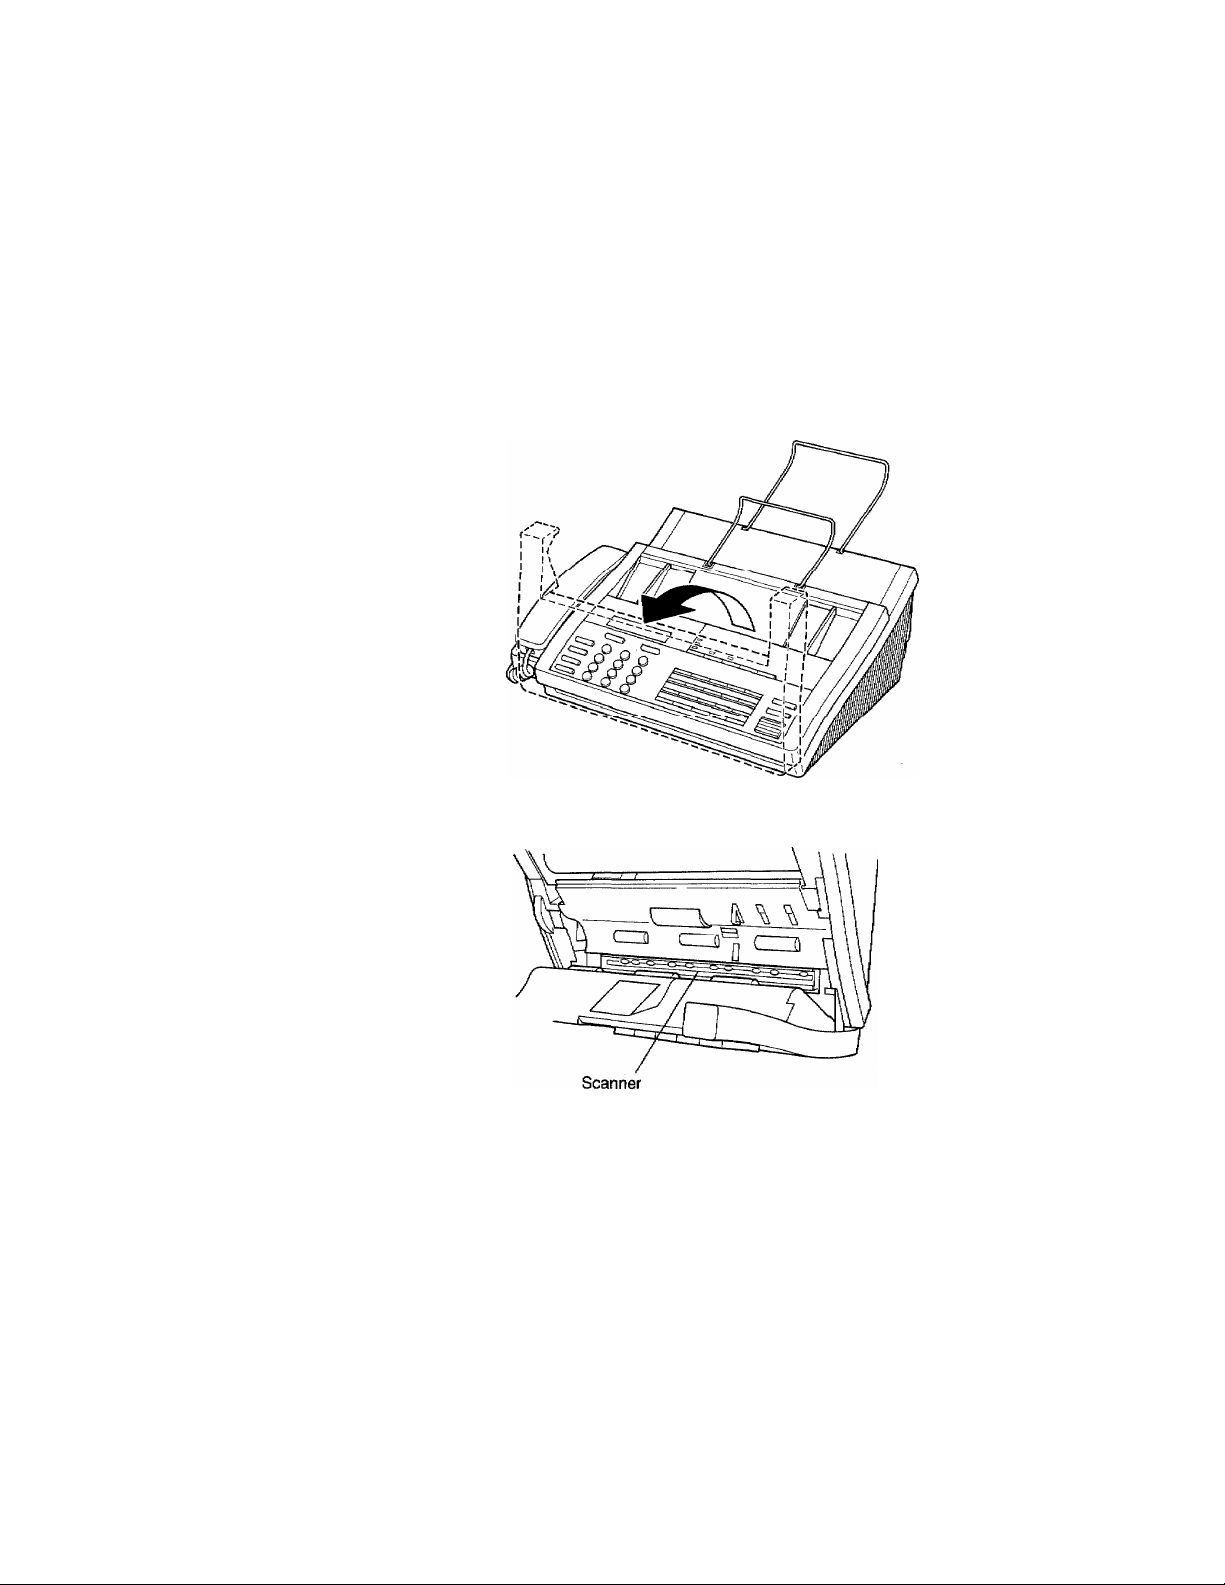
Lift up on the front cover of the unit to open the machine.
Carefully remove any dirt from the clear glass cover of the scanner
using a soft cloth soaked in alcohol. Do not use organic solvents
such as thinners, or petrol.
CLE A N IN G TH E SC A N NE R
VlI -3
Page 12

Page 13

VIII. Specifications
Type
Compatibility
Coding system
Modulation
Document input size
Scanning/Printing width
Paper roii size
Scanner type
Printer type
Gray scale
Paper Cutter
LCD
Polling types
Contrast control
Resolution
One-touch dial
Speed dial
Total station memories
Automatic redial
Speaker type
Auto answer (# of rings)
Communications source
Operating environment
Power source
Power consumption
Dimensions
Weight
Desktop facsimile transceiver
CCITT Group 3
Modified Huffman (MH) and Modified Read (MR)
CCITT V.27 ter and a V.29 modem (9600bps)
8.5"/216mm x 5.8"/148nun
8.2'7208mm
8.5" X 1647216mm x 50m
Contact Image Sensor (CIS)
Line Thermal
16
Automatic
24 digits X 2 lines
Standard / Security/Turnaround
AUTO/Super Light
• Standard (203 x 98 lines/inch)
• Fine (203 X 196 lines/inch)
• Super Fine (203 x 392 lines/inch)
• Photo (203 X 196 lines/inch)
15 stations
40 stations
55 stations
3 times (5 minutes intervals)
Monitor
Shorterd ring)/Longer(4 rings)
Public switched telephone network (or compatible
approved PBX)
41 -95°V
120 VAC, 60Hz
Stand-by; under 15 watts Peak;under 150 watts
16.0" X 15.0" X 5.7"mm x 380 mm x 145 mm
14.31bs/6.5 kg
Specifications are subject to change for improvement without prior notice.
vm-1
Page 14

Page 15
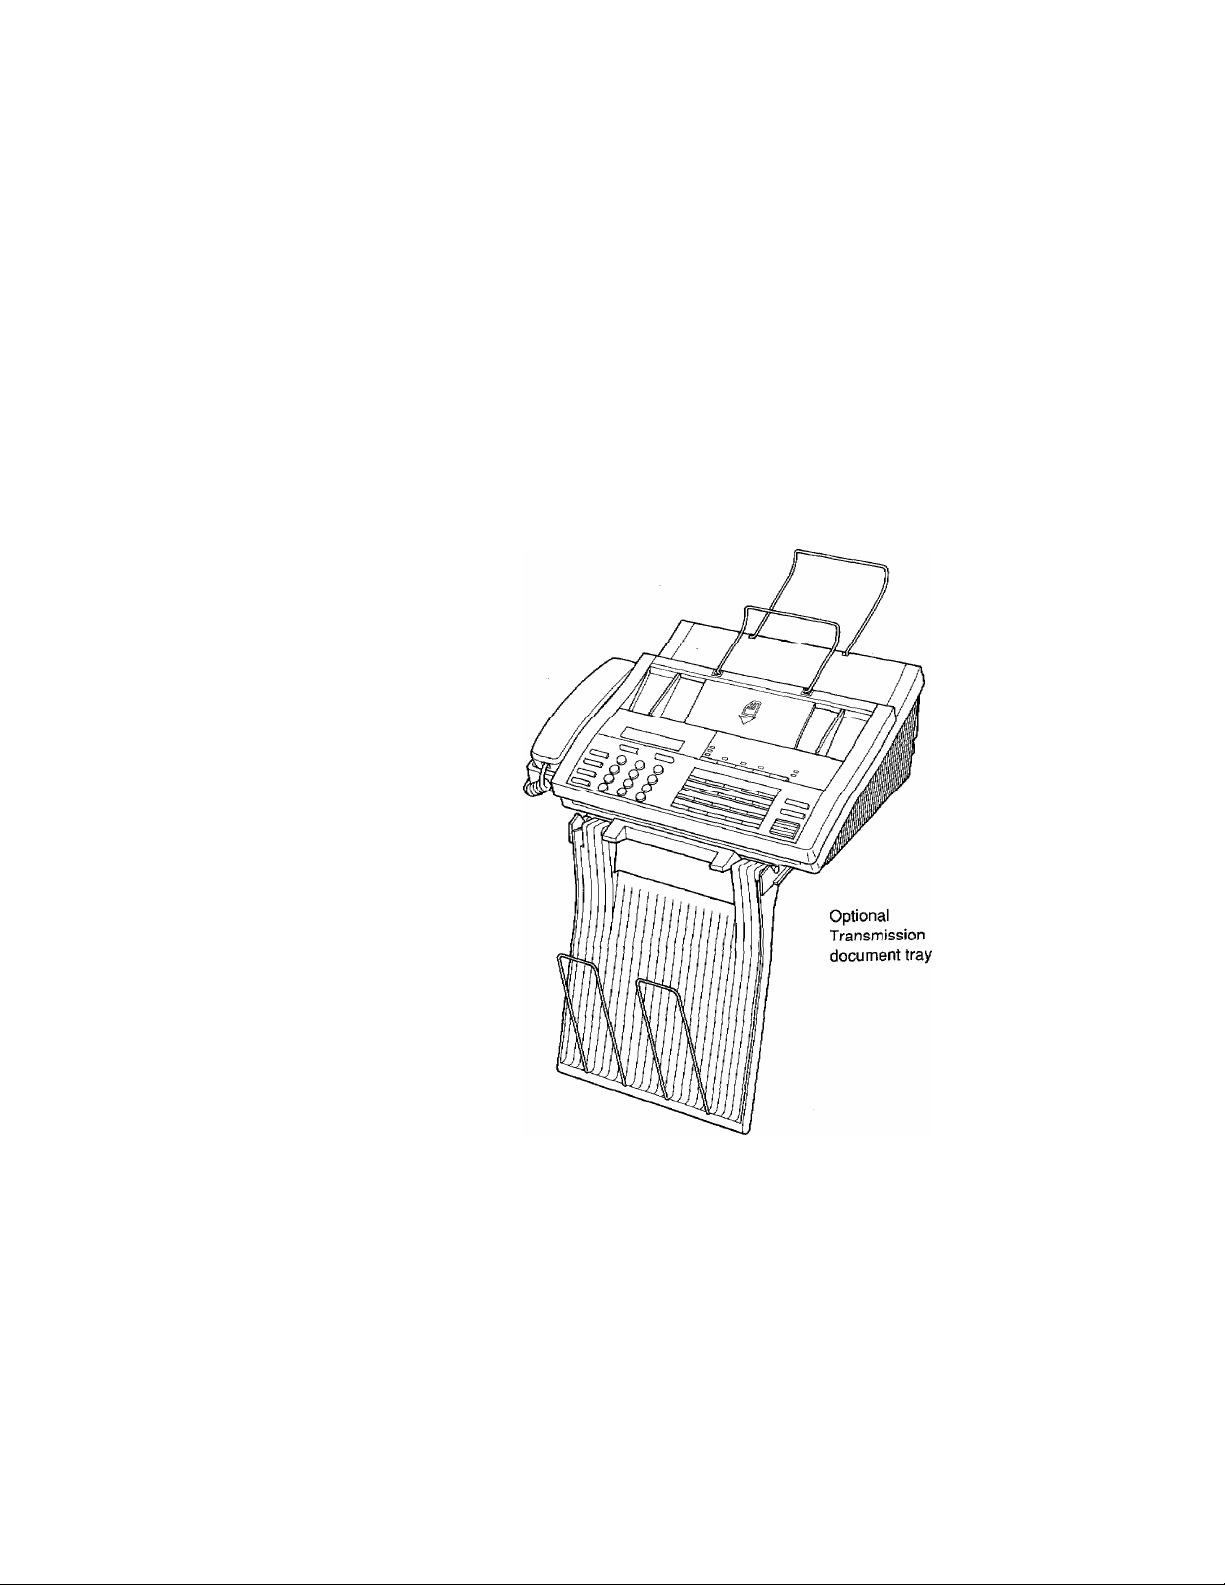
12. OPTIONAL KITS
V-1 2. OP T IO NA L K IT S
You can expand further your fax machine with the following
optional kits.
• Transmission document tray
An additional tray is available for catching the transmitted
documents.
For detailed information, please contact your dealer or the shop
where you bought this machine.
y-12-1
Page 16

V-1 3. PR IN T IN G O UT R EP O RT S AN D L IS TS
13. PRINTING OUT REPORTS AND LISTS
The unit allows you to print out the following lists and reports.
• All dial lists (Print out one-touch dial and speed dial at once.)
• One-touch dial list (see IV-4-3)
• Speed dial list (see IV-5-3)
• Super COVERPAGE format (see V-4-3)
• Call Back Message format (see V-5-2)
• System configuration list (see V-13-3)
• Transmission verification report (see IV-1-12)
Other reports
The following reports are printed out automatically for your
information. (You cannot print them out manually.)
• Transmission Verification Report (ERROR) (See IV-2-1)
• Polled report (see V-8-6)
• Delayed sending report (see V-6-2)
All-dial list
C=1 {¿)
INT ERR UPT
I
START
An all-dial list is a printout both of "oiie-touch dial list" and "speed
dial list" at once.
1) Press the FUNCTION key. Then press the 4 key.
4.LISTS AND REPORTS
PRESS SET KEY
2) Press the SET key and then the 1 key.
o
l.ALL DIAL
PRESS START KEY
3) Press the START key. Both one-touch dial list and speed dial list
are printed out.
V-1 3- 1
Page 17

V-1 3. PR IN T IN G OU T R EP O RT S AN D L IS TS
Configuration list
laWWlMl GHI
INT EfiflUPT PRS
START
©
0
A configuration list is a printout showing all the user switch
settings and registration into the machine.
1) To print out a configuration list press the FUNCTION key. Press
the 4 key.
4.LISTS AND REPORTS
PRESS SET KEY
2) Press the SET key followed by the 7 key.
/.USER OPTIONS
PRESS START KEY
3) Press the START key.
(See next page for the sample of this list.)
V-1 3- 2
Page 18

V-1 3. PR IN T IN G O UT R EP O RT S AN D L IS TS
SYSTEM CONFIGURATION 1,1ST
TIME : 06/01/1991 18:11
NAME : BROTHER
FAX : 052-811-5981
TEL : 052-824-2554
***USER
OPTIONS**-*
1 .
2 .
RING DELAY
TONE/PULSE
3 . AUTO REDIAL
4 .
5 .
6.
7 .
8.
XMT VERIFICATION (OK) REPORT
FAX/TEL RING TIME
BEEPER
RECEIVE PASSWORD
SMOOTHING
**PARAMETER**
COVER PAGE COMMENT
1.
2 .
INITIAL TIME
FAX/TEL SWITCH ID
FAX REMOTE ACTIVATION ID
RTI/TTI
RECEIVE PASSWORD
NOT USED
5
6
NAME
FAX
TEL
SHORTER
TONE
ON
ON
10 SECS.
ON
OFF
OFF
ORDER COFIRMATION
NOT USED
19:00
: *#
BROTHER
052-811-5981
052-824-2554
1234
V-1 3- 3
Page 19

VI. Troubleshooting
This section provides possible solutions to the problems you may encounter in the use of this
machine.
-If There Are Image Quality Prohlems-
If you are having trouble with the image quality of faxes you send or receive^ make a test copy of
the document. If the copy is of good quality, the problem is not with your fax machine, but in the
phone lines or in the fax machine on the other end of the line.
If the image of the copy you make is poor, clean the interior of the unit. (See page VII-2 for a
description of how to do this.)
If you are not able to solve a problem with your fax machine, contact Brother service personnel at
1-800-284-4FAX. (U.S.A. Only).
RECEIVING
SYMPTOM
Manual reception
doesn't work
Recording paper is
jammed
Received copies are
blank
Telephone rings
continuously
Image quality is not
good
Polling reception does
not work
POSSIBLE CAUSE
• Document left in feeder
• Cover not closed properly
• No recording paper
• Paper jammed in the
recording section
• Recording paper is set
incorrectly
• Paper jammed in the
recording section
• Recording paper roll has been
inserted upside down
• Documents were not sent
correctly
• No recording paper
• Auto Answer is OFF
• Cover not closed properly
• Paper jammed in the
recording section
• Wrong type of recording
paper is used
♦ Printing head is dirty
* Sender's resolution or
contrast setting may need
adjustment
• Sender has not set up to
perform polling
• Polling security codes do not
match
• Sender is not using a Brother
series machine
ACTION
• Remove the document
• Push cover closed until you
hear a click
• Load new paper roll
• Remove the jammed paper
• Reload paper roll correctly
• Remove the jammed paper
• Reload the paper roll
correctly
• Contact the sender
• Load new paper roll
• Turn Auto Answer to ON
• Push cover closed until you
hear a click
• Remove the jammed paper
• Replace with Brother thermal
printing paper
• Clean the printing head
• Contact the sender
• Contact the sender to be sure
he has set up for polling
• Contact the sender to confirm
the code being used
• Contact the sender to confirm
the machine being used
cf.
III-5-1
VI-5
III-5-1
VI-5
III-5-1
III- 5-1
IV- 1-7
VI-5
VII-2
VI- l
Page 20

SEN D IN G
SENDING
SYMPTOM
Document jam
Document not feeding
properly
Documents are
impossible to feed
Password transmission
error
Image quality of
document is poor
Documents sent are
received blank
Auto transmission is
not working
Delayed sending does
not work
POSSIBLE CAUSE
• Jam in the scanning section
• Cover not closed securely
• Document is too thick or thim
too small, wet, wrinkled,
curled or torn
• Document guide not adjusted
to document size
• More than 20 pages of
documents in the feeder
• Documents have been
inserted in the position for
recording paper output
• Password function on
rpcpiving pnd is OFF
• Passwords do not match
• Receiving unit has no
password function
• Receiving unit is not a
Brother series machine
• Problem with receiving unit
• Scanning head is dirty
• Scanning head is bad
* Document is face up in the
feeder
• The wrong (a non-fax)
number was dialed
• Polled or transmission or
redialing with a document in
the feeder is being carried out
• The HOOK key has been
pressed or the handset was
picked up
• Polled transmission, or
redialing with a document in
the feeder is being carried out
ACTION
• Open the panel cover and
remove the jammed paper.
Close the cover (and listen for
the click).
• Push the panel cover closed
until you hear a clicfc
• Use a photocopier to make a
copy, then send the copy
• Adjust the document guide to
fit the document size
• Set only 20 pages of the
document in the feeder at one
time
• Insert the documents into the
document wire extension
• Contact the receiver
• Contact the receiver to
confirm the code being used
• Contact the receiver
• Contact the receiver to
confirm the machine being
used
* Use your fax unit to make a
test copy (If this is passable,
the problem is at the other
end.)
* Clean the scanning head
* Call your Brother service
center
* Set the document face down
in the feeder and send it again
♦ Double check the fax number
you have registered in the
machine
• Use the interrupt function
• Refer to the instructions and
begin again
• Use the interrupt function
cf.
III-8-1
III-8-1
VII-3
V-10-1
V-10-1
VI- 2
Page 21

O “"©
V-8 . P O LL IN G
3) Press the 1 key if the document for which you are polling is not
protected by a secure polling ID code. If it is protected, press the
2 key and enter the polling ID code, as explained in the previous
section.
POLL
ENTER FAX NO.
T/MBR
START
I
4) Press the TIM E R key and use the number keys to enter the time
at which you want polling to take place.
TIMER
SET TIMER : 21:00
5) When you have entered the time (as a 4 digit number), the screen
will change briefly.
21:00 POLL
ENTER FAX N0
6) Enter the fax number of the machine you are polling, either by
keying it in using the number keys, a one-touch, or a speed dial
number.
0528113030
PRESS START KEY
7) Press the START key. The initial display is restored and the
machine can now be used for other tasks
At the time that you specified, your machine will poll for a document
from the station whose number you entered.
POLLING I
V-8 -4
Page 22

V-8 . P O LL IN G
Turn>around polling
FLA SH
POLLIN G
O""0
The following procedure is used to send a fax and poll for a
document on the same phone connection.
1) Set the document in the feeder.
EAX
COPY
ENTEREAX
PRESS
COPYKEY
NO.
2) Press the POLLING key.
SELECT NO.
1.STANDARD 2.SECURE
3) Press the 1 key if the document for which you are polling is not
protected
by a
secure
polling
ID code. If
it
is protected, press
the
2 key and enter the polling ID code, as explained in the previous
section.
POLE
PRESS START KEY
FLIP-FLOP
-OR-
POEL
ENTER FAX NO.
START
4) Enter the fax number of the machine you are polling. You can
either key in the number using the number keys, a one-touch, or
a speed dial number.
BROTHER MIZUHO
PRESS START KEY
5) Press the START key. Your document is transmitted first.
After your document has been transmitted, your machine polls
for a document from the called side.
V-8 -5
Page 23

V-8 . P O LL IN G
Setting a document
to be polled.
FLA SH
POLLIN G
O”*©
The steps for setting a document to be polled are shown below.
1) Set the document face down in the feeder.
FAX
COPY
ENTERFAX NO.
PRESS COPY KEY
2) Press the POLLING key:
SELECT NO.
¡.STANDARD 2.SECURE
3) Press th e 1 key to choose standard polling or press the 2 key and
enter the 4 digits secure code.
POLL
PRESS START KEY
FLIP-FLOP
-OR-
POLE
ENTER FAX NO.
START
DATE.TIME
DURATION
PAGE(S)
RESULT
MODE
r PC
POLLING ■
4) Press the START key. The machine waits for a call from the
calling side.
After a document has been polled, a "Polled Report" will be
printed out.
POLLED REPORT
TIME : 06/01/1991 14:23
NAME : BROTHER
FAX : 052-811-5981
TEL : 052-824-2554
06/01 14:22
00:00:32
01
OK
FINE
If you select “Secure", the calling side fax machine must he
another Brother fax. The calling side must also use the same
"secure" code.
___________________________________________________
V-8-6
Page 24

V-9 . V A RI OU S TY P ES O F TR A NS M IS SI ON S
9. VARIOUS TYPES OF TRANSMISSIONS
As described in "Advanced Uses", this unit has many useful dedicated keys. And you can do
various types of transmissions can be carried out by pressing these keys in combination.
A summary of "Advanced Uses" is provided below.
1. The following dedicated keys are available for all transmissions.
RESOLUTION key
]RNE
1 S.FINE
I PHOTO
COVERPAGE key
I
----
1 COVER PAG E
I •
----
I
2. The following key is not available for delayed transmission operation.
CALL key , -]
tZZl CALL
3. The following keys are available for the various types of transmissions listed below.
CH.i1/W
PASSWORD key
POLLING key
P.ilSSW0f?0
FLA SH
POLLIN G
TIMER key
(1) Timer (delayed) transmission with password
® @ ®
r “
TIM ER
1
1 L_ _I1
CHAIN
PASSW ORD
______
III
START
Set the document
face down in
the feeder
V-9 -1
Set TIMER Set PASSWORD
Enter Fax No.
Page 25

(2) Timer polling (Delayed polling)
V-9 . V A RI OU S TY P ES O F TR A NS M IS SI O NS
(0
No document
in the feeder
FLA SH
POLUm
Set POLLING
Set TIMER
(4)
(3) Turn around polling with password
© ®
Set the document
face down in
the feeder
I CHAIN
I PASSW ORD
L
Set Set
PASSWORD POLLING
-----------
FLA SH I
POLUN G I
______
1
I
Enter Fax No.
(4) Timer (delayed) turn around polling with password
© @ ®
1C
FLA SH
POLLIN G
CHAIN I
PASSW ORD I
Enter Fax No.
©
START
START
START
Set the document
face down in
the feeder
Set TIMER
Set
POLLING
Set
PASSWORD
Enter Fax No.
V-9 -2
Page 26
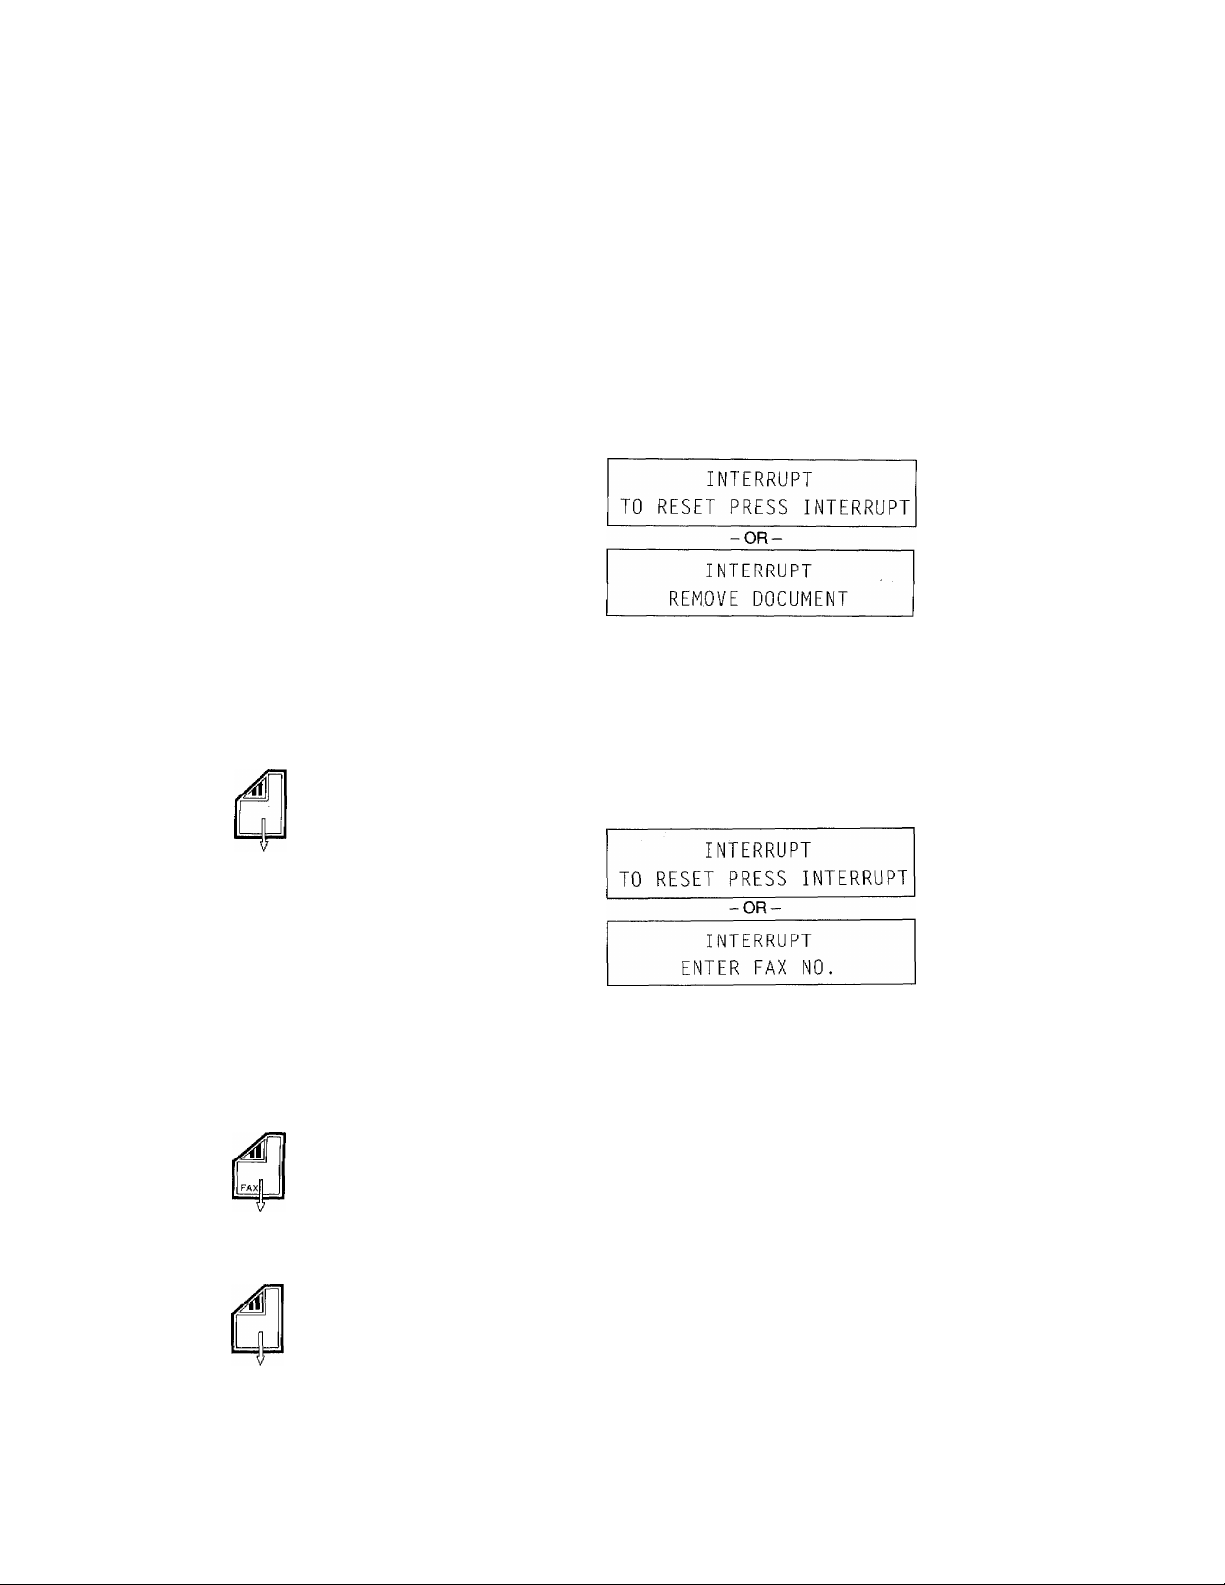
V-1 0. IN TE R RU P TI NG A TRA NS M IS SI O N
10. INTERRUPTING A TRANSMISSION
If you need to send a document immediately but the machine is set
up to perform an operation, for example a Timer (delayed)
transmission or waiting polled operation, you can interrupt the
current activity and then resume it when you have sent your urgent
fax.
1) Press the INTERRUPT key.
FLIP-FLOP
2) Remove the document.
INTERRUPT
SET DOCUMENT(S)
START
3) Set the document that you need to send quickly face down in the
feeder.
FLIP-FLOP
4) Enter a fax number. Then press the START key. The machine
will send the document.
5) When transmission has been completed the following message
is displayed.
INTERRUPT
SET DOUCUMENTCS)
6) Replace the original document.
V-1 0- 1
Page 27

V-1 0. IN TE R RU P TI NG Л TRA N SM I SS IO N
FLIP-FLOP
7) Press the INTERRUPT key again. The machine returns to the
waiting mode.
- You can repeat the interrupt operation as often as you like,
- You can use the resolution setting and the super COVERPAGE.
Other current settings can not be used for the interrupt
transmission.
- Even if auto redial is "ON'S it cannot be used for an interrupt
transmission.
V-1 0- 2
Page 28

V-1 1. CA N CE L LI NG A T R AN S MI SS IO N
11. CANCELLING A TRANSMISSION
You may wish to cancel a particular activity that is in progress or
that is due to take place at a specified time. An example of this
would be a Timer (delayed)
1) Press the FUNCTION key. Press the 9 key on the number keys.
©
9.CANCEL TRANSMISSION
transmission operation.
PRESS SET KEY
INT ERR UPT
\ I
0 ^“^0
2) Press the SET key. The screen now displays the various
transmission activities that are currently in progress or will take
place in the future.
SELECT N0.
l.HEAD OFFICE
FLIP-FLOP
Z.341 1411 REDIAL
3) Select number of operation that you wish to cancel.
HEAD OFFIOE
CANCEL ?
4) Enter the 1 key to confirm cancellation or the 2 key to reinstate
the transmission activity.
The meaning of the different LCD indications is as follows.
HEAD OFFICE
-OR-
SELECT NO.
l.YES 2.N0
Destination
Destination Name
............
Number ....Means Destinatin Number
Means Destinatin Name
21:00
21:00
21:00
I
___
setting
I
V-1 1- 1
Setting 00:00
....................
POLL
.............
REDIAL
POLLED
Means "Timer" transmission time. If
using the 'Timer'O the current setting
will appear "00:00 (setting time)"
Means "Polling" not "Timer".
........
Means "Redial" without "Timer" or
"Polling".
.......
Means "Polled"
Page 29

y-7. TH E P A SS W OR D
7) Press the SET key to confirm your password setting .
- The initial setting is "0000".
- This procedure merely sets the receiving password. It does not
enable password mode. To turn your machine's password "ON"
follow the procedure below.
Turning password
protection on and off
■0 "0
О ■"■©
©
To turn password protection on or off, or to enable the PASSWORD
PLUS function, proceed as follows.
1) Press the FUNCTION key. Press the 5 key on the number keys.
5.USER OPTIONS
PRESS SET KEY
2) Press the SET key. Press the 0 key followed by the 7 key.
07.RECEIVE PASSWORD
PRESS SET KEY
3) Press the SET key.
CURRENT : OFF
l.ON 2.PLUS 3.0FF
4) Press the 1 key to turn password protection on, press the 2 key
to turn password plus protection on, or press the 3 key to turn
password protection off.
- '0
RECEIVE PASSWORD : ON
PRESS SET KEY
5) Press the SET key to confirm your selection.
- The initial setting is "off".
V-7 -3
Page 30

V-8 . P O LL IN G
8. POLLING
What is Foiling?
Polling is a feature which lets fax machines call other machines to
request a fax transmission. The unit can receive a request for
transmission of a document (making you the called side) or it can
request a document from another unit (which makes you the
calling side). It can be operated using either standard or security
polling functions.
Polling is among the most advanced features on the machine.
While the concept may be new to some users^ the operation is
always basically the same: one fax machine calls another to request
a document. The table below shows the various polling operations
which can be carried out by the machine.
• Standard Polling Sends a request to have a document sent
from another fax unit.
• Secure Polling
Makes use of a coded security feature when
requesting a document.
• Timer (delayed)
Polling
Sends a request at a specified time for the
transmission of a fax from another machine.
Turnaround Polling Used for "two-way" polling, this lets you
send a document, then request a document
from another fax unit.
Remember that the calling side bears the expense of a fax
transmission when polling is done.
V-8 -1
STANDARD POLLING
REQUEST
Calling Side
SEND
Called Side
- There are some types of fax machine which you cannot poll or he
polled.
- Secure polling can onlytakeplacebetweenBrotherfaxmachines.
- The password function cannot he used with polling, hut this
function can be used for only tum-around polling.
- To cancel a polling operation use the * cancel transmission'
feature.
Page 31

V-8 . P O LL IN G
To poll for a document that is not confidential, (and so is not
protected with a security code) proceed as follows.
1) Make sure there is no document in the feeder.
06/01/1991 14;00
FAX/C0PY:SET DOC.
FLA SH
POLLIN G
o
START
POLLING
2) Press the POLLING key.
SELECT N0.
1.STANDARD 2.SECURE
3) Press the 1 key.
POLL
ENTER FAX N0.
4) Enter the fax number of the machine you are polling. You can
enter the number manually using the number keys, one-touch,
or speed dial number.
BROTHER MIZUHO
PRESS START KEY
5) Press the START key. The machine contacts the called side and
requests a document.
1
- When the called side sets the document jvith a secure code, you
cannot poll the document.
FLA SH
POLLIN G
To poll for a confidential document that is protected with a security
code, the procedure is as follows.
1) Make sure there is no document in the feeder.
06/01/1991 14:00
FAX/C0PY:SET DOC.
2) Press the POLLING key.
SELECT
1 .STANDARD
N0.
2.SECURE
V-8 -2
Page 32

V-8. POLUNG
ABC
©
0^*^0 "'©
”0 ”©"”©
© ""©
0
“© ©
3) Press the 2 key.
POLLING ID ; 0000
ENTER CODE NO.
4) Enter the polling ID - this four-digit secure code that should be
the same as the secure code used by the called side.
POLLING ID : 4753
ENTER CODE NO.
5) When you have entered the four digit code, the screen will
briefly change. (Wait 2 seconds)
POLL
ENTER FAX NO.
6) Enter the fax number of the machine you are polling. You can
enter the number using the number keys or you can use manual
dialing a one-touch, speed dial number.
0528242864
PRESS START KEY
START
Timer (delayed)
polling
FLA SH
POLLIN G
POLLING J
7) Press the START key.
The machine contacts the called side and requests the document.
- When the secure code does not match with that used by the called
side, the document can not he polled.
- The called side's machine should be a Brother machine.
Follow the steps described below to set up a timer polling operation.
1) Make sure there is no document in the feeder.
06/01/1991 14:00
FAX/COPY:SET DOC.
2) Press the POLLING key.
SFl FCT N0.
1.STANDARD 2.SECURE
V-8-3
Page 33

V-6 . T IM E R TR A NS M IS SI ON ( DE L AY E D TR A NS M IS SI ON )
DELAYED SENDING REPORT
DATE.TIME
FAX NO./NAME
DURATION
PAGE (S)
RESULT
MODE
©
TIME
NAME
FAX
TEL
06/01 14:29
NJ OFFICE
00:00:42
02
OK
FINE
06/01/1991 14:30
BROTHER
052-811-5981
052-824-2554
• Your machine can still receive fax transmissions while waiting to
send.
• To cancel timer transmission, press the FUNCTION key, the 9
key, and then press the SET key to enable the "Cancel
Transmission" function.
• If you want to use the unit for another operation without
disturbing your Timer (delayed) transmission settings, press
the "Interrupt" key to carryout another operation (see page V-10-
1).
Initial Timer
laaaiEa
If you want to send a Timer (delayed) transmission every day at a
fixed time, you can use the "Initial Timer" function. The time that
has been set appears when you press the "Timer" key. (Initial
setting is 00:00.)
You need only register the initial timer once - you do not need to re
enter the time every day. Then each day just press the TIMER key
and the SET key.
To register the initial time proceed as follows.
1) Press the FUNCTION key, then press the 2 key.
0
2.REGISTRATION
PRESS SET
KEY
V-6 -2
Page 34

V-6 . T IM E R TR A NS m SS IO N (D E LA YE D T RA N SM I SS IO N )
2) Press the SET key, then press the 0 key followed by the 3 key.
03.INITIAL TIMER
"0
3) Press the S ET key.
PRESS SET KEY
J
O
Q «PQ INTEfift UPr
'0-0-0 r-' ■■ [
“0 ™0 ""0
© "0 0
CURRENT : 00:00
CHANGE ? l.YES 2.N0
4) Press the 1 key.
INITIAL TIMER : 00:00
INPUT / PRESS SET TO END
5) Enter the time you require and press the SET key.
V-6 -3
Page 35

7. THE PASSWORD
V-7 . T H E P A SS W OR D
The fax password function is provided for use in a closed network
of fax machines. It can also be used to help you prevent reception
of the "junk faxes" that can interfere with your daily operations. It
can also prevent the transmission of faxes to the wrong parties.
Passwords should not be used casually. If you have activated the
password function^ only people who have Brother (or compatible)
fax machines and have set the correct password code on their own
machine can exchange faxes with your unit.
To remedy this you can enable the PASSWORD PLUS feature^
whereby the unit accepts transmissions without passwords from
anybody whose number is listed as a one-touch number. (The unit
detects the last four digits of the numbers whether it is same or not.)
People whose numbers have not been registered as a one-touch dial
in your machine must still use the password.
Sending a fax with
password
CHAIN
PASSW ORD
O “'©
^0 '‘0 “”0
-0 '“'0 ""0
©“'O ©
4’n
r
START
To send a fax with a password, carry out the procedure described
below. Before this procedure, please re-check the other party's
password code.
1) Set the document face down in the feeder.
FAX
COPY
ENTERFAX
PRESS COPY
N0.
KEY
2) Press the PASSWORD key.
PASSWORD : 0000
ENTER CODE N0.
3) Enter the 4-digit password code. This must be the same code as
the other side's receiving password.
PASSWORD : 1234
ENTER CODE NO.
4) When you have entered the 4-digit code, the display will briefly
change. (Wait for 2 seconds)
PASSWORD
ENTER FAX N0.
5) Enter the fax number using the number keys, a one-touch key,
or speed dial number. Now press START key.
V-7 -1
Page 36

V-7 . T H E P A SS W OR D
- When the other side sets their receiving password to "'off", you
can not send a fax with a password, even if the password code is
the same as the party's receiving password,
- Password function can only be used for tum-around polling.
Setting the fax
receiving password
©
MNO /
-------------
0
©
To set the fax receiving password, use the following procedure.
Your machine's receiving password is used by the other party
when transmitting.
1) Press the FUNCTION key.
2) Press the 2 key.
2.REGISTRATION
PRESS SET KEY
3) Press the SET key.
\
4) Press the 0 key followed by the 6 key.
06.RECEIVE PASSWORD
PRESS SET KEY
5) Press the SET key.
"O "0 *“0
“0 ""0
0 "0
y-7-2
©
RECEIVE PASSWORD : 0000
INPUT / PRESS SET TO END
6) Enter a four-digit password number using the number keys.
RECEIVE PASSWORD ; 1234
INPUT / PRESS SET TO END
Page 37

V-5. CALL RESERVATION AND THE CALL BACK MESSAGE
5. CALL RESERVATION AND THE CALL BACK MESSAGE
The purpose of this feature is to alert the party receiving your fax
transmission that you want to speak to them on completion of the
transmission. When your document has been printed at the receiving
Station the receiving fax machine will ring as if it were receiving a
telephone call. If the receiving party is present and picks up the
handset your fax machine will also ring. Then you can pick up the
handset and talk with the person to whom you have just sent a fax.
Sending a fax with
Cali Reservation
d] CALL
I
.........
....
1
O-"©
The steps for sending a fax transmission with Call Reservation are
as follows:
1) Set the document face down in the feeder.
FAX ENTER
COPY PRESS
FAX NO.
COPY KEY
2) Press the CALL key.
CALL BACK MSG.
l.ON 2.OFF
The Call hack Message is a text message that will be printed at the
receiving station if the receiving party does not answer. The message
requests the receiver to call you.
- If you have not registered your telephone number at station ID
(see page IV-1-2), you cannot send "Call Back Message".
3) Press the 1 key if you want a Call Back Message to appear, or the
2 key if you do not. The CALL LED is lit.
ENTER FAX NO.
4) Select the destination fax number, either by entering it using
one-touch dial, speed dial, or manual dial.
NJ OFFICE
PRESS START KEY
V-5-1
Page 38

V-5. CALL RESERVATION AND THE CALL BACK MESSAGE
START
5) Press the START key. The machine now transmits
automatically.
When the document has been transmitted, the unit at the
receiving station rings. The message on the screen changes to
show;
NJ OFFICE
CALLING
6) If the receiving party answers, your unit will also ring.
NJ OFFICE
CALL PICKUP
7) You can now pick up the handset and talk.
If the receiving party does not answer and you have previously
selected Call Back Message "ON", the Call Back Message will be
printed at the receiving station instead.
If an error occurs during the transmission of the fax itself the call
reservation function will not operate,
- There are certain types of fax machine which will not respond to
the Call Reservation function.
- When auto redialing, Call Reservation will he cancelled. But if
you select CallBackMessage "on", the unit will send a Call Back
Message after sending the document.
- You cannot use Call Reservation with either the timer, or polling
function.
- You can print out a sample of the Call Back Message
- If you set Call Reservation "on" then set up a Timer (delayed)
transmission, the Call Reservation will be cancelled.
V-5-2
Page 39

V-5. CALL RESERVATION AND THE CALL BACK MESSAGE
Printing out a Call
Back Message
hW/fiiW i GHI
I
...
I
©
INTERRUPT mo
©
START
You can print out a sample Call Back Message as follows.
1) Press the FUNCTION key followed by the 4 key.
4.LISTS AND REPORTS
PRESS START KEY
2) Press the SET key. Then press the 6 key.
6.CALL BACK MSG.
PRESS START KEY
3) Press the START key, and a sample Call Back Message will be
printed out.
- The destination for the sample Call Back Message is taken from
one-touch number "00". If this number is not programmed^ the
destination area will be blank.
CALL BACK MESSAGE ==
TO:
FAX:
FROM;
PLEASE CALL AT [TEL]052-824-2554
NJ OFFICE
908-356-8880
BROTHER
[FAX]052-811-5981
V-5-3
Page 40

V-6. TIMER TRANSMISSION (DELAYED TRANSMISSION)
6. TIMER TRANSMISSION (DELAYED TRANSMISSION)
If you wish to defer the sending of a document^ (for example, to take
advantage of cheaper telephone rates) you can use the timer
(d elayed) transmission facility. Simply place your fax document in
the document feeder and set the time at which you want the fax to
be sent. The unit will automatically send the fax at the time you
have set.
Sending a fax with
Timer
J
O»0-0
'0*0""©
0 0-0
0 “0 0
The steps involved in sending a timer (delayed) transmission are as
follows:
1) Set the document face down in the document feeder.
FAX : ENTER EAX N0.
COPY : PRESS
COPY KEY
2) Press the TIMER key.
TIMER
SET
TIMER :
00:00
3) Use the number keys to enter the time (between 00:00 to 23:59)
within the next 24 hours at which you wish to send the fax
transmission. When you have entered the 4 digits, the following
screen appears after 2 seconds.
23:30
ENTER FAX NO.
4) Now enter the fax number of the destination, using a one-touch
key, a speed dial number, or dialing manually.
V-6-1
BROTHER
PRESS START KEY
5) Now press the START key. You can now leave your fax machine
as it is and it will send your fax to the specified destination at the
appointed time. After transmission has successfully been
completed, a "Delayed Sending Report" will be printed out
automatically.
Page 41

V-3. SMOOTHING (ENHANCED IM AGE RESOLUTION)
3. SMOOTHING (ENHANCED IMAGE RESOLUTION)
The fax machine has the capability to smooth the outlines of text
characters on the faxes that you receive. This is a useful feature as
it allows you to enhance the presentation quality of text documents
that are sent to you without having to rely on the sender to alter the
resolution setting on his machine.
There are two possible smoothing settings - ON or OPT, Select OFF
to prevent the fax machine from performing any smoothing, and
select ON to activate smoothing.
The procedure for turning smoothing ON or OFF is shown below.
ISSZSSSSU
I
......
/NTERHUPT
0
о "“©
"0
©
1) Press the FUNCTION key. Press the 5 key on the number keys.
5.USER OPTIONS
PRESS SET KEY
2) Press the SET key. Press the 0 key followed by the 8 key.
08.SMOOTHING
PRESS SET KEY
3) Press the SET key.
CURRENT : ON
l.ON 2.OFF
4) Press the 1 key to select the smoothing mode, and press the 2 key
to turn the smoothing function off.
SMOOTHING :
PRESS SET
5) Press the SET key to confirm your selection.
OFF
KEY
The smoothing setting will remain in effect until you change it.
- The initial setting is "ON".
V-3-1
Page 42

V-4. USING THE SUPER COVERPAGE FACILITY
4. USING THE SUPER COVERPAGE FACILITY
When you send a fax it is often useful to send an accompanying
cover sheet at the same time. This sheet is known as the super
COVERPAGE and tells the person receiving the fax your name, fax
number and telephone number. These are the name and numbers
that you have registered in the machine as part of the configuration
process. If you have not registered your name, fax number and
telephone number (Station ID), you cannot send the super
COVERPAGE.
You can also choose to show on the super COVERPAGE the
number of pages you are faxing.
You can include an optional comment on the super COVERPAGE.
You can select one of five comments, three that are preset and two
original messages which you can create yourself.
Sending a fax with a
super COVERPAGE
nUCOVBRPAGE
The steps for sending a fax transmission with a super COVERPAGE
are as follows:
1) Set the document face down in the feeder.
FAX
COPY
ENTER
PRESS
FAX NO.
COPYKEY
2) Press the COVERPAGE key on the panel. The screen prompts
you to select one of the five available comments or select to send
the fax without a comment. Comments 5 and 6 are the comments
that you have registered yourself.
SELECT COMMENT (1-6)
2,PLEASE CALL
The five available comments are ;
1. (comment off)
2. PLEASE CALL
3. URGENT !
4. CONFIDENTIAL
5. (your original comment)
6. (your original comment)
as for 5 and 6, you can register your original comment as described
"Entering information using keys".
0-0 -0
“'O "0 ””0
-0 -0 -0
0 “0
V-4-1 ____
©
3) Make your selection by pressing the appropriate number key
from 1 to 6. The screen briefly displays the option you have
chosen.
Page 43

O «"©
V-4. USING THE SUPER COVERPAGE FACILITY
COVERPAGE
3. URGENT 1
4) Now the screen displays a message asking you whether you
want to show on the super COVERPAGE the number of pages
that you are sending.
TOTAL N0 OF PAGES
l.ON 2.0FE
5) Press the 1 key if you do, and the 2 key if you do not. If you press
the 1 key, you are then prompted to enter the number of pages
that you are faxing.
TOTAL PAGES : 00
ENTER TOTAL N0.
OF PAGES
0 '“0 "0
^0-0-0
'0-0-0
0 “0 0
iCOVERPAGE
START
^ I
Printing out a super COVERPAGE
bUMisiai
I— ~"J
o
6) Enter the number of pages as a two digit number (that is, if you
are sending five pages enter "05") using the number keys. The
number of pages you enter is briefly shown.
TOTAL PAGES: 05
7) The screen display reverts, and the COVERPAGE LED is lit.
ENTER FAX N0.
8) Now enter the fax number, by using the number keys, onetouch key, speed dial number, and press the START key.
NJ OFFICE
SENDING COVERPAGE
When the super COVERPAGE has been sent, the machine then
sends the document.
You can print out a sample of the super COVERPAGE as follows.
1) Press the FUNCTION key, then press the 4 key.
4.LIST AND REPORTS
PRESS SET KEY
INTERRUPT
©
2) Press the SET key, then press the 5 key.
5.COVERPAGE
PRESS SET KEY
3) Press the SET key.
V-4-2
Page 44

V-4. USING THE SUPER COVERPAGE FAGILITY
0-0 -Q
''O ■"‘©“”0
"0 '“0 “'0
© "0
Entering a comment
0
la ЛВС у—
START
TO:
FROM:
COMMENT:
0
4) Choose the comment you require and press the START key.
- The destination of sample super COVERPAGE is taken from
one-touch dial number "00". If you have nothing programmed in
that one-touch, the destination area will be left blank. Also, the
total pages will always be "00".
=== COVER PAGE ===
NJ OFFICE
FAX:
FAX:
TEL:
To register your original comment for inclusion on the super
COVERPAGE, use the following procedure.
1) Press the FUNCTION key followed by the 2 key
908-356-8880
BROTHER
052-811-5981
052-824-2554
00 PAGE[S] TO FOLLOW
URGENT !
2.REGISTRATION
PRESS SET KEY
INTERRUPT
INTERRUPT JKL
mo
or
0
0 '0 ""©
0“©“"©
0 “■’© ©
V-4-3
© О
1
0 00
2) Press the SET key. Now press the 0 key followed by the 1 key.
01,COVERPAGE COMMENT
PRESS SET KEY
3) Press the SET key. Press 5 or 6, depending on which of the two
0
comments you wish to register, then press the SET key again.
5._
INPUT / PRESS SET TO END
4) Enter your comment (which can be up to 27 characters) using
the keys on the number keys as described in the section "Entering
information using the keys".
5. ORDER CONFIRMATION_
INPUT / PRESS SET TO END
5) When you have correctly entered your comment, press the S ET
key.
Page 45

rV-7. USING THE UNH AS A TELEPHONE
Using an external
telephone answering
device
I MANUAL
— F/T
I AUTO ANS
Connect your external telephone answering device (TAD) to the
EXT.DEVICE jack as shown in the illustration below.
Set the Auto Ans. switch to ''Manual" (so that only the "Manual"
LED is lit).
The external TAD is now ready for use.
The unit will enter the document reception mode automatically
when another party tries to send a fax transmission with a CNG
tone to your machine. CNG is generated by most Group 3 FAX
machines.
If the sending party (using a tone type unit) presses your F/T &
REMOTE ID code, fax reception is switched to the main unit.
• If the ICM secLioit of yocu’ external TAD is full, the TAD will not
answer the telephone. As a result the unit cannot receive the
transmission.
• If your external TAD has a paging function, the unit may prevent
the paging function from working.
• Some fax machines may not be able to signal your fax machine
to switch on automatically during a transmitting. To cover this
possibility we recommend that you record a message on your
TAD requesting the sending party to enter the F/T & Remote ID
code key on his unit before transmission.
A sample message; "Our answering machine is connected to a
fax unit at present, so if you would like to send a fax, please press
the XX (your F/T & REMOTE ID) by tone signal and send your
fax after you hear the FAX tone. If you would like to leave a
message, please do so after this message. Thank you."
IV-7-2
Page 46

Page 47

V. Advanced uses
1. RESOLUTION
There are four different resolution settings available - STANDARD^
FINE^ SUPER EINE and PHOTO. The STANDARD resolution is
adequate for sending ordinary text documents. FINE resolution is
intended for the transmission of graphic images. SUPER FINE is for
use with finely-detailed graphic images such as complex line
drawings and similar artwork. PHOTO resolution mode is
specifically designed for the transmission of photographic images.
Whichever mode you use, the quality of the printed document's
text will not be adversely affected.
You can select a resolution setting in two ways. Firstly, you can
press the RESOLUTION key on the key panel prior to sending your
document and light the LED corresponding to the resolution mode
you want to select. Your document is then transmitted using the
same resolution mode you have selected. Secondly, you can use the
CURRENT SETTING fonction to select a resolution setting tor each
page of a document individually. Both setting methods will be
effective for one transmission only. If the receiving fax machine
cannot print at the resolution that you specified, transmission will
take place at a lesser resolution. (The resolution LEDs change to
show you which resolution is being used to print the current
document or page that you are sending is being printed.)
Single resolution transmission
1 HN£
1 S.FINE
I PHOTO
START
- "Super Fine" resolution can only he used between Brother
machines.
- If no LED is lit, the unit is in standard resolution.
Place your document in the document feeder and dial the number
as you do for an ordinary fax transmission. Before pressing the
START key select a resolution by pressing the RESOLUTION key.
Press once for FINE mode, twice for SUPERFINE and three times
for PHOTO mode. Pressing the RESOLUTION key fourth time
returns the machine to the standard resolution mode. There are
three LED lights positioned next to the RESOLUTION key to
indicate the current resolution setting. If all three are not lit, the unit
will transmit at the standard resolution. For each of the other three
resolution modes, the appropriate light comes on when the mode
has been selected.
When you have selected the resolution mode press the START key.
Your document will be is sent at the specified resolution.
After transmission has been completed the unit reverts to standard
resolution mode. 1 he three resolution LEDs are not lit.
V-1-1
Page 48

V-1. RESOLUTION
Multiple resolution
transmission
I FfNE
I S.FINE
I PHOTO
’©
INTEFtRUPT
©
If your fax transmission document runs to several pages^ some with
graphics, some with text and others with photographic images.
1) Set the document in the feeder. Use the RESOLUTION key to set
the resolution you require for the first page of your document.
2) Press the FUNCTION key followed by the 6 key.
6.CURRENT SETTINGS
PRESS SET KEY
3) Press the SET key, then the 2 key.
2.RESOLUTION
PRESS SET KEY
4) Press the SET key. The screen display now alternates between
the following two messages, prompting you to specify a
resolution for page 2 of your document.
PAGE 02 ;
1.STANDARD 2. FINE
FLIP-FLOP
PAGE 02 :
3.PHOTO
STANDARD
-OR
STANDARD
4.S.FINE
0-0“'©
© “© “”o
© “© ©
V-1-2
STOP
5) Enter the number corresponding to the resolution you wish to
set for page 2.
PAGE 02 : FINE
PRESS SET KEY
6) Press the SET key to confirm your choice. The display now
prompts you to select a resolution for page 3. Specify your
choice in the same way. The display continues to prompt you for
resolution settings for successive pages up to a maximum of 30.
When you have selected settings for all the pages in your
transmission press the STOP key.
- The super COVERPAGE and Call Back Messages are not counted
when determining the page number for scanning resolution.
Page 49

V-1. RESOLUTION
STAfir
The resolution of
in-coming documents
FAX
COPY
- Any pages for which you did not set a resolution will he
transmitted at the same resolution as the last page for which you
did set a resolution.
ENTER FAX NO.
PRESS COPY KEY
6) Select the fax number in the usual way and press the START key.
Your document is sent at the specified resolutions.
After transmission has been completed the unit reverts to standard
resolution mode. The three resolution LEDs are not lit.
The resolution of fax transmissions that you receive depends
entirely on the capabilities of the fax machine from which the
document was transmitted and the settings selected by the person
sending it. Your fax machine can receive and print documents in
three modes, STANDARD, FINE and SUPERFINE. The mode
being used to print the document (or the current page) is indicated
by the LED lights.
The photo LED is not lit when receiving a document in photo mode.
Copier resolution
I FINE
I S.FINE
1 PHOTO
copy
r..
..... ~l
You can use the convenience copier in SUPERFINE or PHOTO
modes. However, you can only use a single mode for each copy
operation. Pages of a document that are to be copied at a resolution
different to that of the rest of the document must be loaded and
copied separately.
Set the document in the feeder. Select a mode by pressing the
resolution key, and then press the COPY key. If you make a copy
without having first selected a resolution, the machine will
automatically copy using "SUPER FINE" mode. The SUPER FINE
LED will come on to show that this mode is being used.
After you have made your copy the unit reverts to the standard
resolution mode. The three LEDs are not lit.
V-1-3
Page 50

y-2. SETTING THE CONTRAST
2. SETTING THE CONTRAST
The unit has an "Auto-Contrast" feature^ so you do not have to
select the contrast setting before sending. However, if you want to
send a very light document, set the contiast to "SUPER LIGHT"
manually.
1) To select the "SUPER LIGHT" contrast mode, first set your
document in the feeder.
INTERRUPT
MT£RffUPT
©
MNO
©
0
srop
2) Press the FUNCTION key followed by the 6 key. The following
message appears.
6.CURRENT SETTINGS
PRESS SET KEY
3) Press the SET key followed by the 1 key.
1.CONTRAST
PRESS SET KEY
4) Press the SET key. The current contrast setting is displayed.
CURRENT : AUTO
l.AUTO 2.SUPER LIGHT
5) Press the 2 key to select SUPER LIGHT mode.
CONTRAST ; SUPER LIGHT
PRESS SET KEY
6) Press the SET key to confirm your selection. Then press the
STOP key.
V-2-1
7) Now you can send your transmission or make your copy.
- This setting is only effective for one transmission or copy.
Page 51

IV-4. USING ONE-TOUCH NUMBERS
Changing or Erasing one-touch names and numbers
ONE TOUCH KEY
O
You can change or erase one-touch dial names and numbers by
following step.
1) Select the one-touch dial option from the functions menu and
press the relevant one-touch key.
■^05:BIS US
CHANGE ? l.YES
Press the 1 key. To alter a one-touch dial name and number,
2)
enter the new number and name as described in the sections
Entering information using the keys. To delete a one-touch dial
name & number, position the cursor at the extreme left end of
the number and press the CLEAR key.
2.NO
/y-4-4
Page 52

lV-5. USING SPEED DIAL NUMBERS
5. USING SPEED DIAL NUMBERS
In addition to one-touch numbers you can also store another forty
fax or telephone numbers that you can access using two-number
combinations - these are known as speed dial numbers. To dial one
of these numbers you simply press the SPD. DIAL key followed by
the appropriate two-digit speed dial numbers, and the machine
dials the number you require. Speed dial numbers are numbered
00-39 on the unit (Even if the first digit is 0 you must type it when
accessing the number - you cannot just type the SPD. DIAL key + the
1 key to call up the speed dial number 01.)
Registsring spe6d dial To store a fax number as a speed dial number proceed as follows,
numbers
1) Press the FUNCTION key. Then press the 1 key.
I • I
O“0“'O
"© '^'© ""©
0 “© ©
© '"© “0
0 ■"'©“”©
0 "■0 "0
00
©
o
©
1.ONE-TOUCH / SPEED DIAL
PRESS SET KEY
2) Press the SET key, then press the 2 key.
2.SPEED DIAL
PRESS SET KEY
3) Press the SET key.
SPEED DIAL
SELECT NO. #
{"#” means “speed")
4) Now enter the two-digit speed dial number you want to set.
#10;_
INPUT / PRESS SET TO END
5) Enter number (up to 20 digits).
When you have entered the number, press the SET key.
NAME:_
INPUT / PRESS SET TO END
IV-5-1
Page 53

■'O ^©'"0
0 "0 0
O, "0
or
0
IV-5. USING SPEED DIAL NUMBERS
6) Enter the name (up to 14 characters) in the way described in the
section entitled Entering information using the keys. Press the
SET key when you have finished.
CURRENT : FAX
l.FAX 2.TEL 3. OFF
7) Press the1 key for Fax^ the 2 key for Telephone, or the 3 key for
off. This selection is only used for the dial list. Selecting "off" is
used for chain keys (see page IV-6-1.).
CURRENT : FAX
PRESS SET KEY
8) Press the SET key to confirm your choice. The screen again
shows:
SPEED DIAL
SELECT NO. #
STOP
Sending speed dial
faxes
SPD.OIAL
Er~~ I
Printing a list of spoed To print out a directory listing of the names and numbers stored as
dial numbers
START
o
©
9) You can either continue and register another speed dial number,
or end registration by pressing the STOP key.
To send a fax to a destination whose number is stored under a speed
dial key simply follow the steps for sending a fax, either manually
or automatically, and instead of dialing the number with the
keypad just press the SPD. DIAL key followed by the appropriate
two digit speed dial code. The stored fax number is dialed
automatically. To begin transmission just press the START key.
speed dial numbers.
1) Press the FUNCTION key. Then press the 4 key.
4.LISTS AND REPORTS
PRESS SET KEY
2) Press the SET key, then press the 3 key.
3.SPEED DIAL
PRESS START KEY
IV-5-2
Page 54

IV-5. USING SPEED DIAL NUMBERS
START
NUMBER
#00
#01
#02
#03
#04
#05
3) Press the START key to print out a list of the speed dial names
4) Press the CLEAR key to return to the functions menu.
FAX/TEL NUMBER
1-2018285881
20135640856
001-3-3148978778
12358769
5892786
-----
and numbers. The screen reverts to the LIST menu.
LIST - SPEED DIAL
PRINTING
SPEED DIAL LIST
DESTINATION
AUSTRALIA OFFICE
FAX
D.D.LTD.
FAX
GERMAN OFFICE
FAX
W.CAMPANY
TEL
M.CAMPANY
TEL
TIME
NAME
FAX
TEL
_____________
06/01/1991 18:40
BROTHER
052-811-5981
052-824-2554
Changing or Erasing
speed dial names and
numbers
O “0 "'0
-0^'0-0
"0 '“'0 ”"0
0 “0 0
o
lV-5-3
You can change or erase speed dial names and numbers by following
these steps.
Select the speed dial option from the functions menu.
1) Press the relevant two digit speed dial code.
#05:BR0THER
CHANGE ? l.YES 2.N0
2) Pressthel key.Toalteraspeeddialnameandnumber,enterthe
new number and name as described in the sections Entering
information using the keys. To delete a speed dial name &
number, position the cursor at the extreme left end of the
number and press the CLEAR key.
Page 55

6. CHAIN DIALING
1V~6. CHAIN DIALING
In addition to the one-touch and speed dialing functions available
on the unit, a further convenient option called ''chain dialing" can
be used with either of the quick dialing functions.
When you send an automatic-transmission, the machine allows
you to use single one-touch dial or speed dial number. However, if
you register a one-touch or speed dial as a "chain dialing" number,
the machine allows you to use two different one-touch or speed dial
numbers (a chain dial number followed by a one-touch, speed dial
number or manual dialing (within 20 numbers)).
When dialing overseas fax or telephone numbers, there may be
situations in which a company can offer you better rates than the
telephone company you normally
use.
Chain dialing
lets
you
choose the telephone company whose line charge is lower if you
register the access code to a second telephone company as a chain
dial number. This is also important when using a telephone credit
card.
Instructions on how to use this option are provided below.
Setting chain dialing
CHAIN
PASSWORD
When you register a one-touch or speed dial number, simply press
the CHAIN key before entering the number.
(@mark appears on the screen. @means “chain dialing.”)
After that, the procedure is the same as for one-touch or speed dial
numbers.
- You can register numbers with up to 19 digits.
- You cannot send a transmission using chain dialing only. A one-
touch, speed dialing number, or manual dialing (within 20
numbers) number must also be used.
IV-6-1
Page 56

IV-7. USING THE UNIT AS A TELEPHONE
7. USING THE UNIT AS A TELEPHONE
As well as sending fax transmissions^ this fax machine can also be
used to make telephone calls. You can either dial numbers manually
or use one-touch dialing, speed dialing.
Manual dialing
HOOK
or
One-touch dialing
HOOK
1—., ,1 O'*
ONE TOUCH KEY
Speed diaiing
HOOK
or
SPD.DIAL
L
Using keys with the
teiephone
Pick up the handset and dial the telephone number normally using
the number keys.
Alternatively, press the HOOK key to enable dialing and then dial
the telephone number using the number keys. When the receiving
party answers, pick up the handset and proceed with your call.
You can use any of the one-touch telephone numbers that you have
registered. Simply pick up the handset (or press the HOOK key), and
press the appropriate one-touch key.
If you use the HOOK key, pick up the handset when your call is
answered.
You can also make use of the speed dial feature. Simply pick up the
handset (or press the HOOK key), press the SPD. DIAL key and type
the appropriate 2 digit speed dial number.
If you used the HOOK key, pick up the handset when your call is
answered.
PAUSE key- Use this key to put a pause between numbers.
(You cannot use the PAUSE key continuously.)
HOLD key- Use this key to put a telephone call on hold.
Using an external
telephone
IV-7-1
Flash key- Use this key to transfer a call and put it on hold.
# key- Use this key to switch the dialing type to "tone",
in case it had previously been set to "pulse".
You can use the fax machine with an external telephone or with an
external TAD (telephone answering device).
Connect the external telephone as described in the "ADDITIONAL
SET UP OPTIONS (see 111-9-1)".
Page 57

IV-3. RECEIVING A FAX
Registering F/T & Remote ID
ABC
I
------
• I
©
0 "©
Use the following procedure to register an F/T & Remote ID.
The initial setting is "
1) Press the FUNCTION key. Then press the 2 key on the number
keys.
2.REGISTRATION
PRESS SET KEY
2) Press the SET key. Then press the 0 key followed by the 4 key.
04.F/T & REMOTE ID
PRESS SET KEY
3) Press the SET key.
F/T & REMOTE ID :
INPUT / PRESS SET TO END
Enter your chosen F/T & REMOTE ID number. When you have
entered it correctly, press the SET key.
- When you connect the external telephone to a TAD (telephone
answering device), the "F/T & REMOTE ID" you enter must he
different from the TAD operation ID.
- If you are making use of an extension or external telephone, be
sure to use the "#" and/or " -k" symbols. This will help prevent
the fax unit from being turned on (accidently into reception
mode) when you are dialing.
IV-3-3
Page 58

IV-4. USING ONE-TOUCH NUMBERS
4. USING ONE-TOUCH NUMBERS
If you regularly send faxes to the same destinations, it is useful to
be able to dial these numbers without having to input them in every
time using the number keys. A one-touch key enables you to send
a fax (or make a telephone call) to a particular destination without
having to enter the number every time - you simply press the
relevant one-touch key and the machine automatically dials the
number you require. The unit can store up to fifteen (15) fax or
telephone numbers as one-touch numbers.
(For example, dial the number stored as one-touch numbered 13,
press the one-touch13 key.)
ROQISterinQ one-touch To store a fax or telephone number as a one-touch number proceed
numbers as follows.
1) Press the FUNCTION key. Then, press the 1 key on the number
n
o
keys.
1.ONE-TOUCH / SPEED DIAL
PRESS SET KEY
iNTERRUPT
INTERRUPT
I
...
I
ONE TOUCH KEY
JV-4-1
©
2) Press the SET key. Then press the 1 key.
1.ONE-TOUCH DIAL
PRESS SET KEY
3) Press the SET key.
ONE-TOUCH DIAL
SELECT ONE-TOUCH KEY
4) Now press one of the one-touch keys. Pressing a key on its own
permits you to register one of the numbers 00 to 14. The display
changes to show the one-touch key number.
*05:_
INPUT / PRESS SET TO END
means one-touch
Page 59

IV-4. USING ONE-TOUCH NUMBERS
O “0 “'0
0”0™0
"O ""Q “0
0 °^0 0
0 '”0 "0
0 ’00
0 '“0 ”0
0 0 0
INTERRUPT
5) Enter the number (up to 20 digits). When you have entered the
6) Enter the name (up to 19 characters) in the way described in the
7) Press the 1 key for Fax, the 2 key for Telephone, or the 3 key for
O,“©
or
'0
8) Press the SET key to confirm the setting.
fax or telephone number, press the SET key.
NAME:_
INPUT / PRESS SET TO END
section entitled Entering information using the keys. Press the
SET key when you have finished.
CURRENT
l.FAX 2
off.
This selection is only used for the dial list. Selecting "off" is used
for chain dialing keys (see page IV-6-1.).
CURRENT : FAX
PRESS SFT KFY
: FAX
TEL 3.0FF
ONE-TOUCH DIAL
SELECT ONE-TOUCH KEY
STOP
Sending one-touch To send a fax to a destination whose number is stored under a one-
f axes touch key simply follow the steps for sending a fax, either manually
ONE TOUCH KEY
I
_____
Printing a list of To print out a directory listing of the names and numbers stored as
one-touch numbers one-touch dial numbers.
nmsissi
I
0
9) You can either continue and register another one-touch dial
number, or end registration by pressing STOP.
or automatically, and instead of dialing the number with the keys
just press the relevant one-touch key. The stored fax number is
dialed automatically. To begin transmission just press the START
key.
1) Press the FUNCTION key. Then press the 4 key on the number
keys.
4.LISTS AND REPORTS
PRESS SET KEY
iV-4-2
Page 60

lV-4. USING ONE-TOUCH NUMBERS
INTERRUPT ABC
r I
2) Press the SET key^ then press the 2 key.
©
2.ONE-TOUCH DIAL
PRESS START KEY
3) Press the START key to print out a list of the one-touch names
and numbers. The screen displays a message informing you
that it is printing out the hst of one-touch dial numbers.
LIST - ONE-TOUCH DIAL
PRINTING
4) Press the CLEAR key to return to the functions menu.
ONE-TOUCH DIAL LIST
TIME : 06/01/1991 18:40
NAME : BROTHER
FAX : 052-811-5981
TEL : 052-824-2554
1——
IV-4-3
NUMBER
*00
*01
*02
*03
*04
*05
*06
*07
-------
FAX/TEL NUMBER
20182858815
9083568880
31489787788
1467823
71498709892
0117361236
0899067856
6753452
*-
----—
FAX
FAX
FAX
FAX
FAX
TEL
TEL
TEL
DESTINATION
HEAD QTR
NJ OFFICE
FIANCE DEPT
DESIGN DEPT
LA OFFICE
UK OFFICE
PARIS OFFICE
ABC CAMPANY
Page 61

lV-1. CONFIGURING THE MACHINE
TRANSMISSION VERIFICATION REPORT
DATE.TIME 06/01 14:16
FAX NO./NAME
DURATION
PAGE (S)
RESULT
MODE
HEAD QTR.
00:01:33
01 coverpage
OK
FINE
TIME
NAME
FAX
TEL
06/01/1991 14:18
BROTHER
052-811-5981
052-824-2554
CALL BACK MSG
IV-1-13
Page 62

IV-2. SENDING A FAX
2. SENDING A FAX
There are two methods of sending a fax transmission - automatic
and manual.
Automatic
transmission
START
To transmita document automatically, set the document face down
in the document feeder. The following screen appears:
FAX
COPY
ENTER
PRESS
FAX NO.
COPY KEY
Dial the fax number of the destination using one-touch, speed dial,
or manual dialing. Then, press the START key.
The document is read through the machine automatically.
On successful completion of transmission, the machine will beep.
If transmission veriification is "ON", then you will get a report at the
end of each successful transmission.
If the telephone connection was not successful, and auto redial was
set to "on", the machine will try to send again automatically. (See
page IV-1-10.) If auto redial was set to "off", the transmission will
fail.
If the transmission was not successful then, the unit will print out
a Transmission Verification Report (error) automatically.
If the distant end is busy or there is no response the LCD will read
either "NO RESPONSE OR BUSY", and the unit will print out a
Transmission Verification Report (busy) automatically.
IV-2-1
DATE.TIME
FAX NO./NAME
DURATION
PAGE (S)
RESULT
MODE
TRANSMISSION VERIFICATION REPORT
TIME ;
NAME :
FAX ;
TEL ;
06/01 14:16
HEAD QTR.
00:01:33
01 COVERPAGE
ERROR
FINE
: 06/01/1991 14:18
: BROTHER
: 052-811-5981
: 052-824-2554
CALL BACK MSG
Page 63

lV-2. SENDING A FAX
Manual transnDission
HOOK
2 or
START
To transmit a document manually, set the document face down in
the document feeder. The following screen appears;
FAX
COPY
ENTER
PRESS COPY KEY
FAX NO.
Either press the HOOK key or pick up the handset. Now dial the
number of the destination using one-touchy, speed, or manual
dialing. When you hear the answering fax tone press the ST ART key
and, if necessary, hang up the handset.
The document is drawn through the machine automatically.
Upon successful completion of the transmission the machine will
beep.
- Auto Redial is not effective for manual transmission.
- Only the following current settings are effective for manual
transmission:
• Resolution
• super COVERPAGE
• Call Reservation
Points to
Remember When
Sending a Fax
Bear in mind the following points whenever you send a fax.
• Adjusted the guides located on either side of the document if it
islessthan8.5inches/216mmwide. (Min. widths.8inches/148
mm.)
• Do not send documents on any of the following types of paper;
- Thick paper
- Very thin paper, such as tissue nr tracing paper
- Wet, wrinkled, torn, curled, or slick paper
- Thick photographic or coated paper
- Paper with tape or staples, or with metal or textiles attached
If you must send a document on any of these types of paper, copy
them first with a photocopy machine and then use the copies to
send your faxes. (Do not make your copies on this convenience
copier, as the paper restrictions for the fax function apply to the
copier as well.)
IV-2-2
Page 64

lV-2. SENDING A FAX
The range of optimum thicknesses for sheets used in the ADF is
2.8 X 10'^- 3.9 X 10'^ inches (0.07 - 0.10 mm) and the range for
weight is 0.07 x 10®- 0.114 x 10® Ibs/inch^ (52- 80g/m®). If you
are using only one sheet of paper, the thickness of the paper
should be between 2.8 x 10"^ - 3.9 x 10 ^ inches (0.07 - 0.12 mm)
and the weight, between 0.114 x 10 ® - 0.182 x 10 ® Ibs/incld (80
-128g/m^).
If the receiving fax machine is not set to AUTO ANSWER,
someone may answer the telephone. If this happens, ask the
other party to start fax reception by pressing their START key.
(Remember you must use the handset to speak to the other
party, as the unit does not have speaker phone.) Press the
START key and then hang up after you hear the fax tone.
If a document stops during feeding, press the STOP key to
remove it. If the jammed paper is not ejected after pressing the
STOP key, open the cover and remove the document.
Remember that the fax machine
cannot read text or images closer
than 4 mm (15.74 x 10'^ inches) from
any edge of a document when
copying or sending a fax.
Loading multiple
pages for transmitting
or copying
Current setting for
sending a fax
Do not load more than 30 documents
into the feeder at one time.
Be sure to remove all paper clips
before sending your document.
Send glossy paper one page at a
time.
Do not attempt to transmit paper of differing sizes or thickness
in one transmission.
If the document you are about to
transmit or copy is more than one page,
fan the sheets of paper and insert them
face down, so that the first page is at the
bottom and will be fed first.
In order to make the clearest, most effective fax transmissions
possible, the following current settings have been provided for
your use. They are described in greater detail in the unit shown in
parenthesis.
IV-2-3
Page 65

IV-2. SENDING A FAX
These current settings should be made after setting the document
face down in the document feeder (if needed)^ but before entering
the fax number.
Set the Doc. In the
feeder
Enter Fax No.
Press START key
STAfir
■>
• Resolution: This can be changed from standard to fine (for
newsprint and drawings), super fine (for highly detailed
drawings), photo (for sending pictures), by pressing the resolution
key. (See page V-1-1)
• Contrast: This can be changed automatically.
If you want to send a super-light document, you can select "super
lighT"' mode manually. (See page V-2-1)
• super mVFRPAGE: This exclusive Brother feature lets you
send an extra sheet which includes your name and fax number as
well as those of the destination. In addition, a message such as an
"urgent!", "confidential", or your own message can be included
with this information. (See page V-4-1)
• Timer: This option allows you to set a time at which you want
your documents to be sent. This means it is possible to send a
document when you are not in the office (e.g. at night when
telephone rates are low). (See page V-6-1)
Redialing
• Polling: Fax units can use this function to request documents
from other units. Several sub-options are also available to let you
make the most effective use of this feature. (See page V-8-1)
• Password: This security function lets you send and receive faxes
in a closed network, and prevents reception of junk faxes. (See
page V -7-1)
• Call Reservation: This allows telephone conversation with the
other party after sending message. (See page V-5-1)
If the number that you have dialed is engaged you can redial it
without having to re-enter the number. There are two different
ways of doing this, depending on whether you are using manual or
automatic transmission.
IV-2-4
Page 66

IV-2 . SENDING A FAX
Automatic radiating
Manual redialing
HOOK
or I I
HOOK
or I
..............
—I
Automatic redialing can only be used for faxes that were sent using
automatic transmission - not for telephone calls. You can turn
automatic redialing on or off (see page IV-1-10).
When using automatic transmission to send a fax, if the destination
number is engaged, the machine will automatically redial the
number up to three (3) times at five (5) minutes intervals.
- Before using automatic redialing, you can send a different fax
message or make a copy of a document using the 'Interrupt"
feature.
(See page V-10-1.)
- To cancel automatic redialing, press FUNCTION key, then press
the 9 key to enable the "Cancelling a Transmission" function.
(See page V-11-1.)
If you are manually sending a fax or using the unit as a telephone
and you obtain a busy signal, carry out the following procedure.
1) Replace the handset or press the HOOK key.
2) Pick up the handset or press the HOOK key.
PAUSE/REDIAL
I
------
lV-2-5
I
START
3) When you hear the dialing tone press the REDIAL key. The
machine now redials the number it dialed last.
4) If you are sending a fax, press the START key when you hear the
answering fax tone. If you are making a telephone call, simply
proceed when the called party answers.
Page 67

3. RECEIVING A FAX
Fax reception can be either manual or automatic. You will probably
want to receive faxes automatically, as this is the more
straightforward method. However, if you are using a single
telephone line for both telephone and fax reception you will have
several options. You can either use the unit in manual reception and
monitor all in-coming calls, or you can use the FAX/TEL switch
and let the machine decide if the call is a fax message or not.
lV-3. RECEIVING A FAX
Automatic reception
AUTOANS |~] M
I I
Manual reception
AUTOANS HlJU
L. I
HOOK
2 or
START
MANUAL
RT
AUTO ANS
MANUAL
F/T
AUTOANS
To receive faxes automatically set the AUTO ANS function to ON
(the AUTO ANS.LED is lit) (see page lV-1-7). There is no need for
any further intervention - the machine will answer all calls
automatically at any time. Having successfully received a fax the
machine beeps once.
To receive faxes manually set the AUTO ANS function to OFF (the
MANUAL LED is lit) (see page IV-1-7). The procedure for receiving
a fax is as follows:
1) When the telephone rings either pick up the handset or press the
HOOK key.
2) If you hear a fax tone press the START key.
3) Replace the handset if necessary.
Having successfully received a fax the machine will beep once.
Reception with
FAX/TEL switching
There are two types of reception with FAX/TEL switching.
1) Automatic transmission from the other party.
2) Manual transmission from the other party.
- Pick up the handset while the machine is ringing. Follow the
same procedure as for manual reception. If you do not pick up the
handset, the machine will he changed to automatic reception
mode after the specified ringing time. (Refer to the section on the
FAX/TEL switch elsewhere in this chapter.)
IV-3-1
Page 68

iV-3. RECEIVING A FAX
Reception by Enhanced Faxes can be received through the use of an external telephone or
Remote Activation an extension telephone.
Remote activation
You can activate the fax machine from a remote telephone. This is
useful if you are using the machine on an extension of a key
telephone system.
Remote activation allows you to receive a call on a telephone which
is either connected from the fax unit, or is parallel connected to your
telephone line (extension telephoned), but is not located near the
fax unit. If an in-coming call is a fax transmission, simply press F/
T & REMOTE ID of the external/extention telephone (tone-type) to
enable reception of the fax.
If you accidently pick up your extension or external telephone hy
mistake when you are transmitting or receiving a FAX, there
might be some slight distortion on the document.
If you are using an extension or external telephone, be sure to use
" 'it**and!or for the F/T & Remote ID, (This will help you
avoid operation errors,)
IV-3-2
Page 69

IV-1. CONFIGURING THE MACHINE
- The cost of the transmission (borne by the sending party) will be
calculated from the point in time at which the beep signals that
the line connection has been made, until the line is disconnected.
- After beep signal, there is no sound for about 4 seconds to detect
a CNG which is sent by other party.
Setting the F/T ringing Vou can select the F/T Ringing period by following the procedure
period below.
- The initial setting is 30 seconds.
2
iUT EFIR UPT OZ
0
0."©
or
©
©
0
1) Press the FUNCTION key. Then press the 5 key.
5.USER OPTIONS
PRESS SET KEY
2) Press the SET key. Then press the 0 key followed by the 5 key.
05.F/T - RING TIME
PRESS 5Ы KEY
3) Press the SET key.
CURRENT : 30SECS.
1.10 2.20 3.30
4) Press the 1 key to select 10 seconds, the 2 key for 20 seconds, the
3 key for 30 seconds.
F/T-RING TIME
PRESS SET
: 20SECS.
KEY
5) Press the SET key to confirm your selection.
IV-1-9
Page 70

iV-1, CONFIGURING THE MACHINE
Setting the ring delay
r" I
INTERRUPT 02
0
J
O'“©
©
0
You can select the number of times the telephone will ring before
the machine will switches to reception mode.:
- The initial setting is Longer.
1) Press the FUNCTION key. Them press the 5 key on the number
keys.
5.USER OPTIONS
PRESS SET KEY
2) Press the SET key. Then, press the 0 key followed by the 1 key.
01.RING DELAY
PRESS SET KEY
3) Press the SET key.
CURRENT : LONGER
1 .SHORTER
4) Press the 1 key for a shorter ring delay (1 ring), the 2 key for a
longer ring delay (4 rings).
2.LONGER
INTERRUPT
r
......
......
I
Turning auto radiai on and off
©
lV-1-10
RING DELAY : SHORTER
PRESS SET KEY
5) Press the SET key to confirm your selection.
If you are sending a fax automatically {see Sending a fax in this
chapter) you can set up the machine to redial the number
automatically if the destination number is engaged. The unit will
redial the last used number up to 3 times at 5-minute intervals.
- The initial setting is "ON".
1) Press the FUNCTiON key. Then press the 5 key on the number
keys.
5.USER OPTIONS
PRESS SET KEY
Page 71

IV-1. CONFIGURING THE MACHINE
INTERRUPT
-0
INTERRUPT
L^,, 1
O>"0
2) Press the SET key then the 0 key followed by the 3 key.
03.AUTO REDIAL
"0
3) Press the SET key.
4) Press the 1 key to turn auto-redialing on, the 2 key to turn auto
redialing off.
5) Press the SET key to confirm your selection.
- Even if auto-redial is "OM" it cannot he used to send an automatic
transmission when the interrupt function has been used.
- Auto redial cannot be used for manual transmission.
PRESS SET KEY
CURRENT : ON
l.ON 2.OFF
AUTO REDIAL : OFF
PRESS SET KEY
Turning the beeper
on and off
©
mo z' \
©
©
The unit has a beeper which sounds to indicate operating errors and
when keys have been pressed. You may decide that you would
rather operate the machine without this facility. To turn the beeper
on or off proceed as follows.
- The initial setting is "ON".
1) Press the FUNCTION key. Then, press the 5 key on the number
keys.
5.USER OPTIONS
PRESS SET KEY
2) Press the SET key. Then press the 0 key followed by the 6 key.
06.BEEPER
PRESS SET KEY
lV-1-11
Page 72

IV-1. CONFIGURING THE MACHINE
3) Press the SET key.
4) Press the 1 key to turn the beeper on^ the 2 key to turn the beeper
o -■“©
5) Press the SET key to confirm your selection.
Turning the
transmission
verification report on
and off
wmiSSi JKL
INTERRUPT
©
You can establish the success or failure of a fax transmission by
printing out the transmission verification report. This report is
automatically printed for each transmission if you turn the
transmission verification feature on. If you do not want this report
generated you can disable the function.
1) To turn this function on or off^ press the FUNCTION key
CURRENT:
l.ON 2.OFF
off.
BEEPER :
PRESS SET KEY
followed by the 5 key. Press SET key. Then press the 0 key
followed by the 4 key.
ON
OFF
© "0
©
IV-1-12
«“©
04.XMT VERIFICATION
PRESS SET KEY
2) Press the SET key.
CURRENT : OFF
l.ON 2.OFF
3) Press the 1 key to turn transmit verification on
turn it off.
XMT VERIFICATION : ON
PRESS SFT KFY
4) Press the SET key.
- The initial setting is "OFF".
- When the transmission error occured, this report is always
printed out.
Page 73

iV. Basic uses
This chapter describes the most common operations that you will perform with your fax machine^
such as sending and receiving faxes^ and using the one-touch, speed dial facilities that allow you
to recall and dial regularly used fax numbers.
1. CONFIGURING THE MACHINE
When you first plug in the power cord to the outlet, the following
text should appear on the LCD screen:
(Make sure there is no document in the feeder.)
WARMING UP
PLEASE WAIT
01/01/1991 00:00
FAX/COPY : SET DOC.
Setting the date and time
I
©
INTERRUPT Qz
0
0
Q “O
"Q -^0
"O ™© ””0
© “'© ©
Carry out the procedure described below to set the correct date and
time for the machine.
1) Press the FUNCTION key. Then press the 2 key on the number
keys.
2.REGISTRATION
PRESS SET KEY
2) Press the SET key. Then press the 0 key followed by the 2 key.
02.DATE-TIME
PRESS SET KEY
3) Press the SET key.
YEAR : XX
INPUT / PRESS SET TO END
4) Enter the last two digits of the current year (for example enter
1991 as "91") using the number keys and then press the S ET key.
MONTH : XX
INPUT / PRESS SET TO END
lV-1-1
Page 74

lV-1. CONFIGURING THE MACHINE
O'“© "'0
'O '"^0 ““©
0 '^0 "'0
© “©
0
0 *“0 ““O
'O ""O ””© I
*0 “0 "”0
© “0 ©
0 “0 “0
'©'‘©““0
0 '“O '"0
C
© "0 ©
5) Enter the current month as a 2-digit number (for example enter
July as "07") using the number keys. When you have correctly
set the month press the SET key.
DAY : XX
INPUT / PRESS SET TO END
INT^RU^
6) Enter the day, also as a 2-digit number (for example enter as
"01") in the same way as you entered the year and month. When
you have correctly set the day press the SET key.
TIME : XX:XX
INPUT / PRESS SET TO END
7) Now enter the current time in hours and minutes using the
number keys. When you have correctly set the time press the S ET
key. The date and time that you have just set are briefly displayed
and then the screen starts scrolling through the registrations'
menu.
When setting the time
Remember that the machine uses the 24 hour clock
If the power is cut off
Should the power outlet for the unit be cutoff, the date and time
setting will be backed up within one hour. After one hour, the
date and time setting will be cleared.
Registering your name To store your name and fax number in the machine so that they will
and number automatically printed (along with the page number) at the top of
each page of every document that you send, proceed as follows:
1) Press the FUNCTION key.
I I
2) Then press the 2 key on the number keys.
©
INT ERR UPT OZ
3) Press the SET key. Then press the 0 key followed by the 5 key.
©
2.REGISTRATION
PRESS SET KEY
05.STATION ID
PRESS SET KEY
©
IV-1-2
Page 75

4) Press the SET key.
FAX:
INPUT / PRESS SET TO END
IV-1. CONFIGURING THE MAGHINE
O ”'©
-‘Q "“Q
0 “© ©
© '"© "0
^0 ^^0 ““0
"© "0 "’©
0 “0 0
INTERRUPT
5) Enter your fax number (which can be up to 20 digits long) using
the number keys. The procedure for entering numbers is
described in detail in the section Entering information using the
keys in this chapter.
6) Press the SET key when you have entered the fax number
correctly.
If you wish to input a (INTERMATIONAL DIALING CODE
PREFIX) at the first position^ press the "Chain" key and continue to
enter the number, using the correct international dialing code, and
omitting any "ZERO" at the beginning of the national area dialing
code.
TEL:
INPUT / PRESS SET TO END
7) Now enter your telephone number (which can be up to 20 digits
long) using the number keys.
8) Press the S ET key when you have entered the telephone number
correctly.
0 ^"0 “'0
'0 '"‘0™0
'0 '“'© “0
© 0 ©
NAME:
INPUT / PRESS SET TO END
9) Enter the name you wish to appear on the faxes that you send
using the number keys. The name can be up to 20 letters long
including spaces. The procedure for entering names is described
in detail in the sectionEnteringinformation using the keys in this
chapter.
10) Press the SET key when you have entered your name.
- The telephone number is only used for the Call Back Message,
super COVERPAGE.
- If you do not enter a fax number you cannot enter anything else.
- You cannot enter a ''-"using the PAUSE key when registering
your fax and telephone number. Use the (e-/—>) cursor key instead
to enter a space. It will be printed as hut not be displayed.
----------------------------------------------------------------------------------------------------------------------------------------- IV-1-3
Page 76

IV-1. CONFIGURING THE MACHINE
Entering information The way in which you enter numbers and names into the machine's
using the keys memory is the same in all cases.
Entering numbers
Q-0-©
(p ■ "‘©"”0
О ™0 ""0
0 “0
©
Entering names
(D "“0 ”"0
(D “©”“©
0 "0 ”0
0 "0 0
To enter a number into the machine, simply type in the number
using the number keys. A horizontal cursor marks the place where
the next digit you enter will be. Every time that you enter a digit, the
cursor is moved one place to the right. You can also move the cursor
left or right using the (e-/ —>) cursor keys.
Press the CLEAR key to delete the number indicated by the cursor
position, and all numbers to the right of the cursor.
To modify an existing digit, use the (<—/—>) cursor keys to move the
cursor to the position you want to modify, and input a new digit
over the old one.
You cannot insert a space into a number that has been input. You
must re-enter it with the space included.
If you do not press any key for one minute, or if you press the
STOP key, any changes you have made are disregarded and the
original number is retained.
To enter names, use the keys on the number keypad and (^/ ->)
cursor keys.
IV-i-4
][
Either two or three letters are assigned to each key on the number
keys. Also, although they are not marked, some special characters,
punctuation marks and symbols are assigned to the keys "1" key,
" * " key, and "tt" key.
"l"key
"2"key
"3"key
"4"key
"5"key
"6" key
"7'key
"8"key
"9"key
"0"key
...................
"Гкеу
...........
...........
...........
A Ё 6 U iE 0 A N 1
..........
ABC 2
..........
DEF3
..........
GHI4
..........
JKL5
.........
M N О 6
PRS7
..........
TUV8
..........
WXY9
..........
QZO
^!"#$%&'()*+, -./
:;< = >?©[] ^_
Page 77

'©
PRS ^ V
IV-1. CONFIGURING THE MACHINE
To enter any character press the appropriate key until the character
appears.
1) For example^ to enter the name "Fred!", press the 3 key three
times.
NAME: F
INPUT / PRESS SET TO END
2) Press the 7 key twice.
0
NAME: FR
INPUT / PRESS SET TO END
3) Press the 3 key twice.
'©
©
©
NAME:
INPUT
4) Press the {->) cursor key once to move the cursor to right.
-To enter successive characters which are assigned to the same
key, you must use the cursor key to move the cursor to the right.
NAME: FRE_
INPUT / PRESS SET TO END
5) Press the 3 key once.
NAME: FRED
INPUT / PRESS SET TO END
6) Press the * key twice.
- When you press the 1 key, * key, or it key, the lower line of the
screen shows the characters assigned to that key. Press the
key n times to use the n*^ character in the row.
NAME: FRED!
MARK-
FRE
/ PRESS SET TO END
7) Press the SET key.
lV-1-5
Page 78

IV-1. CONFIGURING THE MACHINE
- You can only overwrite characters. Insertions cannot he made.
- You can overwrite with a space by pressing the * key once.
- If you want to change a character, use the cursor keys to
move the cursor underneath the character and enter a new
character.
- Press the CLEAR key to delete the character indicated by the
cursor position, and all characters to the right of the cursor.
Selecting tone
or pulse dialing
¡NTEfíRUPT
I
0
1
O - "0
©
0
There are two different dial types, and you must select the type of
signal suitable for your telephone line.
- The default setting is 'Hone".
1) Press the FUNCTION key. Then press the 5 key on the number
keys.
5.USER OPTIONS
PRESS SET KEY
2) Press the SET key. Then press the 0 key followed by the 2 key.
02.TONE-PULSE
PRESS SET KEY
3) Press the SET key.
CURRENT
1 .TONE
: TONE
2.PULSE
4) Press the 1 key for tone dialing, the 2 key for pulse dialing.
TONE-PULSE:
PRESS SET KEY
PULSE
IV-1-6
mEfífí¿jPT
5) Press the SET key to confirm your selection.
Page 79

IV-1. CONFIGURING THE MACHINE
Setting the auto
answer switch
FAX/TEL switch
AUTO ANS
I MANUAL
— f /T
\AUTOANS
( MANUAL
— F/T
I AUTO ANS
1 MANUAL
— F/T
[AUTOANS
I MANUAL
— F/T
[AUTOANS
Yon can select answering mode for fax reception - your choices are
automatically, manually, or FAX/TEL auto switching.
You can set the unit to answer in-coming calls automatically by
turning on the auto answer feature. To do this, press the AUTO ANS.
key to light the AUTO ANS LED.
If you want all calls to be answered manually, press the AUT0 ANS.
key to light the MANUAL LED.
If you want to select FAX/TEL, Auto changing switch, press the
AUTO ANS. key, and light both the AUTO ANS. and MANUAL
LEDs.
- The initial setting is '"Auto Ans.”
The unit is equipped with a switching feature that can distinguish
between telephone calls and fax transmissions. Improving
commnnicationfi when the machine is used on a single telephone
line. To activate this function on your machine, press the Auto Ans
key until both LEDs are lit the AUTO ANS and MANUAL LEDs.
If the other party is sending an automatic transmission, the unit
detects the CNG tone and enters fax reception mode automatically.
START
If the other party is sending a manual transmission or telephone call
the unit rings for a specified period (10 or 20 or 30 seconds which
you can select as the F/T ringing time). Within the F/T ringing time,
if you pick up the handset, you can talk with the other party. When
the other party wants to send a manual transmission, press the
START key and you will receive the document. If you cannot pick
up the handset within the F/T ringing time, the unit will enter FAX
reception mode automatically. So you can receive a document by
manual transmission even if you are away from the machine.
Also, if you have given your F/T & Remote ID number to the other
party they can always send a manual transmission and put your
machine into FAX reception mode by entering the ID number (only
using a tone dial unit), (see F/T & remote ID)
lV-1-7
Page 80

IV-1. CONFIGURING THE MACHINE
The following flow chart illustrates the situations which may arise
in the operation of the FAX/TEL switch on the unit.
FAX/TEL SWITCHING
LINE CONNECTION
RING DELAY : This refers to the number of rings before the phone line is connected in response
to a telephone call or fax transmission. You have the option of setting this to either
1 or 4 rings.
F/T RINGING : After the line is connected, the machine begins to ring a second time, for a
selectable period of 10,20 or 30 seconds. This additional ringing period provides
you with extra time to pick up the telephone for a phone conversation or to
receive the manual transmission of a fax. During this period, the other party can
hear pseudo-ling back tone.
IV-1-8 ___________________________________________________________________
_
_______________________________________________________________________
Page 81

III-6. CONNECTING YOUR FAX TO THE POWER OUTLET
6. CONNECTING YOUR FAX TO THE POWER OUTLET
Important
The machine must always be connected to the power outlet
before you connect it to a telephone line.
Similarly^ when moving the unit^ the telephone line connection
should be removed before unplugging the power cord. This is
because the machine relies on the ground from the plug to
protect you from any hazardous electrical conditions occuring
on the telephone network.
This machine can be plugged into any standard grounded power
niT tle t. Make sure the socket is grounded and that it is not on the
same line as any large appliances or office machines such as
refrigerators or photocopiers. The power requirements for this fax
machine can be found in the
There is no ON/OFF switch. When the machine is plugged in, the
date/time display appears on the LCD. You can set the correct time
and date on this display by following the instructions on page IV-
1-1 in the section Configuring the machine.
Specifications section on page VIII.
- When the machine is plugged in, the recording paper will he fed
through the feeder automatically.
ni-6-1
Page 82

III-7. CONNECTING TO A TELEPHONE LINE
7. CONNECTING TO A TELEPHONE LINE
If you plan to use a single telephone line connection follow the
instructions below. This is straightforward if your telephone receiver
is connected using modular telephone jacks.
1) Plug one end of the telephone line cord into the back of the fax
machine. Use the TEL LINE socket located farthest to the left.
2) Plug the other end of the cord into the telephone wall jack
socket. Make sure this end clicks into place.
Jacks
Multi Line connections
(PBXs)
If you have the older 4-prong telephone wall jack, you must use a
modular 4-prong adapter (USOC RJAIX). Plug the adapter into the
wall jack and then plug the telephone cord into the adapter, as
shown in the illustration below.
Most offices use a central telephone system. While it is often
relatively simple to connect the machine to a key system or a PBX
(private branch exchange), we suggest that you contact the company
which installed your telephone system and ask them to connect the
fax machine for you.
III-7-1
It is advisable to have a separate line for the fax machine. You can
then leave the machine in AUTO ANSWER mode to receive faxes
at any time of the day or night.
If the fax machine is to be connected to a multi-line system, ask your
installer to connect the unit to the last line on the system. This will
prevent the unit from being activated each time a telephone call is
received.
Page 83

I1I-7. CONNECTING TO A TELEPHONE LINE
- If you have call waiting, ringmaster, or any other custom calling
feature on your telephone line it may create a problem in the
operation of your fax unit
- As with all fax units this machine must be connected to a two
wire system. If your line has more than two wires proper
connection of the fax machine can not he made.
Connecting to a
private branch
exchange
The following points should be kept in mind if you are installing the
machine to work with a private branch exchange (PBX).
1) It is not guaranteed that the unit will operate correctly under all
circumstances with approved PBXs. Any cases of difficulty
should be reported first to your Brother dealer.
2) If all incoming calls will be answered by a switchboard operator,
it is recommended that the AUTO ANSWER function be set to
be manual, (see page IV-1-7) All in-coming calls should initially
be regarded as telephone calls.
3) The unit may be used with either the pulse or tone dialing
telephone types.
1II-7-2
Page 84

I1I-8. MAKING A TRIAL COPY
8. MAKING ATRIAL COPY
Now that your fax machine is ready for use^ it is a good idea to test
it by making a copy.
You can copy any document up to 8.5 inches/216 mm (A4 size)
wide. Follow the instructions below.
1) Set the document face down into the feeder. Adjust the guides
2) The following display appears on the LCD screen.
located on either side of the document if it is less than 8.5 inches
wide.
COPY
FAX ENTER
COPY PRESS
FAX
NO.
COPYKEY
3) Press the COPY key. The fax machine draws the original through
and prints a copy.
The default setting for making copies is SUPER FINE. To change
this setting when copying photographs, press the R ESOLUTION key
to light "PHOTO" LED, then press the COPY key.
- When the copy has been printed, the automatic paper cutter will
cut the page from the paper roll.
- The machine cannot read text or images closer than 4mm to any
edge of the document.
- Do not pull on the paper while copying is in progress. This may
ruin the copied image.
1II-8-1
Page 85

9. ADDITIONAL SET-UP OPTIONS
111-9. ADDITIONAL SET-UP OPTIONS
Connecting to an
external telephone
Connect an external telephone to the "EXT. DEVICE" jack as
shown.
EXT. DEVICE HANDSET BASE
You can remotely activate the machine using your external
telephone. This is described in "Reception by Enhanced Remote
Activation." (see lV-3-2)
Installing the one-
touch dial label
Locate the one-touch dial label as shown in the diagram below and
cover it with the plastic sheet.
Page 86

Page 87

III-3. ASSEMBLING THE HANDSET
5) Insert the other end of the curled cord into the handset itself, A
click will sound when the plug is in position.
IiI-3-3
Page 88

111-4. MRE PAPER TRAYS
4. INSTALLING THE WIRE EXTENSIONS
1) Pinch the ends of the receive wire extension together slightly
and insert the prongs into the holes provided at the rear of the
mdchiiie as shown iiT the illustration.
2) Pull the ends of the document wire extension apart slightly and
insert them into the holes provided on the machine as shown in
the illustration.
111-4-1
- Install the wire extension with the curved part of the wire
extension pointing upward.
Page 89

5. LOADING PAPER
I1I-5. LOADING PAPER
1) Set your fingers at fingering slots provided at either side under
the tray used for inserting original documents. Lift up on the
tray to open the machine as shown in the illustration.
III-5-1
Page 90

7/7-5. LOADING PAPER
2) Insert the plastic paper handlers into the ends of the tube
holding the paper. (When replacing an empty paper roll, be
sure not to lose track of these paper handlers, as they are
necessary for fitting the roll into place in the machine.)
777-5-2
3) Load the roll of paper into the machine, inserting the paper
handlers so they fit firmly into the sockets provided, as shown
in the illustration. Check to be sure the paper is coming off the
roll correctly, from the bottom, not from the top of the roll.
Page 91

111-5. LOADING PAPER
4) Pull the paper evenly away from the roll, and insert it between
the metal guide and the plastic ribs located below the metal
guide. Check the paper as it leads from the roll into the guide
to be sure there is not too much tension nor too much slack in
the paper.
5) Close the cover.
Be sure not to mistakenly push the release levers for the cover down
into the lower position. These release levers must be in the upper
position (as shown in the illustration provided) or the machine
will not close properly.
111-5-3
Page 92

ni-5. LOADING PAPER
If you have inserted the plug into the power supply before you have
loaded the machine with paper, an alarm will sound and a CHECK
RECORDING PAPER message will appear on the screen.
Use V* core thermal Roll paper.
(You may experience some difficulty if you try to use paper of less
than 1" core.)
III-5-4
Page 93

11-3. THE CONTROL PANEL KEYS
Key
r
.............
AUTOANS
POLUNG
CHAIN
PAi^SiWnRn
ONE TOUCH KEY
I
FLA SH
Explanation
Used to restore existing function settings, and to delete numbers or letters
during the registration of one-touch and speed dialing numbers, etc.
Pressing this key with the cursor located at the beginning of a one-touch or
speed dialing number will clear the number which has been registered.
Used to enable various functions in the machine.
Used to select the fax reception mode from among the following options--Auto
Answer reception mode, manual reception mode, or the FAX/TEL mode. The
LED will light to indicate the current status. Both LEDs light if F/T is being
used.
Used to set a time for a delayed transmission or delayed polling.
Used to poll (or to be polled by) a remote unit for a document. This key is
also used to transfer an in-coming call to another extension.
Used to send a fax with a password. This key is also used for chain dialing
when registering FAX/TEL nunabers for one-touch or speed dialing.
Used to dial phone numbers that you have previously registered.
HOOK
Used to dial telephone or fax number without lifting the handset.
Used to control speaker monitor volume, (high and low)
Ring volume control of handset. (High, middle, or low). This control is on the
left side of the handset base.
II-3-3
Page 94

II-4. FUNCTIONS
4. FUNCTIONS
Pressing the FUNCTION key will bring the primary function menu items on the LCD one at a time.
The unit will scroll all of the first level items automatically. The (—>) cursor key can be used to scroll
through this list of items quickly.
First function menus are as follows;
1. ONE-TOUCH/SPEED DIAL
2. REGISTRATION
3. Not used
4. LISTS AND REPORTS
5. USER OPTIONS
6. CURRENT SETTINGS
7. Not used
8. Not used
9. CANCEL TRANSMISSION
Select the function you want to use by pressing the relevant number key. Your selection will
appear on the LCD. After you have confirmed your choice, press the SET key.
After the SET key has been pressed, secondary items for the FI JNCTION you have selected will
appear on the LCD. The procedure for choosing a secondary item is the same as that for selecting
a primary function. These menu items and brief explanations are provided below.
1. ONE-TOUCH/SPEED DIAL
Number
1
2
ONE-TOUCH DIAL
SPEED DIAL
Menu
Explanation
Registering/Changing/Erasing one-touch dial
Registering/Changing/Erasing speed dial
cf.
IV-4-1
IV-5-1
11-4-1
Page 95

2. REGISTRATION
11-4. FUNCTIONS
Number
01 COVERPAGE
COMMENT
02 DATE-TIME
Menu
Explanation
Registering/Changing/ Erasing user comment
for super COVERPAGE.
Setting/Changing date and time for the unit's
clock
03 INITIAL TIMER
04
F/T & REMOTE ID
Setting/Changing initial timer
Setting/Changing fax/tel and remote
activation ID
05
06
07
08
09
10
11
12
- Be sure to use a two digits number zvken entering the numbers shozvn above. (EX. For *'01
COVERPAGE COMMENT" press the "0" key followed by the "1" key.)
STATION ID
RECEIVE PASSWORD
NOT USED
NOT USED
NOT USED
NOT USED
NOT USED
NOT USED
Setting/Changing machine ID
Setting/Changing password for the unit
cf.
V-4-3
IV-1-1
V-6-2
IV-3-3
IV-1-2
V-7-2
3. NOT USED
4. LISTS AND REPORTS
Number
1
ALL DIAL
Menu Explanation cf.
Printing out both one-touch and speed dial list
at once
2 ONE-TOUCH DIAL Printing out one-touch dial list
3
SPEED DIAL Printing out speed dial list
4 NOT USED
5
6
7 USER OPTIONS
COVERPAGE Printing out super COVERPAGE format
CALL BACK MSG Printing out Call Back Message format
Printing out user options list
8 NOT USED
IV-13-1
IV-4-3
IV-5-3
V-4-3
V-5-3
V-13-2
II-4-2
Page 96

II-4. FUNCTIONS
5. USER OPTIONS
Number
01
RING DELAY
Menu
Explanation
Setting/Changing ring delay shorter (Iring/
longer (4 rings)
02
TONE/PULSE
Setting/Changing tone or pulse for telephone
line
03
04
05
AUTO REDIAL
XMT VERIFICATION
REPORT
F/T RING TIME
Setting/Changing auto redial on or off
Setting/Changing transmission verification
report on or off
Setting/Changing the period of pseudo-ring
back tone
06 BEEPER
07 PASSWORD
Setting/Changing the beeper on or off IV-1-11
Setting password protection on or off V-7-2
PROTECTION
08 SMOOmiNG
09
10
11
12
NOT USED
NOT USED
NOT USED
NOT USED
Setting smoothing on or off
- Be sure to use a two digits number when entering the numbers shown above. (EX. For "01. RING
DELAY, press the "0" key followed by the "1" key.
cf.
IV-1-10
IV-1-6
IV-1-10
IV-1-12
IV-1-9
V-3-1
6. CURRENT SETTINGS
Number
1
Menu
CONTRAST
Setting current contrast to super light or auto
Explanation
mode
2
RESOLUTION
Setting resolution (Standard/Fine/Super
fine/Photo) for each pages up to 30 pages
7. NOT USED
8. NOT USED
9. CANCEL TRANSMISSION
Canceling transmission/polled which has been already set. {cf. V-11-1)
11-4-3
cf.
V-2-1
V-1-2
Page 97

///. Setting up
1. SELECTING A LOCATION FOR YOUR FAX MACHINE
The following points should be kept in mind when selecting a place to set up your fax machine.
• Place the fax machine on a flat, stable surface such as a desk or stand.
• Select a place where the machine will not be subjected to bumping or excessive vibration.
• Do not set it up in a high-traffic area.
• Locate the unit near a telephone wall jack and a standard grounded outlet.
• Avoid setting up the machine near heaters, air conditioners, water, chemicals or refrigerators.
• Avoid direct sunlight, excessive heat, moisture, or dust.
• Do not connect the unit to electrical outlets controlled by wall switches or automatic timers.
Disruption of power can wipe out information in the unites memory.
• Do not connect the unit to electrical outlets on the same circuit as large appliances and other
equipment that might disturb the power supply.
• Avoid interference sources, such as loudspeakers or the base units of cordless telephones.
• Be sure to disconnect the handset when moving the unit.
ili-M
Page 98

111-2. UNPACKING. THE MACHINE
2. UNPACKING THE MACHINE
Unpack the unit and accessories from the box. Check that you have all the items shown in the
illustration below.
Receive wire extension
Handset line cord
Document wire extension
I1I-2-1
Page 99

3. CONNECTING THE HANDSET
1) Insert the handset line cord into the base of the handset as
shown. Listen for the click which will indicate that the plug is
securely in position.
II1-3. ASSEMBLING THE HANDSET
2) Draw the handset line cord through the gap provided to
prevent the cord from being pinched between the base and the
fax unit. Set the fax unit on its side, so the slot for sliding the
handset base into position is accessible. Insert the handset into
the slot provided. Insert until the handset base is fixed in
position.
111-3-1
Page 100

III-3. ASSEMBLING THE HANDSET
3) Insert the remaining end of the handset line cord into the
Again, lisleii fur the elick when inserting the plug into the
socket.
4) Insert the curled cord into the base of the handset as illustrated.
Listen for the click.
"HANDSET BASE" socket located at the rear of the machine.
III-3-2
 Loading...