

Page 1

USER’S GUIDE
DECT™
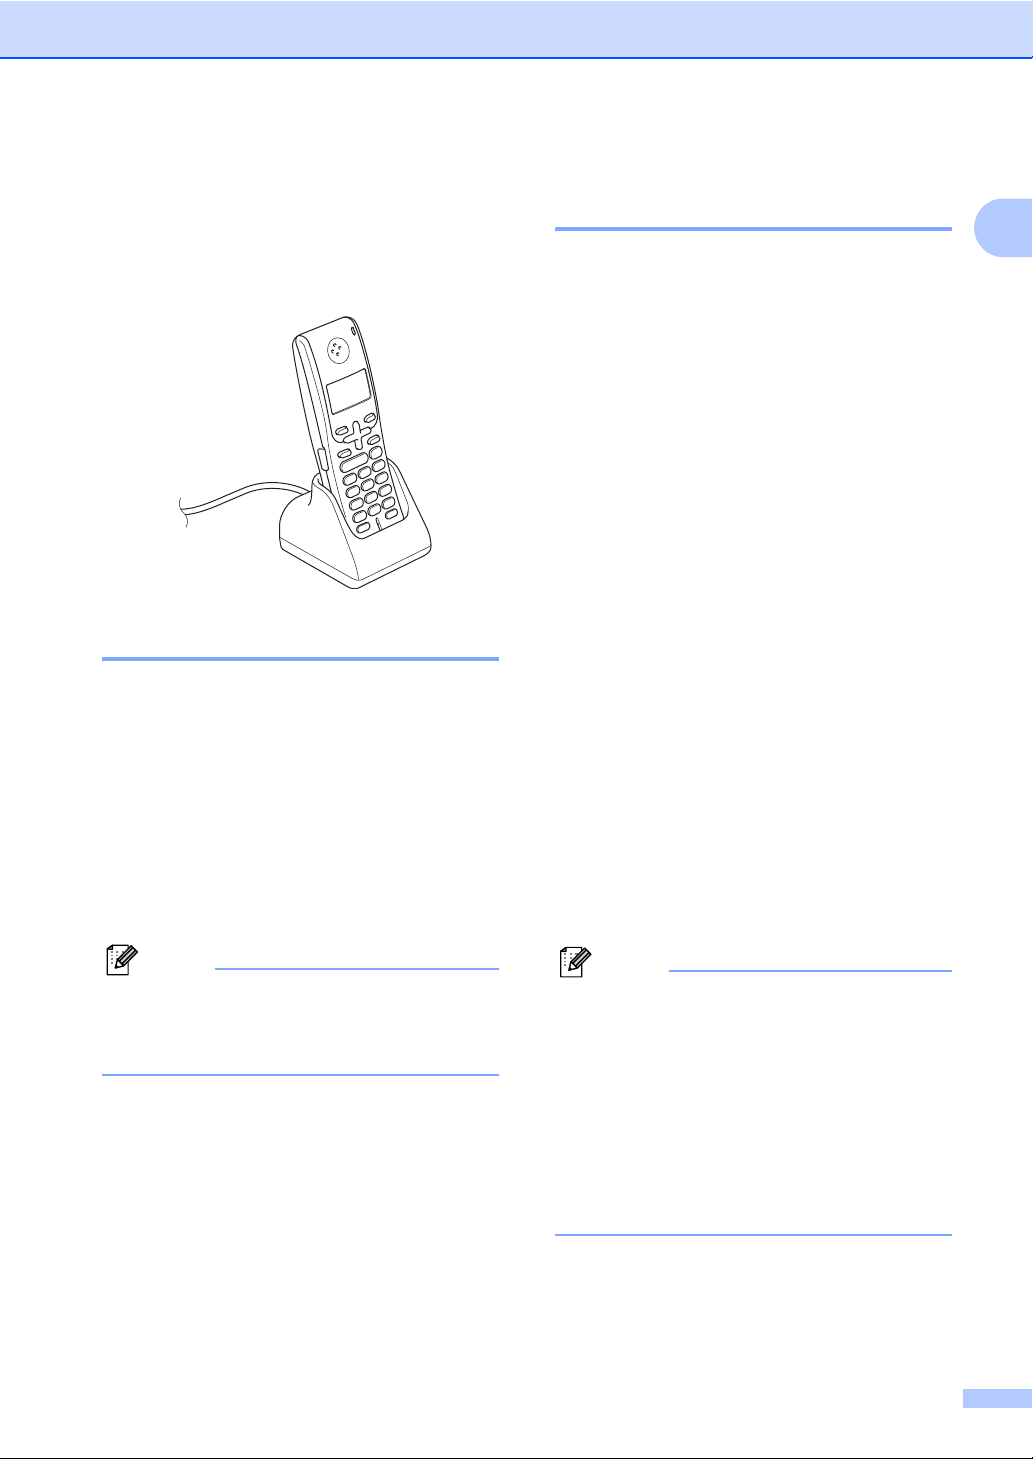
Handset
BCL-D70
Version 0
UK/IRE/OCE/ASA
Page 2

© 2008 Brother Industries, Ltd.
Page 3

Approval Information and Compilation and Publication Notice
THIS EQUIPMENT IS DESIGNED TO WORK WITH A TWO WIRE ANALOGUE PSTN LINE
FITTED WITH THE APPROPRIATE CONNECTOR.
APPROVAL INFORMATION
Brother advises that this product may not function correctly in a country other than where it was
originally purchased, and does not offer any warranty in the event that this product is used on
public telecommunication lines in another country.
Compilation and Publication Notice
Under the supervision of Brother Industries Ltd., this manual has been compiled and published,
covering the latest product descriptions and specifications.
The contents of this manual and the specifications of this product are subject to change without
notice.
Brother reserves the right to make changes without notice in the specifications and materials
contained herein and shall not be responsible for any damages (including consequential) caused
by reliance on the materials presented, including but not limited to typographical and other errors
relating to the publication.
i
Page 4
EC Declaration of Conformity
ii
Page 5

Table of Contents
1 General Information 1
Using the documentation....................................................................................... 1
Symbols and conventions used in the documentation .................................... 1
Introduction............................................................................................................ 1
Initial Setup............................................................................................................ 2
Connecting the battery charger cradle power cord.......................................... 2
Installing the battery ........................................................................................ 2
Setting your country......................................................................................... 3
Registering cordless handsets ........................................................................3
Deregistering cordless handsets ..................................................................... 4
Choosing a location ...............................................................................................5
Important safety instructions..................................................................................5
Control panel overview ..........................................................................................6
LCD display indications ...................................................................................7
2 Telephone 8
Basic operation......................................................................................................8
Making a telephone call...................................................................................8
Answering calls................................................................................................ 8
Mute (Hold)...................................................................................................... 9
Tone or pulse
(Not available in New Zealand) ................................................................... 9
Search .............................................................................................................9
Call History/Redial ........................................................................................... 9
Caller ID history ............................................................................................... 9
Pause ............................................................................................................10
Storing numbers for easy dialling ........................................................................10
Storing numbers ............................................................................................ 10
Storing numbers from Call History.................................................................11
Storing numbers from the Caller ID history ...................................................11
Changing stored numbers .............................................................................11
Deleting stored numbers ............................................................................... 12
Advanced operation.............................................................................................12
Transferring a call at the end of a conversation ............................................12
Using an intercom.......................................................................................... 13
Making a three-way conference call ..............................................................13
Choosing Base unit ....................................................................................... 14
Key Lock........................................................................................................ 14
iii
Page 6

3 Menu and Features 15
On-screen programming......................................................................................15
Menu keys ...........................................................................................................15
Memory storage.............................................................................................15
Menu Table.......................................................................................................... 16
Entering Text .......................................................................................................18
General setup ......................................................................................................19
Ring Volume ..................................................................................................19
Beeper Volume.............................................................................................. 19
Speaker Volume ............................................................................................19
Handset Volume ............................................................................................19
Ringer Pattern ...............................................................................................19
Automatic Daylight Savings Time (For Europe) ............................................20
Daylight Savings Time
(For Asia and Oceania) .............................................................................20
LCD Contrast.................................................................................................20
Date and Time ...............................................................................................20
Choosing your language................................................................................21
Echo Control.................................................................................................. 21
Modify PIN .....................................................................................................22
Restoring all the settings to factory settings ..................................................22
4 Troubleshooting and Routine Maintenance 23
Troubleshooting ...................................................................................................23
If you are having difficulty with your cordless handset .................................. 23
Error messages ...................................................................................................24
Routine maintenance...........................................................................................25
Charging the battery ......................................................................................25
Cleaning ........................................................................................................26
Replacing the battery.....................................................................................26
5 Specifications 28
General ................................................................................................................28
Cordless handset...........................................................................................28
Battery ...........................................................................................................28
Battery charger cradle ...................................................................................29
AC adapter ....................................................................................................29
Basic Features.....................................................................................................29
6 Index 30
iv
Page 7

General Information 1
1
Using the
1
Introduction 1
documentation 1
Thank you for buying a Brother machine!
Reading the documentation will help you
make the most of your cordless DECT™
(Digital Enhanced Cordless
Telecommunication) handset.
The cordless handset battery is designed so
that it can be replaced by the user. For
replacement instruction, see Replacing the
battery on page 26.
Symbols and conventions used in the documentation 1
The following symbols and conventions are
used throughout the documentation.
Bold Bold typeface identifies specific
keys on the control panel of the
cordless handset or the
machine (base unit).
Italics Italicized typeface emphasizes
an important point or refers you
to a related topic.
Courier
New
Text in the Courier New font
identifies messages on the
LCD of the cordless handset.
Warnings tell you what to do to
prevent possible personal injury.
Cautions specify procedures you
must follow or avoid to prevent
possible damage to the cordless
handset or other objects.
Notes tell you how you should
respond to a situation that may arise
or give tips about how the operation
works with other features.
The cordless handset offers several functions
that can be used to enhance the calling
features of your Brother machine.
Redial:
Allows you to choose one of the last 10
numbers dialled for redialling. You can
also store this number in the Phonebook.
Store numbers:
You can store up to 100 names with each
having a number available in the
Phonebook.
Transfer:
Transfer calls between the cordless
handset and the machine (base unit). If
you have additional optional cordless
handsets, you can also transfer a call to
another cordless handset.
Intercom:
Use the intercom feature to make internal
calls between the cordless handset and
the machine (base unit). If you have
additional optional cordless handsets, you
can also make an intercom call to another
cordless handset.
Three-way conference call:
Three-way conference call allows two
users to speak with a third party from the
machine (base unit) and the cordless
handset at the same time.
Caller ID:
If you have a Caller ID subscriber service
from your telephone company the
incoming caller will be identified on the
LCD display of the cordless handset. You
can also store this number as a
Phonebook. This feature may not be
available in some countries.
1
Page 8
Chapter 1
Initial Setup 1
Your Brother machine can support up to 3
optional cordless handsets for a total of 4
cordless handsets. If you have purchased an
optional cordless handset please follow the
setup steps instructions below. For the
cordless handset that was included with your
machine please follow the setup steps
instructions in the Quick Setup Guide.
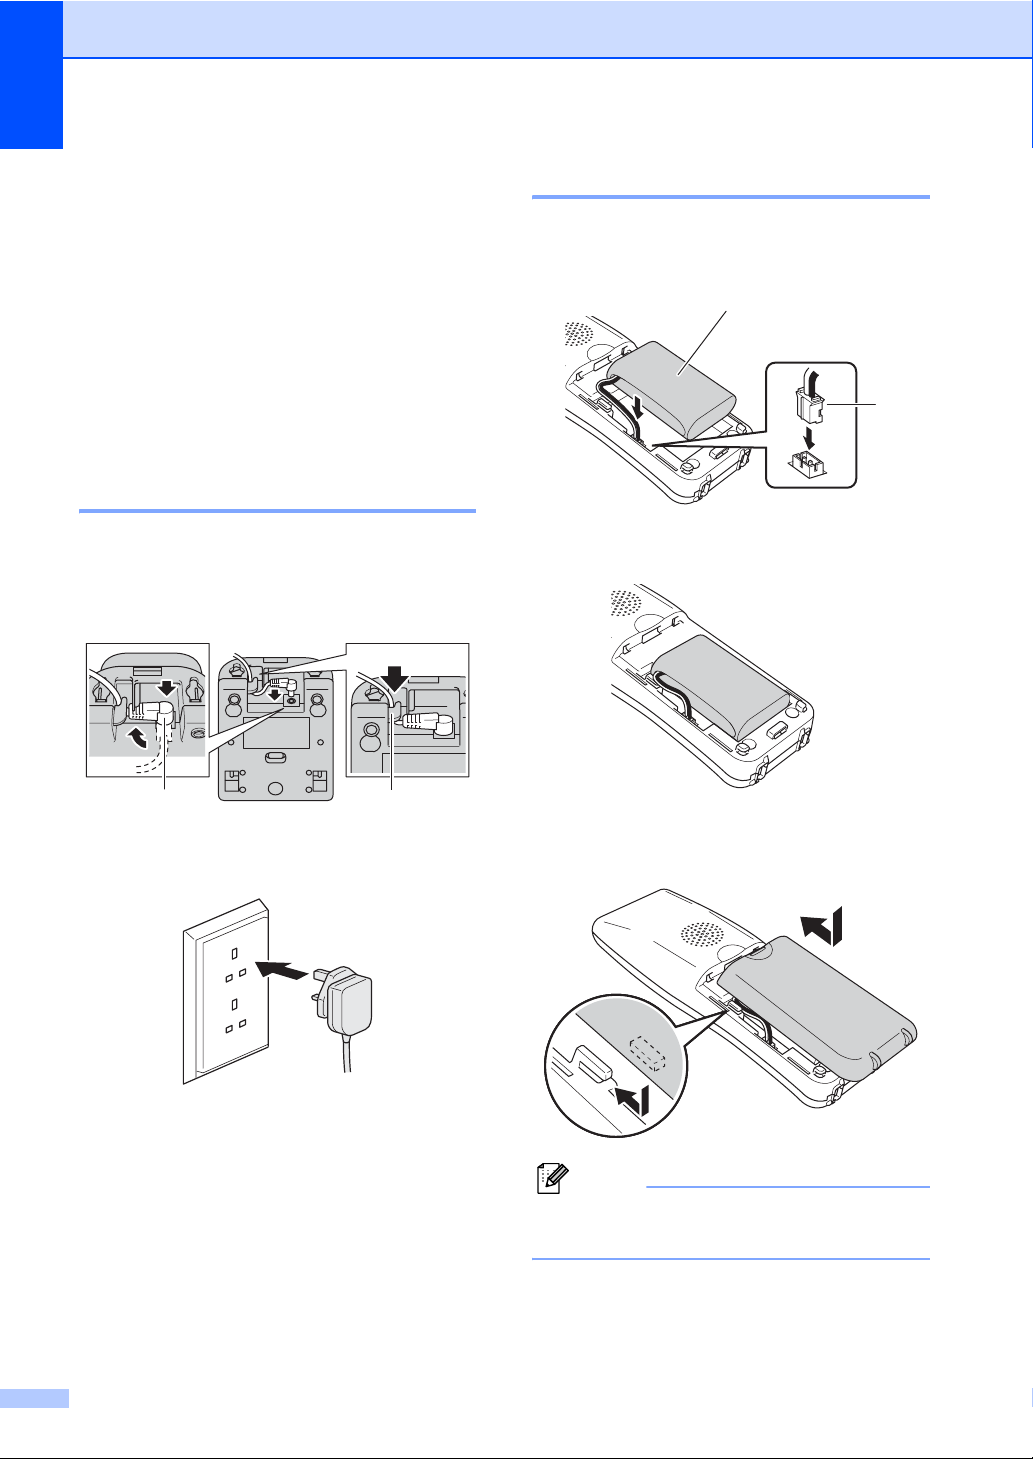
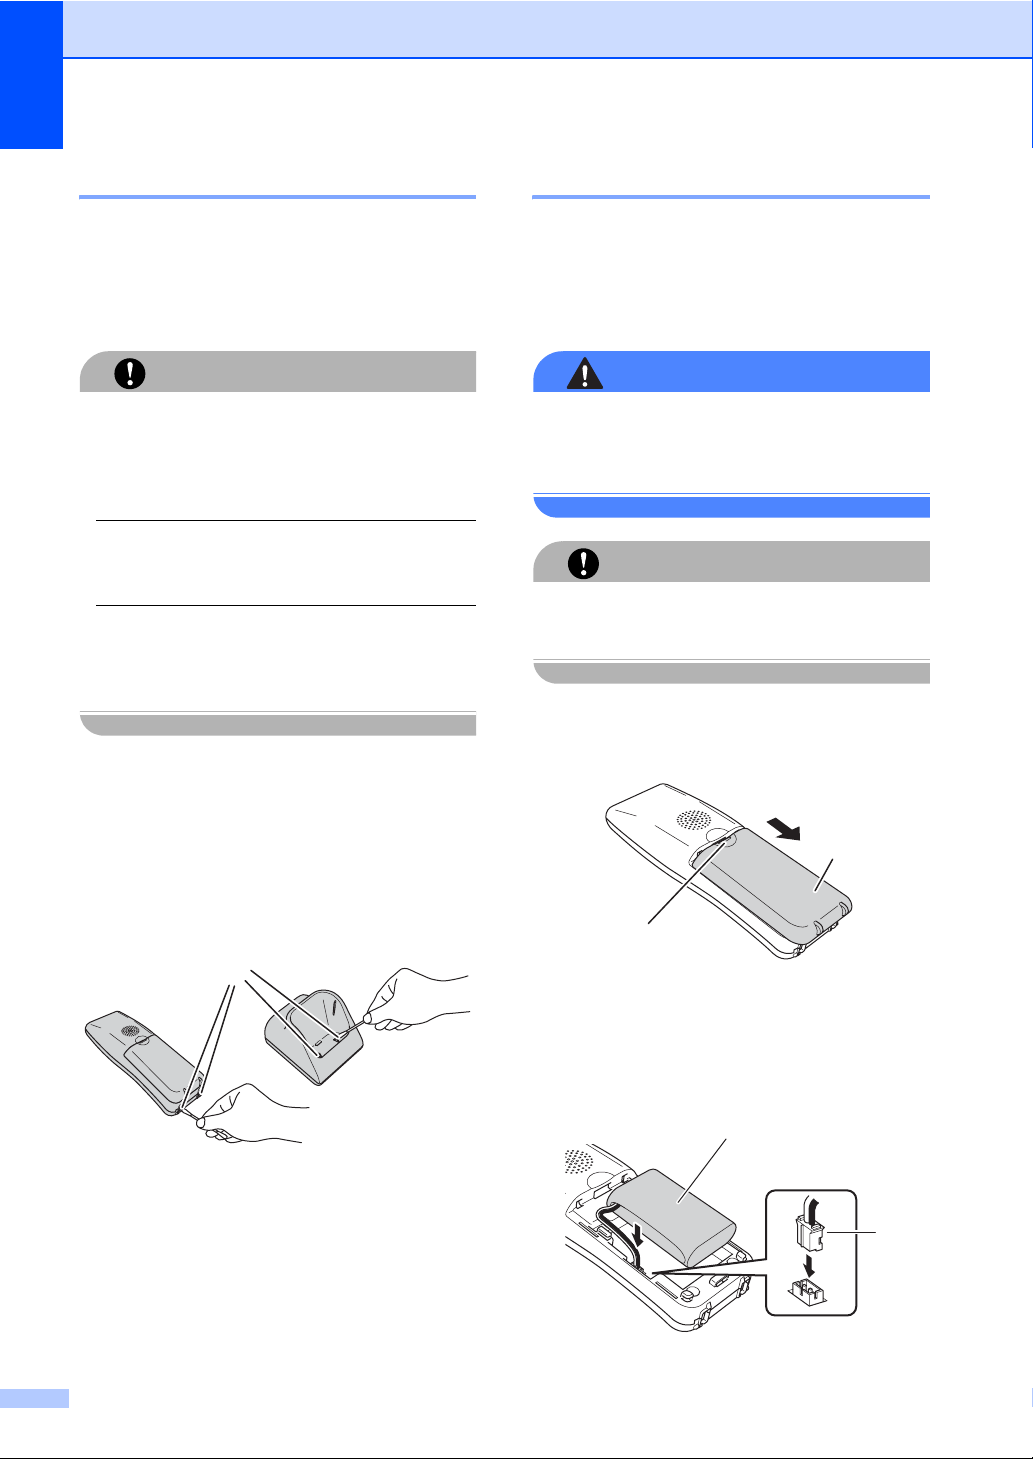
Connecting the battery charger cradle power cord 1
a Plug the connector into the socket (1)
and then hook the cable around its
retaining clip (2) as shown in the
diagram.
Installing the battery 1
a Insert the connector (1) of the battery (2)
in the direction shown below.
2
1
b Place the battery in the position shown.
1 2
b Plug the AC adapter into the electrical
socket.
(Example for U.K.)
c Install the battery cover by sliding it onto
the back of the handset.
Note
Be careful that you do not catch the
battery connector cord.
2
Page 9
General Information
d Charge the battery by leaving the
cordless handset in the cradle for at
least 12 hours before you use it.
(See Charging the battery on page 25.)
You can continue to set up the handset
during this time.
Setting your country 1
The first time you install the battery, you must
set your country so that the cordless handset
works correctly on local telecommunication
lines.
Registering cordless handsets 1
1
You can register up to 3 additional cordless
handsets for a total of 4 cordless handsets to
the machine (base unit).
a Press MENU on the touchscreen of the
machine (base unit).
b Press a or b to display Initial
Setup.
c Press Initial Setup.
d Press a or b to display Register
Handset.
e Press Register Handset.
f Press Register.
The machine (base unit) searches for
the cordless handset.
g Press Menu/OK on the cordless
handset.
a Press Menu/OK.
b Press a or b to choose your country.
Press Menu/OK.
c Press 1 to confirm.
Note
(For Asia)
If you do not find your country, choose
Others in step b.
h Press a or b to choose Register HS.
Press Menu/OK.
i Press a or b to choose Base1, Base2,
Base3 or Base4.
Press Menu/OK.
Note
• If you have already registered the handset
to a base unit, make sure you choose a
base unit number that is not being used.
For example, if you register the handset to
an additional base unit and you choose
Base1, the base unit previously stored in
Base1 will be overwritten and the handset
will no longer be connected to it.
• Your machine (base unit) is already stored
as Base1 on the included handset.
3
Page 10

Chapter 1
j Enter the registered 4-digit PIN number
of the machine (base unit) (The factory
setting is “0000”.) by pressing the dial
pad on the control panel of the cordless
handset.
Press Menu/OK.
Note
• If you hear three short beeps, the cordless
handset did not register. Try to register the
cordless handset again.
• If you want to install another cordless
handset, repeat steps f through j.
• You can change the PIN number. (See
Modify PIN on page 22.)
• You may register GAP (Generic Access
Profile) compatible DECT™ handsets to
your machine (base unit). Follow steps a
through f, then refer to your handset
documentation to complete the
registration. Functions are limited to
making and receiving external calls. Some
handsets may not work with your
machine.
k Press Stop/Exit on the control panel of
the machine (base unit).
Deregistering cordless handsets 1
You can deregister your cordless handset.
If you are using more than one cordless
handset, deregistration will remove all
handsets registered with the machine (base
unit).
a Press MENU on the touchscreen of the
machine (base unit).
b Press a or b to display Initial
Setup.
c Press Initial Setup.
d Press a or b to display Register
Handset.
e Press Register Handset.
f Press Terminate.
Press Yes to confirm.
g Press Stop/Exit.
4
Page 11
General Information
Choosing a location 1
Choose a location where the temperature
remains between 10° C and 35° C.
DO NOT put the cordless handset and
cradle near heaters, air conditioners,
water or chemicals.
DO NOT expose the cordless handset and
cradle to direct sunlight, excessive heat,
moisture, or dust.
DO NOT use the cordless handset near
electro-medical equipment.
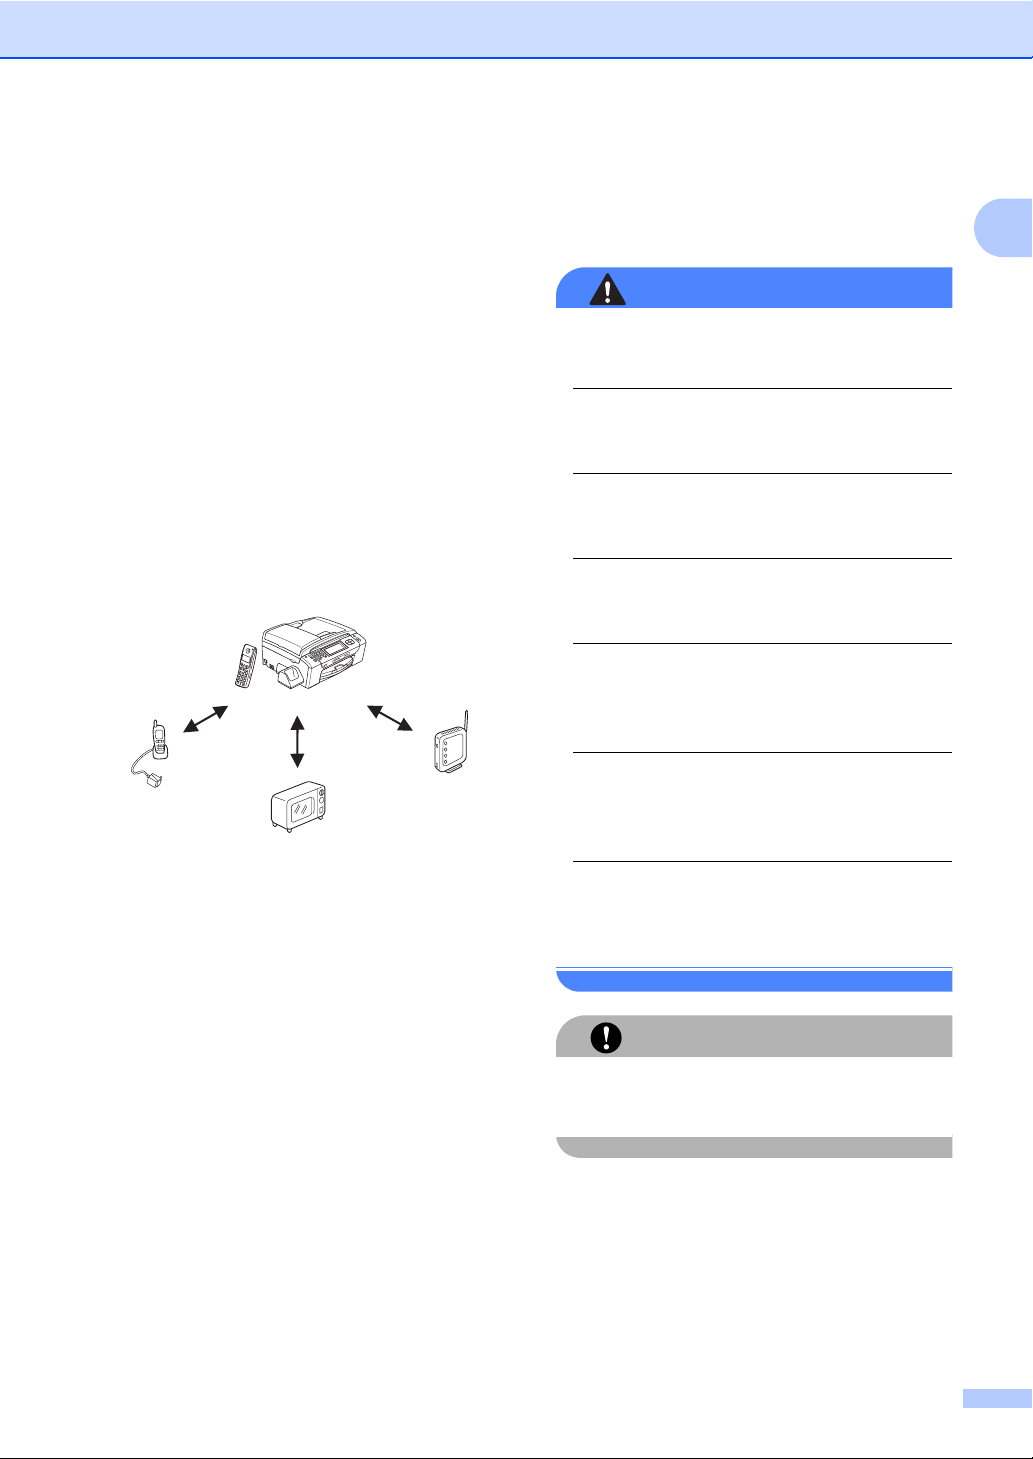
We recommend at least 3 m between the
machine (base unit) or cordless handset
and possible sources of radio
interference.
3 m
3 m
Important safety instructions 1
Use only the AC adapter and the cradle
supplied with this cordless handset.
This product must be installed near an
electrical socket that is easily accessible.
Use only a genuine Brother rechargeable
battery.
DO NOT dispose of a used battery in a fire.
It may explode.
Corrosive fluid rarely leaks out. If it gets in
your eyes wash them with water at once.
Call a doctor if you are concerned.
DO NOT allow the battery to touch any
conductive materials. It can cause a short
circuit of the battery.
Small metallic objects such as pins and
staples may be attracted to the phone’s
earpiece.
WARNING
1
CAUTION
DO NOT take off the white plastic that
covers the battery.
5
Page 12
Chapter 1
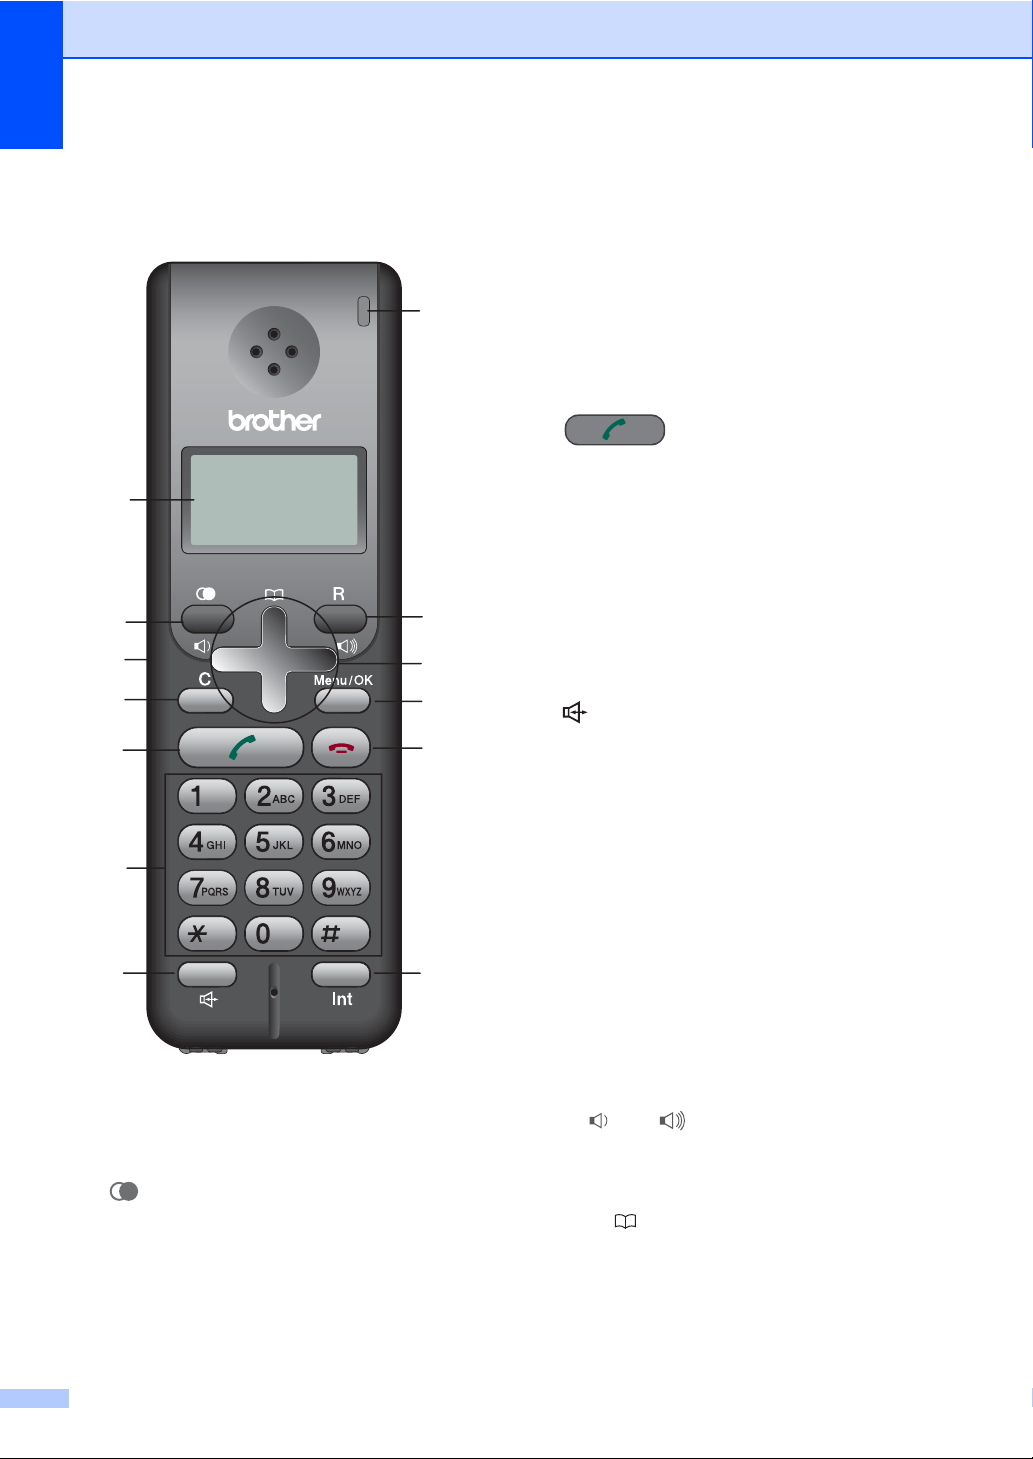
Control panel overview1
8
1
2
3
4
5
6
7
1 LCD (liquid crystal display)
Displays messages on the screen to help you
set up and use your cordless handset.
2 (Redial/Pause)
Redials any of the last 10 numbers you called.
It also lets you put a pause in Phonebook
numbers.
9
10
11
12
13
3 Headset socket
You can connect an external headset with
microphone (not included) to the cordless
handset. To access the headset socket fold
open the headset socket cover located on the
left side of the cordless handset. You can
connect any standard headsets that use a
2.5 mm mini style plug.
4 C (Clear)
Press to back up a cursor and delete a letter.
5 (Talk)
Press to make or receive a phone call.
6 Dial Pad
Use these keys to dial a telephone number and
as a keyboard for entering information into the
cordless handset.
The # key lets you temporarily switch the
dialling mode during a telephone call from
Pulse to Tone
1
Not available in New Zealand
7 (Speaker Phone)
Lets you speak to another party without lifting
the cordless handset.
8 Charging LED
Turns green when the cordless handset is
being charged.
9R
Use this key to gain access to an outside line,
or transfer a call to another extension when it is
connected to a PBX.
(For Asia and Oceania regions)
Gaining access to an outside line is only
available to users in Australia and New
Zealand.
10 Menu keys:
Volume keys
d c
You can press these keys to adjust the ring,
speaker or handset volume of the cordless
handset.
a
Lets you look up numbers that are stored in
the dialling memory.
a or b
Press to scroll through the menus and
options.
1
.
6
Page 13

General Information
11 Menu/OK
Lets you access the Menu to program or store
your settings in the cordless handset.
12 (Off)
Press to hang up or cancel the current
operation.
13 Int (Mute/Intercom, Hold/Intercom)
Puts the current phone call on hold. Also, press
this key to speak on the intercom, to transfer an
incoming call to the cordless handset or to
make a three-way conference call.
LCD display indications 1
The LCD shows the current cordless handset
status.
12 3 4
1 Cordless status
A four level indicator shows the current
cordless handset signal strength.
0Max
2 Speaker Phone
Lets you see when you are speaking with the
Speaker Phone.
3 Ring volume status
Lets you see when the ring volume is set to off.
4 Battery status
A four level indicator shows the available
battery.
1
0Max
7
Page 14

2
Telephone 2
Basic operation 2
Making a telephone call 2
a Pick up the cordless handset.
b Enter a number using the dial pad or
choose a number stored in the dialling
memory.
c Press .
d Speak clearly toward the microphone.
e Press to hang up.
f Replace the cordless handset.
Answering calls 2
a Pick up the cordless handset from the
cradle to answer the call. If your
cordless handset is not in the cradle you
must press to answer the
call.
b To end the call, press .
c Replace the cordless handset.
When the machine (base unit) or the cordless
handset rings, instead of lifting the cordless
handset, and pressing you can
also press on the cordless handset.
Speak clearly toward the cordless handset.
To end the call, press .
If you have a bad connection, your caller
might hear your voice echoed during the call.
If you experience this problem, pick up the
cordless handset and press to use the
handset.
Note
If you want to make a telephone call
without lifting the cordless handset, press
and enter a number using the dial pad.
8
Note
Even if it is a fax call when you answer, the
machine (base unit) will receive the fax
automatically. See Fax Detect in the
User’s Guide.
Page 15

Telephone
Mute (Hold) 2
If you want to put a call on hold, press the Int
key. To release the call from hold press Int
again. You can also transfer to the machine
(base unit) or to another cordless handset if
you have an additional optional cordless
handset. (See Transferring a call at the end of
a conversation on page 12.)
Tone or pulse (Not available in New Zealand)
If you have a pulse dialling service, but need
to send tone signals (for example, for
telephone banking), follow the instructions
below. If you have a Touch Tone service, you
will not need this feature to send tone signals.
a Pick up the cordless handset.
b Press .
c Press # on the control panel of your
cordless handset. Any digits dialled after
this will send tone signals.
When you hang up, the cordless
handset will return to the pulse dialling
service.
d Press .
Search 2
You can search for names you have stored in
the Phonebook memory.
a Pick up the cordless handset.
b Press a ( ) and do one of the
following:
Press a or b to choose the name
you want to call.
Use the dial pad to enter the first
letter of the name, and then
press a or b to choose the name
you want to call.
Call History/Redial 2
The last 10 numbers you called will be stored
in the call history. You can choose one of
these numbers to make a call, add it to the
Phonebook, or delete it from the history.
a Press .
You can also choose Call History
by pressing Menu/OK.
b Press a or b to choose the number and
2
do one of the following:
To make a call, press .
To store or delete the number, press
Menu/OK and go to step c.
c Do one of the following:
If you want to store the number,
press a or b to choose
Add Phonebook.
Press Menu/OK.
(See Storing numbers from Call
History on page 11.)
Press a or b to choose Delete.
Press Menu/OK.
Press 1 to confirm.
If you want to delete all the stored
numbers, press a or b to choose
All Delete.
Press Menu/OK.
Press 1 to confirm.
Caller ID history 2
This feature requires the Caller ID subscriber
service offered by many local telephone
companies. (See Caller ID in the User’s
Guide.)
The last 30 numbers you received will be
stored in the Caller ID history. You can
choose one of these numbers to make a call,
add it to the Phonebook, or delete it from the
history.
a Press Menu/OK.
2
9
Page 16

Chapter 2
b Press a or b to choose
Caller ID hist..
Press Menu/OK.
c Press a or b to choose the number and
do one of the following:
To make a call, press .
To store or delete the number, press
Menu/OK and go to step d.
d Do one of the following:
If you want to store the number,
press a or b to choose
Add Phonebook.
Press Menu/OK.
(See Storing numbers from the
Caller ID history on page 11.)
Press a or b to choose Delete.
Press Menu/OK.
Press 1 to confirm.
If you want to delete all the stored
numbers, press a or b to choose
All Delete.
Press Menu/OK.
Press 1 to confirm.
Note
This feature may not be available in some
countries.
Pause 2
Storing numbers for easy dialling 2
You can set up your cordless handset for
easy dialling. When you choose a number
stored in the dialling memory, the LCD shows
the name, if you stored it, or the number.
Storing numbers 2
You can store up to 100 locations with a
name and a number. When you dial you will
only have to press a few keys (For example:
a ( ), a or b and ).
a Press Menu/OK.
b Press a or b to choose Phonebook.
Press Menu/OK.
c Press a or b to choose Add.
Press Menu/OK.
d Do one of the following:
Enter the name (up to 16 characters)
using the dial pad.
Press Menu/OK.
(To help you enter letters, see
Entering Text on page 18.)
To store the number without a name,
press Menu/OK.
When dialling manually, you can press to
insert a 3.5 second pause between numbers.
If you are dialling overseas, you can press
as many times as needed to increase the
length of the pause.
10
e Enter the telephone number (up to 20
digits).
Press Menu/OK.
f Do one of the following:
To store another number, go to
step c.
To finish the setting, press .
Page 17

Telephone
Storing numbers from Call History 2
You can also store numbers from the call
history.
a Press .
You can also choose Call History
by pressing Menu/OK.
b Press a or b to choose the number you
want to store.
Press Menu/OK.
c Press a or b to choose
Add Phonebook.
Press Menu/OK.
d Do one of the following:
Enter the name (up to 16 characters)
using the dial pad.
Press Menu/OK.
(To help you enter letters, see
Entering Text on page 18.)
To store the number without a name,
press Menu/OK.
e Press Menu/OK to confirm the number.
Storing numbers from the Caller ID history 2
If you have the Caller ID subscriber service
from your telephone company you can also
store Phonebook numbers from incoming
calls in the Caller ID history. (See Caller ID in
the machine’s User’s Guide.)
a Press Menu/OK.
b Press a or b to choose
Caller ID hist..
Press Menu/OK.
c Press a or b to choose a number you
want to store.
Press Menu/OK.
d Press a or b to choose
Add Phonebook.
Press Menu/OK.
e Do one of the following:
Enter the name (up to 16 characters)
using the dial pad.
Press Menu/OK.
(To help you enter letters, see
Entering Text on page 18.)
To store the number without a name,
press Menu/OK.
f Press Menu/OK to confirm the number.
Changing stored numbers 2
You can change a name or number that has
already been stored.
a Press Menu/OK.
b Press a or b to choose Phonebook.
Press Menu/OK.
c Press a or b to choose Change.
Press Menu/OK.
d Press a or b to choose the name or
number you want to change.
Press Menu/OK.
e Do one of the following:
Enter the name (up to 16 characters)
using the dial pad.
Press Menu/OK.
(See Entering Text on page 18.)
If you do not want to change the
name, press Menu/OK.
Note
How to change the stored name or
number:
If you want to change a character, press
d or c to position the cursor under the
incorrect character, then press C.
Re-enter the correct letter.
2
11
Page 18

Chapter 2
f Do one of the following:
Enter the new number (up to 20
digits).
Press Menu/OK.
If you do not want to change the
number, press Menu/OK.
g Press .
Deleting stored numbers 2
You can delete a name or number that has
already been stored.
a Press Menu/OK.
b Press a or b to choose Phonebook.
Press Menu/OK.
c Do one of the following:
Press a or b to choose Delete.
Press Menu/OK.
If you want to delete all the stored
numbers, press a or b to choose
All Delete.
Press Menu/OK.
Press 1 to confirm and then press
.
Advanced operation 2
You can transfer a call, make an intercom call
or make a three-way conference call. If you
have optional cordless handsets you must
register each handset to the machine (base
unit). See Registering cordless
handsets on page 3. The cordless handset
that was included with your machine (base
unit) is already registered as Handset 1.
Base Unit Machine
Handset#1 Handset included with
the machine
Handset#2 Optional cordless
handset
Handset#3 Optional cordless
handset
Handset#4 Optional cordless
handset
Transferring a call at the end of a conversation 2
From the machine (base unit) 2
d Press a or b to choose the name or
number you want to delete.
Press Menu/OK.
Press 1 to confirm.
e Press .
12
a When you finish speaking, press
Mute/Intercom (Hold/Intercom).
b Press 1, 2, 3 or 4 on the dial pad for the
handset you want to transfer to.
c After you confirm the other person is on
the line, hang up.
Note
If no one is on the line, press
Mute/Intercom (Hold/Intercom) to
release the call from hold.
Page 19

Telephone
From the cordless handset 2
a Press Int when you finish speaking.
b Press a or b to choose Base Unit.
Press Menu/OK.
c After you confirm the other person is on
the line, press .
Note
• If no one is on the line, press Int to release
the call from hold.
• If you have one or more optional cordless
handsets, you can choose one of these
handsets in step b.
Using an intercom 2
The intercom feature allows you to make
internal calls between the cordless handset
and the machine (base unit). If you have
additional optional cordless handsets (4
max.) you can also make an intercom call to
another cordless handset.
Note
If you have one or more optional cordless
handsets, you can choose one of these
handsets in step c.
Making a three-way conference call 2
During a call to or from an outside line you
can add another person to the call to make a
three way conference call.
Calling the cordless handset from the machine (base unit)
a During a call, press Mute/Intercom
(Hold/Intercom).
b Press 1, 2, 3 or 4 on the dial pad to add
the handset you want to the call.
c After you confirm the other person is on
the line, press Mute/Intercom
(Hold/Intercom).
2
2
Making a call from the machine (base unit)
a Press Mute/Intercom (Hold/Intercom).
b Press 1, 2, 3 or 4 on the dial pad for the
handset you want to connect to.
c After you finish speaking, hang up.
Making a call from the cordless handset
a Pick up the cordless handset.
b Press Int.
c Press a or b to choose Base Unit.
Press Menu/OK.
d After you finish speaking, hang up.
Calling the machine (base unit) from the cordless handset
2
a During a call, press Int.
b Press a or b to choose Base Unit.
Press Menu/OK.
c After you confirm the other person is on
the line, press Int.
2
Note
If you have one or more optional cordless
handsets, you can choose one of these
handsets in step b.
2
13
Page 20

Chapter 2
Choosing Base unit 2
If you registered multiple base units into your
cordless handset, you can choose which
base unit you want to use. (See Registering
cordless handsets on page 3.)
a Press Menu/OK.
b Press a or b to choose HS Settings.
Press Menu/OK.
c Press a or b to choose Select BASE.
Press Menu/OK.
d Press a or b to choose Base1, Base2,
Base3 or Base4.
Press Menu/OK.
e Press .
Key Lock 2
Key Lock lets you prevent unauthorized
access to the cordless handset. While Key
Lock is on, the handset will only be able to
answer calls.
Turning Key Lock on 2
a Press Menu/OK, #.
The LCD shows Keypad Locked.
Turning Key Lock off 2
a Press Menu/OK, #.
14
Page 21

3
Menu and Features 3
On-screen programming 3
Your cordless handset is designed to be easy
to use with LCD on-screen programming
using the menu keys. User-friendly
programming helps you take full advantage of
all the menu selections your cordless handset
has to offer.
Since your programming is done on the LCD,
we have created step-by-step on-screen
instructions to help you program your
cordless handset. All you need to do is follow
the instructions as they guide you through the
menu selections and programming options.
Menu keys 3
To access the menu mode:
a Press Menu/OK.
b Press a or b to choose an option.
c Press Menu/OK when that option
appears on the LCD.
The LCD will then show the next option.
Access the menu.
Go to the next menu level.
Accept an option.
Delete an incorrect letter when
you need to enter text into the
cordless handset.
Go back to the previous menu
level.
Scroll through the current menu
level.
Exit the menu.
3
d Press a or b to choose the option.
e Press Menu/OK.
When you finish setting an option, the
LCD shows Accepted.
Memory storage 3
Even if your battery is discharged, you will not
lose your menu settings because they are
stored permanently. You may have to reset
the date and time.
15
Page 22

Chapter 3
Menu Table 3
The menu table will help you understand the menu selections and options that are found in the
cordless handset's programs. The factory settings are shown in Bold with an asterisk.
Level1 Level2 Level3 Options Descriptions Page
Phonebook Add
Change
Delete
All Delete
Call History — Delete
Caller ID
hist.
Modify Pin ———You can change the PIN
HS Settings Setup Ringer Beeper On*
— Delete
Auto Daylight
(For Europe)
Daylight Save
(For Asia and
Oceania)
LCD Contrast — ooooooo
— — You can add, change or
delete a number.
— You can choose a number
All Delete
Add Phonebook
— You can choose a number
All Delete
Add Phonebook
Off
Ringer
Pattern
— On*
— On
Signal 1*
Signal 2
Signal 3
Signal 4
Signal 5
Melody 1
Melody 2
Off
Off
oooooon
ooooonn
oooonnn*
ooonnnn
oonnnnn
onnnnnn
from the call history and then
make a phone call to it, add it
to the Phonebook, or delete it.
from the Caller ID history and
then make a phone call to it,
add it to the Phonebook, or
delete it.
number of the machine (base
unit).
Adjusts the volume level of
the beeper.
You can choose a ring
pattern.
Changes for daylight savings
time automatically.
Changes for daylight saving
time manually.
Adjusts the contrast of the
LCD.
10
9
9
22
19
19
20
20
20
16
Page 23

Menu and Features
Level1 Level2 Level3 Options Descriptions Page
HS Settings
(Continued)
Register HS ——Base1
Date&Time — — Puts the date and time on the
LCD.
Select
Language
Select BASE — Base1*
HS Default — — Restores all settings to the
— English*
French
German
Dutch
Italian
Spanish
Portuguese
Norwegian
Swedish
Finnish
Danish
Base2
Base3
Base4
Base2
Base3
Base4
Allows you to change the
LCD language for your
country.
You can choose a base unit. 14
factory default.
Registers the cordless
handset into the machine
(base unit).
20
21
22
3
3
17
Page 24

Chapter 3
Entering Text 3
When you are storing a name or a number in
the Phonebook memory, you may need to
enter text into the cordless handset. Most
number keys have three or four letters printed
on them. The keys for 0, # and l do not have
printed letters because they are used for
special characters.
By pressing the relevant number key
repeatedly, you can access the character you
want.
Press
Key
2 ABC2
3 DEF 3
4 GH I 4
5 JKL5
6 MNO6
7 PQRS
8 TUV8
9 WXY Z
one
time
two
times
three
times
four
times
Special characters and symbols
Press l, # or 0, repeatedly until you see the
special character or symbol you want.
Press l for (space) ! " # $ % & ' ( ) l
+ , - . / m
Press # for : ; < = > ? @ [ ] ^ _
Press 0 for Ä Ë Ö Ü À Ç È É 0
Putting spaces
To enter a space in a name, press c twice
between characters.
Making corrections
If you entered an incorrect letter and want to
change it, press d to move the cursor under
the incorrect character, press C to delete, and
then re-enter the correct character. You can
also back up and insert letters.
Repeating letters
If you need to enter a letter that is on the
same key as the letter before, press c to
move the cursor to the right before you press
the key again.
18
Page 25

Menu and Features
General setup 3
Ring Volume 3
You can choose a range of ring volume
levels, from High to Off.
a Press d or c to adjust the volume
level.
This setting will stay until you change it
again.
Note
• If you choose Off, will appear on the
LCD.
• Even if you choose Off, the cordless
handset will ring in the lowest volume level
when you receive a transferred call.
Beeper Volume 3
When the beeper is on, the cordless handset
will beep when you press a key.
a Press Menu/OK.
b Press a or b to choose HS Settings.
Press Menu/OK.
Speaker Volume 3
You can choose a range of speaker volume
levels, from High to Low.
a Press .
b Press d or c .
This setting will stay until you change it
again.
c Press .
Handset Volume 3
You can adjust the cordless handset volume
any time you are talking on the telephone.
a Press d or c .
This setting will stay until you change it
again.
Ringer Pattern 3
You can choose a ring pattern from five signal
(regular ring patterns) or two types of
melodies.
a Press Menu/OK.
3
c Press a or b to choose
Setup Ringer.
Press Menu/OK.
d Press a or b to choose Beeper.
Press Menu/OK.
e Press a or b to choose On or Off.
Press Menu/OK.
f Press .
b Press a or b to choose HS Settings.
Press Menu/OK.
c Press a or b to choose
Setup Ringer.
Press Menu/OK.
d Press a or b to choose
Ringer Pattern.
Press Menu/OK.
e Press a or b to choose Signal 1,
Signal 2, Signal 3, Signal 4,
Signal 5, Melody 1 or Melody 2.
Press Menu/OK.
f Press .
19
Page 26
Chapter 3
Melody name
Melody 1
Melody 2
My Grandfather’s Clock
The Four Seasons Concerto
No.1 “Spring”
Automatic Daylight Savings Time (For Europe) 3
You can set the cordless handset to change
automatically for daylight savings time. It will
reset itself forward one hour in the Spring and
backward one hour in the Autumn. Make sure
you have set the correct date and time in the
Date&Time setting.
a Press Menu/OK.
b Press a or b to choose HS Settings.
Press Menu/OK.
c Press a or b to choose
Auto Daylight.
Press Menu/OK.
d Press a or b to choose On or Off.
Press Menu/OK.
e Press .
LCD Contrast 3
You can adjust the LCD contrast for a sharper
and more vivid display. If you are having
difficulty reading the LCD, try changing the
contrast setting.
a Press Menu/OK.
b Press a or b to choose HS Settings.
Press Menu/OK.
c Press a or b to choose
LCD Contrast.
Press Menu/OK.
d Press d or c to adjust the contrast.
Press Menu/OK.
e Press .
d Press a or b to choose On or Off.
Press Menu/OK.
e Press .
Daylight Savings Time (For Asia and Oceania) 3
You can set the cordless handset to change
for daylight savings time. It will reset itself
forward one hour in the Spring and backward
one hour in the Autumn. Make sure you have
set the correct date and time in the
Date&Time setting.
a Press Menu/OK.
b Press a or b to choose HS Settings.
Press Menu/OK.
c Press a or b to choose
Daylight Save.
Press Menu/OK.
Date and Time 3
The cordless handset displays the date and
time.
a Press Menu/OK.
b Press a or b to choose HS Settings.
Press Menu/OK.
c Press a or b to choose Date&Time.
Press Menu/OK.
d Enter the two digits for the day on the
dial pad.
(e.g. Enter 0 1 for the first of the month.)
e Enter the two digits for the month on the
dial pad.
(e.g. Enter 0 3 for March.)
f Enter the last two digits of the year on
the dial pad.
Press Menu/OK.
(e.g. Enter 0 8 for 2008.)
20
Page 27

Menu and Features
g Enter the time in 24-hour format on the
dial pad.
Press Menu/OK.
(e.g. Enter 1 5, 2 5 for 3:25 P.M.)
h Press .
Choosing your language 3
You can change the LCD language.
a Press Menu/OK.
b Press a or b to choose HS Settings.
Press Menu/OK.
c Press a or b to choose
Select Language.
Press Menu/OK.
d Press a or b to choose your language.
Press Menu/OK.
e Press .
Echo Control 3
Under some conditions you may experience
an echo when using the cordless handset.
You can reduce or remove the echo by
choosing a level in the echo control setting
from the control panel of the machine (base
unit). It will take a moment for the level setting
to change. During this time you cannot
answer a call.
a Press MENU on the touchscreen of the
machine (base unit).
b Press a or b to display General
Setup.
c Press General Setup.
d Press a or b to display Echo
Control.
e Press Echo Control.
f Press level1, level2, level3 or
level4.
3
g Press Stop/Exit.
21
Page 28

Chapter 3
Modify PIN 3
You can change the PIN number of the
machine (base unit). The factory setting is
0000.
a Press Menu/OK.
b Press a or b to choose Modify Pin.
Press Menu/OK.
c Enter a 4-digit number for the current
PIN number.
Press Menu/OK.
d Enter a 4-digit number for a new PIN
number.
Press Menu/OK.
Press 1 to confirm.
e Press .
Note
Make sure that you make a note of your
new PIN number and keep it in a safe
place. If you forget or lose your PIN
number please call your Brother dealer for
service.
Restoring all the settings to factory settings 3
You can reset all the settings you have
changed to the factory settings, such as the
phonebook memory, call history, Caller ID
history and other settings.
a Press Menu/OK.
b Press a or b to choose HS Settings.
Press Menu/OK.
c Press a or b to choose HS Default.
Press Menu/OK.
Press 1 to confirm.
22
Page 29

Troubleshooting and Routine
4
Maintenance
Troubleshooting 4
If you think there is a problem with your cordless handset, check the chart below and follow the
troubleshooting tips.
Most problems can be easily resolved by yourself. If you need additional help, the Brother
Solutions Center offers latest FAQs and troubleshooting tips. Visit us at
http://solutions.brother.com
If you are having difficulty with your cordless handset 4
Difficulties Suggestions
The cordless handset does not
operate.
Dialling or receiving does not work. Check phone line connection of the machine (base unit).
Bad phone line connection Make sure that there are no possible sources of radio interference between the
The battery does not charge. Check that the battery is installed properly in the cordless handset. (See
The battery performance is still
poor after recharging.
The cordless handset beeps during
a call.
.
Check that the battery is charged properly. (See Charging the
battery on page 25.)
Check that the machine (base unit) is plugged in. For dialling feature, check that
the machine (base unit) is not in Power Save Mode.
Check that the battery is charged properly. (See Charging the
battery on page 25.)
Move closer to the machine (base unit). The cordless handset may be too far away
from the machine (base unit).
If you have registered the handset to more than one machine (base unit), check
that you have chosen the correct machine (base unit) from the handset menu.
(See Choosing Base unit on page 14.)
machine (base unit) and the cordless handset.
Move closer to the machine (base unit). The cordless handset may be too far away
from the machine (base unit).
During the conversation, try adjusting the angle of the antenna on the right of the
machine (base unit) to improve reception.
Move away from walls.
Replacing the battery on page 26.)
Check that the cordless handset is placed properly in the cradle and LED turns
green. (See Charging the battery on page 25.)
Clean the charge contacts for both cordless handset and the cradle. (See
Cleaning on page 26.)
It is time to replace the battery. (See Replacing the battery on page 26.)
Move closer to the machine (base unit). The cordless handset may be too far away
from the machine (base unit).
Your battery may be discharged. If you want to continue the call, transfer the call
to the machine (base unit) and use the Speaker Phone key to answer. (See
Transferring a call at the end of a conversation on page 12.) Charge the battery.
(See Charging the battery on page 25.)
4
4
23
Page 30

Chapter 4
Difficulties Suggestions
You cannot make an internal call. The cordless handset or the machine (base unit) you want to call to may be
making an internal call or an outside call. Wait until the line is free.
If you have more than one machine (base unit), check that your handset is
registered to the correct machine (base unit).
Make sure that the machine (base unit) is not in Power Save condition. Then press
on the cordless handset to go back to standby mode.
You cannot register an optional
cordless handset.
Check that both the cordless handset and the machine (base unit) are in standby
mode.
Error messages 4
As with any sophisticated office product, errors may occur. If this happens, your cordless handset
identifies the error and shows an error message. The most common error messages are shown
below.
You can correct most errors by yourself. If you need more help, the Brother Solutions Center offers
latest FAQs and troubleshooting tips.
Visit us at http://solutions.brother.com
Error Message Cause Action
Base Unit in
use
Cannot
register
handset
Line in use Another person is on the phone
Low Battery
Put handset
on cradle
No Caller ID There is no incoming call history.
The machine (base unit) is being
used for intercom calling.
The machine (base unit) is being
set up for cordless handset
registration.
The machine (base unit) is being
used for TAD functions such as
OGM recording or ICM playing.
Handset registering was
unsuccessful.
with machine’s (base unit) speaker
phone or other cordless handset.
The machine (base unit) is
receiving faxes.
The battery of the cordless handset
is discharged.
You have not received any calls,
you have not activated the Caller ID
feature on your machine (base
unit), or you have not subscribed to
the Caller ID service from your
telephone company.
.
Wait until the line is free.
Wait until the registration is finished.
Wait until machine (base unit) is back in standby
mode.
Try to register the cordless handset again. (See
Registering cordless handsets on page 3.)
Wait until the line is free.
Wait until the line is free.
Charge the battery. (See Charging the
battery on page 25.)
If you want to use the Caller ID feature call your
telephone company. (See Caller ID in the User’s
Guide.)
24
Page 31

Troubleshooting and Routine Maintenance
Error Message Cause Action
Power Off The machine (base unit) is in Power
Save mode.
Searching for
Base Unit
(Base Unit
not detected)
The cordless handset is too far
away from the machine (base unit).
Your machine (base unit) is not
plugged in.
You have not registered the
cordless handset.
The antenna on the right of the
machine (base unit) is in the down
position.
If you want to make a phone call, press the
Power Save key on your machine (base unit) to
bring your machine out of Power Save mode.
Then press on the cordless
handset to go back to standby mode.
Move the cordless handset closer to the
machine (base unit).
Make sure that the machine (base unit) is
plugged in.
Register the cordless handset. (See Registering
cordless handsets on page 3.)
Make sure the antenna is in the up position.
4
Routine maintenance 4
Charging the battery 4
If the battery charge level is getting low, you
should charge the battery. You can see the
battery charge level indicator at the bottom
right of the LCD.
a Make sure the AC adapter of the cradle
or the machine (base unit) is connected
to an electrical socket.
b Place the cordless handset in the cradle
with the dial pad facing forward.
25
Page 32
Chapter 4
Cleaning 4
Clean the outside of the cordless handset
with a soft cloth. You should also clean the
charge contacts once a month. If the charge
contacts are not clean, the battery may not
charge properly.
Use neutral detergents. Cleaning with
volatile liquids such as thinner or benzine
will damage the outside surface of the
cordless handset.
DO NOT use cleaning materials that
contain ammonia.
DO NOT use isopropyl alcohol to remove
dirt from the control panel. It may crack the
panel.
Clean the charge contacts as follows: 4
CAUTION
Replacing the battery 4
If the battery charge level indicator empties
very quickly after recharging make sure that
you have charged the battery correctly. If the
battery performance is still poor, it is time to
replace it.
WARNING
Use a genuine Brother rechargeable
battery (BCL-BT20). If not, it may cause
damage or personal injury.
CAUTION
DO NOT take off the white plastic that
covers the battery.
a Press the area indicated (1) on the
battery cover (2) and slide it off the
cordless handset.
a Unplug the cradle from the electrical
socket.
b Clean the charge contacts (1) for both
the cordless handset and the cradle with
a cotton swab.
1
2
1
b Remove the old battery and pull out the
connector.
c Insert the connector (1) of the new
battery (2) in the direction shown below.
2
1
26
Page 33

d Place the battery in the position shown.
Troubleshooting and Routine Maintenance
e Install the battery cover by sliding it onto
the back of the handset.
Note
• After battery replacement, you should set
the date and time.
(See Date and Time on page 20.)
• Be sure to dispose of the expired battery
as directed by local regulations for the
disposal of nickel metal hydride battery.
4
27
Page 34

Specifications 5
5
General 5
Cordless handset 5
Frequency 1.9 GHz
Standard DECT™
Multi Handset Capability Up to 4 handsets
Dimensions
154 mm
31.6 mm
Weight (including battery) 149 g
LCD (liquid crystal display) 16-Digit, 3-Line (+1-Line for Pict), Backlit (Orange)
Charge Indicator Yes (LED)
Full Charge Time 12 hours
While in Use (TALK) 10 hours
While Not in Use (Standby) 200 hours
49.6 mm
Battery 5
Type BCL-BT20
Rating Ni-MH 3.6 V 730 mAh
28
Page 35

Specifications
Battery charger cradle 5
Dimensions
Weight 71.6 g
Power Consumption
(during charge) Charging: Average 2 W
67 mm
85 mm
69 mm
AC adapter 5
Type BCL-ADB (For U.K., Singapore, Hong Kong and Malaysia)
BCL-ADOCE (For Australia and New Zealand)
BCL-ADC (For others)
Input AC 220 to 240 V 50/60 Hz
Output DC 11.0 V
5
Basic Features 5
Tel-Index Up to 100 numbers with names
Redial Yes
Melody ringer patterns Yes (2 melodies, 5 signals)
2 Way Intercom Handset-to-Handset and Handset-to-Base Unit
Talk Time display Yes
29
Page 36

6
Index
B
Battery
charging
installing
replacing
................................................25
..................................................2
...............................................26
C
Cleaning ...................................................26
Control panel overview
..............................6
D
Date and time ...........................................20
Daylight saving time
Dialling
call history/redial
caller ID history
pause
....................................................10
phonebook
..............................................9
.................................20
.....................................9
.......................................9
E
Error messages on LCD ..........................24
H
Handset default ........................................22
HELP
LCD messages
using menu keys
menu table
.....................................15
................................15
............................................15
L
LCD (liquid crystal display) ................. 7, 15
changing language
contrast
.................................................20
................................21
P
Phonebook
changing
deleting
storing
from call history
from caller ID history
PIN
entering
modifying
Programming your cordless handset
............................................... 11
................................................. 12
................................................... 10
................................. 11
......................... 11
............................................3, 22
.............................................. 22
....... 15
R
Registering ................................................ 3
Ringer pattern
.......................................... 19
S
Safety instructions ..................................... 5
T
Telephone ................................................. 8
caller ID history
choosing base unit
hold
......................................................... 9
intercom
mute
three-way conference call
transferring
Text, entering
special characters
Troubleshooting
error messages on LCD
if you are having difficulty
............................................1, 13
....................................................... 9
....................................... 9
............................... 14
................1, 13
........................................... 12
.......................................... 18
................................ 18
....................................... 23
....................... 24
..................... 23
V
M
Maintenance, routine ...............................25
Memory storage
Menu table
30
.......................................15
...............................................16
Volume, setting
beeper
handset
ring
speaker
.................................................. 19
................................................. 19
....................................................... 19
................................................. 19
Page 37
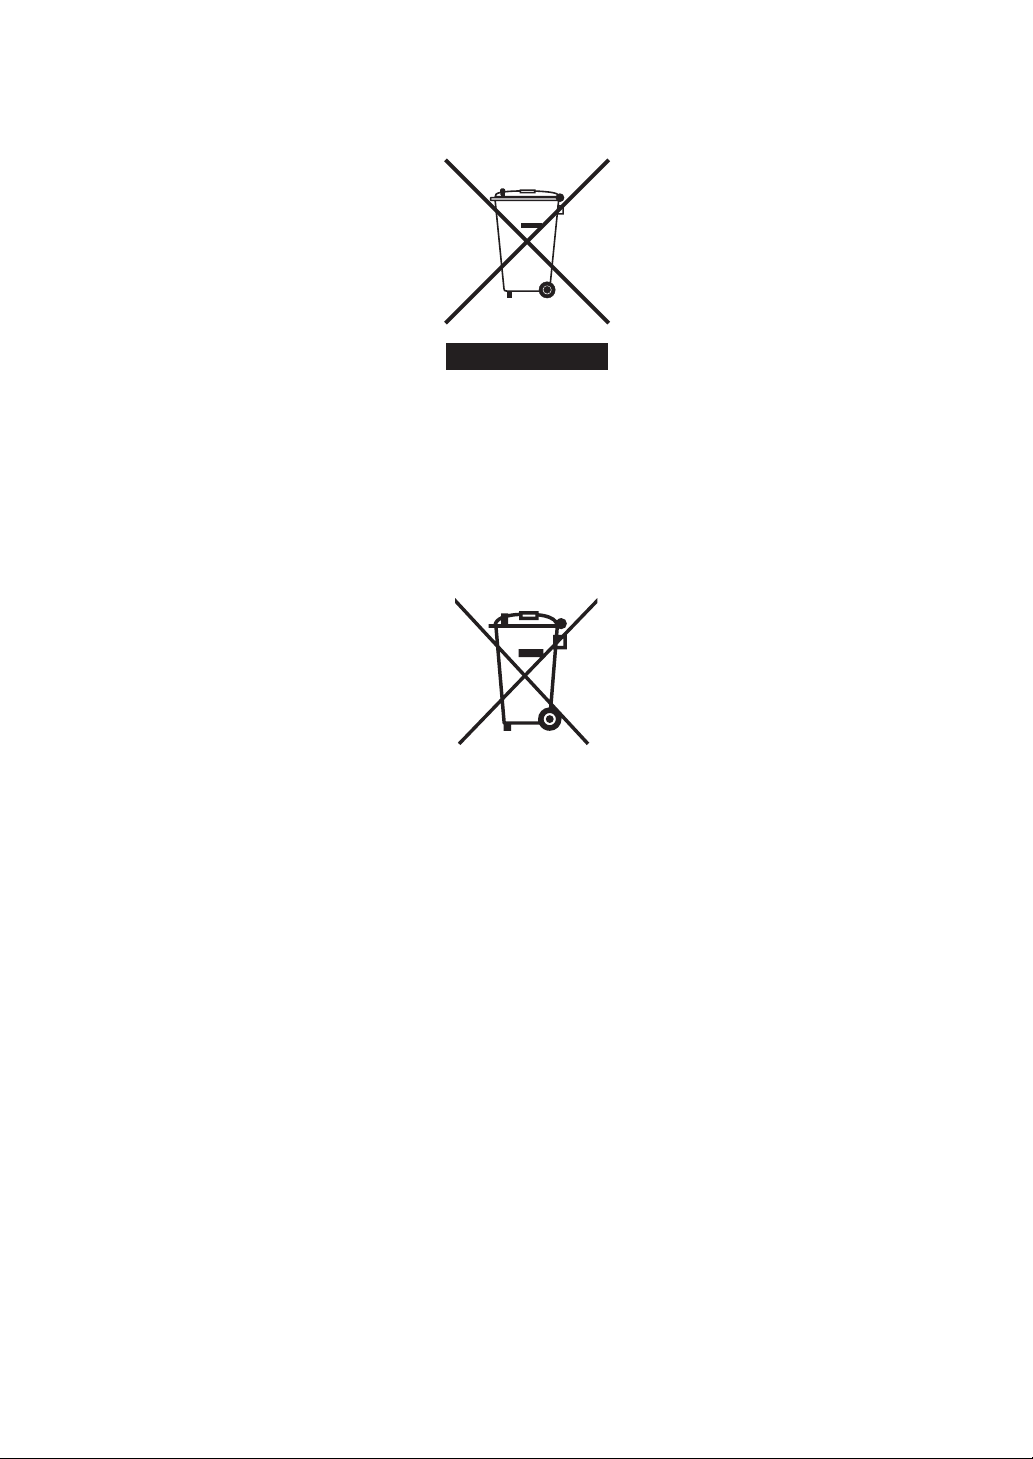
EU Directive 2002/96/EC and EN50419
European Union only
This equipment is marked with the above recycling symbol. It means that at the end of the life of
the equipment you must dispose of it separately at an appropriate collection point and not place
it in the normal domestic unsorted waste stream. This will benefit the environment for all.
(European Union only)
EU Directive 2006/66/EC and EN61429
The battery is marked with the above recycling symbol. It means that at the end of the life of the
battery, you must dispose of it separately at an appropriate collection point, and not place it in the
normal domestic unsorted waste stream. This will benefit the environment for all.
Trademark
The Brother logo is a registered trademark of Brother Industries, Ltd.
Brother is a registered trademark of Brother Industries, Ltd.
DECT is a trademark of ETSI.
© 2008 Brother Industries, Ltd. All rights reserved.
All other brand and product names mentioned in this User's Guide are registered
trademarks of their respective companies.
Page 38

Visit us on the World Wide Web
http://www.brother.com
This machine is approved for use in the country of purchase only. Local Brother companies or their
dealers will only support machines purchased in their own countries.
 Loading...