

Page 1

Flight Force
™
BATTLING DRONES
SET OF 2
for ages
14
+
Page 2

1
TABLE OF CONTENTS
Warnings and Cautions ....................................................1
FCC Information ..........................................................5
Li-Po Battery Warning .....................................................6
AA Battery Precautions ....................................................6
Charging the Drone's Battery ..............................................7
Inserting the Controller Batteries ...........................................7
Drone Parts...............................................................8
Controller Parts and Controls...............................................9
Link the Drones with the Controllers .......................................10
Flying the Drone .........................................................11
Speed Setting............................................................11
Flying Tips ...............................................................12
Headless Mode ..........................................................13
Battle! ...................................................................14
Gyroscope Recalibration ..................................................16
Trim Adjustment ..........................................................17
Rotor Replacement .......................................................18
Care and Maintenance....................................................19
Specifications ............................................................19
Warranty.................................................................20
CAUTION
• TO REDUCE THE RISK OF ELECTRIC SHOCK, DO NOT REMOVE COVER.
THERE ARE NO SERVICEABLE PARTS INSIDE.
• TO REDUCE THE RISK OF FIRE OR ELECTRIC SHOCK, DO NOT EXPOSE
THIS UNIT TO RAIN OR MOISTURE.
The lightning flash with arrow-head symbol within an equilateral triangle is
intended to alert the user to the presence of uninsulated “dangerous voltage”
within the unit’s enclosure that may be of sufficient magnitude to constitute
a risk of electric shock.
The exclamation point within an equilateral triangle is intended to alert the
user to the presence of important operating and maintenance (servicing)
instructions in the literature accompanying the unit.
IMPORTANT SAFETY INSTRUCTIONS
All of the safety and operating instructions should be read, adhered to and followed
before the unit is operated.
SAVE THESE INSTRUCTIONS
Page 3

2 3
DANGER
To reduce the risk of electric shock, burns, fire or injury:
1. Do not use while bathing or in a shower.
2. Do not place or store unit where it can fall or be pulled into a tub or sink.
3. Do not place in, drop or submerge in water or other liquid.
4. Do not reach for unit that has fallen into water. Unplug it immediately.
5. Care should be taken so that objects do not fall and liquids are not spilled onto the
unit.
WARNING
1. Close supervision is necessary when this appliance/product is used near children or
mentally disabled individuals.
2. This drone is recommended for use by persons aged 14 and older.
3. Use this unit only for its intended use as described in this manual.
4. Never drop or insert an object into any opening.
5. Protect the charging cable from being walked on or pinched, particularly at plug
outlets, convenience receptacles and the point where it exits the unit.
6. Do not allow charging cable to touch hot surfaces. Wrap cord loosely around the
unit when storing. Unplug the charging cable during lightning storms
7. The unit should be situated away from direct sunlight or heat sources such as radiators,
electric heaters, heat registers, stoves, or other units (including amplifiers) that produce
heat. Avoid placing on top of stereo equipment that radiates heat.
8. Never block the air openings of the unit with materials such as clothing, plastic
bags or papers, or place it on a soft surface such as a bed or couch, where the air
openings may be blocked.
9. Do not carry this unit by the charging cable or use the cable as a handle.
10. Never operate this unit if it has a damaged cable, if it is not working properly, or if it
has been dropped or damaged, or dropped into water. If the unit’s charging cable or
plug is damaged, do not attempt to fix it yourself.
11. To avoid the risk of electric shock, do not disassemble or attempt to repair the unit.
Incorrect repair can cause risk of electric shock or injury to persons when unit is
used.
12. Do not operate in the presence of explosive and/or flammable fumes.
DRONE WARNINGS
1. The drone’s blades revolve at high speeds and can cause damage to the user,
spectators and animals. Stand away from the drone to reduce the risk of getting into
the flight path and always maintain visual contact with the drone while flying.
2. Warn spectators that you will be flying your drone so that they are aware of its
position.
3. Before flight, inspect the rotor blades to make certain that the blades are securely
fastened to the drone and check all components for damage. Do not use if there is
any damage that impacts flight characteristics.
4. Before flying check your local laws and regulations pertaining to drone usage,
particularly around airports.
5. Operating the drone in a wide-open space is recommended. The ideal space should
have a 200-foot (61 meter) radius, without buildings, crowds, or electrical power lines.
6. Do not fly near tall buildings, high voltage cables, or other places that produce signal
interference. Signal interruptions may result in accidents.
7. Parental guidance or adult supervision is required at all times.
8. If you are flying the drone with others, make sure all spectators are behind you and at
least 6 feet (2 meters) from the drone.
Page 4
4 5
9. For best performance, it is recommended that you operate the drone in no wind or
light wind conditions, as wind can greatly affect the performance of the aircraft.
10. Keep the drone in sight at all times during flight. If you lose sight of the drone at any
time, power down and cease flight immediately.
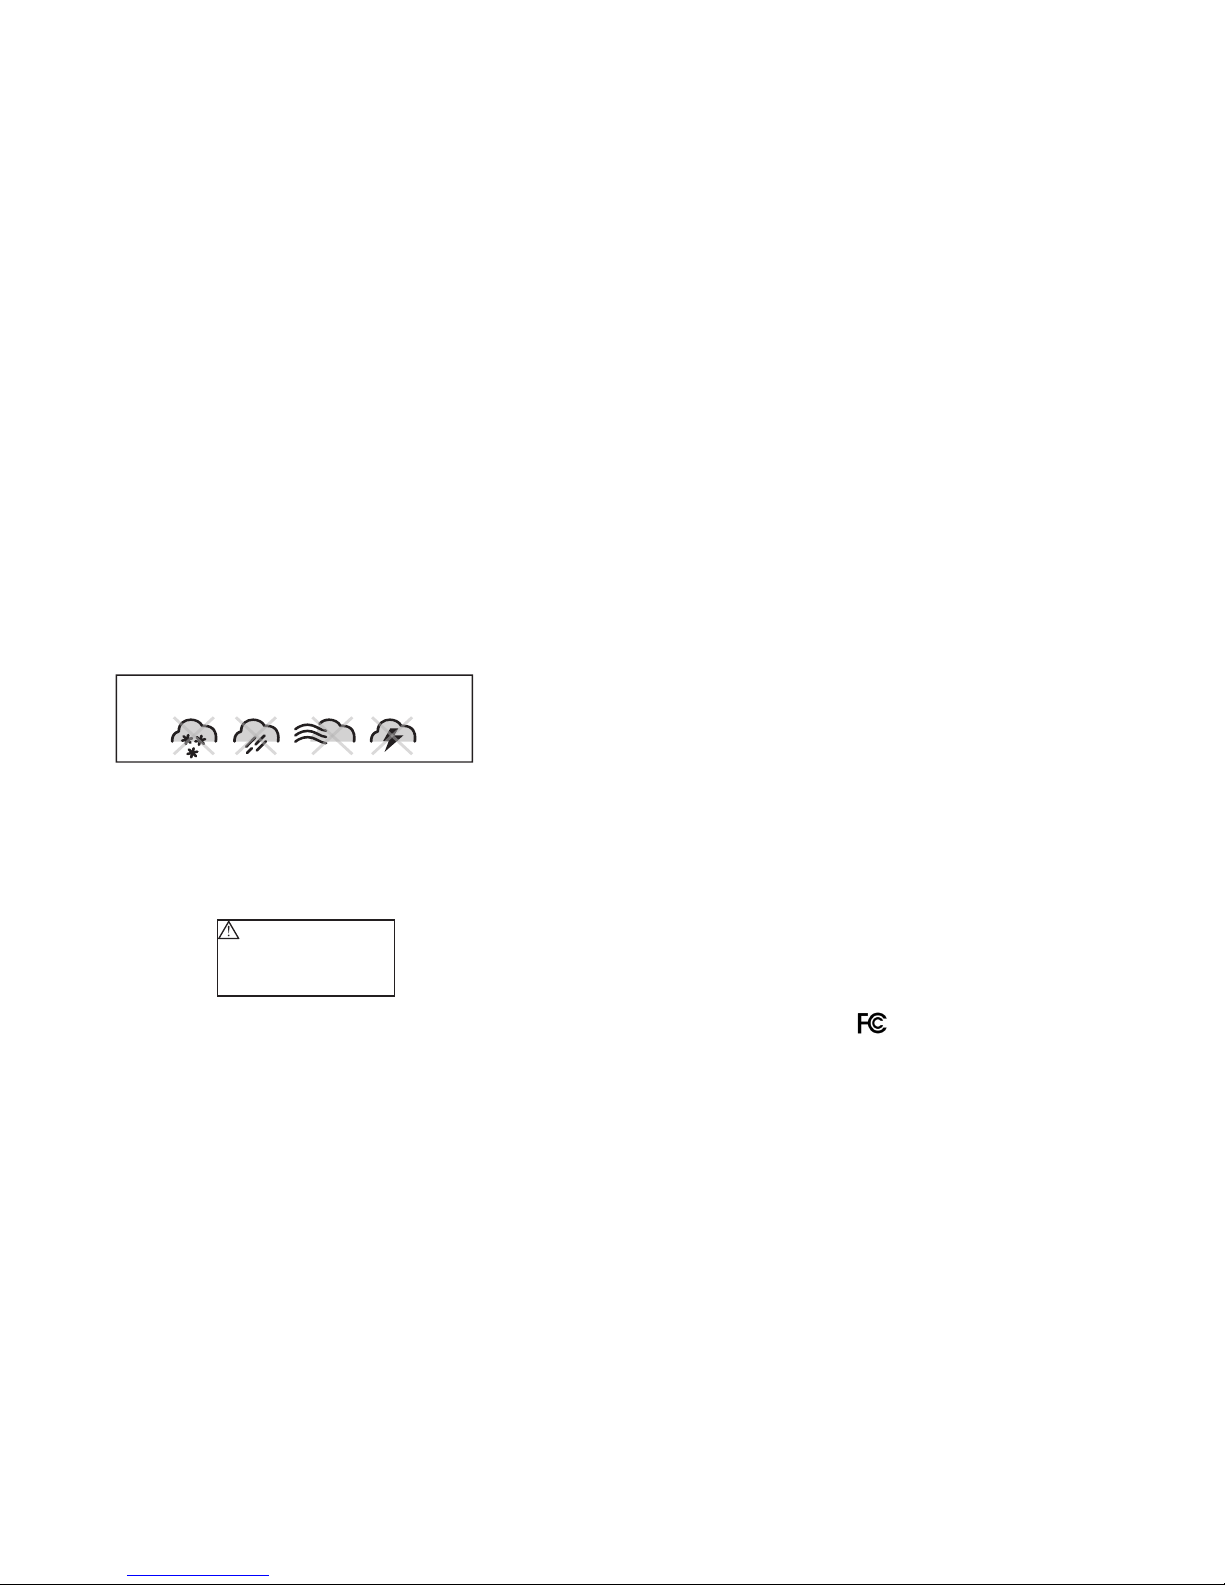
CAUTION: DO NOT ATTEMPT TO FLY THE DRONE IF THE RE IS RAIN, SNOW,
HEAVY WINDS, THUNDER OR LIGHTNING OUTDOORS. IT COULD DAMAGE YOUR
PRODUCT AND MAY CAUSE BODILY HARM.
WARNING!
• Choking/cutting hazard. Small parts/sharp rotor blades.
• Keep hands, hair and loose clothing away from the propeller when the power switch
is turned to the ON position.
• Not suitable for children under 14 years old. Parental supervision recommended.
FCC INFORMATION
Caution: Changes or modifications not expressly approved by the party responsible for
compliance could void the user's authority to operate the equipment.
This equipment has been tested and found to comply with the limits for a Class B Digital
Device, pursuant to Part 15 of the FCC Rules. These limits are designed to provide
reasonable protection against harmful interference in a residential installation. This
equipment generates, uses, and can radiate radio frequency energy and, if not installed
and used in accordance with the instructions, may cause harmful interference to radio
communications. However, there is no guarantee that interference will not occur in a
particular installation.
If this equipment does cause harmful interference to radio or television reception, which can
be determined by turning the equipment off and on, the user is encouraged to try to correct
the interference by one or more of the following measures:
• Reorient or relocate the receiving antenna.
• Increase the distance between the equipment and receiver.
• Connect the equipment to an outlet on a circuit different from that
to which the receiver is connected.
• Consult the dealer or an experienced radio/TV technician for help.
This equipment complies with part 15 of the FCC Rules. Operation is subject to the
following two conditions:
1. This equipment may not cause harmful interference.
2. This equipment must accept any interference received, including interference that may
cause undesired operation.
WARNING: To comply with FCC's RF radiation exposure limits for general population/
uncontrolled exposure, the antenna(s) used for this transmitter must be installed to
provide a separation distance of at least 20 cm from all persons and must not be
collocated or operating in conjunction with any other antenna or transmitter.
FCC ID: Z3CWECCAN-DRONE
DO NOT FLY THE DRONE IN FOUL WEATHER!
WARNING
WARNING!
CHOKING HAZARD - Small
parts. Not suitable for children
under 3 years.
Page 5

6
LI-PO BATTERY WARNING
This device contains a Lithium-Polymer battery. The battery must be recycled or disposed
of properly. Contact your local waste management office for information on battery
recycling or disposal.
Use only the supplied cable to recharge the battery. Improper charging may damage the
battery and the device.
Do not attempt to open the rechargeable battery or battery pack. There are no
serviceable parts inside.
Keep the battery out of reach of children. If swallowed, consult a physician immediately.
Do not hit, throw, or drop the battery on any hard surface.
Do not immerse the battery in water; keep in a dry, cool place.
Do not overcharge the battery. Charge for one hour or less. Monitor the charging process.
When storing the battery, store it with a partial charge. Do not store when fully charged or
depleted.
Do not expose the battery to high temperatures or dispose of battery in a fire as it may
explode. The battery may also explode if damaged.
BC
AA BATTERY PRECAUTIONS
Dispose of used batteries properly. Do not dispose of batteries in a fire.
Do not leave the batteries where a child or pet could play with or swallow them. If the
batteries are swallowed, contact a physician immediately.
The batteries may explode if mistreated. Do not attempt to recharge or disassemble the
batteries.
Use only fresh batteries of the required size and type. Do not mix old and new batteries,
different types of batteries, or rechargeable batteries of different capacities.
7
CHARGING THE BATTERY
Each drone uses a rechargeable Lithium-Polymer battery. Charge the batteries before
first use and when the battery is low, indicated by a flashing red LED on the controller.
To charge the batteries:
1. Ensure that the drones and the controllers are powered OFF.
2. On the bottom of each drone, press the Battery Release Latch away from the
Battery Brick to the unlocked position, then remove the Battery Brick. (See the
illustration on Page 8 for location of release lever and brick.)
3. Slide the Battery Brick into the charging unit. Ensure that the connector
is inserted properly, with the electronic connections matched.
4. Connect the USB connector to the USB port of an active device, such
as a computer or USB power adapter (not included). While charging,
the red LED in the charging unit will be on and the yellow LED will be flashing. A
full charge takes approximately 80 minutes.
5. When the battery is fully charged, the green LED will be solid. Disconnect the
cable, hold the Battery Release Latch in the unlocked position, and reinsert the
Battery Brick into the drone.
NOTE: Do not leave unattended while charging. Do not charge overnight.
INSERTING THE CONTROLLER BATTERIES
Each controller uses 4 AA batteries (included) which must be inserted
before first use. To insert the controller's batteries:
1. Use the included screwdriver to remove the battery cover on the
back of each controller.
2. Insert 4 AA batteries, following the polarity indicators.
3. Replace the battery cover.
1.5V AA
1.5V AA
1.5V AA
1.5V AA
1.5V AA
1.5V AA
1.5V AA
1.5V AA
Page 6

ON
OFF
8 9
DRONE PARTS CONTROLLER PARTS AND CONTROLS
Velocity
Press to set drone speed
Power Switch and
Indicator Light
Headless Mode
Press to enter
Headless Mode
Trim
Press to adjust
the trim
Shoot
Press to fire the IR laser
Right Control Stick
Pitch: Push forward/backward
Roll/Bank: Push left/right
Left Control Stick
Increase Throttle: Push forward
Decrease Throttle: Pull backward
Yaw/Spin: Push left or right
Rotors and Guards
Marked on underside with raised letters
A (front) and B (back)
Infrared (IR)
Laser
Landing Feet
Battery Brick
Battery Release
Latch
Battle Lights
Power Switch
Page 7

10
LINK THE DRONES WITH THE CONTROLLERS
Before flying, each drone and controller pair must be linked and the gyroscopes must be
allowed to calibrate.
NOTE: It is important to perform the drone/controller link one pair at a time. If
both drones are powered ON during the linking procedure they will both be linked to the
same remote and the second remote will be unable to link to either craft. If this occurs,
completely power OFF all of the equipment and perform the connection procedure again,
one pair at a time.
Begin with the drone and the controller powered OFF.
1. Ensure that the drone's battery has been fully charged and the controller's batteries
have been inserted (see Page 7).
2. Slide the drone's Power switch to the ON position. The LED lights will blink as the
craft searches for a signal from the controller.
3. Place the drone on a flat, level surface. This is necessary for the drone's gyroscopes
to properly align.
4. Power the controller ON. The light on the controller will blink
as it searches for the signal from the drone. A tone will sound
when the controller and the drone have linked with each other.
5. Push the Left Control Stick (throttle) fully forward, wait for a
tone, then pull the stick fully back and wait for a second tone.
When this last tone has sounded the drone is ready to fly.
11
FLYING THE DRONE
After the drones and controllers have been linked, you are ready to fly the drones.
NOTE: Review the warnings and tips on Pages 3, 4, and 12 before flying.
1. Use the Left Control Stick to take off and control the
throttle and yaw (spin) movement of the drone.
2. Use the Right Control Stick to control the pitch (forward/
backward) and Roll (left/right) movement of the drone.
3. When you are done flying, land the drone, then pull the
Left Control Stick (throttle) fully back and wait for the rotors to stop spinning.
4. Important: Power OFF the controller BEFORE powering OFF the drone. This will
ensure that no signals are accidentally sent by the controller, reducing the chance of
injury. After the controller is powered OFF, it is safe to pick up the drone and remove
the battery.
Flight range (distance between drone and controller) is up to 100 feet (30 meters).
SPEED SETTING
While the drone is on and not flying, press the Velocity
button to set the desired speed.
• Low: Provides smooth and predictable control of the
drone. One beep will confirm the setting.
• High: Highest setting for maximum performance.
Two beeps will confirm the setting.
ON
OFF
ON
OFF
ON
OFF
Page 8

1312
FLYING TIPS
• Fly in large, open spaces that are free of obstacles like power lines, trees, ceiling
fans, etc.
• When flying indoors, avoid walls and ceilings, as the drone will be drawn towards
them if closer than 2 to 3 feet (.6 to .9 meters).
• Stand behind the drone when first taking off, so that you and the drone are facing
the same "forward" direction. This will help with orientation when the drone is
airborne.
• Novice pilots should move the controls slowly and deliberately to get used to the
craft's flying characteristics. Try using one control at a time.
• Practice basic flight operations like take off, hovering, and landing.
• If you crash, power down the engines IMMEDIATELY to reduce the chance of
damage or injury.
• If anything obstructs the propellers for any reason, throttle own IMMEDIATELY and
safely clear the obstruction. Check for possible damage before flying again.
• Flying over bodies of water or at night is not recommended.
• Never try to retrieve the drone from areas you cannot safely reach, such as rooftops
or trees.
• Never launch the drone from your hand.
• Never leave the drone unattended while it is powered on or while the battery is
charging.
• REMINDE R: Pilots are responsible for any damage caused by improper use.
HEADLESS MODE
While you are becoming familiar with operating your drone, it can be useful to operate in
Headless Mode. In Headless Mode, pushing forward on the right control stick will move
the drone in a forward direction, away from you. Pull back on the right control stick and
the drone will come back toward you, no matter the direction of the front and back of the
drone, as long as you remain stationary.
To enter Headless Mode, after pairing your drone position yourself with the drone in front
of you (this will be the forward direction) and press the Headless Mode button on the
controller. While in Headless Mode, the controller will sound a tone slowly and the front
light of the drone will flash.
To exit Headless Mode, press the Headless Mode button again. You will hear a tone from
the controller and the front light of the drone will again be solid.
Page 9

BATTLE!
To engage in a battle between drones, the drones must be between 3 and 6 feet (1
to 2 meters) apart. Press the Shoot button to shoot the infrared light "canon" at your
opponent. After the fifth hit, your opponent's drone is slowly auto-landed.
Drones will not enter battle mode if the battery is low, indicated by a flashing red LED on
the controller.
14 15
ARMED
SAFE
FLIP
Press the Shoot button to shoot the IR
laser at your opponent.
3 to 6 feet (1 to 2 meters) apart.
Each hit produces the following responses:
• 1st hit: When the drone gets hit for the first time, the controller vibrates one time,
the first LED battle light turns off, and the drone sways left and right.
• 2nd hit: When the drone gets hit for the second time, the controller vibrates two
times, the second LED battle light turns off, and the drone sways left and right.
• 3rd hit: When the drone gets hit for the third time, the controller vibrates two times,
the third LED battle light turns off, and the drone sways left and right.
• 4th hit: When the drone gets hit for the fourth time, the controller vibrates two times,
the fourth LED battle light turns off, and the drone sways left and right.
• 5th hit: When the drone gets hit for the fifth time, the controller vibrates for about
two seconds, the last LED battle light turns off, the drone sways left and right and
then will auto-land on the ground.
ON
OFF
Page 10

16 17
GYROSCOPE RECALIBRATION
Each drone includes a 6-axis gyroscope. If the drone is experiencing difficulty flying or is
behaving erratically, the gyroscopes may need to be recalibrated. Do not attempt to do
this while flying. Safely land the drone before attempting this procedure.
Pull the left control stick to the lowest left position, and pull the right control stick to the
lowest right position, as illustrated below. Hold for 2 to 3 seconds and wait for a tone
from the controller. When the LED lights on the drone start blinking, release the control
sticks. When the LED lights turn solid, the gyroscopes are recalibrated and the craft is
ready to fly.
ON
OFF
TRIM ADJUSTMENT
Even after the drone is calibrated, it may show a tendency to drift while airborne.
Adjusting the trim will help counter this effect and allow for better control of the drone.
To enter trim mode, press the Trim button. You will hear a short tone and the LED will
flash red.
Use the Right Control Stick to correct the drift of the drone, pushing it right, left, forward
or backward to correct the drift. Each push will sound a short tone; the LED continues to
flash red. When you hear a long tone, the trim is complete in the selected direction.
To exit trim mode, press the Trim button again. You will hear a short tone and the LED will
turn solid red, indicating that you have exited trim mode. (Alternatively, you will exit trim
mode automatically if there is no operation for two to three seconds.)
Adjusting the trim will help with drift but it will not entirely eliminate it. Turbulence and
other factors may still influence the drone's flight characteristics.
Craft drifts left
Craft drifts right
Craft drifts backwardCraft drifts forward
In trim mode, push the Right Control
Stick to the right.
In trim mode, push the Right Control Stick
to the left.
In trim mode, push the
Right Control Stick
forward.
In trim mode, pull the
Right Control Stick
backward.
Page 11

18 19
CARE AND MAINTENANCE
• Clean with a soft, damp cloth.
• Do not use harsh cleaning agents.
• Check components regularly, such as the rotor blades, chassis, motors. If any
component is damaged or worn, do not use the drone until the component has been
repaired or replaced.
• Remove the controller's batteries before storing.
• Store in a cool, dry location. Do not store in high temperatures or near a heat
source.
SPECIFICATIONS
Drone Size ..................................................................Approx. 6.2 x 6.2 x 2.26 in. (15.8 x 15.8 x 6.5 cm)
Drone Weight .................................................................................................................................Approx. 4.8 oz (135 g)
Controller Batteries ....................................................................................................................4 AA (each controller)
Operating Time .................................................................................................................................................... Up to 5 mins
Drone Battery .................................................................................................................................................Lithium-Polymer
Drone Battery Charge Time .................................................................................................. Approx. 70 - 75 mins.
Infrared "laser" distance................................................................................................Up to 9.8 ft (2.98 meters)
Control Distance .......................................................................................................................Up to 98 ft (30 meters)
ROTOR REPLACEMENT
Each drone comes with four replacement
rotors, two A-type and 2 B-type. It
is extremely important to use the
correct rotor for replacement. Using
the incorrect rotor will make the craft
impossible to control.
The marking can be found on the rotor.
Matching rotors are diagonally opposed.
To remove the old rotor, insert the 'v'
end of the included installation wrench
under the rotor and around the plastic
shaft. Hold the drone steadily, then
gently pry the rotor upward until fully
disconnected. Insert the replacement
rotor, ensuring that it is pushed down
completely.
For additional spare parts, contact
Brookstone Customer Service at 800292-9819.
ROTOR B
ROTOR A
FRONT
ROTOR B
ROTOR A
Page 12

ONE (1) YEAR LIMITED WARRANTY
Brookstone® warrants this product against defects in materials and/or workmanship
under normal use for a period of ONE (1) YEAR from the date of purchase by the
original purchaser (“Warranty Period”). If a defect arises and a valid claim is received
within the Warranty Period, at its option, Brookstone will either 1) repair the defect
at no charge, using new or refurbished replacement parts, or 2) replace the product
with a new product that is at least functionally equivalent to the original product, or
3) if the product was purchased through Brookstone, provide Brookstone
store credit in the amount of the purchase price of the original product.
A replacement product or part, including a user-installable part installed in accordance
with instructions provided by Brookstone, assumes the remaining warranty of the
original product. When a product or part is exchanged, any replacement item becomes
your property and the replaced item becomes Brookstone’s property. When a store
credit is given, the original product must be returned to Brookstone and becomes
Brookstone’s property.
Obtaining Service: To obtain warranty service, call Brookstone Limited Warranty Service
at 1-800-292-9819. Please be prepared to describe the product that needs service
and the nature of the problem. A purchase receipt is required. All repairs and
replacements must be authorized in advance. Service options, parts availability and
response times will vary. You are responsible for delivery and the cost of delivery of
the product or any parts to the authorized service center for replacement, per our
instructions.
Limits and Exclusions: Coverage under this Limited Warranty is limited to the United
States of America, including the District of Columbia and the U.S. Territories of
Guam, Puerto Rico, and the U.S. Virgin Islands. This Limited Warranty applies only
to products manufactured for Brookstone that can be identified by the “Brookstone”
trademark, trade name, or logo affixed to them or their packaging. The Limited
20
Warranty does not apply to any non-Brookstone products. Manufacturers or
suppliers other than Brookstone may provide their own warranties to the purchaser,
but Brookstone, in so far as permitted by law, provides these products “as is.”
This warranty does not apply to: a) damage caused by failure to follow instructions
relating to product’s use or the installation of components; b) damage caused by
accident, abuse, misuse, fire, floods, earthquake or other external causes; c) damage
caused by service performed by anyone who is not a representative of Brookstone;
d) accessories used in conjunction with a covered product; e) a product or part
that has been modified to alter functionality or capability; f) items intended to be
periodically replaced by the purchaser during the normal life of the product including,
without limitation, batteries or light bulbs; g) any product sold “as is” including, without
limitation, floor demonstration models and refurbished items; or h) a product that is
used commercially or for a commercial purpose.
BROO KSTON E SHALL NOT BE LIABLE FOR I NCIDE NTAL OR C ONSEQU ENTIAL
DAMAGES RESULTING FROM THE USE OF THIS PRODUCT, OR ARISING
OUT OF ANY BR EACH OF THIS WARRANTY. TO THE EXTENT PERMITTED BY
APPLICABLE LAW, BROOKSTONE DISCLAIMS ANY AND ALL STATUTORY OR
IMPLIED WARRANTIES, INCLUDING, WITHOUT LIMITATION, WARRANTIES
OF MERCHANTABILITY, FITNESS FOR A PARTICULAR PU RPOSE AND
WARRANTIES AGAINST HIDDEN OR LATENT DEFECTS. IF BROOKSTONE
CANNOT LAWFULLY DISCLAIM STATUTORY OR IMPLIED WARRANTI ES, THEN
TO THE EXTENT PERMITTED BY LAW, ALL SUCH WARRANTIES SHALL BE
LIMITE D IN DURATION TO THE DURATION OF THIS EXPRESS WARRANTY.
Some states disallow the exclusion or limitation of incidental or consequential damages
or how long an implied warranty lasts, so the above exclusions or limitations may not
apply to you. This warranty gives you specific legal rights and you may also have other
rights, which vary from state to state.
21
Page 13

Find thousands more
great ideas online
Brookstone.com | 1-800-846-3000
1 Innovation Way, Merrimack, NH 03054
324185
Rev 3
© Brookstone 2017
 Loading...