

DOCUMENT ID 992547
Page 1 of 2
BMW S 1000 RR (10-12) 5” Window Link Set (#240733) Installation Instructions
Please read thoroughly before beginning installation. A factory service manual should be consulted for any
information not provided here.
1. Place bike on a lift or swing arm stand to securely support it.
The bike
must be supported securely to prevent it from falling over and causing
injury or damage.
See Figure 1.
2. Remove the muffler and catalytic converter, if equipped. Some
aftermarket exhausts may need to be removed to allow clearance to
place a jack under the frame.
3. Remove the nut retaining the linkage to the pivot lever. See Figure 2.
4. Place a jack under the frame behind the engine with a block of wood to
protect the frame. Raise the jack until the linkage bolt is free and can be
removed by hand. See Figures 1 & 3.
5. Remove front bolt retaining the link to the frame and remove the stock
link. See Figure 3.
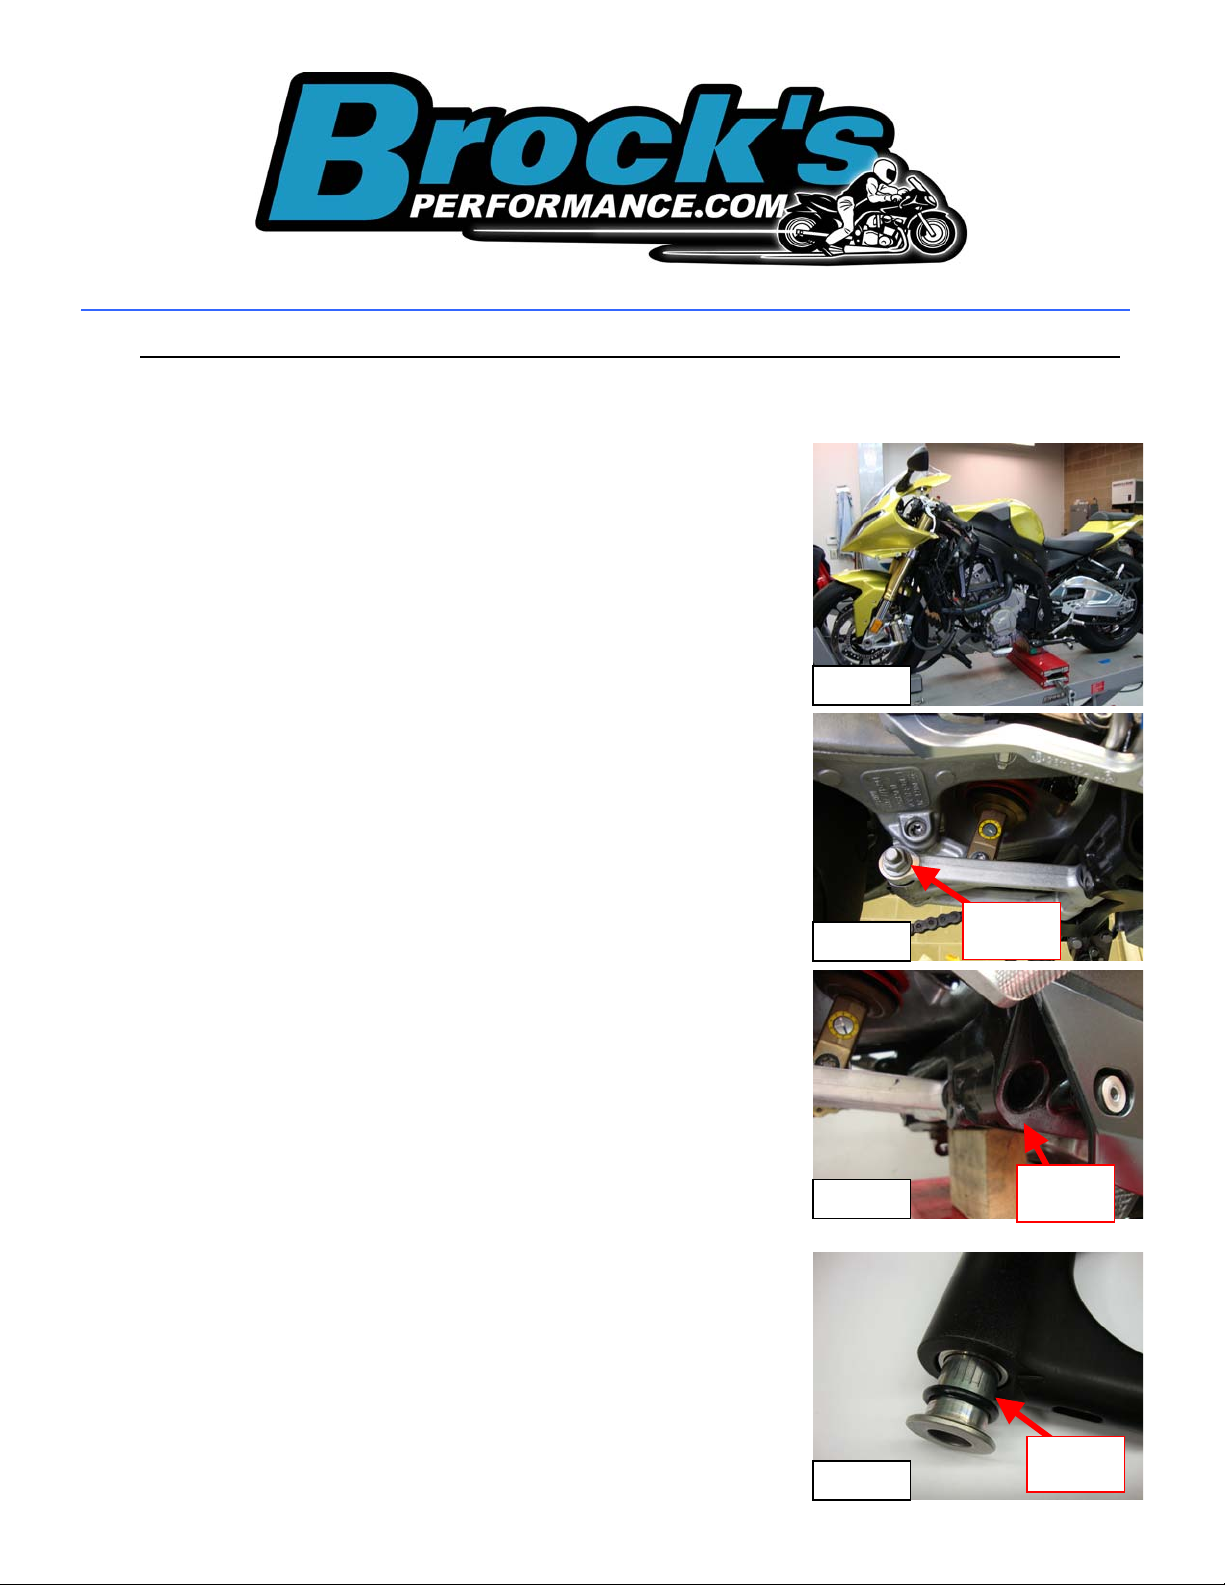
6. Remove the two (2) inner bearing races from the stock link. Apply grease
(Multi-Purpose Lithium grease will work well) to the supplied o-rings and
install the o-rings, one (1) onto each of the bearing races. Apply grease
to each bearing race and slide them into each side of the Brock’s
Performance billet link end. See Figure 4.
Brock’s Performance Products • 4064 E. Patterson Road • Dayton, OH 45430 • Phone: 937-912-0054 • Fax: 937-912-0062
Figure 1
Figure 2
Figure 3
Figure 4
Apply
Grease
Bolt in
Frame
Remove
Nut

DOCUMENT ID 992547
Page 2 of 2
7. Install the billet link end into the frame with the stock bolt and torque to
73.5 lb-ft (100 Nm).
8. Adjust the length of the links to align the link ends with the bearing race
in the pivot lever. The bolt should easily slide through link ends and pivot.
See Figure 5.
9. Install the stock bolt and supplied spacers, install the nut and torque to
73.5 lb-ft (100 Nm). See Figure 6.
10. Remove jack from under bike.
11. Adjust links to desired ride height. Laser etched “L” /Arrow shows direction to turn wrench to lower bike.
Remember L = LOWER.
(Links adjust LONGER to make the bike LOWER. Opposite direction to raise the bike.)
Check the threads in the windows, if threads are NOT showing in all
adjustment windows, then DO NOT
OPERATE the bike! Contact Advice@BrocksPerformance.com, or call our technical support line for additional
information and/or optional adjustment rod lengths.
12. Measure links to confirm that each side is adjusted to the same length. Once the lengths are confirmed, you can
count the same number of flats on the adjustment rods on each link to adjust ride height.
13. Tighten lock nuts on links. Also note:
The L/Arrow also shows the direction to LOOSEN the lock nuts. After ride
height adjustment, snug each lock nut (in the opposite direction of the L/Arrow) to prevent movement during
operation of the bike. DO NOT OPERATE the motorcycle with the lock nuts loose! A drop of Loctite®
Threadlocker Blue should be used on all threads as an added safety measure.
14. Replace the exhaust and any other components removed to install the window links.
WARNING: Chassis adjustments can alter the handling characteristics of any machine, and a
lowered vehicle is more likely to experience obstacle and/or cornering clearance contact
problems, especially with the addition of a passenger.
Brock’s Performance Products are designed for Closed-Course Racetrack use ONLY!
For more information, go to www.BrocksPerformance.com; click: Installation Instructions.
If you have questions, you can e-mail us at advice@brocksperformance.com
, or call the office at 937-912-0054.
For Brock’s Performance Products policies and warranty information, go to www.BrocksPerformance.com
; click: Policies.
Figure 6
Spacers
Adjust
Figure 5
Align
 Loading...