

Brinno BCC100 User Manual
TimeLapse
Construction Camera - BCC100
Construction Camera
Quick Guide
w w w . b r i n n o . c o m

CONSTRUCTION CAMERA - BCC100
)(p
1
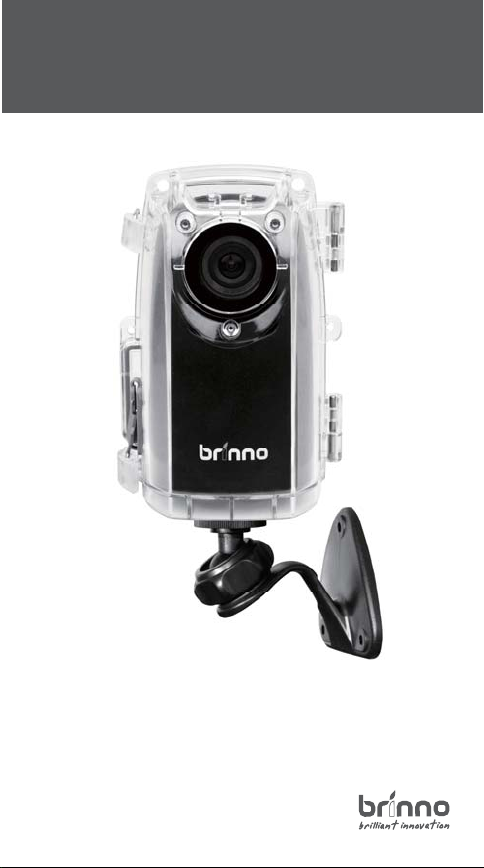
TimeLapse Camera
(TLC200 f1.2)
2 3 4
Weather Resistant
Housing
(ATH110)
Camera Wall
Mount
(AWM100)
BCC100 - Installation
STEP 2.
Insert an SD Card and
switch on the Time Lapse
Camera power.
Keep the inside of the Weather Resistant Housing dry before inserting
the Time Lapse Camera.
Please make sure the Time Lapse Camera lens is positioned
STEP 3.
correctly to t into the transparent lens (Housing).
Close the Weather Resistant Housing door and latch the
buckles (Top and bottom).
Insert the Time Lapse Camera into the
Weather Resistant Housing, conrming
the waterproof seal is aligned correctly.
Camera Lens
Housing Lens
CORRECT FITTING
Rubber Strap
Seal
 Loading...