

Page 1
Manual No. 207489GS Revision B (07/23/2008)
BRIGGS & STRATTON POWER PRODUCTS GROUP, LLC
JEFFERSON, WISCONSIN, U.S.A.
Pressure Washer
Operator’s Manual
This pressure washer is rated in accordance to the Pressure Washer Manufacture Association
(PWMA) standard PW101 (Testing and Rating Performance of Pressure Washers).
Page 2

2 BRIGGSandSTRATTON.COM
Briggs & Stratton Power Products Group, LLC
900 North Parkway
Jefferson, WI 53549
Copyright © 2008 Briggs & Stratton Power Products Group,
LLC. All rights reserved. No part of this material may be
reproduced or transmitted in any form by any means without
the express written permission of Briggs & Stratton Power
Products Group, LLC.
Thank you for purchasing this quality-built Briggs & Stratton pressure washer. We are pleased that you’ve placed your
confidence in the Briggs & Stratton brand. When operated and maintained according to the instructions in this manual, your
Briggs & Stratton pressure washer will provide many years of dependable service.
This manual contains safety information to make you aware of the hazards and risks associated with pressure washers and
how to avoid them. Because Briggs & Stratton does not necessarily know all the applications this pressure washer could be
used for, it is important that you read and understand these instructions thoroughly before attempting to start or operate this
equipment. Save these instructions for future reference.
This pressure washer requires final assembly before use. Refer to the Assembly section of this manual for instructions on
final assembly procedures. Follow the instructions completely.
Where to Find Us
You never have to look far to find Briggs & Stratton support and service for your pressure washer. There are thousands of
Briggs & Stratton authorized service dealers worldwide who provide quality service. You can also find the nearest Authorized
Service Dealer in our dealer locator map on the Internet at BRIGGSandSTRATTON.COM.
Pressure Washer
Model Number
Revision
Serial Number
Engine
Model Number
Type Number
Code Number
Date Purchased
Page 3
Table of Contents
Operator Safety . . . . . . . . . . . . . . . . . . . . . . . . . . . . . . . . . 4
Equipment Description. . . . . . . . . . . . . . . . . . . . . . . . . . . . . . . . . . . . . . . . . 4
Safety Rules. . . . . . . . . . . . . . . . . . . . . . . . . . . . . . . . . . . . . . . . . . . . . . . . . 4
Assembly . . . . . . . . . . . . . . . . . . . . . . . . . . . . . . . . . . . . . 8
Unpack Pressure Washer. . . . . . . . . . . . . . . . . . . . . . . . . . . . . . . . . . . . . . . 8
Attach Handle. . . . . . . . . . . . . . . . . . . . . . . . . . . . . . . . . . . . . . . . . . . . . . . . 8
Install Wheel Kit. . . . . . . . . . . . . . . . . . . . . . . . . . . . . . . . . . . . . . . . . . . . . . 8
Add Engine Oil . . . . . . . . . . . . . . . . . . . . . . . . . . . . . . . . . . . . . . . . . . . . . . . 9
Add Fuel. . . . . . . . . . . . . . . . . . . . . . . . . . . . . . . . . . . . . . . . . . . . . . . . . . . . 9
Connect Hose and Water Supply to Pump. . . . . . . . . . . . . . . . . . . . . . . . . 10
Features and Controls . . . . . . . . . . . . . . . . . . . . . . . . . . . . 11
Operation . . . . . . . . . . . . . . . . . . . . . . . . . . . . . . . . . . . . 12
Pressure Washer Location. . . . . . . . . . . . . . . . . . . . . . . . . . . . . . . . . . . . . 12
How to Start Your Pressure Washer . . . . . . . . . . . . . . . . . . . . . . . . . . . . . 12
How to Stop Your Pressure Washer . . . . . . . . . . . . . . . . . . . . . . . . . . . . . 13
How to Use the Adjustable Nozzle . . . . . . . . . . . . . . . . . . . . . . . . . . . . . . . 14
Applying Detergent . . . . . . . . . . . . . . . . . . . . . . . . . . . . . . . . . . . . . . . . . . 14
Pressure Washer Rinsing . . . . . . . . . . . . . . . . . . . . . . . . . . . . . . . . . . . . . 15
Cleaning Detergent Siphoning Tube. . . . . . . . . . . . . . . . . . . . . . . . . . . . . . 15
Automatic Cool Down System (Thermal Relief). . . . . . . . . . . . . . . . . . . . . 15
Maintenance . . . . . . . . . . . . . . . . . . . . . . . . . . . . . . . . . . 16
Maintenance Schedule. . . . . . . . . . . . . . . . . . . . . . . . . . . . . . . . . . . . . . . . 16
Pressure Washer Maintenance . . . . . . . . . . . . . . . . . . . . . . . . . . . . . . . . . 16
Engine Maintenance. . . . . . . . . . . . . . . . . . . . . . . . . . . . . . . . . . . . . . . . . . 18
After Each Use . . . . . . . . . . . . . . . . . . . . . . . . . . . . . . . . . . . . . . . . . . . . . . 20
Winter Storage. . . . . . . . . . . . . . . . . . . . . . . . . . . . . . . . . . . . . . . . . . . . . . 21
Long Term Storage . . . . . . . . . . . . . . . . . . . . . . . . . . . . . . . . . . . . . . . . . . 21
Troubleshooting . . . . . . . . . . . . . . . . . . . . . . . . . . . . . . . . 22
Warranties. . . . . . . . . . . . . . . . . . . . . . . . . . . . . . . . . . . . 23
Emissions Control System Warranty . . . . . . . . . . . . . . . . . . . . . . . . . . . . . 23
Pressure Washer Owner Warranty. . . . . . . . . . . . . . . . . . . . . . . . . . . . . . . 25
Specifications . . . . . . . . . . . . . . . . . . . . . . . . . . . . . . . . . 26
Product Specifications. . . . . . . . . . . . . . . . . . . . . . . . . . . . . . . . . . . . . . . . 26
Common Service Parts . . . . . . . . . . . . . . . . . . . . . . . . . . . . . . . . . . . . . . . 26
3
Page 4
4 BRIGGSandSTRATTON.COM
Operator Safety
Equipment Description
Read this manual carefully and become familiar
with your pressure washer. Know its applications,
its limitations, and any hazards involved.
This pressure washer operates at 2,000 PSI (137.9 BARS) at
a flow rate of 1.9 gallons (7.2 l) per minute. This high quality
residential system features 7” (17.8 cm) wheels, axial cam
pump with stainless steel pistons, automatic cool down
system, detergent siphoning system, adjustable spray nozzle,
safety goggles, heavy duty 30’ (9.1 m) hose, and more.
Every effort has been made to ensure that information in this
manual is accurate and current. However, we reserve the
right to change, alter, or otherwise improve the product and
this document at any time without prior notice.
The Emission Control System for this pressure washer is
warranted for standards set by the Environmental Protection
Agency and the California Air Resources Board.
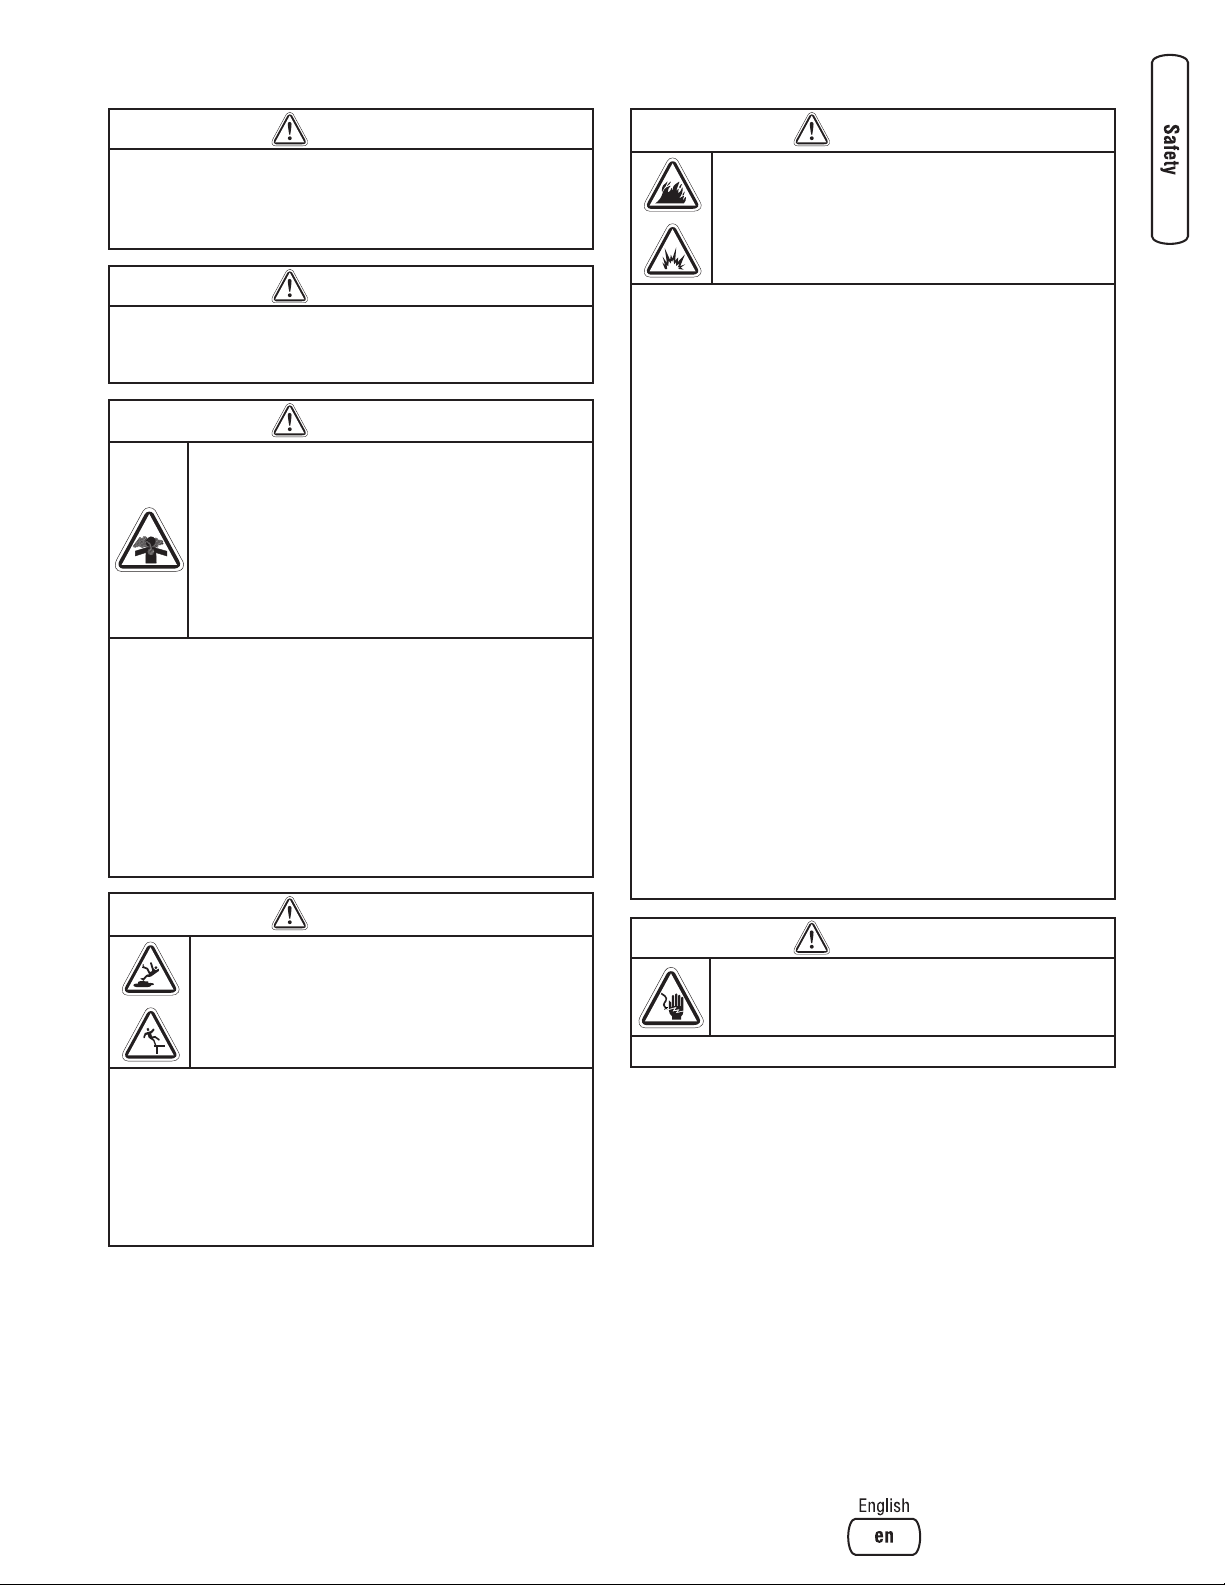
Safety Rules
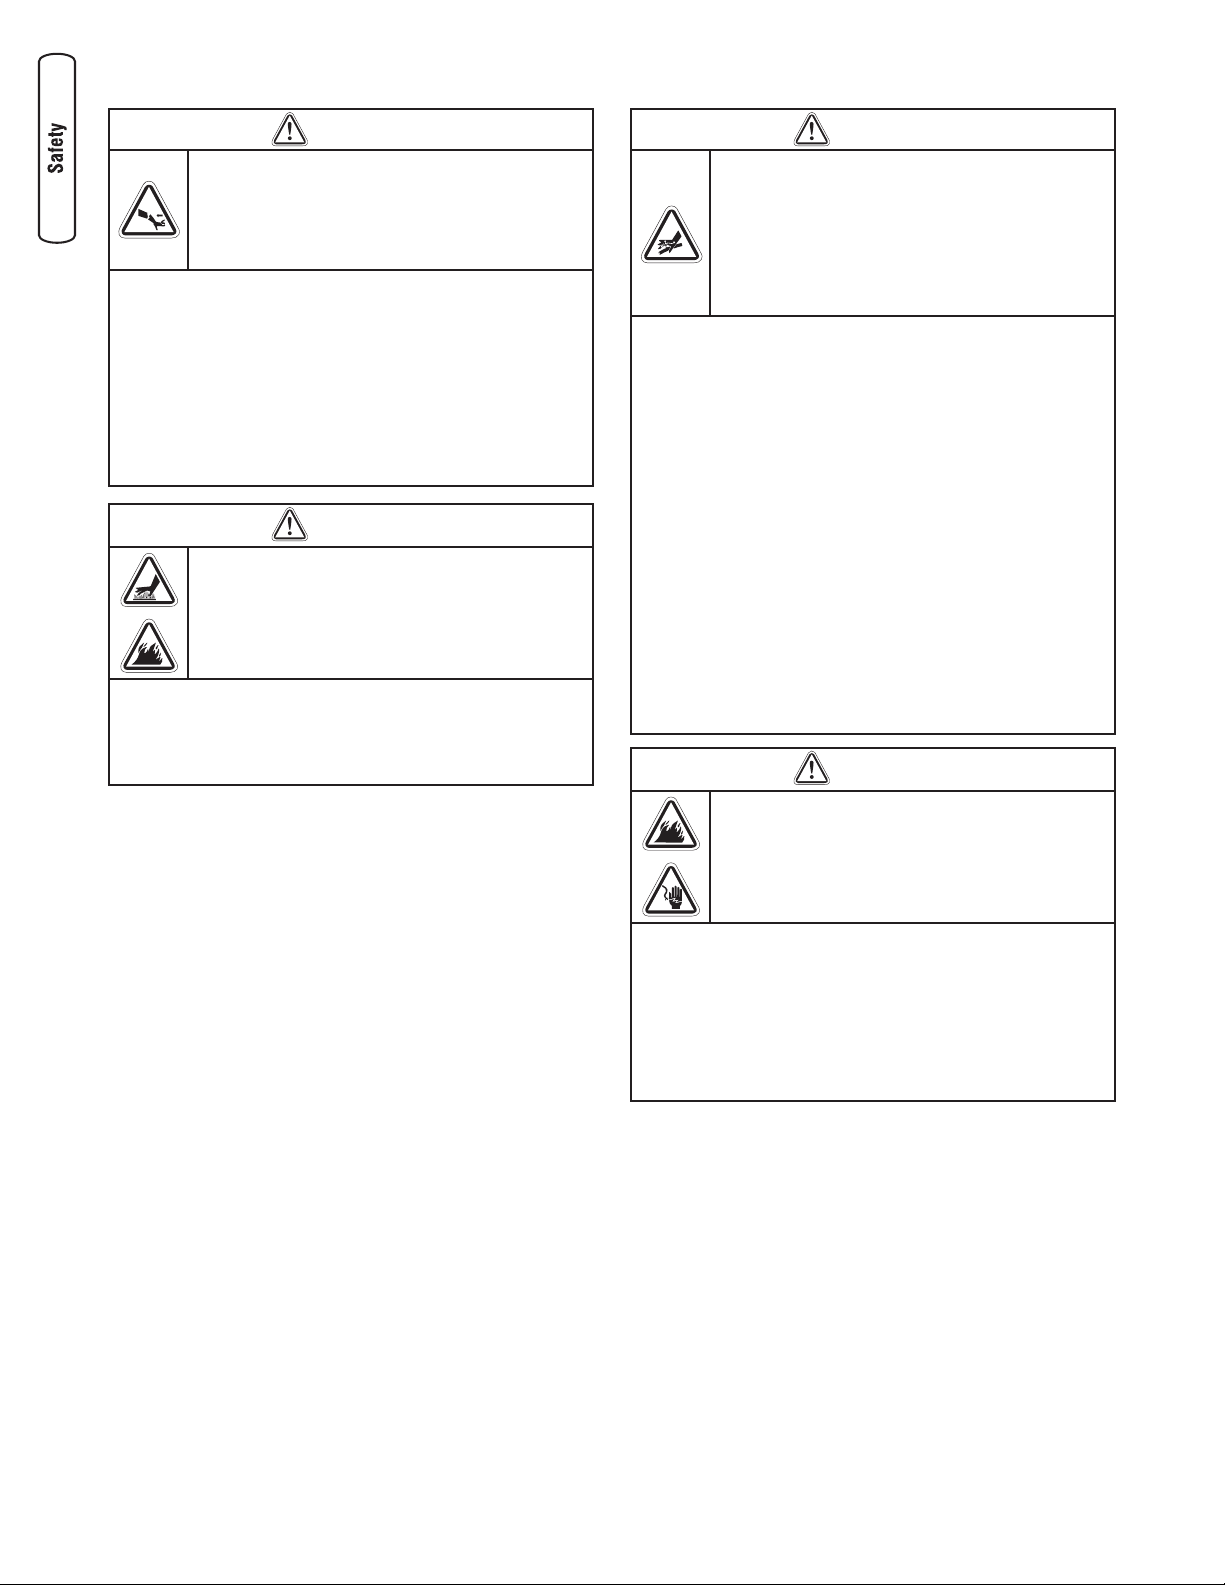
This is the safety alert symbol. It is used to alert
you to potential personal injury hazards. Obey all
safety messages that follow this symbol to avoid
possible injury or death.
The safety alert symbol ( ) is used with a signal word
(DANGER, CAUTION, WARNING), a pictorial and/or a safety
message to alert you to hazards. DANGER indicates a hazard
which, if not avoided, will result in death or serious injury.
WARNING indicates a hazard which, if not avoided, could
result in death or serious injury. CAUTION indicates a hazard
which, if not avoided, might result in minor or moderate
injury. NOTICE indicates a situation that could result in
equipment damage. Follow safety messages to avoid or
reduce the risk of injury or death.
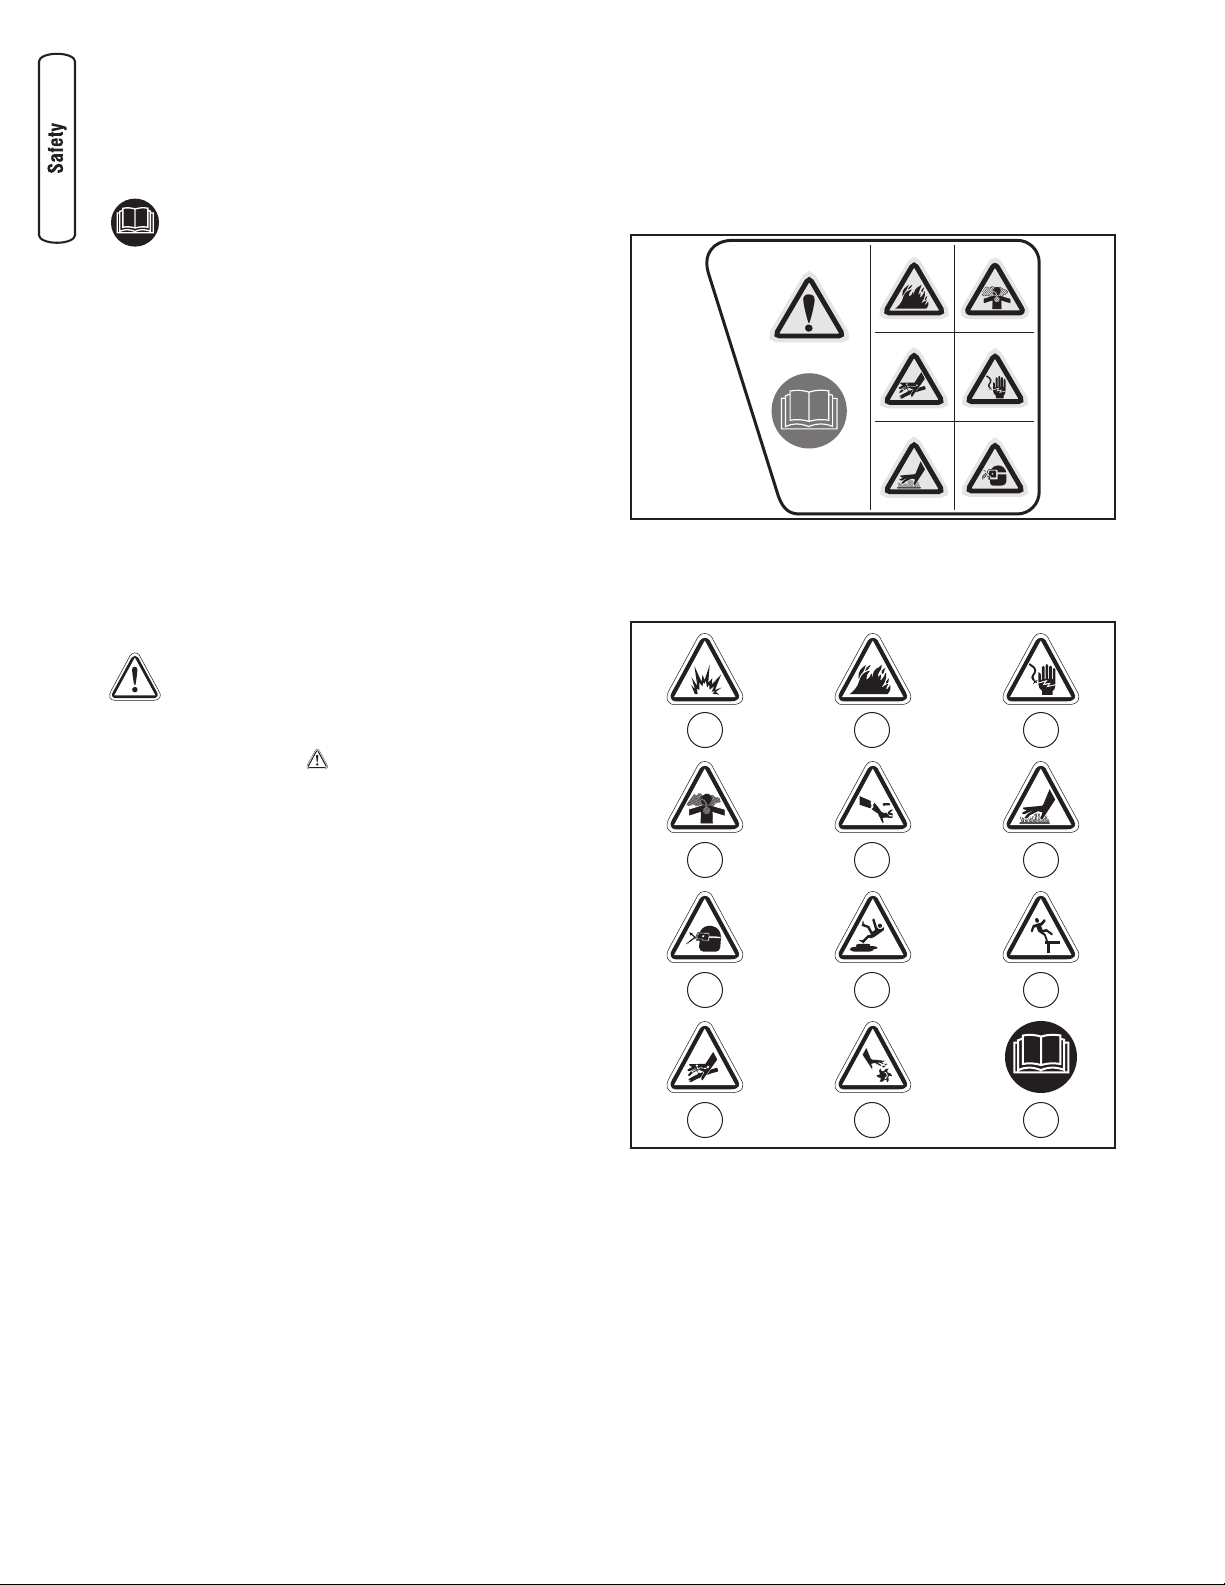
Warning Tag
A warning tag is provided on your unit to inform you of
potential safety hazards. If the tag becomes damaged or
illegible, replace it by contacting your local Briggs & Stratton
dealer to obtain a new one.
The icons on the warning tag are shown and described in
detail later in the next section.
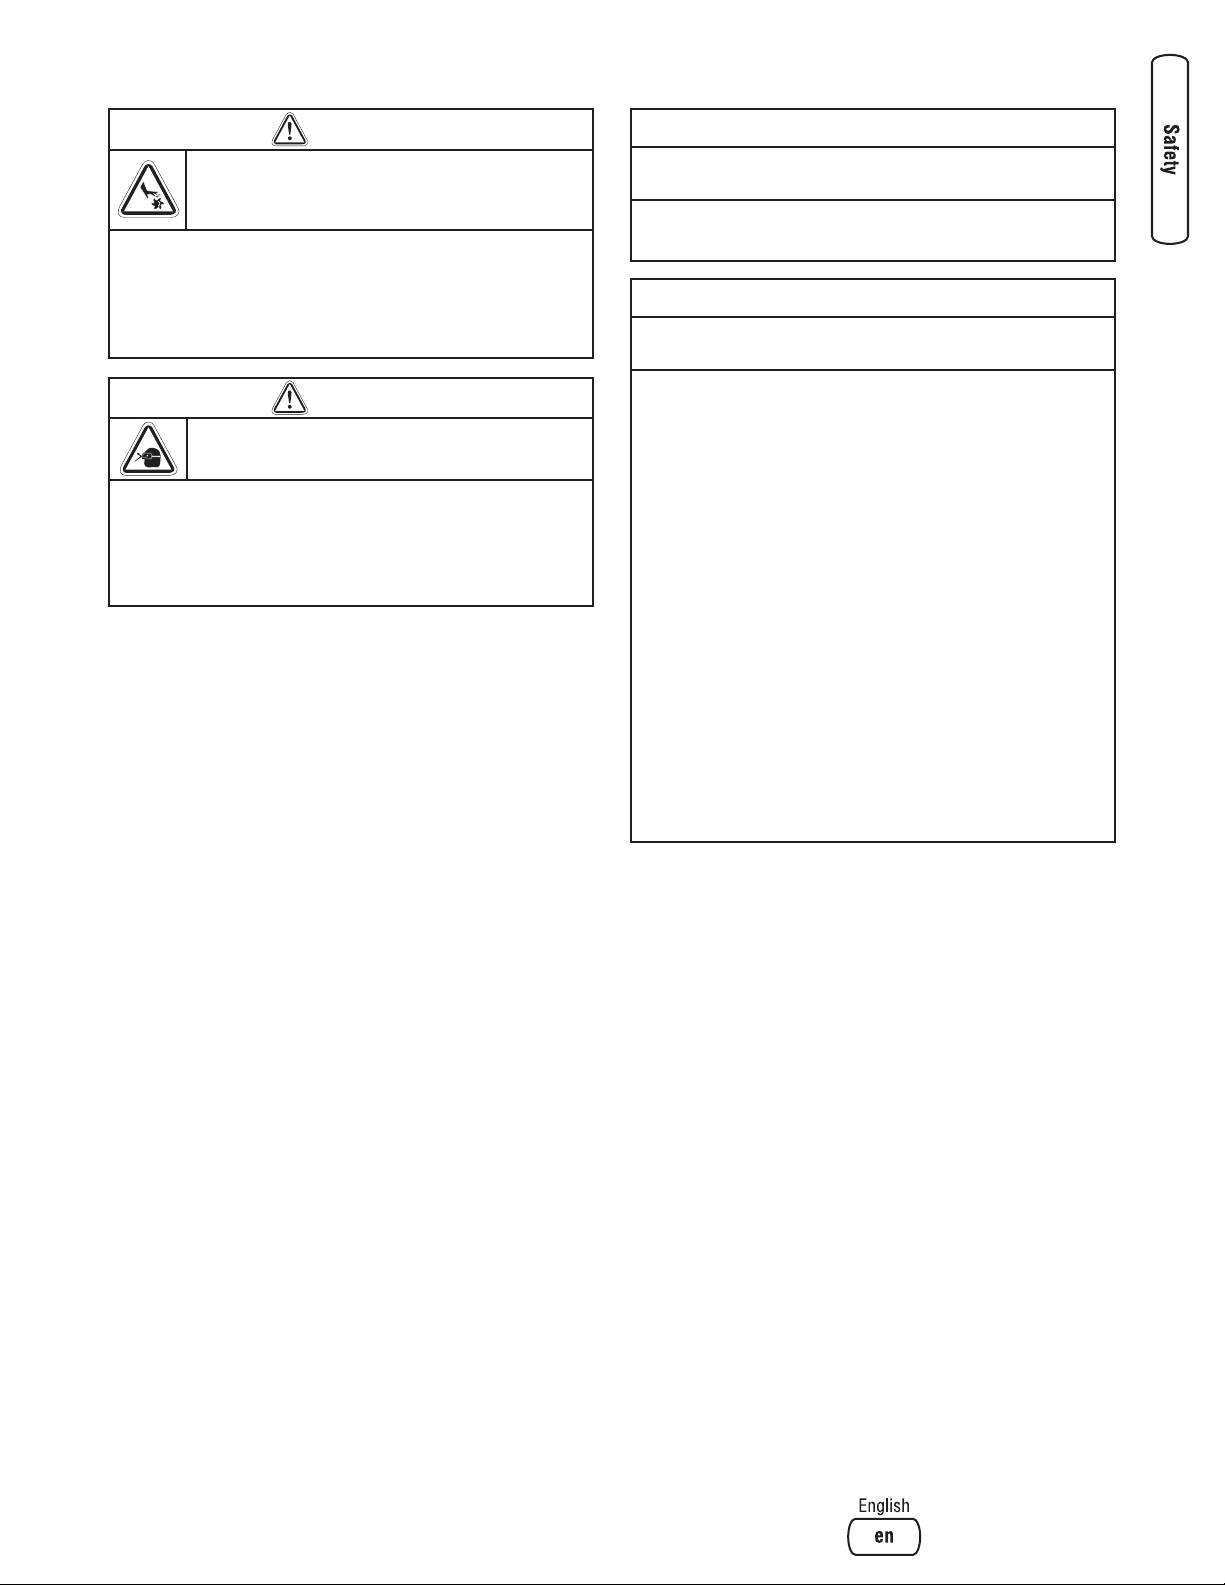
Hazard Symbols and Meanings
A - Explosion G - Flying Objects
B - Fire H - Slippery Surface
C - Electric Shock J - Fall
D - Toxic Fumes K - Fluid Injection
E - Kickback L - Moving Parts
F - Hot Surface M - Read Manual
A B C
D E
G H
F
J
K L M
Page 5
5
WARNING
The engine exhaust from this product contains chemicals
known to the State of California to cause cancer, birth
defects, or other reproductive harm.
WARNING
Risk of electrocution.
Contact with power source can cause electric
shock or burn.
• NEVER spray near power source.
WARNING
Use of pressure washer can create puddles and
slippery surfaces.
Kickback from spray gun can cause you to fall.
• Operate pressure washer from a stable surface.
• The cleaning area should have adequate slopes and drainage to
reduce the possibility of a fall due to slippery surfaces.
• Be extremely careful if you must use the pressure washer from
a ladder, scaffolding, or any other similar location.
• Firmly grasp spray gun with both hands when using high
pressure spray to avoid injury when spray gun kicks back.
WARNING
Fuel and its vapors are extremely flammable and
explosive.
Fire or explosion can cause severe burns or
death.
WHEN ADDING OR DRAINING FUEL
• Turn pressure washer OFF and let it cool at least 2 minutes
before removing fuel cap. Loosen cap slowly to relieve pressure
in tank.
• Fill or drain fuel tank outdoors.
• DO NOT overfill tank. Allow space for fuel expansion.
• If fuel spills, wait until it evaporates before starting engine.
• Keep fuel away from sparks, open flames, pilot lights, heat, and
other ignition sources.
• DO NOT light a cigarette or smoke.
WHEN STARTING EQUIPMENT
• Ensure spark plug, muffler, fuel cap, and air cleaner are in place.
• DO NOT crank engine with spark plug removed.
WHEN OPERATING EQUIPMENT
• DO NOT tip engine or equipment at angle which causes fuel to
spill.
• DO NOT spray flammable liquids.
WHEN TRANSPORTING OR REPAIRING EQUIPMENT
• Transport/repair with fuel tank EMPTY or with fuel shutoff valve
OFF.
• Disconnect spark plug wire.
WHEN STORING FUEL OR EQUIPMENT WITH FUEL IN TANK
• Store away from furnaces, stoves, water heaters, clothes dryers,
or other appliances that have pilot light or other ignition source
because they can ignite fuel vapors.
WARNING
Running engine gives off carbon monoxide, an
odorless, colorless, poisonous gas.
Breathing carbon monoxide can cause headache,
fatigue, dizziness, vomiting, confusion, seizures,
nausea, fainting or death.
Some chemicals or detergents may be harmful if
inhaled or ingested, causing severe nausea,
fainting, or poisoning.
• Operate pressure washer ONLY outdoors.
• Keep exhaust gas from entering a confined area through
windows, doors, ventilation intakes, or other openings.
• DO NOT start or run engine indoors or in an enclosed area, even
if windows and doors are open.
• Use a respirator or mask whenever there is a chance that vapors
may be inhaled.
• Read all instructions with mask so you are certain the mask will
provide the necessary protection against inhaling harmful
vapors.
WARNING
Certain components in this product and related
accessories contain chemicals known to the State of
California to cause cancer, birth defects or other
reproductive harm. Wash hands after handling.
Page 6
6 BRIGGSandSTRATTON.COM
WARNING
Starter cord kickback (rapid retraction) can result
in bodily injury. Kickback will pull hand and arm
toward engine faster than you can let go.
Broken bones, fractures, bruises, or sprains
could result.
• NEVER pull starter cord without first relieving spray gun
pressure.
• When starting engine, pull cord slowly until resistance is felt and
then pull rapidly to avoid kickback.
• After each starting attempt, where engine fails to run, always
point spray gun in safe direction, press red button and squeeze
spray gun trigger to release high pressure.
• Firmly grasp spray gun with both hands when using high
pressure spray to avoid injury when spray gun kicks back.
WARNING
Contact with muffler area can result in serious
burns.
Exhaust heat/gases can ignite combustibles,
structures or damage fuel tank causing a fire.
• DO NOT touch hot parts and AVOID hot exhaust gases.
• Allow equipment to cool before touching.
• Keep at least 5 feet (1.5 m) of clearance on all sides of pressure
washer including overhead.
WARNING
The high pressure stream of water that this
equipment produces can cut through skin and its
underlying tissues, leading to serious injury and
possible amputation.
Spray gun traps high water pressure, even when
engine is stopped and water is disconnected,
which can cause injury.
• DO NOT allow CHILDREN to operate pressure washer.
• NEVER repair high pressure hose. Replace it.
• NEVER repair leaking connections with sealant of any kind.
Replace o-ring or seal.
• NEVER connect high pressure hose to nozzle extension.
• Keep high pressure hose connected to pump and spray gun
while system is pressurized.
• ALWAYS point spray gun in safe direction, press red button and
squeeze spray gun trigger, to release high pressure, every time
you stop engine.
• NEVER aim spray gun at people, animals, or plants.
• DO NOT secure spray gun in open position.
• DO NOT leave spray gun unattended while machine is running.
• NEVER use a spray gun which does not have a trigger lock or
trigger guard in place and in working order.
• Always be certain spray gun, nozzles and accessories are
correctly attached.
WARNING
Unintentional sparking can result in fire or
electric shock.
WHEN ADJUSTING OR MAKING REPAIRS TO YOUR PRESSURE
WASHER
• Disconnect the spark plug wire from the spark plug and place
the wire where it cannot contact spark plug.
WHEN TESTING FOR ENGINE SPARK
• Use approved spark plug tester.
• DO NOT check for spark with spark plug removed.
Page 7
7
NOTICE
High pressure spray may damage fragile items including
glass.
• DO NOT point spray gun at glass when in jet spray mode.
• NEVER aim spray gun at plants.
WARNING
Risk of eye injury.
Spray can splash back or propel objects.
• Always wear safety goggles when using this equipment or in
vicinity of where equipment is in use.
• Before starting the pressure washer, be sure you are wearing
adequate safety goggles.
• NEVER substitute safety glasses for safety goggles.
WARNING
Starter and other rotating parts can entangle
hands, hair, clothing, or accessories.
• NEVER operate pressure washer without protective housing or
covers.
• DO NOT wear loose clothing, jewelry or anything that may be
caught in the starter or other rotating parts.
• Tie up long hair and remove jewelry.
NOTICE
Improper treatment of pressure washer can damage it and
shorten its life.
• If you have questions about intended use, ask dealer or contact
qualified service center.
• NEVER operate units with broken or missing parts, or without
protective housing or covers.
• DO NOT by-pass any safety device on this machine.
• DO NOT tamper with governed speed.
• DO NOT operate pressure washer above rated pressure.
• DO NOT modify pressure washer in any way.
• Before starting pressure washer in cold weather, check all parts
of the equipment to be sure ice has not formed there.
• NEVER move machine by pulling on hoses. Use handle provided
on unit.
• Check fuel system for leaks or signs of deterioration, such as
chafed or spongy hose, loose or missing clamps, or damaged
tank or cap. Correct all defects before operating pressure
washer.
• This equipment is designed to be used with Briggs & Stratton
Power Products authorized parts ONLY. If equipment is used
with parts that DO NOT comply with minimum specifications,
user assumes all risks and liabilities.
Page 8
Assembly
Read entire operator’s manual before you attempt
to assemble or operate your new pressure washer.
Your pressure washer requires some assembly and is ready
for use after it has been properly serviced with the
recommended oil and fuel.
If you have any problems with the assembly of your pressure
washer, contact your local Briggs & Stratton service center.
If you need assistance, please have the model, revision, and
serial number from the identification label available.
Unpack Pressure Washer
1. Remove the parts bag, accessories, and inserts
included with pressure washer.
2. Open carton completely by cutting each corner from
top to bottom.
3. Ensure you have all included items prior to assembly.
Items in the carton include:
• Main Unit
• Handle
• High Pressure Hose
• Spray Gun
• Adjustable Nozzle Extension
• Wheels (2)
• Parts Bag (which includes the following):
• Safety Goggles
• Operator’s Manual
• Hose Fittings
• Maintenance Kit
• Accessory Storage Bag
• Handle/Wheel Kit Fastening Hardware Kit (which
includes):
• Carriage Bolts (2)
• Plastic Knobs (2)
• Axle Pins (2)
• Retaining Pins (2)
To prepare your pressure washer for operation, you will
need to perform these tasks:
1. Attach handle and wheel kit to main unit.
2. Add oil to engine crankcase.
3. Add fuel to fuel tank.
4. Connect high pressure hose to spray gun and pump.
5. Connect water supply to pump.
6. Attach nozzle extension to spray gun.
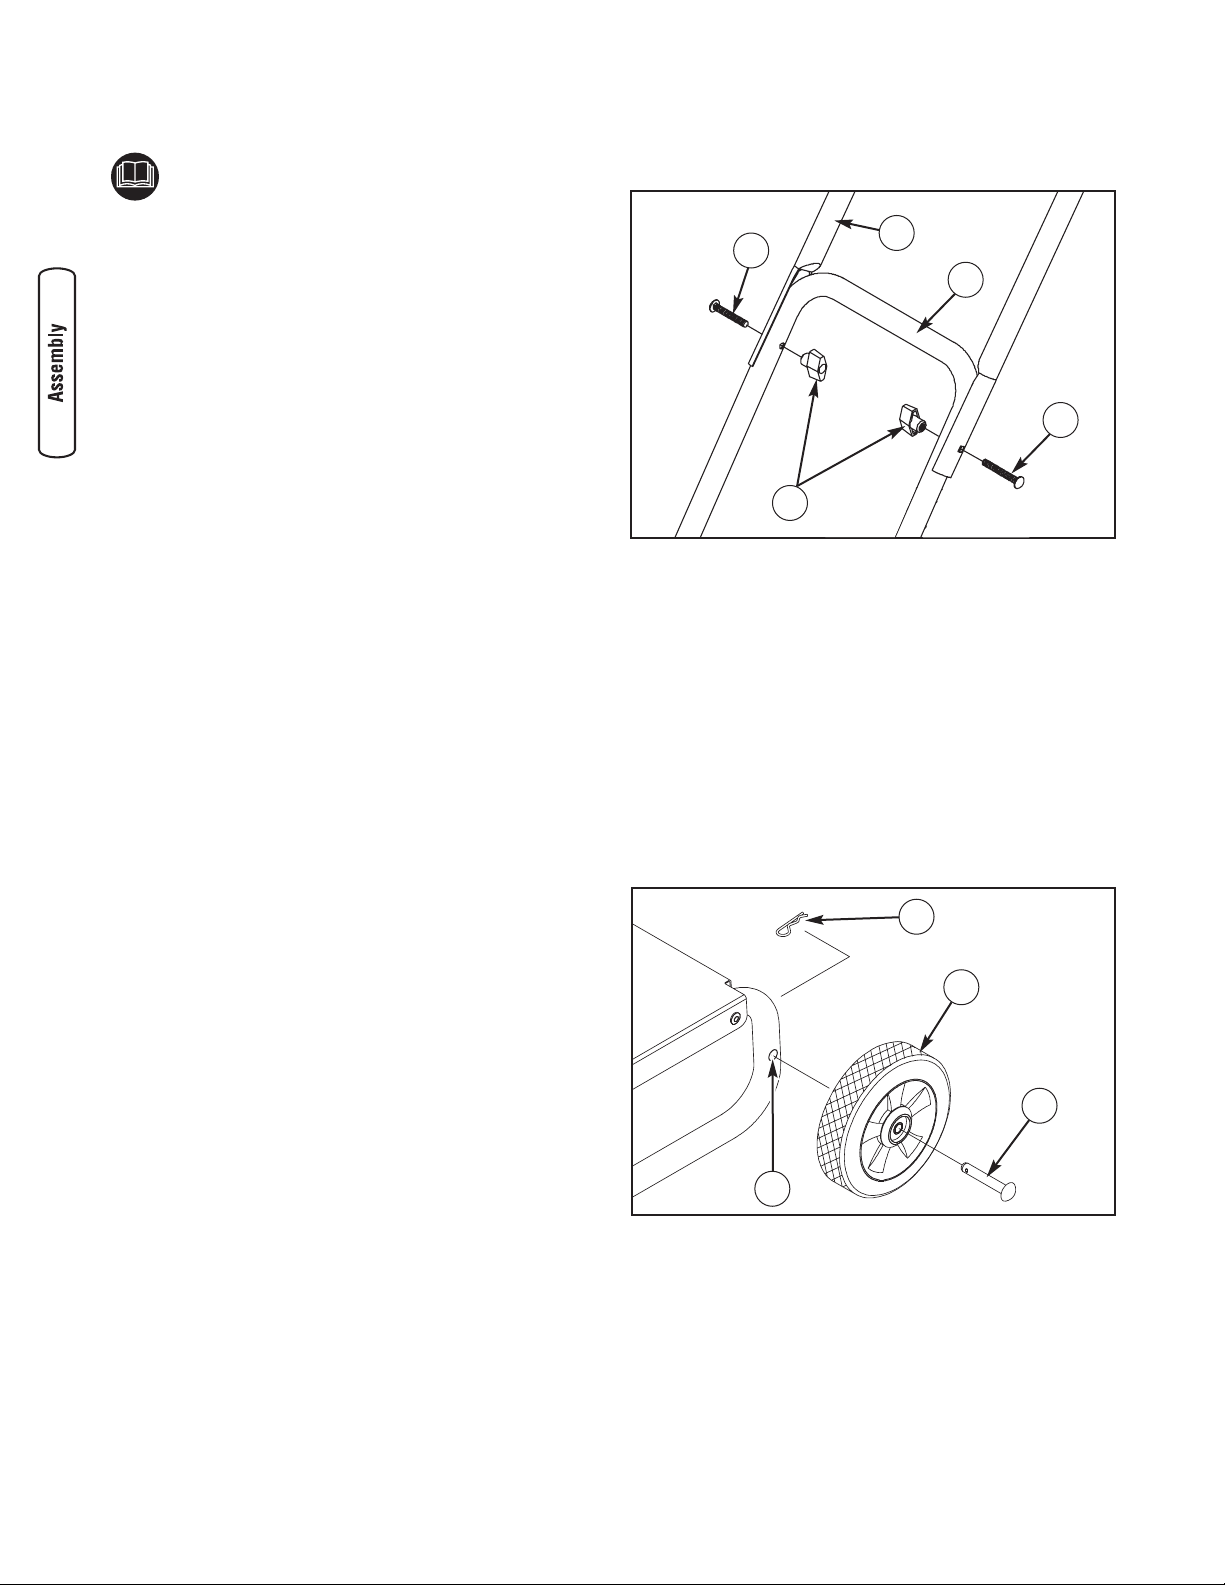
Attach Handle
1. Place handle (A) onto base (B). Make sure holes in
handle align with holes on base.
2. Insert carriage bolts (C) through holes from outside of
unit and attach a plastic knob (D) from inside of unit.
Tighten by hand.
Install Wheel Kit
The wheel kit is designed to greatly improve the portability of
your pressure washer.
NOTE: Wheel kit is not intended for over-the-road use.
Install the wheel kit as follows:
1. Place the bottom of the pressure washer frame on a
flat, even surface.
2. Slide a wheel (E) over the axle pin (F).
NOTE: Be sure to install wheel with raised hub inboard.
3. Slide axle pin through hole (G) in frame.
4. Retain wheel on axle pin with retaining pin (H).
5. Repeat step 2 through 4 to secure second wheel.
8 BRIGGSandSTRATTON.COM
D
A
B
C
C
G
F
H
E
Page 9
Add Engine Oil
1. Place pressure washer on a flat, level surface.
2. Clean area around oil fill and remove yellow oil fill
cap/dipstick.
3. Using oil funnel (optional), slowly pour oil into oil fill
opening to the “Full” mark on dipstick. DO NOT overfill.
4. Replace oil fill cap/dipstick and fully tighten.
Add Fuel
Fuel must meet these requirements:
• Clean, fresh, unleaded gasoline.
• A minimum of 87 octane/87 AKI (91 RON). High
altitude use, see High Altitude.
• Gasoline with up to 10% ethanol (gasohol) or up to
15% MTBE (methyl tertiary butyl ether) is acceptable.
To protect the fuel system from gum formation, mix in a fuel
stabilizer when adding fuel. See Storage. All fuel is not the
same. If you experience starting or performance problems
after using fuel, switch to a different fuel provider or change
brands. This engine is certified to operate on gasoline. The
emission control system for this engine is EM (Engine
Modifications).
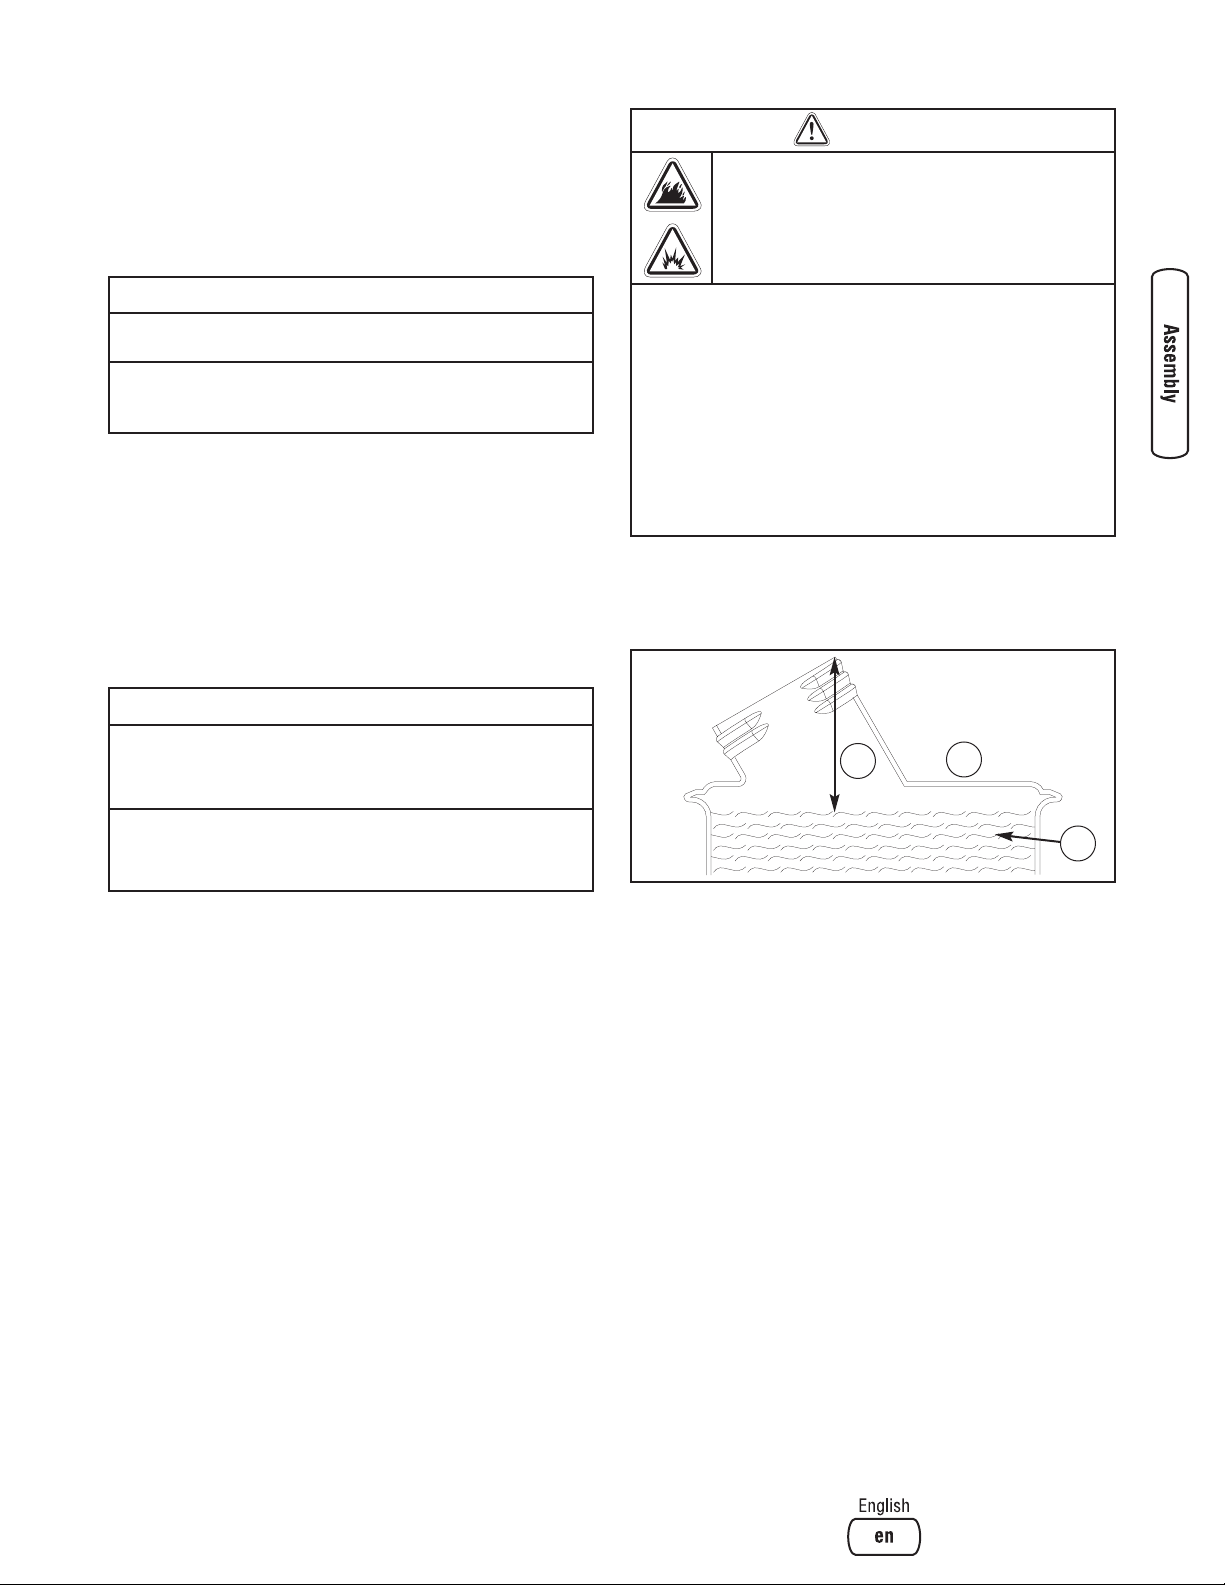
1. Clean area around fuel fill cap, remove cap.
2. Slowly add regular unleaded fuel (A) to fuel tank (B). Be
careful not to overfill. Allow about 1.5" (4 cm) (C) of
tank space for fuel expansion.
3. Install fuel cap and let any spilled fuel evaporate before
starting engine.
High Altitude
At altitudes over 5,000 feet (1524 meters), a minimum
85 octane / 85 AKI (89 RON) gasoline is acceptable. To
remain emissions compliant, high altitude adjustment is
required. Operation without this adjustment will cause
decreased performance, increased fuel consumption, and
increased emissions. See an Authorized Briggs & Stratton
dealer for high altitude adjustment information. Operation of
the engine at altitudes below 2,500 feet (762 meters) with
the high altitude kit is not recommended.
9
NOTICE
Improper treatment of pressure washer can damage it and
shorten its life.
• DO NOT attempt to crank or start the engine before it has been
properly serviced with the recommended oil. This may result in
an engine failure.
NOTICE
Avoid pressure washer damage.
Failure to follow Operator’s Manual for fuel
recommendations voids warranty.
• DO NOT use unapproved gasoline such as E85.
• DO NOT mix oil in gasoline.
• DO NOT modify engine to run on alternate fuels.
WARNING
Fuel and its vapors are extremely flammable and
explosive.
Fire or explosion can cause severe burns or
death.
WHEN ADDING FUEL
• Turn pressure washer OFF and let it cool at least 2 minutes
before removing fuel cap. Loosen cap slowly to relieve pressure
in tank.
• Fill fuel tank outdoors.
• DO NOT overfill tank. Allow space for fuel expansion.
• If fuel spills, wait until it evaporates before starting engine.
• Keep fuel away from sparks, open flames, pilot lights, heat, and
other ignition sources.
• DO NOT light a cigarette or smoke.
C
B
A
Page 10
Connect Hose and Water Supply to Pump
NOTE: Remove and discard the shipping caps from the
pump’s high pressure outlet and water inlet before attaching
hoses.
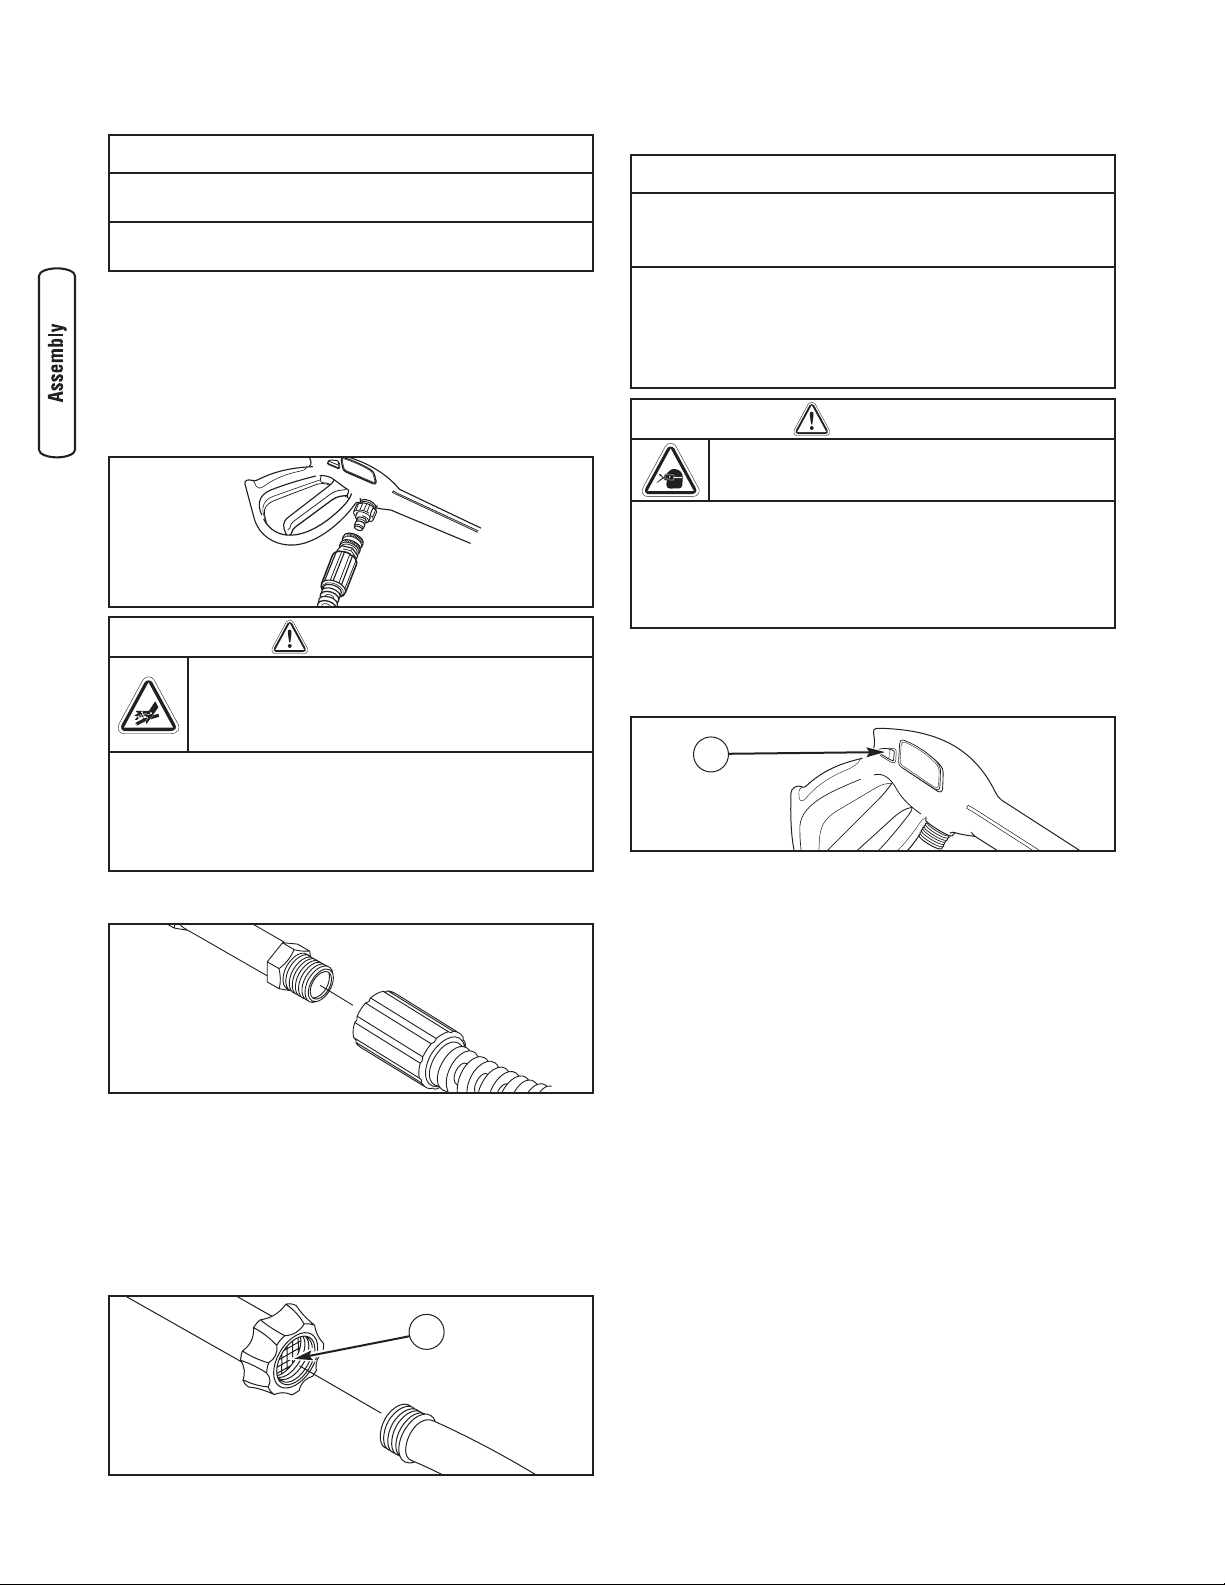
1. Uncoil high pressure hose and attach one end of hose
to base of spray gun. Pull back on collar of quick
connect, slide fitting onto spray gun and let go of
collar. Pull on hose to be sure of a tight connection.
2. Attach other end of high pressure hose to high
pressure outlet on pump. Tighten by hand.
3. Run water through your garden hose for 30 seconds to
clean out any debris.
IMPORTANT: DO NOT siphon standing water for the water
supply. Use ONLY cold water (less than 100°F (38°C)).
4. Before connecting garden hose to water inlet, inspect
inlet screen (A). Clean screen if it contains debris or
have it replaced if damaged. DO NOT run pressure
washer if inlet screen is damaged.
5. Connect the garden hose (not to exceed 50 feet (15 m)
in length) to the water inlet. Tighten by hand.
6. Turn ON the water, press red button (B) on the gun and
squeeze the trigger to purge the pump system of air and
impurities.
Checklist Before Starting Engine
Review the unit’s assembly to ensure you have performed all
of the following.
1. Be sure to read the Operator Safety section and
Operation section before using pressure washer.
2. Make sure handle is in place and secure.
3. Check that oil has been added to proper level in the
engine crankcase.
4. Add proper fuel to fuel tank.
5. Check for properly tightened hose connections.
6. Check to make sure there are no kinks, cuts, or damage
to high pressure hose.
7. Provide a proper water supply at an adequate flow.
10 BRIGGSandSTRATTON.COM
WARNING
Risk of eye injury.
Spray can splash back or propel objects.
• Always wear safety goggles when using this equipment or in
vicinity of where equipment is in use.
• Before starting the pressure washer, be sure you are wearing
adequate safety goggles.
• NEVER substitute safety glasses for safety goggles.
NOTICE
DO NOT run the pump without the water supply connected
and turned on.
• Damage to equipment resulting from failure to follow this
instruction will void warranty.
WARNING
The high pressure stream of water that this
equipment produces can cut through skin and its
underlying tissues, leading to serious injury and
possible amputation.
• NEVER connect high pressure hose to nozzle extension.
• Keep high pressure hose connected to pump and spray gun
while system is pressurized.
• Always be certain spray gun, nozzles and accessories are
correctly attached.
NOTICE
Damage to pump or water inlet connector will occur if a
One Way Valve (vacuum breaker or check valve) is
connected to pump.
• There MUST be at least ten feet (3M) of unrestricted garden
hose between the pressure washer inlet and any device, such as
a One Way Valve.
• Damage to equipment caused by attaching a One Way Valve to
pump will void warranty.
A
B
Page 11
11
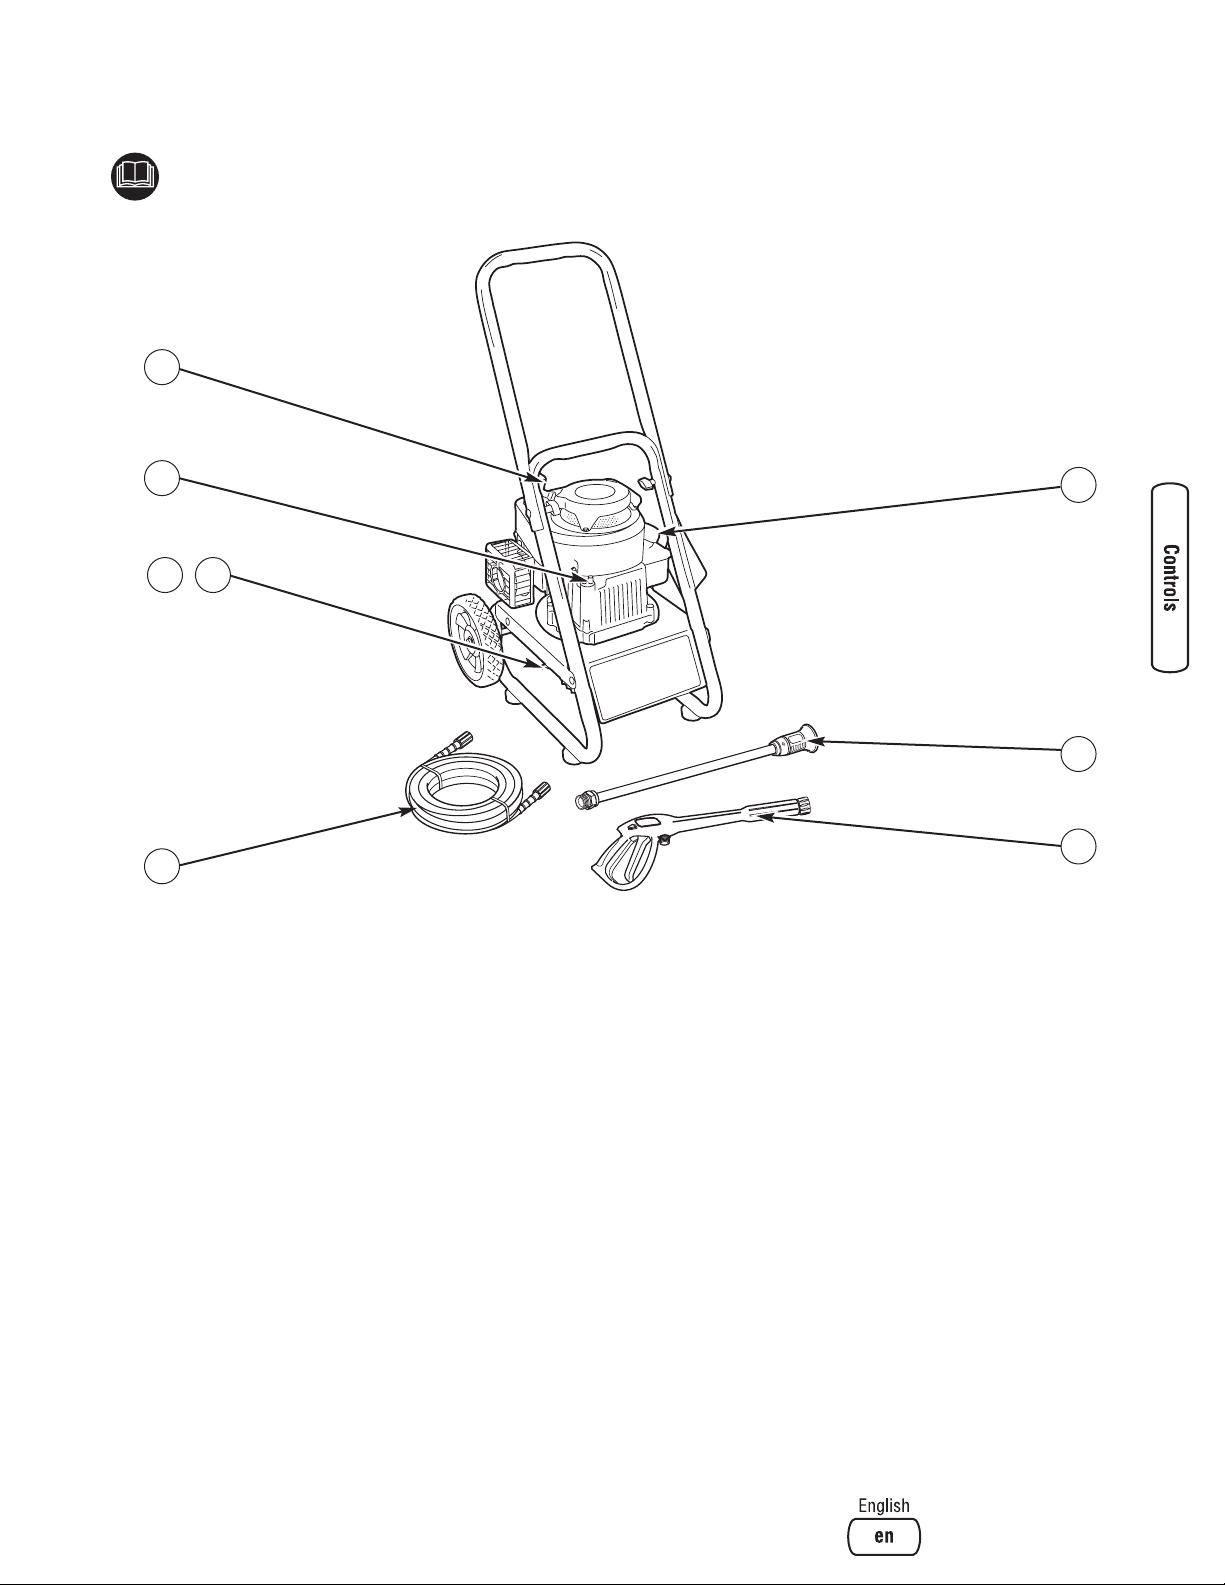
Features and Controls
Read this Operator’s Manual and safety rules before operating your pressure washer.
Compare the illustrations with your pressure washer, to familiarize yourself with the locations of various controls and
adjustments. Save this manual for future reference.
A - Recoil Starter — Used for starting the engine manually.
B - Oil Fill/Dipstick — Check and fill with oil here.
C - Pump — Develops high pressure.
D - Automatic Cool Down System — Cycles water through
pump when water reaches 125°-155°F. Warm water will
discharge from pump onto ground. This system prevents
internal pump damage.
E - High Pressure Hose — Connect one end to water pump
and the other end to spray gun.
F - Spray Gun — Controls the application of water onto
cleaning surface with trigger device. Includes trigger lock.
G - Adjustable Nozzle — Always attached to nozzle
extension. Adjustable nozzle allows you to adjust spray
pressure and spray pattern.
H - Fuel Tank — Fill tank with regular unleaded fuel. Always
leave room for fuel expansion.
Items Not Shown:
Air Filter — Protects engine by filtering dust and debris out
of intake air.
Identification Label (near rear of base plate) — Provides
model and serial number of pressure washer. Please have
these readily available if calling for assistance.
Detergent Siphoning Tube/Filter — Use to siphon pressure
washer safe detergents into the low pressure stream.
High Pressure Outlet — Connection for high pressure hose.
Primer Bulb — Prepares a cold engine for starting.
Throttle Lever — Sets engine in starting mode for recoil
starter and stops a running engine.
Water Inlet — Connection for garden hose.
Safety Goggles — Always use the enclosed safety goggles
when running your pressure washer.
B
A
D
,
C
F
E
G
H
Page 12
Operation
If you have any problems operating your pressure washer,
please contact the local Briggs & Stratton service center.
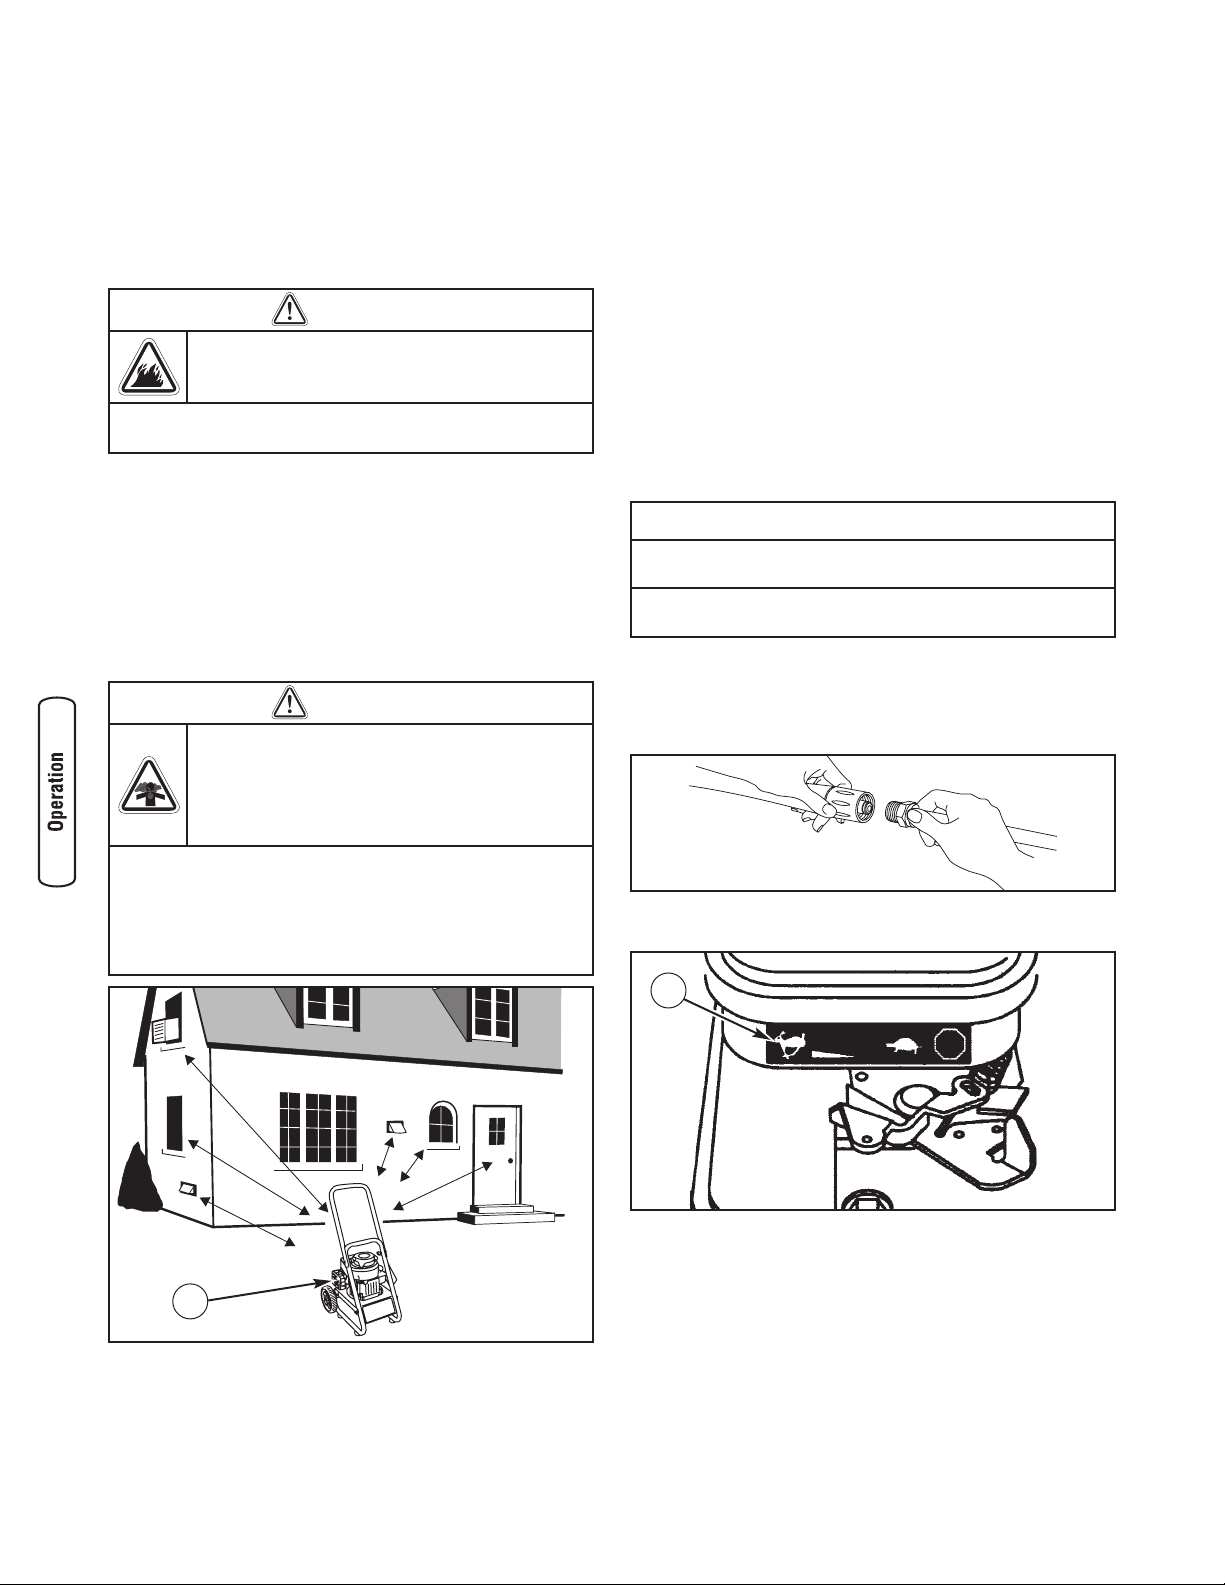
Pressure Washer Location
Clearances and Air Movement
Place pressure washer outdoors in an area that will not
accumulate deadly exhaust gas. DO NOT place pressure
washer where exhaust gas could accumulate and enter inside
or be drawn into a potentially occupied building. Ensure
exhaust gas (A) is kept away from any windows, doors,
ventilation intakes, or other openings that can allow exhaust
gas to collect in a confined area. Prevailing winds and air
currents should be taken into consideration when positioning
pressure washer.
How to Start Your Pressure Washer
To start your pressure washer for the first time, follow these
instructions step-by-step. This starting information also
applies if you have let the pressure washer sit idle for at least
a day.
1. Place pressure washer near an outside water source
capable of supplying water at a flow rate greater than
2.9 gallons (11 l) per minute and no less than 20 PSI
(1.38 BARS) at pressure washer end of garden hose.
DO NOT siphon supply water.
2. Check that high pressure hose is tightly connected to
spray gun and pump. See Assembly section.
3. Make sure unit is in a level position.
4. Connect garden hose to water inlet on pressure washer
pump.
5. Turn ON water, point gun in a safe direction, press red
button and squeeze trigger to purge pump system of air
and impurities.
6. Attach nozzle extension to spray gun. Tighten by hand.
7. Move throttle lever to “Fast” position (B), shown as a
rabbit.
To start the engine for the very first time:
8A. Push primer bulb firmly 5 times, waiting 2 seconds
between each push.
To start engine thereafter:
8B. Press primer bulb firmly 3 times, waiting 2 seconds
between each push. For a warm engine, DO NOT press
primer bulb.
12 BRIGGSandSTRATTON.COM
WARNING
Exhaust heat/gases can ignite combustibles,
structures or damage fuel tank causing a fire.
• Keep at least 5 ft. (1.5 m) clearance on all sides of pressure
washer including overhead.
WARNING
Running engine gives off carbon monoxide, an
odorless, colorless, poison gas.
Breathing carbon monoxide can cause headache,
fatigue, dizziness, vomiting, confusion, seizures,
nausea, fainting or death.
• Operate pressure washer ONLY outdoors.
• Keep exhaust gas from entering a confined area through
windows, doors, ventilation intakes, or other openings.
• DO NOT start or run engine indoors or in an enclosed area, even
if windows and doors are open.
NOTICE
DO NOT run the pump without the water supply connected
and turned on.
• Damage to equipment resulting from failure to follow this
instruction will void warranty.
B
A
Page 13
13
IMPORTANT: Before starting the pressure washer, be sure
you are wearing adequate safety goggles.
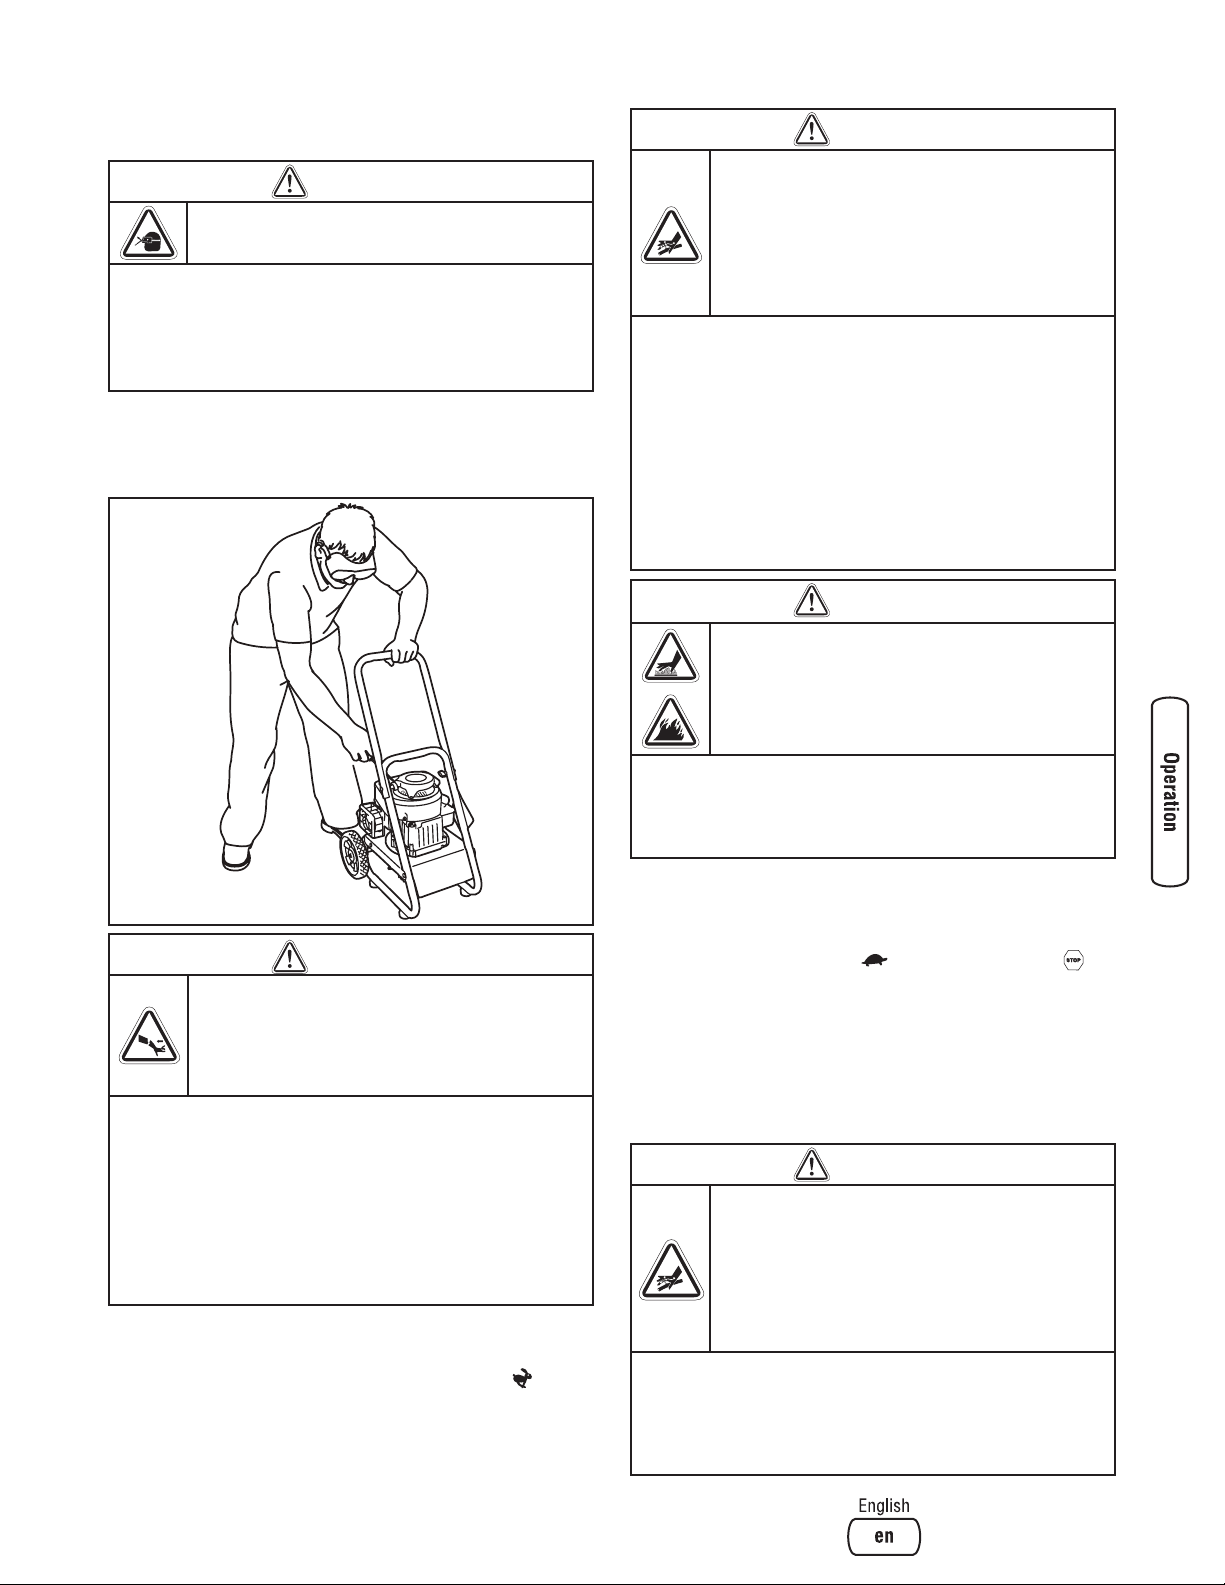
9. When starting engine, position yourself as
recommended and grasp starter grip handle and pull
slowly until you feel some resistance. Then pull rapidly
to start engine.
10. Return starter grip handle slowly. DO NOT let rope
“snap back” against starter.
NOTE: Always keep the throttle lever in the “Fast”
position when operating the pressure washer.
How to Stop Your Pressure Washer
1. Release spray gun trigger and let engine idle for two
minutes.
2. Move throttle to SLOW position, then STOP
position.
3. ALWAYS point gun in a safe direction, press red button
and squeeze spray gun trigger to release retained high
water pressure.
IMPORTANT: Spray gun traps high water pressure, even
when engine is stopped and water is disconnected.
WARNING
Risk of eye injury.
Spray can splash back or propel objects.
• Always wear safety goggles when using this equipment or in
vicinity of where equipment is in use.
• Before starting the pressure washer, be sure you are wearing
adequate safety goggles.
• NEVER substitute safety glasses for safety goggles.
WARNING
Starter cord kickback (rapid retraction) can result
in bodily injury. Kickback will pull hand and arm
toward engine faster than you can let go.
Broken bones, fractures, bruises, or sprains
could result.
• NEVER pull starter cord without first relieving spray gun
pressure.
• When starting engine, pull cord slowly until resistance is felt and
then pull rapidly to avoid kickback.
• After each starting attempt, where engine fails to run, always
point spray gun in safe direction, press red button and squeeze
spray gun trigger to release high pressure.
• Firmly grasp spray gun with both hands when using high
pressure spray to avoid injury when spray gun kicks back.
WARNING
The high pressure stream of water that this
equipment produces can cut through skin and its
underlying tissues, leading to serious injury and
possible amputation.
Spray gun traps high water pressure, even when
engine is stopped and water is disconnected,
which can cause injury.
• DO NOT allow CHILDREN to operate pressure washer.
• Keep high pressure hose connected to pump and spray gun
while system is pressurized.
• NEVER aim spray gun at people, animals, or plants.
• DO NOT secure spray gun in open position.
• DO NOT leave spray gun unattended while machine is running.
• NEVER use a spray gun which does not have a trigger lock or
trigger guard in place and in working order.
• Always be certain spray gun, nozzles and accessories are
correctly attached.
WARNING
Contact with muffler area can result in serious
burns.
Exhaust heat/gases can ignite combustibles,
structures or damage fuel tank causing a fire.
• DO NOT touch hot parts and AVOID hot exhaust gases.
• Allow equipment to cool before touching.
• Keep at least 5 feet (1.5 m) of clearance on all sides of pressure
washer including overhead.
WARNING
The high pressure stream of water that this
equipment produces can cut through skin and its
underlying tissues, leading to serious injury and
possible amputation.
Spray gun traps high water pressure, even when
engine is stopped and water is disconnected,
which can cause injury.
• Keep high pressure hose connected to pump and spray gun
while system is pressurized.
• After each starting attempt, where engine fails to run, always
point spray gun in safe direction, press red button and squeeze
spray gun trigger to release high pressure.
Page 14
How to Use the Adjustable Nozzle
You should now know how to START and STOP your
pressure washer. The information in this section will tell you
how to adjust the spray pattern and to apply pressure
washer specific detergents.
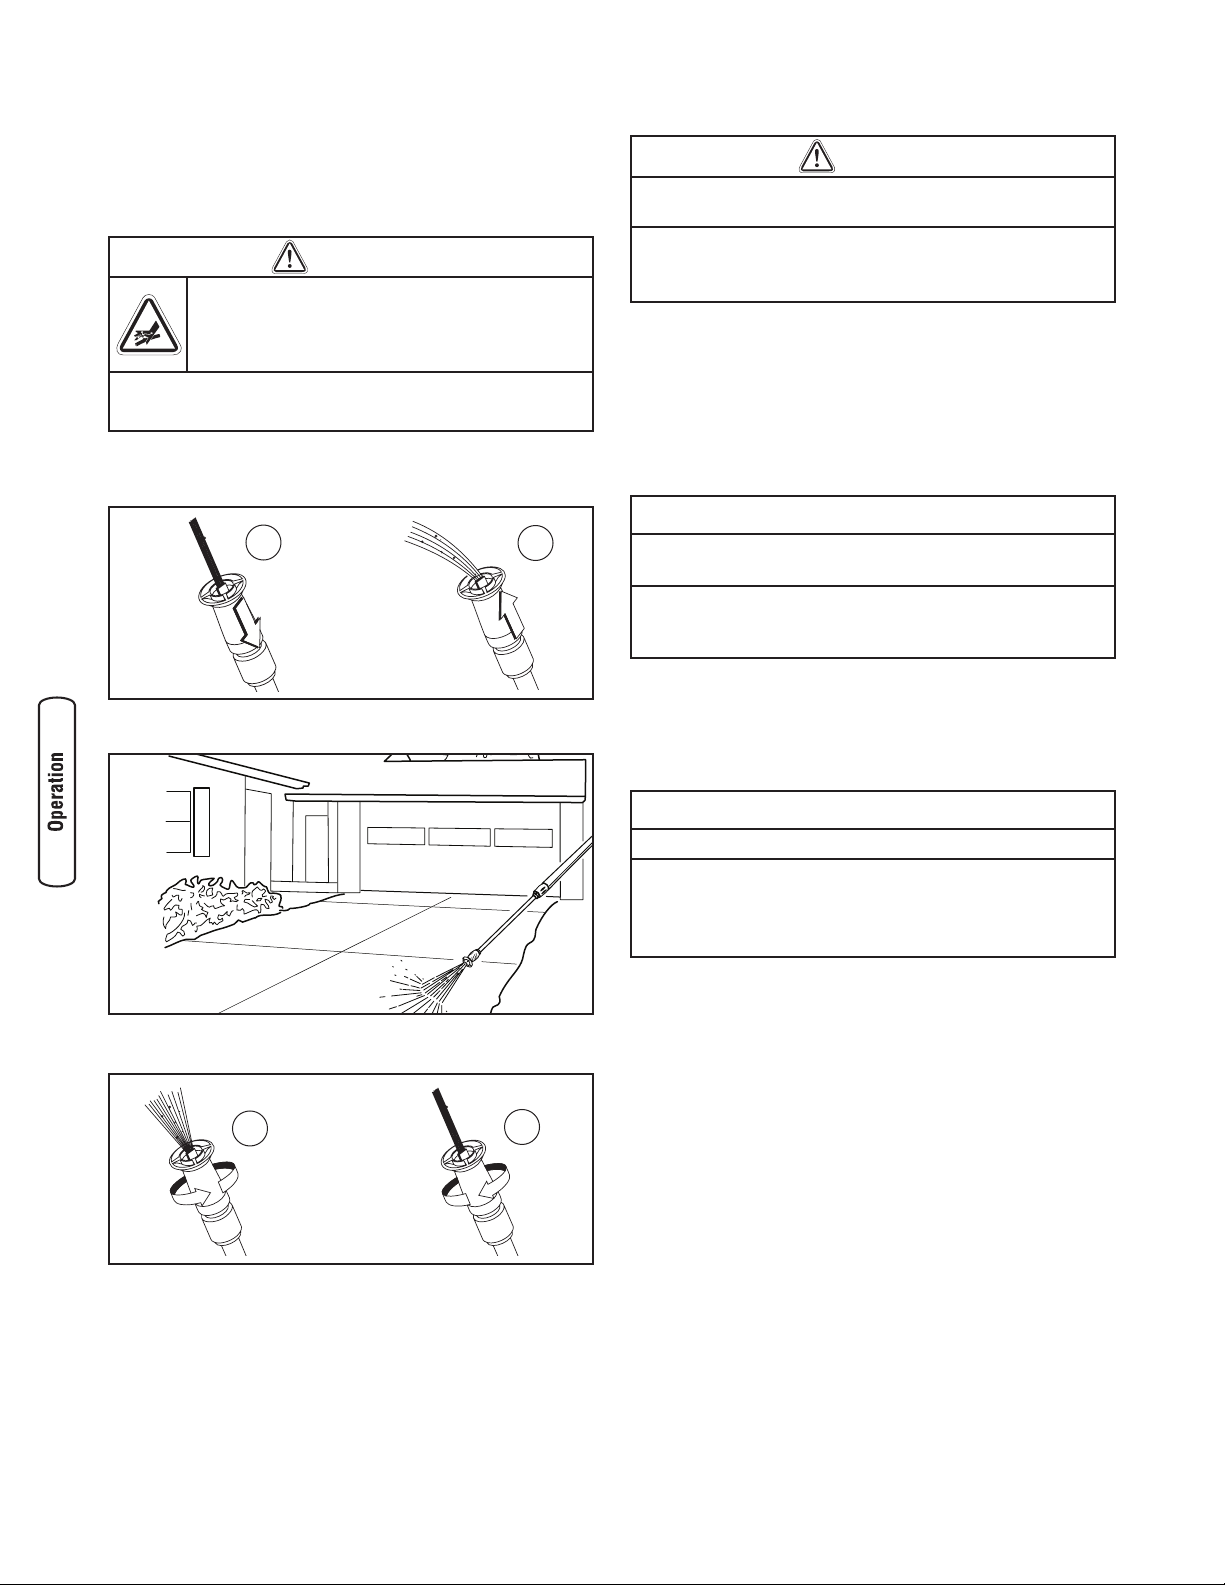
1. Slide nozzle backward (A) to achieve high pressure.
Slide nozzle forward (B) when you wish to adjust spray
to low pressure mode.
2. Point nozzle down towards a firm surface and press
trigger to test pattern.
3. Twisting nozzle adjusts spray pattern from a fan pattern
(C) to a narrow pattern (D).
Usage Tips
• For most effective cleaning, keep spray nozzle from 8 to
24 inches (20 to 61 cm) away from cleaning surface.
• If you get spray nozzle too close, especially using high
pressure mode, you may damage surface being cleaned.
• DO NOT get closer than 6 inches (15 cm) when
cleaning tires.
Applying Detergent
To apply detergent, follow these steps:
1. Review use of adjustable nozzle.
2. Prepare detergent solution as required by job.
3. Place small filter end of detergent siphoning tube into
detergent container.
NOTE: Make sure the filter is fully submerged in detergent
while applying detergent.
4. Slide nozzle forward to low pressure mode. Detergent
cannot be applied with nozzle in high pressure position.
5. Make sure garden hose is connected to water inlet.
Check that high pressure hose is connected to spray
gun and pump. Turn on water.
6. Start engine following instructions How to Start Your
Pressure Washer.
7. Apply detergent to a dry surface, starting at lower
portion of area to be washed and work upward, using
long, even, overlapping strokes.
8. Allow detergent to "soak in" for 3-5 minutes before
washing and rinsing. Reapply as needed to prevent
surface from drying. DO NOT allow detergent to dry on
(prevents streaking).
IMPORTANT: You must flush the detergent siphoning
system after each use by placing the filter into a bucket of
clean water, then run the pressure washer in low pressure
for 1-2 minutes.
14 BRIGGSandSTRATTON.COM
A
B
WARNING
The high pressure stream of water that this
equipment produces can cut through skin and its
underlying tissues, leading to serious injury and
possible amputation.
• NEVER adjust spray pattern when spraying.
• NEVER put hands in front of nozzle to adjust spray pattern.
C
D
CAUTION
Chemicals can cause bodily injury, and/or property
damage.
• NEVER use caustic liquid with pressure washer.
• Use ONLY pressure washer safe detergents/soaps. Follow all
manufacturers instructions.
NOTICE
Contact with the hot muffler can damage detergent
siphoning tube.
• When inserting the filter into a detergent solution bottle, route
the tube so as to keep it from inadvertently contacting the hot
muffler.
NOTICE
You must attach all hoses before you start the engine.
• Starting the engine without all the hoses connected and without
the water turned ON will damage the pump.
• Damage to equipment resulting from failure to follow this
instruction will void warranty.
Page 15
15
Pressure Washer Rinsing
For Rinsing:
1. Slide the nozzle backward to high pressure, press the
trigger and wait for the detergent to clear.
NOTE: You can also stop detergent from flowing by simply
removing detergent siphoning tube from bottle.
2. Keep the spray gun a safe distance from the area you
plan to spray.
3. Apply a high pressure spray to a small area, then check
the surface for damage. If no damage is found, it is
okay to continue cleaning.
4. Start at the top of the area to be rinsed, working down
with same overlapping strokes as you used for washing
and applying detergent.
Cleaning Detergent Siphoning Tube
If you used the detergent siphoning tube, you must flush it
with clean water before stopping the engine.
1. Place detergent siphoning tube/filter in a bucket full of
clean water.
2. Slide adjustable nozzle forward to low pressure position.
3. Flush for 1-2 minutes.
4. Shut off engine following instructions How to Stop
Pressure Washer and turn off water supply.
5. ALWAYS point gun in a safe direction, press red button
and squeeze spray gun trigger to release retained high
water pressure.
IMPORTANT: Spray gun traps high water pressure, even
when engine is stopped and water is disconnected.
Automatic Cool Down System (Thermal Relief)
If you run the engine on your pressure washer for
3-5 minutes without pressing the trigger on the spray gun,
circulating water in the pump can reach temperatures above
125°F (51°C). The system engages to cool the pump by
discharging the warm water onto the ground.
WARNING
Kickback from spray gun can cause you to fall.
• Operate pressure washer from a stable surface.
• Be extremely careful if you must use the pressure washer from
a ladder, scaffolding, or any other similar location.
• Firmly grasp spray gun with both hands when using high
pressure spray to avoid injury when spray gun kicks back.
WARNING
The high pressure stream of water that this
equipment produces can cut through skin and its
underlying tissues, leading to serious injury and
possible amputation.
Spray gun traps high water pressure, even when
engine is stopped and water is disconnected,
which can cause injury.
• Keep high pressure hose connected to pump and spray gun
while system is pressurized.
• After each starting attempt, where engine fails to run, always
point spray gun in safe direction, press red button and squeeze
spray gun trigger to release high pressure.
Page 16

16 BRIGGSandSTRATTON.COM
Maintenance
Maintenance Schedule
Follow the hourly or calendar intervals, whichever occurs
first. More frequent service is required when operating in
adverse conditions noted below.
1
Clean if clogged. Replace if perforated or torn.
2
Service more often under dirty or dusty conditions.
General Recommendations
Regular maintenance will improve the performance and
extend the life of the pressure washer. See any qualified
dealer for service.
The pressure washer’s warranty does not cover items that
have been subjected to operator abuse or negligence. To
receive full value from the warranty, the operator must
maintain the pressure washer as instructed in this manual,
including proper storage as detailed in Winter Storage and
Long Term Storage.
NOTE: Should you have questions about replacing
components on your pressure washer, please visit our
website at BRIGGSandSTRATTON.COM.
Some adjustments will need to be made periodically to
properly maintain your pressure washer.
All service and adjustments should be made at least once
each season. Follow the requirements in the Maintenance
Schedule chart above.
NOTE: Once a year you should clean or replace the spark
plug, clean or replace the air filter, and check the spray gun
and nozzle extension assembly for wear. A new spark plug
and clean air filter assure proper fuel-air mixture and help
your engine run better and last longer.
Pump Oil
DO NOT attempt any oil maintenance on this pump. The
pump is pre-lubricated and sealed from the factory, requiring
no additional maintenance for the life of the pump.
Emissions Control
Maintenance, replacement, or repair of the emissions
control devices and systems may be performed by any
non-road engine repair establishment or individual.
However, to obtain ”no charge” emissions control service,
the work must be performed by a factory authorized dealer.
See the Emissions Warranty.
Before Each Use
1. Check engine oil level.
2. Clean debris.
3. Check water inlet screen for damage.
4. Check high pressure hose for leaks.
5. Check detergent siphoning tube/filter for damage.
6. Check spray gun and nozzle extension assembly for
leaks.
7. Rinse out garden hose to flush out debris.
Pressure Washer Maintenance
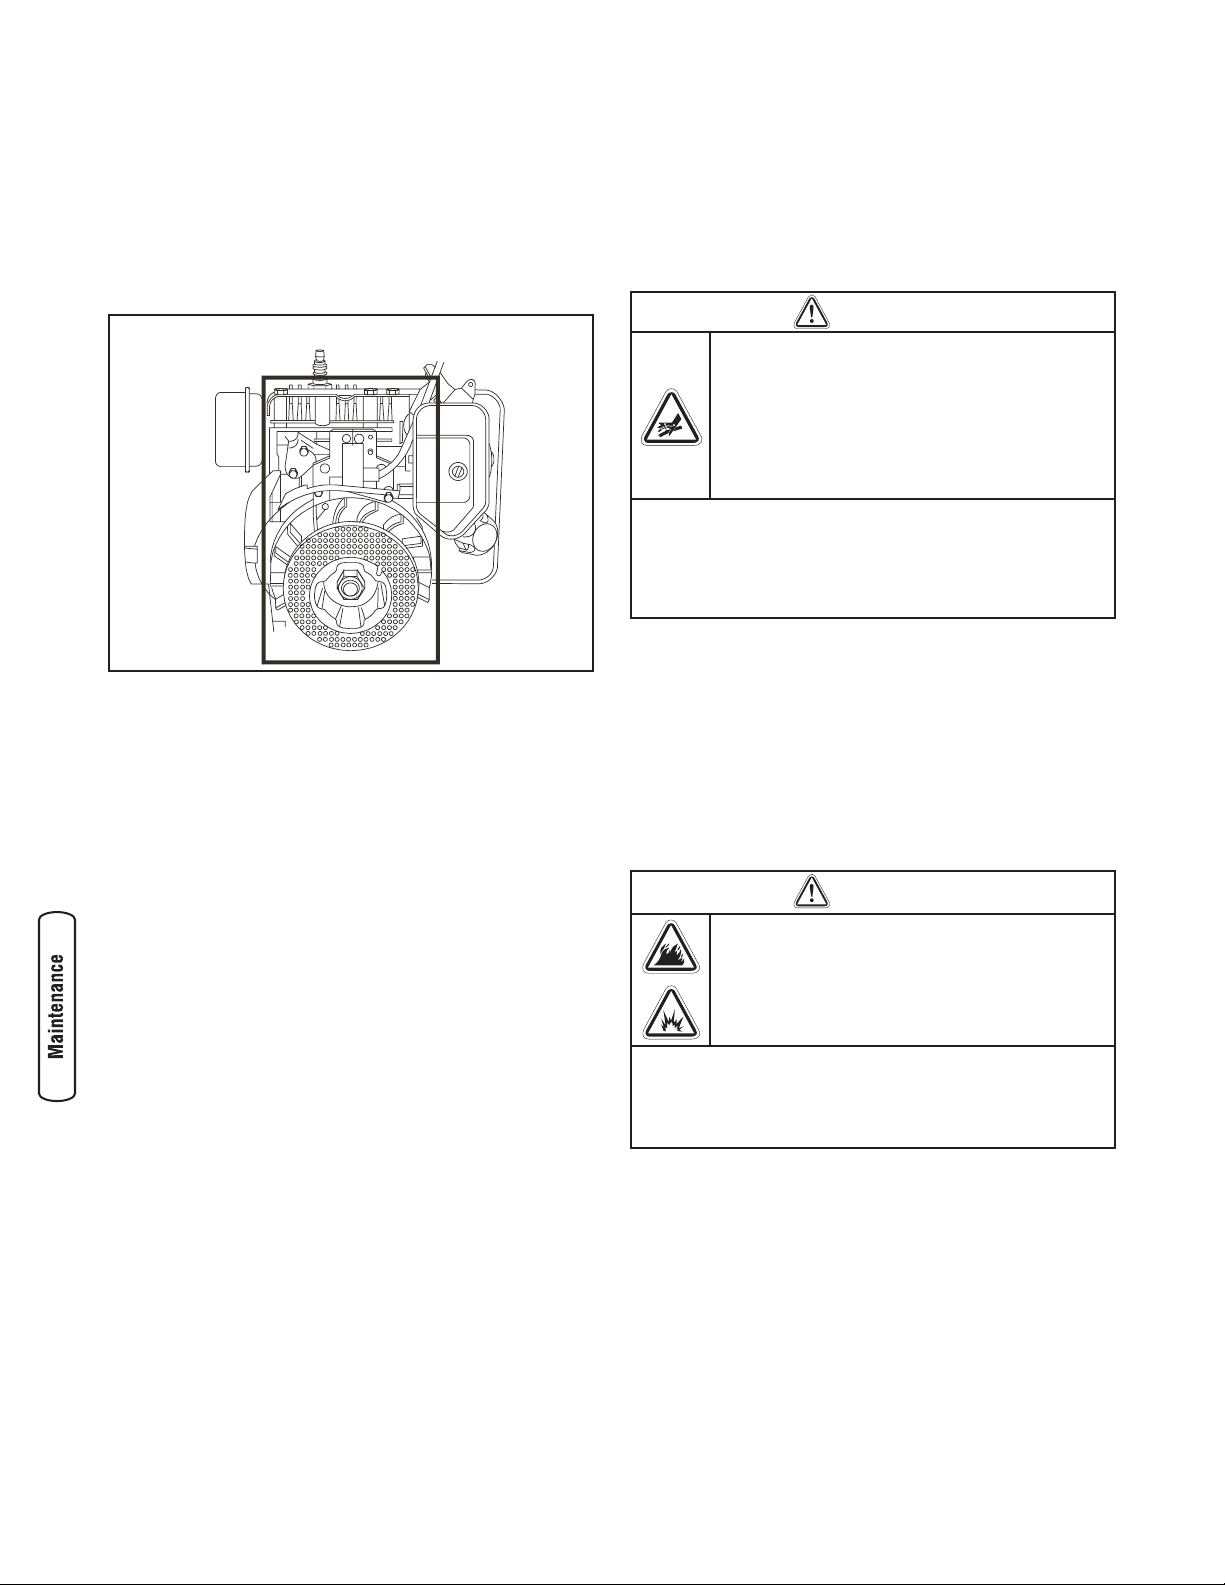
Clean Debris
Daily or before use, clean accumulated debris from cleaning
system. Keep linkage, spring and controls clean. Keep area
around and behind muffler free from any combustible debris.
Inspect cooling air slots and openings on the pressure
washer. These openings must be kept clean and
unobstructed.
Cleaning system parts should be kept clean to reduce the
risk of overheating and ignition of accumulated debris.
• Use a damp cloth to wipe exterior surfaces clean.
• Use a soft bristle brush to loosen caked on dirt, oil, etc.
• Use a vacuum cleaner to pick up loose dirt and debris.
Check and Clean Inlet Screen
Examine the screen on the pump’s water inlet. Clean it if the
screen is clogged or replace it if screen is damaged.
First 5 Hours
• Change engine oil
Every 8 Hours or Daily
• Check/clean water inlet screen
1
• Check high pressure hose
• Check detergent siphoning hose/filter
• Check spray gun and assembly for leaks
• Clean debris
• Check engine oil level
Every 25 Hours or Yearly
• Service engine air cleaner
2
Every 50 Hours or Yearly
• Change engine oil
2
• Service spark arrester
Every 100 Hours or Yearly
• Service spark plug
• Clean cooling system
2
NOTICE
Improper treatment of pressure washer can damage it and
shorten its life.
• DO NOT insert any objects through cooling slots.
Page 17
17
Check High Pressure Hose
The high pressure hose can develop leaks from wear,
kinking, or abuse. Inspect the hose each time before using it.
Check for cuts, leaks, abrasions or bulging of cover, damage
or movement of couplings. If any of these conditions exist,
replace the hose immediately.
Check Detergent Siphoning Tube
Examine the filter on the detergent tube and clean if clogged.
The tube should fit tightly on the barbed fitting. Examine the
tube for leaks or tears. Replace the filter or tube if either is
damaged.
Check Spray Gun
Examine the hose connection to the spray gun and make
sure it is secure. Test the trigger by pressing the red button
and making sure the trigger “springs back” into place when
you release it. You should not be able to press the trigger
without pressing the red button. Replace spray gun
immediately if it fails any of these tests.
Nozzle Maintenance
A pulsing sensation felt while squeezing the spray gun
trigger may be caused by excessive pump pressure. The
principal cause of excessive pump pressure is a orifice
clogged or restricted with foreign materials, such as dirt, etc.
To correct the problem, immediately clean the orifice using
the tools included with your pressure washer and follow
these instructions:
1. Shut off engine and turn off water supply.
2. ALWAYS point spray gun in a safe direction, press red
button and squeeze spray gun trigger to release
retained high water pressure.
3. Remove nozzle extension from spray gun.
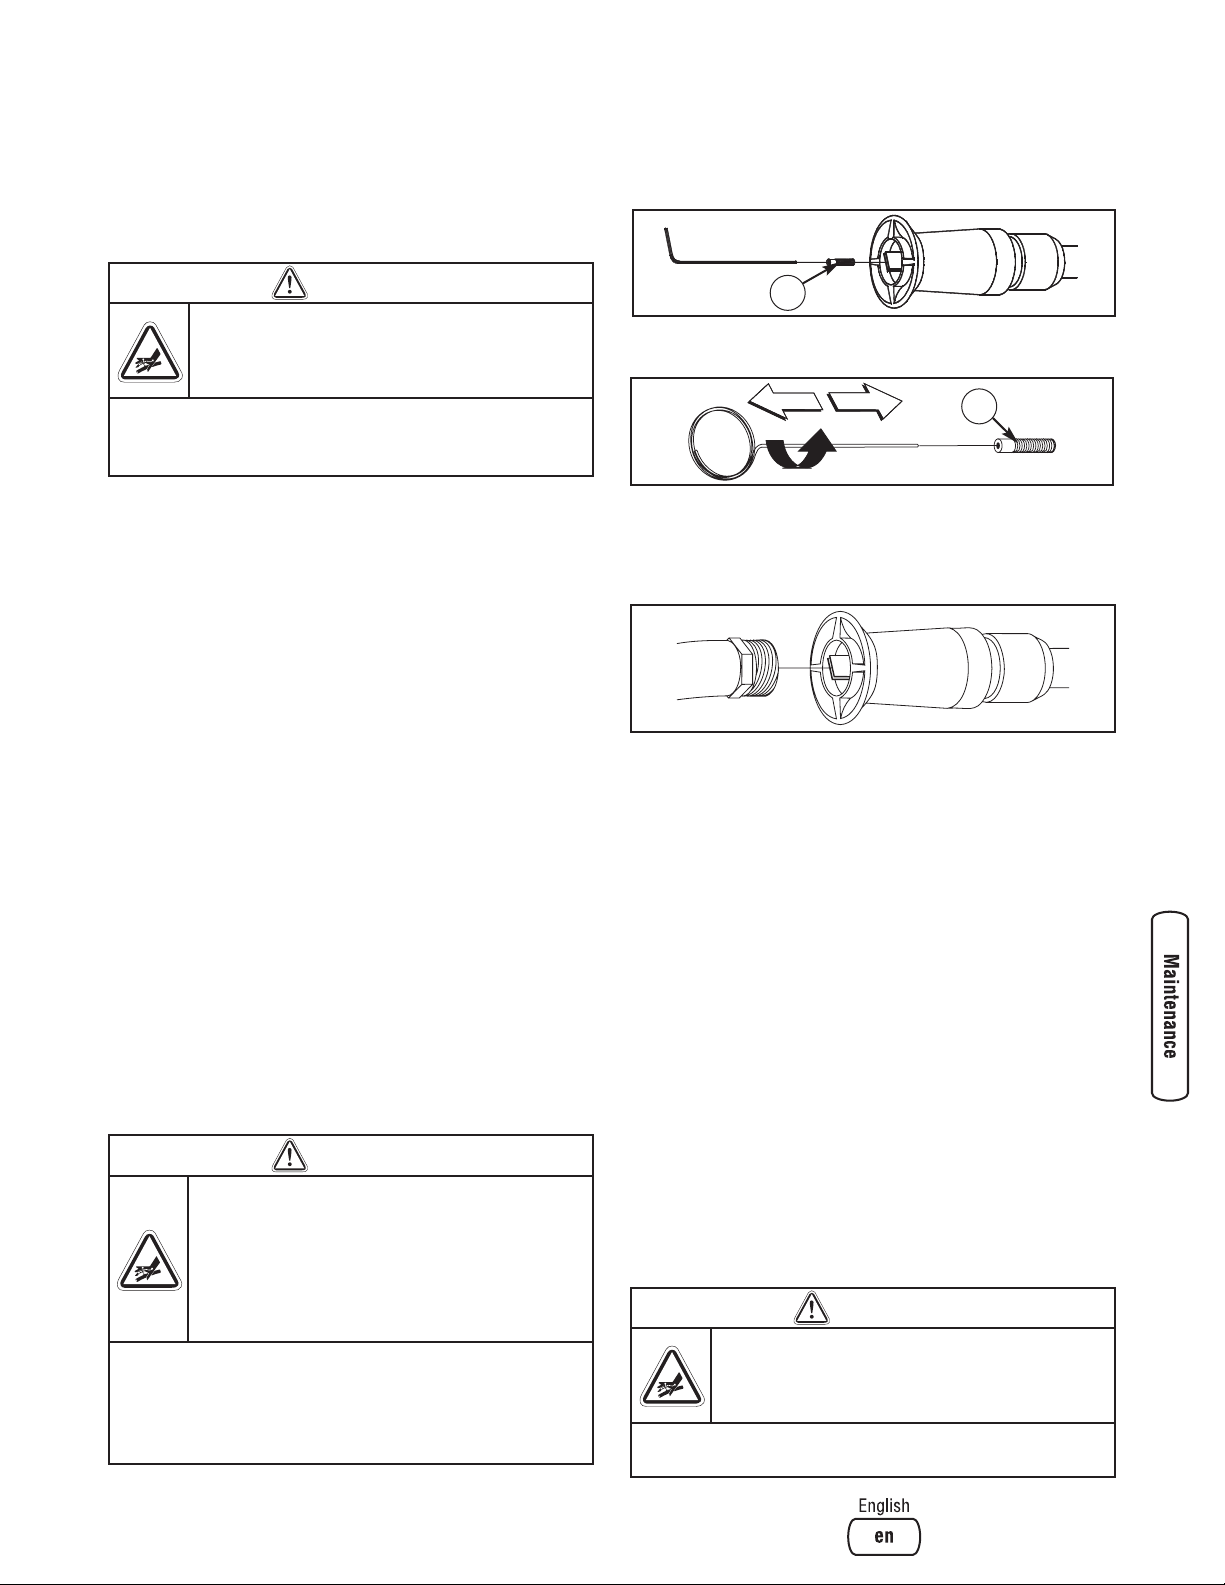
4. Twist nozzle clockwise to stream position. Using 2mm
allen wrench, remove orifice (A) from end of nozzle
extension.
5. Use wire (or small paper clip) to free any foreign
material clogging or restricting orifice (B).
6. Using a garden hose, remove additional debris by back
flushing water through nozzle extension. Back flush
between 30 to 60 seconds. Turn adjustable nozzle
extension to stream spray and move nozzle from low to
high while flushing.
7. Reinstall orifice into nozzle extension. DO NOT
overtighten orifice with allen wrench.
8. Reconnect nozzle extension to spray gun.
9. Make sure garden hose is connected to water inlet.
Check that high pressure hose is connected to spray
gun and pump. Turn on water.
10. Start engine following instructions How to Start Your
Pressure Washer.
11. Test pressure washer by operating with nozzle in high
and low positions.
O-Ring Maintenance
Through the normal operation of your pressure washer,
o–rings are used to keep the connections of the hoses and
spray gun tight and leak–free. These o-rings may become
worn or damaged.
An O–Ring Maintenance Kit is provided with your pressure
washer which includes replacement o-rings, rubber washer
and water inlet filter. Refer to the instruction sheet provided
in the kit to service your unit’s o-rings. Note that you will not
use all of the parts in the kit.
To remove a worn or damaged o–ring; use a small flathead
screwdriver to get underneath the o-ring and pry it off.
B
A
WARNING
The high pressure stream of water that this
equipment produces can cut through skin and its
underlying tissues, leading to serious injury and
possible amputation.
• NEVER repair high pressure hose. Replace it.
• Replacement hose rating MUST exceed maximum pressure
rating of unit.
WARNING
The high pressure stream of water that this
equipment produces can cut through skin and its
underlying tissues, leading to serious injury and
possible amputation.
Spray gun traps high water pressure, even when
engine is stopped and water is disconnected,
which can cause injury.
• Keep high pressure hose connected to pump and spray gun
while system is pressurized.
• After each starting attempt, where engine fails to run, always
point spray gun in safe direction, press red button and squeeze
spray gun trigger to release high pressure.
WARNING
The high pressure stream of water that this
equipment produces can cut through skin and its
underlying tissues, leading to serious injury and
possible amputation.
• NEVER repair leaking connections with sealant of any kind.
Replace o-ring or seal.
Page 18
18 BRIGGSandSTRATTON.COM
Engine Maintenance
Oil
Oil Recommendations
We recommend the use of Briggs & Stratton Warranty
Certified oils for best performance. Other high-quality
detergent oils are acceptable if classified for service SF, SG,
SH, SJ or higher. DO NOT use special additives.
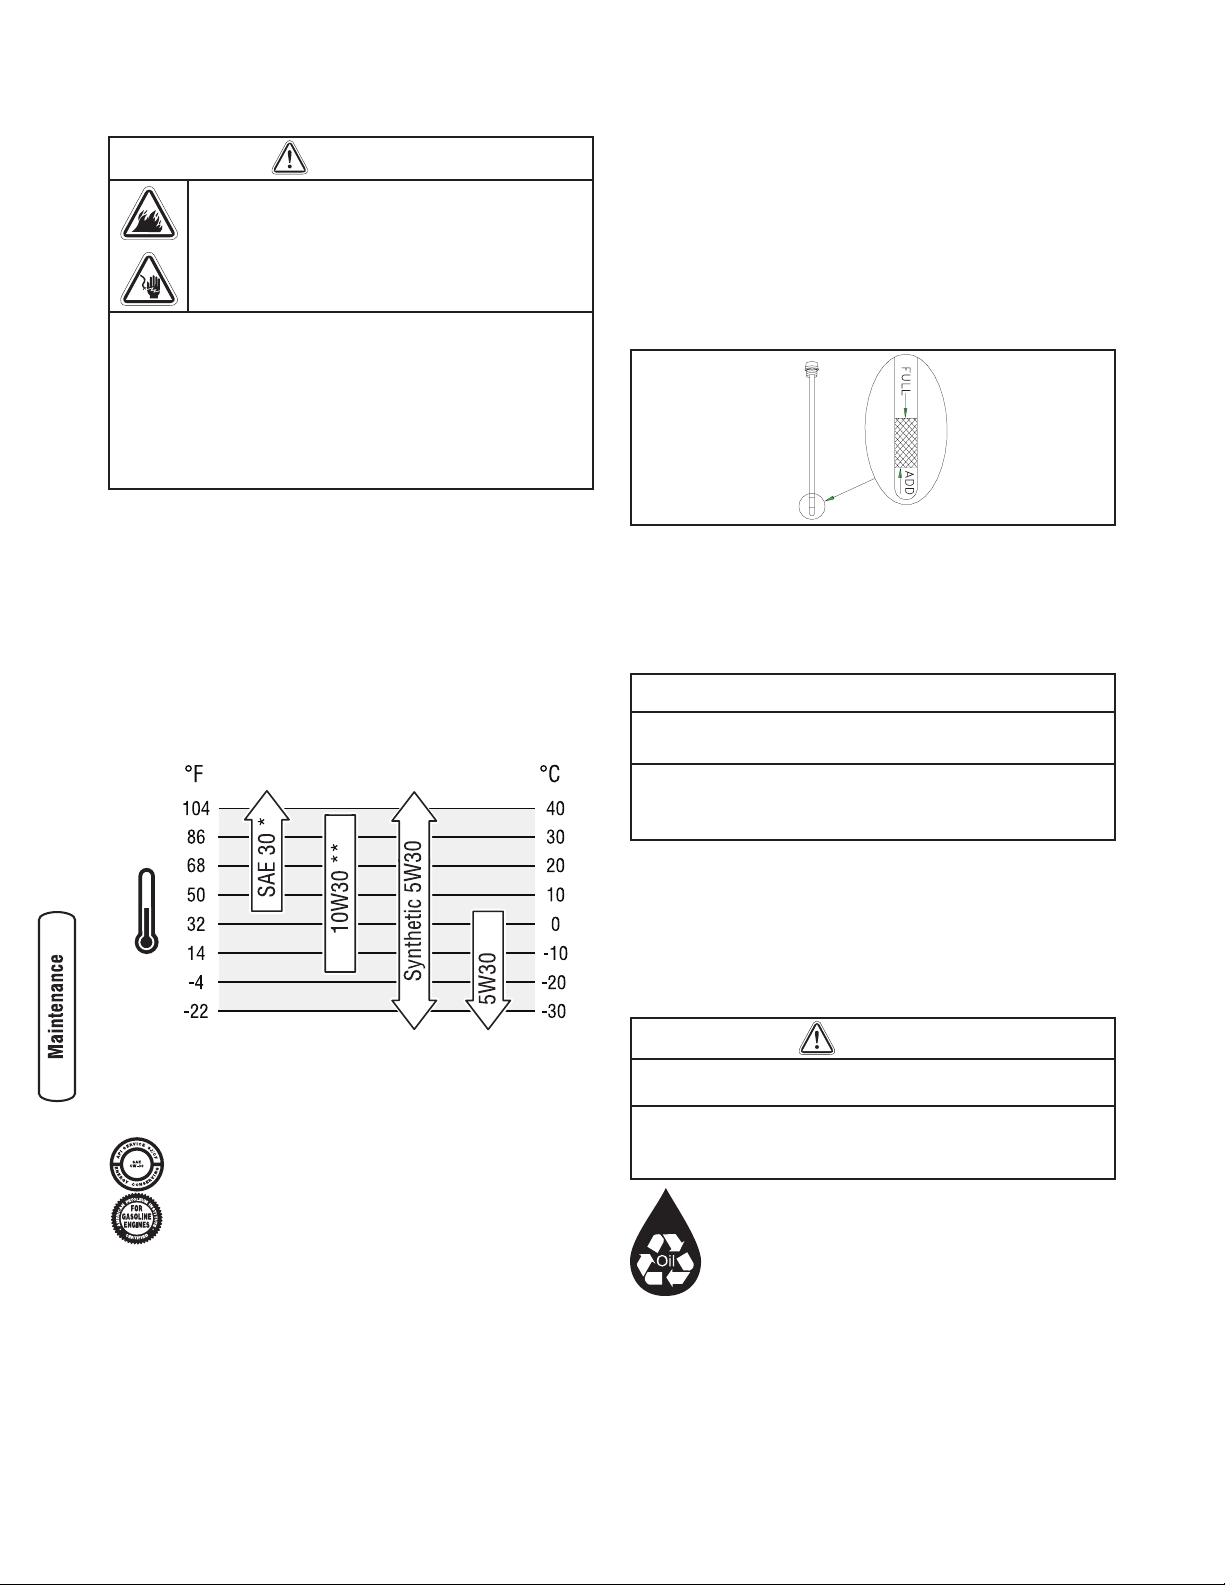
Outdoor temperatures determine the proper oil viscosity for
the engine. Use the chart to select the best viscosity for the
outdoor temperature range expected.
* Below 40°F (4°C) the use of SAE 30 will result in hard starting.
** Above 80°F (27°C) the use of 10W30 may cause increased oil
consumption. Check oil level more frequently.
NOTE: Synthetic oil meeting ILSAC GF-2, API
certification mark and API service symbol with
“SJ/CF ENERGY CONSERVING” or higher, is an
acceptable oil at all temperatures. Use of synthetic
oil does not alter required oil change intervals.
Checking Oil Level
Oil level should be checked prior to each use or at least
every 8 hours of operation. Keep oil level maintained.
1. Make sure pressure washer is on a level surface.
2. Remove oil dipstick and wipe dipstick with clean cloth.
Replace and tighten dipstick. Remove and and check oil
level.
3. Verify oil is at “Full” mark on dipstick. Replace and
tighten dipstick.
Adding Engine Oil
1. Make sure pressure washer is on a level surface.
2. Check oil level as described in Checking Oil Level.
3. If needed, slowly pour oil into oil fill opening to the
“Full” mark on dipstick. DO NOT overfill.
4. Replace and tighten dipstick.
Changing Engine Oil
Change the engine oil after the first 5 hours and every
50 hours thereafter. If you are using your pressure washer
under extremely dirty or dusty conditions, or in extremely
hot weather, change the oil more often.
KEEP OUT OF REACH OF CHILDREN. DON’T
POLLUTE. CONSERVE RESOURCES. RETURN
USED OIL TO COLLECTION CENTERS.
WARNING
Unintentional sparking can result in fire or
electric shock.
WHEN ADJUSTING OR MAKING REPAIRS TO YOUR PRESSURE
WASHER
• Disconnect the spark plug wire from the spark plug and place
the wire where it cannot contact spark plug.
WHEN TESTING FOR ENGINE SPARK
• Use approved spark plug tester.
• DO NOT check for spark with spark plug removed.
NOTICE
Overfilling with oil may cause the engine to not start, or
hard starting.
• DO NOT overfill.
• If over the FULL mark on dipstick, drain oil to reduce oil level to
FULL mark on dipstick.
CAUTION
Avoid prolonged or repeated skin contact with used motor
oil.
• Used motor oil has been shown to cause skin cancer in certain
laboratory animals.
• Thoroughly wash exposed areas with soap and water.
Page 19

19
Change oil while engine is still warm from running, as
follows:
1. Drain fuel tank by running pressure washer until fuel
tank is empty.
2. Disconnect spark plug wire and keep it away from
spark plug.
3. Clean area around oil fill, remove oil fill cap/dipstick.
Wipe dipstick clean.
4. Tip your pressure washer to drain oil from oil fill into a
suitable container making sure you tip your unit away
from spark plug. When crankcase is empty, return
pressure washer to upright position.
5. Slowly pour recommended oil (about 20 oz. (0.6 l)) into
oil fill opening. Pause to permit oil to settle. Fill to
“Full” mark on dipstick.
6. Wipe dipstick clean each time oil level is checked. DO
NOT overfill.
7. Replace and tighten dipstick.
8. Wipe up any remaining oil.
9. Reconnect spark plug wire to spark plug.
Service Air Cleaner
Your engine will not run properly and may be damaged if
you run it with a dirty air cleaner.
Service the air cleaner once every 25 hours of operation or
once each year, whichever comes first. Service more often if
operating under dirty or dusty conditions.
To service the air cleaner, follow these steps:
1. Remove screw (A).
2. Carefully remove air cleaner assembly to prevent debris
from falling into carburetor.
3. Take air cleaner assembly apart and clean all parts.
Wash foam air cleaner (B) in liquid detergent and
water. Squeeze dry in a clean cloth.
4. SATURATE foam air cleaner in engine oil and squeeze
in a clean cloth to remove excess oil.
5. Reinstall clean or new foam air cleaner in base (C).
6. Install air cleaner securely on carburetor with screw.
Service Spark Plug
Change the spark plug every 100 hours of operation or once
each year, whichever comes first. This will help your engine
to start easier and run better.
1. Clean area around spark plug.
2. Remove and inspect spark plug.
3. Check electrode gap with wire feeler gauge and set
spark plug gap to .030 inch (0.76 mm) if necessary.
4. Replace spark plug if electrodes are pitted, burned or
porcelain is cracked. Use the recommended
replacement plug. See Specifications.
5. Install spark plug and tighten firmly.
Spark Arrester Service
Your engine is not factory-equipped with a spark arrester. In
some areas, it is illegal to operate an engine without a spark
arrester. Check local laws and regulations. A spark arrester is
available from your nearest qualified service center. The
spark arrester must be serviced every 50 hours to keep it
functioning as designed.
If the engine has been running, the muffler will be very hot.
Allow the muffler to cool before servicing spark arrester.
• Remove spark arrester screen for cleaning and
inspection.
• Replace if screen is damaged.
WARNING
Contact with muffler area can result in serious
burns.
Exhaust heat/gases can ignite combustibles,
structures or damage fuel tank causing a fire.
• DO NOT touch hot parts and AVOID hot exhaust gases.
• Allow equipment to cool before touching.
• Keep at least 5 feet (1.5 m) of clearance on all sides of pressure
washer including overhead.
A
B
C
Page 20
20 BRIGGSandSTRATTON.COM
Air Cooling System
Over time debris may accumulate in cylinder cooling fins and
cannot be observed without partial engine disassembly. For
this reason, we recommend you have an authorized Briggs &
Stratton service dealer clean the cooling system per
recommended intervals (see Maintenance Schedule in
beginning of Maintenance section). Equally important is to
keep top of engine free from debris. See Clean Debris.
After Each Use
Water should not remain in the unit for long periods of time.
Sediments or minerals can deposit on pump parts and freeze
pump action. Follow these procedures after every use:
1. Shut off engine, turn off water supply, point gun in a
safe direction, press red button and squeeze trigger to
relieve trapped pressure, and let engine cool.
2. Disconnect hose from spray gun and high pressure
outlet on pump. Drain water from hose, spray gun, and
nozzle extension. Use a rag to wipe off the hose.
3. Empty pump of all pumped liquids by pulling recoil
handle about six times. This should remove most liquid
in pump.
4. Store unit in a clean, dry area.
5. If storing for more than 30 days, see Long Term
Storage on next page.
Keep areas within heavy line clear of debris.
WARNING
Fuel and its vapors are extremely flammable and
explosive.
Fire or explosion can cause severe burns or
death.
WHEN STORING FUEL OR EQUIPMENT WITH FUEL IN TANK
• Store away from furnaces, stoves, water heaters, clothes dryers,
or other appliances that have pilot light or other ignition source
because they can ignite fuel vapors.
WARNING
The high pressure stream of water that this
equipment produces can cut through skin and its
underlying tissues, leading to serious injury and
possible amputation.
Spray gun traps high water pressure, even when
engine is stopped and water is disconnected,
which can cause injury.
• Keep high pressure hose connected to pump and spray gun
while system is pressurized.
• After each starting attempt, where engine fails to run, always
point spray gun in safe direction, press red button and squeeze
spray gun trigger to release high pressure.
Page 21
21
Winter Storage
To protect the unit from freezing temperatures:
1. Follow steps 1-3 in the previous section After Each Use.
2. Use pump saver, Model 6039, to treat pump. This
minimizes freeze damage and lubricates pistons and
seals.
3. If pump saver is not available, connect a 3 ft. (92 cm)
section of garden hose to water inlet adapter. Pour
RV-antifreeze (antifreeze without alcohol) into hose.
Pull recoil handle twice. Disconnect 3 ft. (92 cm) hose.
4. Store unit in a clean, dry area.
Long Term Storage
If you do not plan to use the pressure washer for more than
30 days, you must prepare the engine and pump for long
term storage.
Protect Fuel System
Fuel Additive:
Fuel can become stale when stored over 30 days. Stale fuel
causes acid and gum deposits to form in the fuel system or
on essential carburetor parts. To keep fuel fresh, use Briggs
& Stratton FRESH START® fuel stabilizer, available as a
liquid additive or a drip concentrate cartridge.
There is no need to drain gasoline from the engine if a fuel
stabilizer is added according to instructions. Run the engine
for 2 minutes to circulate the stabilizer throughout the fuel
system. The engine and fuel can then be stored up to
24 months.
If gasoline in the engine has not been treated with a fuel
stabilizer, it must be drained into an approved container. Run
the engine until it stops from lack of fuel. The use of a fuel
stabilizer in the storage container is recommended to
maintain freshness.
Change Oil
While engine is still warm, drain oil from crankcase. Refill
with recommended grade. See Changing Engine Oil in Engine
Maintenance.
Oil Cylinder Bore
• Remove spark plug and pour about 1/2 ounce (15 ml)
of clean engine oil into the cylinder.
• Install spark plug and pull starter handle slowly to
distribute oil.
Protecting the Pump
To protect the pump from damage caused by mineral
deposits or freezing, use PumpSaver, Model 6039, to treat
pump. This prevents freeze damage and lubricates pistons
and seals.
NOTE: PumpSaver is available as an optional accessory. It is
not included with the pressure washer. Contact the nearest
authorized service center to purchase PumpSaver.
To use PumpSaver, make sure the pressure washer is turned
off and disconnected from supply water. Read and follow all
instructions and warnings given on the PumpSaver
container.
Other Storage Tips
1. DO NOT store fuel from one season to another unless it
has been treated as described in Protect Fuel System.
2. Replace fuel container if it starts to rust. Rust and/or
dirt in fuel can cause problems if it’s used with this
unit.
3. Cover unit with a suitable protective cover that does not
retain moisture.
4. Store unit in a clean and dry area.
NOTICE
You must protect your unit from freezing temperatures.
• Failure to do so will permanently damage your pump and render
your unit inoperable.
• Freeze damage is not covered under warranty.
NOTICE
You must protect your unit from freezing temperatures.
• Failure to do so will permanently damage your pump and render
your unit inoperable.
• Freeze damage is not covered under warranty.
WARNING
Storage covers can be flammable.
• DO NOT place a storage cover over a hot pressure washer.
• Let equipment cool for a sufficient time before placing the cover
on the equipment.
Page 22

22 BRIGGSandSTRATTON.COM
Troubleshooting
Problem Cause Correction
Pump has following problems: failure
to produce pressure, erratic pressure,
chattering, loss of pressure, low water
volume.
1. Nozzle in low pressure mode.
2. Water inlet is blocked.
3. Inadequate water supply.
4. Inlet hose is kinked or leaking.
5. Clogged inlet hose screen.
6. Water supply is over 100°F (38°C).
7. High pressure hose is blocked or
leaks.
8. Gun leaks.
9. Orifice is obstructed.
10. Pump is faulty.
1. Pull nozzle backward for high
pressure mode.
2. Clear inlet.
3. Provide adequate water flow.
4. Straighten inlet hose, patch leak.
5. Check and clean inlet hose screen.
6. Provide cooler water supply.
7. Clear blocks in outlet hose.
8. Replace gun.
9. Clean orifice.
10. Contact local service facility.
Detergent fails to mix with spray.
1. Detergent siphoning tube is not
submerged.
2. Detergent siphoning tube/filter is
clogged or cracked.
3. Nozzle is in high pressure mode.
1. Insert detergent siphoning tube into
detergent.
2. Clean or replace filter/detergent
siphoning tube.
3. Push nozzle forward for low
pressure mode.
Engine runs good at no-load but "bogs"
when load is added.
Engine speed is too slow. Move throttle control to FAST position. If
engine still "bogs down", contact local
service facility.
Engine will not start; or starts and runs
rough.
1. Low oil level.
2. Dirty air cleaner.
3. Out of fuel.
4. Stale fuel.
5. Spark plug wire not connected to
spark plug.
6. Bad spark plug.
7. Water in fuel.
8. Excessively rich fuel mixture.
1. Fill crankcase to proper level.
2. Clean or replace air cleaner.
3. Fill fuel tank.
4. Drain fuel tank; fill with fresh fuel.
5. Connect wire to spark plug.
6. Replace spark plug.
7. Drain fuel tank; fill with fresh fuel.
8. Contact local service facility.
Engine shuts down during operation.
Out of fuel. Fill fuel tank.
Engine lacks power. Dirty air filter. Replace air filter.
Page 23

23
Warranties
Emissions Control System Warranty
Briggs & Stratton Corporation (B&S), the California Air
Resources Board (CARB) and the United States
Environmental Protection Agency (U.S. EPA)
Emissions Control System Warranty Statement (Owner’s
Defect Warranty Rights and Obligations)
California, United States and Canada Emissions Control
Defects Warranty Statement
The California Air Resources Board (CARB), U.S. EPA and
B&S are pleased to explain the Emissions Control System
Warranty on your small off-road engine (SORE). In
California, new small off-road engines model year 2006 and
later must be designed, built and equipped to meet the
State’s stringent anti-smog standards. Elsewhere in the
United States, new non-road, spark-ignition engines certified
for model year 1997 and later must meet similar standards
set forth by the U.S. EPA. B&S must warrant the emissions
control system on your engine for the periods of time listed
below, provided there has been no abuse, neglect or
improper maintenance of your small off-road engine.
Your emissions control system includes parts such as the
carburetor, air cleaner, ignition system, fuel line, muffler and
catalytic converter. Also included may be connectors and
other emissions related assemblies.
Where a warrantable condition exists, B&S will repair your
small off-road engine at no cost to you including diagnosis,
parts and labor.
Briggs & Stratton Emissions Control Defects Warranty
Coverage
Small off-road engines are warranted relative to emissions
control parts defects for a period of two years, subject to
provisions set forth below. If any covered part on your
engine is defective, the part will be repaired or replaced by
B&S.
Owner’s Warranty Responsibilities
As the small off-road engine owner, you are responsible for
the performance of the required maintenance listed in your
Operating and Maintenance Instructions. B&S recommends
that you retain all your receipts covering maintenance on
your small off-road engine, but B&S cannot deny warranty
solely for the lack of receipts or for your failure to ensure the
performance of all scheduled maintenance.
As the small off-road engine owner, you should however be
aware that B&S may deny you warranty coverage if your
small off-road engine or a part has failed due to abuse,
neglect, improper maintenance or unapproved modifications.
You are responsible for presenting your small off-road engine
to an Authorized B&S Service Dealer as soon as a problem
exists. The undisputed warranty repairs should be completed
in a reasonable amount of time, not to exceed 30 days.
If you have any questions regarding your warranty rights and
responsibilities, you should contact a B&S Service
Representative at (414) 259-5262.
The emissions warranty is a defects warranty. Defects are
judged on normal engine performance. The warranty is not
related to an in-use emissions test.
Briggs & Stratton Emissions Control Defects Warranty
Provisions
The following are specific provisions relative to your
Emissions Control Defects Warranty Coverage. It is in
addition to the B&S engine warranty for non-regulated
engines found in the Operator’s Manual.
1. Warranted Parts
Coverage under this warranty extends only to the parts
listed below (the emissions control systems parts) to
the extent these parts were present on the engine
purchased.
a. Fuel Metering System
• Cold start enrichment system (soft choke)
• Carburetor and internal parts
• Fuel Pump
• Fuel line, fuel line fittings, clamps
• Fuel tank, cap and tether
• Carbon canister
b. Air Induction System
• Air cleaner
• Intake manifold
• Purge and vent line
c. Ignition System
• Spark plug(s)
• Magneto ignition system
d. Catalyst System
• Catalytic converter
• Exhaust manifold
• Air injection system or pulse valve
e. Miscellaneous Items Used in Above Systems
• Vacuum, temperature, position, time sensitive
valves and switches
• Connectors and assemblies
Page 24

24 BRIGGSandSTRATTON.COM
2. Length of Coverage
B&S warrants to the initial owner and each subsequent
purchaser that the Warranted Parts shall be free from
defects in materials and workmanship which caused the
failure of the Warranted Parts for a period of two years
from the date the engine is delivered to a retail
purchaser.
3. No Charge
Repair or replacement of any Warranted Part will be
performed at no charge to the owner, including
diagnostic labor which leads to the determination that a
Warranted Part is defective, if the diagnostic work is
performed at an Authorized B&S Service Dealer. For
emissions warranty service contact your nearest
Authorized B&S Service Dealer as listed in the “Yellow
Pages” under “Engines, Gasoline,” “Gasoline Engines,”
“Lawn Mowers,” or similar category.
4. Claims and Coverage Exclusions
Warranty claims shall be filed in accordance with the
provisions of the B&S Engine Warranty Policy.
Warranty coverage shall be excluded for failures of
Warranted Parts which are not original B&S parts or
because of abuse, neglect or improper maintenance as
set forth in the B&S Engine Warranty Policy. B&S is not
liable to cover failures of Warranted Parts caused by
the use of add-on, non-original, or modified parts.
5. Maintenance
Any Warranted Part which is not scheduled for
replacement as required maintenance or which is
scheduled only for regular inspection to the effect of
“repair or replace as necessary” shall be warranted as
to defects for the warranty period. Any Warranted Part
which is scheduled for replacement as required
maintenance shall be warranted as to defects only for
the period of time up to the first scheduled replacement
for that part. Any replacement part that is equivalent in
performance and durability may be used in the
performance of any maintenance or repairs. The owner
is responsible for the performance of all required
maintenance, as defined in the B&S Operator’s Manual.
6. Consequential Coverage
Coverage hereunder shall extend to the failure of any
engine components caused by the failure of any
Warranted Part still under warranty.
Emission Information
Engines that are certified to meet the California Air
Resources Board (CARB) Emission Standards must display
information regarding the Emissions Durability Period and
Air Index. The engine manufacturer makes this information
available to the consumer on emission labels. The engine
emission label will indicate certification information.
The Emissions Durability Period describes the number of
hours of actual running time for which the engine is certified
to be emissions compliant, assuming proper maintenance in
accordance with the Operating & Maintenance Instructions.
The following categories are used:
Moderate: Engine is certified to be emission compliant for
125 hours of actual engine running time.
Intermediate: Engine is certified to be emission compliant
for 250 hours of actual engine running time.
Extended: Engine is certified to be emission compliant for
500 hours of actual engine running time.
For example, a typical walk-behind lawn mower is used 20 to
25 hours per year. Therefore, the Emissions Durability
Period of an engine with an intermediate rating would
equate to 10 to 12 years.
Certain engines will be certified to meet the United States
Environmental Protection Agency (USEPA) Phase 2 emission
standards. For phase 2 certified engines, the Emissions
Compliance Period referred to on the Emissions Compliance
label indicates the number of operating hours for which the
engine has been shown to meet Federal emission
requirements.
For engines less than 225 cc displacement:
Category C = 125 hours
Category B = 250 hours
Category A = 500 hours.
For engines of 225 cc or more displacement:
Category C = 250 hours
Category B = 500 hours
Category A = 1000 hours.
Page 25

25
BRIGGS & STRATTON POWER PRODUCTS GROUP, LLC PRESSURE WASHER OWNER WARRANTY POLICY
LIMITED WARRANTY
Briggs & Stratton Power Products Group, LLC will repair or replace, free of charge, any part(s) of the pressure washer that is defective in material or
workmanship or both. Transportation charges on product submitted for repair or replacement under this warranty must be borne by purchaser. This
warranty is effective for the time periods and subject to the conditions stated below. For warranty service, find the nearest Authorized Service Dealer in
our dealer locator map at BRIGGSandSTRATTON.COM.
THERE IS NO OTHER EXPRESS WARRANTY. IMPLIED WARRANTIES, INCLUDING THOSE OF MERCHANTABILITY AND FITNESS FOR A PARTICULAR
PURPOSE, ARE LIMITED TO ONE YEAR FROM PURCHASE, OR TO THE EXTENT PERMITTED BY LAW. ANY AND ALL IMPLIED WARRANTIES ARE
EXCLUDED. LIABILITY FOR INCIDENTAL OR CONSEQUENTIAL DAMAGES ARE EXCLUDED TO THE EXTENT EXCLUSION IS PERMITTED BY LAW. Some
states or countries do not allow limitations on how long an implied warranty lasts, and some states or countries do not allow the exclusion or limitation
of incidental or consequential damages, so the above limitation and exclusion may not apply to you. This warranty gives you specific legal rights and
you may also have other rights which vary from state to state or country to country.
2 years
90 days
Consumer Use
Commercial Use
The warranty period begins on the date of purchase by the first retail consumer or commercial end user, and continues for the period of time stated above.
“Consumer use" means personal residential household use by a retail consumer. “Commercial use" means all other uses, including use for commercial,
income producing or rental purposes. Once equipment has experienced commercial use, it shall thereafter be considered as commercial use for purposes of
this warranty.
NO WARRANTY REGISTRATION IS NECESSARY TO OBTAIN WARRANTY ON BRIGGS & STRATTON PRODUCTS. SAVE YOUR PROOF OF PURCHASE
RECEIPT. IF YOU DO NOT PROVIDE PROOF OF THE INITIAL PURCHASE DATE AT THE TIME WARRANTY SERVICE IS REQUESTED, THE MANUFACTURING
DATE OF THE PRODUCT WILL BE USED TO DETERMINE THE WARRANTY PERIOD.
ABOUT YOUR WARRANTY
We welcome warranty repair and apologize to you for being inconvenienced. Any Authorized Service Dealer may perform warranty repairs. Most warranty
repairs are handled routinely, but sometimes requests for warranty service may not be appropriate. For example, warranty service would not apply if
equipment damage occurred because of misuse, lack of routine maintenance, shipping, handling, warehousing or improper installation. Similarly, the
warranty is void if the manufacturing date or the serial number on the pressure washer or engine has been removed or the equipment has been altered or
modified. During the warranty period, the Authorized Service Dealer, at its option, will repair or replace any part that, upon examination, is found to be
defective under normal use and service. This warranty will not cover the following repairs and equipment:
• Normal Wear: Outdoor Power Equipment, like all mechanical devices, needs periodic parts and service to perform well. This warranty does not cover
repair when normal use has exhausted the life of a part or the equipment.
• Installation and Maintenance: This warranty does not apply to equipment or parts that have been subjected to improper or unauthorized installation or
alteration and modification, misuse, negligence, accident, overloading, overspeeding, improper maintenance, repair or storage so as, in our judgment,
to adversely affect its performance and reliability. This warranty also does not cover normal maintenance such as air filters, adjustments, fuel system
cleaning and obstruction (due to chemical, lime, dirt, and so forth).
• Other Exclusions: This warranty excludes wear items such as quick couplers, seals, o-rings, pumps that have been run without water supplied or
damage or malfunctions resulting from accidents, abuse, modifications, alterations, or improper servicing or freezing or chemical deterioration.
Accessory parts, such as guns, hoses, nozzle extensions (wands), and nozzles, are excluded from the product warranty. This warranty excludes used,
reconditioned, and demonstration equipment and failures due to acts of God and other force majeure events beyond the manufacturers control.
198203E, Rev. B, 12/31/2006
BRIGGS & STRATTON POWER PRODUCTS GROUP, LLC
JEFFERSON, WI, USA
Effective December 1, 2005 replaces all undated Warranties and all Warranties dated before December 1, 2005
WARRANTY PERIOD
Page 26

26 BRIGGSandSTRATTON.COM
Briggs & Stratton Power Products Group, LLC
900 N. Parkway
Jefferson, Wisconsin, 53549 U.S.A.
Pressure Washer
Power Ratings: The gross power rating for individual gas engine models is labeled in accordance with SAE (Society of
Automotive Engineers) code J1940 (Small Engine Power & Torque Rating Procedure), and rating performance has been
obtained and corrected in accordance with SAE J1995 (Revision 2002-05). Torque values are derived at 3060 RPM; horsepower
values are derived at 3600 RPM. Actual gross engine power will be lower and is affected by, among other things, ambient
operating conditions and engine-to-engine variability. Given both the wide array of products on which engines are placed and
the variety of environmental issues applicable to operating the equipment, the gas engine will not develop the rated gross power
when used in a given piece of power equipment (actual "on-site" or net power). This difference is due to a variety of factors
including, but not limited to, accessories (air cleaner, exhaust, charging, cooling, carburetor, fuel pump, etc.), application
limitations, ambient operating conditions (temperature, humidity, altitude), and engine-to-engine variability. Due to
manufacturing and capacity limitations, Briggs & Stratton may substitute an engine of higher rated power for this Series engine.
This pressure washer is rated in accordance to the Pressure Washer Manufacture Association (PWMA) standard PW101
(Testing and Rating Performance of Pressure Washers).
Product Specifications
Outlet Pressure . . . . . . . . . . . . . . .2,000 PSI (137.9 BARS)
Flow Rate . . . . . . . . . . . . . . . . . . . .1.9 GPM (7.2 liters/min)
Water Supply Temperature . . . . . . . . . . .100ºF (38ºC) MAX
Displacement . . . . . . . . . . . . . . . . . . . . . . . . . . . . . . .158 cc
Spark Plug Gap . . . . . . . . . . . . . . . . . . .0.030 in. (0.76 mm)
Fuel Capacity . . . . . . . . . . . . . . . . . . . . .1.0 Qt. (0.95 Liters)
Oil Capacity . . . . . . . . . . . . . . . . . . . .20 Ounces (0.6 Liters)
Common Service Parts
PumpSaver . . . . . . . . . . . . . . . . . . . . . . . . . . . . . . . . . .6039
O-Ring Maintenance Kit . . . . . . . . . . . . . . . . . . . . . . . .6048
Water Inlet Screen . . . . . . . . . . . . . . . . . . . . . . . . .B2384GS
Air Cleaner . . . . . . . . . . . . . . . . . . . . . . . .698369 or 5088D
Resistor Spark Plug . . . . . . . . . . . . . . . .802592S or 5095D
Long Life Platinum Spark Plug . . . . . . . . . . . . . . . . . .5062D
Engine Oil Bottle . . . . . . . . . . . . . . . . . . . . . . . . . . . .100005
Fuel Stabilizer . . . . . . . . . . . . . . . . . . . . . . . . . . . . . . .5041D
Spark Arrester . . . . . . . . . . . . . . . . . . . . . . . . . . . . . .398067
Page 27
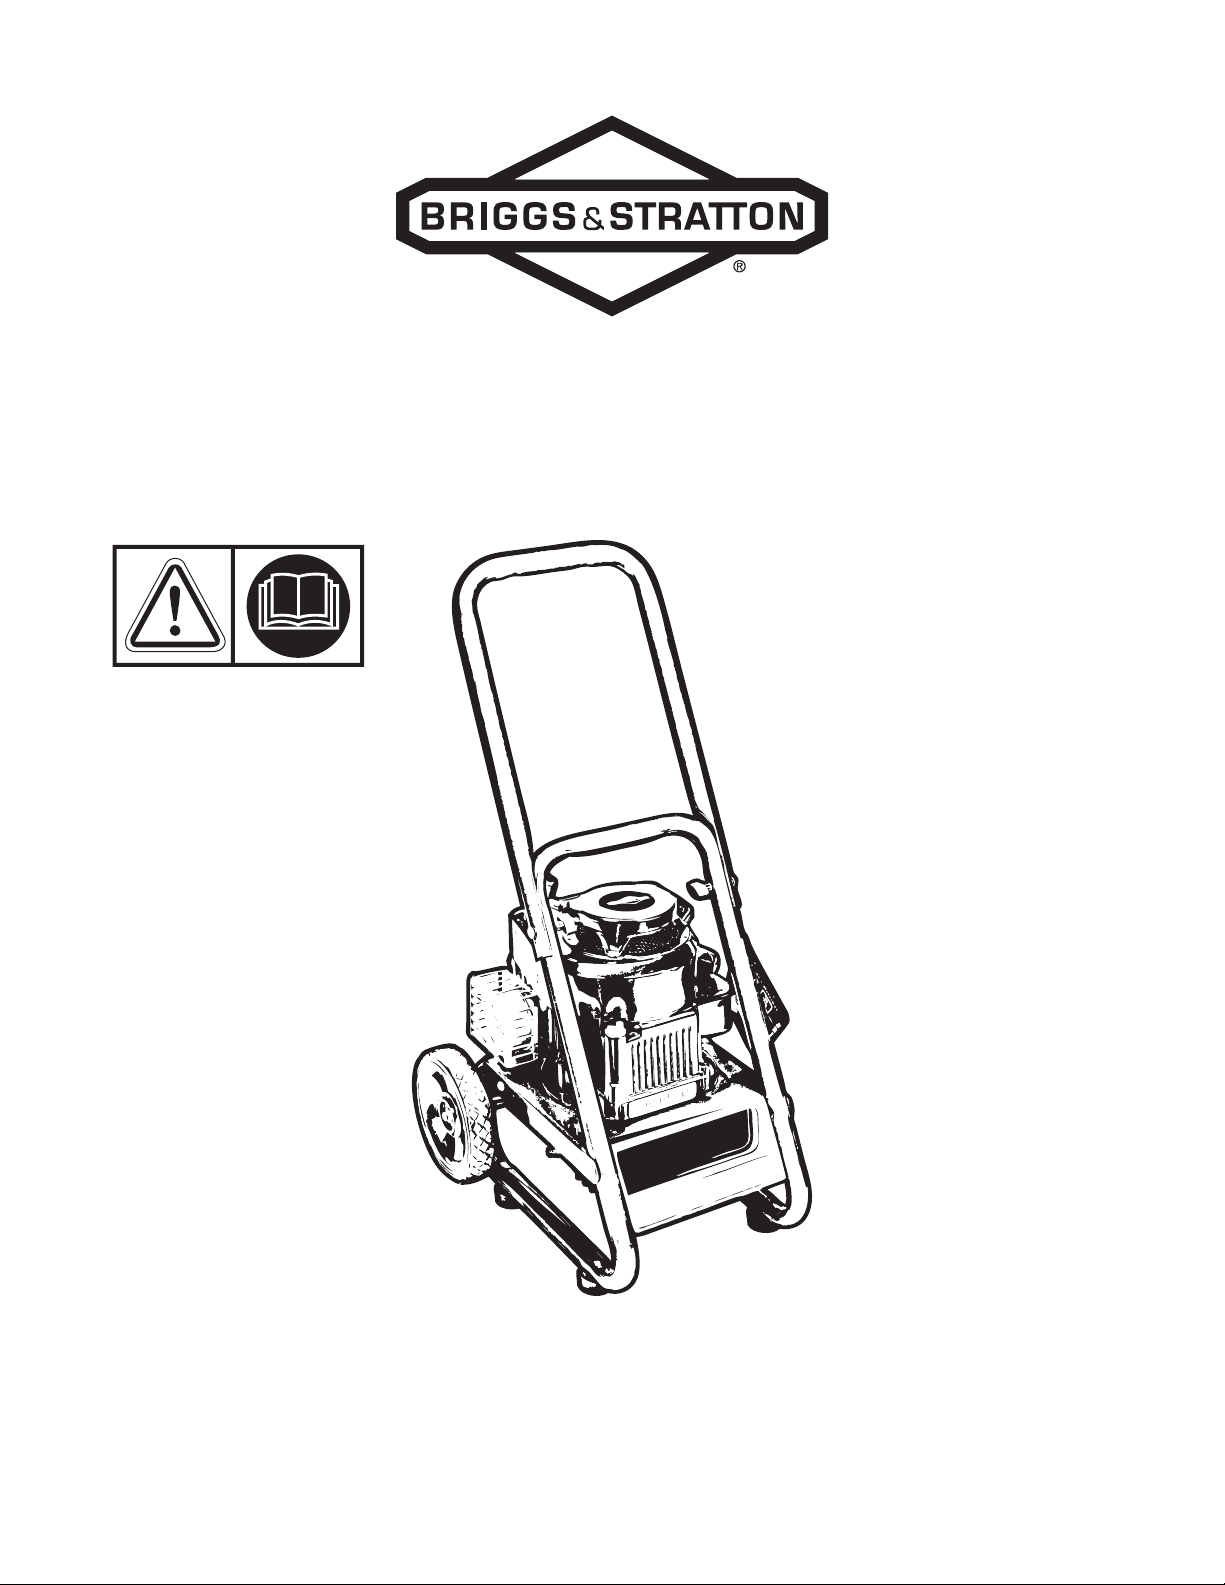
BRIGGS & STRATTON POWER PRODUCTS GROUP, LLC
JEFFERSON, WISCONSIN, ÉTATS-UNIS D'AMÉRIQUE
Laveuse haute pression
Manuel d'utilisation
Cette laveuse haute pression est classée conformément à la norme PW101 de la
Pressure Washer Manufacture Association (PWMA) (Essai et classement des
performances des laveuses à pression).
Page 28

2 BRIGGSandSTRATTON.COM
Briggs & Stratton Power Products Group, LLC
900 North Parkway
Jefferson, WI 53549, États-Unis d'Amérique
Copyright © 2008 Briggs & Stratton Power Products Group,
LLC. Tous droits réservés. Aucune partie de ce manuel ne peut
être reproduite ou transmise sous n'importe quelle forme et
par quelque moyen que ce soit sans l'autorisation expresse
écrite de Briggs & Stratton Power Products Group, LLC.
Merci d'avoir acheté cette laveuse haute pression Briggs & Stratton de qualité. Nous sommes heureux que vous fassiez
confiance à la marque Briggs & Stratton. Si vous respectez les instructions d’utilisation et d’entretien de ce manuel, vous
pourrez vous fier à votre laveuse haute pression Briggs & Stratton durant de nombreuses années.
Ce manuel contient des renseignements sur la sécurité pour vous informer des dangers et des risques associés laveuses à
pression ainsi que de la façon de les éviter. Briggs & Stratton n'a pas nécessairement connaissance de toutes les applications
pour lesquelles cette laveuse haute pression peut être utilisée ; il est donc important que vous lisiez et compreniez ces
instructions avant d'essayer de faire démarrer ou d'utiliser cet appareil. Conservez ces instructions pour vous y référer
ultérieurement.
Cette laveuse haute pression doit être montée avant toute utilisation. Consultez la section Montage de ce manuel pour
connaître les étapes du montage final. Suivez ces directives à la lettre.
Où nous trouver
Vous n'aurez jamais à chercher bien loin pour trouver un centre de support et service Briggs & Stratton pour votre laveuse
haute pression. Plusieurs milliers de distributeurs de service après-vente agréés Briggs & Stratton dans le monde offrent un
service de qualité. Vous trouverez aussi le plus proche distributeur de service agréé sur la carte des détaillants
BRIGGSandSTRATTON.COM.
Laveuse haute pression
Numéro de modèle
Révision
Numéro de série
Moteur
Numéro de modèle
Numéro du type
Numéro du code
Date d'achat
Page 29
Table des matières
Sécurité de l'opérateur . . . . . . . . . . . . . . . . . . . . . . . . . . . . 4
Description de l’équipement . . . . . . . . . . . . . . . . . . . . . . . . . . . . . . . . . . . . 4
Consignes de sécurité . . . . . . . . . . . . . . . . . . . . . . . . . . . . . . . . . . . . . . . . . 4
Assemblage. . . . . . . . . . . . . . . . . . . . . . . . . . . . . . . . . . . . 8
Déballage de la laveuse haute pression . . . . . . . . . . . . . . . . . . . . . . . . . . . . 8
Fixer la poignée . . . . . . . . . . . . . . . . . . . . . . . . . . . . . . . . . . . . . . . . . . . . . . 8
Installer le kit de roues . . . . . . . . . . . . . . . . . . . . . . . . . . . . . . . . . . . . . . . . 8
Ajouter l'huile moteur . . . . . . . . . . . . . . . . . . . . . . . . . . . . . . . . . . . . . . . . . 9
Ajouter du carburant . . . . . . . . . . . . . . . . . . . . . . . . . . . . . . . . . . . . . . . . . . 9
Raccorder le flexible et l'alimentation en eau à la pompe . . . . . . . . . . . . . 10
Caractéristiques et commandes . . . . . . . . . . . . . . . . . . . . . 11
Fonctionnement . . . . . . . . . . . . . . . . . . . . . . . . . . . . . . . . 12
Emplacement du laveuse haute pression. . . . . . . . . . . . . . . . . . . . . . . . . . 12
Démarrage de la laveuse haute pression . . . . . . . . . . . . . . . . . . . . . . . . . . 12
Procédure d'arrêt du laveuse haute pression . . . . . . . . . . . . . . . . . . . . . . 14
Utilisation de la buse réglable . . . . . . . . . . . . . . . . . . . . . . . . . . . . . . . . . . 14
Application de détergent . . . . . . . . . . . . . . . . . . . . . . . . . . . . . . . . . . . . . . 14
Rinçage avec le laveuse haute pression. . . . . . . . . . . . . . . . . . . . . . . . . . . 15
Nettoyage du tube de siphonage de détergent. . . . . . . . . . . . . . . . . . . . . . 15
Système de refroidissement automatique (dissipation de la chaleur) . . . . 15
Entretien . . . . . . . . . . . . . . . . . . . . . . . . . . . . . . . . . . . . . 16
Calendrier d'entretien. . . . . . . . . . . . . . . . . . . . . . . . . . . . . . . . . . . . . . . . . 16
Entretien du laveuse haute pression . . . . . . . . . . . . . . . . . . . . . . . . . . . . . 16
Entretien du moteur . . . . . . . . . . . . . . . . . . . . . . . . . . . . . . . . . . . . . . . . . . 18
Après chaque utilisation. . . . . . . . . . . . . . . . . . . . . . . . . . . . . . . . . . . . . . . 20
Hivernage. . . . . . . . . . . . . . . . . . . . . . . . . . . . . . . . . . . . . . . . . . . . . . . . . . 21
Entreposage à long terme . . . . . . . . . . . . . . . . . . . . . . . . . . . . . . . . . . . . . 21
Diagnostic des problèmes . . . . . . . . . . . . . . . . . . . . . . . . . 22
Garanties . . . . . . . . . . . . . . . . . . . . . . . . . . . . . . . . . . . . 23
Garantie du système de contrôle des émissions dans l'environnement. . . 23
Garantie du propriétaire d’un laveuse haute pression . . . . . . . . . . . . . . . . 25
Caractéristiques . . . . . . . . . . . . . . . . . . . . . . . . . . . . . . . . 26
Caractéristiques du produit . . . . . . . . . . . . . . . . . . . . . . . . . . . . . . . . . . . . 26
Pièces d'entretien courantes . . . . . . . . . . . . . . . . . . . . . . . . . . . . . . . . . . . 26
3
Page 30
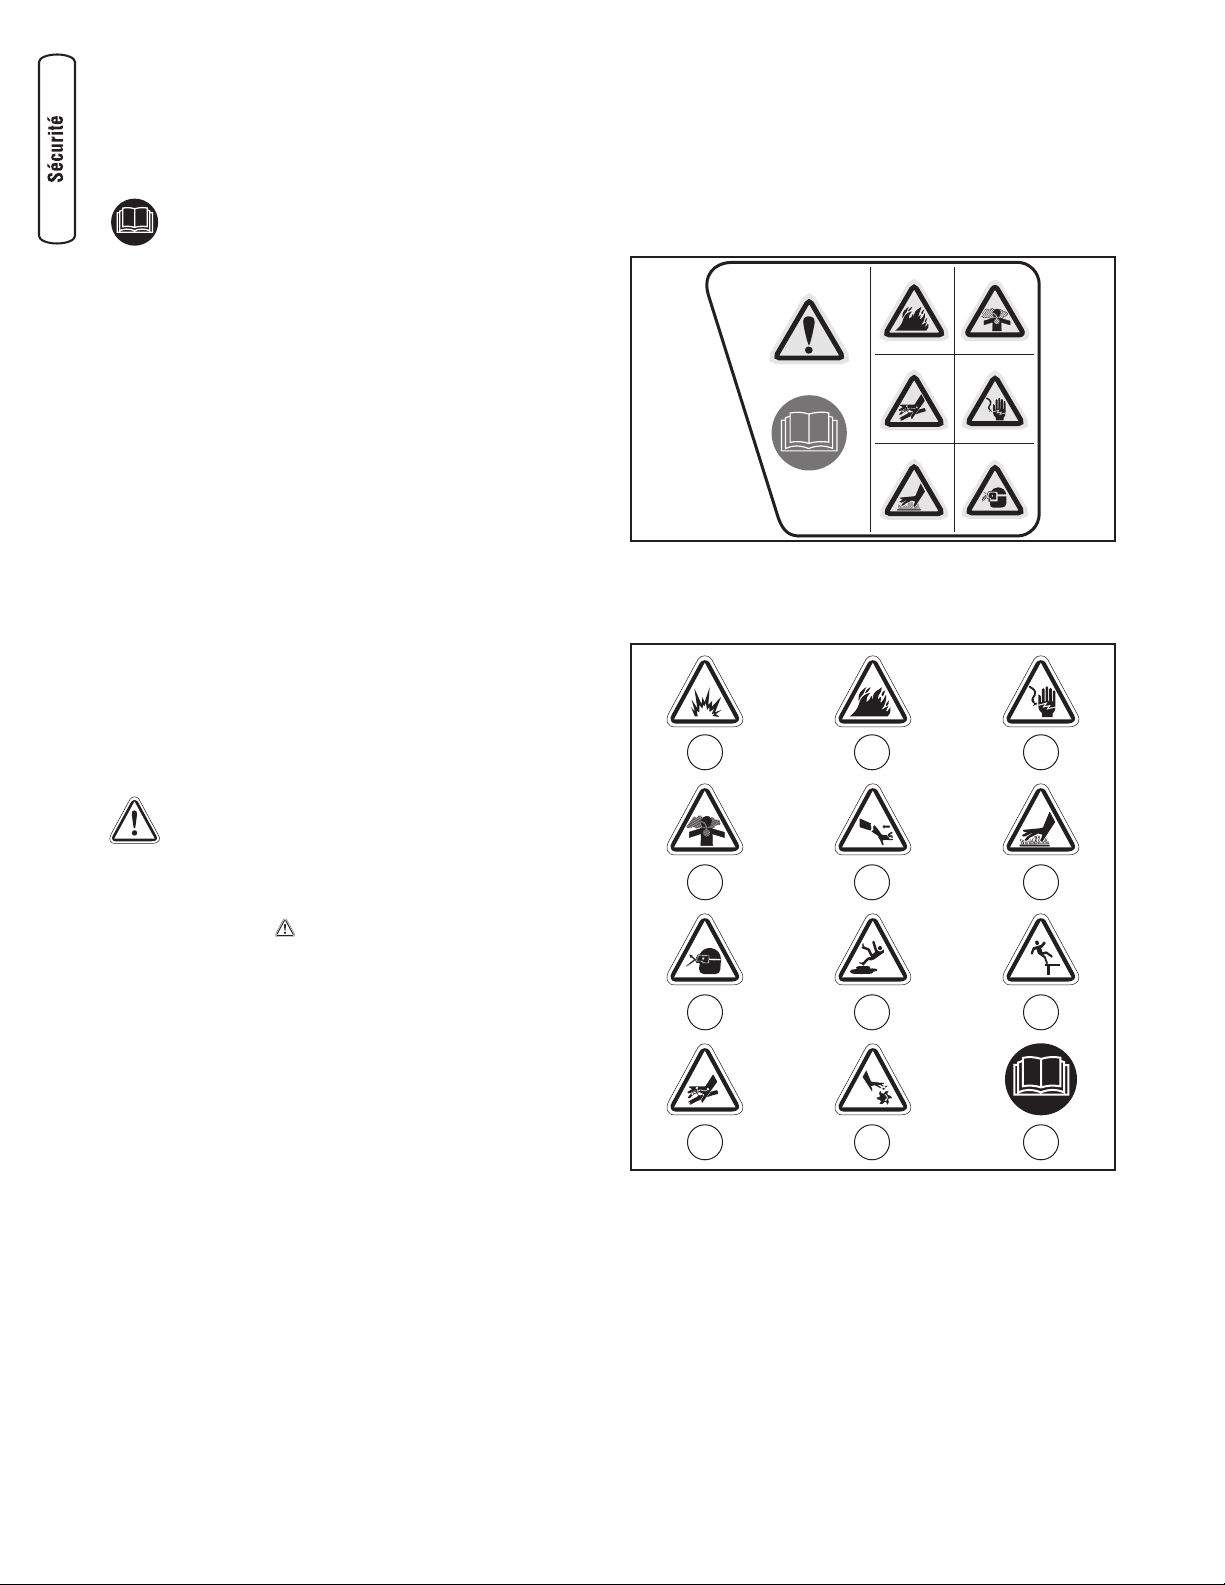
Sécurité de l'opérateur
Description de l’équipement
L'utilisateur doit lire ce manuel soigneusement et
se familiariser avec le laveuse haute pression. Il
doit prendre connaissance de ses applications, de
ses limites et des risques inhérents à son
utilisation.
Cette laveuse haute pression fonctionne sous 137,9 bars
(2 000 PSI) avec un débit de 7,2 l/minute. Cet appareil
domestique de grande qualité comporte des roues de
17,8 cm, une pompe à came axiale avec pistons en acier
inoxydable, un circuit de refroidissement automatique, un
circuit de siphonage de détergent, un embout de pulvérisation
réglable, des lunettes de sécurité à pourtour étanche, un tuyau
souple à usage industriel de 9,1 m et plus encore.
Tout a été fait pour s'assurer que les renseignements
contenus dans le présent guide soient exacts et à jour.
Toutefois, le fabriquant se réserve le droit de changer, de
modifier ou encore d'amélorer le système en tout temps et
ce, sans préavis.
Le système de contrôle des émissions dans l'environnement
de cette laveuse haute pression est garanti conforme aux
normes définies par l'Agence américaine de protection de
l'environnement et le California Air Resources Board.
Consignes de sécurité
Voici le symbole d'avertissement de sécurité. Ces
symboles attirent votre attention sur le risque de
blessure corporelle. Pour éviter toute blessure
mortelle ou non, observer toutes les consignes de
sécurité associées à ces symboles.
Le symbole d'alerte ( ) apparaît complété par un qualificatif
(DANGER, ATTENTION, AVERTISSEMENT), une image ou un
message de sécurité pour attirer l'attention sur les risques.
Un DANGER signale un risque qui - s'il n'est pas écarté entraîne des blessures graves ou la mort. Un
AVERTISSEMENT signale un risque qui - s'il n'est pas écarté
- pourrait entraîner des blessures graves ou la mort. La
mention ATTENTION signale un risque qui - s'il n'est pas
écarté - pourrait entraîner des blessures légères ou
modérées. La mention AVIS signale une situation qui pourrait
entraîner une détérioration de l'équipement. Respectez
scrupuleusement les consignes de sécurité pour éliminer ou
réduire les risques de blessures ou dangers de mort.
Plaque d'avertissement
Une plaque d'avertissement figure sur l'appareil pour
signaler les risques pour la sécurité. Si cette plaque vient à
être endommagée ou illisible, la remplacer par une étiquette
neuve disponible auprès de votre représentant local Briggs &
Stratton.
Les pictogrammes de la plaque d'avertissement sont
explicités plus bas dans cette section consacrée à la sécurité.
Pictogrammes des risques et signification
A - Explosion G - Projection d'objets
B - Incendie H - Surface glissante
C - Choc électrique J - Risque de chute
D - Vapeurs toxiques K - Injection de fluide
E - Risque de recul L - Pièces en mouvement
F - Surface chaude M - Manuel d'opérateur
4 BRIGGSandSTRATTON.COM
A B C
D E
G H
F
J
K L M
Page 31

5
AVERTISSEMENT
L'échappement du moteur de ce produit contient des
produits chimiques reconnus par l'État de Californie pour
provoquer des cancers, des malformations congénitales
ou d'autres lésions liées à la reproduction.
AVERTISSEMENT
Risque d'électrocution.
Tout contact avec une source d'alimentation
électrique peut provoquer un choc électrique ou
des brûlures.
• NE JAMAIS pulvériser près d'une source d'alimentation
électrique.
AVERTISSEMENT
L'utilisation du laveuse haute pression peut
causer l'apparition de flaques d'eau et rendre les
surfaces glissantes et dangereuses.
Le recul du pistolet de pulvérisation peut vous
déséquilibrer.
• Utiliser cet appareil sur une surface stable.
• La pente et le drainage de l'aire de nettoyage doivent être
suffisants pour réduire le risque de chute accru sur des surfaces
glissantes.
• Agir avec une extrême prudence en cas d'utilisation du laveuse
haute pression sur une échelle, un échafaudage ou tout autre
emplacement relativement instable.
• Pour éviter tout risque de blessure en cas de recul du pistolet de
pulvérisation, le tenir fermement des deux mains pour la
pulvérisation haute pression.
AVERTISSEMENT
L'essence sous forme liquide ou vapeur est
extrêmement inflammable et explosive.
Un incendie ou une explosion peuvent provoquer
de graves brûlures ou la mort.
LORS DE L'AJOUT OU DE LA VIDANGE DE CARBURANT
• Arrêter la laveuse haute pression (OFF) et la laisser refroidir
pendant au moins 2 minutes avant de retirer le bouchon de
carburant. Desserrer lentement de bouchon pour libérer la
pression du réservoir.
• Remplir ou vidanger le réservoir de carburant à l'extérieur.
• NE PAS trop remplir le réservoir. Laisser un espace suffisant
pour l’évaporation de l'essence.
• En cas de renversement de carburant, attendre qu'il s'évapore
avant de lancer le moteur.
• Manipuler l'essence à l'abri des étincelles, des flammes nues,
des veilleuses, de la chaleur ainsi que d'autres sources
potentielles d'inflammation.
• NE PAS allumer de cigarettes, ni fumer.
LORS DE LA MISE EN MARCHE DE L'APPAREIL
• Vérifier que la bougie, le silencieux, le bouchon de carburant et
le filtre à air sont en place.
• NE PAS tenter de faire démarrer le moteur en l'absence de
bougie.
UTILISATION DE L'ÉQUIPEMENT
• NE JAMAIS incliner le moteur ni l'équipement au point que
l'essence se mette à couler.
• NE PAS vaporiser de liquides inflammables.
TRANSPORT ET RÉPARATION DE L'ÉQUIPEMENT
• VIDER le réservoir et FERMER le robinet d'essence pour
transporter et réparer l'équipement.
• Débrancher le fil de la bougie.
ENTREPOSAGE D'ESSENCE OU D'UN ÉQUIPEMENT DONT LE
RÉSERVOIR CONTIENT DE L'ESSENCE
• NE PAS entreposer à proximité de fours, poêles, chauffe-eau,
sèche-linge ou d'autres équipements susceptibles de comporter
une veilleuse ou une source potentielle d'inflammation des
vapeurs d'essence.
AVERTISSEMENT
En fonctionnement, le moteur dégage du
monoxyde de carbone, un gaz inodore, incolore
et mortel.
L'inhalation du monoxyde de carbone peut
provoquer des maux de tête, de la fatigue, des
étourdissements, des vomissements, de la
confusion, des crises d'épilepsie, des nausées,
un évanouissement ou la mort.
Certains produits chimiques ou détergents
peuvent être dangereux et, s'ils sont inhalés ou
ingérés, provoquer des nausées importantes, des
évanouissements ou des empoisonnements.
• Utiliser le nettoyeur EXCLUSIVEMENT en extérieur.
• Empêchez les gaz d'échappement de pénérer dans un lieu
confiné par les fenêtres, portes, entrées d'aération et d'autres
ouvertures.
• NE PAS faire démarrer ou faire fonctionner le moteur à
l'intérieur d'un local ou d'une zone fermée, même si les fenêtres
et les portes sont ouvertes.
• S'il y a un risque d'inhalation de vapeurs, utiliser un appareil ou
un masque respiratoire.
• Lire soigneusement les instructions d'emploi du masque afin d'être
certain qu'il protège efficacement contre l'inhalation de vapeurs
dangereuses.
AVERTISSEMENT
Certains composants de ce produit et accessoires
connexes contiennent des produits chimiques reconnus
par l'État de Californie pour provoquer des cancers, des
malformations congénitales ou d'autres lésions liées à la
reproduction. Se laver les mains après toute utilisation.
Page 32

6 BRIGGSandSTRATTON.COM
AVERTISSEMENT
Le recul (la rétractation rapide) du cordon du
démarreur peut provoquer des blessures. Ce
recul attire la main et le bras en direction du
moteur plus vite qu'il n'est possible de les retirer.
Ce peut être la cause de fêlures, fractures,
contusions ou foulures.
• NE JAMAIS tirer sur le cordon du démarreur sans libérer
d'abord la pression du pistolet de pulvérisation.
• Lors du démarrage du moteur, tirer lentement sur la corde
jusqu'à sentir une résistance, puis tirer rapidement afin d'éviter
l'effet de recul.
• Après chaque tentative de démarrage qui échoue, toujours
pointer le pistolet de pulvérisation dans une direction sans
danger, appuyer sur le bouton rouge et enfoncer la gâchette du
pistolet de pulvérisation pour libérer la pression.
• Pour éviter tout risque de blessure en cas de recul du pistolet de
pulvérisation, le tenir fermement des deux mains pour la
pulvérisation haute pression.
AVERTISSEMENT
Tout contact avec la zone du silencieux peut
provoquer des brûlures graves.
Les gaz ou la chaleur d’échappement peuvent
mettre le feu à des produits combustibles, des
structures ou endommager le réservoir d’essence
et provoquer un incendie.
• NE PAS toucher aux pièces chaudes et ÉVITER le contact avec
les gaz d’échappement.
• Laisser l'équipement refroidir avant d'y toucher.
• Conserver un débattement d’au moins 152 cm autour du
laveuse haute pression, y compris au-dessus du nettoyeur.
AVERTISSEMENT
Le jet d’eau à haute pression produit par ce
matériel peut percer la peau et les tissus sousjacents, provoquer des blessures graves et
même une amputation.
Le pistolet de pulvérisation conserve l’eau à
haute pression, même lorsque le moteur est
arrêté et l’arrivée d’eau débranchée, et peut donc
provoquer des blessures.
• NE PAS laisser des ENFANTS manipuler le laveuse haute
pression.
• NE JAMAIS tenter de réparer le flexible haute pression. Le
remplacer systématiquement.
• Ne JAMAIS réparer les connexions qui fuient avec un mastic
d’étanchéité. Remplacer le joint torique ou le joint.
• NE JAMAIS brancher le tuyau souple sous pression directement
sur l'extension d'embout de pulvérisation.
• Toujours garder le tuyau flexible haute pression raccordé à la
pompe et au pistolet de pulvérisation lorsque le système est
sous pression.
• Lors de chaque arrêt du moteur, TOUJOURS diriger l'embout de
pulvérisation vers une direction sans danger, appuyer sur le
bouton rouge et enfoncer la gâchette du pistolet de pulvérisation
pour libérer la pression.
• NE JAMAIS diriger le jet vers des personnes, des animaux ou
des plantes.
• NE PAS verrouiller le pistolet de pulvérisation en position
ouverte.
• NE PAS laisser le pistolet de pulvérisation sans surveillance
lorsque l'appareil est en marche.
• Ne JAMAIS utiliser un pistolet de pulvérisation dont le verrou de
détente ou le pontet n'est pas installé et en ordre de marche.
• Toujours s'assurer que le pistolet de pulvérisation, les buses et
les accessoires sont bien fixés.
AVERTISSEMENT
La production involontaire d'étincelles peut
provoquer un incendie ou une électrocution.
POUR RÉGLER OU RÉPARER LE LAVEUSE HAUTE PRESSION
• Débrancher le fil de bougie d'allumage et l'écarter de sorte qu'il
ne puisse toucher la bougie.
LORS DES ESSAIS D’ALLUMAGE
• Utiliser un testeur de bougie d’allumage approuvé.
• NE PAS vérifier l’allumage lorsque la bougie est retirée.
Page 33

7
AVIS
Le jet à haute pression peut endommager les matériaux
fragiles, le verre par exemple.
• En mode haute pression, ne pas diriger le jet sur des vitres.
• NE JAMAIS diriger le jet sur des plantes.
AVERTISSEMENT
Risque de blessure oculaire.
Le jet de pulvérisation peut revenir violemment
en arrière ou propulser des objets.
• Toujours porter des lunettes de sécurité lors de l’utilisation de
ce matériel ou dans la zone où ce matériel est utilisé.
• Avant de démarrer le laveuse haute pression, veiller à porter des
lunettes de sécurité adaptées.
• NE JAMAIS remplacer les lunettes de sécurité à pourtour
étanche par des lunettes de sécurité ordinaires.
AVERTISSEMENT
Le démarreur et les autres pièces en rotation
peuvent attraper les mains, les cheveux, les
vêtements ou les accessoires.
• Ne JAMAIS utiliser un appareil dont des pièces sont cassées,
manquantes ou non munies de leur capot ou de leurs
couvercles protecteurs.
• NE PAS porter de vêtements amples, de bijoux ni d'autres effets
qui pourraient être happés par le démarreur ou les autres pièces
en rotation.
• Retenir les cheveux longs en chignon et retirer les bijoux.
AVIS
Un traitement inadéquat du laveuse haute pression peut
l'endommager et réduire sa durée de vie utile.
• En cas de questions à propos de l'utilisation conforme de cet
appareil, consulter le distributeur ou prendre contact avec
Briggs & Stratton Power Products.
• Ne JAMAIS utiliser un appareil dont des pièces sont cassées,
manquantes ou non munies de leur capot ou de leurs
couvercles protecteurs.
• NE neutraliser AUCUN dispositif de sécurité de cette machine.
• NE PAS modifier la vitesse régulée du moteur.
• NE PAS faire fonctionner le nettoyeur à une pression supérieure
à la pression nominale.
• NE PAS MODIFIER la laveuse haute pression de quelque
manière que ce soit.
• Par temps froid, avant de démarrer le nettoyeur à haute
pression, vérifier tous ses éléments pour vérifier l'absence de
gel.
• Ne JAMAIS utiliser le flexible haute pression comme poignée
pour déplacer l'appareil. Toujours utiliser pour cela la poignée
de l'appareil.
• Vérifier la présence de fuites ou de signes de détérioration du
circuit de carburant, comme un flexible usé ou spongieux, des
brides de serrage desserrées ou manquantes, ou un réservoir
ou un bouchon endommagé. Réparer toutes les défectuosités
avant d'utiliser le laveuse haute pression.
• Cet appareil est conçu pour être utilisé uniquement avec des
pièces Briggs & Stratton Power Products d'origine. Si
l'équipement est utilisé avec des pièces qui NE sont PAS
conformes aux caractéristiques minimales, tous les risques et
responsabilités incomberont à l'utilisateur.
Page 34

Assemblage
Lire entièrement le manuel d'opérateur avant de
monter et d'utiliser l'appareil.
La laveuse haute pression doit être montée ; elle est prête à
être utilisée après avoir été convenablement remplie avec
l'huile et le carburant conseillés.
En cas de problème de montage de la laveuse haute
pression, s'adresser au distributeur de service après-vente
agréé Briggs & Stratton local. Pour obtenir de l'aide, se
munir des numéros de modèle, de révision et de série
inscrits sur l'étiquette d'identification.
Déballage de la laveuse haute pression
1. Sortir le sac de pièces, les accessoires et les inserts
inclus avec la laveuse haute pression.
2. Ouvrir complètement le carton en coupant chaque angle
de haut en bas.
3. Vérifier que tous les éléments sont inclus avant de
commencer le montage.
La boîte contient les éléments suivants :
• Unité principale
• Poignée
• Flexible haute pression
• Pistolet de pulvérisation
• Rallonge de buse réglable
• Roues (2)
• Sachet de pièces détachées (contenant les éléments
suivants) :
• Manuel d'opérateur
• Lunettes de sécurité
• Kit d'entretien
• Raccords de tuyau
• Sac de rangement des accessoires
• Kit de matériel de fixation des ensembles
Poignée/Roues (comprenant) :
• Boulon (2)
• Boutons en plastique (2)
• Axe d'essieu (2)
• Goupilles de fixation (2)
Pour mettre le laveuse haute pression en état de
fonctionnement, les tâches suivantes doivent être
effectuées:
1. Fixer la poignée et les roues au boîtier principal.
2. Faire le niveau d'huile.
3. Faire le plein d'essence.
4. Raccorder le flexible haute pression au pistolet et pompe.
5. Raccorder l'alimentation en eau à la pompe.
6. Monter la rallonge de buse réglable sur le pistolet.
Fixer la poignée
1. Placer la poignée (A) sur la base (B). Vérifier que les
trous de la poignée soient alignés sur ceux de la base.
2. Insérer les écrous de carrossier (C) dans les trous
depuis l'extérieur de l'appareil et fixer un boulon de
plastique (D) depuis l'intérieur de l'appareil. Serrer à la
main.
Installer le kit de roues
Le kit de roues est destiné à améliorer la facilité de transport
de la laveuse haute pression.
REMARQUE : Le kit de roues n'est pas destiné à une
utilisation sur route.
Installer le kit de roues de la manière suivante :
1. Placer la partie inférieure de la laveuse haute pression
sur une surface plane et régulière.
2. Faire glisser une roue (E) par-dessus l'axe d'essieu (F).
REMARQUE : Veiller à installer la roue avec le moyeu en
relief vers l'intérieur.
3. Faire glisser l'axe d'essieu par le trou (G) du cadre.
4. Fixer la roue sur l'axe d'essieu avec la goupille de
fixation (H).
5. Répéter les étapes 2 à 4 pour fixer la seconde roue.
8 BRIGGSandSTRATTON.COM
D
A
B
C
C
G
F
H
E
Page 35

Ajouter l'huile moteur
1. Placer la laveuse haute pression sur une surface plane
de niveau.
2. Nettoyer le pourtour de l'orifice de remplissage d'huile
et retirer le bouchon jaune/jauge de remplissage
d'huile.
3. En s'aidant d'un entonnoir (facultatif), verser lentement
l'huile dans l'orifice de remplissage d'huile jusqu'au
repère « Full » (Plein) de la jauge. NE PAS TROP
REMPLIR.
4. Remettre en place le bouton/jauge et serrer à fond.
Ajouter du carburant
Le carburant doit satisfaire aux spécifications suivantes :
• Essence propre, neuve, sans plomb.
• Indice d'octane minimum de 87/87 AKI (NOR 91).
Utilisation en haute altitude, voir Haute altitude.
• Il est possible d'utiliser de l'essence avec addition de
10 % maximum d'éthanol (mélange essence-alcool) ou
de 15 % maximum d'éther méthyl-tertiobutylique
(MTBE).
Pour protéger le circuit de carburant contre la formation de
gomme, mélanger l'essence à un stabilisateur de carburant
lors du remplissage. Voir Entreposage. Tous les carburants
ne sont pas identiques. En cas de problèmes de démarrage
ou de mauvaises performances après l'utilisation d'un
carburant, choisir un autre fournisseur ou changer de
marque. Ce moteur est certifié pour fonctionner à l'essence.
Le système de contrôle des émissions dans l'environnement
de ce moteur est du type EM (Engine Modifications).
1. Nettoyer la zone entourant le bouchon de remplissage
d'essence, retirer le bouchon.
2. Ajouter lentement du carburant sans plomb normal (A)
dans le réservoir de carburant (B). Veiller à ne pas trop
le remplir. Laisser environ 4 cm (C) d'espace vide dans
le réservoir pour l'expansion du carburant.
3. Installer le bouchon de carburant et laisser toute trace
de carburant s'évaporer avant de faire démarrer le
moteur.
Haute altitude
À une altitude supérieure à 1524 mètres, il est possible
d'utiliser de l'essence avec un indice d'octane de 85 / 85 AKI
(NOR de 89). Pour rester conforme aux réglementations sur
les émissions dans l'environnement, un réglage est
nécessaire pour la haute altitude. Tout fonctionnement sans
que ce réglage soit effectué provoquera une baisse des
performances, une augmentation de la consommation de
carburant et une augmentation des émissions dans
l'environnement. Consulter un concessionnaire Briggs &
Stratton agréée pour toute information sur le réglage pour la
haute altitude. Il n'est pas conseillé d'utiliser l'appareil à une
altitude inférieure à 762 mètres avec le kit de haute altitude.
9
AVIS
Une manipulation inappropriée de la laveuse haute pression
peut l'endommager et raccourcir sa durée de vie utile.
• NE PAS essayer de faire démarrer le moteur avant de l'avoir
convenablement rempli avec l'huile conseillée. Ceci peut
provoquer un dysfonctionnement du moteur.
AVIS
Éviter d'endommager la laveuse haute pression.
Le non-respect des instructions du manuel d'utilisation
relatives au carburant annulera la garantie.
• NE PAS utiliser d'essence non approuvée, telle que du
bioéthanol (E85).
• NE PAS mélanger d'huile avec l'essence.
• NE PAS modifier le moteur pour le faire fonctionner avec des
carburants alternatifs.
AVERTISSEMENT
L'essence sous forme liquide ou vapeur est
extrêmement inflammable et explosive.
Un incendie ou une explosion peuvent provoquer
de graves brûlures ou la mort.
LORS DE L'AJOUT DE CARBURANT
• Arrêter la laveuse haute pression (OFF) et la laisser refroidir
pendant au moins 2 minutes avant de retirer le bouchon de
carburant. Desserrer lentement de bouchon pour libérer la
pression du réservoir.
• Remplir le réservoir de carburant à l'extérieur.
• NE PAS trop remplir le réservoir. Laisser un espace suffisant
pour l’évaporation de l'essence.
• En cas de renversement de carburant, attendre qu'il s'évapore
avant de lancer le moteur.
• Manipuler l'essence à l'abri des étincelles, des flammes nues,
des veilleuses, de la chaleur ainsi que d'autres sources
potentielles d'inflammation.
• NE PAS allumer de cigarettes, ni fumer.
C
B
A
Page 36

Raccorder le flexible et l'alimentation en eau à
la pompe
REMARQUE : Retirer et jeter les bouchons de transport de la
sortie haute pression de la pompe et de l'admission d'eau
avant de brancher les tuyaux.
1. Dérouler le flexible haute pression et fixer une extrémité
à la base du pistolet. Repousser le collier du raccord
rapide, emboîter le raccord sur la pistolet et relâcher le
collier. Tirer sur le tuyau pour vérifier la solidité du
branchement.
2. Fixer l'autre extrémité du flexible haute pression à la
sortie haute pression de la pompe. Serrer à la main.
3. Faire couler l'eau dans le tuyau d'arrosage pendant
trente secondes pour éliminer tous les débris en
suspension. Refermer l'eau.
IMPORTANT: NE PAS siphonner une eau stagnante pour
alimenter le nettoyeur. Utiliser EXCLUSIVEMENT de l'eau
froide (moins de 35 °C).
4. Avant de raccorder le tuyau d'arrosage à l'entrée d'eau
du nettoyeur, inspecter le tamis d'entrée (A). Nettoyer le
tamis s'il contient des débris, le remplacer s'il est
endommagé. NE JAMAIS UTILISER UN laveuse haute
pression DONT LE TAMIS D'ENTRÉE EST ENDOMMAGÉ.
5. Brancher le tuyau d'arrosage (de 15 m de long au
maximum) à l'admission d'eau. Serrer à la main.
6. Ouvrir l'eau, appuyer sur le bouton rouge (B) du pistolet
et enfoncer la détente pour purger le système de pompe
de l'air et des impuretés.
Liste de vérifications avant le démarrage du moteur
Inspecter le montage de l'appareil pour confirmer que les
tâches suivantes ont été accomplies:
1. Lire la section Sécurité de l'opérateur et la section
Fonctionnement avant d'utiliser la laveuse haute pression.
2. Vérifier que la poignée est en place et bien fixée.
3. Vérifier que le niveau d'huile du carter moteur est correct.
4. Vérifier que l'essence ajoutée dans le réservoir est d'un
type approprié.
5. Vérifier que les tuyaux souples sont solidement
branchés.
6. Vérifier l'absence de pliure, coupure ou avarie sur le
tuyau haute pression.
7. Vérifier que l'alimentation en eau et son débit sont
appropriés.
10 BRIGGSandSTRATTON.COM
A
B
AVIS
NE PAS faire fonctionner la pompe sans avoir branché et
ouvert l'arrivée d'eau.
• La garantie sera annulée si des dommages à l'appareil sont
entraînés par le non-respect de cette directive.
AVIS
Le connecteur d'admission d'eau ou la pompe peut être
endommagé si une valve de retenue (reniflard ou clapet
anti-retour) est branchée à la pompe.
• Il DOIT y avoir au moins 3 m de tuyau d'arrosage sans
restriction entre l'admission de la laveuse haute pression et tout
dispositif tel qu'une valve de retenue.
• Tout dommage au matériel provoqué par l'installation d'une
valve de retenue à la pompe annulera la garantie.
AVERTISSEMENT
Risque de blessure oculaire.
Le jet de pulvérisation peut revenir violemment
en arrière ou propulser des objets.
• Toujours porter des lunettes de sécurité lors de l’utilisation de
ce matériel ou dans la zone où ce matériel est utilisé.
• Avant de démarrer le laveuse haute pression, veiller à porter des
lunettes de sécurité adaptées.
• NE JAMAIS remplacer les lunettes de sécurité à pourtour
étanche par des lunettes de sécurité ordinaires.
AVERTISSEMENT
Le jet d’eau à haute pression produit par ce
matériel peut percer la peau et les tissus sousjacents, provoquer des blessures graves et
même une amputation.
• NE JAMAIS brancher le tuyau souple sous pression directement
sur l'extension d'embout de pulvérisation.
• Toujours garder le tuyau flexible haute pression raccordé à la
pompe et au pistolet de pulvérisation lorsque le système est
sous pression.
• Toujours s'assurer que le pistolet de pulvérisation, les buses et
les accessoires sont bien fixés.
Page 37

A - Lanceur - Sert à démarrer le moteur manuellement.
B - Remplissage/Jauge d'huile — Vérifier, remplir et vidanger
l'huile.
C - Pompe - Fournit la haute pression.
D - Système de refroidissement automatique - Fait circuler de
l'eau dans la pompe lorsque la température de l'eau atteint 51,6
à 68,3 ºC. L'eau chaude de la pompe est évacuée au sol. Ce
système prévient tout dommage interne à la pompe.
E - Flexible haute pression - Raccorder une des extrémités du
flexible à la pompe à eau et l'autre au pistolet de pulvérisation.
F - Pistolet de pulvérisation - Un dispositif de détente permet de
contrôler le jet d'eau sur la surface à nettoyer. Inclut un verrou
de déclenchement.
G - Buse réglable - Toujours fixée à la rallonge de buse. La buse
réglable permet de régler la pression et la forme du jet.
H - Réservoir d'essence — Remplir le réservoir d'essence sans
plomb normale. Toujours laisser de la place pour l'expansion du
carburant.
Éléments non représentés :
Filtre à air - Protège le moteur en filtrant la poussière et les débris
avant la prise d'air.
Étiquette d'identification (près de l'arrière de la semelle) —
Indique le numéro de modèle et de série de la laveuse haute
pression. Garder ces renseignements à portée de main en cas
d'appel pour demander de l'aide.
Tube/Filtre de siphonage de détergent — Utiliser pour siphonner
le détergent sans danger de la laveuse haute pression vers le circuit
à basse pression.
Sortie haute pression - Sert au branchement du flexible haute
pression.
Bulle d'amorçage — Prépare le moteur froid au démarrage.
Levier de contrôle de étrangler - Cette manette place le moteur en
mode démarrage pour le lanceur et arrête le moteur lorsqu'il est en
marche.
Admission d'eau - Raccorder le tuyau d'arrosage à cet endroit.
Lunettes à pourtour étanche — Toujours utiliser les lunettes de
sécurité à pourtour étanche lors de l'utilisation de la laveuse haute
pression.
11
Caractéristiques et commandes
Lisez ce manuel d'opérateur et ces règles de sécurité avant d'utiliser le laveuse haute pression.
Reportez-vous aux illustrations pour repérer l'emplacement des divers réglages et commandes de votre nettoyeur.
Conservez ce manuel pour pouvoir vous y référer ultérieurement.
B
A
D
,
C
F
E
G
H
Page 38

Fonctionnement
Si le fonctionnement du laveuse haute pression pose
problème, contacter le centre de réparation Briggs & Stratton
le plus proche.
Emplacement du laveuse haute pression
Débattement et circulation d'air
Placer la laveuse haute pression à l'extérieur dans un lieu où
les gaz d'échappement mortels ne pourront pas s'accumuler.
NE PAS placer la laveuse haute pression là où les gaz
d'échappement mortels pourraient s'accumuler et pénétrer
ou être entraînés dans un bâtiment susceptible d'être
occupé. Assurez-vous que les gaz d'échappement (A) ne
puissent entrer par une fenêtre, une porte, une prise
d'aération ou une autre ouverture qui pourrait leur permettre
de s'accumuler dans un espace clos. Il faut tenir compte des
vents dominants et des courants d'air lors de la mise en
place de la laveuse haute pression.
Démarrage de la laveuse haute pression
Pour le démarrage initial du laveuse haute pression, suivre
les instructions pas à pas. Ces instructions de démarrage
sont également valables si le nettoyeur n'a pas été utilisé
pendant plus d'une journée.
1. Placer le laveuse haute pression près d'une arrivée
d'eau extérieure capable d'un débit supérieur à
11 litres/minute sous une pression égale ou supérieure
à 20 PSI (1,38 bar) au niveau de l'extrémité du tuyau
d'arrosage, côté laveuse haute pression. NE PAS
siphonner l'eau d'alimentation.
2. Vérifier que le flexible haute pression est solidement
raccordé au pistolet et à la pompe. Voir la section
Assemblage.
3. S'assurer que l'appareil est placé sur une surface plane.
4. Vérifier que le tuyau d'arrosage est raccordé à l'entrée
d'eau de la pompe du laveuse haute pression.
5. Ouvrir l'eau, pointer le pistolet dans une direction sans
danger, appuyer sur le bouton rouge et enfoncer la
gâchette pour purger le système de pompe de l'air et
des impuretés.
6. Monter la lance sur le pistolet. Serrer à la main.
7. Placer la manette des gaz en position « Fast » (B),
signalée par l'image d'un lapin .
Pour le tout premier démarrage du moteur :
8A. Pousser la bulle d'amorçage à fond 5 fois de suite, en
attendant 2 secondes entre deux appuis.
Pour faire démarrer le moteur par la suite :
8B. Pousser la bulle d'amorçage à fond 3 fois de suite, en
attendant 2 secondes entre deux appuis. Si le moteur
est chaud, NE PAS pousser la bulle d'amorçage.
12 BRIGGSandSTRATTON.COM
AVERTISSEMENT
Les gaz ou la chaleur d’échappement peuvent
mettre le feu à des produits combustibles, des
structures ou endommager le réservoir d’essence
et provoquer un incendie.
• Conserver un débattement d’au moins 152 cm autour du
laveuse haute pression, y compris au-dessus du nettoyeur.
AVIS
Ne pas faire fonctionner la pompe si l'alimentation en eau
n'est pas raccordée et ouverte.
• La garantie sera annulée si l'équipement est endommagé par
suite du non-respect de cette instruction.
AVERTISSEMENT
En fonctionnement, le moteur dégage du monoxyde
de carbone, un gaz inodore, incolore et mortel.
L'inhalation du monoxyde de carbone peut
provoquer des maux de tête, de la fatigue, des
étourdissements, des vomissements, de la
confusion, des crises d'épilepsie, des nausées,
un évanouissement ou la mort.
• Utiliser le nettoyeur EXCLUSIVEMENT en extérieur.
• Empêchez les gaz d'échappement de pénérer dans un lieu
confiné par les fenêtres, portes, entrées d'aération et d'autres
ouvertures.
• NE PAS faire démarrer ou faire fonctionner le moteur à
l'intérieur d'un local ou d'une zone fermée, même si les fenêtres
et les portes sont ouvertes.
B
A
Page 39

IMPORTANT : Avant de faire démarrer la laveuse haute
pression, veiller à porter des lunettes de sécurité à pourtour
étanche adéquates.
9. Lors du démarrage du moteur, se placer comme
indiqué et saisir la poignée du démarreur puis tirer
lentement jusqu'à sentir une résistance. Tirer ensuite
rapidement pour faire démarrer le moteur.
10. Relâcher lentement la poignée du démarrage. NE PAS
laisser la corde revenir en frappant contre le démarreur.
REMARQUE : Toujours garder la manette des gaz en position
« Fast » lors de l'utilisation de la laveuse haute pression.
13
AVERTISSEMENT
Le jet d’eau à haute pression produit par ce
matériel peut percer la peau et les tissus sousjacents, provoquer des blessures graves et
même une amputation.
Le pistolet de pulvérisation conserve l’eau à
haute pression, même lorsque le moteur est
arrêté et l’arrivée d’eau débranchée, et peut donc
provoquer des blessures.
• NE PAS laisser des ENFANTS manipuler le laveuse haute
pression.
• Toujours garder le tuyau flexible haute pression raccordé à la
pompe et au pistolet de pulvérisation lorsque le système est
sous pression.
• NE JAMAIS diriger le jet vers des personnes, des animaux ou
des plantes.
• NE PAS verrouiller le pistolet de pulvérisation en position
ouverte.
• NE PAS laisser le pistolet de pulvérisation sans surveillance
lorsque l'appareil est en marche.
• Ne JAMAIS utiliser un pistolet de pulvérisation dont le verrou de
détente ou le pontet n'est pas installé et en ordre de marche.
• Toujours s'assurer que le pistolet de pulvérisation, les buses et
les accessoires sont bien fixés.
AVERTISSEMENT
Risque de blessure oculaire.
Le jet de pulvérisation peut revenir violemment
en arrière ou propulser des objets.
• Toujours porter des lunettes de sécurité lors de l’utilisation de
ce matériel ou dans la zone où ce matériel est utilisé.
• Avant de démarrer le laveuse haute pression, veiller à porter des
lunettes de sécurité adaptées.
• NE JAMAIS remplacer les lunettes de sécurité à pourtour
étanche par des lunettes de sécurité ordinaires.
AVERTISSEMENT
Le recul (la rétractation rapide) du cordon du
démarreur peut provoquer des blessures. Ce
recul attire la main et le bras en direction du
moteur plus vite qu'il n'est possible de les retirer.
Ce peut être la cause de fêlures, fractures,
contusions ou foulures.
• NE JAMAIS tirer sur le cordon du démarreur sans libérer
d'abord la pression du pistolet de pulvérisation.
• Lors du démarrage du moteur, tirer lentement sur la corde
jusqu'à sentir une résistance, puis tirer rapidement afin d'éviter
l'effet de recul.
• Après chaque tentative de démarrage qui échoue, toujours
pointer le pistolet de pulvérisation dans une direction sans
danger, appuyer sur le bouton rouge et enfoncer la gâchette du
pistolet de pulvérisation pour libérer la pression.
• Pour éviter tout risque de blessure en cas de recul du pistolet de
pulvérisation, le tenir fermement des deux mains pour la
pulvérisation haute pression.
AVERTISSEMENT
Tout contact avec la zone du silencieux peut
provoquer des brûlures graves.
Les gaz ou la chaleur d’échappement peuvent
mettre le feu à des produits combustibles, des
structures ou endommager le réservoir d’essence
et provoquer un incendie.
• NE PAS toucher aux pièces chaudes et ÉVITER le contact avec
les gaz d’échappement.
• Laisser l'équipement refroidir avant d'y toucher.
• Conserver un débattement d’au moins 152 cm autour du
laveuse haute pression, y compris au-dessus du nettoyeur.
Page 40

Procédure d'arrêt du laveuse haute pression
1. Relâcher la gâchette du pistolet de pulvérisation et laisser
le moteur tourner au ralenti pendant deux minutes.
2. Placer la manette des gaz en position SLOW , puis
en position STOP .
3. TOUJOURS pointer le pistolet de pulvérisation dans une
direction sans danger, appuyer sur le bouton rouge et
enfoncer la gâchette pour libérer l'eau sous pression.
IMPORTANT: Le pistolet de pulvérisation garde l'eau sous
pression, même lorsque le moteur est arrêté et l'arrivée
d'eau débranchée.
Utilisation de la buse réglable
Il faut savoir comment faire DÉMARRER et ARRÊTER la
laveuse haute pression. Les informations de cette section
indiquent comment ajuster le schéma de pulvérisation et
appliquer des détergents spécifiques pour laveuse haute
pression.
1. La faire coulisser vers l'arrière pour fonctionner en
mode haute pression (A). Faire coulisser la buse vers
l'avant pour fonctionner en mode basse pression (B).
2. Diriger la buse vers le bas sur une surface solide et
appuyer sur la gâchette pour contrôler la forme du jet.
3. En faisant tourner la buse, la forme varie entre un
pinceau large (C) et un pinceau étroit (D).
Conseils d'utilisation
• Pour un nettoyage aussi efficace que possible il faut
maintenir la buse à une distance de 20 à 60 cm de la
surface à nettoyer.
• Si l'embout de pulvérisation est trop proche, surtout en
mode haute pression, la surface à nettoyer peut être
endommagée.
• NE PAS nettoyer les pneus de voitures à une distance
inférieure à 15 cm.
Application de détergent
Pour appliquer le détergent, procéder comme suit:
1. Relire le mode d'emploi de la buse réglable.
2. Préparer la solution de détergent selon les instructions
du fabricant.
3. Placer la petite extrémité côté filtre du tube de
siphonage de détergent dans le récipient de détergent.
14 BRIGGSandSTRATTON.COM
A
B
C
D
AVERTISSEMENT
Le jet d’eau à haute pression produit par ce
matériel peut percer la peau et les tissus sousjacents, provoquer des blessures graves et
même une amputation.
• NE JAMAIS régler le schéma de pulvérisation pendant la
pulvérisation.
• NE JAMAIS placer les mains devant l'embout de pulvérisation
pour ajuster le schéma de pulvérisation.
AVERTISSEMENT
Le jet d’eau à haute pression produit par ce
matériel peut percer la peau et les tissus sousjacents, provoquer des blessures graves et
même une amputation.
Le pistolet de pulvérisation conserve l’eau à
haute pression, même lorsque le moteur est
arrêté et l’arrivée d’eau débranchée, et peut donc
provoquer des blessures.
• Toujours garder le tuyau flexible haute pression raccordé à la
pompe et au pistolet de pulvérisation lorsque le système est
sous pression.
• Lors de chaque arrêt du moteur, TOUJOURS diriger l'embout de
pulvérisation vers une direction sans danger, appuyer sur le
bouton rouge et enfoncer la gâchette du pistolet de pulvérisation
pour libérer la pression.
ATTENTION
Les produits chimiques peuvent blesser les personnes
et/ou endommager les biens.
• NE JAMAIS utiliser de liquide caustique avec la laveuse haute
pression.
• N'utiliser la laveuse haute pression QU'AVEC des
détergents/savons sans danger. Suivre toutes les instructions
des fabricants.
AVIS
Tout contact avec le pot d'échappement chaud peut
endommager le tube de siphonage de détergent.
• Lors de l'insertion du filtre dans une bouteille de solution
détergente, acheminer le tube en veillant à éviter tout contact
accidentel avec le pot d'échappement chaud.
Page 41

REMARQUE : Veiller à ce que le filtre soit complètement
immergé dans le détergent lors de l'application de celui-ci.
4. Faire coulisser la buse vers l'avant en position basse
pression. Le détergent ne peut pas être utilisé en mode
haute pression.
5. Vérifier que le tuyau d'arrosage est branché sur
l'admission d'eau. Vérifier que le tuyau à haute
pression est branché au pistolet de pulvérisation et à la
pompe. Ouvrir l'arrivée d'eau.
6. Faire démarrer le moteur en suivant les instructions de
la section Démarrage de la laveuse haute pression.
7. Appliquer le détergent sur une surface sèche en
commençant par le bas et en remontant en effectuant
de larges mouvements de va-et-vient horizontaux se
chevauchant.
8. Laisser le détergent agir entre 3 et 5 minutes avant de
nettoyer et rincer. Au besoin, faire une nouvelle
application pour éviter le séchage de la surface. NE PAS
laisser le détergent sécher (pour éviter les traces).
IMPORTANT: Rincer le système de siphonage de détergent
après chaque utilisation en plaçant le filtre dans un seau
d'eau propre, puis faire fonctionner la laveuse haute pression
à basse pression pendant 1 à 2 minutes.
Rinçage avec le laveuse haute pression
Pour le rinçage:
1. Faire glisser la buse vers l'arrière en position haute
pression, appuyer sur la détente et attendre l'évacuation
complète du détergent.
REMARQUE: Il est également possible d'empêcher le
détergent de couler en sortant simplement le tube de
siphonage de détergent de la bouteille.
2. Garder le pistolet de pulvérisation à distance suffisante
de la zone à pulvériser.
3. Pulvériser sous haute pression sur une petite surface
puis rechercher des dommages éventuels. En l'absence
de dommage, on peut supposer qu'il est possible de
poursuivre le rinçage.
4. Commencer en haut de la zone à rincer, en travaillant
de haut en bas avec les mêmes chevauchements que
pour le nettoyage.
Nettoyage du tube de siphonage de détergent
En cas d'utilisation du tube de siphonage de détergent, le
rincer à l'eau propre avant d'arrêter le moteur.
1. Placer le tube/filtre de siphonage de détergent dans un
seau plein d'eau propre.
2. Faire glisser la buse réglable vers l'avant en position
basse pression.
3. Faire couler pendant 1 à 2 minutes.
4. Arrêter le moteur en suivant les instructions de la
section Arrêt de la laveuse haute pression et fermer
l'arrivée d'eau.
5. TOUJOURS pointer le pistolet de pulvérisation dans une
direction sans danger, appuyer sur le bouton rouge et
enfoncer la gâchette pour libérer l'eau sous pression.
IMPORTANT : Le pistolet de pulvérisation conserve l’eau à
haute pression, même lorsque le moteur est arrêté et
l’arrivée d’eau débranchée.
Système de refroidissement automatique
(dissipation de la chaleur)
Si le moteur du laveuse haute pression fonctionne pendant
3 à 5 minutes sans que l'on appuie sur la détente du pistolet
de pulvérisation, l'eau en circulation dans la pompe peut
atteindre des températures supérieures à 51ºC. Le système
commence alors à refroidir la pompe en évacuant l'eau
chaude sur le sol.
15
AVERTISSEMENT
Le recul du pistolet de pulvérisation peut vous
déséquilibrer.
• Utiliser cet appareil sur une surface stable.
• Agir avec une extrême prudence en cas d'utilisation du laveuse
haute pression sur une échelle, un échafaudage ou tout autre
emplacement relativement instable.
• Pour éviter tout risque de blessure en cas de recul du pistolet de
pulvérisation, le tenir fermement des deux mains pour la
pulvérisation haute pression.
AVIS
Brancher tous les tuyaux avant de faire démarrer le
moteur.
• Le démarrage du moteur sans que tous les tuyaux soient
branchés et sans que l'arrivée d'eau soit OUVERTE
endommagerait le moteur.
• La garantie sera annulée si des dommages à l'appareil sont
entraînés par le non-respect de cette directive.
AVERTISSEMENT
Le jet d’eau à haute pression produit par ce
matériel peut percer la peau et les tissus sousjacents, provoquer des blessures graves et
même une amputation.
Le pistolet de pulvérisation conserve l’eau à
haute pression, même lorsque le moteur est
arrêté et l’arrivée d’eau débranchée, et peut donc
provoquer des blessures.
• Toujours garder le tuyau flexible haute pression raccordé à la
pompe et au pistolet de pulvérisation lorsque le système est
sous pression.
• Lors de chaque arrêt du moteur, TOUJOURS diriger l'embout de
pulvérisation vers une direction sans danger, appuyer sur le
bouton rouge et enfoncer la gâchette du pistolet de pulvérisation
pour libérer la pression.
Page 42

Entretien
Calendrier d'entretien
Suivre les intervalles horaires ou calendaires, suivant ce qui
se présente en premier. La fréquence d'entretien doit être
plus élevée en cas d'utilisation dans les conditions difficiles
mentionnées ci-dessous.
1
Nettoyer en cas d'obturation. Remplacer en cas de perforation ou déchirure.
2
Entretenir plus souvent en environnement sale ou poussiéreux.
Recommandations générales
L'entretien régulier améliore les performances et prolonge la
durée de vie utile de la laveuse haute pression. S'adresser à
un distributeur de service après-vente qualifié pour l'entretien.
La garantie de la laveuse haute pression ne couvre pas les
éléments soumis à une utilisation abusive ou une négligence de
la part de l'opérateur. Pour bénéficier de la totalité de la
garantie, l'opérateur doit entretenir la laveuse haute pression
comme le stipule ce manuel, y compris en l'entreposant comme
l'indique la section Hivernage et Entreposage à long terme.
REMARQUE: Pour toute question sur le remplacement des
composants du laveuse haute pression BSPP, rendez-vous
sur notre site sur la toile mondiale à l'adresse
BRIGGSandSTRATTON.COM.
Certains réglages doivent être effectués périodiquement pour
entretenir le laveuse haute pression.
Tout l'entretien et les réglages doivent être effectués au
moins une fois par saison. Suivre les directives du Calendrier
d'entretien ci-dessus.
REMARQUE : Une fois par an, nettoyer ou remplacer la
bougie, nettoyer ou remplacer le filtre à air et rechercher une
usure de l'ensemble pistolet de pulvérisation/extension
d'embout. Une nouvelle bougie et un nouveau filtre à air
garantissent un bon mélange air-carburant et permettent au
moteur de mieux fonctionner et de durer plus longtemps.
Huile de la pompe
NE PAS essayer d'intervenir sur l'huile de cette pompe. La
pompe est prélubrifiée et scellée en usine et ne nécessite
aucun entretien supplémentaire pendant toute sa durée de vie.
Contrôle des émissions dans l'environnement
L'entretien, le remplacement ou la réparation des
dispositifs et systèmes de contrôle des émissions dans
l'environnement peuvent être effectués par tout réparateur
professionnel de moteurs non routiers. Cependant, pour
obtenir un entretien gratuit de contrôle des émissions dans
l'environnement, le travail doit être effectué par un
distributeur de service après-vente agréé par l'usine. Voir
Garantie relative aux émissions dans l'environnement.
Avant chaque utilisation
1. Contrôler le niveau d'huile du moteur.
2. Nettoyer les débris.
3. Contrôler le bon état du tamis d'entrée d'eau.
4. Vérifier l'absence de fuite du flexible haute pression.
5. Contrôler le bon état du tube de siphonnage et du filtre
du détergent.
6. Vérifier l'absence de fuites dans l'ensemble de rallonge
de buse ajustable.
7. Rincer le tuyau d'arrosage pour éliminer les débris.
Entretien du laveuse haute pression
Nettoyer les débris
Quotidiennement, ou avant l'utilisation, nettoyer les débris
accumulés du système de nettoyage. Nettoyer la tringlerie, le
ressort et les commandes. Éliminer tout débris combustible du
pourtour ou de l'arrière du pot d'échappement. Examiner les
évents et fentes de refroidissement de la laveuse haute pression.
Ces ouvertures doivent demeurer propres et non obstruées.
Les pièces de l'appareil doivent rester propres pour limiter
les risques de surchauffe et d'embrasement de débris
accumulés.
• Utiliser un linge humide pour nettoyer les surfaces
extérieures.
• Utiliser une brosse à soies douces pour déloger les
accumulations de saletés, d’huile, etc.
• Utiliser un aspirateur pour ramasser les saletés et
débris.
16 BRIGGSandSTRATTON.COM
Les 5 premières heures
• Changer l'huile moteur
Toutes les 8 heures ou quotidiennement
• Vérifier/nettoyer le tamis d'admission d'eau
1
• Vérifier le tuyau souple haute pression
• Vérifier le tuyau/filtre de siphonage de détergent
• Vérifier le pistolet de pulvérisation et rechercher des
fuites sur l'appareil complet
• Nettoyer les débris
• Vérifier le niveau d'huile moteur
Toutes les 25 heures ou annuellement
• Entretenir le filtre à air du moteur
2
Toutes les 50 heures ou annuellement
• Changer l'huile moteur
2
• Entretenir le pare-étincelles de la bougie
Toutes les 100 heures ou annuellement
• Entretenir la bougie
• Nettoyer le circuit de refroidissement
2
AVIS
Une manipulation inappropriée de la laveuse haute pression
peut l'endommager et raccourcir sa durée de vie utile.
• N'insérer AUCUN objet dans les fentes de refroidissement.
Page 43

17
Vérifier et nettoyer le tamis de filtrage d'entrée
Contrôler le tamis à l'entrée d'eau. Nettoyer le tamis s'il est
colmaté, le remplacer s'il est endommagé.
Contrôler le flexible haute pression
Le flexible haute pression peut fuir en raison de l'usure, de
pincements ou d'une mauvaise utilisation. Vérifier le bon état
du flexible avant chaque utilisation. Vérifier l'absence de
coupures, de fuites, d'usure ou de renflement du revêtement,
de détérioration et de jeu dans les raccords. Remplacer le
flexible immédiatement au moindre signe de détérioration.
Vérifier le tube de siphonage de détergent
Examiner le filtre du tube de siphonage et le nettoyer en cas
de colmatage. Le tube doit s'ajuster sur l'emmanchement
barbelé. Rechercher des fuites ou des déchirures du tube.
Remplacer le filtre ou le tube s'il est endommagé.
Vérifier le pistolet de pulvérisation
Vérifier le branchement du tuyau souple sur le pistolet de
pulvérisation. Essayer la gâchette en appuyant sur le bouton
rouge et en vérifiant que la gâchette « revient en arrière »
lorsqu'elle est relâchée. Il ne doit pas être possible
d'enfoncer la gâchette sans appuyer sur le bouton rouge.
Remplacer immédiatement le pistolet de pulvérisation en cas
d'échec de l'un de ces tests.
Entretien de la buse
Cet excès de pression dans la pompe est souvent dû à
l'engorgement ou au blocage d'un orifice par des corps
étrangers, tels que de la poussière, etc. Pour remédier au
problème, nettoyer immédiatement l'orifice au moyen des
outils fournis avec le laveuse haute pression et suivre les
instructions ci-dessous:
1. Arrêter le moteur et couper l'alimentation en eau.
2. TOUJOURS pointer le pistolet de pulvérisation dans une
direction sans danger, appuyer sur le bouton rouge et
enfoncer la gâchette pour libérer l'eau sous pression.
3. Déposer l'extension d'embout du pistolet de pulvérisation.
4. Faire tourner l'embout dans le sens horaire en position
écoulement. Avec une clé Allen de 2 mm, retirer
l'orifice (A) de l'extrémité de l'extension d'embout.
5. Utiliser du fil de fer (ou un petit trombone) pour déloger
tout corps étranger bouchant ou colmatant l'orifice (B).
6. À l'aide d'un tuyau d'arrosage, éliminer tout autre
débris en rinçant la lance en sens inverse du débit
normal. Effectuer ce rinçage à contre-débit pendant
30 s à 1 minute. Tourner la lance de la buse réglable en
position ouverte et déplacer la buse d'avant en arrière
tout en la rinçant.
7. Remettre l'orifice en place dans la rallonge de buse. NE
PAS trop serrer l'orifice avec la clé six pans.
8. Remonter l'extension d'embout du pistolet de
pulvérisation.
9. Vérifier que le tuyau d'arrosage est branché sur
l'admission d'eau. Vérifier que le tuyau à haute
pression est branché au pistolet de pulvérisation et à la
pompe. Ouvrir l'arrivée d'eau.
10. Faire démarrer le moteur en suivant les instructions de
la section Démarrage de la laveuse haute pression.
11. Essayer le laveuse haute pression avec la buse en
position haute et basse pression.
AVERTISSEMENT
Le jet d’eau à haute pression produit par ce
matériel peut percer la peau et les tissus sousjacents, provoquer des blessures graves et
même une amputation.
• NE JAMAIS tenter de réparer le flexible haute pression. Le
remplacer.
• Le flexible de remplacement DOIT pouvoir résister à une
pression supérieure à la pression nominale du nettoyeur.
B
A
AVERTISSEMENT
Le jet d’eau à haute pression produit par ce
matériel peut percer la peau et les tissus sousjacents, provoquer des blessures graves et
même une amputation.
Le pistolet de pulvérisation conserve l’eau à
haute pression, même lorsque le moteur est
arrêté et l’arrivée d’eau débranchée, et peut donc
provoquer des blessures.
• Toujours garder le tuyau flexible haute pression raccordé à la
pompe et au pistolet de pulvérisation lorsque le système est
sous pression.
• Lors de chaque arrêt du moteur, TOUJOURS diriger l'embout de
pulvérisation vers une direction sans danger, appuyer sur le
bouton rouge et enfoncer la gâchette du pistolet de pulvérisation
pour libérer la pression.
Page 44

Entretien des joints toriques
Les joints toriques maintiennent l'étanchéité des raccords
des flexibles et du pistolet. En fonctionnement normal du
laveuse haute pression, ils s'usent et finissent par s'abîmer.
Un kit d'entretien est disponible pour le laveuse haute
pression ; il contient des joints toriques de rechange, des
joints en caoutchouc et des tamis de filtrage. Consulter la
notice d'instruction fournie avec le kit pour le remplacement
des joints. Noter que la totalité des pièces du kit ne sont pas
utilisées sur chaque modèle de nettoyeur.
Pour déposer un joint usé ou endommagé; glisser la lame
plate d'un petit tournevis sous le joint et l'extraire.
Entretien du moteur
Huile
Huile conseillée
Pour de meilleures performances, nous conseillons
l'utilisation des huiles certifiées pour la garantie Briggs &
Stratton. Il est possible d'utiliser d'autres huiles détergentes
de grande qualité pour l'entretien SF, SG, SH, SJ ou plus. NE
PAS utiliser d'additifs spéciaux.
La température extérieure déterminer la viscosité de l'huile
moteur utilisée. Suivre le diagramme pour sélectionner la
meilleure viscosité pour la plage de températures extérieures
prévues.
* Sous 4 ºC, l'utilisation de SAE 30 rendra le démarrage difficile.
** Au-dessus de 27 ºC, l'utilisation de 10W30 peut provoquer une
augmentation de la consommation d'huile. Vérifier plus fréquemment le
niveau d'huile.
REMARQUE : Il est possible d'utiliser à toutes
températures de l'huile synthétique satisfaisant à la
marque de certification API ILSAC GF-2 et au
symbole de service API « SJ/CF ENERGY
CONSERVING » ou plus. L'utilisation d'huile
synthétique ne modifie pas les intervalles de
changement de l'huile.
Vérification du niveau d'huile
Le niveau d'huile doit être vérifié avant chaque utilisation ou
au moins toutes les 8 heures de fonctionnement. Le niveau
d'huile doit rester constant.
1. Poser la laveuse haute pression sur une surface de niveau.
2. Sortir la jauge d'huile et l'essuyer avec un linge propre.
Remettre la jauge en place et serrer. La sortir de
nouveau et vérifier le niveau d'huile.
3. Vérifier si l'huile arrive au repère « Full » de la jauge.
Remettre la jauge en place et serrer.
Ajout d'huile moteur
1. Poser la laveuse haute pression sur une surface de niveau.
2. Vérifier le niveau d'huile comme l'indique la section
Vérification du niveau d'huile.
3. Si nécessaire, verser lentement l'huile dans l'orifice de
remplissage jusqu'au repère « Full » de la jauge. NE
PAS TROP REMPLIR.
4. Remettre la jauge en place et serrer.
18 BRIGGSandSTRATTON.COM
AVERTISSEMENT
Le jet d’eau à haute pression produit par ce
matériel peut percer la peau et les tissus sousjacents, provoquer des blessures graves et
même une amputation.
• Ne JAMAIS réparer les connexions qui fuient avec un mastic
d’étanchéité. Remplacer le joint torique ou le joint.
AVIS
Un niveau d'huile trop élevé peut empêcher le moteur de
démarrer ou rendre le démarrage difficile.
• NE PAS TROP REMPLIR.
• Si le niveau d'huile dépasse le repère FULL de la jauge, vidanger
l'huile pour la ramener au niveau du repère.
AVERTISSEMENT
La production involontaire d'étincelles peut
provoquer un incendie ou une électrocution.
POUR RÉGLER OU RÉPARER LE LAVEUSE HAUTE PRESSION
• Débrancher le fil de bougie d'allumage et l'écarter de sorte qu'il
ne puisse toucher la bougie.
LORS DES ESSAIS D’ALLUMAGE
• Utiliser un testeur de bougie d’allumage approuvé.
• NE PAS vérifier l’allumage lorsque la bougie est retirée.
Page 45

19
Vidange de l'huile moteur
Changer l'huile moteur après les 5 premières heures de
fonctionnement et toutes les 50 heures par la suite. En cas
d'utilisation de la laveuse haute pression dans un
environnement extrêmement poussiéreux ou sale, ou par
temps très chaud, changer l'huile plus souvent.
GARDER HORS DE PORTÉE DES ENFANTS. NE
PAS POLLUER L'ENVIRONNEMENT. PRÉSERVER
LES RESSOURCES NATURELLES. RENVOYER
L'HUILE USAGÉE AUX CENTRES DE COLLECTE.
Changer l'huile lorsque le moteur est encore chaud après
avoir fonctionné, en procédant comme suit :
1. Vidanger le réservoir de carburant en faisant
fonctionner la laveuse haute pression jusqu'à ce que le
réservoir de carburant soit vide.
2. Débrancher le fil de la bougie et l'éloigner de celle-ci.
3. Nettoyer le pourtour de l'orifice de remplissage d'huile,
retirer le bouchon/jauge d'huile. Essuyer la jauge.
4. Incliner la laveuse haute pression pour faire couler
l'huile depuis le réservoir dans un récipient adapté en
veillant à l'incliner du côté opposé à la bougie. Lorsque
le carter du vilebrequin est vide, remettre la laveuse
haute pression en position verticale.
5. Verser lentement l'huile recommandée (environ 0,6 l)
dans l'orifice de remplissage d'huile. Faire une pause
pour laisser l'huile se stabiliser. Remplir jusqu'au
repère « Full » sur la jauge.
6. Essuyer la jauge lors de chaque vérification du niveau
d'huile. NE PAS TROP REMPLIR.
7. Remettre la jauge en place et serrer.
8. Essuyer toute huile répandue.
9. Rebrancher le fil de la bougie.
Entretenir le filtre à air
Le moteur ne fonctionnera pas normalement et peut même
être endommagé si le filtre à air est sale.
Nettoyer le filtre à air toutes les 25 heures de fonctionnement
ou une fois par an, en fonction de ce qui se présente en
premier. Entretenir plus souvent en cas d'utilisation dans un
environnement sale ou poussiéreux.
Pour entretenir le filtre à air, procéder comme suit :
1. Retirer la vis (A).
2. Déposer soigneusement le bloc de filtre à air pour
éviter que des débris ne tombent dans le carburateur.
3. Démonter le bloc de filtre à air et nettoyer toutes les
pièces. Laver le filtre à air en mousse (B) avec un
détergent liquide et de l'eau. Essorer dans un linge
propre.
4. SATURER le filtre à air en mousse d'huile moteur et
l'essorer dans un linge propre pour éliminer le surplus
d'huile.
5. Réinstaller le filtre à air propre ou neuf dans la base (C).
6. Fixer le filtre à air sur le carburateur avec la vis.
Entretenir la bougie
Changer la bougie toutes les 100 heures de fonctionnement
ou une fois par an, selon ce qui se présente en premier. Ceci
permet au moteur de démarrer plus facilement et de mieux
fonctionner.
1. Nettoyer le pourtour de la bougie.
2. Déposer et examiner la bougie.
3. Vérifier l'écartement des électrodes à l'aide d'une jauge
d'épaisseur à fils et le régler à 0,76 mm si nécessaire.
4. Remplacer la bougie si les électrodes sont piquées,
brûlées ou si la porcelaine est fendue. Utiliser une
bougie de rechange recommandée. Voir les
Spécifications.
5. Installer la bougie et bien serrer.
ATTENTION
Éviter un contact prolongé ou répété de la peau avec
l'huile moteur usagée.
• Il a été démontré que l'huile moteur usagée provoque des
cancers de la peau chez certains animaux de laboratoire.
• Laver soigneusement les zones exposées au savon et à l'eau.
A
B
C
Page 46

Entretien du pare-étincelles
Le moteur n'est pas équipé d'origine d'un pare-étincelles.
Dans certaines régions, il est interdit de faire fonctionner un
moteur sans pare-étincelles. Vérifier les lois et
réglementations locales. Le distributeur de service aprèsvente agréé Briggs & Stratton le plus proche peut fournir un
pare-étincelles. Pour fonctionner comme prévu, le pareétincelles doit être entretenu toutes les 50 heures.
Si le moteur a fonctionné, le pot d'échappement est très
chaud. Laisser le pot d'échappement refroidir avant
d'intervenir sur le pare-étincelles.
• Déposer le pare-étincelles pour le nettoyer et
l'examiner.
• Le remplacer s'il est endommagé.
Circuit de refroidissement d'air
Au fil du temps, des débris peuvent s'accumuler dans les
ailerons de refroidissement du cylindre, mais ne sont visibles
qu'en démontant partiellement le moteur. C'est pourquoi
nous conseillons de faire nettoyer le circuit de
refroidissement par un distributeur de service après-vente
agréé Briggs & Stratton aux intervalles recommandés (voir le
Calendrier d'entretien au début de la section Entretien). Il est
également important d'éliminer tous débris de la partie
supérieure du moteur. Voir Nettoyer les débris.
Après chaque utilisation
L'eau ne doit pas séjourner dans l'appareil pendant de
longues périodes. Des sédiments ou des minéraux peuvent
se déposer sur les pièces de la pompe et figer son
fonctionnement. Suivre ces étapes après chaque utilisation :
1. Arrêter le moteur, fermer l'arrivée d'eau, pointer le
pistolet dans une direction sans danger, appuyer sur le
bouton rouge et sur la gâchette pour libérer la pression
interne et laisser le moteur refroidir.
2. Débrancher le tuyau souple du pistolet de pulvérisation
et de la sortie haute pression de la pompe. Vidanger
l'eau du tuyau, du pistolet et de l'extension d'embout.
Essuyer le tuyau avec un chiffon.
3. Vider la pompe de tout liquide en tirant environ six fois
sur la poignée de recul. La majeure partie du liquide
devrait être évacuée de la pompe.
4. Entreposer l'appareil dans un endroit propre et sec.
5. En cas de durée d'entreposage supérieure à 30 jours,
consulter la section Entreposage à long terme en page
suivante.
20 BRIGGSandSTRATTON.COM
Garder des secteurs dans la ligne lourde éclaircissent de débris.
AVERTISSEMENT
Tout contact avec la zone du silencieux peut
provoquer des brûlures graves.
Les gaz ou la chaleur d’échappement peuvent
mettre le feu à des produits combustibles, des
structures ou endommager le réservoir d’essence
et provoquer un incendie.
• NE PAS toucher aux pièces chaudes et ÉVITER le contact avec
les gaz d’échappement.
• Laisser l'équipement refroidir avant d'y toucher.
• Conserver un débattement d’au moins 152 cm autour du
laveuse haute pression, y compris au-dessus du nettoyeur.
AVERTISSEMENT
L'essence sous forme liquide ou vapeur est
extrêmement inflammable et explosive.
Un incendie ou une explosion peuvent provoquer
de graves brûlures ou la mort.
ENTREPOSAGE D'ESSENCE OU D'UN ÉQUIPEMENT DONT LE
RÉSERVOIR CONTIENT DE L'ESSENCE
• NE PAS entreposer à proximité de fours, poêles, chauffe-eau,
sèche-linge ou d'autres équipements susceptibles de comporter
une veilleuse ou une source potentielle d'inflammation des
vapeurs d'essence.
AVERTISSEMENT
Le jet d’eau à haute pression produit par ce
matériel peut percer la peau et les tissus sousjacents, provoquer des blessures graves et
même une amputation.
Le pistolet de pulvérisation conserve l’eau à
haute pression, même lorsque le moteur est
arrêté et l’arrivée d’eau débranchée, et peut donc
provoquer des blessures.
• Toujours garder le tuyau flexible haute pression raccordé à la
pompe et au pistolet de pulvérisation lorsque le système est
sous pression.
• Lors de chaque arrêt du moteur, TOUJOURS diriger l'embout de
pulvérisation vers une direction sans danger, appuyer sur le
bouton rouge et enfoncer la gâchette du pistolet de pulvérisation
pour libérer la pression.
Page 47

21
Hivernage
Pour protéger l'appareil contre le gel :
1. Suivre les étapes 1 à 3 de la section précédente, Après
chaque utilisation.
2. Utiliser le protecteur de pompe modèle 6039 pour
traiter la pompe. Ceci permet de limiter les avaries dues
au gel et de lubrifier les pistons et les joints.
3. Si le protecteur de pompe n'est pas disponible,
brancher une section de tuyau d'arrosage de 92 cm à
l'orifice d'admission d'eau. Verser de l'antigel RV
(antigel sans alcool) dans le tuyau. Tirer deux fois sur
la poignée de rappel. Débrancher le tuyau de 92 cm.
4. Entreposer l'appareil dans un endroit propre et sec.
Entreposage à long terme
S'il n'est pas prévu d'utiliser la laveuse haute pression
pendant plus de 30 jours, il faut préparer le moteur et la
pompe pour un entreposage à long terme.
Protéger le circuit de carburant
Additif de carburant :
S'il est entreposé pendant plus de 30 jours, le carburant peut
se périmer. Le carburant périmé provoque des dépôts
d'acide et de gomme dans le circuit de carburant ou sur des
pièces essentielles du carburateur. Pour conserver la
fraîcheur du carburant, utiliser le stabilisateur de carburant
FRESH START® de Briggs & Stratton, disponible sous forme
d'additif liquide ou de cartouche de concentré.
Il n'est pas nécessaire de vidanger l'essence du moteur si le
stabilisateur de carburant est ajouté conformément aux
instructions. Faire fonctionner le moteur pendant deux
minutes pour faire circuler le stabilisateur dans tout le circuit
de carburant. Le moteur et l'essence peuvent alors être
entreposés pendant 24 mois au plus.
Si l'essence du moteur n'a pas été traitée avec un
stabilisateur de carburant, elle doit être vidangée dans un
récipient approuvé. Faire fonctionner le moteur jusqu'à la
panne sèche. Il est conseillé d'utiliser un stabilisateur de
carburant dans le récipient d'entreposage pour conserver la
fraîcheur de l'essence.
Changer l'huile
Pendant que le moteur est encore chaud, vidanger l'huile du
carter de vilebrequin. Remplir d'huile à la viscosité
recommandée. Voir Vidange de l'huile moteur dans la
section Entretien du moteur.
Huiler l'alésage du cylindre
• Déposer la bougie et verser environ 15 ml d'huile
moteur propre dans le cylindre.
• Réinstaller la bougie et tirer lentement sur la poignée
du démarreur pour répartir l'huile.
Protection de la pompe
Pour protéger la pompe des dommages provoqués par les
dépôts de minéraux ou par le gel, utiliser le protecteur de
pompe PumpSaver modèle 6039 pour traiter la pompe. Ceci
prévient les avaries dues au gel et lubrifie les pistons et les
joints.
REMARQUE : Le PumpSaver est un accessoire facultatif. Il
n'est pas inclus avec la laveuse haute pression. S'adresser
au distributeur de service après-vente agréé Briggs &
Stratton le plus proche pour acheter le PumpSaver.
Pour utiliser le PumpSaver, vérifier que la laveuse haute
pression est arrêtée et débranchée de l'alimentation en eau.
Lire et respecter toutes les instructions et tous les
avertissements figurant sur le conteneur du PumpSaver.
Autres conseils pour l'entreposage
1. NE PAS entreposer le carburant d'une saison à l'autre
sans le traiter conformément à la section Protéger le
circuit de carburant.
2. Remplacer le récipient de carburant s'il commence à
rouiller. Des problèmes peuvent survenir en cas
d'utilisation de carburant contenant de la rouille ou de
poussière avec cet appareil.
3. Couvrir l'appareil avec un revêtement de protection
adapté ne retenant pas l'humidité.
4. Entreposer l'appareil dans un endroit propre et sec.
AVIS
L'appareil doit être protégé du gel.
• Dans le cas contraire, la pompe serait définitivement
endommagée et rendrait l'appareil inutilisable.
• Les avaries dues au gel ne sont pas couvertes par la garantie.
AVERTISSEMENT
Les couvertures d'entreposage peuvent être
inflammables.
• NE PAS placer de couverture d'entreposage sur une laveuse
haute pression chaude.
• Laisser le matériel refroidir assez longtemps avant de le couvrir.
AVIS
L'appareil doit être protégé du gel.
• Dans le cas contraire, la pompe serait définitivement
endommagée et rendrait l'appareil inutilisable.
• Les avaries dues au gel ne sont pas couvertes par la garantie.
Page 48

22 BRIGGSandSTRATTON.COM
Diagnostic des problèmes
Symptôme Cause Solution
La pompe rencontre les
problèmes suivants : impossible
de monter en pression, pression
intermittente, à coups de
pression, faible débit d'eau.
1. Buse en mode basse pression.
2. Entrée d'eau obstruée.
3. Alimentation en eau inadéquate.
4. Pincement ou fuite sur le flexible
d'entrée.
5. Crépine du flexible d'entrée
colmatée.
6. Température d'eau supérieure à 35 °C.
7. Colmatage ou fuite du flexible haute
pression.
8. Fuite au pistolet.
9. Orifice obstrué.
10. Pompe défectueuse.
1. Tirer la buse vers l'arrière pour passer
en mode haute pression.
2. Nettoyer l'entrée.
3. Fournir un débit d'eau adéquat.
4. Éliminer le pincement, réparer la fuite.
5. Vérifier et nettoyer la crépine d'entrée
du flexible.
6. Fournir une alimentation en eau plus
froide.
7. Déboucher le flexible haute pression.
8. Remplacer le pistolet ou les joints
toriques.
9. Nettoyer l'orifice.
10. Contacter le distributeur de service
après-vente agréé Briggs & Stratton.
Le détergent ne se mélange pas
avec le jet d'eau.
1. Tube de siphonnage non immergé
dans le détergent.
2. Le tube/filtre de siphonage de
détergent est colmaté ou fendu.
3. Buse en mode haute pression.
1. Faire plonger le tube de siphonnage
dans le détergeant
2. Nettoyer ou remplacer le tube/filtre de
siphonage de détergent.
3. Pousser la buse vers l'avant pour
passer en mode basse pression.
Le moteur tourne bien à vide mais
a des ratés en charge.
Régime moteur trop faible. Placer la manette des gaz en position FAST.
Si le moteur s'étouffe encore, contacter le
distributeur de service après-vente agréé
Briggs & Stratton.
Le moteur ne démarre pas, ou il
démarre et a des ratés.
1. Niveau d'huile trop bas.
2. Filtre à air sale.
3. Manque de carburant.
4. Carburant périmé.
5. Fil de la bougie non connecté à la
bougie.
6. Bougie endommagée.
7. Eau dans le carburant.
8. Mélange de carburant trop riche.
1. Remplir le carter de vilebrequin au
niveau approprié.
2. Nettoyer ou remplacer le filtre à air.
3. Remplir le réservoir de carburant.
4. Vidanger le réservoir de carburant ;
remplir de carburant frais.
5. Brancher le fil à la bougie.
6. Remplacer la bougie.
7. Vidanger le réservoir de carburant ;
remplir de carburant frais.
8. Contacter le distributeur de service
après-vente agréé Briggs & Stratton.
Le moteur s'arrête inopinément. Panne sèche. Refaire le plein.
Le moteur manque de puissance. Filtre à air sale. Remplacer le filtre à air.
Page 49

23
Garanties
Garantie du système de contrôle des émissions
dans l'environnement.
Briggs & Stratton Corporation (B&S), le California Air
Resources Board (CARB) et l'agence américaine de
protection de l'environnement (United States
Environmental Protection Agency U.S. EPA)
Déclaration de garantie du système de contrôle des
émissions dans l'environnement (Droits et obligations de
garantie des défauts pour le propriétaire)
Californie, États-Unis et Déclaration de garantie des
défauts de contrôle des émissions dans l'environnement,
Canada
Le California Air Resources Board (CARB), U.S. EPA et le
B&S ont le plaisir d'expliquer la garantie du système de
contrôle des émissions dans l'environnement sur votre petit
moteur non routier (SORE). En Californie, les nouveaux
petits moteurs non routiers années modèle 2006 et
ultérieures doivent être conçus, construits et équipés pour
satisfaire aux strictes normes anti-brouillard de cet État.
Partout ailleurs aux États-Unis, les nouveaux moteurs non
routiers à allumage par bougie certifiés pour les années
modèle 1997 et ultérieures doivent satisfaire aux normes
similaires définies par l'U.S. EPA. B&S doit garantir le
système de contrôle des émissions dans l'environnement de
votre moteur pendant les durées indiquées ci-dessous, en
l'absence de toute utilisation abusive, négligence ou mauvais
entretien de votre petit moteur non routier.
Le système de contrôle des émissions dans l'environnement
inclut des pièces telles que le carburateur, le filtre à air, le
système d'allumage, la conduite de carburant, le pot
d'échappement et un convertisseur catalytique. Il peut aussi
inclure des raccords et d'autres éléments concernant les
émissions dans l'environnement.
En présence d'une situation couverte par la garantie, B&S
réparera votre petit moteur non routier gratuitement, et ceci
couvrira le diagnostic, les pièces et la main-d'ouvre.
Couverture de la garantie Briggs & Stratton des défauts du
contrôle des émissions dans l'environnement
Les petits moteurs non routiers sont garantis contre les
défauts des pièces de contrôle des émissions dans
l'environnement pendant une durée de deux ans sous
réserve des dispositions énoncées ci-dessous. Si une pièce
du moteur couverte par la garantie est défectueuse, la pièce
sera réparée ou remplacée par B&S.
Responsabilités du propriétaire dans le cadre de la garantie
En tant que propriétaire du petit moteur non routier, vous
êtes responsable de l'exécution de l'entretien nécessaire
figurant dans les instructions d'utilisation et d'entretien. B&S
conseille de conserver toutes les factures d'entretien du petit
moteur hors route, mais B&S ne peut pas refuser la garantie
pour la seule raison de l'absence de factures ou du défaut
d'exécution de tout l'entretien prévu.
En tant que propriétaire du petit moteur non routier, vous
devez cependant savoir que B&S peut vous refuser la
couverture de la garantie en cas de dysfonctionnement de
tout ou partie du petit moteur non routier dû à une utilisation
abusive, à la négligence, à un mauvais entretien ou à des
modifications non approuvées.
Il est de votre responsabilité de présenter votre petit moteur
non routier à un distributeur de service après-vente agréé
Briggs & Stratton dès que survient un problème. Les
réparations sous garantie acceptées doivent être terminées
dans un délai raisonnable qui ne doit pas excéder 30 jours.
Pour toute question concernant les droits et les responsabilités
dans le cadre de la garantie, contacter un représentant du
service d'entretien B&S au +1 (414) 259-5262.
La garantie relative aux émissions dans l'environnement est
une garantie contre les défauts. Les défauts sont évalués par
rapport aux performances normales du moteur. La garantie
n'est pas liée à un test d'émissions en cours d'utilisation.
Dispositions de la garantie Briggs & Stratton contre les
défauts de contrôle des émissions dans l'environnement
Voici les dispositions relatives à la couverture de la garantie
contre les défauts de contrôle des émissions dans
l'environnement Contrôle des gaz d'échappement. Elles
s'ajoutent à la garantie B&S du moteur pour les moteurs non
réglementés qui se trouve dans le Manuel d'utilisation.
1. Pièces garanties
La couverture de cette garantie ne s'étend qu'aux pièces
figurant ci-dessous (les pièces du système de contrôle
des émissions dans l'environnement) dans la mesure où
ces pièces étaient présentes à l'achat du moteur.
a. Système de dosage de carburant
• Système d'enrichissement au démarrage à froid
(soft choke)
• Carburateur et pièces internes
• Pompe à carburant
• Conduite de carburant, fixations de conduite de
carburant, colliers de serrage
• Réservoir de carburant, bouchon et attache
• Réservoir à charbon actif
b. Système d'induction d'air
• Filtre à air
• Collecteur d'admission
• Purge et conduite de prise d'air
c. Système d'allumage
• Bougie(s)
• Système d'allumage électromagnétique
d. Système catalytique
• Convertisseur catalytique
• Tubulure d'échappement
• Système d'injection pneumatique ou valve à impulsion
e. Divers éléments utilisés dans les systèmes ci-dessus.
• Valves et commutateurs actionnés par le vide, la
température, la position, l'heure
• Connecteurs et assemblages
Page 50

24 BRIGGSandSTRATTON.COM
2. Durée de couverture
B&S garantit au propriétaire initial et à chaque acheteur
suivant que les pièces garanties seront libres de tout
défaut matériel et de main-d'ouvre à l'origine d'un
dysfonctionnement des pièces garanties pendant une
durée de deux ans à compter de la livraison du moteur
à un acheteur au détail.
3. Gratuité
La réparation ou le remplacement de toute pièce
garantie sera effectué gratuitement pour le propriétaire,
y compris le travail de diagnostics qui conduit à
déterminer qu'une pièce garantie est défectueuse, si le
travail de diagnostic est effectué chez un fournisseur de
service après-vente agréé B&S. Pour l'entretien couvert
par la garantie relative aux émissions dans
l'environnement, adressez-vous au fournisseur de
service après-vente agréé B&S le plus proche figurant
dans les pages jaunes, sous « moteurs, essence », «
moteurs à essence », « tondeuses à gazon » ou une
catégorie similaire.
4. Réclamations et exclusions de couverture
Les réclamations liées à la garantie seront reçues
conformément aux dispositions des Règles de garantie
du moteur B&S. La garantie ne couvrira pas les
dysfonctionnements des pièces garanties qui ne sont
pas des pièces B&S d'origine ou dus à une utilisation
abusive, à la négligence, à un mauvais entretien,
comme indiqué dans les Règles de garantie du moteur
B&S. B&S n'est pas tenue de couvrir les défaillances
des pièces garanties qui seraient dues à l'utilisation
d'additif, qui ne seraient pas d'origine, ou qui seraient
modifiées.
5. Entretien
Toute pièce garantie dont le remplacement n'est pas
prévu dans le cadre de l'entretien nécessaire ou qui doit
seulement être examinée régulièrement pour «
réparation ou remplacement si nécessaire » sera
garantie contre les défauts pendant la durée de la
garantie. Toute pièce garantie qui doit être remplacée
dans le cadre de l'entretien nécessaire ne sera garantie
contre les défauts que pendant la période courant
jusqu'au premier remplacement prévu pour cette pièce.
Toute pièce de remplacement équivalente en
performances et longévité peut être utilisée lors de tout
entretien ou de toute réparation. Le propriétaire est
responsable de l'exécution de tout l'entretien nécessaire
tel que défini dans le Manuel d'utilisation de B&S.
6. Couverture consécutive
La couverture décrite dans les présentes s'étendra à la
défaillance de tout composant du moteur provoquée
par le dysfonctionnement de toute pièce garantie
encore sous garantie.
Information sur les émissions dans
l'environnement
Les moteurs certifiés conformes aux normes des émissions
dans l'environnement du California Air Resources Board
(CARB) doivent porter les informations concernant la
Emissions Durability Period and Air Index. Le fabricant du
moteur rend ces informations disponibles pour le
consommateur sur les étiquettes relatives aux émissions
dans l'environnement. L'étiquette sur les émissions dans
l'environnement du moteur porte les informations de
certification.
La longévité relative aux émissions décrit le nombre
d'heures de fonctionnement réel pour lequel le moteur est
certifié conforme aux normes sur les émissions, sous
réserve d'un entretien correct conforme aux instructions de
fonctionnement et d'entretien. Les catégories suivantes sont
utilisées :
Modéré : le moteur est certifié conforme aux normes sur les
émissions pendant 125 heures de fonctionnement réel.
Intermédiaire : le moteur est certifié conforme aux normes
sur les émissions pendant 250 heures de fonctionnement
réel.
Étendu : le moteur est certifié conforme aux normes sur les
émissions pendant 500 heures de fonctionnement réel.
Par exemple, une tondeuse à gazon poussée type est utilisée
pendant 20 à 25 heures par an. C'est pourquoi la longévité
relative aux émissions d'un moteur classé Intermédiaire
est égale à 10 à 12 ans.
Certains moteurs seront certifiés pour satisfaire aux normes
de Phase 2 relatives aux émissions dans l'environnement de
l'United States Environmental Protection Agency (USEPA).
Pour les moteurs certifiés Phase 2, la longévité relative aux
émissions mentionnée sur l'étiquette correspondante indique
le nombre d'heures de fonctionnement pour lequel il a été
vérifié que le moteur satisfait aux exigences relatives aux
émissions.
Pour les moteurs de moins de 225 cc de cylindrée :
Catégorie C = 125 heures
Catégorie B = 250 heures
Catégorie A = 500 heures.
Pour les moteurs de 225 cc de cylindrée et plus :
Catégorie C = 250 heures
Catégorie B = 500 heures
Catégorie A = 1000 heures.
Page 51

25
GARANTIE DU PROPRIÉTAIRE D'UN NETTOYEUR HAUTE PRESSION DE BRIGGS & STRATTON POWER PRODUCTS GROUP, LLC
GARANTIE LIMITÉE
Briggs & Stratton Power Products Group, LLC réparera ou remplacera, sans frais, toutes pièces du nettoyeur haute pression défectueuses comportant
un vice de matériau, un défaut de fabrication ou les deux. Les frais de transport des pièces envoyées en réparation ou pour être remplacées au titre de la
présente garantie sont à la charge de l'acheteur. la garantie est en vigueur durant les périodes et aux conditions stipulées dans le présent document.
Pour faire jouer la garantie, s'adresser à l'établissement de service après-vente agréé le plus proche indiqué sur le site
http://www.BRIGGSandSTRATTON.COM.
IL N'EXISTE AUCUNE AUTRE GARANTIE EXPLICITE. LES GARANTIES IMPLICITES, COMPRENANT CELLES DE QUALITÉ MARCHANDE ET D'APTITUDE
À UN USAGE PARTICULIER, SONT LIMITÉES À UN AN À PARTIR DE LA DATE D'ACHAT, SANS PRÉJUDICE D'UNE DURÉE LÉGALE DIFFÉRENTE
EXCLUANT TOUTE GARANTIE IMPLICITE. LA RESPONSABILITÉ DES DOMMAGES ACCESSOIRES OU INDIRECTS EST EXCLUE DANS LA MESURE OÙ
UNE TELLE EXCLUSION EST LÉGALE. Certains pays ou États/provinces n'autorisent aucune restriction sur la durée d'une garantie implicite, et certains
pays ou États/provinces n'autorisent pas l'exclusion ou la limitation des dommages accessoires ou indirects. Par conséquent, les restrictions et
exclusions décrites ci-dessus pourraient ne pas s'appliquer dans certains cas. La présente garantie accorde légalement à l'utilisateur certains droits
spécifiques auxquels peuvent également s'ajouter d'autres droits qui varient d'un pays ou d'un état à l'autre.
À partir du 1 er décembre 2005, la présente garantie remplace toute garantie non datée et toute garantie dont la date est antérieure au 1 er décembre 2005
La période de garantie débute à la date d'achat par le premier acheteur de détail ou par le premier utilisateur commercial final, et couvre la durée stipulée dans
le tableau ci-dessus. Par " usage privé ", on entend une utilisation personnelle résidentielle par l'acheteur de détail. Par " usage professionnel " on entend toute
autre utilisation, y compris à des fins commerciales, donnant lieu à rémunération ou location. Dès la première exploitation de l'équipement en usage
professionnel il est réputé être définitivement à usage professionnel au titre de la présente garantie. Les équipements utilisés pour une alimentation principale
en remplacement du réseau public d'électricité ne sont pas couverts par la présente garantie. Les nettoyeurs haute pression à moteur électrique utilisés à des
fins commerciales ne sont pas couverts.
POUR TOUS LES ÉQUIPEMENTS FABRIQUÉS PAR BRIGGS & STRATTON, L'ENREGISTREMENT DE LA GARANTIE N'EST PAS OBLIGATOIRE POUR QU'ELLE
PRENNE EFFET. CONSERVER LE REÇU COMME PREUVE D'ACHAT. SI, LORS DUNE DEMANDE D'INTERVENTION SOUS GARANTIE, LA DATE INITIALE
D'ACHAT NE PEUT ÊTRE FOURNIE, LA DATE DE FABRICATION DU PRODUIT SERT DE RÉFÉRENCE POUR DÉTERMINER LA PÉRIODE DE GARANTIE.
À PROPOS DE LA GARANTIE DE VOTRE ÉQUIPEMENT
Nous vous encourageons à faire réparer votre appareil au titre de la garantie et tenons à nous excuser pour tout inconvénient subi. Tout établissement de
service après-vente agréé peut effectuer les réparations sous garantie. La plupart des réparations sous garantie sont traitées sans formalité ; cependant, il
arrive parfois qu'une demande d'intervention au titre de la garantie ne soit pas fondée. Par exemple, la garantie ne couvre pas les dommages causés à
l'équipement par une mauvaise utilisation, par un manque d'entretien périodique, durant l'expédition, la manutention ou l'entreposage, ou en raison d'un
montage incorrect. De même, la garantie sera annulée si la date de fabrication ou le numéro de série apposé sur l'équipement a été enlevé ou si le matériel a
été altéré ou modifié. Durant la période de garantie, l'établissement de service après-vente agréé réparera ou remplacera, à sa discrétion, toute pièce qui,
après examen, est trouvée défectueuse à la suite d'une utilisation et d'un entretien normaux. La présente garantie ne couvre pas les réparations ni les
équipements suivants:
• Usure normale: Comme tout appareil mécanique, le matériel motorisé extérieur nécessite, pour fonctionner correctement, que certaines de ses pièces
soient régulièrement entretenues et remplacées La présente garantie ne couvre pas les frais de réparation lorsque la durée de vie d'une pièce ou de
l'équipement est dépassée par suite de l'utilisation normale.
• Montage et entretien: la présente garantie ne couvre pas les équipements ni les pièces dans les cas qui, selon nous, auraient nuit à la performance et
à la fiabilité du produit, à savoir : montage et modifications inadéquats ou non autorisés ; mauvaise utilisation, négligence, accident, surcharge,
emballement ; réparation, entreposage ou entretien inadéquats. De plus, la garantie ne couvre pas l'entretien normal tel que les filtres à air, les
réglages, le nettoyage du système de carburant et l’obstruction (due à des produits chimiques, des débris, de la poussière, ainsi de suite).
• Autres exclusions: La présente garantie exclut les pièces telles que les raccords rapides, les joints, les joints toriques, les pompes ayant fonctionné
sans alimentation en eau ou tout dommage ou tout mauvais fonctionnement résultant d'un accident, d'une utilisation abusive, de modifications, de
changements ou d'un entretien inadéquat du système, du gel ou d'une détérioration chimique. La garantie du produit ne couvre pas les pièces
accessoires telles que les pistolets, les tuyaux, les rallonges de buse (lances) et les buses. Cette garantie ne couvre ni le matériel d’occasion,
reconditionné et de démonstration, ni les pannes dues au fait de Dieu et autres cas de force majeure hors du contrôle des fabricants.
198203CF, Rev. B,
12/31/2006
BRIGGS & STRATTON POWER PRODUCTS GROUP, LLC
JEFFERSON, WI, USA
Usage privé
Usage professionnel
2 an
90 jours
PÉRIODE DE GARANTIE
Page 52

26 BRIGGSandSTRATTON.COM
Briggs & Stratton Power Products Group, LLC
900 N. Parkway
Jefferson, Wisconsin, 53549 U.S.A.
Laveuse haute pression
Puissance nominale : la puissance nominale brute des modèles individuels de moteur thermique est indiquée sur l'étiquette
conformément au code J1940 (Small Engine Power & Torque Rating Procedure) de la SAE (Society of Automotive Engineers)
et les performances nominales ont été obtenues et corrigées conformément au code J1995 (révision 05-2002) de la SAE. Les
valeurs de couple sont dérivées à 3060 t/mn ; les valeurs de puissance en chevaux sont dérivées à 3600 t/mn. La puissance
moteur brute réelle sera inférieure et est modifiée, entre autres facteurs, par les conditions de fonctionnement ambiantes et les
variations d'un moteur à l'autre. Étant donnée la vaste gamme de produits sur lesquels sont placés les moteurs et la diversité
des problèmes environnementaux applicables à l'utilisation du matériel, le moteur thermique ne développera pas la puissance
brute nominale lorsqu'il est utilisé sur un appareil donné (puissance « sur site » réelle, ou nette). La différence est due à divers
facteurs y compris, sans que ce soit une limite, les accessoires (filtre à air, échappement, charge, refroidissement, carburateur,
pompe à carburant, etc.), les limitations de l'application, les conditions de fonctionnement ambiantes (température, humidité,
altitude) et les variations d'un moteur à l'autre. En raison des limitations de la capacité de fabrication, Briggs & Stratton peut
remplacer le moteur de cette série par un moteur de puissance nominale supérieure.
Cette laveuse haute pression est classée conformément à la norme PW101 de la Pressure Washer Manufacture Association
(PWMA) (Essai et classement des performances des laveuses à pression).
Caractéristiques du produit
Pression de sortie . . . . . . . . . . . . . . .2 000 PSI (137,9 bars)
Débit . . . . . . . . . . . . . . . . . . . . . . . . . . . . . .7,2 litres/minute
Température d'alimentation en eau . . . . . . .38 ºC maximum
Cylindrée . . . . . . . . . . . . . . . . . . . . . . . . . . . . . . . . . . .158 cc
Écartement de la bougie . . . . . . . . . . . . . . . . . . . . .0,76 mm
Capacité de carburant . . . . . . . . . . . . . . . . . . . . . . .0,95 litre
Capacité d'huile . . . . . . . . . . . . . . . . . . . . . . . . . . . . .0,6 litre
Pièces d'entretien courantes
PumpSaver . . . . . . . . . . . . . . . . . . . . . . . . . . . . . . . . . .6039
Kit d'entretien de joint torique . . . . . . . . . . . . . . . . . . . .6048
Filtre d'admission d'eau . . . . . . . . . . . . . . . . . . . . .B2384GS
Filtre à air . . . . . . . . . . . . . . . . . . . . . . . . .698369 ou 5088D
Bougie à résistance . . . . . . . . . . . . . . . . .802592S ou 5095D
Bougie platine longue durée . . . . . . . . . . . . . . . . . . . .5062D
Bouteille d'huile moteur . . . . . . . . . . . . . . . . . . . . . . .100005
Stabilisateur de carburant . . . . . . . . . . . . . . . . . . . . . .5041D
Pare-étincelles . . . . . . . . . . . . . . . . . . . . . . . . . . . . . .398067
Page 53

BRIGGS & STRATTON POWER PRODUCTS GROUP, LLC
JEFFERSON, WISCONSIN, U.S.A.
Hochdruckreiniger
Bedienerhandbuch
Dieser Hochdruckreiniger erfüllt die Vorschrift PW101 (Prüf- und Nennleistung von
Hochdruckreinigern) der Pressure Washer Manufacture Association.
Page 54

2 BRIGGSandSTRATTON.COM
Briggs & Stratton Power Products Group, LLC
900 North Parkway
Jefferson, WI 53549, U.S.A.
Copyright © 2008 Briggs & Stratton Power Products Group, LLC.
Alle Rechte vorbehalten. Die Vervielfältigung oder Übertragung
dieses Dokuments in beliebiger Form durch beliebige Mittel ist
nur nach ausdrücklicher schriftlicher Genehmigung durch die
Briggs & Stratton Power Products Group zulässig.
Vielen Dank, dass Sie sich für diesen hochwertigen Hochdruckreiniger von Briggs & Stratton entschieden haben! Wenn das
Gerät entsprechend den Anweisungen in diesem Handbuch betrieben und gepflegt wird, können Sie von einem zuverlässigen
Einsatz über viele Jahre hinweg ausgehen.
Dieses Handbuch beschreibt die Betriebsrisiken und gibt Tipps für den sicheren Umgang mit dem Gerät. Briggs & Stratton
kann nicht im Detail auf sämtliche Anwendungsfälle des Hochdruckreinigers eingehen. Daher ist es wichtig, dass Sie vor der
Inbetriebnahme die Sicherheitsanweisungen vollständig und aufmerksam lesen. Heben Sie die Anweisungen auf, damit Sie
später bei Bedarf darin nachschlagen können.
Der Hochdruckreiniger muss vor der Inbetriebnahme zusammengebaut werden. Die Montage wird im Abschnitt
„Zusammenbau“ beschrieben. Führen Sie alle darin aufgeführten Arbeitsschritte durch.
Kontakt
Briggs & Stratton unterhält einen umfangreichen Kundendienst; weltweit gibt es mehrere tausend Vertragshändler, die unsere
Produkte führen und einen erstklassigen Service bieten. Die interaktive Karte auf BRIGGSandSTRATTON.COM weist Ihnen den
Weg zum nächsten Händler.
Hochdruckreiniger
Modellnummer
Revision
Seriennummer
Motor
Modellnummer
Typnummer
Codenummer
Kaufdatum
Page 55

Inhaltsverzeichnis
Bedienersicherheit . . . . . . . . . . . . . . . . . . . . . . . . . . . . . . . 4
Gerätebeschreibung. . . . . . . . . . . . . . . . . . . . . . . . . . . . . . . . . . . . . . . . . . . 4
Sicherheitsvorkehrungen . . . . . . . . . . . . . . . . . . . . . . . . . . . . . . . . . . . . . . . 4
Zusammenbau . . . . . . . . . . . . . . . . . . . . . . . . . . . . . . . . . . 8
Hochdruckreiniger auspacken . . . . . . . . . . . . . . . . . . . . . . . . . . . . . . . . . . . 8
Griff montieren. . . . . . . . . . . . . . . . . . . . . . . . . . . . . . . . . . . . . . . . . . . . . . . 8
Radsatz montieren. . . . . . . . . . . . . . . . . . . . . . . . . . . . . . . . . . . . . . . . . . . . 8
Einfüllen von Motoröl. . . . . . . . . . . . . . . . . . . . . . . . . . . . . . . . . . . . . . . . . . 9
Kraftstoff Einfüllen . . . . . . . . . . . . . . . . . . . . . . . . . . . . . . . . . . . . . . . . . . . . 9
Anschließen der Schläuche und der Wasserzufuhr an die Pumpe. . . . . . . 10
Kennzeichen und Kontrollen. . . . . . . . . . . . . . . . . . . . . . . . 11
Verwendung des Hochdruckreinigers. . . . . . . . . . . . . . . . . . 12
Aufstellung des Hochdruckreinigers . . . . . . . . . . . . . . . . . . . . . . . . . . . . . 12
Inbetriebnahme des Hochdruckreinigers . . . . . . . . . . . . . . . . . . . . . . . . . . 12
Ausschalten des Hochdruckreinigers. . . . . . . . . . . . . . . . . . . . . . . . . . . . . 14
Verwenden der einstellbaren Düse. . . . . . . . . . . . . . . . . . . . . . . . . . . . . . . 14
Reinigungsmittel mit einstellbarer Düse versprühen . . . . . . . . . . . . . . . . . 14
Abspülen mit dem Hochdruckreiniger . . . . . . . . . . . . . . . . . . . . . . . . . . . . 15
Reinigung des Saugrohrs . . . . . . . . . . . . . . . . . . . . . . . . . . . . . . . . . . . . . 15
Automatisches Abkühlsystem (Wärmeabbau) . . . . . . . . . . . . . . . . . . . . . . 15
Wartung . . . . . . . . . . . . . . . . . . . . . . . . . . . . . . . . . . . . . 16
Wartungsplan. . . . . . . . . . . . . . . . . . . . . . . . . . . . . . . . . . . . . . . . . . . . . . . 16
Wartung des hochdruckreinigers. . . . . . . . . . . . . . . . . . . . . . . . . . . . . . . . 16
Wartung des Motors . . . . . . . . . . . . . . . . . . . . . . . . . . . . . . . . . . . . . . . . . 18
Nach dem Gebrauch . . . . . . . . . . . . . . . . . . . . . . . . . . . . . . . . . . . . . . . . . 20
Lagerung im Winter . . . . . . . . . . . . . . . . . . . . . . . . . . . . . . . . . . . . . . . . . . 21
Lagerung über längere Zeiträume . . . . . . . . . . . . . . . . . . . . . . . . . . . . . . . 21
Fehlersuche. . . . . . . . . . . . . . . . . . . . . . . . . . . . . . . . . . . 22
Gewährleistung . . . . . . . . . . . . . . . . . . . . . . . . . . . . . . . . 23
Gewährleistung für Emissionskontrollsysteme . . . . . . . . . . . . . . . . . . . . . 23
Garantieerklärung. . . . . . . . . . . . . . . . . . . . . . . . . . . . . . . . . . . . . . . . . . . . 25
Produktdaten . . . . . . . . . . . . . . . . . . . . . . . . . . . . . . . . . . 26
Produktdaten . . . . . . . . . . . . . . . . . . . . . . . . . . . . . . . . . . . . . . . . . . . . . . . 26
Verbrauchsmaterial . . . . . . . . . . . . . . . . . . . . . . . . . . . . . . . . . . . . . . . . . . 26
3
Page 56

Bedienersicherheit
Gerätebeschreibung
Lesen Sie dieses Handbuch sorgfältig durch, um
sich mit Ihrem Hochdruckreiniger vertraut zu
machen: mit seinen Möglichkeiten, seinen Grenzen
und den möglichen Gefahren.
Der Betriebsdruck des Hochdruckreinigers beträgt 137,9 bar
bei einer Durchflussrate von 7,2 l pro Minute. Das Gerät
wurde nicht für den kommerziellen Einsatz entwickelt. Es hat
Räder mit einem Durchmesser von 7 Zoll, eine Axialpumpe
mit Edelstahlkolben, ein automatisches Kühlsystem, ein
Einspritzsystem für Reinigungsmittel und eine verstellbare
Sprühdüse. Zum Lieferumfang gehören u. a. eine
Schutzbrille und ein 9 m langer Hochdruckschlauch.
Es wurde sorgfältig auf die Genauigkeit und Aktualität der
Informationen in diesem Handbuch geachtet. Jedoch
behalten wir uns das Recht vor, das Produkt und dieses
Dokument zu jeder Zeit ohne vorherige Ankündigung zu
ändern oder zu verbessern.
Die Emissionskontrolle des Geräts erfüllt die Anforderungen
der US-Umweltschutzbehörde und des California Air
Resources Board.
Sicherheitsvorkehrungen
Dieses Sicherheitssymbol weist Sie auf mögliche
Verletzungsgefahren hin. Beachten Sie alle auf
dieses Symbol folgenden Sicherheitshinweise, um
die Möglichkeit der Verletzung oder der
Todesgefahr auszuschließen.
Das Sicherheitssymbol ( ) weist Sie in Verbindung mit
einem entsprechenden Wort (GEFAHR, VORSICHT,
WARNUNG), einer Abbildung und/oder einem erläuternden
Text auf Gefahrensituationen hin. GEFAHR zeigt eine
Gefahrensituation an, die, wenn sie nicht vermieden wird,
unvermeidlich zum Tode führt oder schwere Verletzungen
nach sich zieht. WARNUNG zeigt eine Gefahrensituation an,
die, wenn sie nicht vermieden wird, u. U. zum Tode führt
oder schwere Verletzungen nach sich zieht. VORSICHT zeigt
eine Gefahrensituation an, die, wenn sie nicht vermieden
wird, geringfügige oder leichte Verletzungen nach sich ziehen
könnte. NOTIZ die eine Beschädigung von Geräten nach sich
ziehen könnte. Beachten Sie die Sicherheitshinweise, um das
Risiko für Verletzung und Tod zu vermeiden bzw. zu
verringern.
Warnschild
Am Gerät befindet sich ein Warnschild, das auf mögliche
Gefahrenquellen hinweist. Beschädigte oder unleserliche
Schilder sind zu ersetzen. Ersatzschilder sind bei Briggs &
Stratton Händlern erhältlich.
Die Symbole auf dem Warnschild werden später in diesem
Abschnitt zum Thema Sicherheit ausführlicher dargestellt
und beschrieben.
Gefahrenhinweise und ihre Bedeutung
A - Explosionsgefahr G - Fliegende Gegenstände
B - Brandgefahr H - Rutschgefahr
C - Stromschlag J - Fallgefahr
D - Giftige Dämpfe K - Hochdruck
E - Rückschlag L - Bewegte Teile
F - Heiße Gegenstände M - Bedienungsanleitung
4 BRIGGSandSTRATTON.COM
A B C
D E
G H
F
J
K L M
Page 57

5
WARNUNG
Die von diesem Gerät erzeugten Abgase enthalten
Chemikalien, die nach Erkenntnissen des US-
Bundesstaates Kalifornien zu Krebserkrankungen,
Geburtsfehlern und sonstigen Erbgutschäden führen.
WARNUNG
Gefahr von Stromschlägen!
Gefahr von Stromschlägen oder Verbrennungen
bei Kontakt mit der Stromquelle.
• NICHT in der Nähe spannungführender Leitungen sprühen!
WARNUNG
Beim Arbeiten mit dem Hochdruckreiniger
können Pfützen und rutschige Stellen entstehen.
Sturzgefahr durch Rückstoß der Spritzpistole!
• Das Gerät nur auf stabilem Untergrund einsetzen.
• Der zu reinigende Bereich muss ausreichend geneigt sein und
Abflussmöglichkeiten bieten, um das Risiko des Stürzens auf
rutschigem Boden zu verringern.
• Besonders vorsichtig vorgehen, wenn der Hochdruckreiniger auf
einer Leiter, einem Gerüst oder an anderen verhältnismäßig
wenig Standsicherheit bietenden Orten eingesetzt wird.
• Bei Hochdruckarbeiten ist die Sprühpistole mit beiden Händen
festzuhalten, da Rückstöße auftreten können.
WARNUNG
Benzin und dessen Dämpfe sind in hohem Maße
brennbar und explosiv.
Feuer oder eine Explosion können zu schweren
Verbrennungen oder zum Tod führen.
KRAFTSTOFF EINFÜLLEN ODER ABLASSEN
• Hochdruckreiniger ausschalten und mindestens zwei Minuten
abkühlen lassen. Deckel langsam abschrauben, damit der Druck
im Tank langsam entweichen.
• Tank nur im Freien nachfüllen oder leeren.
• Nicht zu viel Kraftstoff in den Tank einfüllen. Platz für die
Kraftstoffausdehnung berücksichtigen.
• Kraftstoffspritzer vor der Inbetriebnahme verdampfen lassen.
• Kraftstoff von Funken, offenen Flammen, Kontrollleuchten, Hitze
und anderen Zündquellen fernhalten.
• Keine Zigaretten anzünden und nicht rauchen.
ANLASSEN
• Zündkerze, Dämpfer, Tankdeckel und Luftfilter kontrollieren.
• Motor NICHT anlassen, wenn Zündkerze fehlt.
BETRIEB DES GERÄTS
• Motor oder Gerät nicht so weit kippen, dass Benzin auslaufen
kann.
• Keine brennbaren Flüssigkeiten versprühen.
TRANSPORT ODER REPARATUR DES GERÄTS
• Zum Transportieren bzw. Reparieren muss der Kraftstofftank
LEER bzw. das Kraftstoff-Absperrventil GESCHLOSSEN sein.
• Zündkabel trennen.
LAGERN VON BENZIN ODER DES GERÄTS MIT KRAFTSTOFF IM
TANK
• Nicht in der Nähe von Öfen, Herden, Wasserkochern,
Wäschetrocknern oder sonstigen Geräten mit Kontrollleuchten
oder anderen Zündquellen lagern, da diese Benzindämpfe
entzünden können.
WARNUNG
Vom laufenden Motor wird Kohlenmonoxid
ausgestoßen, ein geruch- und farbloses giftiges
Gas.
Das Einatmen von Kohlenmonoxid kann zu
Kopfschmerzen, Ermüdung, Schwindel,
Erbrechen, Orientierungsstörungen, Krämpfen,
Übelkeit, Ohnmacht oder zum Tod führen.
Einige Chemikalien oder Reinigungsmittel können
gesundheitsschädlich sein, wenn sie eingeatmet
oder verschluckt werden, und starke Übelkeit,
Bewusstlosigkeit oder Vergiftung zur Folge haben.
• Den Hochdruckreiniger NUR im Freien verwenden.
• Abgase dürfen nicht durch Fenster, Türen, Lüftungsschächte
oder andere Öffnungen in geschlossene Räume gelangen.
• Gerät NICHT in geschlossenen Räumen anlassen oder betreiben,
auch wenn Fenster und Türen geöffnet sind.
• Ein Atemschutzgerät oder eine Schutzmaske tragen, wenn die
Gefahr des Einatmens von Dämpfen besteht.
• Lesen Sie alle Anweisungen für die Schutzmaske durch, damit
gewährleistet ist, dass sie den erforderlichen Schutz gegen das
Einatmen von gesundheitsschädlichen Dämpfen leistet.
WARNUNG
Einige Gerätekomponenten und Zubehörteile
enthalten Stoffe, die nach Erkenntnissen des US-
Bundesstaates Kalifornien zu Krebserkrankungen,
Geburtsfehlern und sonstigen, Erbgutschäden führen.
Hände nach Benutzung waschen!
Page 58

6 BRIGGSandSTRATTON.COM
WARNUNG
Im Falle eines Rückschlages kann das plötzliche
Einziehen des Anlasserseils zu Verletzungen
führen. Hand und Arm werden so schnell zum
Motor gezogen, dass kein Loslassen möglich ist.
Dabei kann es zu Knochenbrüchen, blauen
Flecken oder Verstauchungen kommen.
• Vor dem Ziehen des Anlasserseils immer den Auslöser
betätigen, damit der Druck abgebaut werden kann.
• Beim Anlassen des Motors langsam am Seil ziehen, bis ein
Widerstand fühlbar wird, und dann schnell am Seil ziehen, um
den Rückschlag zu vermeiden.
• Startet der Motor nicht, die Sprühpistole in eine sichere
Richtung halten und Hebel der Sprühpistole betätigen, um den
Druck abzubauen.
• Bei Hochdruckarbeiten ist die Sprühpistole mit beiden Händen
festzuhalten, da Rückstöße auftreten können.
WARNUNG
Schalldämpfer nicht berühren –
Verbrennungsgefahr!
Abgase können brennbare Stoffe, Möbel,
Gebäude u. Ä. entzünden. Lecks im Tank können
Brände auslösen.
• Keine heißen Teile berühren und Abgase NICHT einatmen.
• Das Gerät abkühlen lassen, bevor es berührt wird.
• Nach allen Seiten und nach oben hin muss ein Freiraum von
mindestens 1,5 m gewährleistet sein.
WARNUNG
Der aus dem Gerät unter hohem Druck
austretende Wasserstrahl kann die Haut und das
darunter befindliche Gewebe durchdringen, was
schwere Verletzungen und Amputationen zur
Folge haben kann.
Die Sprühpistole steht auch nach Ausschalten
des Motors und Abschalten der Wasserzufuhr
unter Hochdruck – Verletzungsgefahr!
• KINDERN nicht die Bedienung des Hochdruckreinigers erlauben.
• Hochdruckschlauch auf keinen Fall reparieren, sondern stets
erneuern.
• Anschlusslecks dürfen NICHT mit Dichtmitteln abgedichtet
werden. Stattdessen ist ein neuer O-Ring bzw. eine neue
Dichtung einzusetzen.
• Hochdruckschlauch NICHT an Düsenverlängerung anschließen.
• Das Drucksystem erst in Betrieb nehmen, wenn der
Hochdruckschlauch an Pumpe und Sprühpistole angeschlossen
ist.
• Die Sprühpistole IMMER in eine sichere Richtung halten. Der
Wasserdruck muss vor jedem Motorstart durch Betätigen der
roten Taste und des Auslösers abgebaut werden.
• Eine Sprühpistole niemals auf Menschen, Tiere oder Pflanzen
richten.
• Sprühpistole NICHT in geöffneter Position sichern.
• Sprühpistole im laufenden Betrieb NICHT UNBEAUFSICHTIGT
lassen.
• Sprühpistolen NUR mit voll funktionsfähiger Hebelsperre
verwenden.
• Sprühpistole, Düsen und Zubehör vor Inbetriebnahme auf
korrekten Anschluss prüfen.
WARNUNG
Durch unbeabsichtigte Funkenerzeugung kann es
zum Brand oder elektrischen Schlag kommen.
EINSTELLEN ODER REPARIEREN DES HOCHDRUCKREINIGERS
• Zündkabel von der Zündkerze abziehen und so befestigen, dass
es nicht mit der Zündkerze in Berührung kommen kann.
PRÜFEN DER ZÜNDKERZE
• Zugelassenen Kerzenprüfer verwenden.
• Keine Prüfung bei ausgebauter Zündkerze durchführen.
Page 59

7
NOTIZ
Von dem unter hohem Druck stehenden Strahl können
zerbrechliche Gegenstände wie etwa Glas beschädigt
werden.
• Die Spritzpistole nicht auf Glas richten, wenn mit hartem Strahl
gearbeitet wird.
• Die Sprühpistole niemals auf Pflanzen richten.
WARNUNG
Gefahr von Augenverletzungen.
Strahl kann zurückgeworfen werden oder
Gegenstände erfassen.
• Beim Arbeiten mit dem Gerät oder beim Aufenthalt in der Nähe
des eingeschalteten Geräts ist eine Schutzbrille zu tragen.
• Bevor der Hochdruckreiniger in Betrieb genommen wird, ist die
Schutzbrille zu überprüfen und aufzusetzen.
• IMMER eine zugelassene Arbeitsschutzbrille tragen.
WARNUNG
Vom Starter und von anderen sich drehenden
Teilen können Hände, Haare, Kleidung und
Schmuck o. Ä. erfasst werden.
• KEIN BETRIEB von unvollständigen oder teilweise defekten
Geräten und von Geräten ohne Schutzgehäuse.
• Keine lose Kleidung, Schmuck oder andere Dinge tragen, die
sich im Starter oder in anderen sich drehenden Teilen verfangen
können.
• Lange Haare hochbinden und Schmuck ablegen.
NOTIZ
Durch unsachgemäße Behandlung kann der
Hochdruckreiniger beschädigt werden und vorzeitig
ausfallen.
• Bei Fragen zum sachgemäßen Betrieb des Geräts wenden Sie
sich an den Fachhändler oder an Briggs & Stratton Power
Products.
• KEIN BETRIEB von unvollständigen oder teilweise defekten
Geräten und von Geräten ohne Schutzgehäuse.
• Die Sicherheitsvorrichtungen dieses Geräts dürfen NICHT
UMGANGEN werden.
• Die eingeregelte Geschwindigkeit nicht ändern.
• Den Nenndruck des Hochdruckreinigers nicht überschreiten.
• KEINE baulichen Änderungen am Hochdruckreiniger
durchführen.
• Vor der Inbetriebnahme des Hochdruckreinigers bei niedrigen
Temperaturen alle Teile auf Eisablagerungen überprüfen.
• Das Gerät NICHT durch Ziehen am Hochdruckschlauch
bewegen, sondern immer am Griff anfassen.
• Kraftstoffsystem auf Lecks oder andere Beschädigungen wie
angescheuerte oder poröse Schläuche, lockere oder fehlende
Klammern und Schäden an Tank bzw. Deckel prüfen. Vor der
Inbetriebnahme alle Schäden beseitigen.
• Dieses Gerät darf nur mit Teilen betrieben werden, die von
Briggs & Stratton Power Products genehmigt worden sind. Bei
Betrieb des Geräts mit Teilen, die NICHT den
Mindestanforderungen entsprechen, trägt der Benutzer das volle
Risiko und haftet für alle Schäden und Verletzungen.
Page 60

Zusammenbau
Lesen Sie die Bedienungsanleitung ganz durch,
bevor Sie Ihren neuen Hochdruckreiniger
zusammenbauen oder in Betrieb nehmen.
Der Hochdruckreiniger muss vor der Inbetriebnahme
zusammengebaut werden. Eine regelmäßige Wartung ist
ebenfalls erforderlich. Nur empfohlene Schmiermittel und
Kraftstoffe verwenden!
Treten Probleme beim Zusammenbau des
Hochdruckreinigers auf, wenden Sie sich bitte an ein
Servicecenter von Briggs & Stratton. Notieren Sie vorher das
Modell, die Revisionsnummer und die Seriennummer. Sie
finden diese Angaben auf dem Typenschild.
Hochdruckreiniger auspacken
1. Teilebeutel, Zubehör und Einlagen aus dem
Hochdruckreiniger entfernen.
2. Verpackung an allen Seiten von oben bis unten
aufschneiden und vollständig öffnen.
3. Vor dem Zusammenbau den Lieferumfang auf
Vollständigkeit kontrollieren.
Der Karton enthält folgende Teile:
• Haupteinheit
• Griff
• Räder (2)
• Hochdruckschlauch
• Sprühpistole
• Verlängerung für einstellbare Düse
• Komponentenbeutel mit:
• Bedienungsanleitung
• Sicherheitsbrille
• Zubehörbeutel
• Wartungssatz
• Schlauchverbindungen
• Griff-/Radmontagesatz mit:
• Schlossschrauben (2)
• Kunststoffknöpfe (2)
• Achsbolzen (2)
• Haltebolzen (2)
Wenn irgendeine Teile verpassen, oder hat beschädigt,
wenden Sie sich an das Kundendienstzentrum von Briggs &
Stratton vor Ort.
Zur Vorbereitung des Hochdruckreinigers für den Einsatz
die folgenden Schritte durchführen:
1. Griff und Radsatz am Grundgerät montieren.
2. Öl in den Motor einfüllen.
3. Kraftstoff in den Kraftstofftank einfüllen.
4. Hochdruckschlauch an der Spritzpistole und an der
Pumpe anschließen.
5. Wasserzulauf an der Pumpe anschließen.
6. Düsenverlängerung an der Spritzpistole anbringen.
Griff montieren
1. Griff (A) auf Sockel (B) setzen. Grifflöcher an den
Sockellöchern ausrichten.
2. Schlossschrauben (C) durch Außenseite stecken und an
der Vorderseite mit Kunststoffgriff (D) sichern.
Handfest anziehen.
Radsatz montieren
Der Radsatz verbessert die Bewegungsfähigkeit des
Hochdruckreinigers.
HINWEIS: Der Radsatz ist nicht geeignet, um das Gerät über
längere Strecken zu transportieren.
Der Radsatz wird wie folgt montiert:
1. Den Hochdruckreiniger auf eine waagerechte, flache
Unterlage stellen.
2. Rad (E) über die Achsbolzen (F) schieben.
HINWEIS: Die Radnabe muss bei der Montage angehoben
werden und nach innen zeigen.
3. Achsbolzen durch Loch (G) im Rahmen schieben.
4. Rad mit Haltebolzen (H) auf Achsbolzen befestigen.
5. Schritt 2 bis 4 für zweites Rad wiederholen.
8 BRIGGSandSTRATTON.COM
D
A
B
C
C
G
F
H
E
Page 61

Einfüllen von Motoröl
1. Den Hochdruckreiniger auf ebenen Untergrund stellen.
2. Bereich um den Öleinfüllstutzen säubern und gelben
Deckel mit Messstab abschrauben.
3. Öl langsam (z.B. mit dem optionalen Trichter) einfüllen,
bis die Marke auf dem Messstab erreicht wird. NICHT
zu viel Öl einfüllen.
4. Deckel mit Messstab aufsetzen und festschrauben.
Kraftstoff Einfüllen
Als Kraftstoff ist:
• Bleibfreies Benzin zulässig, das sauber und frisch sein
muss.
• Mindestens 87 Oktan. Bei Einsatz in großen Höhen gelten
spezielle Vorschriften (vgl. „Einsatz in großen Höhen“).
• Benzin mit bis zu 10% Äthanol (Gasohol) oder mit bis
zu 15% MTBE (Methyl-tert-butylether) ist zulässig.
Beim Nachfüllen Stabilisator zugeben, um die
Kraftstoffanlage vor Verharzung zu schützen; vgl.
„Lagerung“. Kraftstoff hat nicht immer die gleiche Qualität.
Treten nach dem Befüllen Probleme beim Anlassen auf oder
bricht die Leistung ein, sollte der Kraftstoffanbieter bzw. die
Kraftstoffmarke gewechselt werden. Der Motor ist für den
Betrieb mit Benzin zugelassen. Als Emissionskontrolle wird
EM (Engine Modifications) verwendet.
1. Den Bereich um den Tankdeckel herum reinigen und
Deckel abnehmen.
2. Bleibfreies Normalbenzin (A) langsam in den Tank (B)
gießen. Tank nicht überfüllen! Es müssen rund 4 cm
Luft bleiben (C), damit sich der Kraftstoff ausdehnen
kann.
3. Tankdeckel wieder aufschrauben und warten, bis
mögliche Kraftstoffspritzer verdunstet sind.
Anschließend kann der Motor angelassen werden.
Einsatz in großen Höhen
Bei Höhen über 1524 m muss das Benzin mindestens
85 Oktan haben. Aus Emissionsschutzgründen sind bei
Arbeiten in großen Höhen einige Anpassungen erforderlich.
Bei einem Betrieb ohne diese Anpassungen verschlechtert
sich die Leistung, der Kraftstoffverbrauch steigt und die
Emissionen nehmen zu. Erkundigen Sie sich bei einem
Vertragshändler von Briggs & Stratton, welche Anpassungen
für Arbeiten in großen Höhen erforderlich sind. In Höhen
unter 762 m ist ein Betrieb mit dem speziellen Höhenbausatz
nicht empfohlen.
9
NOTIZ
Durch unsachgemäße Behandlung kann der
Hochdruckreiniger beschädigt werden und vorzeitig ausfallen.
• Der Motor darf erst angelassen werden, wenn eine ausreichende
Menge des empfohlenen Öls nachgefüllt wurden. Bei zu wenig
Öl droht Motorschaden.
NOTIZ
Beschädigung des Hochdruckreinigers vermeiden!
Bei Nichteinhaltung der Kraftstoffanweisungen erlischt die
Gewährleistung.
• Nicht zugelassenes Benzin (z.B. E85) darf NICHT verwendet
werden.
• Benzin NICHT mit Öl mischen.
• Motor NICHT für andere Kraftstoffe modifizieren.
WARNUNG
Benzin und dessen Dämpfe sind in hohem Maße
brennbar und explosiv.
Feuer oder eine Explosion können zu schweren
Verbrennungen oder zum Tod führen.
NACHFÜLLEN VON KRAFTSTOFF
• Hochdruckreiniger ausschalten und mindestens zwei Minuten
abkühlen lassen. Deckel langsam abschrauben, damit der Druck
im Tank langsam entweichen.
• Kraftstofftank im Freien auffüllen.
• Nicht zu viel Kraftstoff in den Tank einfüllen. Platz für die
Kraftstoffausdehnung berücksichtigen.
• Kraftstoffspritzer vor der Inbetriebnahme verdampfen lassen.
• Kraftstoff von Funken, offenen Flammen, Kontrollleuchten, Hitze
und anderen Zündquellen fernhalten.
• Keine Zigaretten anzünden und nicht rauchen.
C
B
A
Page 62

Anschließen der Schläuche und der
Wasserzufuhr an die Pumpe
HINWEIS: Vor dem Anbringen der Schläuche die
Transportsicherungen aus den Hochdruck- und
Wasseranschlüssen entfernen.
1. Den Hochdruckschlauch abrollen und ein Ende des
Schlauchs an der Spritzpistole anschließen. Ring an der
Schnellkupplung herunterziehen, Fitting auf die
Spritzpistole aufstecken und den Ring loslassen. Am
Schlauch ziehen, um auf festen Sitz zu prüfen.
2. Das andere Ende des Hochdruckschlauchs am
Hochdruckanschluss an der Pumpe anschließen. Von
Hand festziehen.
3. Um alle Verunreinigungen zu entfernen, 30 Sekunden
lang Wasser durch den Gartenschlauch laufen lassen.
Wasser abstellen.
WICHTIG: Kein stehendes Wasser für die Wasserzufuhr
ansaugen. NUR kaltes Wasser verwenden (unter 38 °C).
4. Bevor der Gartenschlauch am Wassereinlass
angeschlossen wird, das Einlasssieb überprüfen (A).
Verunreinigtes Sieb reinigen, beschädigtes Sieb
erneuern. DEN HOCHDRUCKREINIGER NICHT IN
BETRIEB NEHMEN, WENN DAS SIEB BESCHÄDIGT IST.
5. Gartenschlauch an das Gerät anschließen. Der Schlauch
darf nicht länger als 15 m sein. Handfest anziehen.
6. Wasserhahn aufdrehen, rote Taste (B) auf der
Sprühpistole drücken und Auslöser betätigen, um das
Pumpsystem von Luft und Verunreinigungen zu
säubern.
Liste der vor dem Starten des Motors vorzunehmenden
Prüfungen
Am Gerät überprüfen, ob alle nachstehend genannten
Schritte durchgeführt wurden:
1. Vor der Inbetriebnahme des Hochdruckreinigers die
Abschnitte „Bedienersicherheit“ und „Umgang mit dem
Gerät“ lesen.
2. Lage und Befestigung des Griffs kontrollieren.
3. Prüfen, ob Öl bis zur vorgeschriebenen Füllhöhe in das
Kurbelgehäuse des Motors eingefüllt wurde.
4. Vorgeschriebene Benzinsorte in den Kraftstofftank
einfüllen.
5. Schlauchanschlüsse auf festen Sitz prüfen.
6. Hochdruckschlauch auf Knicke, Risse oder ähnliche
Schäden untersuchen.
7. Geeigneten Wasseranschluss mit ausreichendem
Durchfluss bereitstellen.
10 BRIGGSandSTRATTON.COM
A
B
NOTIZ
Pumpe erst einschalten, wenn die Wasserzufuhr
angeschlossen und eingeschaltet ist.
• Schäden aufgrund der Nichtbeachtung der Anweisungen sind
nicht durch die Gewährleistung abgedeckt.
WARNUNG
Der aus dem Gerät unter hohem Druck
austretende Wasserstrahl kann die Haut und das
darunter befindliche Gewebe durchdringen, was
schwere Verletzungen und Amputationen zur
Folge haben kann.
• Hochdruckschlauch NICHT an Düsenverlängerung anschließen.
• Das Drucksystem erst in Betrieb nehmen, wenn der
Hochdruckschlauch an Pumpe und Sprühpistole angeschlossen ist.
• Sprühpistole, Düsen und Zubehör vor Inbetriebnahme auf
korrekten Anschluss prüfen.
NOTIZ
Bei Anschluss von Einwegventilen an die Pumpe
(Rückflussverhinderer oder Sperrventil) werden Pumpe
oder Wasseranschluss beschädigt.
• Zwischen Einwegventilen o.ä. Sperren und dem
Wasseranschluss des Reinigers müssen sich mindestens 3 m
unbegrenzter Schlauch befinden.
• Bei Geräteschäden infolge des Anschlusses von Einwegventilen
an die Pumpe erlischt die Gewährleistung.
WARNUNG
Gefahr von Augenverletzungen.
Strahl kann zurückgeworfen werden oder
Gegenstände erfassen.
• Beim Arbeiten mit dem Gerät oder beim Aufenthalt in der Nähe
des eingeschalteten Geräts ist eine Schutzbrille zu tragen.
• Bevor der Hochdruckreiniger in Betrieb genommen wird, ist die
Schutzbrille zu überprüfen und aufzusetzen.
• IMMER eine zugelassene Arbeitsschutzbrille tragen.
Page 63

A - Rückstoßstarter - Zum manuellen Anlassen des Motors.
B - Öleinfüllstutzen/Messstab – Zum Kontrollieren des Ölstands,
Nachfüllen und Ablassen von Öl.
C - Pumpe - Erzeugt den Hochdruck.
D - Automatisches Abkühlsystem - Pumpt Wasser aus dem Gerät,
sobald eine Wassertemperatur von 50 bis 68 C erreicht wird.
Das Abkühlsystem verhindert eine Beschädigung der Pumpe.
E - Hochdruckschlauch - Wird an Wasserpumpe und Sprühpistole
angeschlossen.
F - Sprühpistole - Steuert das Ausbringen des Sprühstrahls auf die
zu reinigende Fläche mit Hilfe eines Hebels. Mit Abzugsperre.
G - Einstellbare Düse - Immer an die Düsenverlängerung
anzuschließen. Die einstellbare Düse ermöglicht die Anpassung
des Sprühdrucks und des Sprühwinkels.
H - Kraftstofftank – Mit bleifreiem Normalbenzin füllen.
Kraftstoffausdehnung berücksichtigen.
Nicht abgebildete Teile:
Luftfilter - Filtert Staub und Schmutz aus der eingesaugten Luft und
schützt so den Motor.
Typenschild (an der Rückseite der Trägerplatte) – Enthält
Modellinfo und Seriennummer des Hochdruckreinigers. Diese
Angaben werden vom Reparaturservice benötigt.
Reinigungsmittel-Saugrohr mit Filter – Zur Beigabe von
hochdruckgeeignetem Reinigungsmittel in den Niederdruckstrom.
Hochdruckausgang - Hier wird der Hochdruckschlauch
angeschlossen.
Primärpumpe – Zum Anlassen des kalten Motors.
Drosselklappenhebel - Bringt den Motor in den Startmodus
(Rückstoßstarter) bzw. hält den Motor an.
Wassereinlass - Hier Gartenschlauch anschließen.
Schutzbrille – Immer mit der mitgelieferten Schutzbrille arbeiten.
11
Kennzeichen und Kontrollen
Vor der Inbetriebnahme sind die Bedienungsanleitung und die Sicherheitshinweise zu lesen.
Der Benutzer sollte sich anhand der Abbildungen mit der Lage der einzelnen Bedienelemente vertraut machen. Das
Handbuch zum Nachschlagen aufheben.
B
A
D
,
C
F
E
G
H
Page 64

Verwendung des Hochdruckreinigers
Wenn Sie Schwierigkeiten mit der Inbetriebnahme des
Hochdruckreinigers haben, wenden Sie sich an das
Kundendienstzentrum von Briggs & Stratton vor Ort.
Aufstellung des Hochdruckreinigers
Freiraum und Luftzirkulation
Der Hochdruckreiniger darf nur im Freien betrieben werden,
wo sich keine gesundheitsschädlichen Abgase konzentrieren
können. Der Reiniger darf NICHT an Orten betrieben werden,
an denen sich die Abgase ansammeln und (z.B. durch
Lüftungsschächte) in Gebäude gesogen werden können.
Abgase dürfen nicht durch Fenster, Türen, Lüftungsschächte
oder andere Öffnungen in geschlossene Räume gelangen
(A). Beim Aufstellen des Hochdruckreinigers sind
Windrichtung und Luftströmungen zu berücksichtigen.
Inbetriebnahme des Hochdruckreinigers
Zur ersten Inbetriebnahme des Hochdruckreinigers,
nacheinander die folgenden Schritte durchführen. Diese
Maßnahmen sind auch durchzuführen, wenn das Gerät
mindestens einen Tag lang nicht eingesetzt wurde.
1. Hochdruckreiniger in der Nähe einer Wasserquelle
aufstellen, die eine Durchflussrate von mehr als 11 l/m
bei einem Mindestdruck von 1,38 bar am Schlauchende
garantieren kann. KEIN stehendes Wasser für die
Wasserzufuhr ansaugen; vgl.
2. Prüfen, ob der Hochdruckschlauch fest an der
Spritzpistole und an der Pumpe angeschlossen ist.
Abschnitt „Zusammenbau“.
3. Sicherstellen, dass das Gerät gerade steht.
4. Prüfen, ob der Gartenschlauch am Wassereinlass an
der Pumpe des Hochdruckreinigers angeschlossen ist.
5. Wasserzufuhr einschalten, Sprühpistole in eine sichere
Richtung halten, rote Taste und Auslöser drücken, um
das Pumpsystem von Luft und Verunreinigungen zu
säubern.
6. Düsenverlängerung an der Spritzpistole anbringen. Von
Hand festziehen.
7. Drosselhebel auf das Kaninchensymbol schieben (B).
Beim ersten Anlassen des Motors:
8A. Primärpumpe fünfmal betätigen, dazwischen jeweils 2
Sekunden warten.
Normaler Motorstart:
8B. Primärpumpe dreimal betätigen, dazwischen jeweils 2
Sekunden warten. Ist der Motor bereits warm, die
Primärpumpe NICHT betätigen.
12 BRIGGSandSTRATTON.COM
WARNUNG
Abgase können brennbare Stoffe, Möbel,
Gebäude u. Ä. entzünden. Lecks im Tank können
Brände auslösen.
• Nach allen Seiten und nach oben hin muss ein Freiraum von
mindestens 1,5 m gewährleistet sein.
WARNUNG
Vom laufenden Motor wird Kohlenmonoxid
ausgestoßen, ein geruch- und farbloses giftiges
Gas.
Das Einatmen von Kohlenmonoxid führt zu
Übelkeit, Bewusstlosigkeit oder zum Tod.
• Den Hochdruckreiniger NUR im Freien verwenden.
• Abgase dürfen nicht durch Fenster, Türen, Lüftungsschächte
oder andere Öffnungen in geschlossene Räume gelangen.
• Den Hochdruckreiniger nicht in Gebäuden oder geschlossenen
Bereichen betreiben, auch wenn Türen und Fenster offen sind.
NOTIZ
Pumpe nicht einschalten, wenn die Wasserzufuhr nicht
angeschlossen und eingeschaltet ist.
• Für Schäden, die sich aus Nichtbeachtung der Anweisungen
ergeben, übernimmt der Hersteller keine Haftung. In diesem Fall
erlischt die Garantie.
B
A
Page 65

WICHTIG: Bevor der Hochdruckreiniger in Betrieb
genommen wird, die Schutzbrille überprüfen und aufsetzen.
9. Beim Starten des Motors die empfohlene Position
einnehmen und langsam am Anlasser ziehen, bis
leichter Widerstand zu spüren ist. Anschließend kräftig
ziehen, bis der Motor anspringt.
10. Anlasser langsam loslassen. Das Anlasserseil darf
NICHT gegen den Anlasser schlagen.
HINWEIS: Während des Betriebs muss der Drosselhebel in
der Hochdruckposition verbleiben.
13
WARNUNG
Der aus dem Gerät unter hohem Druck
austretende Wasserstrahl kann die Haut und das
darunter befindliche Gewebe durchdringen, was
schwere Verletzungen und Amputationen zur
Folge haben kann.
Die Sprühpistole steht auch nach Ausschalten
des Motors und Abschalten der Wasserzufuhr
unter Hochdruck – Verletzungsgefahr!
• KINDERN nicht die Bedienung des Hochdruckreinigers erlauben.
• Das Drucksystem erst in Betrieb nehmen, wenn der
Hochdruckschlauch an Pumpe und Sprühpistole angeschlossen
ist.
• Eine Sprühpistole niemals auf Menschen, Tiere oder Pflanzen
richten.
• Sprühpistole NICHT in geöffneter Position sichern.
• Sprühpistole im laufenden Betrieb NICHT UNBEAUFSICHTIGT
lassen.
• Sprühpistolen NUR mit voll funktionsfähiger Hebelsperre
verwenden.
• Sprühpistole, Düsen und Zubehör vor Inbetriebnahme auf
korrekten Anschluss prüfen.
WARNUNG
Gefahr von Augenverletzungen.
Strahl kann zurückgeworfen werden oder
Gegenstände erfassen.
• Beim Arbeiten mit dem Gerät oder beim Aufenthalt in der Nähe
des eingeschalteten Geräts ist eine Schutzbrille zu tragen.
• Bevor der Hochdruckreiniger in Betrieb genommen wird, ist die
Schutzbrille zu überprüfen und aufzusetzen.
• IMMER eine zugelassene Arbeitsschutzbrille tragen.
WARNUNG
Im Falle eines Rückschlages kann das plötzliche
Einziehen des Anlasserseils zu Verletzungen
führen. Hand und Arm werden so schnell zum
Motor gezogen, dass kein Loslassen möglich ist.
Dabei kann es zu Knochenbrüchen, blauen
Flecken oder Verstauchungen kommen.
• Vor dem Ziehen des Anlasserseils immer den Auslöser
betätigen, damit der Druck abgebaut werden kann.
• Beim Anlassen des Motors langsam am Seil ziehen, bis ein
Widerstand fühlbar wird, und dann schnell am Seil ziehen, um
den Rückschlag zu vermeiden.
• Startet der Motor nicht, die Sprühpistole in eine sichere
Richtung halten und Hebel der Sprühpistole betätigen, um den
Druck abzubauen.
• Bei Hochdruckarbeiten ist die Sprühpistole mit beiden Händen
festzuhalten, da Rückstöße auftreten können.
WARNUNG
Schalldämpfer nicht berühren –
Verbrennungsgefahr!
Abgase können brennbare Stoffe, Möbel,
Gebäude u. Ä. entzünden. Lecks im Tank können
Brände auslösen.
• Keine heißen Teile berühren und Abgase NICHT einatmen.
• Das Gerät abkühlen lassen, bevor es berührt wird.
• Nach allen Seiten und nach oben hin muss ein Freiraum von
mindestens 1,5 m gewährleistet sein.
Page 66

Ausschalten des Hochdruckreinigers
1. Auslöser freigeben und Motor zwei Minuten im Leerlauf
laufen lassen.
2. Drossel auf SLOW und dann auf STOP
schieben.
3. Die Sprühpistole IMMER in eine sichere Richtung
halten. Rote Taste und Auslöser betätigen, um den
Wasserdruck abzubauen.
WICHTIG: Die Sprühpistole steht auch nach Abstellen des
Motors und Abschalten der Wasserzufuhr unter Hochdruck.
Verwenden der einstellbaren Düse
Sie sollten jetzt mit dem Ein- und Ausschalten des
Hochdruckreinigers vertraut sein. In diesem Abschnitt wird
die Einstellung des Sprühmusters und die Beigabe von
Reinigungsmitteln beschrieben.
1. Die Düse nach vorn schieben (A), um mit niedrigem
Druck zu arbeiten. Die Düse nach hinten ziehen (B), um
mit hohem Druck zu arbeiten.
2. Die Düse auf einen festen Gegenstand richten und den
Hebel betätigen, um das Muster zu überprüfen.
3. Durch Verdrehen der Düse ändert sich das Spritzmuster
(C) von einem feinen Strahl (D) zu einem Fächermuster.
Betriebshinweise
• Beste Reinigungsergebnisse werden erzielt, wenn die
Sprühdüse im Abstand von 20 bis 60 cm von der zu
reinigenden Fläche gehalten wird.
• Bei zu geringem Abstand kann insbesondere bei
Hochdruckbetrieb die zu reinigende Fläche beschädigt
werden.
• Beim Reinigen von Autoreifen einen Abstand von
mindestens 15 cm einhalten.
Reinigungsmittel mit einstellbarer Düse
versprühen
Zum Arbeiten mit Reinigungsmitteln wie folgt vorgehen:
1. Einstellbare Düse während des Betriebs prüfen.
2. Reinigungsmittellösung gemäß den Anweisungen des
Herstellers vorbereiten.
3. Reinigungsmittel-Saugrohr mit dem kleinen Filterende
in die Reinigungsmittelflasche tauchen.
14 BRIGGSandSTRATTON.COM
A
B
C
D
WARNUNG
Der aus dem Gerät unter hohem Druck
austretende Wasserstrahl kann die Haut und das
darunter befindliche Gewebe durchdringen, was
schwere Verletzungen und Amputationen zur
Folge haben kann.
Die Sprühpistole steht auch nach Ausschalten
des Motors und Abschalten der Wasserzufuhr
unter Hochdruck – Verletzungsgefahr!
• Das Drucksystem erst in Betrieb nehmen, wenn der
Hochdruckschlauch an Pumpe und Sprühpistole angeschlossen
ist.
• Die Sprühpistole IMMER in eine sichere Richtung halten. Der
Wasserdruck muss vor jedem Motorstart durch Betätigen der
roten Taste und des Auslösers abgebaut werden.
WARNUNG
Der aus dem Gerät unter hohem Druck
austretende Wasserstrahl kann die Haut und das
darunter befindliche Gewebe durchdringen, was
schwere Verletzungen und Amputationen zur
Folge haben kann.
• Das Sprühmuster darf NICHT während des Sprühens eingestellt
werden.
• Hände NICHT vor Düse halten (z.B. um das Sprühmuster
einzustellen).
CAUTION
Chemikalien können zu Schäden an Gegenständen und
Personen führen.
• KEINE ätzenden Flüssigkeiten im Hochdruckreiniger verwenden.
• Es dürfen NUR hochdruckgeeignete Reinigungsmittel verwendet
werden. Herstelleranweisungen beachten!
NOTIZ
Bei Berührung des heißen Schalldämpfers kann das
Saugrohr beschädigt werden.
• Beim Einsetzen des Filters in eine Flasche mit Reinigungslösung
ist das Rohr so zu führen, dass der heiße Schalldämpfer nicht
berührt werden kann.
Page 67

HINWEIS: Bei Verwendung von Reinigungsmittel darauf
achten, dass der Filter vollständig in das Reinigungsmittel
eingetaucht ist.
4. Die Düse zur Einstellung des Niederdruckbetriebs nach
vorn schieben. Reinigungsmittel kann nicht aufgebracht
werden, wenn sich die Düse in der Hochdruckstellung
befindet.
5. Anschluss des Gartenschlauchs an den
Hochdruckreiniger kontrollieren. Anschluss von
Sprühpistole und Pumpe an den Hochdruckschlauch
kontrollieren. Wasserhahn aufdrehen.
6. Motor anlassen; vgl. Anweisungen im Abschnitt
„Inbetriebnahme des Hochdruckreinigers“.
7. Reinigungsmittel drei bis fünf Minuten einwirken
lassen, bevor es abgewaschen und nachgespült wird.
Nach Bedarf wiederholen, um das Trocknen der Fläche
zu verhindern. Reinigungsmittel nicht antrocknen
lassen (verhindert die Streifenbildung).
WICHTIG: Nach jedem Gebrauch das
Reinigungsmittelbeigabesystem spülen. Dazu den Filter in
einen Eimer mit sauberem Wasser legen und den
Hochdruckreiniger bei niedrigem Druck ein bis zwei Minuten
laufen lassen.
Abspülen mit dem Hochdruckreiniger
Ausspülen:
1. Düse nach hinten schieben (Hochdruckmodus), Hebel
betätigen und warten, bis Reinigungsmittel abgelaufen
ist.
WICHTIG: Die Reinigung kann auch durch Herausziehen des
Saugrohrs aus dem Eimer unterbrochen werden.
2. Die Spritzpistole in sicherem Abstand von der zu
reinigenden Fläche halten.
3. Hochdruckstrahl auf einen kleinen Bereich
konzentrieren und besprühte Fläche auf Schäden
prüfen. Wenn keine Schäden sichtbar sind, kann das
Abspülen fortgesetzt werden.
4. Mit dem oberen, abzuspülenden Bereich beginnen und
überlappend nach unten vorarbeiten (genauso wie beim
Reinigen).
Reinigung des Saugrohrs
Das Reinigungsmittel-Saugrohr muss zuerst mit sauberem
Wasser gespült werden, bevor der Motor abgestellt werden
kann.
1. Das Saugrohr mit Filter in einen Eimer mit sauberem
Wasser tauchen.
2. Einstellbare Düse nach vorn schieben
(Niederdruckmodus).
3. Ein bis zwei Minuten lang spülen.
4. Motor abstellen (vgl. Anweisungen im Abschnitt
„Hochdruckreiniger ausschalten“) und Wasserhahn
zudrehen.
5. Die Sprühpistole IMMER in eine sichere Richtung
halten. Rote Taste und Auslöser betätigen, um den
Wasserdruck abzubauen.
WICHTIG: Die Sprühpistole steht auch nach Ausschalten des
Motors und Abschalten der Wasserzufuhr unter Hochdruck.
Automatisches Abkühlsystem (Wärmeabbau)
Bei längerem Betrieb des Geräts (3-5 Minuten) ohne
Betätigung des Hebels an der Sprühpistole erreicht das
Wasser in der Pumpe eine Temperatur von mehr als ca. 50 C
und wird automatisch abgelassen.
15
WARNUNG
Sturzgefahr durch Rückstoß der Spritzpistole!
• Das Gerät nur auf stabilem Untergrund einsetzen.
• Besonders vorsichtig vorgehen, wenn der Hochdruckreiniger auf
einer Leiter, einem Gerüst oder an anderen verhältnismäßig
wenig Standsicherheit bietenden Orten eingesetzt wird.
• Bei Hochdruckarbeiten ist die Sprühpistole mit beiden Händen
festzuhalten, da Rückstöße auftreten können.
NOTIZ
Vor dem Anlassen des Motors müssen alle Schläuche
angeschlossen werden.
• Durch Anlassen des Motors ohne vollständige
Schlauchverbindung oder ohne eingeschaltete Wasserzufuhr
wird die Pumpe beschädigt.
• Bei Schäden aufgrund der Nichtbeachtung der Anweisungen
erlischt die Gewährleistung.
WARNUNG
Der aus dem Gerät unter hohem Druck
austretende Wasserstrahl kann die Haut und das
darunter befindliche Gewebe durchdringen, was
schwere Verletzungen und Amputationen zur
Folge haben kann.
Die Sprühpistole steht auch nach Ausschalten
des Motors und Abschalten der Wasserzufuhr
unter Hochdruck – Verletzungsgefahr!
• Das Drucksystem erst in Betrieb nehmen, wenn der
Hochdruckschlauch an Pumpe und Sprühpistole angeschlossen
ist.
• Die Sprühpistole IMMER in eine sichere Richtung halten. Der
Wasserdruck muss vor jedem Motorstart durch Betätigen der
roten Taste und des Auslösers abgebaut werden.
Page 68

Wartung
Wartungsplan
Die Wartungsarbeiten werden nach Ablauf einer bestimmten
Anzahl von Betriebsstunden, mindestens jedoch in festen
Abständen durchgeführt. Sind die Betriebsbedingungen
schwieriger als nachstehend beschrieben, muss unter
Umständen das Wartungsintervall verkürzt werden.
1
Verstopfungen entfernen. Bei Lochschäden oder Verschleiß ersetzen.
2
Bei stärker verschmutzten Betriebsumgebungen sind die Wartungsarbeiten
häufiger durchzuführen.
Allgemeine Empfehlungen
Durch regelmäßige Wartung verbessern Sie Leistung und
Gebrauchsdauer des Hochdruckreinigers. Wartungsarbeiten
sollten von unseren Vertragshändler durchgeführt werden.
Die Gewährleistung gilt nicht für Teile, die vom Benutzer
falsch oder fahrlässig behandelt wurden. Eine vollständige
Gewährleistung kann nur übernommen werden, wenn der
Benutzer den Hochdruckreiniger gemäß den Anweisungen in
diesem Handbuch wartet und das Gerät entsprechend den
Anweisungen in den Abschnitten „Lagerung im Winter“ und
„Lagerung über längere Zeiträume“ aufbewahrt.
HINWEIS: Anleitungen zum Ersetzen von Teilen des BSPPHochdruckreinigers finden Sie auf der Website des
Herstellers unter BRIGGSandSTRATTON.COM.
Zur ordnungsgemäßen Wartung des Hochdruckreinigers sind
in regelmäßigen Abständen bestimmte Einstellungen
vorzunehmen.
Alle Wartungsarbeiten und Einstellungen sind mindestens
einmal pro Saison durchzuführen. Dabei gelten die
Anweisungen aus dem Wartungsplan (s.o.).
HINWEIS: Einmal pro Jahr sind Zündkerze und Luftfilter zu
reinigen oder auszutauschen und die Sprühpistole sowie die
Düsenverlängerung auf Beschädigungen zu überprüfen. Durch
Verwendung einer neuen Zündkerze und eines sauberen
Luftfilters wird ein korrektes Kraftstoff-Luft-Gemisch
gewährleistet – der Motor läuft besser und hält länger.
Pumpenöl
Die Pumpe muss NICHT nachgeschmiert werden. Sie ist
abgedichtet und werkseitig auf Lebensdauer vorgeschmiert.
Emissionskontrollsystem
Wartung, Austausch und Reparatur der
Emissionskontrollanlage dürfen von jeder qualifizierten
Werkstatt bzw. Person durchgeführt werden. Werden
spezielle Emissionsbescheinigungen benötigt, sind die
Arbeiten jedoch von einem autorisierten Vertragshändler
durchzuführen. Weitere Hinweise finden Sie im Abschnitt
„Gewährleistung für das Emissionskontrollsystem“.
Vor jedem Einsatz
1. Motoröl-Füllstand prüfen.
2. Verschmutzungen entfernen.
3. Sieb im Wassereinlass auf Beschädigung prüfen.
4. Hochdruckschlauch auf Undichtigkeiten prüfen.
5. Reinigungsmittel-Saugrohr und Filter auf Beschädigung
prüfen.
6. Sprühpistole und Verlängerung der einstellbaren Düse
auf Lecks prüfen.
7. Gartenschlauch vor dem Anschluss an den
Hochdruckreiniger ausspülen, um Verunreinigungen zu
entfernen.
Wartung des hochdruckreinigers
Verschmutzungen entfernen
Täglich oder vor der Inbetriebnahme das Reinigungssystem
säubern. Gestänge, Federn und Bedienelemente müssen
sauber sein. Der Bereich um den Schalldämpfer muss frei
von entzündbarem Staub sein. Kühlschlitze und
Kühlöffnungen kontrollieren. Sie müssen sauber und frei sein.
Die Teile des Reinigungssystems sind sauber zu halten,
damit das Gerät nicht überhitzt und Staubablagerungen sich
nicht entzünden können.
• Gerät mit einem weichen Tuch abwischen.
• Festklebende Verunreinigungen, Öl usw. mit einer
weichen Haarbürste lösen.
• Anschließend das Gerät mit einem Staubsauger absaugen.
16 BRIGGSandSTRATTON.COM
Nach den ersten 5 Stunden
• Motoröl wechseln
Alle 8 Stunden oder täglich
• Wassersieb kontrollieren und reinigen
1
• Hochdruckschlauch kontrollieren
• Saugrohr und Filter für Reinigungsmittel kontrollieren
• Spritzpistole und Schläuche auf Lecks kontrollieren
• Verschmutzungen entfernen
• Ölstand prüfen
Alle 25 Stunden oder jährlich
• Motor-Luftfilter warten
2
Alle 50 Stunden oder jährlich
• Motoröl wechseln
2
• Funkenlöscher warten
Alle 100 Stunden oder jährlich
• Zündkerze warten
• Kühlanlage reinigen
2
NOTIZ
Durch unsachgemäße Behandlung kann der
Hochdruckreiniger beschädigt werden und vorzeitig ausfallen.
• KEINE Gegenstände durch die Kühlschlitze stecken.
Page 69

17
Prüfen und Reinigen des Einlasssiebs
Das Sieb am Wassereinlass untersuchen. Das Sieb reinigen,
wenn es verstopft ist, bzw. erneuern, wenn es beschädigt ist.
Prüfen des Hochdruckschlauchs
Der Hochdruckschlauch kann infolge von Verschleiß, durch
Knicken oder falschen Gebrauch undicht werden. Den
Schlauch vor jedem Gebrauch überprüfen. Auf Risse,
undichte Stellen, Abrieb oder Ausbeulungen der Umhüllung
und Beschädigung oder Verstellung der Kupplungen prüfen.
Werden entsprechende Mängel festgestellt, den Schlauch
sofort erneuern.
Prüfung des Saugrohrs
Den Filter am Reinigungsmittelrohr untersuchen und bei
Verstopfung reinigen. Das Rohr muss fest auf dem
Steckanschluss sitzen. Das Rohr auf undichte Stellen und
Risse kontrollieren. Filter bzw. Rohr bei Beschädigung
auswechseln.
Sprühpistole kontrollieren
Feste Verbindung zwischen Schlauch und Sprühpistole
kontrollieren. Rote Taste testweise betätigen und
kontrollieren, ob der Auslöser zurückspringt, sobald die rote
Taste nicht mehr gedrückt ist. Ohne Betätigung der roten
Taste darf es nicht möglich sein, den Auslöser zu drücken.
Sprühpistole sofort auswechseln, wenn eine dieser
Prüfungen fehlschlägt.
Wartung der Düsen
Hauptursache für zu großen Pumpendruck sind verstopfte
Düsen. Um Verstopfungen vorzubeugen, ist die Düse sofort
nach Verwendung mit den mitgelieferten Werkzeugen zu
reinigen. Dabei folgendermaßen vorgehen:
1. Motor abstellen und Wasserzufuhr absperren.
2. Sprühpistole IMMER in eine sichere Richtung halten.
Rote Taste und Auslöser betätigen, um den
Wasserdruck abzubauen.
3. Düsenverlängerung von der Spritzpistole abnehmen.
4. Die Düse im Uhrzeigersinn in die Strahlposition drehen.
Mit einem 2-mm-Inbusschlüssel die Düse (A) aus der
Düsenverlängerung schrauben.
5. Mit Draht oder einer kleinen Büroklammer sämtliches
Fremdmaterial aus der Düse entfernen (B).
6. Mit einem Gartenschlauch Wasser entgegen der
Spritzrichtung durch die Düsenverlängerung laufen
lassen, um alle Verunreinigungen zu entfernen. Wasser
etwa 30 bis 60 Sekunden lang durchlaufen lassen. Die
einstellbare Düsenverlängerung in die Strahlposition
drehen und während des Durchspülens die Düse aus
der Niederdruck- in die Hochdruckstellung verstellen.
7. Düse wieder in die Düsenverlängerung einsetzen. Die
Düse mit dem Innensechskantschlüssel festziehen, aber
nicht zu stark anziehen.
8. Düsenverlängerung wieder an der Spritzpistole
befestigen.
9. Verbindung von Gartenschlauch und Wassereinlass
kontrollieren. Anschluss von Sprühpistole und Pumpe
an den Hochdruckschlauch kontrollieren. Wasserhahn
aufdrehen.
10. Motor anlassen; vgl. Anweisungen im Abschnitt
„Inbetriebnahme des Hochdruckreinigers“.
WARNUNG
Der aus dem Gerät unter hohem Druck
austretende Wasserstrahl kann die Haut und das
darunter befindliche Gewebe durchdringen, was
schwere Verletzungen und Amputationen zur
Folge haben kann.
• Hochdruckschlauch auf keinen Fall reparieren, sondern stets
erneuern.
• Der zulässige Druck von Ersatzschläuchen MUSS höher sein als
der Maximaldruck des Geräts.
B
A
WARNUNG
Der aus dem Gerät unter hohem Druck
austretende Wasserstrahl kann die Haut und das
darunter befindliche Gewebe durchdringen, was
schwere Verletzungen und Amputationen zur
Folge haben kann.
Die Sprühpistole steht auch nach Ausschalten
des Motors und Abschalten der Wasserzufuhr
unter Hochdruck – Verletzungsgefahr!
• Das Drucksystem erst in Betrieb nehmen, wenn der
Hochdruckschlauch an Pumpe und Sprühpistole angeschlossen
ist.
• Die Sprühpistole IMMER in eine sichere Richtung halten. Der
Wasserdruck muss vor jedem Motorstart durch Betätigen der
roten Taste und des Auslösers abgebaut werden.
Page 70

11. Zum Testen des Hochdruckreinigers die Düse in die
Position für Hoch- und die Niederdruckbetrieb stellen.
Wartung der O-Ringe
O-Ringe sorgen für die Dichtigkeit der Anschlüsse von
Schläuchen und Spritzpistole. Sie können beim normalen
Betrieb des Hochdruckreinigers verschleißen oder beschädigt
werden.
Zum Lieferumfang des Hochdruckreinigers gehört ein ORing-Wartungssatz, der Ersatz-O-Ringe, eine
Gummidichtung und einen Wassereinlassfilter enthält.
Hinweise zur Wartung der O-Ringe des Geräts entnehmen
Sie bitte dem Informationsblatt im Wartungssatz. Beachten
Sie, dass nicht alle im Satz enthaltenen Teile für Ihr Gerät
vorgesehen sind.
Ausbauen eines verschlissenen oder beschädigten O-Rings;
Einen kleinen Schlitzschraubendreher unter den O-Ring
einstecken und den O-Ring hochdrücken.
Wartung des Motors
Schmiermittel
Empfohlene Schmiermittel
Für eine optimale Leistung empfehlen wir die Verwendung
der von Briggs & Stratton zertifizierten Öle. Es können auch
andere HD-Öle verwendet werden, wenn sie für einen Einsatz
in den Kategorien SF, DE, SH, SJ oder höher zugelassen
sind. KEINE speziellen Additive verwenden.
Die Viskosität ist in Abhängigkeit von den
Umgebungstemperaturen auszuwählen. Die empfohlenen
Werte entnehmen Sie dem Diagramm.
* Bei Temperaturen unter 4 °C treten bei SAE 30 Startschwierigkeiten auf.
** Bei Temperaturen über 27 °C kann sich bei 10W30 der Ölverbrauch
erhöhen. Ölstand regelmäßig kontrollieren.
HINWEIS: Synthetisches Öl mit der Kennzeichnung
ILSAC GF-2 API und dem API-Servicesymbol „SJ/CF
ENERGY CONSERVING“ (oder besser) ist für alle
Temperaturen geeignet. Das Ölwechselintervall ändert
sich nicht bei Verwendung von synthetischem Öl.
Ölstand kontrollieren
Der Ölstand sollte vor jedem Einsatz, mindestens jedoch alle
8 Betriebsstunden kontrolliert werden. Konstanten Ölstand
gewährleisten und bei Bedarf Öl nachfüllen.
1. Das Gerät auf ebenen Untergrund stellen.
2. Ölstandmessstab herausziehen und mit sauberem Tuch
abwischen. Messstab wieder einsetzen und Deckel
zuschrauben. Ölstand kontrollieren.
3. Ölstand kontrollieren, die Füllstandsmarke muss
erreicht werden. Messstab wieder einsetzen und Deckel
zuschrauben.
18 BRIGGSandSTRATTON.COM
WARNUNG
Der aus dem Gerät unter hohem Druck
austretende Wasserstrahl kann die Haut und das
darunter befindliche Gewebe durchdringen, was
schwere Verletzungen und Amputationen zur
Folge haben kann.
• Anschlusslecks dürfen NICHT mit Dichtmitteln abgedichtet
werden. Stattdessen ist ein neuer O-Ring bzw. eine neue
Dichtung einzusetzen.
WARNUNG
Durch unbeabsichtigte Funkenerzeugung kann es
zum Brand oder elektrischen Schlag kommen.
EINSTELLEN ODER REPARIEREN DES HOCHDRUCKREINIGERS
• Zündkabel von der Zündkerze abziehen und so befestigen, dass
es nicht mit der Zündkerze in Berührung kommen kann.
PRÜFEN DER ZÜNDKERZE
• Zugelassenen Kerzenprüfer verwenden.
• Keine Prüfung bei ausgebauter Zündkerze durchführen.
Page 71

19
Motoröl nachfüllen
1. Das Gerät auf ebenen Untergrund stellen.
2. Ölstand kontrollieren; vgl. Abschnitt „Ölstand
kontrollieren“.
3. Bei Bedarf Öl langsam nachfüllen, bis die Marke auf
dem Messstab erreicht wird. Nicht zu viel Öl einfüllen.
4. Messstab wieder einsetzen und Deckel zuschrauben.
Ölwechsel
Das Motoröl nach den ersten 5 Betriebsstunden sowie
anschließend nach jeweils 50 Stunden auswechseln. Bei
Betrieb des Hochdruckreinigers in sehr schmutzigen oder
staubigen Umgebungen bzw. bei sehr hohen Temperaturen
muss das Öl häufiger gewechselt werden.
NICHT FÜR KINDER ZUGÄNGLICH LAGERN.
VORSCHRIFTGEMÄSS ENTSORGEN. SCHÜTZEN
SIE DIE UMWELT. ALTÖL MUSS
VORSCHRIFTGEMÄSS ENTSORGT WERDEN.
Der Ölwechsel sollte folgendermaßen erfolgen, solange
der Motor noch warm ist:
1. Hochdruckreiniger so lange laufen lassen, bis der Tank
leer ist.
2. Zündkabel ziehen, dabei darauf achten, dass das Kabel
nicht die Zündkerze berührt.
3. Bereich um den Ölfüllstutzen säubern und Deckel mit
Messstab abschrauben. Messstab abwischen.
4. Hochdruckreiniger kippen, damit das Altöl in einen
geeigneten Behälter ablaufen kann. Gerät so kippen,
dass das Öl nicht zur Zündkerze fließt. Sobald alles Öl
aus dem Kurbelgehäuse abgeflossen ist, den
Hochdruckreiniger wieder aufrecht stellen.
5. Empfohlenes Frischöl nachfüllen (0,6 l). Öl langsam
eingießen, damit es sich setzen kann. Nachfüllen, bis
die Füllstandsmarke auf dem Messstab erreicht ist.
6. Messstab nach jeder Ölstandskontrolle abwischen.
Nicht zu viel Öl nachfüllen.
7. Deckel mit Messstab wieder aufschrauben.
8. Verschüttetes Öl abwischen.
9. Zündkabel wieder anschließen.
Wartung des Luftfilters
Bei Betrieb des Geräts mit verschmutztem Luftfilter läuft der
Motor nicht korrekt und wird eventuell beschädigt.
Den Luftfilter nach jeweils 25 Betriebsstunden, mindestens
aber einmal pro Jahr warten. Bei stärker verschmutzten
Betriebsumgebungen sind die Wartungsarbeiten häufiger
durchzuführen.
Der Luftfilter wird folgendermaßen gewartet:
1. Schraube (A) lösen.
2. Luftfilter vorsichtig herausnehmen, dabei darauf achten,
dass kein Schmutz in den Vergaser fällt.
3. Luftfilter auseinander nehmen und alle Teile reinigen.
Filterschwamm (B) in Reinigungsmittellösung waschen.
Filterschwamm in trockenes Tuch wickeln und durch
Zusammendrücken trocknen.
4. Filterschwamm in Motoröl tauchen und in einem
trockenen Tuch ausdrücken, um überschüssiges Öl zu
entfernen.
5. Gereinigten oder neuen Filter wieder in Sockel (C)
stecken.
6. Luftfilter mit Schraube am Vergaser befestigen.
Wartung der Zündkerze
Die Zündkerze nach jeweils 100 Betriebsstunden, mindestens
aber einmal pro Jahr warten. Eine gut gereinigte Zündkerze
erleichtert das Starten des Motors.
1. Bereich um die Zündkerze reinigen.
2. Zündkerze herausziehen und sichtprüfen.
3. Fühlerlehre in Elektrodenabstand schieben und bei
Bedarf den Spalt nachstellen (0,76 mm).
4. Bei verbrannten oder erodierten Elektroden bzw. bei
Rissen im Porzellan die Zündkerze auswechseln. Nur
empfohlene Zündkerzen verwenden; vgl. Abschnitt
„Technische Daten“.
5. Zündkerze einstecken und festschrauben.
NOTIZ
Bei zu hohem Ölstand kann es zu Startschwierigkeiten
kommen.
• Nicht zu viel Öl einfüllen.
• Übersteigt der Ölstand die Füllstandsmarke auf dem Messstab,
ist Öl abzulassen, bis die Marke erreicht worden ist.
VORSICHT
Längeren oder wiederholten Hautkontakt mit altem
Motoröl vermeiden.
• Altes Motoröl hat bei Laborversuchen an Tieren zu Hautkrebs
geführt.
• Motoröl mit Wasser und Seife abwaschen.
A
B
C
Page 72

Wartung des Funkenlöschers
Das Gerät wird ohne Funkenlöscher ausgeliefert. In einigen
Ländern ist ein Funkenlöscher zwingend vorgeschrieben.
Informieren Sie sich, welche Vorschriften in Ihrem Land
gelten. Sie erhalten den Funkenlöscher bei Ihrem
Servicecenter. Der Funkenlöscher muss nach jeweils 50
Stunden gewartet werden.
Bei laufendem Motor wird der Schalldämpfer sehr heiß. Vor
dem Ausbau des Funkenlöschers warten, bis sich der
Dämpfer abgekühlt hat.
• Sieb des Funkenlöschers entfernen, sichtprüfen und
reinigen.
• Bei Beschädigung ist das Sieb auszutauschen.
Luftkühlung
Im Laufe der Zeit setzt sich Schmutz auf den
Zylinderkühlrippen ab. Eine Kontrolle der Rippen ist nur nach
teilweisem Ausbau des Motors möglich. Aus diesem Grund
sollte ein Briggs & Stratton-Vertragshändler die kühlenden
Teile im empfohlenen Intervall reinigen (vgl. Abschnitt
„Wartungsplan“). Ebenso muss die Oberseite des Motors frei
von starken Verschmutzungen bleiben; vgl. Abschnitt
„Reinigung“.
Nach dem Gebrauch
Soll das Gerät länger gelagert werden, ist das Wasser
abzulassen, damit sich keine Feststoffe in der Pumpe
ablagern, was zu einer Beschädigung der Pumpe führen
könnte. Nach jedem Gebrauch folgende Schritte durchführen:
1. Motor abstellen, Wasserhahn zudrehen, Sprühpistole in
eine sichere Richtung halten, rote Taste und Auslöser
betätigen, um den Wasserdruck abzubauen. Motor
abkühlen lassen.
2. Schlauch von Sprühpistole und Hochdruckanschluss
der Pumpe abschrauben. Wasser aus Schlauch,
Sprühpistole und Düsenverlängerung ablassen.
Schlauch mit Putzlappen abwischen.
3. Auslöser an der Pistole ungefähr sechs Mal betätigen,
um die Pumpe vollständig zu leeren.
4. Das Gerät an einem sauberen und trockenen Ort lagern.
5. Bei längerem Nichtbetrieb (mind. 30 Tage) die
Anweisungen im Abschnitt „Lagerung über längere
Zeiträume“ beachten.
20 BRIGGSandSTRATTON.COM
Behalten Sie Gebiete innerhalb schwerer
Linie, von Trümmern zu reinigen
WARNUNG
Benzin und dessen Dämpfe sind in hohem Maße
brennbar und explosiv.
Feuer oder eine Explosion können zu schweren
Verbrennungen oder zum Tod führen.
LAGERN VON BENZIN ODER DES GERÄTS MIT KRAFTSTOFF IM
TANK
• Nicht in der Nähe von Öfen, Herden, Wasserkochern,
Wäschetrocknern oder sonstigen Geräten mit Kontrollleuchten
oder anderen Zündquellen lagern, da diese Benzindämpfe
entzünden können.
WARNUNG
Schalldämpfer nicht berühren –
Verbrennungsgefahr!
Abgase können brennbare Stoffe, Möbel,
Gebäude u. Ä. entzünden. Lecks im Tank können
Brände auslösen.
• Keine heißen Teile berühren und Abgase NICHT einatmen.
• Das Gerät abkühlen lassen, bevor es berührt wird.
• Nach allen Seiten und nach oben hin muss ein Freiraum von
mindestens 1,5 m gewährleistet sein.
WARNUNG
Der aus dem Gerät unter hohem Druck
austretende Wasserstrahl kann die Haut und das
darunter befindliche Gewebe durchdringen, was
schwere Verletzungen und Amputationen zur
Folge haben kann.
Die Sprühpistole steht auch nach Ausschalten
des Motors und Abschalten der Wasserzufuhr
unter Hochdruck – Verletzungsgefahr!
• Das Drucksystem erst in Betrieb nehmen, wenn der
Hochdruckschlauch an Pumpe und Sprühpistole angeschlossen
ist.
• Die Sprühpistole IMMER in eine sichere Richtung halten. Der
Wasserdruck muss vor jedem Motorstart durch Betätigen der
roten Taste und des Auslösers abgebaut werden.
Page 73

21
Lagerung im Winter
So wird das Gerät vor Gefriertemperaturen geschützt:
1. Die Schritte 1 bis 3 aus dem Abschnitt „Nach dem
Gebrauch“ durchführen.
2. Pumpe mit Pumpenschutzmittel 6039 behandeln. Das
Pumpenschutzmittel verringert die Gefahr von
Gefrierschäden und schmiert Kolben und Dichtungen.
3. Ist kein Pumpenschutzmittel verfügbar, einen ca. 92 cm
langen Gartenschlauch mit dem Wasseranschluss des
Reinigers verbinden und alkoholfreies Rostschutzmittel
in den Schlauch füllen. Auslöser zweimal betätigen und
Schlauch wieder abtrennen.
4. Das Gerät an einem sauberen und trockenen Ort lagern.
Lagerung über längere Zeiträume
Bei längerem Nichtgebrauch des Reinigers (mind. 30 Tage)
sind Motor und Pumpe für die Langzeitlagerung
vorzubereiten.
Schutz der Kraftstoffanlage
Kraftstoffadditiv:
Bei längerer Lagerung (über 30 Tage) altert Benzin. In der
Kraftstoffanlage bzw. im Vergaser bilden sich Säuren und
Verharzungen. Benzin ist mit dem Stabilisator FRESH
START® von Briggs & Stratton aufzufrischen. Der
Stabilisator ist als Flüssigadditiv und als Konzentratpatrone
erhältlich.
Bei sachgemäßer Verwendung von Stabilisator muss
Altbenzin nicht abgelassen werden. Den Motor zwei Minuten
laufen lassen, damit der Stabilisator durch die
Kraftstoffanlage zirkulieren kann. Stabilisiertes Benzin kann
24 Monate gelagert werden.
Nicht stabilisiertes Benzin ist in einen geeigneten Behälter
abzulassen. Anschließend Motor laufen lassen, bis er infolge
Kraftstoffmangels ausgeht. In Benzinkanistern gelagertem
Kraftstoff sollte Stabilisator zugegeben werden, um den
Alterungsprozess zu verlangsamen.
Ölwechsel
Bei abgestelltem, aber noch warmem Motor das Öl aus dem
Kurbelgehäuse ablassen. Mit empfohlenem Öl nachfüllen;
vgl. Abschnitt „Ölwechsel“ im Kapitel „Wartung des Motors“.
Zylinderlauffläche
• Zündkerze ausschrauben und 15 ml Frischöl in den
Zylinder gießen.
• Zündkerze wieder einschrauben und langsam Anlasser
ziehen, damit das Öl verteilt wird.
Schutz der Pumpe
Mit Pumpenschutzmittel Nr. 6039 die Pumpe vor Schäden
durch Ablagerungen im Öl schützen. Das
Pumpenschutzmittel verringert die Gefahr von
Gefrierschäden und schmiert Kolben und Dichtungen.
HINWEIS: Pumpenschutzmittel gehört nicht zum
Lieferumfang des Hochdruckreinigers. Das Mittel kann bei
Vertragshändlern erworben werden.
Hochdruckreiniger ausschalten und Wasserzuleitung trennen.
Die Anweisungen auf dem Pumpenschutzmittel befolgen und
die Warnhinweise beachten.
Weitere Tipps für die Lagerung
1. Benzin nur länger als eine Saison lagern, wenn es
entsprechend den Anweisungen im Abschnitt „Schutz
der Kraftstoffanlage“ behandelt wurde.
2. Rostende Benzinkanister dürfen nicht verwendet
werden. Rost und Verunreinigungen in Benzinkanistern
können zu Betriebsstörungen führen.
3. Reiniger mit einer feuchtigkeitabweisenden Plane
schützen.
4. Gerät an einem sauberen und trockenen Ort lagern.
NOTIZ
Das Gerät ist vor Minustemperaturen zu schützen.
• Bei Temperaturen unter dem Gefrierpunkt kann die Pumpe
beschädigt werden.
• Gefrierschäden sind nicht durch die Gewährleistung abgedeckt.
WARNUNG
Schutzplanen können brennbar sein.
• Stellen Sie keine Speicherdecke über eine heiße
Hochdruckreiniger.
• Schutzplane erst über Hochdruckreiniger legen, nachdem dieser
abgekühlt ist.
NOTIZ
Das Gerät ist vor Minustemperaturen zu schützen.
• Bei Temperaturen unter dem Gefrierpunkt kann die Pumpe
beschädigt werden.
• Gefrierschäden sind nicht durch die Gewährleistung abgedeckt.
Page 74

Fehlersuche
22 BRIGGSandSTRATTON.COM
Problem Ursache Korrektur
Pumpe hat folgende Probleme: kein
Druckaufbau, Druckschwankungen,
Klappern, Druckverlust, niedrige
Wassermenge.
1. Düse im Niederdruckmodus.
2. Wassereinlass verstopft.
3. Nicht ausreichende Wasserzufuhr.
4. Einlassschlauch geknickt oder
undicht.
5. Sieb im Einlassschlauch zugesetzt.
6. Zugeführtes Wasser über 38 °C.
7. Hochdruckschlauch verstopft oder
undicht.
8. Spritzpistole undicht.
9. Düse verstopft.
10. Pumpe defekt.
1. Düse nach hinten ziehen
(Hochdruckmodus).
2. Einlass reinigen.
3. Für ausreichende Wasserzufuhr
sorgen.
4. Knick entfernen, undichte Stelle
schließen.
5. Sieb im Einlassschlauch prüfen und
reinigen.
6. Kälteres Wasser zuführen.
7. Verstopfung im Auslassschlauch
beseitigen.
8. Spritzpistole oder O-Ringe
erneuern.
9. Düse reinigen.
10. Kundendienst informieren.
Reinigungsmittel tritt nicht mit
Wasserstrahl aus.
1. Reinigungsmittel-Saugrohr ist nicht
eingetaucht.
2. Reinigungsmittel-Saugrohr mit
Filter ist verstopft oder beschädigt.
3. Düse im Hochdruckmodus.
1. Reinigungsmittel-Saugrohr in
Reinigungsmittel eintauchen.
2. Filter/Reinigungsmittel-Saugrohr
reinigen oder erneuern.
3. Düse nach vorn schieben
(Niederdruckmodus).
Motor läuft ohne Last gut, unter Last
aber "schwerfällig".
Motordrehzahl zu niedrig. Drosselklappenhebel in die Position
FAST stellen. Läuft der Motor noch
immer schwerfällig, an den
Kundendienst wenden.
Motor startet nicht oder läuft unrund.
1. Niedriger Ölstand.
2. Luftfilter verschmutzt.
3. Kein Benzin im Tank.
4. Kraftstoff zu alt.
5. Zündkabel nicht angeschlossen.
6. Zündkerze defekt.
7. Wasser im Kraftstoff.
8. Zu fettes Kraftstoffgemisch.
1. Öl in Kurbelgehäuse auffüllen.
2. Luftfilter reinigen oder erneuern.
3. Kraftstofftank auffüllen.
4. Kraftstoff ablassen, frischen
Kraftstoff einfüllen.
5. Kabel an der Zündkerze
anschließen.
6. Zündkerze erneuern.
7. Kraftstoff ablassen, frischen
Kraftstoff einfüllen.
8. Kundendienst informieren.
Motor geht aus. Kraftstofftank leer. Kraftstofftank auffüllen.
Zu geringe Motorleistung. Luftfilter verschmutzt. Luftfilter erneuern.
Page 75

23
Gewährleistung
Gewährleistung für Emissionskontrollsysteme
Briggs & Stratton Corporation (B&S), California Air
Resources Board (CARB) und USUmweltschutzministerium (EPA)
Gewährleistung für Emissionskontrollsysteme (Rechte und
Pflichten des Betreibers im Schadensfall)
Gewährleistung für Emissionskontrollsysteme (Kalifornien
und Kanada)
Nachstehend beschreiben das California Air Resources Board
(CARB), EPA und B&S die Mängelhaftung für das
Emissionskontrollsystem des von Ihnen erworbenen
kleinvolumigen Arbeitsmotors. In Kalifornien müssen alle
nicht straßengebundenen Kleinmotoren ab Baujahr 2006
strenge Abgasvorschriften erfüllen. In anderen USBundesstaaten müssen nicht straßengebundene Motoren mit
Fremdzündung ab Baujahr 1997 ähnliche Vorschriften der
EPA erfüllen. B&S übernimmt für den Motor die nachstehend
beschriebene Gewährleistung für den genannten Zeitraum,
sofern der Motor innerhalb der Spezifikationen betrieben,
vorschriftgemäß gewartet und nicht fahrlässig behandelt
wurde.
Das Emissionskontrollsystem besteht u.a. aus Vergaser,
Luftfilter, Zündanlage, Benzinleitung, Schalldämpfer und
Katalysator. Anschlüsse und andere emissionsspezifische
Teile können ebenfalls zum System gehören.
Im Gewährleistungfall repariert B&S den Motor, ohne dass
Ihnen dadurch Kosten entstehen. B&S übernimmt u.a. die
Diagnose-, Material- und Arbeitskosten.
Umfang der Gewährleistung von Briggs & Stratton für das
Emissionskontrollsystem
Bei Schäden der Emissionskontrolle in kleinvolumigen
Arbeitsmotoren gilt die Gewährleistung über einen Zeitraum
von zwei Jahren, sofern die nachstehend aufgeführten
Bedingungen erfüllt sind. Bei Schäden an
gewährleistungspflichtigen Motorteilen werden die defekten
Teile durch B&S repariert oder ersetzt.
Gewährleistungspflichten des Betreibers
Als Betreiber eines Kleinmotors sind Sie für die
Durchführung der in den Betriebs- und
Wartungsanweisungen aufgeführten Wartungsarbeiten
verantwortlich. Heben Sie alle Quittungen für entsprechende
Wartungsarbeiten auf, auch wenn B&S die Mängelhaftung
nicht aufgrund des Fehlens dieser Quittungen oder aufgrund
Ihres Nichtausführens der Routinewartungsarbeiten
verweigern darf.
B&S ist jedoch berechtigt, die Mängelhaftung zu verweigern,
wenn Sie den Motor fahrlässig behandelt, nicht
spezifikationsgerecht oder nicht vorschriftgemäß gewartet
oder unautorisierte Modifikationen vorgenommen haben.
Als Betreiber sind Sie verpflichtet, sich bei Motorstörungen
unverzüglich an einen autorisierten B&S-Vertragshändler zu
wenden. Unbestrittene Gewährleistungsreparaturen sind
innerhalb einer zumutbaren Frist auszuführen und müssen
nach 30 Tagen abgeschlossen sein.
Bei Fragen zu Ihren Rechten und Pflichten im Rahmen der
Gewährleistung wenden Sie sich bitte an den B&SKundendienstverantwortlichen, den Sie unter +1 414 259 5262
erreichen.
Die Gewährleistung für das Emissionskontrollsystem ist eine
Sachmängelhaftung. Mängel werden durch Vergleich mit der
normalen Motorleistung festgestellt. Emissionsprüfungen im
Betriebszustand haben keinen Einfluss auf die
Mängelhaftung.
Briggs & Stratton-Gewährleistungsbedingungen für das
Emissionskontrollsystem
Die Gewährleistung für das Emissionskontrollsystem ist an
die nachstehend aufgeführten Bedingungen geknüpft. Die
Gewährleistung gilt zusätzlich zu der B&SMotorgewährleistung für nichtregulierte Motoren, die Sie im
Bedienerhandbuch finden.
1. Gewährleistungsteile
Diese Gewährleistung gilt nur für die nachstehend
aufgeführten Teile (d.h. Teile des
Emissionskontrollsystems), sofern sich diese zum
Zeitpunkt des Erwerbs im oder am Motor befanden.
a. Kraftstoffmessanlage
• Kaltstartanlage („Soft choke“)
• Vergaser und interne Teile
• Kraftstoffpumpe
• Benzinleitung, Verbindungsstücke, Schellen
• Tank, Deckel und Tankdeckelbefestigung
• Kohlefilter
b. Luftansaugsystem
• Luftfilter
• Einlasskrümmer
• Spüllufteinlass
c. Zündanlage
• Zündkerze(n)
• Magnetzündung
d. Katalysatorsystem
• Katalysator
• Abgaskrümmer
• Lufteinspritzung oder Impulsventil
e. Verschiedene Teile in den vorgenannten Systemen
• Vakuum-, temperatur-, lage- und zeitspezifische
Ventile und Schalter
• Anschlüsse und Baugruppen
Page 76

2. Gewährleistungsfrist
B&S sichert dem Erstkäufer und allen Folgekäufern zu,
dass die Gewährleistungsteile zwei Jahre ab Datum der
Auslieferung an einen nicht gewerblichen Käufer frei
von Material- und Verarbeitungsfehlern sind.
3. Kostenfreier Service
Reparatur oder Ersatz der Gewährleistungsteile erfolgen
kostenfrei für den Eigentümer. Die Geräteprüfung, in
deren Ergebnis der Defekt der Gewährleistungsteile
festgestellt wird, ist ebenfalls kostenfrei für den
Eigentümer. Servicearbeiten im Rahmen der
Gewährleistung sind von autorisierten B&SVertragshändlern durchzuführen, die in den Gelben
Seiten unter den einschlägigen Kategorien aufgeführt
sind.
4. Forderungen und Haftungsausschluss
Gewährleistungsforderungen sind entsprechend den
Bedingungen der B&S-Motorgewährleistung geltend zu
machen. Die Gewährleistung gilt nicht bei Ausfall von
Gewährleistungsteilen, die keine Originalteile von B&S
sind. Sie gilt ebenfalls nicht bei fehlerhafter oder
fahrlässiger Wartung oder wenn die Wartungsarbeiten
nicht entsprechend B&S-Motorgewährleistung
durchgeführt wurden. B&S haftet nicht bei Ausfällen
von Gewährleistungsteilen, die auf Zusatzteile,
modifizierte Teile oder Teile von Fremdherstellern
zurückzuführen sind.
5. Wartung
Jedes Gewährleistungsteil, dessen Ersatz nicht im
Rahmen der Routinewartung vorgesehen ist oder das
nur regelmäßig zu prüfen und bei Bedarf zu reparieren
oder auszutauschen ist, fällt innerhalb der
Gewährleistungsfrist unter die Gewährleistung. Jedes
Gewährleistungsteil, dessen Ersatz im Rahmen der
Routinewartung vorgesehen ist, fällt nur bis zum
Termin des ersten Routineaustauschs unter die
Gewährleistung. Reparatur- und Austauschleistungen
im Rahmen der Gewährleistung können durch
funktionsgleiche Ersatzteile mit gleicher Haltbarkeit
erfolgen. Der Betreiber ist für die Durchführung der im
B&S-Bedienerhandbuch festgelegten Wartungsarbeiten
verantwortlich.
6. Verlängerung der Gewährleistungspflicht
Wird eine Motorkomponente im Rahmen der
Gewährleistung ersetzt bzw. repariert, verlängert sich
die Gewährleistung für diese Komponente
entsprechend.
Emissionsdaten
Für Motoren, die nach den Emissionsvorschriften des
California Air Resources Board (CARB) zertifiziert sind, sind
die Angaben „Emissions Durability Period“ and „Air Index“
vorgeschrieben. Diese Angaben sind auf den
Emissionsschildern der Motoren aufgeführt. Die
Emissionsschilder geben auch Auskunft über die
Motorzertifizierung.
Die „Emissions Durability Period“ gibt an, wie viele
Betriebsstunden der Motor bei sachgerechter Wartung
entsprechend Betriebs- und Wartungsanweisungen die
Emissionsvorschriften erfüllt. Folgende Kategorien werden
verwendet:
Moderate: Der Motor erfüllt die Emissionsvorschriften für
125 Betriebsstunden.
Intermediate: Der Motor erfüllt die Emissionsvorschriften für
250 Betriebsstunden.
Extended: Der Motor erfüllt die Emissionsvorschriften für
500 Betriebsstunden.
Zum Vergleich: Ein typischer Motorrasenmäher leistet
jährlich 20 bis 25 Betriebsstunden und erfüllt damit 10 bis
12 Jahre lang die Emissionsvorschriften.
Einige Motoren sind für die Emissionsvorschriften nach
Phase 2 des US-Umweltschutzministeriums EPA zertifiziert.
Bei diesen Motoren gibt die „Emissions Compliance Period“
auf dem Emissionsschild an, wie viele Betriebsstunden der
Motor die nationalen US-Emissionsvorschriften erfüllt.
Für Motoren mit weniger als 225 ccm Hubraum gilt:
Kategorie C = 125 Stunden
Kategorie B = 250 Stunden
Kategorie A = 500 Stunden
Für Motoren mit mindestens 225 ccm Hubraum gilt:
Kategorie C = 250 Stunden
Kategorie B = 500 Stunden
Kategorie A = 1000 Stunden
24 BRIGGSandSTRATTON.COM
Page 77

25
BRIGGS & STRATTON POWER PRODUCTS GROUP, LLC – GARANTIEERKLÄRUNG
BEGRENZTE GARANTIE
Briggs & Stratton Power Products Group repariert oder ersetzt kostenlos alle Teile des Geräts, die Material- bzw. Verarbeitungsfehler aufweisen. Die
beim Einschicken der Teile zwecks Reparatur oder Austausch gemäß dieser Garantie entstehenden Transportkosten sind vom Käufer zu tragen. Für diese
Garantie gelten die unten genannten Zeiten und Bedingungen. Bei Garantiefragen wenden Sie sich bitte an einen in Ihrer Nähe befindlichen
Vertragshändler; eine Übersichtskarte finden Sie unter www.BRIGGSandSTRATTON.COM.
ES EXISTIEREN KEINE SONSTIGEN AUSDRÜCKLICHEN GARANTIEN. KONKLUDENTE GARANTIEN, EINSCHLIESSLICH DER FÜR DIE
MARKTGÄNGIGKEIT ODER DIE EIGNUNG FÜR EINEN BESTIMMTEN ZWECK, SIND AUF DIE DAUER VON EINEM JAHR AB KAUF BZW. AUF DIE
GESETZLICHE ZULÄSSIGKEIT BEGRENZT. DIE HAFTUNG FÜR ZUFÄLLIGE ODER FOLGESCHÄDEN IST INSOWEIT AUSGESCHLOSSEN, ALS EIN
SOLCHER AUSSCHLUSS GESETZLICH ZULÄSSIG IST. Da in einigen US-Bundesstaaten und Ländern eine Begrenzung der Dauer von konkludenten
Garantieleistungen oder der Ausschluss oder die Begrenzung von zufälligen oder Folgeschäden nicht zulässig ist, sind die oben genannte Begrenzung
und der oben genannte Ausschluss u. U. für Sie nicht zutreffend. Diese Garantie verleiht Ihnen bestimmte Rechte, und Sie besitzen u. U. weitere Rechte,
die in den verschiedenen US-Bundesstaaten bzw. Ländern unterschiedlicher Art sein können.
Gældende fra 1. Dezember 2005, erstatter alle udaterede Garantier og alle Garantier dateret før 1. Dezember 2005
Die Garantiezeit beginnt am Datum des Kaufs durch den ersten Einzelhandelskunden bzw. gewerblichen Endbenutzer und dauert entsprechend den Angaben in
oben stehender Tabelle. "Private Nutzung" bezieht sich auf die Nutzung in privaten Haushalten durch Einzelhandelsverbraucher. "Gewerbliche Nutzung" bezieht
sich auf alle anderen Arten der Nutzung, einschließlich der Nutzung zu gewerblichen, gewinnbringenden oder Ausleihzwecken. Nachdem das Gerät einmal für
gewerbliche Zwecke genutzt wurde, gilt es für den Zweck dieser Garantie als gewerblich genutztes Produkt. Für Geräte, die für eigenerzeugte Energie anstelle
der Energie der öffentlichen Versorger eingesetzt werden, ist diese Garantie nicht gültig. Elektrisch betriebene Hochdruckreiniger, die für gewerbliche Zwecke
eingesetzt werden, unterliegen nicht der Garantie.
DIE GARANTIE FÜR GERÄTE VON BRIGGS & STRATTON IST AUCH OHNE REGISTRIERUNG RECHTSKRÄFTIG. BEWAHREN SIE IHREN KAUFBELEG GUT AUF.
WENN SIE BEI DER FORDERUNG VON GARANTIELEISTUNGEN KEINEN BELEG FÜR DAS ERSTE KAUFDATUM VORLEGEN KÖNNEN, WIRD DIE
GARANTIEZEIT ANHAND DES DATUMS DER HERSTELLUNG DES GERÄTS BESTIMMT.
ÜBER IHRE GERÄTE GARANTIE
Wir führen gern Garantiereparaturen für Sie durch und entschuldigen uns für etwaige Unannehmlichkeiten. Garantiereparaturen können von allen
Vertragshändlern durchgeführt werden. Bei den meisten Garantiereparaturen handelt es sich um Routinearbeiten; mitunter ist jedoch der Anspruch auf die
Garantieleistung nicht gerechtfertigt. Beispielsweise wird keine Garantieleistung erbracht, wenn das Gerät durch falschen Gebrauch, durch mangelhafte
Wartung, unsachgemäßen Transport, unsachgemäße Handhabung oder Lagerung oder durch falsche Installation beschädigt wurde. Ebenso besteht kein
Garantieanspruch, wenn das Herstellungsdatum oder die Seriennummer am Hochdruckreiniger oder am Motor entfernt oder Änderungen am Gerät
vorgenommen wurden. Während der Garantiezeit repariert oder ersetzt der Vertragshändler nach eigenem Ermessen jedes Teil, das nach der Überprüfung
nach seinem Urteil unter normalen Gebrauchs- und Betriebsbedingungen nicht mehr eingesetzt werden kann. Durch diese Garantie sind die folgenden
Reparaturen und Geräte nicht abgedeckt:
• Normaler Verschleiß: Bei im Freien eingesetzten motorgetriebenen Geräten, wie etwa bei allen mechanischen Geräten, müssen regelmäßig
Wartungsarbeiten durchgeführt und Teile erneuert werden, damit das Gerät einwandfrei funktioniert. Diese Garantie bietet keinen Anspruch auf
Reparatur, wenn ein Teil oder das ganze Gerät durch normalen Gebrauch verschlissen ist.
• Installation und Wartung: Diese Garantie gilt nicht, wenn das Gerät oder Teile unsachgemäß oder unbefugt installiert oder geändert, falsch eingesetzt,
vernachlässigt, durch Unfall beschädigt, überlastet, mit überhöhter Drehzahl betrieben, unsachgemäß gewartet, repariert oder gelagert wurden, so dass
nach unserer Auffassung die Leistung oder Zuverlässigkeit beeinträchtigt wurde. Ebenfalls nicht unter diese Garantie fallen normale Wartungsarbeiten
wie der Austausch von Luftfiltern, Einstellungen, die Reinigung des Kraftstoffsystems und die Beseitigung von Verunreinigungen (Chemikalien, Kalk,
Schmutz usw.).
• Sonstige Ausschlüsse: Ausgeschlossen von der Garantie sind Verschleißteile wie Schnellkupplungen, Dichtungen, Öldruckanzeigen, Riemen, O-Ringe,
Filter, Pumpendichtungen usw. sowie Pumpen, die ohne Wasser betrieben wurden, und Schäden oder Funktionsstörungen, welche die Folge von
Unfällen, unsachgemäßem Gebrauch, Modifikationen oder unsachgemäßer Wartung, Einfrieren oder Qualitätsverlust von Chemikalien sind. Zubehörteile
wie Sprühpistolen, Schläuche, Düsenverlängerungen und Düsen sind von der Produktgarantie ausgeschlossen. Die Garantie gilt nicht für
Gebrauchtgeräte, generalüberholte Geräte und Vorführgeräte sowie für Ausfälle aufgrund höherer Gewalt. 198203G, Rev. B, 12/31/2006
BRIGGS & STRATTON POWER PRODUCTS GROUP, LLC
JEFFERSON, WI, USA
2 Jahr
90 Tage
Private Nutzung
Gewerbliche Nutzung
GARANTIEZEIT
Page 78

26 BRIGGSandSTRATTON.COM
Briggs & Stratton Power Products Group, LLC
900 N. Parkway
Jefferson, Wisconsin, 53549 U.S.A.
Hochdruckreiniger
Nennleistung: Die Bruttonennleistung der Motormodelle wird gemäß SAE-Code (Society of Automotive Engineers) J1940
(Leistungs- und Momentmessungen bei Kleinmotoren) und die Nennleistung gemäß SAE J1995 (Revision 2002-05) angegeben.
Die Drehmomente gelten für 3060 U/min, die Leistungswerte für 3600 U/min. Die tatsächliche Bruttoleistung ist niedriger. Sie
wird u.a. durch die Umgebungsbedingungen und individuelle Abweichungen beeinflusst. Angesichts des breiten Einsatzbereichs
von Motoren und der Vielfalt der Umgebungsfaktoren beim Motorbetrieb liegt die tatsächliche Nettoleistung des Benzinmotors
unterhalb der angegebenen Bruttoleistung. Diese Abweichung ist auf die Vielfalt der Umgebungs- und Betriebsfaktoren
zurückzuführen, insbesondere auf das Zubehör (Luftfilter, Krümmer, Kühlung, Vergaser, Benzinpumpe usw.), auf
Anwendungseinschränkungen, Umgebungsbedingungen (Temperatur, Luftfeuchte, Höhe) und auf individuelle Abweichungen.
Aus Fertigungs- und Kapazitätsgründen ist Briggs & Stratton berechtigt, defekte Motoren durch leistungsstärkere Modelle aus
der gleichen Baureihe zu ersetzen.
Dieser Hochdruckreiniger erfüllt die Vorschrift PW101 (Prüf- und Nennleistung von Hochdruckreinigern) der Pressure Washer
Manufacture Association.
Produktdaten
Ausgangsdruck . . . . . . . . . . . . . . . . . . . . . . . . . .137,9 bar
Durchflussrate . . . . . . . . . . . . . . . . . . . . . . . . . . . .7,2 l/min
Temperatur des zugeführten Wassers . . . . . . . .max. 38 ºC
Hubraum . . . . . . . . . . . . . . . . . . . . . . . . . . . . . . . .158 ccm
Elektrodenabstand Zündkerze . . . . . . . . . . . . . . . .0,76 mm
Fassungsvermögen Kraftstoff . . . . . . . . . . . . . . . . . . .0,95 l
Fassungsvermögen Öl . . . . . . . . . . . . . . . . . . . . . . . . .0,6 l
Verbrauchsmaterial
Pumpenschutzmittel . . . . . . . . . . . . . . . . . . . . . . . . . .6039
Wartungssatz O-Ringe . . . . . . . . . . . . . . . . . . . .100516GS
Wassereinlasssieb . . . . . . . . . . . . . . . . . . . . . . . .B2384GS
Luftfilter . . . . . . . . . . . . . . . . . . . . . . . . . .698369 or 5088D
Widerstandszündkerze . . . . . . . . . . . . .802592S or 5095D
Langlebige Platinkerze . . . . . . . . . . . . . . . . . . . . . . .5062D
Motoröl . . . . . . . . . . . . . . . . . . . . . . . . . . . . . . . . . .100005
Kraftstoffstabilisator . . . . . . . . . . . . . . . . . . . . . . . . .5041D
Funkenlöscher . . . . . . . . . . . . . . . . . . . . . . . . . . . . .398067
Page 79

BRIGGS & STRATTON POWER PRODUCTS GROUP, LLC
JEFFERSON, WISCONSIN, E.U.A.
Lavadora de Pressão
Manual de Operação
Esta lavadora de pressão é classificada de acordo com a norma PW101 da Associação
de Fabricação de Lavadoras de Pressão (Teste e Classificação de Lavadoras de Pressão).
Page 80

2 BRIGGSandSTRATTON.COM
Briggs & Stratton Power Products Group, LLC
900 North Parkway
Jefferson, WI 53549
Copyright © 2008 Briggs & Stratton Power Products Group,
LLC. Todos os direitos reservados. Nenhuma parte deste
material pode ser reproduzida ou transmitida de qualquer
forma ou por quaisquer meios sem autorização expressa por
escrito do Briggs & Stratton Power Products Group, LLC.
Obrigado por adquirir a lavadora de pressão de alta qualidade da Briggs & Stratton. Estamos satisfeitos por você ter
depositado sua confiança na marca Briggs & Stratton. Quando operado e mantido de acordo com as instruções deste manual,
a sua lavadora de pressão da Briggs & Stratton lhe oferecerá muitos anos de serviço confiável.
Este manual contém informações de segurança sobre os perigos e riscos inerentes a Lavadoras de Pressão e como evitá-los.
Em virtude da Briggs & Stratton não conhecer necessariamente todas as aplicações desta lavadora de pressão, é importante
que você leia e compreenda muito bem estas instruções antes de ligar ou operar este equipamento. Guarde estas instruções
para referência futura.
Esta lavadora de pressão necessita uma montagem final, antes do uso. Consulte na seção de Montagem deste manual as
instruções sobre os procedimentos de montagem final. Siga as instruções em sua totalidade.
Onde Nos Encontrar
Você nunca terá de procurar muito pelo suporte e serviços da Briggs & Stratton para o seu lavadora de pressão. Há milhares
de representantes de serviço autorizado Briggs & Stratton no mundo inteiro que prestam serviços de qualidade. Você também
pode encontrar o Representante de Serviço Autorizado mais próximo em nosso mapa localizador de representantes, na
Internet em BRIGGSandSTRATTON.COM.
Lavadora de Pressão
Número do Modelo
Revisão
Número de Série
Motor
Número do Modelo
Número do Tipo
Número de Código
Data de Compra
Page 81

3
Índice
Segurança do Operador. . . . . . . . . . . . . . . . . . . . . . . . . . . . 4
Descrição do Equipamento . . . . . . . . . . . . . . . . . . . . . . . . . . . . . . . . . . . . . 4
Regras de Segurança. . . . . . . . . . . . . . . . . . . . . . . . . . . . . . . . . . . . . . . . . . 4
Montagem. . . . . . . . . . . . . . . . . . . . . . . . . . . . . . . . . . . . . 8
Desembale a Lavadora de Pressão . . . . . . . . . . . . . . . . . . . . . . . . . . . . . . . 8
Conecte a Empunhadura . . . . . . . . . . . . . . . . . . . . . . . . . . . . . . . . . . . . . . . 8
Instale o Kit da Roda . . . . . . . . . . . . . . . . . . . . . . . . . . . . . . . . . . . . . . . . . . 8
Adicionar Lubrificante do Motor . . . . . . . . . . . . . . . . . . . . . . . . . . . . . . . . . 9
Adicionar Combustível. . . . . . . . . . . . . . . . . . . . . . . . . . . . . . . . . . . . . . . . . 9
Conecte a Mangueira e o Suprimento de Agua à Bomba. . . . . . . . . . . . . . 10
Características e Controles . . . . . . . . . . . . . . . . . . . . . . . . 11
Funcionamento . . . . . . . . . . . . . . . . . . . . . . . . . . . . . . . . 12
Localização da Lavadora de Pressão . . . . . . . . . . . . . . . . . . . . . . . . . . . . . 12
Como dar a Partida na Lavadora de Pressão. . . . . . . . . . . . . . . . . . . . . . . 12
Como Desligar a sua Lavadora de Pressão . . . . . . . . . . . . . . . . . . . . . . . . 14
Como Usar o Bico Ajustável . . . . . . . . . . . . . . . . . . . . . . . . . . . . . . . . . . . 14
Aplicação de Detergente . . . . . . . . . . . . . . . . . . . . . . . . . . . . . . . . . . . . . . 14
Enxágüe com a Lavadora de Pressão . . . . . . . . . . . . . . . . . . . . . . . . . . . . 15
Limpar o Tubo do Sifão do Detergente . . . . . . . . . . . . . . . . . . . . . . . . . . . 15
Sistema Automático de Esfriamento (alívio térmico). . . . . . . . . . . . . . . . . 15
Manutenção. . . . . . . . . . . . . . . . . . . . . . . . . . . . . . . . . . . 16
Cronograma de Manutenção . . . . . . . . . . . . . . . . . . . . . . . . . . . . . . . . . . . 16
Manutenção da Lavadora de Pressão . . . . . . . . . . . . . . . . . . . . . . . . . . . . 16
Manutenção do Motor . . . . . . . . . . . . . . . . . . . . . . . . . . . . . . . . . . . . . . . . 18
Após Cada Uso . . . . . . . . . . . . . . . . . . . . . . . . . . . . . . . . . . . . . . . . . . . . . 20
Armazenagem de Inverno . . . . . . . . . . . . . . . . . . . . . . . . . . . . . . . . . . . . . 21
Armazenagem de Longo Prazo . . . . . . . . . . . . . . . . . . . . . . . . . . . . . . . . . 21
Solução de Problemas . . . . . . . . . . . . . . . . . . . . . . . . . . . 22
Garantias . . . . . . . . . . . . . . . . . . . . . . . . . . . . . . . . . . . . 23
Garantia do Sistema de Controle de Emissões . . . . . . . . . . . . . . . . . . . . . 23
Garantia para o Proprietário da Lavadora de Pressão . . . . . . . . . . . . . . . . 25
Especificações . . . . . . . . . . . . . . . . . . . . . . . . . . . . . . . . . 26
Especificações de Produto. . . . . . . . . . . . . . . . . . . . . . . . . . . . . . . . . . . . . 26
Peças Comuns de Serviço . . . . . . . . . . . . . . . . . . . . . . . . . . . . . . . . . . . . . 26
Page 82

Segurança do Operador
Descrição do Equipamento
Leia este manual cuidadosamente para se
familiarizar com a sua lavadora de pressão.
Conheça aplicações, limitações e riscos
envolvidos.
Esta lavadora de pressão opera em 2.000 PSI (137,9 Bar)
em uma vazão de 1,9 galões (7,2 l) por minuto. Este sistema
residencial de alta qualidade oferece engrenagens de
7” (17.8 cm), bomba de came axial com pistões de aço
inoxidável, sistema de arrefecimento automático, sistema
sifonado de detergente, borrifador de spray ajustável, óculos
de proteção de segurança, mangueira resistente de
30’ (9,1 m) e muito mais.
Todo cuidado foi tomado para garantir que as informações
neste manual estejam corretas e atualizadas. Entretanto, nos
reservamos o direito de alterar, modificar ou melhorar o
produto e sua documentação a qualquer momento sem aviso
prévio.
O Sistema de Controle de Emissão desta lavadora de pressão
é garantido pelas normas estabelecidas pela Agencia de
Proteção Ambiental e pelo Comitê de Recursos Aéreos da
California.
Regras de Segurança
Este é o símbolo de alerta de segurança. É usado
para alertá-lo sobre os riscos potenciais de danos
pessoais. Obedeça todas as mensagens de
segurança que acompanham esse símbolo para
evitar possíveis danos ou morte.
O símbolo de alerta de segurança é usado com uma palavra
(PERIGO, CUIDADO, ATENÇÃO), uma ilustração e/ou uma
mensagem de segurança para avisá-lo dos riscos. PERIGO
indica um risco que se não for evitado, resultará em morte
ou ferimentos graves. ATENÇÃO indica um risco que se não
for evitado, pode resultar em morte ou ferimentos graves.
CUIDADO indica um risco que se não for evitado, poderia
resultar em ferimentos menores. AVISO indica uma situação
que pode resultar em dano ao equipamento. Siga as
mensagens de segurança para evitar ou reduzir os riscos de
ferimento ou morte.
Etiqueta de advertência
A sua unidade é fornecida com uma etiqueta de advertência
para informá-lo dos riscos em potencial relativos à
segurança. Se a etiqueta ficar danificada ou ilegível, entre em
contato com o revendedor local da Briggs & Stratton para
substituí-la por uma nova.
Os ícones da etiqueta de advertência são apresentados e
descritos em detalhes mais adiante nesta seção sobre
segurança.
Símbolos de riscos e seus significados
A - Explosão G - Objetos voadores
B - Fogo H - Superfície escorregadia
C - Choque elétrico J - Queda
D - Gases tóxicos K - Injeção de fluido
E - Contragolpe L - Peças móveis
F - Superfície quente M - Manual do Operador
4 BRIGGSandSTRATTON.COM
A B C
D E
G H
F
J
K L M
Page 83

5
ATENÇÃO
Os gases de exaustão do motor deste produto
contêm substâncias químicas conhecidas no Estado
de Califórnia como causadoras de câncer,
deformações congênitas ou outros males genéticos.
ATENÇÃO
Há risco de choque elétrico.
O contacto com a fonte de energia pode causar
choque elétrico ou queimadura.
• NUNCA use o spray perto da fonte de energia.
ATENÇÃO
O uso da lavadora de pressão pode criar poças e
superfícies escorregadias.
O coice do canhão do spray pode derrubá-lo.
• Opere esta unidade em uma superfície estável.
• A área de limpeza deverá ter inclinação e drenagem adequadas
para reduzir a possibilidade de uma queda devido a superfícies
escorregadias.
• Seja extremamente cuidadoso se precisar usar a lavadora de
pressão em uma escada, andaime ou qualquer outro local
instável.
• Segure firmemente a pistola de pulverização com as duas mãos
ao utilizar pulverização em alta pressão para evitar ferimentos
quando a pistola quicar.
ATENÇÃO
A combustível e seus vapores são extremamente
inflamáveis e explosivos.
Fogo ou explosão pode causar queimaduras
sérias ou morte.
AO ADICIONAR OU DRENAR O COMBUSTÍVEL
• DESLIGUE a lavadora de pressão e deixe-a esfriar, pelo menos
durante 2 minutos antes de remover a tampa do combustível.
Solte a tampa lentamente, para aliviar a pressão no tanque.
• Encha ou drene o tanque de combustível em ambiente externo.
• NÃO encha o tanque completamente. Deixe um espaço para
expansão do combustível.
• Se o combustível espirrar, espere que evapore antes de dar
partida no motor.
• Mantenha a combustível longe de fagulhas, chama descoberta,
lâmpada piloto, calor e outras fontes de ignição.
• NÃO acenda cigarro, nem fume.
AO LIGAR O EQUIPAMENTO
• Garanta que o faiscador, o silenciador e o purificador de ar
estejam no lugar.
• NÃO acione o motor se o faiscador foi removido.
AO OPERAR O EQUIPAMENTO
• NÃO incline o motor ou o equipamento em um ângulo tal que a
combustível possa se derramar.
• NÃO borrife líquidos inflamáveis.
AO TRANSPORTAR OU CONSERTAR O EQUIPAMENTO
• Transporte ou conserte o equipamento com o tanque VAZIO ou
com o registro de combustível FECHADO.
• Desconecte o cabo do faiscador.
AO ARMAZENAR COMBUSTIVEL OU EQUIPAMENTO COM
COMBUSTÍVEL NO TANQUE
• Armazene longe de fogões, fornos, aquecedores de água,
secadoras de roupa ou qualquer outro equipamento que tenha
uma lâmpada piloto ou outra fonte de ignição porque podem
disparar a combustão dos vapores de combustível.
ATENÇÃO
A operação do motor libera monóxido de
carbono, um gás venenoso, incolor e sem odor.
A aspiração de monóxido de carbono pode causar
dor de cabeça, cansaço, tontura, vômito, confusão,
apreensão, náuseas, desmaio ou a morte.
Alguns produtos químicos ou detergentes podem
ser nocivos se inalados ou ingeridos, provocando
náusea grave, desmaios ou envenenamento.
• SÓ opere a lavadora ao ar livre.
• Impeça que o gás de exaustão entre em uma área confinada
através de janelas, portas, entradas de ventilação ou outras
aberturas.
• NÃO LIGUE o opere o motor em ambiente interno ou em uma
área fechada, mesmo que as janelas e portas estejam abertas.
• Use um respirador ou máscara sempre que houver a
possibilidade de inalação de vapores.
• Leia todas as instruções que acompanham a máscara para ter
certeza que ela fornecerá a proteção necessária contra a
inalação de vapores nocivos.
ATENÇÃO
Determinados componentes deste produto e seus
acessórios contêm elementos químicos no
Estado da Califórnia como causadoras de câncer,
deformações congênitas ou outros males genéticos.
Lave as mãos após o manuseio.
Page 84

6 BRIGGSandSTRATTON.COM
ATENÇÃO
A chicotada do cabo do starter (retração rápida)
pode resultar em ferimento corporal. A chicotada
puxará a mão e o braço no sentido do motor
mais rápido que você permitir.
Isso poderia causar ossos quebrados, fraturas,
escoriações ou luxações.
• NUNCA puxe o cabo do starter sem antes aliviar a pressão do
canhão do spray.
• Ao dar a partida no motor, puxe a corda lentamente até sentir a
resistência e, em seguida, puxe rapidamente para evitar o
contragolpe.
• Depois de cada tentativa de dar partida, quando o motor falhar,
aponte sempre o canhão do spray na direção segura, pressione
o botão vermelho e aperte o gatilho do canhão de spray, para
liberar pressão alta.
• Segure firmemente a pistola de pulverização com as duas mãos
ao utilizar pulverização em alta pressão para evitar ferimentos
quando a pistola quicar.
ATENÇÃO
O contacto com a área do silenciador pode
causar queimaduras sérias.
Gases de escape/aquecimento podem incendiar
combustíveis, estruturas ou danificar tanques de
combustíveis, causando incêndios.
• NÃO toque nas partes quentes e EVITE os gases da exaustão.
• Deixe o equipamento esfriar antes de tocá-lo.
• Deixe pelo menos 1,5 m de folga em todas as laterais da
lavadora a pressão, incluindo a parte superior.
ATENÇÃO
O fluxo de água a alta pressão que este
equipamento produz pode perfurar a pele e seus
tecidos subjacentes, ocasionando sérios danos e
possível amputação.
A pistola de pulverização retém água em alta
pressão mesmo quando o motor está parado e a
água está desligada, o que pode causar ferimentos.
• NÃO permita que CRIANÇAS operem a lavadora de pressão.
• Nunca conserte a mangueira de alta pressão. Substitua a
mesma.
• NUNCA conserte conexões que estão vazando com nenhum tipo
de vedante. Substitua o anel de vedação ou a vedação.
• NUNCA conecte a mangueira de alta pressão na extensão do
esguicho.
• Mantenha a mangueira de alta pressão conectada à bomba e à
pistola de pulverização enquanto o sistema estiver sendo
pressurizado.
• Aponte o canhão do spray SEMPRE para uma direção segura,
pressione o botão vermelho e aperte o gatilho do canhão do
spray para liberar a alta pressão, todas as vezes que o motor for
parado.
• NUNCA direcione a pistola de pulverização a pessoas, animais
ou plantas.
• NÃO mantenha a pistola de pulverização na posição "Open"
(Aberta).
• Enquanto a unidade estiver em operação, NÃO deixe a pistola de
pulverização sem supervisão.
• NUNCA utilize pistolas de pulverização sem a trava ou a
proteção do acionador; verificar sempre as condições
operacionais desses dispositivos.
• Verifique sempre se a pistola de pulverização, os bicos e os
acessórios estão corretamente instalados.
ATENÇÃO
O faiscamento involuntário pode provocar
incêndio ou choque elétrico.
AO AJUSTAR OU REALIZAR REPAROS EM SUA LAVADORA DE
PRESSÃO
• Desconecte o cabo da vela e mantenha-o em local onde não
possa entrar em contato com a vela.
AO TESTAR A VELA DO MOTOR
• Use um testador aprovado para vela de motor.
• NÃO verifique se há centelha se a vela tiver sido removida.
Page 85

7
AVISO
O spray à alta pressão pode danificar itens frágeis
incluindo vidro.
• NÃO aponte a pistola de pulverização quando estiver no modo
de jato.
• Nunca direcione a pistola de pulverização a plantas.
ATENÇÃO
Há risco de causar ferimento nos olhos.
O spray pode espirrar para trás ou lançar detritos.
• Use sempre óculos de segurança ao utilizar este equipamento
ou quando estiver perto de onde este equipamento está em uso.
• Antes de acionar a lavadora a pressão, certifique-se de usar
óculos de segurança adequados.
• NUNCA substitua óculos de segurança por óculos de proteção.
ATENÇÃO
A ignição e outras peças giratórias podem
enroscar nas mãos, cabelos, roupas ou
acessórios.
• NUNCA opere unidades com peças quebradas, faltantes ou sem
as tampas ou caixas protetoras.
• NÃO use roupas soltas, jóias ou nada que possa ficar preso no
acionador de partida ou em outras peças giratórias.
• Amarre os cabelos se forem compridos e remova as jóias.
AVISO
O tratamento inadequado da lavadora de pressão poderá
danificá-la e reduzir sua vida útil.
• Se você tiver dúvidas sobre as instruções de utilização, consulte
o revendedor ou entre em contato com a Briggs & Stratton
Power Products.
• NUNCA opere unidades com peças quebradas, faltantes ou sem
as tampas ou caixas protetoras.
• NÃO desconsidere nenhum dispositivo de segurança desta
máquina.
• NÃO mexa com o controle de velocidade.
• NÃO opere a lavadora acima da pressão nominal.
• NUNCA faça modificações na lavadora de pressão.
• Em dias frios, antes de dar a partida na lavadora de pressão,
verifique todas as peças do equipamento, para certificar-se de
não haver formação de gelo.
• NUNCA movimente a máquina puxando a mangueira de alta
pressão. Use o puxador da unidade.
• Verifique se não existem vazamentos ou sinais de deterioração
no sistema de combustível, por exemplo, mangueira desgastada
ou porosa ou, ainda, se faltam abraçadeiras ou se as mesmas
estão soltas ou se há danos no tanque ou na respectiva tampa.
Antes de operar a lavadora de pressão, todos os defeitos devem
ser corrigidos.
• Este equipamento foi projetado para uso somente com peças
sobressalentes autorizadas da Briggs & Stratton Power
Products. O usuário assumirá os riscos e as responsabilidades
decorrentes do uso do equipamento com peças sobressalentes
que NÃO estejam de acordo com as especificações mínimas.
Page 86

Montagem
Leia todo o manual do operador antes de tentar
montar ou operar sua nova lavadora de pressão.
A sua lavadora de pressão necessita de alguma montagem e
estará pronta para uso depois que for alimentada
adequadamente com lubrificante e combustível.
Se houver algum problema com a montagem da lavadora de
pressão, entre em contacto com o centro de manutenção da
Briggs & Stratton local. Caso você necessite de assistência,
tenha em mãos o modelo, a revisão e o número de série que
se encontra na plaqueta de identificação.
Desembale a Lavadora de Pressão
1. Remova a sacola de peças e os insertos que
acompanham a lavadora de pressão.
2. Abra a caixa de papelão por completo, cortando cada
canto de cima até embaixo.
3. Assegure-se de que todos os itens estão à mão, antes
de começar a montagem.
Os itens da caixa são os seguintes:
• Unidade principal
• Puxador
• Bandeja de plástico para acessórios
• Mangueira de alta pressão
• Pistola de pulverização
• Extensão do bico ajustável
• Rodas (2)
• Bolsa de peças (inclui os seguintes itens):
• Óculos de segurança
• Acessórios da mangueira
• Kit de manutenção
• Manual do operador
• Sacola para guardar acessórios
• Empunhadura/Kit da roda Kit de hardware de aperto
(o qual inclui):
• Parafuso francê (2)
• Botão de plástico (2)
• Pinos do eixo (2)
• Prisioneiros (2)
Se houver alguma peça faltando ou danificada, contate o
centro de manutenção local autorizado da Briggs & Stratton.
Para preparar a lavadora de pressão para operação, será
necessário realizar estas tarefas:
1. Conecte a empunhadura e o kit da roda à unidade
principal.
2. Abasteça o motor de óleo.
3. Adicione combustível ao tanque.
4. Conecte a mangueira de alta pressão à pistola de
pulverização e à bomba.
5. Conecte o suprimento de água à bomba.
6. Conecte a extensão do bico à pistola de pulverização.
Conecte a Empunhadura
1. Coloque a empunhadura (A) sobre a base (B). Garanta
que os furos na empunhadura estejam alinhados com
os furos na base.
2. Insira os parafusos do carrinho (C) nos furos pelo lado
externo da unidade e conecte um botão de plástico (D)
pelo lado interno da unidade. Aperte com a mão.
Instale o Kit da Roda
O kit da roda é projetado para aumentar significativamente a
portabilidade de seu lavador a pressão.
NOTA: O kit da roda não se destina para uso em rodovias.
Instale o kit da roda como indicado abaixo:
1. Coloque a parte inferior do quadro do lavador a pressão
sobre uma superfície plana e lisa.
2. Deslize a roda (E) sobre o pino do eixo (F).
NOTA: Certifique-se de instalar a roda com o cubo do eixo
elevado no quadro.
3. Deslize o pino do eixo pelo furo (G) no quadro.
4. Prenda a roda no pino do eixo com o prisioneiro (H).
5. Repita os passos 2 a 4 para prender a segunda roda.
8 BRIGGSandSTRATTON.COM
D
A
B
C
C
G
F
H
E
Page 87

Adicionar Lubrificante do Motor
1. Coloque a lavadora de pressão sobre uma superfície
plana, nivelada.
2. Limpe a área ao redor da abertura do depósito de óleo
e, em seguida, remova a tampa amarela/vareta de nível.
3. Usando um funil (opcional), despeje lentamente o óleo
na boca de alimentação de óleo até a marca “Full”
(Cheio) da vareta de nível. NÃO encha demais.
4. Substitua a tampa/ vareta de nível do depósito de óleo
e aperte-a bem.
Adicionar Combustível
O combustível deve satisfazer estes requisitos:
• Gasolina limpa, fresca, isenta de chumbo.
• Octanagem mínima de 87/87 AKI (91 RON). Para uso
em altitudes elevadas, consulte Altitudes Elevadas.
• A gasolina com até 10% de etanol (gasool) ou até 15%
MTBE (metil terciário butil éter) é aceitável.
Para proteger o sistema de combustível contra a formação
de resina, adicione um estabilizador de combustível ao
abastecer. Consulte Armazenamento. Nem todo combustível
é igual. Se você tiver problemas de desempenho ou
dificuldade de dar a partida depois de usar um combustível,
mude para um fornecedor de combustível diferente ou
troque de marca. Este motor é certificado para operar com
gasolina. O sistema de controle de emissão para este motor
é o EM (Engine Modifications, Modificações de Motor).
1. Limpe a área em torno da tampa da boca do tanque,
remova a tampa.
2. Lentamente adicione combustível isento de chumbo (A)
ao tanque de combustível (B). Cuidado para não encher
demais. Deixe um espaço no tanque de aproximadamente
1,5” (4 cm) (C) para a expansão do combustível.
3. Coloque a tampa e deixe qualquer espirro de
combustível evaporar antes de dar partida no motor.
Altitude Elevada
Em altitudes acima de 5.000 pés (1.524 metros), é aceitável
gasolina com um mínimo de 85 octanas/ 85 AKI (89 RON).
Para atender a conformidade com as emissões, é necessário
o ajuste para altitudes elevadas. A operação sem este ajuste
causará redução no desempenho, maior consumo de
combustível e aumento nas emissões. Consulte um
representante autorizado Briggs & Stratton para obter
informações sobre o ajuste em altitudes elevadas. A operação
do motor em altitudes abaixo de 2.500 pés (762 metros),
com o kit para altitudes elevadas não é recomendável.
9
AVISO
Tratamento inadequado da lavadora de pressão pode
danificá-la e encurtar a sua vida.
• NÃO tente dar manivela ou dar partida no motor antes dele ter
sido alimentado com o lubrificante recomendado. Isto por
causar falha no motor.
AVISO
Evite danificar a lavadora de pressão.
Falha em seguir as recomendações do Manual do
Operador quanto ao combustível anula a garantia.
• NÃO use gasolina não aprovada, como a E85.
• NÃO misture óleo na gasolina.
• NÃO faça modificações no motor para que funcione com
combustíveis alternativos.
ATENÇÃO
A combustível e seus vapores são extremamente
inflamáveis e explosivos.
Fogo ou explosão pode causar queimaduras
sérias ou morte.
AO ADICIONAR COMBUSTÍVEL
• DESLIGUE a lavadora de pressão e deixe-a esfriar, pelo menos
durante 2 minutos antes de remover a tampa do combustível.
Solte a tampa lentamente, para aliviar a pressão no tanque.
• Reabasteça ao ar livre.
• NÃO encha o tanque completamente. Deixe um espaço para
expansão do combustível.
• Se o combustível espirrar, espere que evapore antes de dar
partida no motor.
• Mantenha a combustível longe de fagulhas, chama descoberta,
lâmpada piloto, calor e outras fontes de ignição.
• NÃO acenda cigarro, nem fume.
C
B
A
Page 88

Conecte a Mangueira e o Suprimento de Agua à
Bomba
NOTA: Remova e descarte as tampas para fins de embarque
dos pontos de saída de pressão alta e da do ponto de água
da bomba, antes de conectar as mangueiras.
1. Desenrole a mangueira de alta pressão e conecte uma
extremidade da mangueira à base da pistola de
pulverização. Puxe o anel da conexão rápida para trás, fixe
a conexão na pistola de pulverização e solte o anel. Puxe a
mangueira para ter certeza de que a conexão ficou firme.
2. Conecte a outra extremidade da mangueira à saída de
alta pressão na bomba. Aperte com a mão.
3. Passe água através da mangueira de jardim por 30
segundos para limpar qualquer detrito. Desligue a água.
IMPORTANTE: NÃO puxe pelo sifão água parada para o
suprimento de água. Use SOMENTE água fria (menos de 38°C).
4. Antes de conectar a mangueira de jardim à entrada de
água, inspecione a tela de entrada (A). Limpe a tela se
ela contiver detritos, substitua-a se estiver danificada.
NÃO OPERE A lavadora de pressão SE A TELA ESTIVER
DANIFICADA.
5. Conecte a mangueira (não exceder 50 pés (15 m) de
comprimento) ao ponto de entrada de água. Aperte
manualmente.
6. ABRA a água, pressione o botão vermelho (B) no
canhão e aperte o gatilho para purgar o sistema de ar e
das impurezas.
Lista de verificação para usar aAntes de dar a partida no
motor
Revise a montagem da unidade para confirmar a execução
de todas estas etapas:
1. Assegure-se de ler a seção da Segurança do Operador
e em Funcionamento, antes de utilizar a lavadora de
pressão.
2. Garanta que a empunhadura está no lugar e presa.
3. Verifique se foi adicionado óleo até o nível adequado no
cárter do motor.
4. Adicione a gasolina adequada ao tanque de
combustível.
5. Verifique se as conexões da mangueira estão
apertadas.
6. Assegure-se de que não há dobras, cortes ou danos na
mangueira de alta pressão.
7. Forneça uma fonte adequada de água com fluxo
suficiente.
10 BRIGGSandSTRATTON.COM
A
B
AVISO
NÃO faça a bomba funcionar sem que a alimentação de
água esteja conectada e aberta.
• Danos no equipamento que resultarem de falhas em obedecer
estas instruções anularão a garantia.
AVISO
Pode ocorrer danos na bomba ou no conector do ponto
de entrada de água se houver uma Válvula Unidirecional
(interruptor a vácuo ou válvula de verificação) conectada à
bomba.
• DEVE HAVER no mínimo dez pés (3 m) de mangueira livre de
obstruções entre a lavadora de pressão e qualquer dispositivo,
como por exemplo uma Válvula Unidirecional.
• Danos causados no equipamento devido a Válvula Unidirecional
instalada na bomba anularão a garantia.
ATENÇÃO
O fluxo de água a alta pressão que este
equipamento produz pode perfurar a pele e seus
tecidos subjacentes, ocasionando sérios danos e
possível amputação.
• NUNCA conecte a mangueira de alta pressão na extensão do
esguicho.
• Mantenha a mangueira de alta pressão conectada à bomba e à
pistola de pulverização enquanto o sistema estiver sendo
pressurizado.
• Verifique sempre se a pistola de pulverização, os bicos e os
acessórios estão corretamente instalados.
ATENÇÃO
Há risco de causar ferimento nos olhos.
O spray pode espirrar para trás ou lançar detritos.
• Use sempre óculos de segurança ao utilizar este equipamento
ou quando estiver perto de onde este equipamento está em uso.
• Antes de acionar a lavadora a pressão, certifique-se de usar
óculos de segurança adequados.
• NUNCA substitua óculos de segurança por óculos de proteção.
Page 89

A - Cordão de partida - Use para dar a partida manual do motor.
B - Depósito de Óleo/Vareta de Nível — Verifique, encha e drene o
óleo aqui.
C - Bomba - Cria a alta pressão.
D - Sistema automático de esfriamento - Faz circular a água pela
bomba quando a água atinge a temperatura de 52ºC-68ºC
(125°F-155°F). A água aquecida será descarregada da bomba
para o chão. Este sistema evita danos internos à bomba.
E - Mangueira de alta pressão - Conecte uma das extremidades à
bomba d'água e a outra, à pistola de pulverização.
F - Pistola de pulverização - Controla a aplicação de água sobre a
superfície de limpeza por meio do dispositivo acionador.
Verifique também a trava do gatilho.
G - Bico ajustável - Deve estar sempre conectado à extensão do
bico. O bico ajustável permite ajustar a pressão e a forma de
pulverização.
H - Tanque de Combustível — Encha o tanque com gasolina
comum isenta de chumbo. Deixe sempre uma folga para a
expansão do combustível.
Itens Não Mostrados:
Filtro de ar - Protege o motor ao filtrar a poeira e os detritos do ar
de admissão.
Plaqueta de Identificação (perto da traseira da placa base) —
Fornece o modelo e o número de série da lavadora de pressão.
Tenha esses dados sempre à mão no caso de pedir assistência.
Tubo/Filtro Sifonado do Detergente — Usar para sifonar, na
lavadora de pressão o detergente de modo seguro na corrente de
baixa pressão.
Descarga de alta pressão - Para conexão da mangueira de alta
pressão.
Bulbo do Primer — Prepara um motor frio para dar partida.
Alavanca de controle de estrangule - Ajusta o motor para o modo
de partida com o cordão e pára o funcionamento do motor.
Entrada de água - Conecte a mangueira de jardim nesta entrada.
Óculos de Proteção — Utilize sempre os óculos de proteção
inclusos quando a lavadora de pressão estiver em funcionamento.
11
Características e Controles
Leia este manual do operador e as regras de segurança antes de operar a lavadora de pressão.
Compare as ilustrações com a sua lavadora de pressão, para se familiarizar com a localização dos diversos controles e
ajustes. Guarde este manual para consultas posteriores.
B
A
D
,
C
F
E
G
H
Page 90

Funcionamento
Se você tiver qualquer problema ao operar a lavadora de
pressão, contate o centro de manutenção local da Briggs &
Stratton.
Localização da Lavadora de Pressão
Folgas e Movimentação do Ar
Instale a lavadora de pressão do lado de fora, em uma área
que não acumulará os gases de exaustão mortíferos. NÃO
instale a lavadora de pressão onde os gases de exaustão
possam acumular e penetrar ou ser sugados para um prédio
ocupado. Garanta que os gases da exaustão (A) sejam
mantidos longe de quaisquer janelas, portas, entradas para
ventilação ou outras aberturas que possam permitir que esses
gases sejam coletados em uma área confinada. Ventos
predominantes e correntes de ar devem ser levadas em
consideração ao instalar a lavadora de pressão.
Como dar a Partida na Lavadora de Pressão
Para dar a partida na lavadora de pressão pela primeira vez,
siga estas instruções passo a passo. Também é possível
aplicar estas informações de partida se a lavadora de
pressão tiver ficado ociosa por no mínimo um dia.
1. Coloque a lavadora de pressão próxima de um
suprimento externo, capaz de fornecer água a uma
vazão superior a 11 litros/minuto (2,9 gal./min) e não
inferior a 20 psi na extremidade da mangueira de
jardim da lavadora de pressão. NÃO use o efeito sifão
para a água de alimentação.
2. Verifique se a mangueira de alta pressão está
conectada firmemente à pistola de pulverização e à
bomba. Consulte a seção Montagem.
3. Certifique-se de que a unidade esteja em uma posição
nivelada.
4. Verifique se a mangueira de jardim está conectada à
entrada de água na bomba da lavadora de pressão.
5. Abra a água, aponte o canhão para uma direção segura,
pressione o botão vermelho e aperte o gatilho para
purgar o sistema da bomba do ar e das impurezas.
6. Conecte a extensão do bico à pistola de pulverização.
Aperte com a mão.
7. Mova a alavanca do regulador de pressão para a
posição “Fast” (B), mostrado como um coelho .
Para dar partida no motor, pela primeira vez:
8A. Acione firmemente o bulbo do primer 5 vezes, aguarde
2 segundos entre cada acionamento.
Para dar partida no motor, nas vezes seguintes:
8B. Pressione o bulbo do primer 3 vezes firmemente,
aguarde 2 segundos entre cada pressionada. Para um
motor que esteja quente, NÃO pressione o bulbo.
12 BRIGGSandSTRATTON.COM
ATENÇÃO
Gases de escape/aquecimento podem incendiar
combustíveis, estruturas ou danificar tanques de
combustíveis, causando incêndios.
• Deixe pelo menos 1,5 m de folga em todas as laterais da
lavadora a pressão, incluindo a parte superior.
ATENÇÃO
A operação do motor libera monóxido de
carbono, um gás venenoso, incolor e sem odor.
Aspirar monóxido de carbono causa náusea,
desmaios ou morte.
• SÓ opere a lavadora ao ar livre.
• Impeça que o gás de exaustão entre em uma área confinada
através de janelas, portas, entradas de ventilação ou outras
aberturas.
• NÃO opere a lavadora a pressão dentro de edificações ou locais
confinados, mesmo se as portas ou janelas estiverem abertas.
AVISO
NÃO opere a bomba sem a fonte de água estar conectada
e ligada.
• Danos no equipamento decorrentes da não obediência a estas
instruções invalidarão a garantia oferecida.
B
A
Page 91

IMPORTANTE: Antes de dar a partida na lavadora de
pressão, garanta que você está usando óculos de proteção
adequados.
9. Ao dar partida no motor, posicione-se como
recomendado e pegue a alavanca de controle do starter
e puxe lentamente até sentir alguma resistência. Em
seguida, puxe rapidamente para dar partida no motor.
10. Retorne a alavanca lentamente. NÃO deixe a corda
“enrolar” no starter.
NOTA: Mantenha sempre a alavanca do regulador de pressão
na posição “Fast” quando estiver operando a lavadora
de pressão.
13
ATENÇÃO
O fluxo de água a alta pressão que este
equipamento produz pode perfurar a pele e seus
tecidos subjacentes, ocasionando sérios danos e
possível amputação.
A pistola de pulverização retém água em alta
pressão mesmo quando o motor está parado e a
água está desligada, o que pode causar ferimentos.
• NÃO permita que CRIANÇAS operem a lavadora de pressão.
• Mantenha a mangueira de alta pressão conectada à bomba e à
pistola de pulverização enquanto o sistema estiver sendo
pressurizado.
• NUNCA direcione a pistola de pulverização a pessoas, animais
ou plantas.
• NÃO mantenha a pistola de pulverização na posição "Open"
(Aberta).
• Enquanto a unidade estiver em operação, NÃO deixe a pistola de
pulverização sem supervisão.
• NUNCA utilize pistolas de pulverização sem a trava ou a
proteção do acionador; verificar sempre as condições
operacionais desses dispositivos.
• Verifique sempre se a pistola de pulverização, os bicos e os
acessórios estão corretamente instalados.
ATENÇÃO
Há risco de causar ferimento nos olhos.
O spray pode espirrar para trás ou lançar detritos.
• Use sempre óculos de segurança ao utilizar este equipamento
ou quando estiver perto de onde este equipamento está em uso.
• Antes de acionar a lavadora a pressão, certifique-se de usar
óculos de segurança adequados.
• NUNCA substitua óculos de segurança por óculos de proteção.
ATENÇÃO
A chicotada do cabo do starter (retração rápida)
pode resultar em ferimento corporal. A chicotada
puxará a mão e o braço no sentido do motor
mais rápido que você permitir.
Isso poderia causar ossos quebrados, fraturas,
escoriações ou luxações.
• NUNCA puxe o cabo do starter sem antes aliviar a pressão do
canhão do spray.
• Ao dar a partida no motor, puxe a corda lentamente até sentir a
resistência e, em seguida, puxe rapidamente para evitar o
contragolpe.
• Depois de cada tentativa de dar partida, quando o motor falhar,
aponte sempre o canhão do spray na direção segura, pressione
o botão vermelho e aperte o gatilho do canhão de spray, para
liberar pressão alta.
• Segure firmemente a pistola de pulverização com as duas mãos
ao utilizar pulverização em alta pressão para evitar ferimentos
quando a pistola quicar.
ATENÇÃO
O contacto com a área do silenciador pode
causar queimaduras sérias.
Gases de escape/aquecimento podem incendiar
combustíveis, estruturas ou danificar tanques de
combustíveis, causando incêndios.
• NÃO toque nas partes quentes e EVITE os gases da exaustão.
• Deixe o equipamento esfriar antes de tocá-lo.
• Deixe pelo menos 1,5 m de folga em todas as laterais da
lavadora de pressão, incluindo a parte superior.
Page 92

Como Desligar a sua Lavadora de Pressão
1. Solte o gatilho do canhão do spray e deixe o motor
desocupado durante dois minutos.
2. Mova o regulador de pressão para a posição LENTO
, em seguida, para a posição PARAR .
3. Aponte o canhão SEMPRE para uma direção segura,
pressione o botão vermelho e aperte o gatilho do
canhão do spray para liberar a água com alta pressão.
IMPORTANTE: O canhão do spray prende água sob alta
pressão, inclusive quando o motor está parado e a água está
fechada.
Como Usar o Bico Ajustável
Agora, você deve saber como DAR PARTIDA e PARAR a
lavadora de pressão. As informações nesta seção lhe
descreverão como ajustar o padrão do spray e como aplicar
detergentes específicos na lavadora de pressão.
1. Deslize o bico para trás (A) para obter alta pressão.
Deslize o bico para a frente (B) para obter o modo de
baixa pressão.
2. Aponte o bico para baixo em direção a uma superfície
firme e pressione o acionador para testar a forma do spray.
3. A torção do bico ajusta a forma do spray de estreita (D)
para em leque (C).
Dicas de Uso
• Para uma limpeza mais eficiente, mantenha o bico de
pulverização 20 a 61 cm longe da superfície de limpeza.
• Se você aproximar demais o bico do spray,
especialmente ao usar o modo alta pressão, poderá
danificar a superfície que está sendo limpa.
• NÃO se aproxime mais de 15 cm ao limpar pneus de
automóveis.
Aplicação de Detergente
Para aplicar detergente, siga estas etapas:
1. Verifique o uso do bico ajustável.
2. Prepare a solução de detergente conforme exigido pelo
fabricante.
3. Instale pequenas terminações de filtro de tubos para
sifonar detergente no contêiner de detergente.
NOTA: Garanta que o filtro fique completamente submerso
no detergente, enquanto o detergente estiver sendo aplicado.
14 BRIGGSandSTRATTON.COM
ATENÇÃO
O fluxo de água a alta pressão que este
equipamento produz pode perfurar a pele e seus
tecidos subjacentes, ocasionando sérios danos e
possível amputação.
A pistola de pulverização retém água em alta
pressão mesmo quando o motor está parado e a
água está desligada, o que pode causar ferimentos.
• Mantenha a mangueira de alta pressão conectada à bomba e à
pistola de pulverização enquanto o sistema estiver sendo
pressurizado.
• Aponte o canhão do spray SEMPRE para uma direção segura,
pressione o botão vermelho e aperte o gatilho do canhão do
spray para liberar a alta pressão, todas as vezes que o motor for
parado.
A
B
C
D
ATENÇÃO
O fluxo de água a alta pressão que este
equipamento produz pode perfurar a pele e seus
tecidos subjacentes, ocasionando sérios danos e
possível amputação.
• NUNCA ajuste o padrão do spray ao executar o spray.
• NUNCA coloque as mãos na frente do bico, para ajustar o
padrão do spray.
CUIDADO
Produtos químicos podem causar ferimentos corporais
e/ou danos da propriedade.
• NUNCA use líquido cáustico com a lavadora de pressão.
• Use SOMENTE detergentes/sabões seguros em Lavadoras de
Pressão. Siga as instruções dos fabricantes.
AVISO
O contacto com o silenciador quente pode danificar o tubo
para sifonar detergente.
• Ao inserir o filtro na garrafa da solução detergente, posicione o
tubo de modo a evitar que ele encoste inadvertidamente no
silenciador quente.
Page 93

4. Deslize-o para frente para obter o modo de baixa
pressão. NÃO é possível aplicar detergente com o bico
na posição de alta pressão.
5. Garanta que a mangueira esteja conectada ao ponto de
entrada de água. Verifique se a mangueira de alta
pressão está conectada ao canhão do spray e à bomba.
Abra a água.
6. Dê partida no motor, seguindo as instruções descritas
em Como Dar Partida na Lavadora de Pressão.
7. Aplique o detergente em uma superfície seca, iniciando
na parte inferior da área a ser lavada e trabalhando para
cima, com movimentos longos, iguais e superpostos.
8. Deixe o detergente saturar a superfície de 3 a 5
minutos antes de lavar e enxaguar. Reaplique conforme
necessário para evitar que a superfície seque. Não
deixe o detergente secar (evita riscos).
IMPORTANTE: Você deve lavar o sistema sifonado do
detergente após o uso, colocando o filtro em um balde com
água limpa, em seguida fazer a lavadora de pressão
funcionar em baixa pressão durante 1-2 minutos.
Enxágüe com a Lavadora de Pressão
Para enxágüe:
1. Para obter alta pressão, puxe o bico para trás, aperte o
acionador e aguarde a limpeza pelo detergente.
NOTA: Você também pode para o fluxo de detergente,
simplesmente removendo o tubo do sifão de detergente da
garrafa.
2. Mantenha o canhão do spray a uma distância segura da
área onde você planeja usar o spray.
3. Aplique a pulverização a alta pressão em uma área
pequena; em seguida, verifique se houve danos na
superfície. Se não houver nenhum dano, considera-se
que o processo está correto e o enxágüe pode continuar.
4. O enxágüe deve ser realizado de cima para baixo, com
movimentos sobrepostos, repetindo a ação utilizada
para limpeza.
Limpar o Tubo do Sifão do Detergente
Se você usou o tubo do sifão do detergente, você deve
limpá-lo com água corrente limpa antes de parar o motor.
1. Coloque o filtro/tubo do sifão do detergente em um
balde com água limpa.
2. Deslize o bico para a frente para obter o modo de baixa
pressão.
3. Enxágüe por 1 a 2 minutos.
4. Desligue o motor seguindo as instruções descritas em
Como Parar a Lavadora de Pressão e feche a
alimentação de água.
5. Aponte o canhão SEMPRE para uma direção segura,
pressione o botão vermelho e aperte o gatilho do
canhão do spray para liberar a água com alta pressão.
IMPORTANTE: A pistola de pulverização retém água em alta
pressão mesmo quando o motor está parado e a água está
desconectada.
Sistema Automático de Esfriamento (alívio
térmico)
Ao operar o motor da lavadora de pressão por 3 a 5
minutos, sem apertar o acionador na pistola de pulverização,
a água de circulação na bomba pode alcançar temperaturas
superiores a 52°C (125°F). O sistema realiza o esfriamento
da bomba descarregando a água aquecida no chão.
15
AVISO
As mangueiras devem estar todas conectadas, antes de
dar partida no motor.
• Dar a partida no motor sem que todas as mangueiras estejam
conectadas e sem que água esteja ABERTA, danificará a bomba.
• Danos no equipamento que resultarem de falhas em obedecer
estas instruções anularão a garantia.
ATENÇÃO
O coice do canhão do spray pode derrubá-lo.
• Opere esta unidade em uma superfície estável.
• Seja extremamente cuidadoso se precisar usar a lavadora de
pressão em uma escada, andaime ou qualquer outro local
instável.
• Segure firmemente a pistola de pulverização com as duas mãos
ao utilizar pulverização em alta pressão para evitar ferimentos
quando a pistola quicar.
ATENÇÃO
O fluxo de água a alta pressão que este
equipamento produz pode perfurar a pele e seus
tecidos subjacentes, ocasionando sérios danos e
possível amputação.
A pistola de pulverização retém água em alta
pressão mesmo quando o motor está parado e a
água está desligada, o que pode causar ferimentos.
• Mantenha a mangueira de alta pressão conectada à bomba e à
pistola de pulverização enquanto o sistema estiver sendo
pressurizado.
• Aponte o canhão do spray SEMPRE para uma direção segura,
pressione o botão vermelho e aperte o gatilho do canhão do
spray para liberar a alta pressão, todas as vezes que o motor for
parado.
Page 94

Manutenção
Cronograma de Manutenção
Siga os intervalos horários ou calendários, o que ocorrer
primeiro. Uma manutenção com maior freqüência é
necessária em condições operacionais adversas, observadas
a seguir.
1
Limpar se estiver entupido Substituir se estiver perfurado ou torto.
2
Fazer a manutenção com mais freqüência em condições de sujeira ou de poeira.
Recomendações Gerais
A manutenção periódica melhorará o desempenho e
estenderá a vida útil da lavadora de pressão. Procure
qualquer representante qualificado para manutenção.
A garantia da lavadora de pressão não cobre itens que
tenham sido submetidos ao abuso ou negligência do
operador. Para receber o valor total da garantia, o operador
deve manter a lavadora de pressão conforme instruído neste
manual, inclusive armazenagem apropriada como está
detalhado em Armazenagem de Inverno e Armazenagem de
Longo Prazo.
NOTA: Se você tiver alguma dúvida sobre como trocar
componentes de sua lavadora a pressão, visite nosso
website: BRIGGSandSTRATTON.COM.
Alguns ajustes periódicos serão necessários para realizar a
manutenção adequada da sua lavadora de pressão.
Todas as manutenções e ajustes devem ser feitos pelo
menos uma vez em cada estação climática. Siga os
requisitos na tabela do Cronograma de Manutenção acima.
NOTA: Uma vez por ano, deve-se limpar ou substituir a vela
de ignição, limpar ou substituir o filtro de ar, e verificar se há
desgaste no canhão do spray e no subconjunto da extensão
do bico. Uma nova vela de ignição e um filtro de ar limpo
garantem a mistura correta de combustível e ar e ajudam o
motor a funcionar melhor, durando muito mais tempo.
Bombear Óleo
NÃO tente nenhuma manutenção do óleo nesta bomba. A
bomba é pré-lubrificada e selada de fábrica, e não necessita de
nenhuma manutenção adicional durante a vida útil da bomba.
Controle de Emissões
A manutenção, a substituição ou o reparo dos dispositivos
e sistemas de controle de emissões pode ser executado
por qualquer estabelecimento ou pessoa que faça o reparo
de motores. No entanto, para obter serviço “gratuito” de
controle de emissões, o trabalho deve ser executado por um
representante autorizado pela fábrica. Consulte a Garantia de
Emissões.
Antes de Cada Uso
1. Verifique o nível de óleo do motor.
2. Limpar detritos.
3. Verifique se houve danos à tela da entrada de água.
4. Verifique se há vazamentos na mangueira de alta
pressão.
5. Verifique se houve danos ao filtro e ao tubo de
sifonagem de detergente.
6. Verifique se há vazamentos no conjunto pistola de
pulverização e bicos ajustáveis.
7. Enxágüe a mangueira de jardim para lavar os detritos
antes de conectá-la à lavadora de pressão.
Manutenção da Lavadora de Pressão
Limpar Detritos
Diariamente, ou antes do uso, limpar detritos acumulados de
sistemas de limpeza. Manter acoplamentos, molas e
controles limpos. Mantenha a área ao redor e atrás do
silenciador livre de quaisquer resíduos combustíveis.
Inspecione as aberturas de resfriamento a ar e as aberturas
da lavadora de pressão. Essas aberturas devem ser mantidas
limpas e desobstruídas.
As peças do sistema de limpeza devem ser mantidas limpas
para diminuir o risco de superaquecimento e ignição de
resíduos acumulados.
• Utilize um pano úmido para limpar as superfícies externas.
• Use uma escova suave para soltar detritos endurecidos
em sujeiras, no óleo, etc.
• Utilize um aspirador para recolher sujeira solta e resíduos.
16 BRIGGSandSTRATTON.COM
Primeiras 5 Horas
• Trocar o óleo do motor
A cada 8 Horas ou Diariamente
• Verificar o visor do ponto de entrada da água limpa
1
• Verificar a mangueira de alta pressão
• Verificar a mangueira/filtro do sifão do detergente
• Verificar se há vazamentos no canhão e no
subconjunto do spray
• Limpar os detritos
• Verificar o nível do óleo do motor
A cada 25 Horas ou Anualmente
• Fazer a manutenção do purificador do ar do motor
2
A cada 50 Horas ou Anualmente
• Trocar o óleo do motor
2
• Fazer a manutenção do delimitador de faísca
A cada 100 Horas ou Anualmente
• Fazer a manutenção da vela de ignição
• Limpar o sistema de resfriamento
2
AVISO
Tratamento inadequado da lavadora de pressão pode
danificá-la e encurtar a sua vida.
• NÃO insira nenhum objeto através das aberturas de resfriamento.
Page 95

17
Verifique e Limpe a Tela de Entrada
Examine a tela na entrada de água. Limpe a tela se estiver
entupida ou a substitua se estiver danificada.
Verifique a Mangueira de Alta Pressão
A mangueira de alta pressão pode desenvolver vazamentos
devido ao desgaste, dobras ou uso indevido. Inspecione a
mangueira sempre que for usá-la. Verifique a presença de
cortes, vazamentos, desgastes ou abaulamento do
revestimento, dano ou movimento de junções. Se alguma
destas condições existir, substitua a mangueira imediatamente.
Verifique o Tubo do Sifão do Detergente
Examine o filtro no tubo do detergente e limpe-o se estiver
entupido. O tubo deve estar instalado bem firmemente no
encaixe rugoso. Verifique se o tubo tem vazamentos ou
desgastes. Substitua o filtro ou o tubo se algum deles estiver
danificado.
Verifique o Canhão do Spray
Examine a conexão da mangueira ao canhão do spray e
garanta que está firme. Teste o gatilho pressionando o botão
vermelho e garanta que o gatilho “salta de volta” no lugar,
quando é liberado. O gatilho não deve funcionar ao ser
apertado, no caso do botão vermelho não estar pressionado.
Substitua o canhão do spray imediatamente se falhar em
qualquer destes testes.
Manutenção do Bico
Uma sensação de pulsar sentida ao apertar o acionador da
pistola de pulverização pode ser causada por excesso de
pressão na bomba. A principal causa do excesso de pressão
na bomba resulta de um orifício entupido ou obstruído por
materiais estranhos, como sujeira, etc. Para corrigir o
problema, limpe imediatamente o orifício utilizando as
ferramentas fornecidas com a lavadora de pressão, seguindo
estas instruções:
1. Desligue o motor e o suprimento de água.
2. Aponte o canhão do spray SEMPRE para uma direção
segura, pressione o botão vermelho e aperte o gatilho
do canhão, para liberar a alta pressão retida.
3. Remova a extensão do bico do canhão do spray.
4. Torça o bico no sentido horário para a posição de
corrente. Usando uma chave Allen de 2mm, remova o
orifício (A) da ponta da extensão do bico.
5. Use um arame (ou um clip de papel) para soltar qualquer
material que esteja entupindo or tapando o orifício (B).
6. Use uma mangueira de jardim para remover outros
detritos por retrolavagem com água através da
extensão do bico. Faça a retrolavagem durante 30 a 60
segundos. Gire a extensão do bico ajustável para spray
de jato e mova o bico de baixo para cima durante a
lavagem.
7. Reinstale o orifício na extensão do bico. NÃO aperte
demais o orifício com a chave Allen.
8. Reconecte a extensão do bico na pistola de pulverização.
9. Garanta que a mangueira esteja conectada ao ponto de
entrada de água. Verifique se a mangueira de alta
pressão está conectada ao canhão do spray e à bomba.
Abra a água.
10. Dê partida no motor, seguindo as instruções descritas
em Como Dar Partida na Lavadora de Pressão.
11. Teste a lavadora de pressão usando o bico nas
posições alta e baixa.
ATENÇÃO
O fluxo de água a alta pressão que este
equipamento produz pode perfurar a pele e seus
tecidos subjacentes, ocasionando sérios danos e
possível amputação.
• NUNCA conserte a mangueira de alta pressão. Substitua a
mesma.
• A capacidade nominal da mangueira substituta DEVE ser
superior à pressão máxima nominal da unidade.
B
A
ATENÇÃO
O fluxo de água a alta pressão que este
equipamento produz pode perfurar a pele e seus
tecidos subjacentes, ocasionando sérios danos e
possível amputação.
A pistola de pulverização retém água em alta
pressão mesmo quando o motor está parado e a
água está desligada, o que pode causar ferimentos.
• Mantenha a mangueira de alta pressão conectada à bomba e à
pistola de pulverização enquanto o sistema estiver sendo
pressurizado.
• Aponte o canhão do spray SEMPRE para uma direção segura,
pressione o botão vermelho e aperte o gatilho do canhão do
spray para liberar a alta pressão, todas as vezes que o motor for
parado.
Page 96

Manutenção do Anel de Vedação
Os anéis de vedação mantêm firmes e livres de vazamentos
as conexões das mangueiras e da pistola de pulverização.
Devido à operação normal da lavadora de pressão, eles
podem tornar-se desgastados ou danificados.
A sua lavadora de pressão está equipada com um Kit de
manutenção de anéis de vedação que inclui anéis de vedação
de reposição, arruela de borracha e filtro de entrada de água.
Consulte o folheto de instruções fornecido com o kit para fazer
a manutenção dos anéis de vedação da sua unidade. Observe
que nem todas as peças do kit serão usadas na unidade.
Para remover um anel de vedação gasto ou danificado; use
uma pequena chave de fenda de ponta chata para alcançar a
parte de baixo do anel de vedação e forçá-lo para fora.
Manutenção do Motor
Óleo
Recomendações sobre o Óleo
Recomendamos o usar óleos Certificados e Garantidos pela
Briggs & Stratton. Outros óleos detergentes de alta
qualidade são aceitáveis se classificados para serviço SF,
SG, SH, SJ ou superiores. NÃO use aditivos especiais.
As temperaturas externas determinam a viscosidade
apropriada para o motor. Use a tabela para selecionar a melhor
viscosidade conforme a faixa de temperatura externa prevista.
* Abaixo de 40°F (4°C) o uso de SAE 30 resulta em dificuldades de
partida.
** Acima de 80°F (27°C) o uso de 10W30 pode aumentar o
consumo de óleo. Verifique o nível do óleo com mais freqüência.
NOTA: Óleos sintéticos que atendem ILSAC GF-2,
com marca de certificação API e símbolo de serviço
API com “CONSERVAÇÃO DE ENERGIA SJ/CF” ou
mais alto, são óleos aceitáveis em todas as
temperaturas. O uso de óleos sintéticos não altera os
intervalos de mudança do óleo.
Verificar o Nível do Óleo
O nível do óleo deve ser verificado antes de cada utilização
ou no mínimo a cada 8 horas de funcionamento. Mantenha o
nível do óleo.
1. Garanta que a lavadora de pressão está sobre uma
superfície nivelada.
2. Remova a vareta de nível e limpe-a com pano limpo.
Substitua e aperte a vareta de nível. Remova e verifique
o nível de óleo.
3. Verifique se o óleo está na marca de “Full” (Cheio) na
vareta de nível. Substitua e aperte a vareta de nível.
Adicionar Óleo do Motor
1. Garanta que a lavadora de pressão está sobre uma
superfície nivelada.
2. Verifique o nível do óleo, conforme descrito em
Verificar o Nível do Óleo.
3. Se necessário, despeje óleo lentamente na abertura do
depósito de óleo, até a marca de “Full” (Cheio) na
vareta de nível. NÃO encha demais.
4. Substitua e aperte a vareta de nível.
18 BRIGGSandSTRATTON.COM
ATENÇÃO
O fluxo de água a alta pressão que este
equipamento produz pode perfurar a pele e seus
tecidos subjacentes, ocasionando sérios danos e
possível amputação.
• NUNCA conserte conexões que estão vazando com nenhum tipo
de vedante. Substitua o anel de vedação ou a vedação.
ATENÇÃO
O faiscamento involuntário pode provocar
incêndio ou choque elétrico.
AO AJUSTAR OU REALIZAR REPAROS EM SUA LAVADORA DE
PRESSÃO
• Desconecte o cabo da vela e mantenha-o em local onde não
possa entrar em contato com a vela.
AO TESTAR A VELA DO MOTOR
• Use um testador aprovado para vela de motor.
• NÃO verifique se há centelha se a vela tiver sido removida.
AVISO
Encher óleo demais pode fazer com que o motor não dê
partida ou que seja difícil de dar partida.
• NÃO encha demais.
• Se o óleo superar a marca de FULL (CHEIO) da vareta de nível,
drene um pouco de óleo até que o nível baixe para a marca de
FULL (CHEIO).
Page 97

19
Trocar o Óleo do Motor
Troque o óleo do motor após as primeiras 5 horas e a cada
50 horas daí em diante. Se a lavadora de pressão estiver em
uso sob condições extremamente sujas ou poeirentas, ou
em clima extremamente quente, troque o óleo com maior
freqüência.
MANTENHA FORA DO ALCANCE DE CRIANÇAS.
NÃO POLUA. CONSERVE OS RECURSOS
AMBIENTAIS. DEVOLVA O ÓLEO USADO AOS
CENTROS DE COLETA.
Troque o óleo enquanto o motor ainda está quente, como
descrito a seguir:
1. Esvazie o tanque de combustível deixando a lavadora
de pressão funcionar até que o tanque esvazie.
2. Desconecte o cabo da vela de ignição e mantenha-o
longe da vela de ignição.
3. Limpe a área ao redor da alimentação de óleo, remova
a tampa/vareta de nível do ponto de enchimento de
óleo. Limpe a vareta de nível.
4. Incline a lavadora de pressão para esvaziar o óleo do
depósito de óleo em um recipiente apropriado,
assegurando–se de que inclina a unidade para longe da
vela de ignição. Quando o cárter estiver vazio, retorne a
lavadora de pressão para a posição vertical.
5. Lentamente, despeje o óleo recomendado (cerca de 20
onças (0,6 l)) na abertura do depósito de óleo. Aguarde
até o óleo assentar. Encha até a marca “Full” (Cheio)
na vareta de nível.
6. Limpe a vareta de nível cada vez for verificar o óleo.
NÃO encha demais.
7. Substitua e aperte a vareta de nível.
8. Limpe o restante do óleo.
9. Reconecte o cabo da vela de ignição.
Fazer Manutenção do Purificador de Ar
O motor não funcionará adequadamente e pode ser
danificado se for colocado em funcionamento com um
purificador de ar sujo.
Faça a manutenção do filtro de ar uma vez a cada 25 horas
de operação ou uma vez por ano, o que vencer primeiro.
Faça a manutenção com maior freqüência se funcionar em
condições sujas ou poeirentas.
Para fazer a manutenção do purificador de ar, siga estes
passos:
1. Remova o parafuso (A).
2. Cuidadosamente, remova o subconjunto do purificador
de ar para evitar que detritos caiam no carburador.
3. Desmonte o subconjunto do purificador de ar e limpe
todas as peças. Lave a espuma do purificador de ar (B)
em detergente líquido e água. Esprema para secar em
um pano limpo.
4. SATURE a espuma do purificador de ar no óleo de
motor e esprema em um pano limpo para remover o
excesso de óleo.
5. Reinstale uma espuma limpa ou nova no purificador de
ar na base (C).
6. Instale o purificador de ar firmemente no carburador
com um parafuso.
Fazer Manutenção da Vela da Ignição
Troque a vela da ignição cada 100 horas de funcionamento
ou uma vez ao ano, o que acontecer primeiro. Isto ajudará o
motor a dar partida mais suavemente e funcionar melhor.
1. Limpe a área ao redor da vela da ignição.
2. Remova e inspecione a vela de ignição.
3. Verifique a folga do eletrodo com um medidor laminar
e ajuste a folga da vela para 0,030 polegada (0,76 mm),
se necessário.
4. Substitua a vela de ignição se os eletrodos estiverem
salpicados, queimados ou a porcelana estiver trincada.
Use a vela de ignição recomendada. Consulte as
Especificações.
5. Instale a vela da ignição e aperte firmemente.
CUIDADO
Evite contacto prolongado ou repetido da pele com óleo
de motor usado.
• Demonstrou-se, em certos animais de laboratório, que óleo
usado causa câncer de pele.
• Lave todas as áreas expostas com água e sabão.
A
B
C
Page 98

Serviço de Limitação de Faísca
O motor não vem equipado de fábrica com um limitador de
faísca. Em algumas áreas, é ilegal operar um motor sem um
limitador de faísca. Verifique as leis e regulamentos locais.
Um retentor de fagulhas está disponível em sua assistência
técnica mais próxima. O limitador de faísca deve passar por
manutenção cada 50 horas, para manter-se funcionando
como projetado.
Se o motor esteve funcionando, o silenciador estará muito
quente. Deixe o silenciador esfriar, antes de começar a
manutenção no limitador de faísca.
• Remova a tela do limitador de faísca para limpeza e
inspeção.
• Substitua a tela se estiver danificada.
Sistema de Resfriamento de Ar
Com o tempo, detritos podem acumular nas lâminas de
resfriamento do cilindro que não podem ser vistos sem que
o motor esteja parcialmente desmontado. Por isto,
recomendamos que a limpeza do sistema de resfriamento
seja executada em um representante de serviço autorizado,
nos intervalos indicados (consulte o Cronograma de
Manutenção no início da seção de Manutenção). Igualmente
importante é manter a parte superior do motor livre de
resíduos. Consulte Limpar Detritos.
Após Cada Uso
Não se deve permitir que água permaneça na unidade
durante muito tempo. Sedimentos ou minerais podem
depositar-se nas peças da bomba e congelar a ação da
bomba. Siga estes procedimentos depois de cada utilização
da unidade:
1. Desligue o motor, feche a água, aponte o canhão para
uma direção segura, pressione o botão vermelho e
aperte o gatilho para aliviar a pressão presa, e deixe o
motor esfriar.
2. Desconecte a mangueira do canhão do spray e do
ponto de saída da alta pressão na bomba. Esvazie a
água da mangueira, do canhão do spray e da extensão
do bico. Use um pano de limpeza para limpar a
mangueira.
3. Esvazie a bomba de todos os líquidos bombeados,
acionando a alavanca de retração cerca de seis vezes.
Esta ação deve remover a maioria do líquido na bomba.
4. Guarde a unidade em uma área limpa, seca.
5. Se for guardá-la mais de 30 dias, consulte
Armazenagem de Longo Prazo, na página seguinte.
20 BRIGGSandSTRATTON.COM
Mantenha áreas dentro de linha pesada aclarar de escombros.
ATENÇÃO
A combustível e seus vapores são extremamente
inflamáveis e explosivos.
Fogo ou explosão pode causar queimaduras
sérias ou morte.
AO ARMAZENAR COMBUSTIVEL OU EQUIPAMENTO COM
COMBUSTÍVEL NO TANQUE
• Armazene longe de fogões, fornos, aquecedores de água,
secadoras de roupa ou qualquer outro equipamento que tenha
uma lâmpada piloto ou outra fonte de ignição porque podem
disparar a combustão dos vapores de combustível.
ATENÇÃO
O contacto com a área do silenciador pode
causar queimaduras sérias.
Gases de escape/aquecimento podem incendiar
combustíveis, estruturas ou danificar tanques de
combustíveis, causando incêndios.
• NÃO toque nas partes quentes e EVITE os gases da exaustão.
• Deixe o equipamento esfriar antes de tocá-lo.
• Deixe pelo menos 1,5 m de folga em todas as laterais da
lavadora de pressão, incluindo a parte superior.
ATENÇÃO
O fluxo de água a alta pressão que este
equipamento produz pode perfurar a pele e seus
tecidos subjacentes, ocasionando sérios danos e
possível amputação.
A pistola de pulverização retém água em alta
pressão mesmo quando o motor está parado e a
água está desligada, o que pode causar ferimentos.
• Mantenha a mangueira de alta pressão conectada à bomba e à
pistola de pulverização enquanto o sistema estiver sendo
pressurizado.
• Aponte o canhão do spray SEMPRE para uma direção segura,
pressione o botão vermelho e aperte o gatilho do canhão do spray
para liberar a alta pressão, todas as vezes que o motor for parado.
Page 99

21
Armazenagem de Inverno
Para proteger a unidade de temperaturas congelantes:
1. Siga os passos de 1-3 na seção anterior, Depois de
Cada Uso.
2. Utilize o PumpSaver (Protetor de Bomba), Modelo
6039, para fazer o tratamento da bomba. Isto minimiza
o dano devido a congelamento e lubrifica os pistões e
vedações.
3. Se o PumpSaver (Protetor de Bomba) não estiver
disponível, conecte uma seção de 3 pés (92 cm) de
mangueira ao adaptador do ponto de entrada da água.
Despeje anticongelante RV (anticongelante sem álcool)
na mangueira. Puxe a alavanca de retração duas vezes.
Desconecte a mangueira de 3 pés (92 cm).
4. Guarde a unidade em uma área limpa, seca.
Armazenagem de Longo Prazo
Se a lavadora de pressão não precisar ser usada durante
mais de 30 dias, deve-se preparar o motor e a bomba para a
armazenagem de longo prazo.
Proteger o Sistema de Combustível
Aditivo do Combustível:
O combustível pode alterar quando guardado por mais de 30
dias. O combustível alterado causa depósitos ácidos e de
goma no sistema de combustível ou em partes essenciais do
carburador. Para manter o combustível novo, use o
estabilizador para combustível da Briggs & Stratton FRESH
START®, disponível como um aditivo líquido ou um
cartucho de gotas concentradas.
Não há necessidade de drenar a gasolina do motor se um
estabilizador de combustível for adicionado, de acordo com
as instruções. Ligue o motor durante 2 minutos para o
estabilizador circular pelo sistema de combustível. O motor e
o combustível podem, então, ser guardados até 24 meses.
Se a gasolina no motor não for tratada com um estabilizador
de combustível, ela deve ser drenada para um contêiner
aprovado. Faça o motor funcionar até ele parar por falta de
combustível. O use de um estabilizador de combustível no
contêiner de armazenagem é recomendado para manter o
frescor.
Trocar o Óleo
Enquanto o motor ainda está quente, esvazie o óleo do
cárter. Utilize óleo da classificação recomendada. Consulte
Trocar o Óleo do Motor em Manutenção do Motor.
Furo do Cilindro de Óleo
• Remova a vela de ignição e despeje cerca de 1/2 onça
(15 ml) de óleo de motor limpo no cilindro.
• Instale a vela de ignição e puxe a maçaneta do starter
para distribuir o óleo.
Protegendo a Bomba
Para proteger a bomba de danos causados por depósitos
minerais ou por causa de congelamento, use o PumpSaver
(Protetor de Bomba), Modelo 6039, para fazer o tratamento
da bomba. Isto previne danos de congelamento e lubrifica os
pistões e vedações.
NOTA: O PumpSaver (Protetor de Bomba) está disponível
como um acessório opcional. Ele não vem junto com a
lavadora de pressão. Entre em contacto com a assistência
técnica mais próxima para adquirir o PumpSaver (Protetor
de Bomba).
Para usar o PumpSaver (Protetor de Bomba), garanta que a
lavadora de pressão esteja desligada e desconectada da
torneira de água. Leia e siga todas as instruções e
advertências fornecidas no contêiner do PumpSaver
(Protetor de Bomba).
Outras Dicas de Armazenagem
1. NÃO armazene combustível de uma estação climática
para outra, a menos que ele tenha sido tratado
conforme descrito em Proteja o Sistema de
Combustível.
2. Substitua o contêiner de combustível, se ele começar a
enferrujar. Ferrugem e/ou sujeira no combustível
podem causar problemas, se for usado nesta unidade.
3. Cubra a unidade com uma capa de proteção adequada
que não retenha umidade.
4. Guarde a unidade em uma área limpa e seca.
AVISO
A unidade deve ser protegida de temperaturas congelantes.
• Caso isto não seja feito, a bomba será danificada
permanentemente e torná-la inoperante.
• Danos devido ao congelamento não estão cobertos pela garantia.
ATENÇÃO
Capas para armazenagem podem ser inflamáveis.
• NÃO coloque uma capa para armazenagem sobre uma lavadora
de pressão que esteja quente.
• Deixe o equipamento esfriar durante um tempo suficiente, antes
de colocar a capa sobre o equipamento.
AVISO
A unidade deve ser protegida de temperaturas congelantes.
• Caso isto não seja feito, a bomba será danificada
permanentemente e torná-la inoperante.
• Danos devido ao congelamento não estão cobertos pela garantia.
Page 100

Solução de Problemas
22 BRIGGSandSTRATTON.COM
Problema Causa Correção
A bomba tem os seguintes
problemas: falha em produzir
pressão, pressão errática,
vibração, perda de pressão, baixo
volume de água.
1. Bico no modo de baixa pressão.
2. A entrada de água está bloqueada.
3. Fonte inadequada de água.
4. A mangueira de entrada está
dobrada ou vazando.
5. Filtro da mangueira de entrada
entupido.
6. A temperatura do suprimento de
água é superior a 38°C.
7. A mangueira de alta pressão está
bloqueada ou vazando.
8. A pistola está vazando.
9. O orifício está obstruído.
10. A bomba está defeituosa.
1. Puxe o bico para trás para obter o
modo de alta pressão.
2. Limpe a entrada.
3. Forneça um fluxo adequado de água.
4. Endireite a mangueira de entrada,
conserte o vazamento.
5. Verifique e limpe o filtro da mangueira
de entrada.
6. Abasteça com água mais fria.
7. Limpe bloqueios na mangueira de
saída.
8. Substitua a pistola ou os anéis de
vedação.
9. Limpe o orifício.
10. Entre em contacto com a unidade de
serviço local.
Falha do detergente em misturar se com o spray.
1. O tubo de sifonagem de detergente
não está submerso.
2. O tubo do sifão detergente/filtro está
entupido ou trincado.
3. Bico no modo de alta pressão.
1. Insira o tubo de sifonagem no
detergente.
2. Limpe ou substitua o filtro/tubo do
sifão do detergente.
3. Empurre o bico para frente para obter
o modo de baixa pressão.
O motor funciona sem carga mas
"vacila" quando se adiciona carga.
Velocidade do motor muito baixa.
Mova o controle do regulador de pressão
para a posição RÁPIDO. Se o motor ainda
“engasga”, entre em contacto com a
unidade de serviço local.
O motor não dá partida; ou dá
partida e funciona mal.
1. Nível de óleo baixo.
2. Sujeira no purificador de ar.
3. Sem gasolina.
4. Combustível envelhecido.
5. Cabo da vela de ignição não
conectado à vela de ignição.
6. Vela de ignição ruim.
7. Água no combustível.
8. Mistura de combustível
excessivamente rica.
1. Encha o cárter até o nível correto.
2. Limpe ou substitua o purificador de ar.
3. Encha o tanque de combustível.
4. Drene o tanque de combustível; encha
com combustível novo.
5. Conecte o cabo da vela de ignição.
6. Substitua a vela de ignição.
7. Drene o tanque de combustível; encha
com combustível novo.
8. Entre em contacto com a unidade de
serviço local.
O motor desliga durante o
funcionamento.
Sem combustível. Reabasteça o tanque.
O motor está sem potência. Filtro de ar sujo. Substitua o filtro de ar.
 Loading...