

Brickcom PH-100Ah Kit-A, PH-100Ah Kit-B, PH-100Ah-01, VB-03 Installation Manual

Easy Installation Guide
Hydra Series
Megapixel Extendible Network Camera
PH-100Ah Kit Series
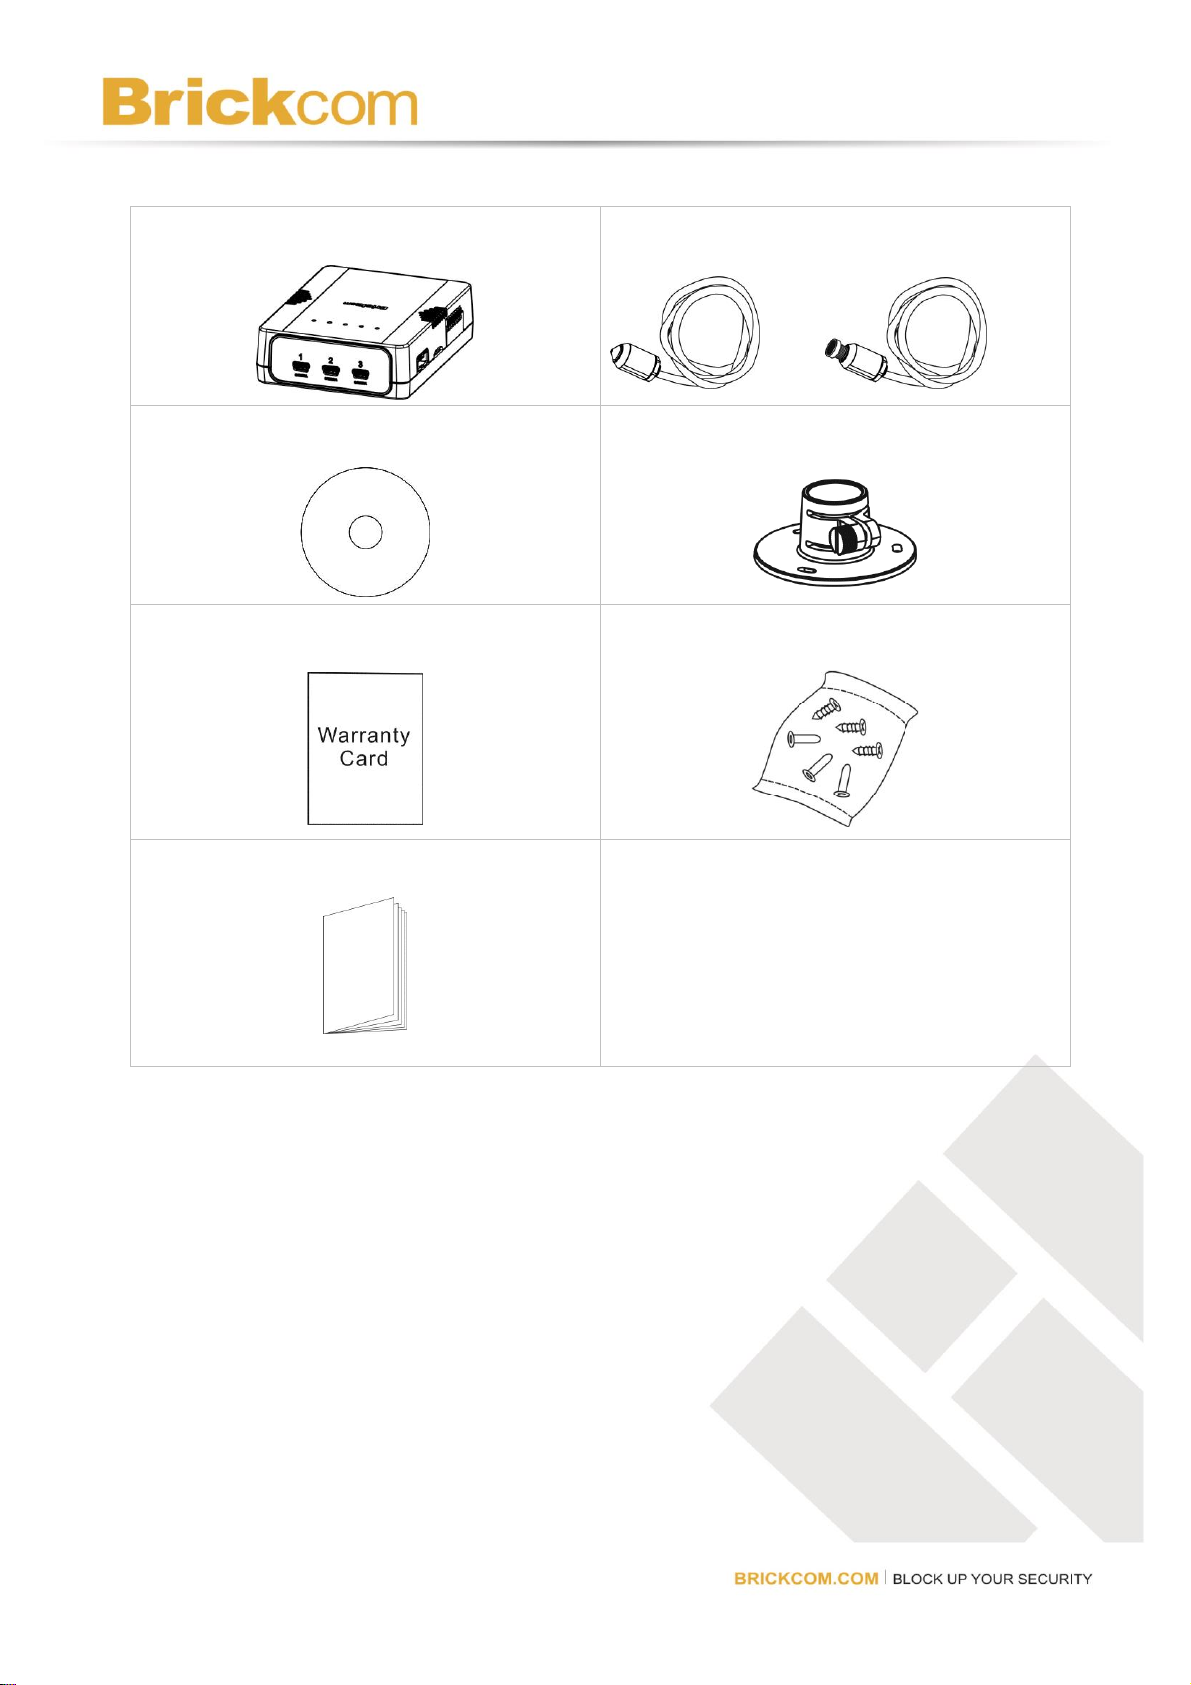
a. Video Box (VB-03)
b. Network Camera (Optional) *
c. Product CD
d. Mounting Bracket
e. Warranty Card
f. Screw Bag
g. Easy Installation Guide
PH-100Ah-01
PH-100Ah-00
Package Contents
(*) The actual device and quantity vary with the product’s configuration.
- 1 -
Router/ Computer/ NVR/ Switch
PoE Switch
PoE Injector
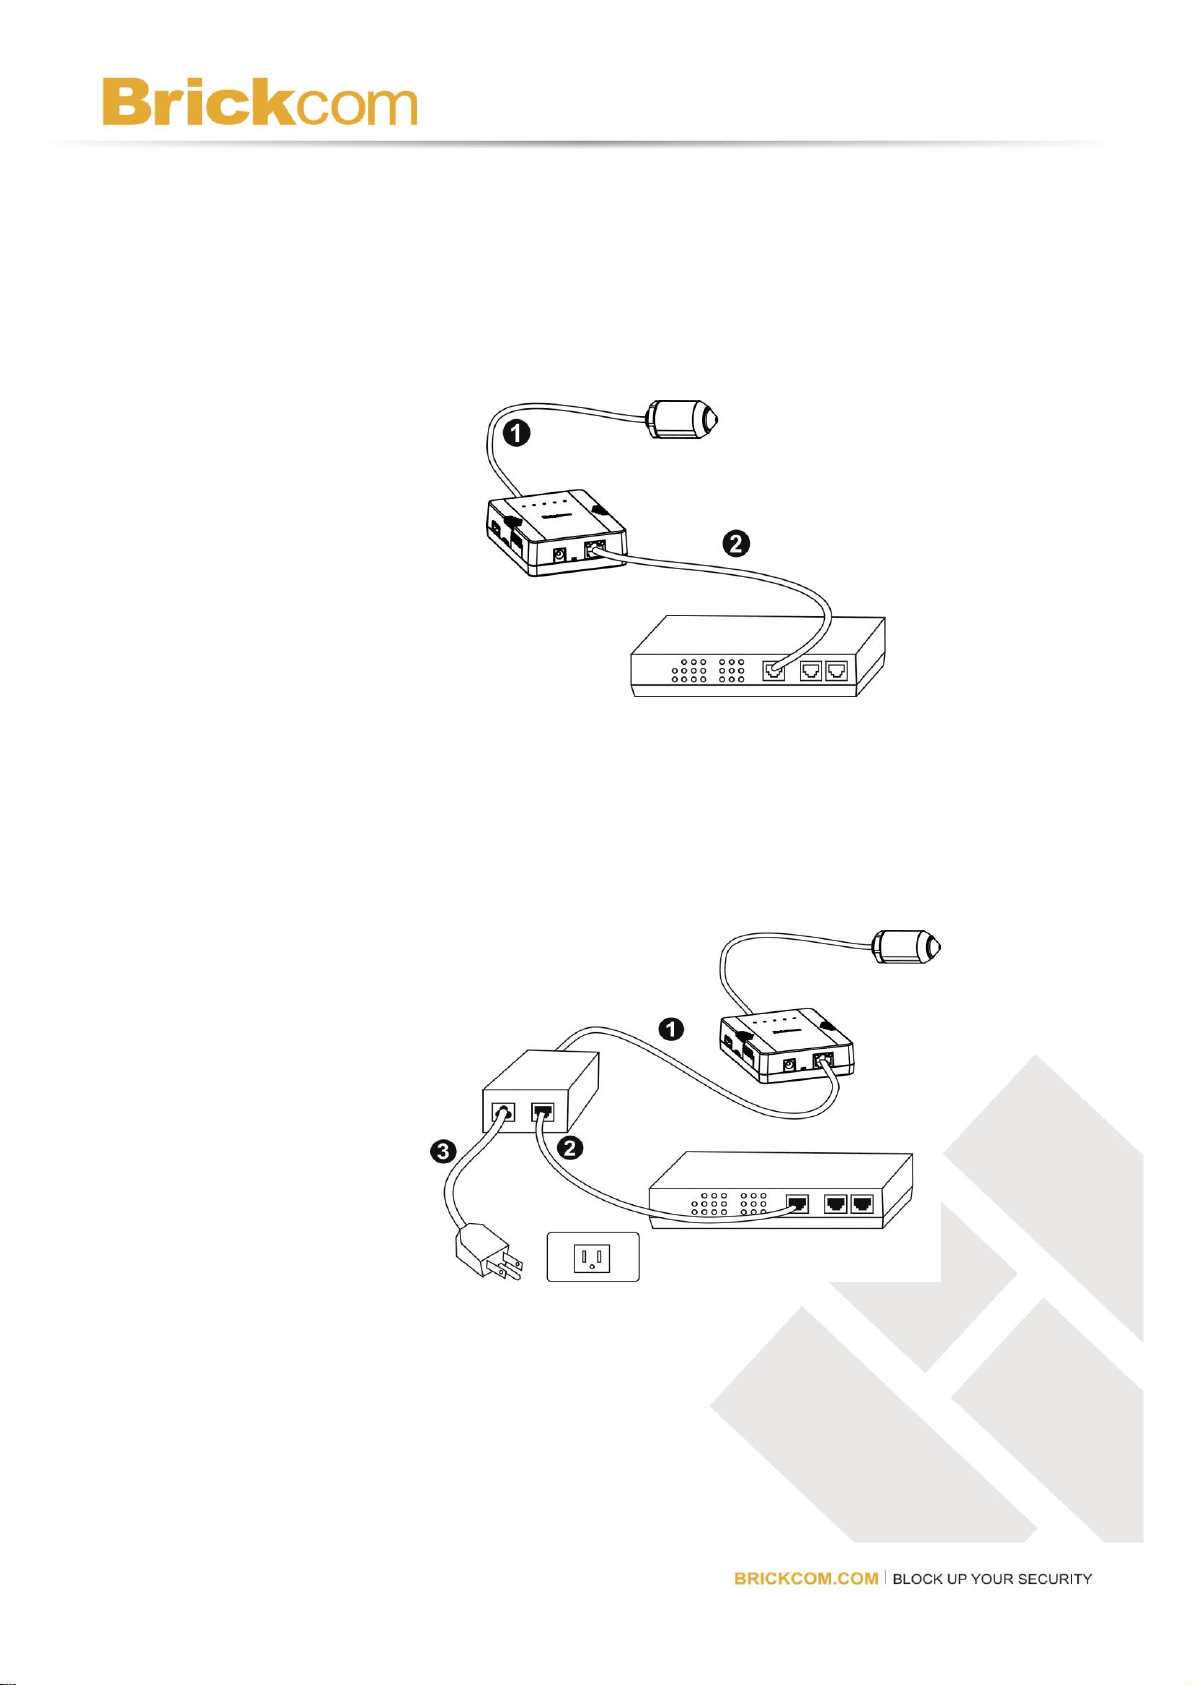
Hardware Installation
Step 1. Power and Ethernet Connection
a. Power on the camera with PoE switch:
Use an Ethernet cable to connect VB-03 to the PoE switch.
b. Power on the camera with PoE injector:
i. Use an Ethernet cable to connect VB-03 to PoE injector.
ii. Use an Ethernet cable to connect the PoE injector to the non-PoE switch.
iii. Connect the PoE injector to a power outlet.
- 2 -
Router/ Computer/ NVR/ Switch
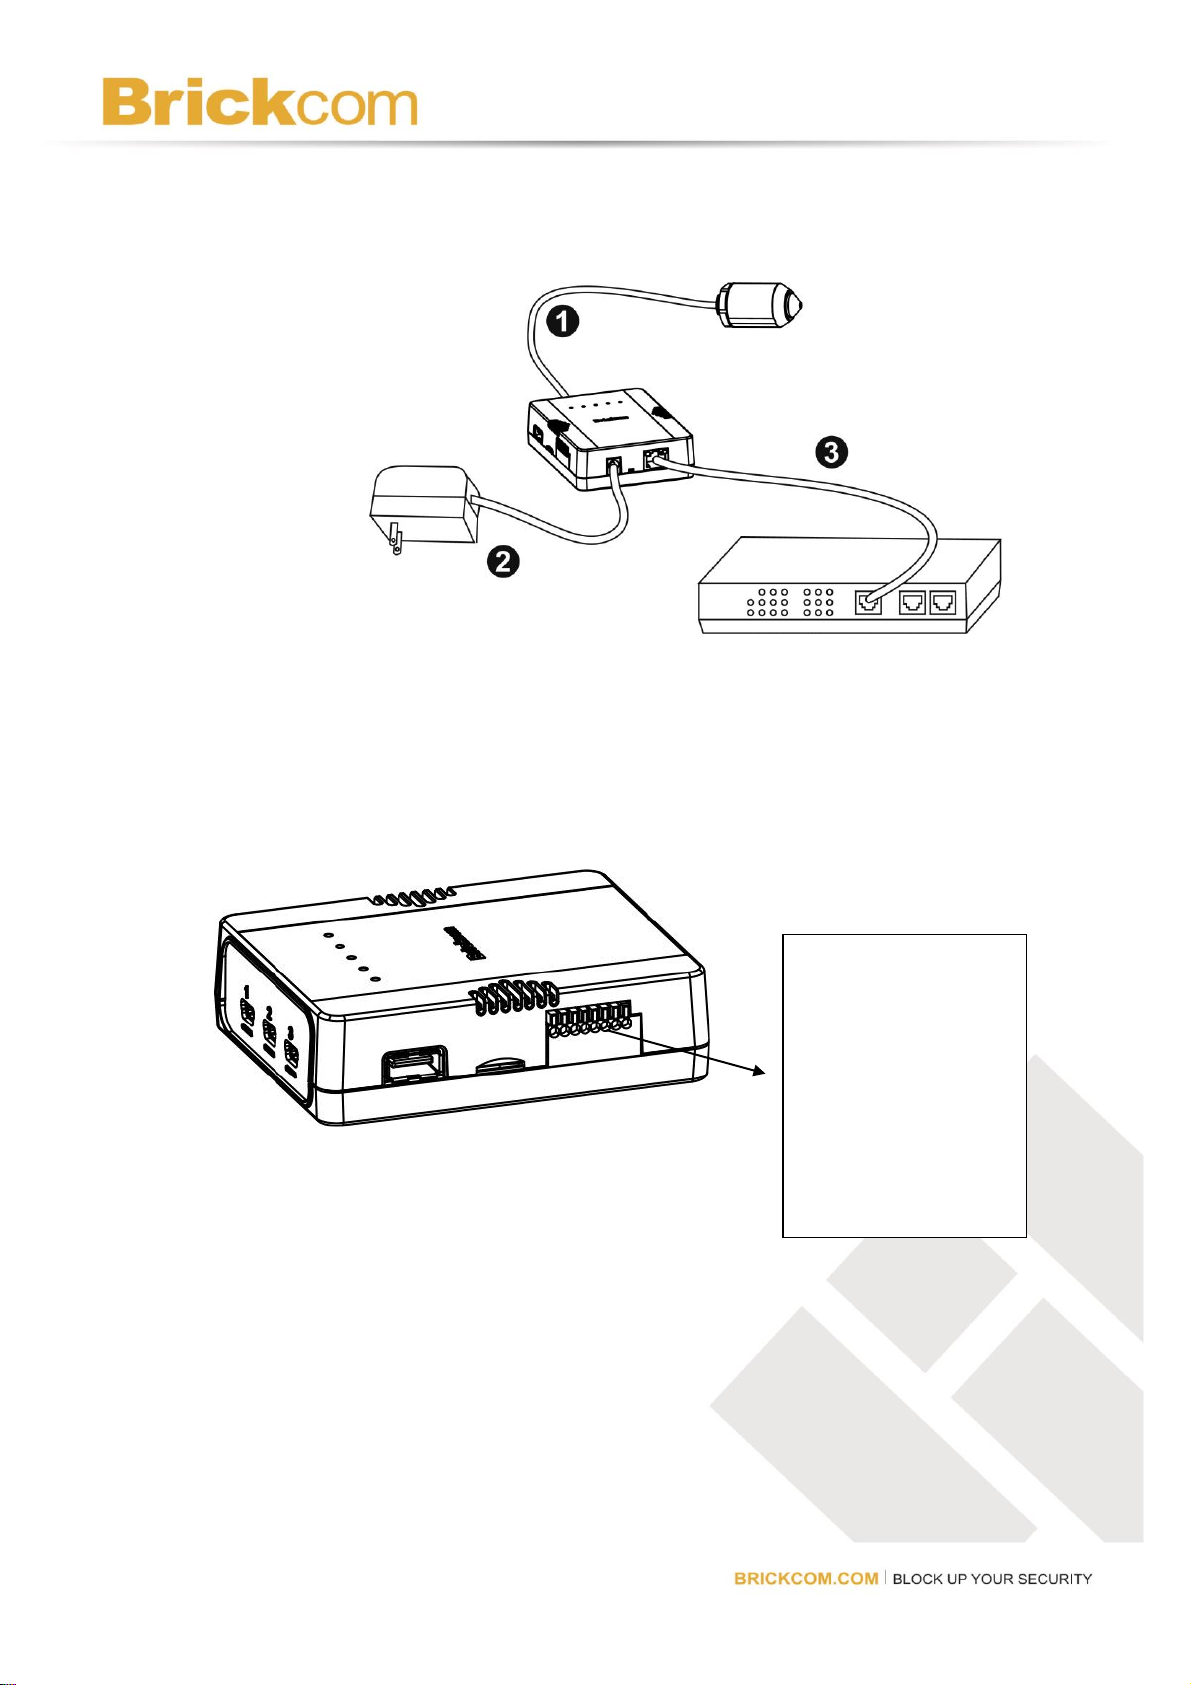
1. Ground
2. Digital Input
3. Digital Output
4. Power +12V
5. Ground
6. Digital Input
7. Digital Output
8. Ground
c. Power on the camera with DC12V 1A power adaptor.
Step 2. Terminal I/O Block Adaptor Pin Definition (from left to right)
- 3 -
 Loading...