

Breville donna hay BEM800DH Instruction Booklet
Wizz® Planetary Mixer
Instruction Booklet
BEM800DH
2
3
INTRODUCING THE DONNA HAY SIGNATURE EDITION
- WIZZ® PLANETARY MIXER
PLANETARY MIXING ACTION
Patisserie Quality Results
Replicating a similar mixing motion used by commercial mixers, Breville’s
planetary mixing action produces patisserie and bakery quality results for
evenly mixed batter, creamy icing and pliable dough.

4
5
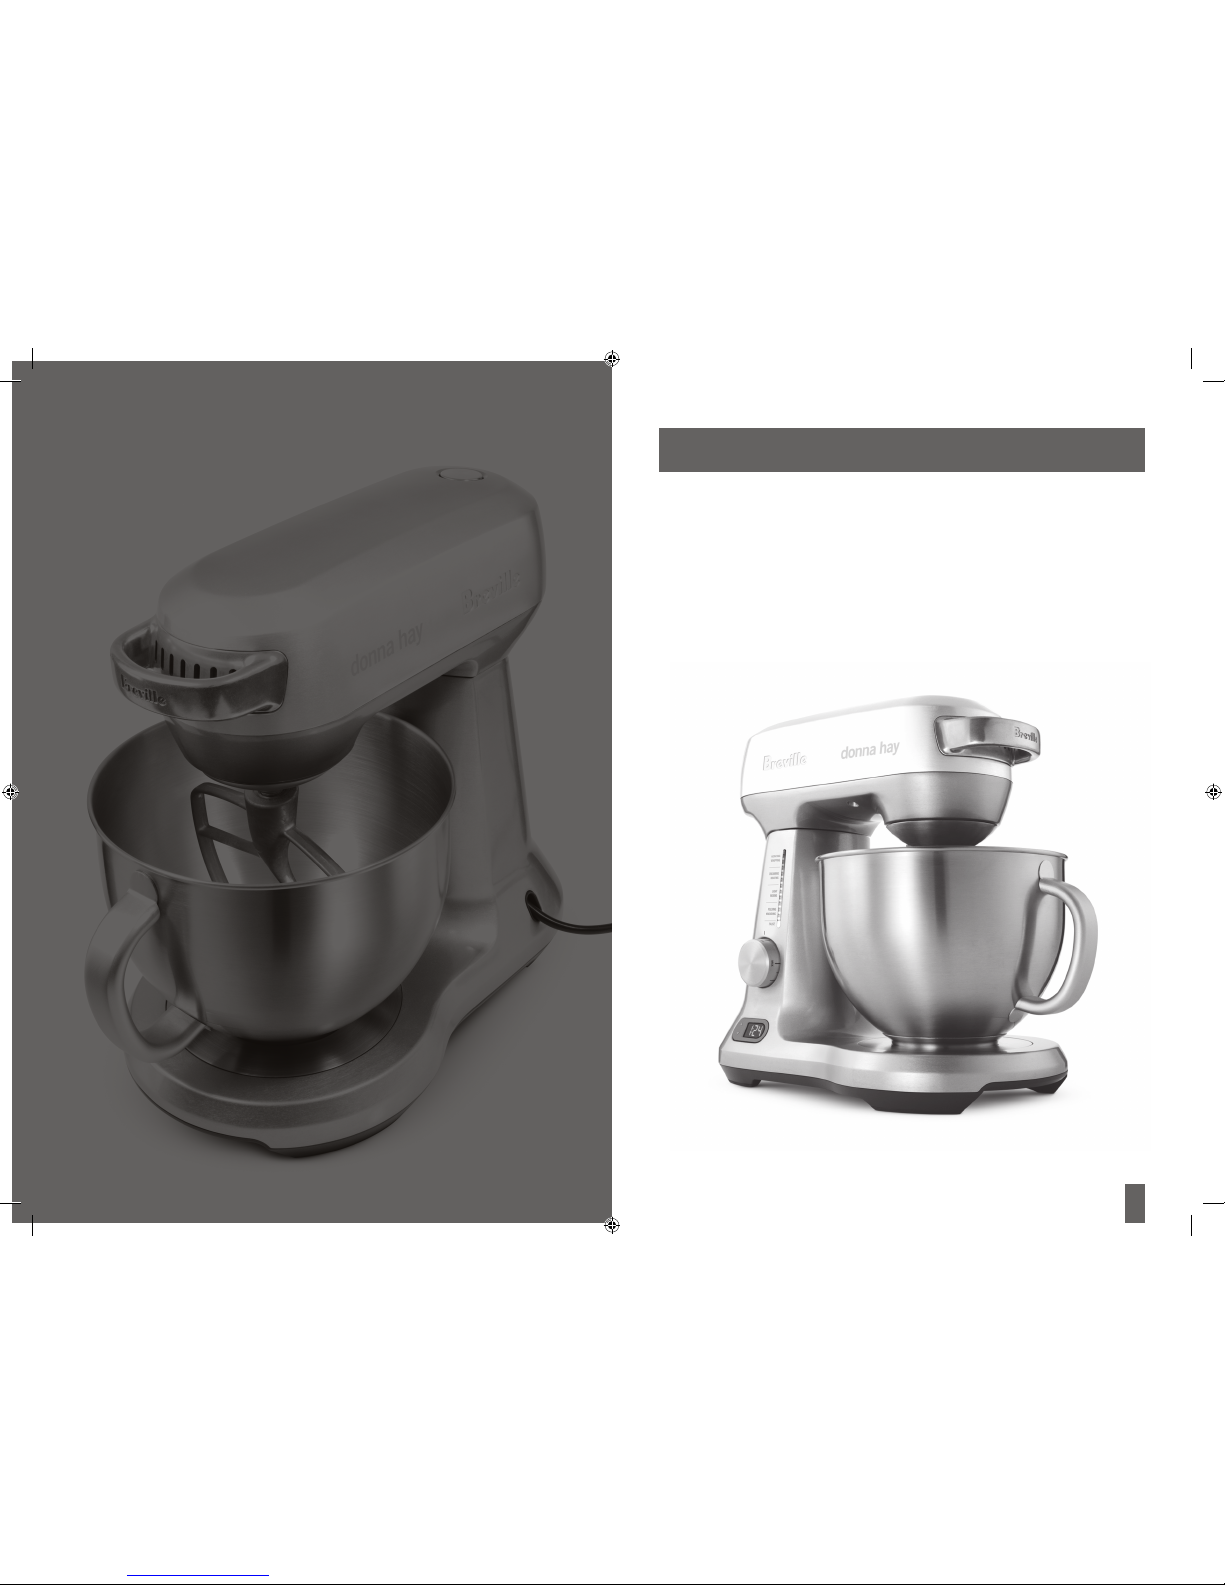
Congratulations on the purchase of your new
Breville Professional 800 Collection™
Wizz® Planetary Mixer
At Breville we are very safety conscious. We design and manufacture consumer products
with the safety of you, our valued customer, foremost in mind. In addition we ask that you
exercise a degree of care when using any electrical appliance and adhere to the following
precautions.
IMPORTANT SAFEGUARDS FOR YOUR BREV ILLE WIZZ
®
PLANETARY MIXE R
Carefully read all instructions before •
operating the Wizz
®
Planetary Mixer
for the first time and save for future
reference.
Remove and safely discard any •
packaging material and promotional
labels before using the be nch mixer for
the first time.
To eliminate a choking hazard for young •
children, remove and safely discard the
protective cover fitted to the power plug
of this appliance.
Do not place the bench mixer near •
the edge of a bench or table during
operation. Ensure the surface is level,
clean and free of water and other
substances. Vibration during operation
may cause the appliance to move.
Do not use the bench mixer on a sink •
drain board.
Do not place the bench mixer on or near •
a hot gas or electric burner, or where it
could touch a heated oven.
Always ensure the bench mixer is •
completely assembled before operating.
Follow the instructions provided in this
book.
Ensure the Speed Control Dial is in the •
‘Off’ position and the bench mixer is
switched off at the power outlet and
the power cord is unplugged before
attaching the beater, whisk or dough
hook.
Do not use attachments other than •
those provided with the bench mixer.
Use only the beater whisk and dough
hook supplied with the mixer.
Do not operate the appliance •
continuously on heavy loads for more
than 3 minutes. None of the recipes in
this book are considered a heavy load.
Handle the bench mixer and •
attachments with care. Never place
your fingers inside the mixing bowl or
near the beater, whisk or dough hook
during operation.
Keep hands, hair, clothing, as well as, •
spatulas and other utensils away from
moving beater, whis k or dough hook/
during operation.
Should an object such as a spoon or •
spatula fall into the bowl while mixing,
immediately ensure the Speed Control
Dial is in the ‘Off’ position, turn the bench
mixer off, unplug at the power outlet and
remove the object.
Do not place hands in the mixing bowl •
unless the bench mixer is disconnected
from the power outlet. Ensure the Speed
Control Dial is in the ‘Of f ’ position,
the bench mixer is switched off and
unplugged from the power outlet before
removing the beater, whisk or dough
hook.
Ensure the motor and b eater, whisk or •
dough hook have completely stopped
before disassem bling.
Always remove the beater, whisk or •
dough hook from the bench mixer
before cleaning.
Care should be taken when removing •
the food from the mixer bowl by ensuring
the motor and the beater, whisk, or
dough hook have completely stopped
CONTENTS BREVILLE RECOMMENDS SAFETY FIRST
5 Breville Recommends Safety First
8 Know Your Breville Wizz
®
Planetary Mixer
11 Before first use
- Assembly and Operation of Your Wizz
®
Planetary Mixer
17 Care, Cleaning and Storage
19 Measuring and Weighing
22 Hints and Tips
25 The Vital Ingredients
31 Trouble Shooting Guide
33 Recipes
67 Notes

6
7
IMPORTANT SAFEGUARDS FOR ALL ELECTRICAL APPLIANCES
Fully unwind the power cord b efore •
use.
Do not let the power cord hang over •
the edge of a bench or table, touch hot
surfaces or become knotted.
To protect against electric shock do not •
immerse the power cord, power plug or
mixer in water or any other liquid.
The appliance is not intended for use •
by per sons (including children) with
reduced physical, sensor y or mental
capabilities, or lack of experience
and knowledge, unless they have
been given supervision or instruction
concerning use of the appliance by a
person responsible for their safety.
Children should be supervised to •
ensure that they do not play with the
appliance.
It is recommended to regularly inspect •
the appliance. To avoid a hazard do not
use the appliance if power cord, power
plug or appliance becomes damaged in
any way. Return the entire appliance to
the nearest authorised Breville Service
Centre for examination a nd/or repair.
before disassembling. Ensure the Speed
Control Dial is in the ‘Off” position, the
appliance is switched off at the power
outlet and unplugged before unlocking
the mixer motor head and moving into
the upright position. The beater, whisk or
dough hook should be released from the
mixer motor head before removing the
processed food from the mixer bowl and
the beater, whisk or dough hook.
Ensure the mixer motor head is locked •
into the horizontal (close d) position
when not in use and before storing.
Always ensure the Speed Control Dial •
is in the ‘Of f’ position, the power is
switched off at the power outlet and
the power cord is unplugged from the
power outlet before attempting to move
the bench mixer, before assembling or
disassembling, when not in use and
before cleaning or storing.
Do not move the bench mixer whilst in •
operation.
Do not leave the bench mixer unattended •
when in use.
Do not place any part of the bench mixer •
in the dishwasher or microwave oven.
Keep the bench mixer clean. Follow the •
cleaning instructions provided in this
book.
Any maintenance other than cleaning •
should be per formed at an authorised
Breville Ser vice Centre.
This appliance is for household use only. •
Do not use this appliance for anything
other than its intended use. Do not use
in moving vehicles or boats. Do not use
outdoors. Misuse may cause injury.
The installation of a re sidual current •
device ( safety switch) is recommended
to provide additional safety protection
when using electrical appliances. It is
advisable that a safety switch with a
rated residual operating current not
exceeding 30m A be installe d in the
electrical circuit supplying the appliance.
See your electrician for professional
advice.
BREVILLE RECOMMENDS SAFETY FIRST continued BREVILLE RECOMMENDS SAFETY FIRST continued
WARNING : E NSURE THE SPEED DIAL CONTRO L IS IN THE ‘OFF’ POSITION THE
BENCH MIXER IS SWITCHED OFF AT THE POWER OUTLET AND UNPLUGGED
FROM THE P OWER OUTLET BEFORE ATTACHING THE BEATER, WHIS K OR
DOUGH HOOK .
8
9
KNOW YOUR BREVILLE WIZZ® PLANETARY MIXER KNOW YOUR BREVILLE WIZZ® PLANETARY MIXER continued
Motor head :A. Powerful motor for
thorough mixing re sults
4.7L stainless steel mixing bowl with B.
handle
Illuminated LED speed indicator C.
band: displays selected mixing task
Tilt back and lock down hinge button:D.
the motor head tilts back and locks into
position to allow easy removal of the
mixing bowl and at tachments
Bowl locking r ecess:E. the bowl locking
recess allows the bowl to be securely
locked into place for safety and stability
when the mixer is in operation
LCD screen with count up & down F.
timer: mixer can be set to count down
according to a specified time on a recipe
or set to count up to asses mixing time
Pause function :G. rotate dial to “pause”
to temporarily stop mixing and pause
the timer
Breville Assist™ handles:H. handle s on
base and on motor head allow for easy
and comforta ble lifting of the mixer
Load Sensing Technology:I. internal
sensors detect when heavy batters are
being mixed and automaticall y adjust
to maintain the selected speed (not
shown)
Internal Cord Stor age:J. located in the
rear of the mixer. Cord pushes into
the m ixer base for convenient and tidy
storage
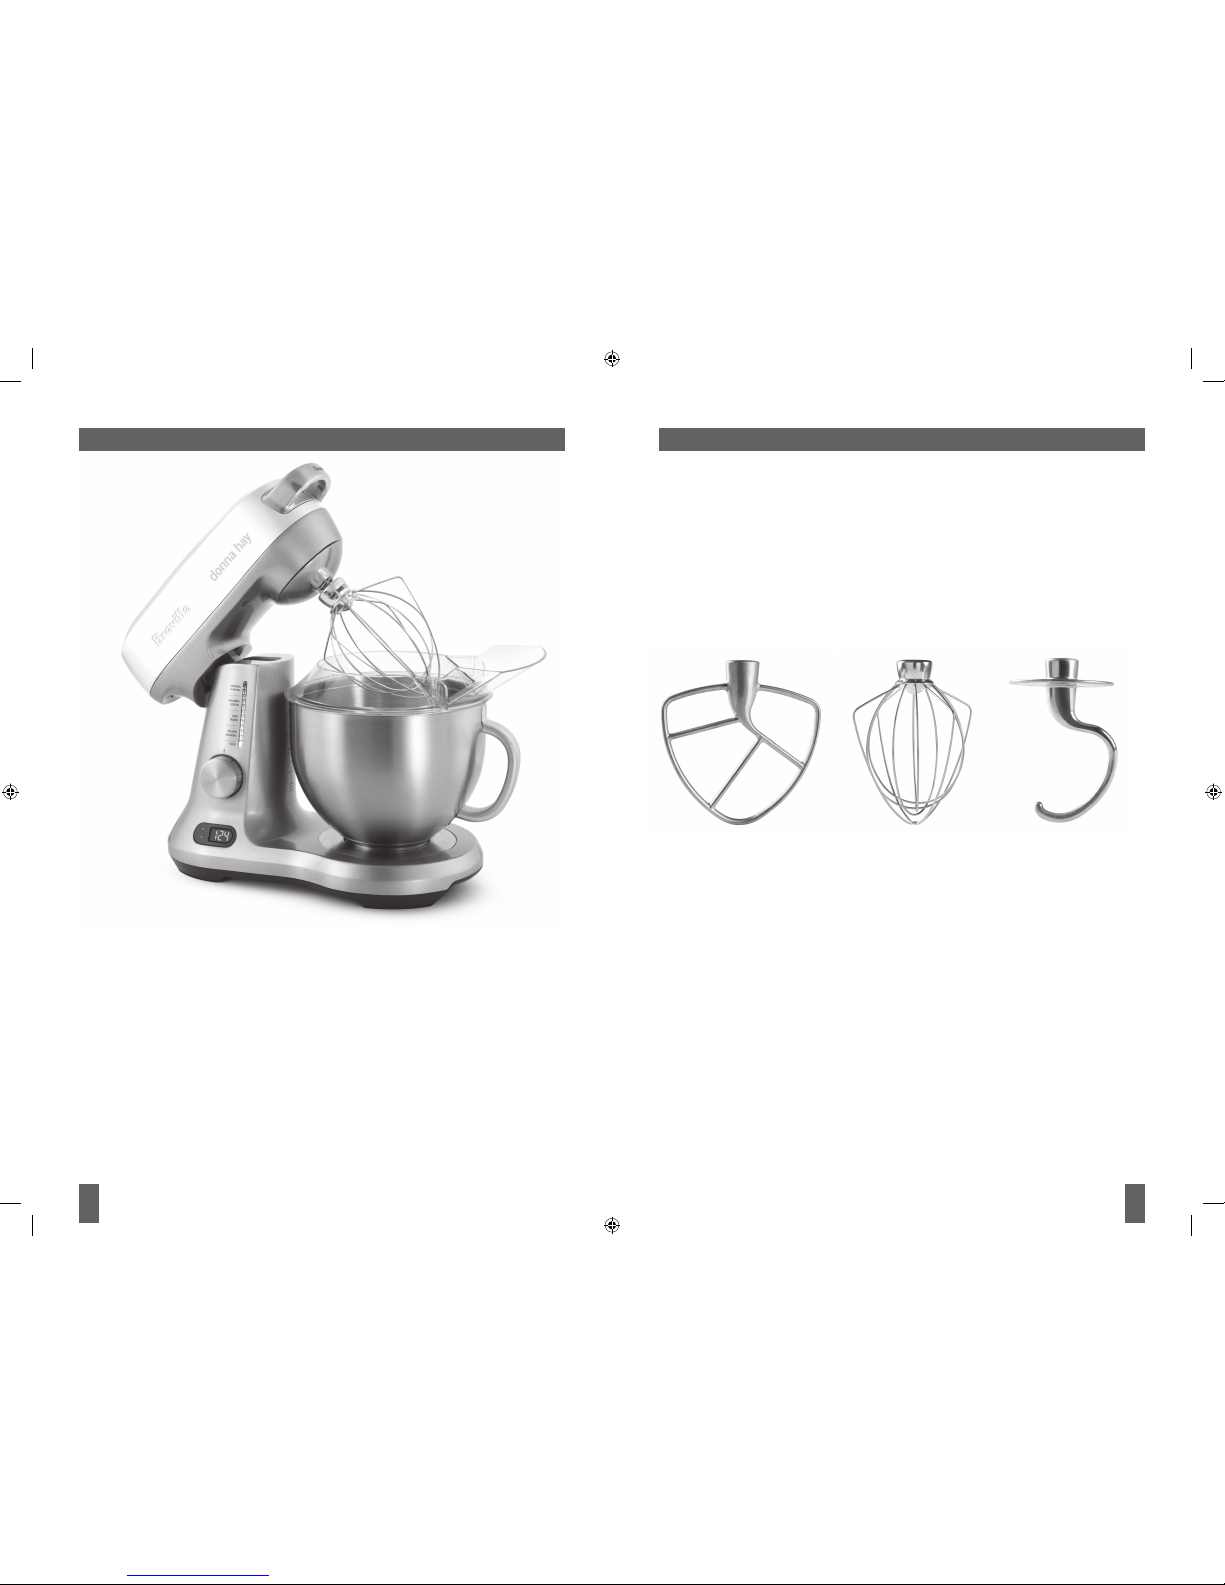
Flat beater:K. thoroughly mixes a variet y
of mixtures such as cake mixture, cookie
batter, pastries, and mashed potatoes
Wire whisk:L. consistently mixes and
aerates for egg whites, cream and thin
batter s
Dough hook:M. effectively k neads heavy
dough for bread and pizza
Splash gu ard:N. prevents ingredients
from splattering out of the bowl
Spatula : (O. not shown)
A
B
C
D
E
F
G
H
H
J
K L M
N
11
Before first use
ASSEMBLING THE MIXER
Before using your Breville Wizz
®
Planetary
Mixer for the first time, remove any packaging
material and promotional labels. Ensure the
speed control dial is in the ‘Off’ position, the
mixer is switched off at the power outlet and
the power cord is unplugged.
Remove the mixing bowl, beater, whisk and
dough hook and wash in warm soapy water
with a soft cloth. Rinse and dry thoroughly.
The bowl and the attachments may be
washed in the dishwasher.
NOTE: When firs t usi ng you r Brev ille
Wizz
®
Planet ary M ixer, you may notice
an o dour comin g fr om t he m otor. T his is
normal a nd will d issipa te with u se.
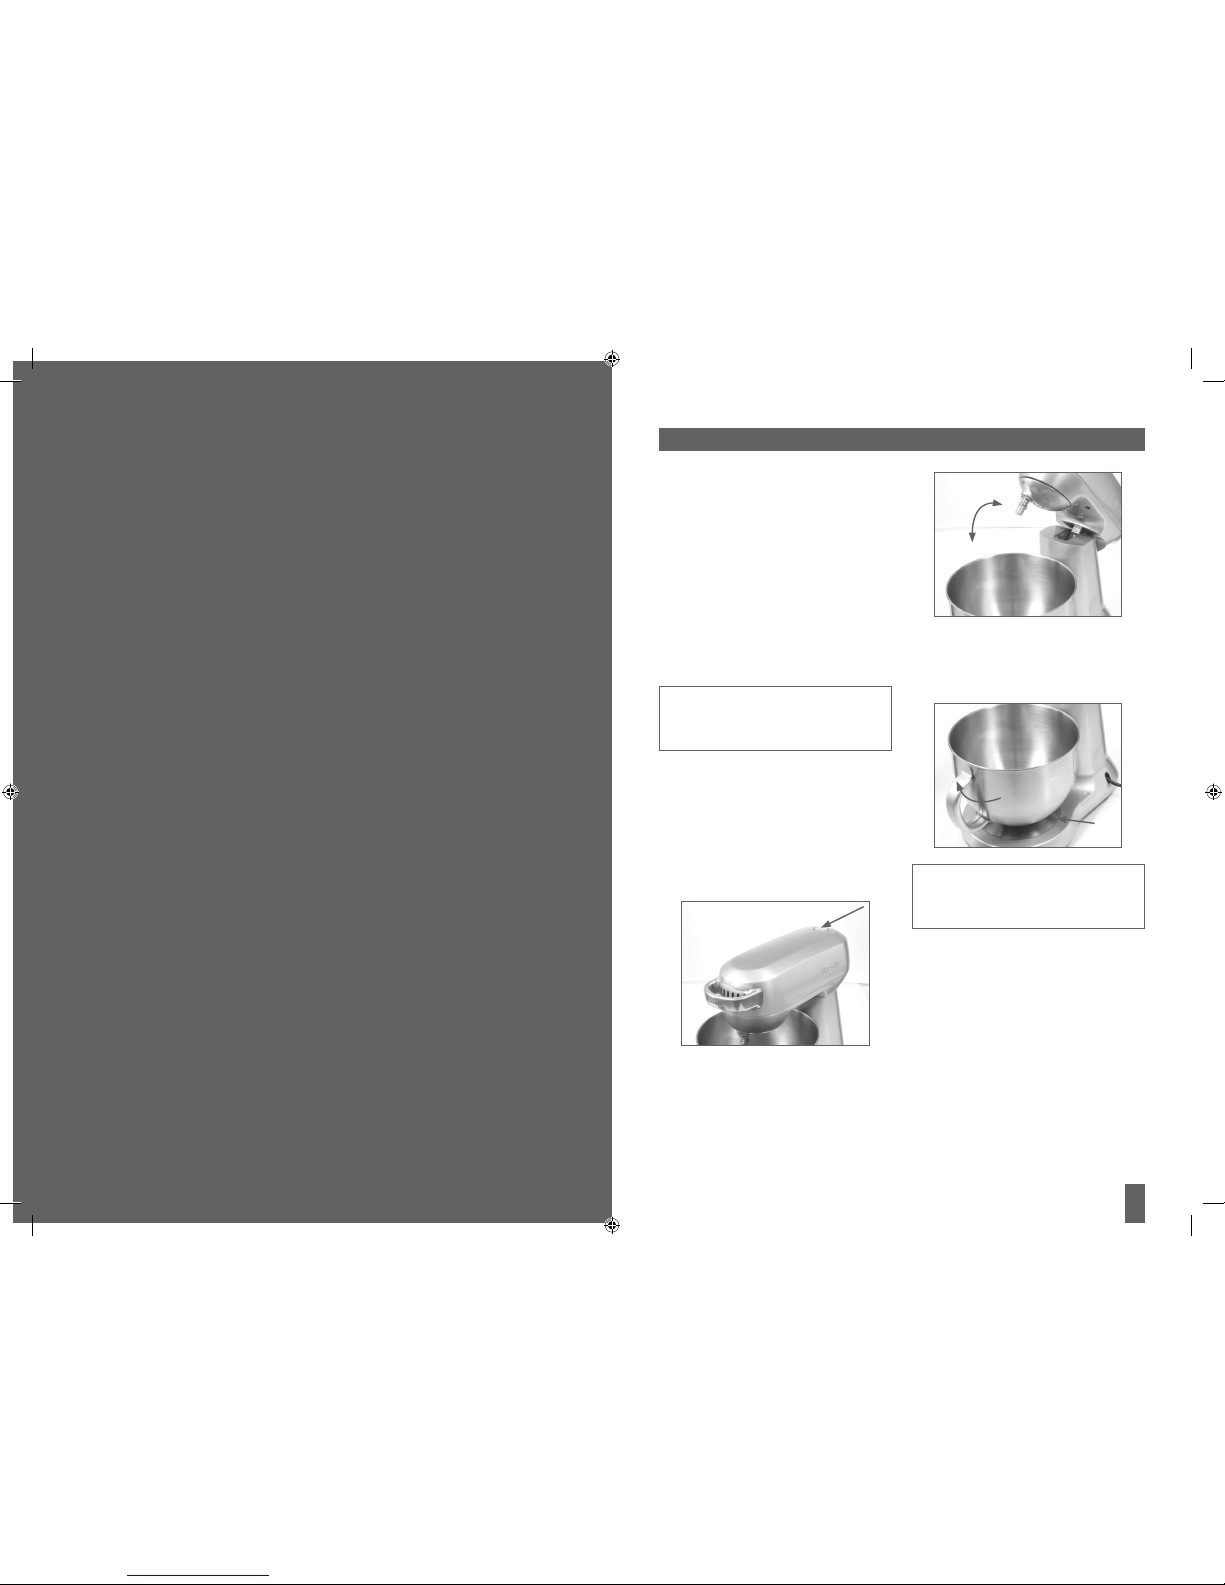
ATTACHING THE BOWL
Place the mixer base on a l evel, dry 1.
surface suc h as a bench top. The
mixer motor head should be in the
horizontal (closed) position. Raise the
mixer motor head by depressing the tilt
back hinge button.
Lift the mixer motor head up until it tilts 2.
back and locks into the open position.
Insert the mixing bowl into the bowl 3.
locking recess of the mixer stand and
turn clockwise until the bowl locks
securely into place.
NOTE: To remove or inser t the m ixing
bowl, th e mixer mo tor head m ust be
raised a nd locked i nto the o pen posi tion.
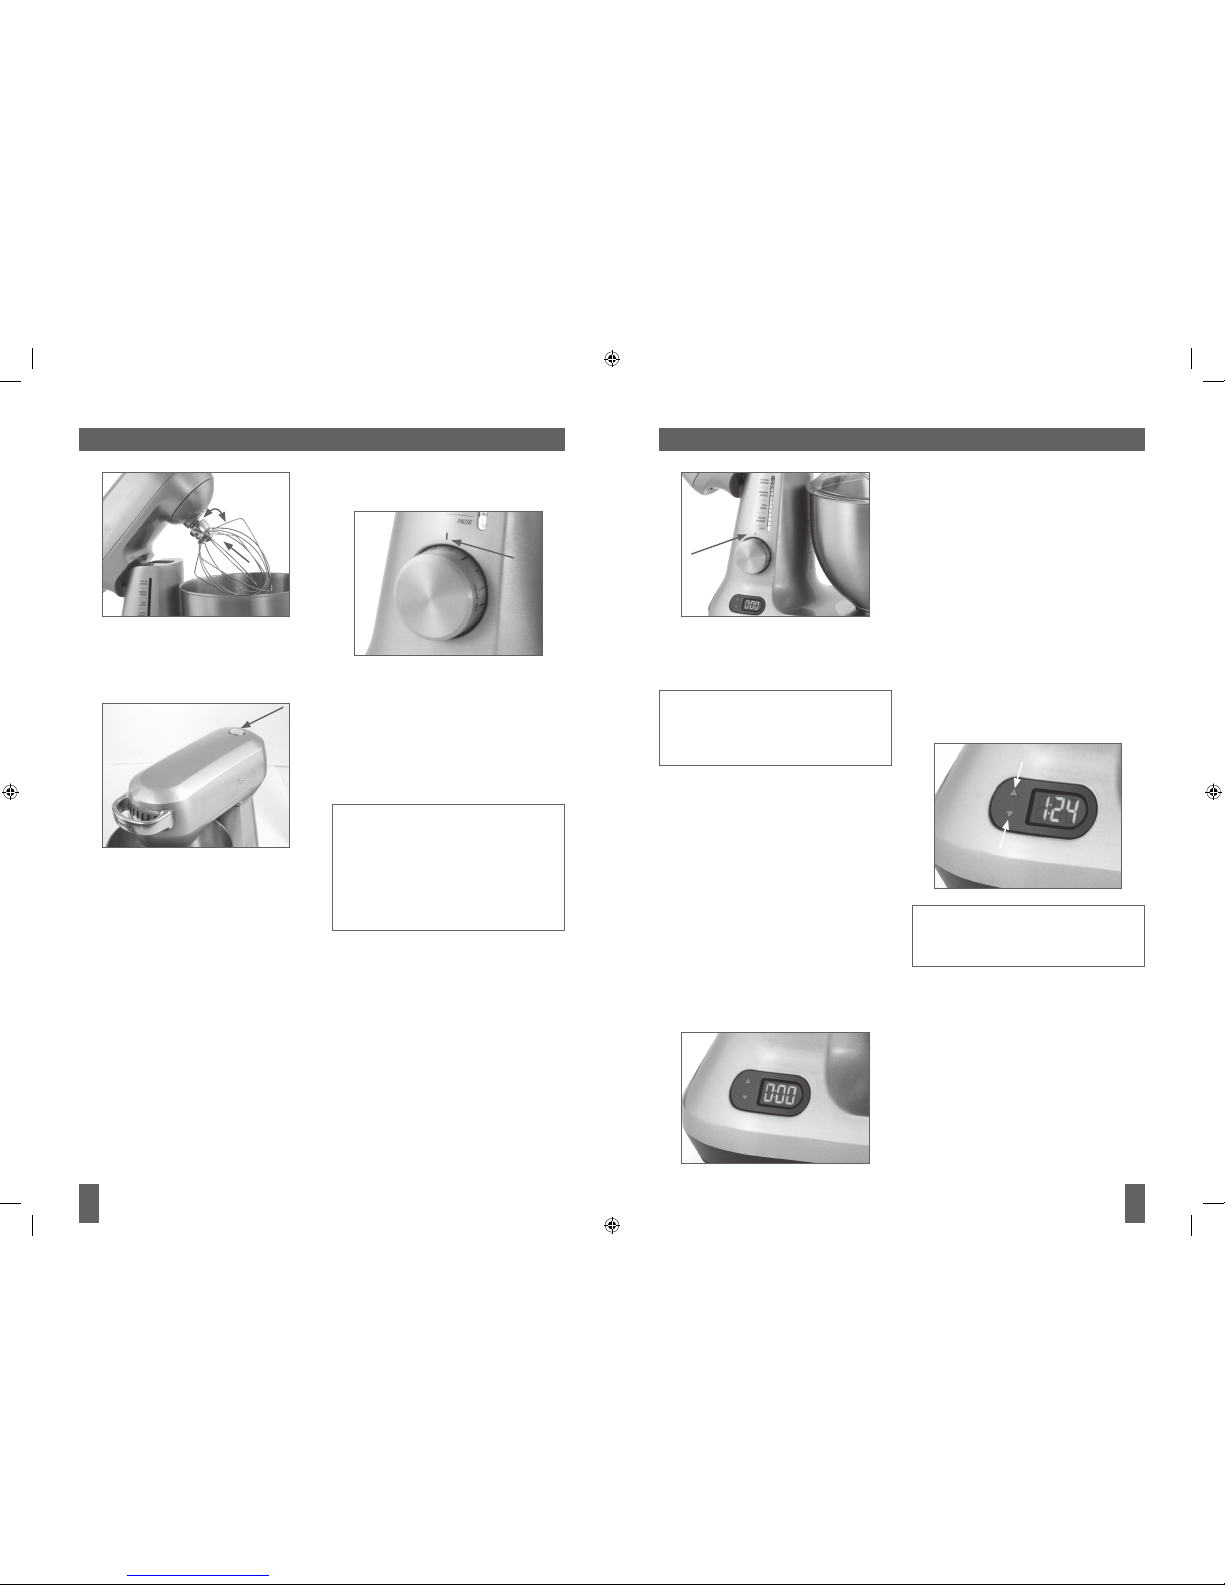
ATTACHING THE BEATER, DOUGH
HOOK OR WHIS K
Ensure the mixer motor head is in the 1.
raised open pos ition. Align the groove
in the top of the beater, dough hook
or whisk with the loc king pin on the
spindle extending down from the mixer
motor head.
ASSEMBLY AND OPERATION OF YOUR WIZZ® PLANETARY MIXER
12
13
Press the beater, dough hook or whisk 2.
upwards and turn clockwise until it
locks securely onto the locking pin on
the spindle.
Lower the mixer motor head by 3.
depressing the tilt back hinge but ton
and pushing the mixer motor head
down until it locks into the horizontal
(closed) position.
Splash guard ca n now be assemble d 4.
if required. Slide main ring into position
on top of bowl, then assemble pour
spout.
OPERATING THE MIXER
Planeta ry Mix ing Action
By replicating a similar mixing action used
by commercial mixers in bakeries and
patisseries, The Breville Wizz
®
Planetary
Mixer head rotates around the bowl whilst
rotating the beater in the opposite direction.
This ensures a superior and thorough mixing
result without the need for a rotating bowl.
Ensure the speed control dial is set to 1.
the ‘Off’ position, plug the cord into a
220-240v power outlet and switch the
power ‘ON’ at the power outlet. The
illuminated LED speed indicator band
will flash and the Count Up/Down timer
will display “0:00.” The mixer is now
ready to be used.
NOTE: If the mixer has not been used for 3
minute s it will automatical ly go to a power
saving “sta nd by mode.” The mixer can be
left in st and by until t he ingred ients in t he
bowl are ready t o be mixe d. To exit st and
by a nd begin mixing, turn the di al to t he
select ed speed or press one of the ‘Coun t
Up/ Down tim er butt ons.
Add ingredients to the mixing bowl as 2.
indicated in the recipe.
Always begin mixing by selecting a low
speed setting on the speed control dial.
This will prevent ingredients splattering.
Increase the speed as suited to the
mixing task. The speed setting can be
adjusted during operation by moving
the dial clockwise for the main mixing
settings. Use the mixing guide in this
booklet as a reference.
If necessary, stop the mixer during operation
and scrape any food mixture down the sides
of the mixing bowl with a spatula.
NOTE: Alway s tu rn t he Brevill e Wi zz®
Planet ary Mixer o ff i f you need t o scr ape
the bowl during use, and then switch back
on and con tinue m ixing.
THE COUNT-UP TIMER
The count-up timer is especially useful to
gauge mixing time or when recipe does not
specify the mixing time. You can monitor
the time it takes to thoroughly mix the
ingredients, so that the next time you mix
the same ingredients you can set the countdown timer for the specific time.
The count-up timer will automatically begin
counting up as soon as the dial is rotated
from ‘Off’ to one of the speeds. When the
dial is turned back to ‘Off’, the total mixing
time will be displayed on the timer and will
flash.
THE COUNT-DOWN TIME R
The count-down timer is especially useful for
any recipe that specifies the length of time
ingredients should be mixed. For example,
if a recipe reads, “beat for 3 minutes,” you
can set the count-down timer to 3 minutes
by pressing the up/down arrows. After 3
minutes of mixing, an alarm will sound and
the motor will automatically turn off. The
count-down timer will flash “OFF”. The
control dial must to be rotated to the “Off”
position to reset the timer and to continue
mixing.
To set the count down timer, press the up or
down arrows until the desired mixing time is
displayed on the LCD screen.
NOTE: Press and hold t he arrows down
to scrol l throu gh the ti mer setting more
quickl y.
Rotate the dial clockwise to select the desired
speed and to begin mixing. When the timer
has finished counting down, “0:00” will flash
on the LCD screen and a beep will sound
to notify you that the time has expired. The
mixer will automatically turn the motor off.
The control dial must be rotated to the 'OFF'
position to reset the timer and to continue
mixing.
ASSEMBLY AND OPERATION OF YOUR WIZZ
®
PLANETARY MIXE R continued ASSEMBLY AND OPERATION OF YOUR WIZZ® PLANETARY MIXE R continued
14
15
ASSEMBLY AND OPERATION OF YOUR WIZZ® PLANETARY MIXE R continued
If this error occurs, turn the speed control
dial to the ‘Off” position, switch the appliance
off at the power outlet and unplug the cord.
Remove some of the ingredients in the
mixing bowl and then restart the mixer.
DISASSE MBLING THE MIXER
When mixing is c omplete, turn the 1.
speed control dial to the ‘Off/Stand by’
position, switch the appliance off at the
power outlet and unplug the cord.
Remove splash guard if assembled. 2.
Separate pour sput then slide main ring
out of position.
Raise the mixer motor head by 3.
depressing the tilt back button and lift
the mixer motor head up until it tilts
back and locks into the open position.
Remove the beater/dough hook/whisk 4.
attachment by holding the mixer motor
head and pressing the attachment
upwards on the spindle. Turn the
attachment anticlockwise to release it
from the pin on the spindle.
Use a soft plastic s patula to remove 5.
mixture from the beater, dough hook or
whisk attachment.
NOTE: W hen lower ing or lif ting th e mixer,
always s uppor t the m otor he ad with your
other ha nd to preve nt from fr ee-fal ling.
Remove the mixing bowl from the 6.
indented bowl lock ing recess of the
mixer Base and turn a nti-clockwise
until the bowl releases. Use a soft
plastic spatula to remove mixture from
the mixing bowl.
Lower the mixer motor head by 7.
depressing the tilt back hinge but ton
and pushing the mixer motor head
down until it locks into the horizontal
(closed) position.
WARNING : AVOID CONTACT WITH
BEATER/ DOUGH HOO K/W HISK
DURING OPE RATION. KEE P HANDS,
HAIR, CLOTHING, SPATULAS A ND
OTHER UTEN SILS AWAY FROM
BEATER/ DOUGH HOO K/W HISK TO
PREVENT PE RSONAL I NJURY OR
DAMAGE TO THE MIX ER.
PAUSE MODE
While mixing, at any stage, you can rotate
the control dial to the “pause” setting. This
will turn the motor off and “pause” the timer.
This enables you to assess the mixing
progress or add additional ingredients
without effecting the timer.
For example, if you are mixing using the
‘count-up timer’ mode, you can rotate the
control dial from one of the mixing speeds
to “pause”. The mixer motor will stop and
the timer will “pause”. Once ready, you can
rotate the dial back to one of the mixing
speeds, the timer will continue to countup from the exact time it was paused.
Alternatively, if you have turned the mixer to
“pause” you can then reset the timer to 0:00
by rotating the dial to “Off” position.
If using the “pause” function in ‘countdown timer’ mode, you can suspend the
timer at any stage during the count-down
process by rotating the control dial to the
“pause” setting. To continue mixing in the
‘count-down timer’ mode, simply rotate the
dial back into one of the mixing speeds or
alternatively to the “Off” position to reset the
timer to 0:00.
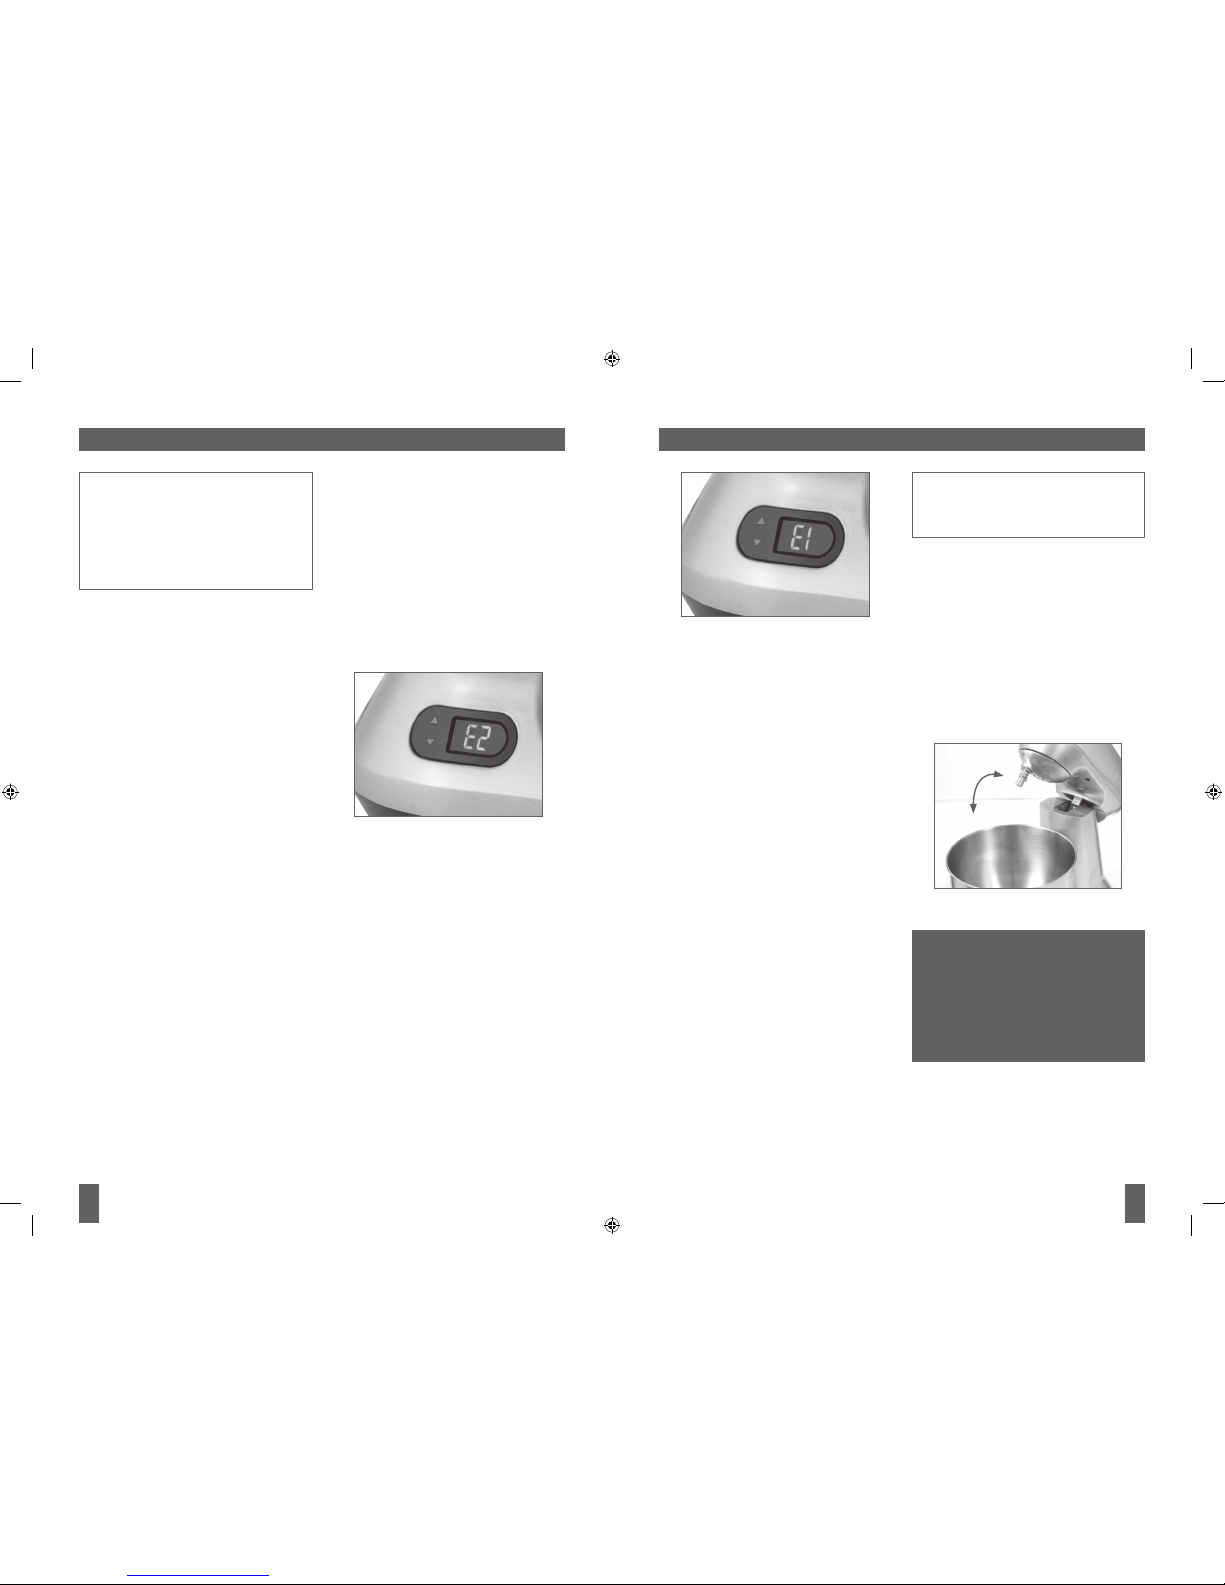
THERMO CUT-OFF – TEMPERATURE
OVERLOAD
The mixer is equipped with a self-resetting
safety device which safeguards against
overheating the motor with excessive
loads. If overheating occurs, the mixer
will automatically activate the overheating
protection device and the motor will switch
itself off. Should the mixer go into this mode,
the LED indicator band will flash and the
error message “E2” will flash on the LCD
screen and the buzzer will “beep” 3 times. .
If this error occurs, turn the speed control
dial to the ‘Off’ position, switch the appliance
off at the power outlet and unplug the cord.
Wait at least 15 minutes before restarting
the mixer.
ELECTRONIC PROTECTION CUTOFF –
CURRENT OVE RLOAD
The mixer is equipped with an electric
protection cutoff and will automatically
stop operating if the motor is stalled or
overloaded. This is normally a result of
excessive ingredients being processed
at one time. Should the mixer go into this
mode, the LED indicator band will flash and
the error message “E1” will flash on the LCD
screen and the buzzer will “beep” 3 times.
ASSEMBLY AND OPERATION OF YOUR WIZZ
®
PLANETARY MIXE R continued
NOTE:T he maxi mum ti me disp layed on
the t imer is 9 :5 9 (n ine m inutes , fif ty-ni ne
second s). The mixer will automat icall y
switch Off at 9 minute s 5 9 se conds . Th e
contro l dial needs to be rotate d to the
“Off ” position to reset the time r and to
contin ue mixi ng.

17
Care, Cleaning
and Storage
CLEANIN G AFTER US E
Always ensure the spe ed control dial 1.
is in the ‘Off’ position, the mixer is
switched off at the power outlet and
the power cord is unplugged.
Remove the beater, dough hook or 2.
whisk attachm ent and mixing bowl
from the mixer. Follow instructions in
the ‘Assembly and operation’ section
of this booklet
Wipe the mixer motor head a nd mixer 3.
stand with a soft, damp cloth then dry
thoroughly.
Wipe any excess food particles from the
power cord. Wash the bowl, beater, dough
hook, and whisk in warm soapy water with
a soft cloth or they can be washed in the
dishwasher. Rinse and dry thoroughly.
NOTE: Do not use abr asive scour ing pads
or c leane rs when clean ing the mixin g
bowl, flat beat er, dough hook or whisk
as these may scratch the surface. Also
ensure th at t he a ttac hment s ar e not
soaked in water for ex tended pe riods
of t ime, for exampl e s everal hour s or
overnig ht, as th is may dam age the fi nish.
NOTE: Do n ot wash or imm erse th e mixer
motor head and mixer base in wat er or any
other liqu id. Clean wit h a soft, damp cloth
and dry thoroug hly. Do not allow water
or an y liq uid to en ter t he g ear s ystem as
damage m ay resul t.
STORAGE
Your Breville Wizz
®
Planetary Mixer should
be kept in a convenient position on your
kitchen bench top or in an accessible
cupboard.
Always ensure the speed control dial is in
the ‘Off’ position, the mixer is switched off
at the power point and the power cord is
unplugged.
Store the mixing bowl in the bowl locking
recess in the mixer Base.
Place the attachments inside the mixing
bowl and lower the mixer motor head into
the horizontal (closed) position.
The motor head cannot be taken off the
base for any purpose.
CARE, CLEANING AND STORAGE

19
Measuring and
Weighing
Care should be taken when weighing and
measuring ingredients to achieve accuracy
and consistency.
AUSTRALI AN METRI C
MEASUREMENTS
ML
1 teaspoon 5
1 tablespoo n 20
1 cup 250
NEW ZEA LAND M ETRIC
MEASUREMENTS
ML
1 teaspoon 5
1 tablespoo n 15
1 cup 250
Recipes in this instruction book have been
developed using Australian metric weights
and measurements.
The New Zealand tablespoon is 5ml less
than the Australian tablespoon, so care
should be taken when measuring ingredients
to compensate for the variance.
For example, 1 Australian tablespoon = 1
New Zealand tablespoon + 1 New Zealand
teaspoon.
It is important to note that New Zealand
ingredients, especially flour and yeast, can
differ from Australian equivalents. In the Vital
Ingredients section of this booklet, suitable
New Zealand products have been listed.
We suggest these New Zealand products
be substituted for the Australian products in
the Recipe Section.
METRIC WEIGHING SCALES
For consistent results it is recommended
that a Breville kitchen scale (for details visit
www.breville.com.au) be used to weigh
larger quantities as they provide greater
MEASURING AND WEIGHING
accuracy than measuring cups.
Tare (zero) the scales with the container in
position then spoon or pour ingredients in
until the desired weight is achieved.
METRIC ME ASURING CUPS AND
SPOONS
If using graduated metric measuring cups,
it is important to spoon the dry ingredients
loosely into the required cup. Do not tap the
cup on the bench or pack the ingredients
into the cup unless otherwise directed. Level
the top of the cup with a knife. When using
graduated metric measuring spoons, level
the top of the spoon with a straight edged
knife or spatula.
METRIC LIQUID MEASURING JUGS
If using a graduated, metric measuring jug,
place jug on a flat surface and check for
accuracy at eye level.
NOTE: I n genera l, water wei ghs the s ame
in grams a s it meas ures in mi llilit res.

20
The following oven temperature settings are included as a guide. These settings may need
to be adjusted to suit the individual oven.
THERMOS TAT
SETTI NGS
DESCRIP TION
OF OVEN
TEMPERATURES
°C ELECTRIC ° F °C GAS °F GAS MARK
Very slow 120 250 120 250 1
Slow 150 300 150 300 2
Moderately sl ow 170 325 160 325 3
Moderate 180 350 180 350 4
Moderately hot 20 0 400 190 375 5
Hot 220 425 200 400 6
Very hot 230 450 230 450 7
NOTE: If using fan fo rced ovens be su re to turn the tempe ratur e down by 15-20°C. A lso
check re cipes at t he back of t his boo k.
MEASURING AND WEIGHING continued
Hint and Tips
 Loading...