

Die-Cast Hemisphere Blender™
Instruction Booklet Livret d’instructions
800BLXL /B
2
CONGRATULATIONS
On the purchase of your new Breville Die-Cast
Hemisphere Blender™
CONTENTS
4 Breville recommends safety fi rst
6 Know your Breville Die-Cast
Hemisphere Blender™
8 Operating your Breville Die-Cast
Hemisphere Blender™
14 Cleaning your Breville Die-Cast
Hemisphere Blender™
16 Blending Chart
17 Do's and don'ts
19 Troubleshooting
20 One year limited warranty

4 5
BREVILLE RECOMMENDS SAFETY FIRST BREVILLE RECOMMENDS SAFETY FIRST
We at Breville are very safety conscious. We design and manufacture consumer products with the
safety of you, our valued customer, foremost in mind. In addition, we ask that you exercise a degree of
care when using any electrical appliance and adhere to the following precautions:
Carefully read all instructions before •
operation and save for future reference.
Remove any packaging material and •
promotional labels before using the
Breville Die Cast Hemisphere Blender™
for the fi rst time.
To protect against electrical shock, do
•
not immerse cord, plug or motor base in
water or any other liquid.
Always use the appliance on a dry, level
•
surface.
The use of attachments not sold or •
recommended by the manufacturer may
cause fi re, electric shock or injury.
Do not remove the blender pitcher
•
from the motor base while blender is in
operation.
Do not place hands in pitcher unless
•
the unit is disconnected from the power
outlet. A scraper may be used but must
be used only when the blender is not
running.
Disconnect the blender from the power
•
outlet before removing pitcher from base.
Blades are sharp - handle carefully.
To reduce risk of injury, never place blade •
assembly on base without jar properly
attached.
Always operate the blender with cover in
•
place.
Do not use this blender for any purpose
•
other than food or beverage preparation.
Do not blend a dry, thick or heavy •
mixture for more than 10 seconds
without turning the blender off. Then, stir
ingredients before continuing to blend.
Do not process boiling liquids. Let cool
•
before placing in pitcher.
Do not leave the appliance unattended
•
when in use. Young children should be
supervised when near the appliance.
Do not allow cord to hang over the edge
•
of a table or counter, touch hot surfaces,
or become knotted.
Do not place appliance on or near a hot
•
gas or electric burner, or where it could
touch any other source of heat.
Unplug appliance from the power outlet
•
when not is use, before putting on or
taking off parts, and before cleaning.
This appliance is for household use only.
•
Do not use this appliance for anything
other than its intended use. Do not use
outdoors.
This appliance has a polarized plug. To •
reduce the risk of electric shock, this
plug will fi t in a polarized outlet only one
way. If the plug does not fi t fully into the
outlet, reverse the plug. If it still does not
fi t, contact a qualifi ed electrician. Do not
modify the plug in any way.
IMPORTANT SAFEGUARDS
READ ALL INSTRUCTIONS BEFORE USE
AND SAVE FOR FUTURE REFERENCE
FOR ALL ELECTRICAL
APPLIANCES
Fully unwind the cord before use.•
To protect against electric shock, do not •
immerse the cord, plug or motor base in
water or any other liquid.
Do not allow the cord to hang over the
•
edge of a table or counter, touch hot
surfaces or become knotted.
This appliance is not intended for use by •
young children or infi rm persons unless
they have been adequately supervised by
a responsible person to ensure they can
use the appliance safely.
Young children should be supervised
•
to ensure that they do not play with the
appliance.
It is recommended to regularly inspect
•
the appliance. Do not use the appliance if
the power supply cord, plug or appliance
becomes damaged in any way. Return
the entire appliance to the nearest
authorized Breville Service Center for
examination and/or repair.
Any maintenance other than cleaning •
should be performed at an authorized
Breville Service Center.
SAVE THESE
INSTRUCTIONS
This appliance is for household use only. •
Do not use this appliance for anything
other than its intended use. Do not use
in moving vehicles or boats. Do not
use outdoors.
6 7
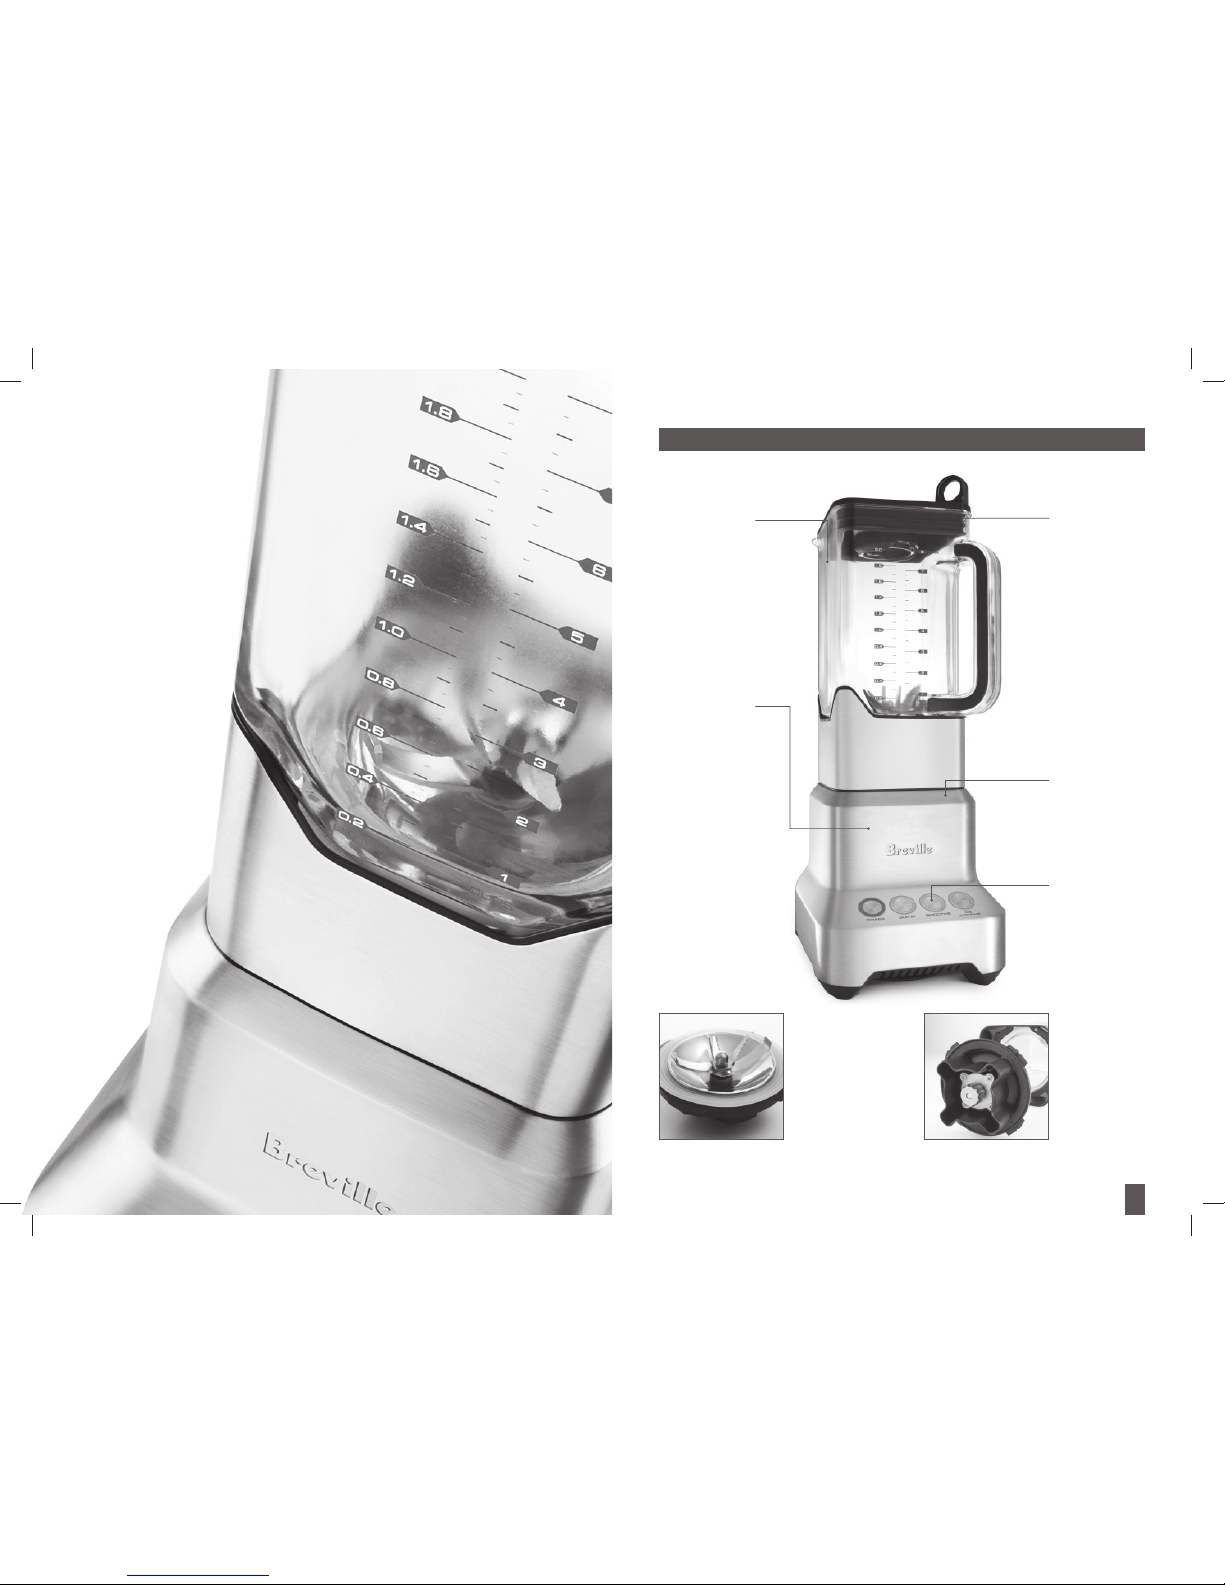
KNOW
your Breville Die-Cast Hemiphere Blender™
BPA Free 2L Jug
Constructed from
heavy-duty BPA
Free Copolyester
materials, provides
optimal toughness
with commercial
volume and style.
The professional
grade, shatter
resistant jug is
remarkably strong
and lightweight.
Breville Assist™
Lid
Reliable leak free
lid with one finger
leverage removal
ensures the lid is
sealed tight during
operation yet
simple to remove.
Speed Control
Pre-programmed
electronic settings
automatically alter
speeds to optimize
blending results.
Capped buttons
illuminate for clarity
when selected.
Die-Cast Design
Bold design with
professional grade
die-cast surfaces
for durability
and long lasting
performance.
Easy Clean,
Dishwasher Safe
Intelligent design
means easy to clean
surfaces and fewer
components that
dismantle in seconds
and are dishwasher
safe.
Intelligent
Engineering
High torque,
powerful
motor, highly
efficient blades
and precision
engineered
components allow
the blender to
operate at speeds
up to half as fast
as other blenders.
Lower speeds
mean quieter
operation and
a longer lasting
motor.
KNOW YOUR BREVILLE DIE-CAST HEMISPHERE BLENDER™
Hemisphere™ System
Revolutionary blade
technology with extra wide
blades which hug the bowl
to eliminate food being
trapped. The serrated
blades are engineered from
surgical grade stainless
steel for durability that
ensures the blade stays
sharp.
Blade Removal
The one piece blade
removal system
is ergonomically
designed for ease of
cleaning.
* Due to continued product improvement, the products illustrated/photographed
in this brochure may vary slightly from the actual product.
8 9
OPERATING
your Breville Die-Cast Hemiphere Blender™
OPERATING YOUR BREVILLE DIE-CAST HEMISPHERE BLENDER™
Before fi rst use
Before using your Breville Die-Cast
Hemisphere Blender™ for the fi rst time,
remove any packaging material and
promotional labels. Ensure the appliance
is switched off at the power outlet and the
power cord is unplugged.
Wash the lid, inner lid, blender jug and
blade assembly (refer to Disassembling the
blender on page 12) of the Breville Die-Cast
Hemisphere Blender™ in warm, soapy
water with a soft cloth.
Rinse and dry thoroughly. Do not place
parts in the dishwasher (with the exception
of the blender jug, lid and inner lid). The
blender jug, lid and inner lid may be
washed in the dishwasher.
Ensure the blade assembly has been
removed from the blender jug before
placing the blender into the dishwasher.
The motor base can be wiped with a
damp cloth.
Dry thoroughly.
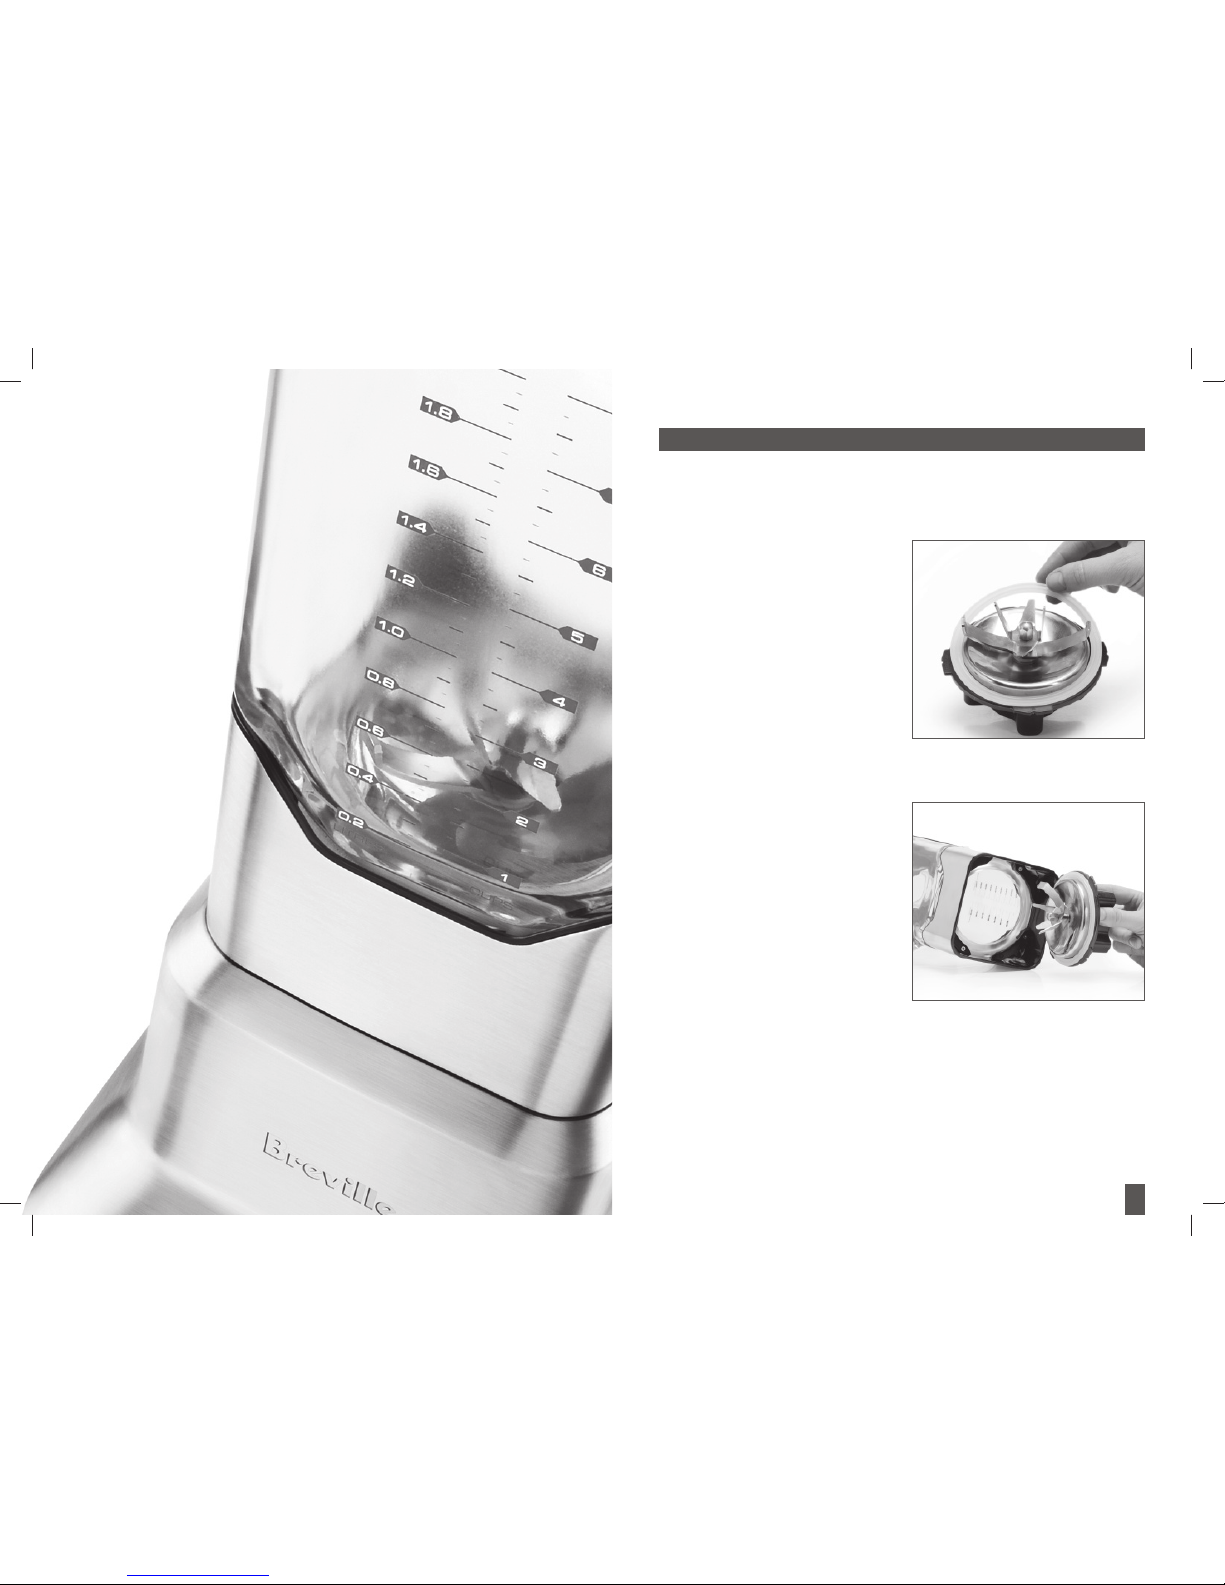
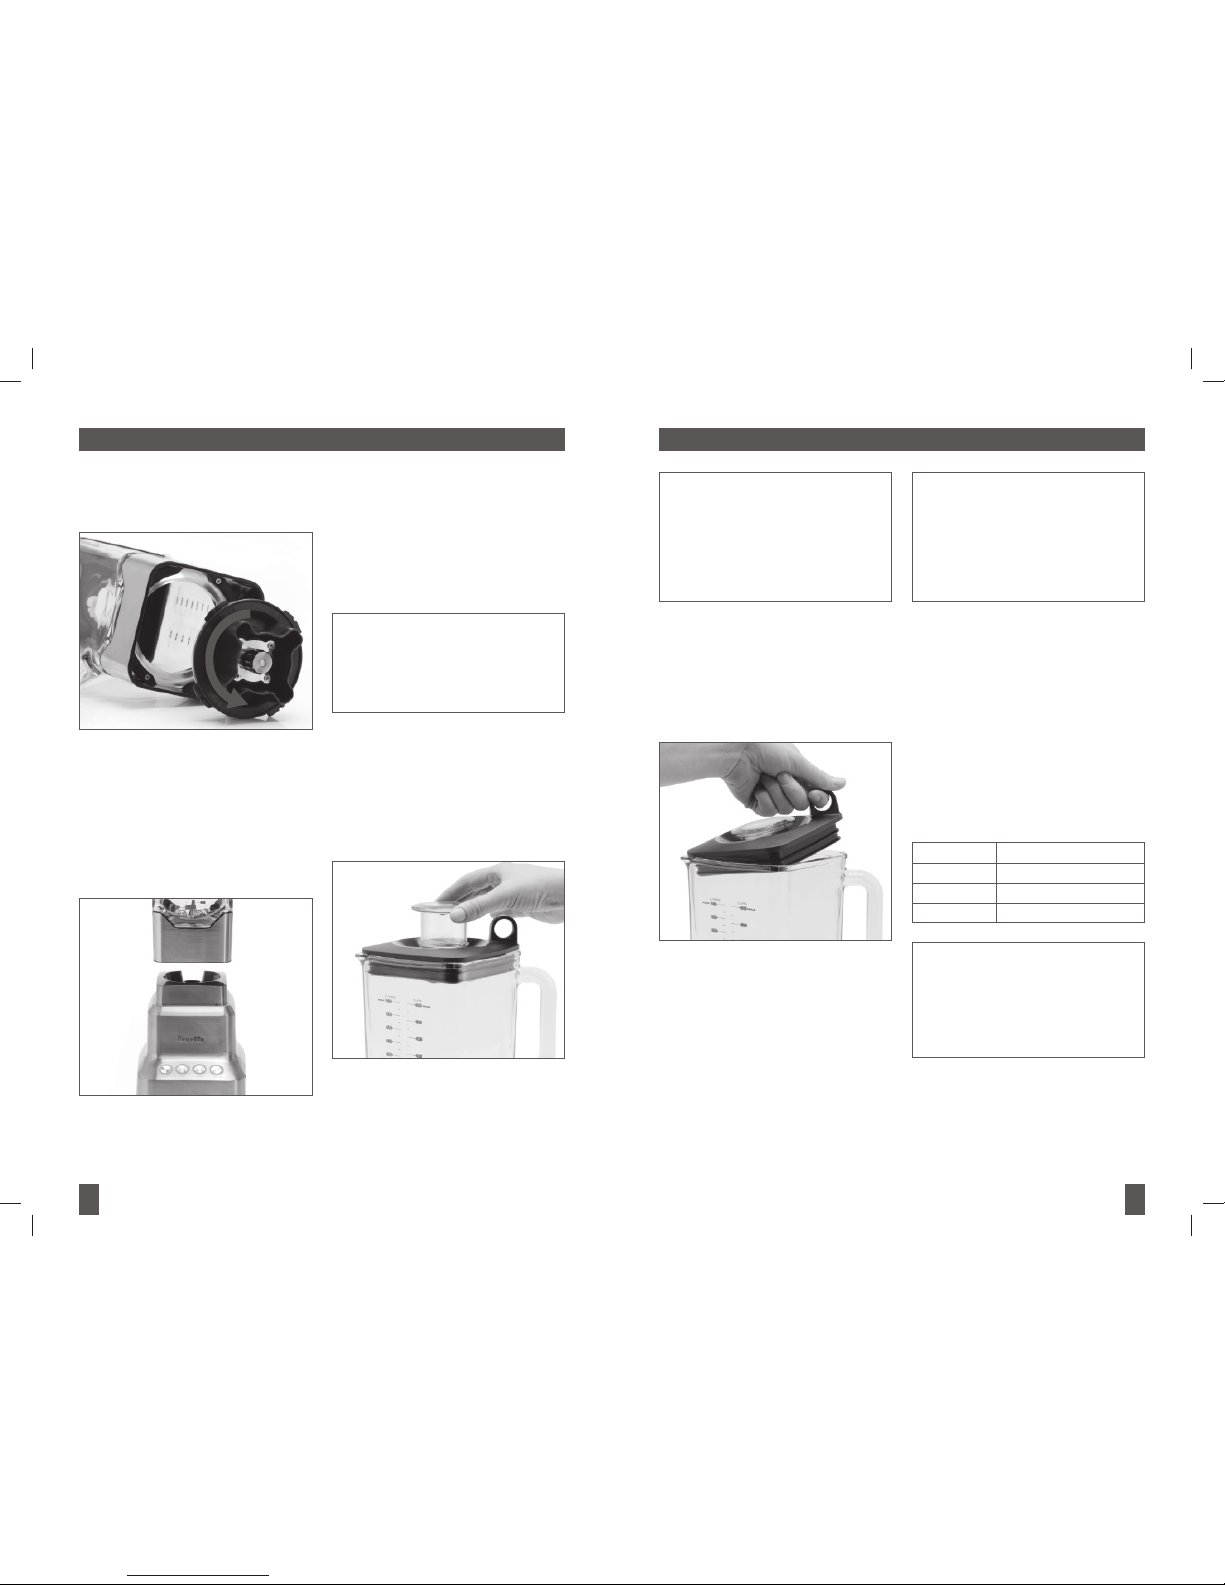
Assembling the Blender
To assemble the blender jug, place the
1.
silicon seal onto the blade assembly.
Upturn the blender jug and insert the
2.
blade assembly into the jug base.
10 11
NOTE:
Operate the blender only for
the appropriate amount of time
required. The Die-Cast Hemisphere
Blender™ will automatically stop
blending on the Blend function and
on the Smoothie and Ice/Auto Pulse
functions to avoid over processing.
The speed can be changed at any time
during the blending process. Each time
a new speed is selected its button will
illuminate and the previous speed button
illumination will go out.
For ice-crushing or ingredients that
5.
require short bursts of power, select the
Ice/Auto Pulse button. The blender will
start to operate and the Ice/Auto Pulse
button will illuminate.
The 'Power' button will continue to fl ash.
The pre-programmed functions have
been designed to run for a specifi c time.
Function Programmed Time
Blend 60 Seconds (1 minute)
Smoothie 60 Seconds (1 minute)
Ice/Auto Pulse 60 Seconds (1 minute)
NOTE:
The smoothie function has a unique
processing technique that blends
the denser ingredients at a lower
speed, then increases as ingredients
thicken. This may happen several
times while blending smoothies.
To stop blending at any time, press the 6.
selected speed button. The ‘Power’
button can also be pressed.
NOTE:
When the blender jug is fi lled at
or near the ‘MAX’ line, place one
hand on the blender lid to avoid
displacement of the lid during
operation. Do not blend hot
ingredients, allow to cool before
placing into the blender jug.
The Breville Die-Cast Hemisphere
Blender™ features a patent pending assist
lid. This allows the lid to fi t tightly onto the
blender jug, avoiding displacement during
operation. The ring pull design allows the
user to easily remove the lid with a simple
leverage action.
Select the required speed (Blend,
4.
Smoothie or Ice/Auto Pulse) by pressing
the corresponding speed button. The
blender will start to operate and only the
selected speed button will illuminate. The
‘Power’ button will continue to fl ash.
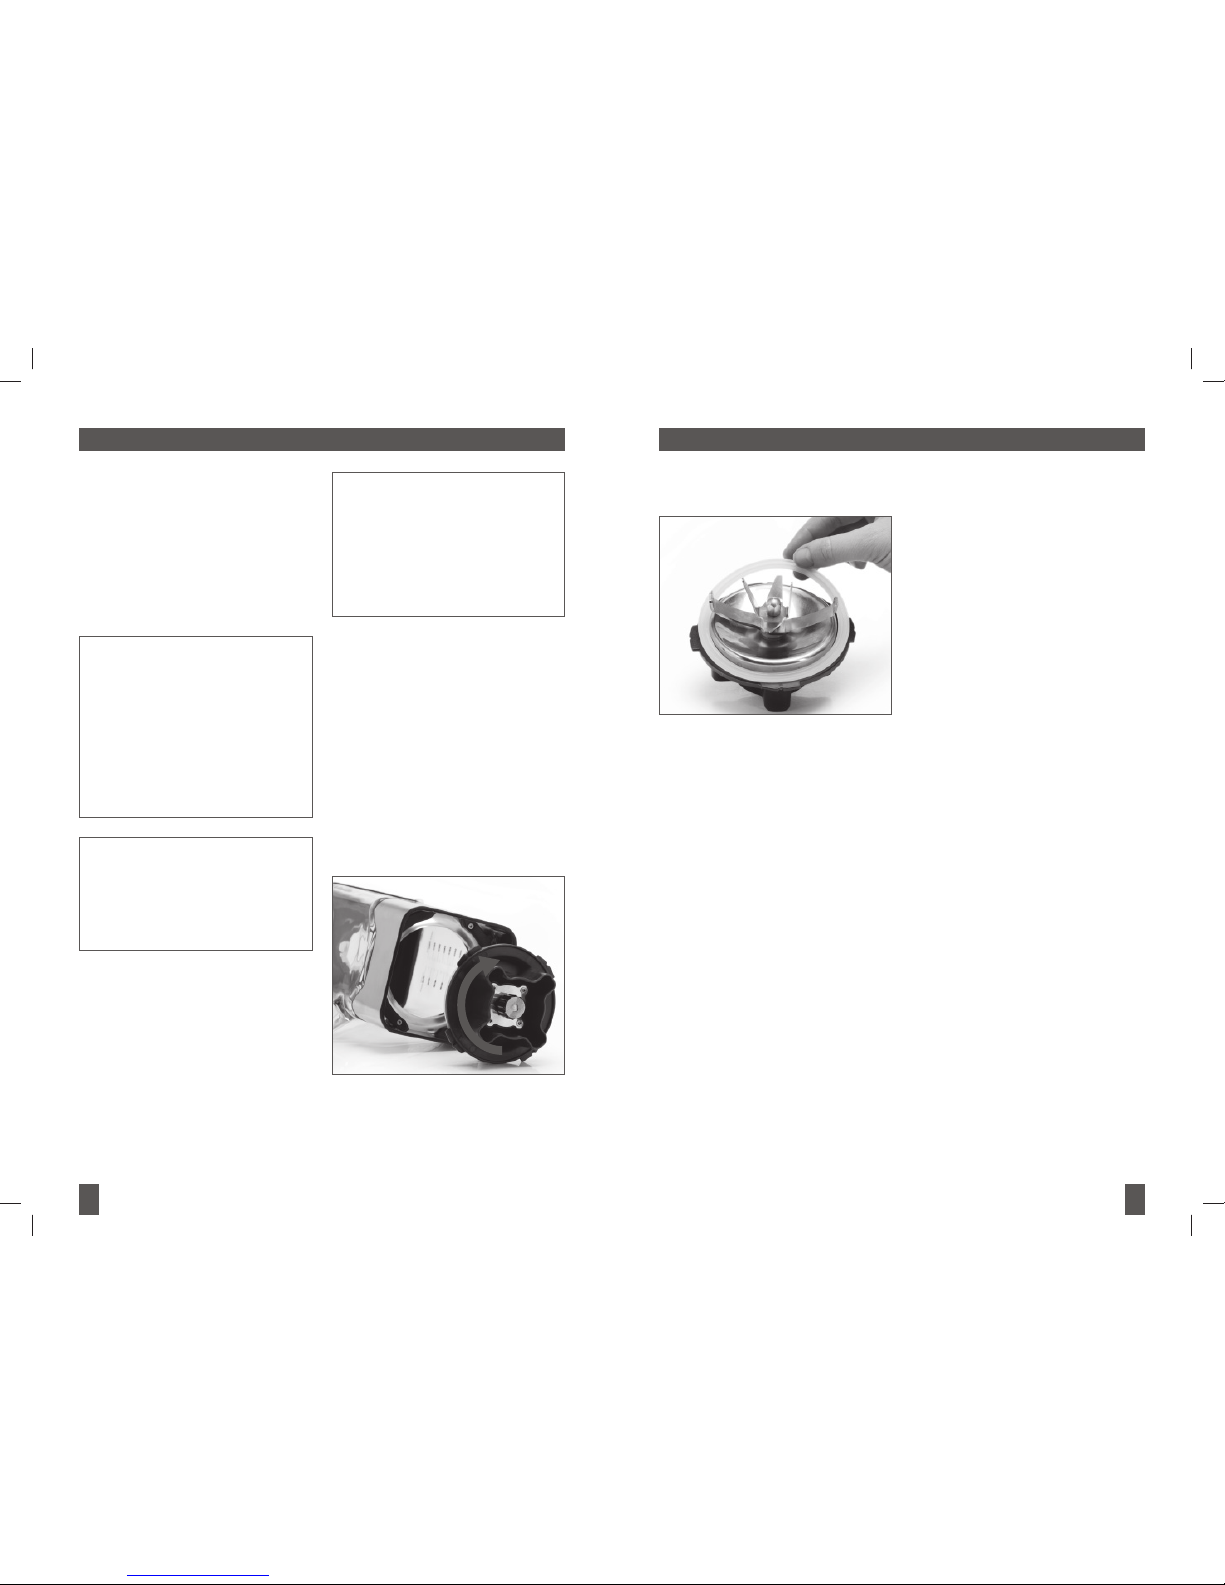
Twist the Blade Removal System
3.
counterclockwise until fi rmly screwed
into position.
Place the motor base on a fl at, dry
4.
surface such as a bench top. Ensure
that the motor base is switched off at
the power outlet and the power cord
is unplugged. Turn the blender jug
upright and insert on to the motor base.
The handle of the blender jug can be
positioned to the left or right hand side of
the appliance.
Plug the power cord into a 110/120v
5.
power outlet.
OPERATING YOUR BREVILLE DIE-CAST HEMISPHERE BLENDER™ OPERATING YOUR BREVILLE DIE-CAST HEMISPHERE BLENDER™
Using the blender
To turn the blender on press the ‘Power’
1.
button on the far left of the control panel.
The ‘Power’ button will illuminate and
fl ash indicating the blender is powered
on. When the jug is placed on the base
all lights will illuminate signalling the
blender is ready for use.
NOTE:
When using your Breville Die-Cast
Hemisphere Blender™ for the
fi rst time, you may notice an odor
coming from the motor. This is
normal and will dissipate with use.
Add food or liquid into the blender jug 2.
ensuring not to exceed the ‘MAX’ mark.
Place the blender lid fi rmly into position 3.
on the top of the blender jug. If not
already in place, insert the clear inner lid
into the blender lid and turn clockwise or
counterclockwise to lock into position.
12 13
NOTE:
The Die-Cast Hemisphere Blender™
features a motor overload protection
feature. If the motor is being
overloaded, the motor will stop and
the key LED's will illuminate and
fl ash. To restart the blender again,
unplug from the mains let it cool
down for 30 minutes or longer.
Dissassembling the blender
Always ensure the Breville Die-Cast
1.
Hemisphere Blender™ is switched off
by pressing the ‘Power’ button on the
control panel. Then unplug the power
cord.
Remove the blender jug from the motor
2.
base by grasping the handle and lifting
the jug in an upward direction. Remove
the blade assembly by upturning the
blender jug and twisting the Blade
Removal System clockwise, then lift
upwards and away from the base of
the blender.
At the end of use, always ensure the
7.
Breville Die Cast Hemisphere Blender is
turned off by pressing the ‘Power’ button
on the control panel. Then unplug the
cord. Ensure the motor and blades have
completely stopped before attempting to
move the appliance, or when the Breville
Die-Cast Hemisphere Blender™ is not in
use and before disassembling, cleaning
and storing.
NOTE:
During the blending process,
ingredients may stick to the sides
of the blender jug. To push the food
back onto the blades, press the
‘Power’ button on the control panel
and remove the power cord.
Remove the lid and use a plastic
spatula to scrape down the sides
of the jug. Replace the lid before
recommencing blending.
NOTE:
If the blades become stuck, the
blender will automatically turn off.
To reset, turn the blender off at the
power outlet, clean the jug and
blades with a spatula and then turn
back on. The blender will be reset.
If any moisture or liquid appears on top
of the motor base during blending, press
the ‘Power’ button on the control panel,
and remove the power plug. Remove
the blender jug. Wipe the motor base
immediately with a dry cloth or paper
towelling to absorb the liquid. Check the
blender jug is correctly assembled.
OPERATING YOUR BREVILLE DIE-CAST HEMISPHERE BLENDER™ OPERATING YOUR BREVILLE DIE-CAST HEMISPHERE BLENDER™
Remove the silicon seal from the blade 3.
assembly.
 Loading...