

Bresser National Geographic 76/350 Operating Instructions Manual
Art.No. 90-15000
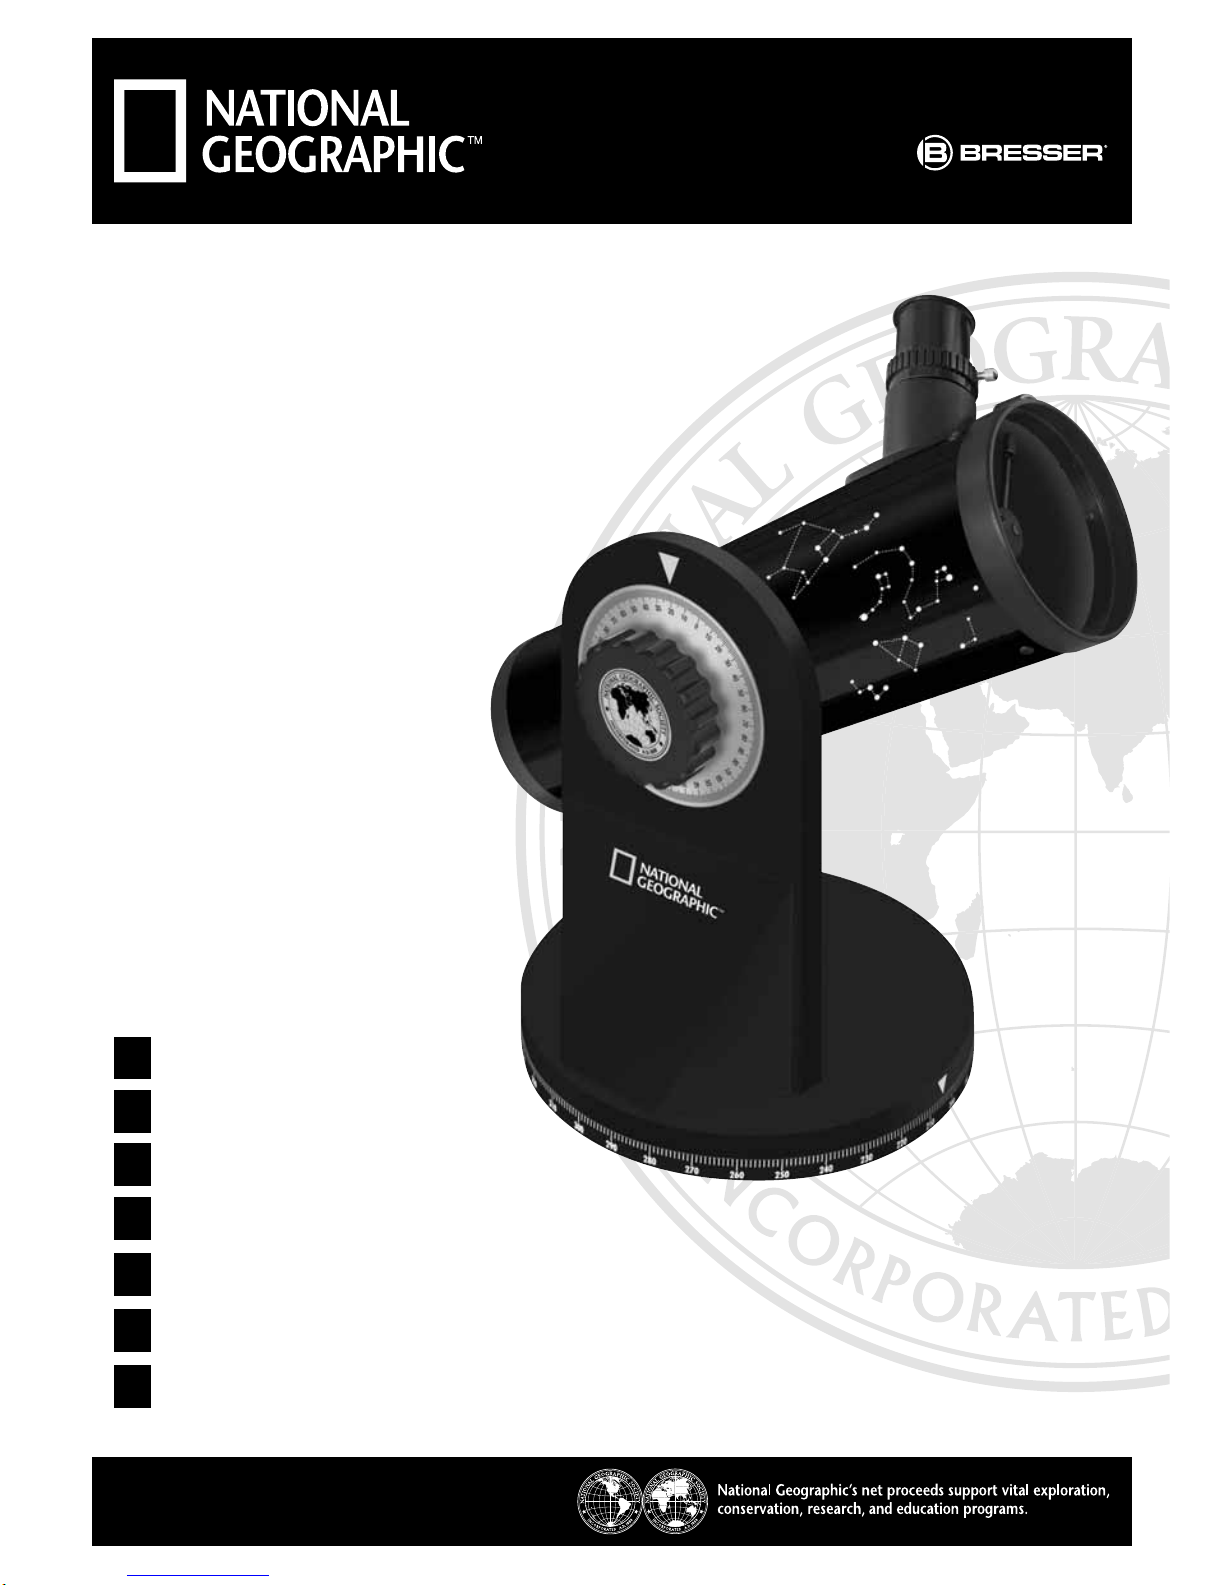
KOMPAKT-TELESKOP
COMPACT TELESCOPE
76/350
Bedienungsanleitung
Operating instructions
Mode d’emploi
Handleiding
Istruzioni per l’uso
Instrucciones de uso
Руководство по эксплуатации
DE
EN
FR
NL
IT
ES
RU
2
i
J
B
C
D
E
F
G
H
1)
1!
Bedienungsanleitung .................................. 3
Operating Instructions ................................ 7
Mode d’emploi ........................................... 11
Handleiding ................................................ 15
Istruzioni per l’uso ..................................... 19
Instrucciones de uso .................................23
Руководство по эксплуатации ............... 27
DE
EN
FR
NL
IT
ES
RU
J
I
3
Allgemeine Warnhinweise
GEFAHR von Körperschäden!
Schauen Sie mit diesem Gerät niemals direkt in die Sonne oder in die Nähe der Sonne.
Es besteht ERBLINDUNGSGEFAHR!
• Kinder dürfen das Gerät nur unter Aufsicht benutzen. Verpackungsmaterialien (Plastiktüten, Gummibänder, etc.)
von Kindern fernhalten! Es besteht ERSTICKUNGSGEFAHR!
• Setzen Sie das Gerät – speziell die Optik – keiner direkten Sonneneinstrahlung aus! Durch die Lichtbündelung
könnten Brände verursacht werden.
• Bauen Sie das Gerät nicht auseinander! Wenden Sie sich im Falle eines Defekts an Ihren Fachhändler. Er nimmt
mit dem Service-Center Kontakt auf und kann das Gerät ggf. zwecks Reparatur einschicken.
• Setzen Sie das Gerät keinen hohen Temperaturen aus.
SCHUTZ der Privatsphäre!
Das Gerät ist für den Privatgebrauch gedacht. Achten Sie die Privatsphäre Ihrer Mitmenschen – schauen Sie mit diesem Gerät zum Beispiel nicht in Wohnungen!
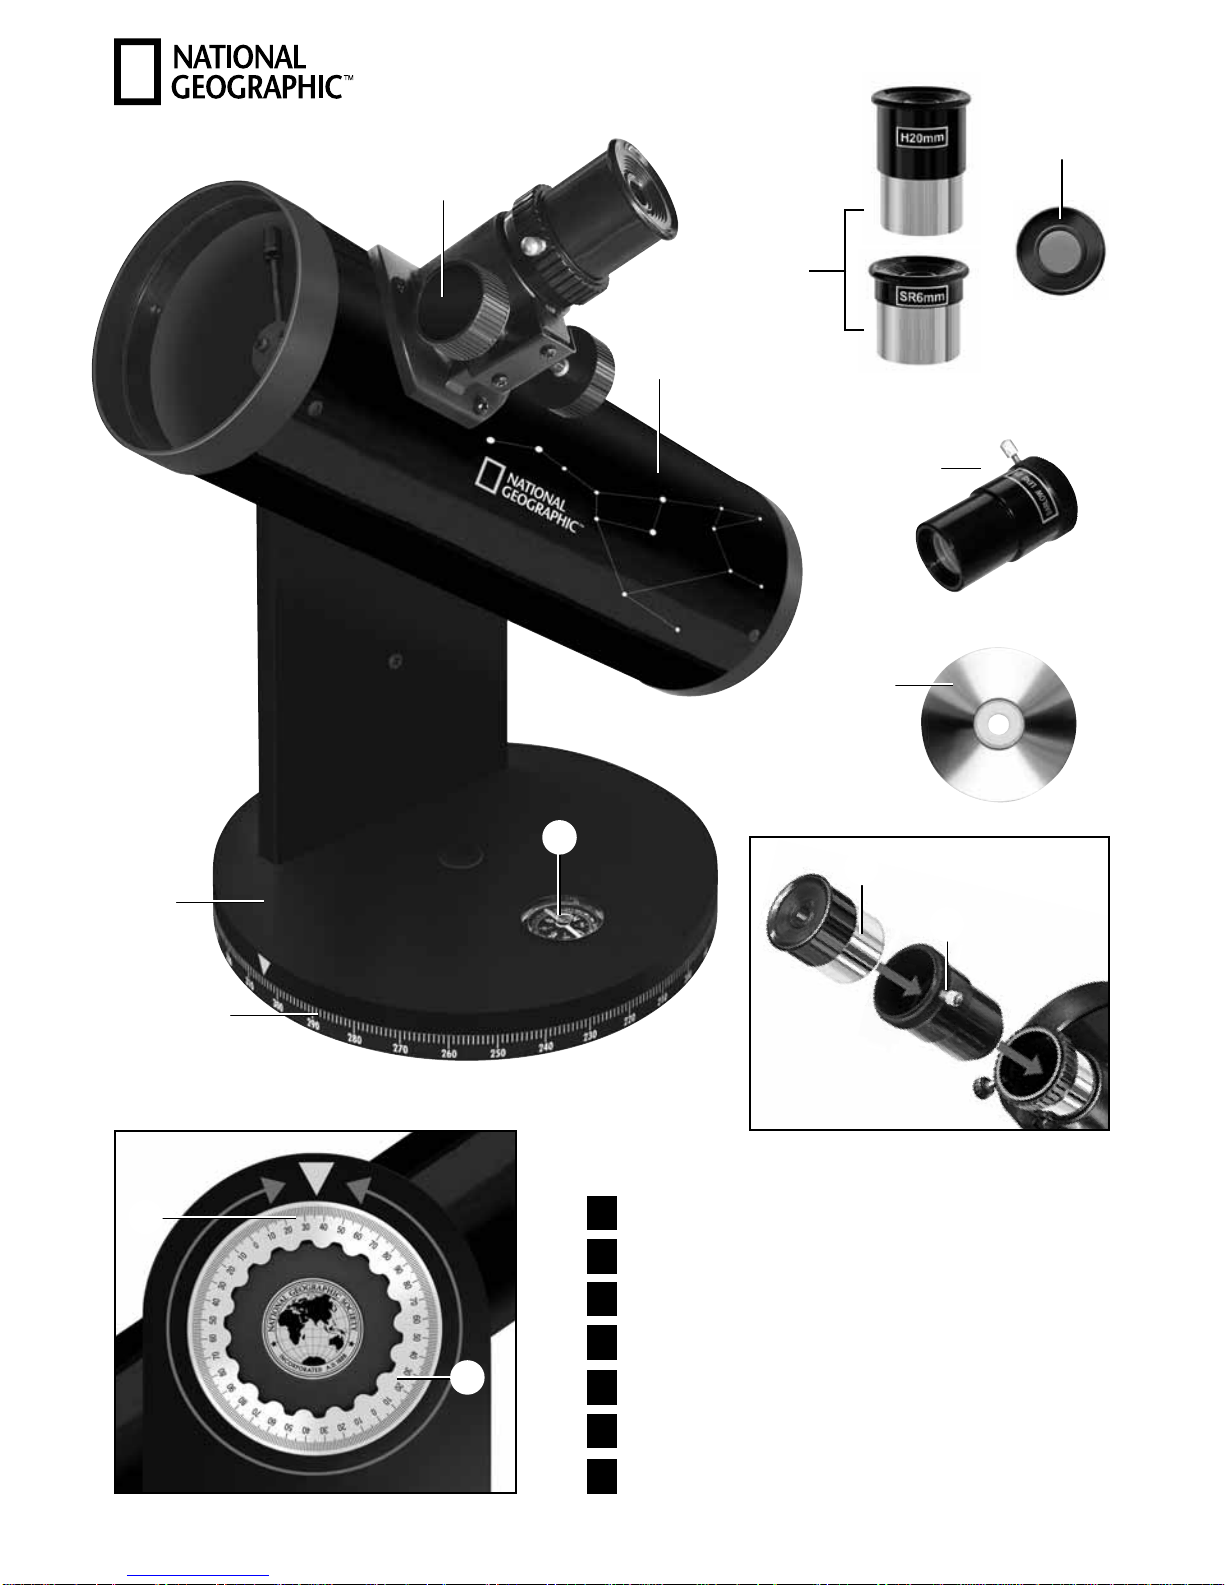
Aus diesen Teilen besteht Ihr Teleskop:
1. Scharfeinstellungsrad
2. Fernrohr (Teleskop-Tubus)
3. Kompass
4. Azimutale Montierung
5. Skala für die Azimut-Achse
6. Skala für die Höhenachse
7. Klemmrad zur Höheneinstellung
Lieferumfang:
8. 2 Okulare (6 mm, 20 mm)
9. Barlow Linse 2X
10. Mondfi lter
11. Software
Wählen Sie einen geeigneten Standort für Ihr Teleskop aus bevor Sie beginnen. Nutzen Sie hierfür einen stabilen
Untergrund, z.B. einen Tisch).
Ihr Teleskop richtig ausrichten
Azimutale Montierung bedeutet nichts anderes, als dass Sie das Teleskop auf- und abwärts und nach links und
rechts bewegen können.
Mit dem Klemmrad für die Höheneinstellung (7) und dem drehbaren Tisch (4) können Sie das Teleskop einstellen,
um ein Objekt zu fi xieren (d.h. fest anzublicken).
Mit Hilfe der Höheneinstellung (7) bewegen Sie das Teleskop langsam auf- und abwärts. Wenn Sie den Tisch (4)
drehen, können Sie Ihr Teleskop nach links und nach rechts schwenken.
Welches ist das richtige Okular?
Wichtig ist zunächst, dass Sie für den Beginn Ihrer Beobachtungen immer ein Okular mit der größten Brennweite wählen.
Generell gilt: Je größer die Brennweite des Okulars, desto niedriger ist die Vergrößerung! Für die Berechnung der Vergrößerung gibt es eine einfache Rechenformel: Brennweite des Fernrohrs : Brennweite des Okulars
= Vergrößerung

4
Sie sehen: Die Vergrößerung ist auch von der Brennweite des Fernrohrs abhängig. Dieses Teleskop hat eine Brennweite von 350 mm.
Daraus ergibt sich anhand der Rechenformel folgende Vergrößerung, wenn Sie ein Okular mit 20 mm Brennweite
verwenden:
350 mm : 20 mm = 18 fache Vergrößerung
Zur Vereinfachung haben wir hier eine Tabelle mit einigen Vergrößerungen zusammengestellt:
TeleskopBrennweite
OkularBrennweite
Vergrößerung Vergrößerung
mit 2X Barlow Linse
350 mm 20 mm 18X 35X
350 mm 6 mm 58X 117X
HINWEISE zur Reinigung
• Reinigen Sie die Linsen der Okulare nur mit einem weichen und fusselfreien Tuch (z. B. Microfaser). Das Tuch
nicht zu stark aufdrücken, um ein Verkratzen der Linsen zu vermeiden.
• Zur Entfernung stärkerer Schmutzpartikel befeuchten Sie das Putztuch mit einer Brillen-Reinigungsfl üssigkeit und
wischen damit die Linsen mit wenig Druck ab.
• Schützen Sie das Gerät vor Staub und Feuchtigkeit! Lassen Sie es nach der Benutzung – speziell bei hoher Luft-
feuchtigkeit – bei Zimmertemperatur einige Zeit akklimatisieren, so dass die Restfeuchtigkeit verdunsten kann.
• Staub auf dem Hauptspiegel entfernen Sie am besten mit einem Blasebalg oder weichem Pinsel (z.B. aus dem
Fotofachhandel). Den Spiegel nicht mit den Fingern berühren oder abwischen — die Verspiegelung kann sonst
beschädigt werden.
ENTSORGUNG
• Entsorgen Sie die Verpackungsmaterialien sortenrein. Informationen zur ordnungsgemäßen Entsorgung erhalten
Sie beim kommunalen Entsorgungsdienstleister oder Umweltamt.
• Beachten Sie bitte bei der Entsorgung des Geräts die aktuellen gesetzlichen Bestimmungen. Informationen zur
fachgerechten Entsorgung erhalten Sie bei den kommunalen Entsorgungsdienstleistern oder dem Umweltamt.
Kleines Teleskop-ABC:
Was bedeutet eigentlich ...
Barlow-Linse:
Mit der Barlow-Linse, benannt nach ihrem Erfi nder Peter Barlow (britischer Mathematiker und Physiker, 1776–
1862), kann die Brennweite eines Fernrohrs erhöht werden. Abhängig vom jeweiligen Linsentyp ist eine Verdopp-
lung oder sogar Verdreifachung der Brennweite möglich. Dadurch kann natürlich auch die Vergrößerung gesteigert
werden. Siehe auch „Okular“.
Brennweite:
Alle Dinge, die über eine Optik (Linse) ein Objekt vergrößern, haben eine bestimmte Brennweite. Darunter versteht
man den Weg, den das Licht von der Linse bis zum Brennpunkt zurücklegt. Der Brennpunkt wird auch als Fokus
bezeichnet. Im Fokus ist das Bild scharf. Bei einem Teleskop werden die Brennweiten des Fernrohrs und des
Okulars kombiniert.

5
DE
Linse:
Die Linse lenkt das einfallende Licht so um, dass es nach einer bestimmten Strecke (Brennweite) im Brennpunkt
ein scharfes Bild erzeugt.
Okular:
Ein Okular ist ein Ihrem Auge zugewandtes System aus einer oder mehreren Linsen. Mit einem Okular wird das im
Brennpunkt einer Linse entstehende scharfe Bild aufgenommen und nochmals vergrößert.
Für die Berechnung der Vergrößerung gibt es eine einfache Rechenformel:
Brennweite des Fernrohrs : Brennweite des Okulars = Vergrößerung
Sie sehen: Bei einem Teleskop ist die Vergrößerung sowohl von der Brennweite des Okulars als auch von der
Brennweite des Fernrohrs abhängig.
Vergrößerung:
Die Vergrößerung entspricht dem Unterschied zwischen der Betrachtung mit bloßem Auge und der Betrachtung
durch ein Vergrößerungsgerät (z.B. Teleskop). Dabei ist die Betrachtung mit dem Auge einfach. Wenn nun ein
Teleskop eine 30-fache Vergrößerung hat, so können Sie ein Objekt durch das Teleskop 30 Mal größer sehen als
mit Ihrem Auge. Siehe auch „Okular“.
Weiteres nützliches Zubehör unter www.bresser.de
Mögliche Beobachtungsobjekte:
Nachfolgend haben wir für Sie einige sehr interessante Himmelskörper und Sternhaufen ausgesucht und erklärt.
Auf den zugehörigen Abbildungen am Ende der Anleitung können Sie sehen, wie Sie die Objekte durch Ihr Teleskop
mit den mitgelieferten Okularen bei guten Sichtverhältnissen sehen werden:
Der Mond
Der Mond ist der einzige natürliche Satellit der Erde.
Durchmesser: 3.476 km
Entfernung: ca. 384.400 km
Der Mond ist seit prähistorischer Zeit bekannt. Er ist nach der Sonne das zweithellste Objekt am Himmel. Da der
Mond einmal im Monat um die Erde kreist, verändert sich ständig der Winkel zwischen der Erde, dem Mond und der
Sonne; man sieht das an den Zyklen der Mondphasen. Die Zeit zwischen zwei aufeinander folgenden Neumondphasen beträgt etwa 29,5 Tage (709 Stunden).
Orion-Nebel (M 42)
M 42 im Sternbild Orion
Entfernung: 1.344 Lichtjahre von der Erde entfernt
Mit einer Entfernung von etwa 1.344 Lichtjahren ist der Orion-Nebel (Messier 42, kurz M 42) der hellste diffuse
Nebel am Himmel.
Dieser Nebel ist mit dem bloßen Auge sichtbar und ein lohnendes Objekt für Teleskope in allen Größen, vom kleinsten Feldstecher bis zu den größten erdgebundenen Observatorien und dem Hubble Space Telescope.
Es handelt sich um den Hauptteil einer weit größeren Wolke aus Wasserstoffgas und Staub, die sich mit über 10
Grad Himmelsausschnitt gut über die Hälfte des Sternbildes Orion erstreckt. Die Ausdehnung dieser gewaltigen
Wolke beträgt mehrere hundert Lichtjahre.
Ringnebel in der Leier (M 57)
M 57 im Sternbild Leier
Entfernung: 2.412 Lichtjahre von der Erde entfernt

6
Der berühmte Ringnebel M 57 im Sternbild Leier wird oft als der Prototyp eines planetarischen Nebels angesehen;
er gehört zu den beliebtesten Nebel des Sommerhimmels der Nordhalbkugel.
Neuere Untersuchungen haben ergeben, dass es sich aller Wahrscheinlichkeit nach um einen Ring (Torus) aus hell
leuchtender Materie handelt, die den Zentralstern umgibt (nur mit größeren Teleskopen sichtbar), und nicht um eine
kugel- oder ellipsoidförmige Gasstruktur.
Würde man den Ringnebel von der Seitenebene betrachten, würde er dem Hantel-Nebel (M 27) ähneln. Wir blicken
bei diesem Objekt genau auf den Pol des Nebels.
Hantel-Nebel im Füchslein (M 27)
M 27 im Sternbild Füchslein
Entfernung: 1.360 Lichtjahre von der Erde entfernt
Der Hantel-Nebel (M 27) im Füchslein war der erste planetarische Nebel, der überhaupt entdeckt wurde. Am 12.
Juli 1764 entdeckte Charles Messier diese neue und faszinierende Klasse von Objekten. Wir sehen dieses Objekt
fast genau von seiner Äquatorialebene. Würde man den Hantel-Nebel von einem der Pole sehen, würde er wahrscheinlich die Form eines Ringes aufweisen und dem Anblick ähneln, den wir von dem Ringnebel M 57 kennen.
Aufgrund seiner Helligkeit ist dieses Objekt bereits bei nicht optimalen Wetterbedingungen sichtbar.
Garantie und Garantiezeitverlängerung
Die Garantiezeit beträgt 2 Jahre und beginnt am Tag des Kaufs. Bitte bewahren Sie die Rechnung auf. Sie können
die Garantiezeit auf 5 Jahre verlängern, wenn Sie sich auf www.bresser.de/garantie registrieren und den kurzen
Fragebogen ausfüllen. Zur Inanspruchnahme der 5-Jahre-Garantie müssen Sie die Registrierung innerhalb von 3
Monaten nach dem Kauf (es gilt das Datum des Kaufbelegs) durchführen. Danach erlischt der Anspruch auf die
verlängerte Garantie. Sollten Sie Probleme mit Ihrem Gerät haben, wenden Sie sich bitte an unseren Service. Bitte
senden Sie uns keine Artikel ohne vorherige telefonische Rücksprache. Viele Probleme lassen sich bereits am
Telefon erledigen; falls nicht, kümmern wir uns um den Transport. Sollte das Problem nach Ablauf der Garantie
auftreten, oder nicht von der Garantie gedeckt sein, so erhalten Sie von uns kostenfrei einen Kostenvoranschlag
über die Reparaturkosten.
Service Hotline: +49 (0) 2872 - 80 74-210
Wichtig bei Rücksendungen:
Um Transportschäden zu vermeiden achten Sie bitte darauf, dass das Gerät sorgfältig verpackt in der OriginalVerpackung zurückgegeben wird. Bitte den Kassenbon (oder eine Kopie) sowie die Fehlerbeschreibung beifügen.
Ihre gesetzlichen Rechte werden durch diese Garantie nicht eingeschränkt.
Ihr Fachhändler: .................................................. Art. Nr.: ..............................................................
Fehlerbeschreibung: ..............................................................................................................................
...........................................................................................................................................................
Name: ...............................................................
Straße: ...............................................................
PLZ/Ort: ............................................................
Telefon: ..............................................................
Kaufdatum: .........................................................
Unterschrift: .......................................................
7
EN
General Warning
Risk of bodily injury!
Never use this device to look directly at the sun or in the direct proximity of the sun. This
will result in a risk of blindness.
• Children should only use the device under adult supervision. Keep packaging material, like plastic bags and rubber bands, out of the reach of children, as they pose a choking hazard.
• Never subject the device, especially the optics, to direct sunlight. The concentration of light can cause fi res or
burns.
• Do not disassemble the device. In the event of a defect, please contact your dealer. The dealer will contact the
Service Centre and can send the device in to be repaired, if necessary.
• Do not expose the device to high temperatures.
Privacy protection!
This device is intended only for private use. Please heed the privacy of other people. Do not use it
to look into apartments, for example.
Your telescope consists of these parts:
1. Focus wheel
2. Telescope (Telescope tube)
3. Compass
4. Alt-azimuth mount
5. Azimuth scale
6. Scale with 90° steps
7. Height adjustment wheel
Additional equipment:
8. Two Eyepieces (6 mm, 20 mm)
9. Barlow lens 2X
10. Moon fi lter
11. Software
Please look for a suitable location to set up your telescope before you begin. Use a stable surface like a table or
countertop.
Pointing your telescope
Azimuthal mounting means that you can move your telescope up and down, left and right.
With the height adjustment wheel (7) and the turnable azimuth mount, you can point the telescope at any object you
want. Use the wheel (7) to tilt the telescope up and down. By using the azimuth mount like a turntable you can pan
the telescope to the left and to the right.
Which eyepiece is right?
It is important that you always choose an eyepiece with the highest focal width for the beginning of your observation. Afterwards, you can gradually move to eyepieces with smaller focal widths. The focal width is indicated in
millimeters, and it is written on each eyepiece. In general, the larger the focal width of an eyepiece, the smaller the
magnifi cation.
8
There is a simple formula for calculating the magnifi cation:
Focal width of the telescope tube / Focal width of the eyepiece
= Magnifi cation
The magnifi cation is also depends on the focal width of the telescope tube. The telescope has a focal length of
350 mm.
From this formula, we see that if you use an eyepiece with a focal width of 20 mm, you will get the following magnifi cation:
350 mm / 20 mm = 18X magnifi cation
The table below shows some common magnifi cations.
Telescope tube
focal width
Focal width of eyepiece Magnifi cation Magnifi cation with
2x Barlow lens
350 mm 20 mm 18X 35X
350 mm 6 mm 58X 117X
NOTES on cleaning
• Clean the eyepieces and lenses only with a soft, lint-free cloth, like a microfi bre cloth. Do not apply excess pres-
sure to the cloth to avoid scratching the lenses.
• To remove more stubborn dirt, moisten the cleaning cloth with an eyeglass-cleaning solution, and wipe the lenses
gently.
• Protect the device from dust and moisture. After use, particularly in high humidity, let the device acclimatize for a
short period of time, so that the residual moisture can dissipate before storing. Remove the dust cover and store
it in the included bag during use.
• To remove dust on the mirrors, use a fi ne brush or air blower (from your local camera shop or optician). Don’t
touch any mirror surface with your fi ngers — they may damage the coating.
DISPOSAL
• Dispose of the packaging materials properly, according to their type, such as paper or cardboard. Contact your
local waste- disposal service or environmental authority for information on the proper disposal.
• Please take the current legal regulations into account when disposing of your device. You can get more information on the proper disposal from your local waste-disposal service or environmental authority.
Telescope ABC:
What do the following terms mean?
Barlow Lens:
The Barlow lens was named after its inventor, Peter Barlow, a British mathematician and physicist who lived from
1776–1862. The lens can be used to increase the focal width of a telescope. Depending on the type of lens, it is
possible to double or even to triple the focal width. As a result, the magnifi cation can also be increased. Also, see
Eyepiece.
Focal width:
Everything that magnifi es an object via an optic (lens) has a certain focal width. The focal width is the length of the
path the light travels from the surface of the lens to its focal point. The focal point is also referred to as the focus. In

9
EN
focus, the image is clear. In the case of a telescope, the focal widths of the telescope tube and the eyepieces are
combined.
Lens:
The lens bends the light which falls on it in such a way that the light creates a clear image at the focal point, after it
has traveled a certain distance (focal width).
Eyepiece:
An eyepiece is a viewing system comprised of one or more lenses. The eyepiece magnifi es the clear image generated at the focal point of a lens.
There is a simple formula for calculating magnifi cation:
Focal width of the telescope tube / Focal width of the eyepiece
= Magnifi cation
In a telescope, the magnifi cation depends on both the focal width of the telescope tube and the focal width of the
eyepiece.
Magnifi cation:
The magnifi cation corresponds to the difference between observation with the naked eye and observation through
a magnifi cation apparatus (e.g. a telescope). Observation with the naked eye is considered single, or 1x magnifi cation. Accordingly, if a telescope has a magnifi cation of 30X, then an object viewed through the telescope will appear
30 times larger than it would with the naked eye. Also see Eyepiece.
Useful accessories can be found at www.bresser.de
Possible objects for observation:
We have compiled and explained a number of very interesting celestial bodies and star clusters for you. On the
accompanying images at the end of the instruction manual, you can see how objects will appear in good viewing
conditions through your telescope using the eyepieces that came with it.
The Moon
The moon is the Earth’s only natural satellite.
Diameter: 3,476 km
Distance: approx. 384,400 km from Earth
The moon has been known to humans since prehistoric times. It is the second brightest object in the sky (after the
sun). Because the moon circles the Earth once per month, the angle between the Earth, the moon and the sun
is constantly changing; one sees this change in the phases of the moon. The time between two consecutive new
moon phases is about 29.5 days (709 hours).
Orion Nebula (M 42)
M 42 in the Orion constellation
Distance: 1,344 light years from Earth
With a distance of about 1,344 light years from the Earth, the Orion Nebula (Messier 42, abbreviation: M 42) is the
brightest diffuse nebula in the sky it is visible with the naked eye and a rewarding object for telescopes in all sizes,
from the smallest fi eld glass to the largest earthbound observatories and the Hubble Space Telescope.
When talking about Orion, we’re actually referring to the main part of a much larger cloud of hydrogen gas and dust,
which spreads out over the half of the Orion constellation. The expanse of this enormous cloud stretches several
hundred light years.

10
Ring Nebula in Lyra constellation (M 57)
M 57 in the Lyra constellation
Distance: 2,412 light years from Earth
The famous Ring Nebula (M 57) in the constellation of Lyra is often viewed as the prototype of a planetary nebula; it
is one of the magnifi cent features of the Northern Hemisphere’s summer sky. Recent studies have shown that it is
probably comprised of a ring (torus) of brightly shining material that surrounds the central star (only visible with larger
telescopes), and not of a gas structure in the form of a sphere or an ellipse.
If you were to look at the Ring Nebula from the side, it would look like the Dumbbell Nebula (M27). With this object,
we’re looking directly at the pole of the nebula.
Dumbbell Nebula in the Vulpecula (Fox) constellation (M 27)
M 27 in the Fox constellation
Distance: 1,360 light years from Earth
The Dumbbell Nebula (M 27) in the Fox constellation was the fi rst planetary nebula ever discovered. On 12 July
1764, Charles Messier discovered this new and fascinating class of objects. We see this object almost directly
from its equatorial plane. If you could see the Dumbbell Nebula from one of its poles, it would probably reveal that
it’s in the shape of a ring, and we would see something very similar to what we know from the Ring Nebula (M 57).
In reasonably good weather, we can see this object well even at small magnifi cations.
Warranty and warranty term extension
The warranty term is two years from the date of purchase. Please keep your proof of purchase.
Register at www.bresser.de/warranty and fi ll out a brief questionnaire to get your warranty term extended to fi ve
years. Registration must be completed within three months of purchase (date of receipt) to validate the warranty. If
you register thereafter, the warranty term will not be extended. If you have problems with your device, please contact our customer service fi rst. Do not send any products without consulting us fi rst by telephone. Many problems
with your device can be solved over the phone. If the problem cannot be resolved by phone, we will take care of
transporting your device to be repaired. If the problem occurred after the warranty ended or it is not covered by our
warranty terms, you will receive an estimate of repair costs, free of charge.
Service Hotline: +49 (0) 2872 - 80 74-210
Important for any returns:
Please make sure to return the device carefully packed in the original packaging in order to prevent damage during
transport. Also, please enclose your receipt for the device (or a copy) and a description of the defect. This warranty
does not imply any restriction of your statutory rights.
Your dealer: ........................................................ Art. No.: .............................................................
Description of problem: ..........................................................................................................................
...........................................................................................................................................................
Name: ...............................................................
Street: ...............................................................
City/Postcode: ....................................................
Telephone: .........................................................
Date of purchase: ................................................
Signature: ..........................................................
 Loading...