

Braun NovoScan I User Manual
-0-

-1-
Table of Contents
1. Precautions…………………………………………. 2
2. Preparation………………………………………….. 5
z S tandard Accessories……………………….. 5
z Parts Names………………………………….. 6
3. Install The Driver and Software…………………… 7
z Install the Driver……………………………… 7
z Install the Software………………………….. 8
4. Place Film/Slide into the Holder………………….. 9
5. Connecting the BRAUN NovoScan I.........……… 10
6. Edit The Pictures/ Photo Editing Tools.................. 15
z Adjust…………….……………………………. 15
z Retouch…………..…..………………………. 19
z Clipboard……………………………………… 21
9. Appendix…………………………………………….. 22
z Specifications…………………………………. 22
z System Requirements……………………….. 22
10. Trouble Shooting……………………………………. 23
EN

-2-
Welcome
Thank you for purchasing a BRAUN NovoScan I.
Please take a moment to read through this manual. Its
contents will send you on an educational journey into your
recorder multiple capabilities.
1. Precaution
Before using BRAUN NovoScan I, please ensure that you
read and understand the safety precautions described
below. Always ensure that the BRAUN NovoScan I is
operated correctly.
• Never operate BRAUN NovoScan I inside of an
aircraft or anywhere else where operation of such
devices is restricted. Improper use creates the risk
of serious accident.
• Do not try to open the case of BRAUN NovoScan I
or attempt to modify BRAUN NovoScan I in any way.
High-voltage internal components create the risk of
electric shock when exposed. Maintenance and
repairs should be performed only by authorized
service providers.
• Keep BRAUN NovoScan I away from water and
other liquids. Do not use BRAUN NovoScan I with
wet hands. Never use BRAUN NovoScan I in the
rain or snow. Moisture creates the danger of fire and
electric shock.
• Keep BRAUN NovoScan I and its accessories out of
the reach of children and animals to prevent
accidents or damage to the BRAUN NovoScan I.

-3-
• If you notice smoke or a strange odor coming from
BRAUN NovoScan I, turn the power off immediately.
Take BRAUN NovoScan I to the nearest authorized
service center for repair. Never attempt to repair
BRAUN NovoScan I on your own.
• Use only the recommended power accessories. Use
of power sources not expressly recommended for
BRAUN NovoScan I may lead to overheating,
distortion of the equipment, fire, electrical shock or
other hazards.
• BRAUN NovoScan I may become slightly warm
during use. This does not indicate malfunction.
• If the exterior of BRAUN NovoScan I needs cleaning,
wipe it with a soft, dry cloth.
EN

-4-
FCC Notice
This equipment has been tested and found to comply with
the limits for a Class B digital device, pursuant to Part 15
of the FCC Rules. These limits are designed to provide
reasonable protection against harmful interference in a
residential installation. This equipment generates, uses
and can radiate radio frequency energy. If not installed
and used in accordance with the instruction, it may cause
harmful interference to radio communication. However,
there is no guarantee that interference will not occur in a
particular installation. If this equipment does cause
harmful interference to radio or television reception, which
can be determined by turning the equipment on the off,
the user is encouraged to try to correct the interference by
one or more the following suggestion.
z Reorient or relocate the receiving antenna.
z Increase the distance between the equipment and
the receiver.
z Connect the equipment to a different power outlet
other than the one where the receiver is connected.
z Consult an experienced television or radio
technician for help.
CAUTION
To comply with the limits for a Class B digital device,
pursuant to Part 15 of the FCC Rules, this device must
only be installed on computer equipment certified to
comply with the Class B limits.
-5-
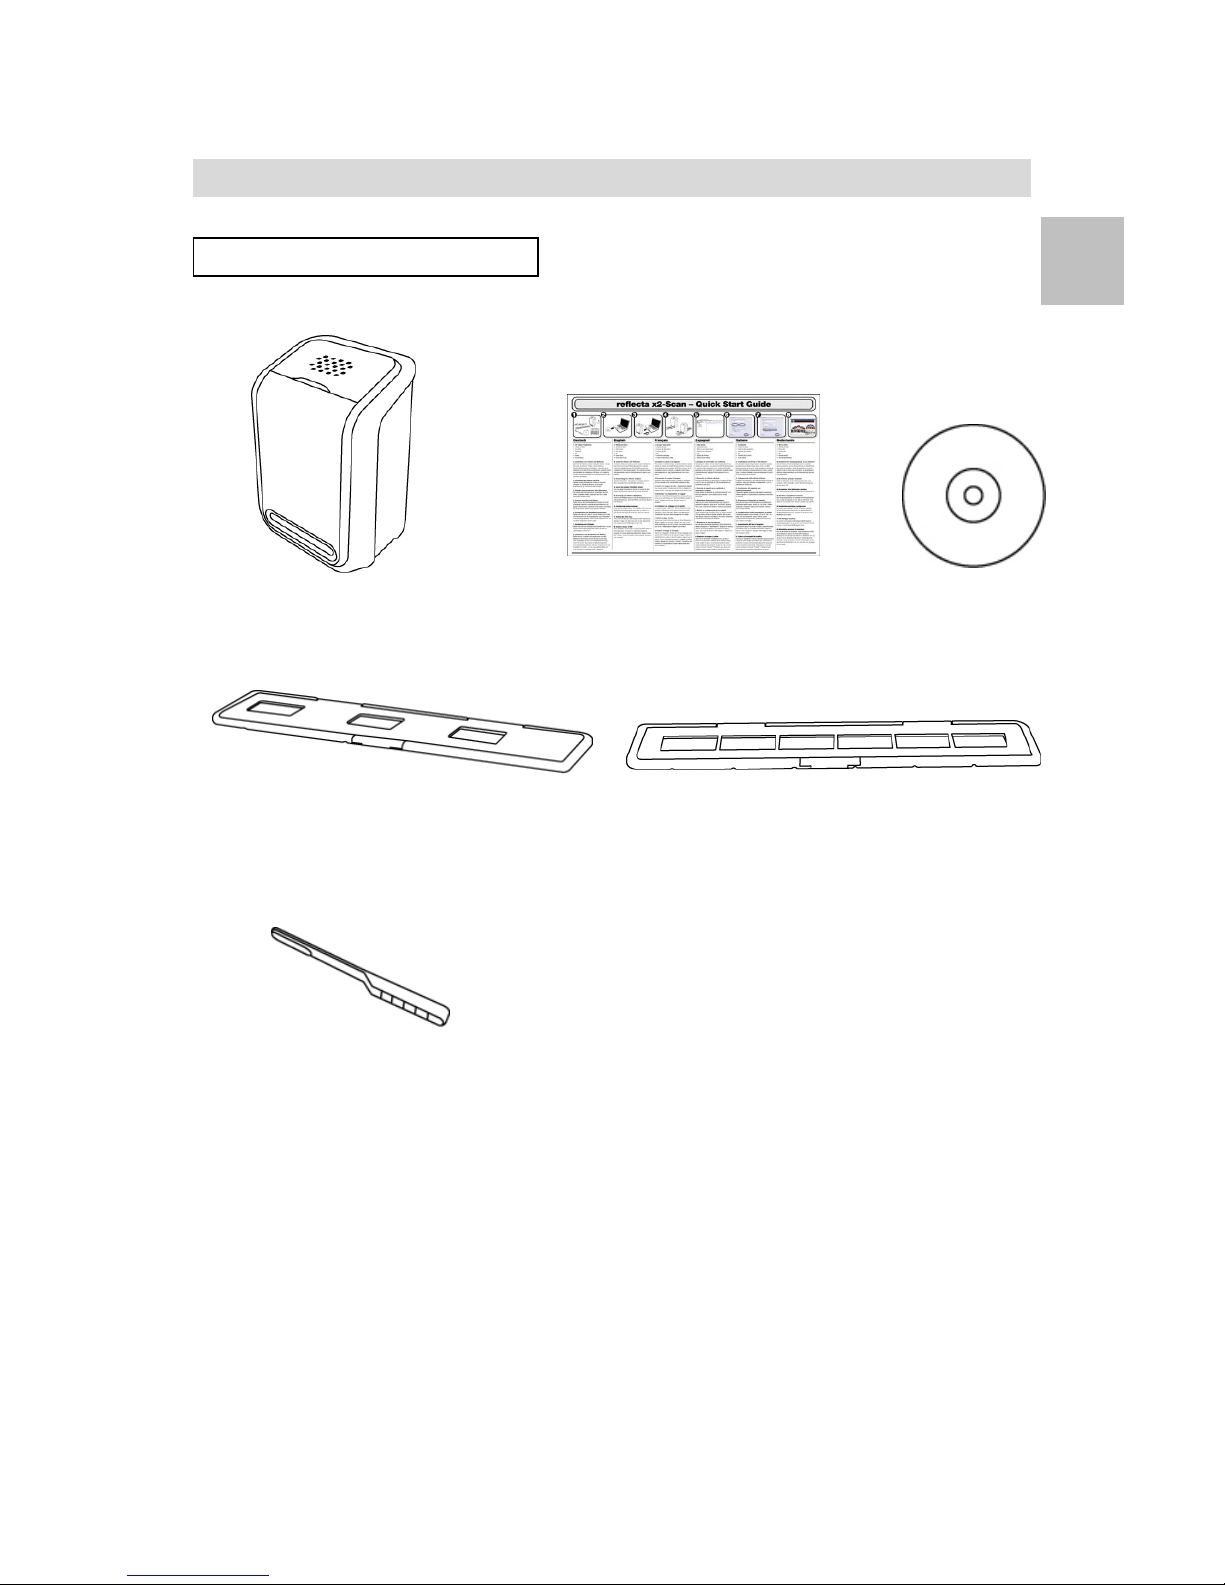
Preparation
St andard Accessories
BRAUN NovoScan I Quick Start Guide CD
Positive Slide Holder Negative Film Holder
Clean brush
EN
-6-
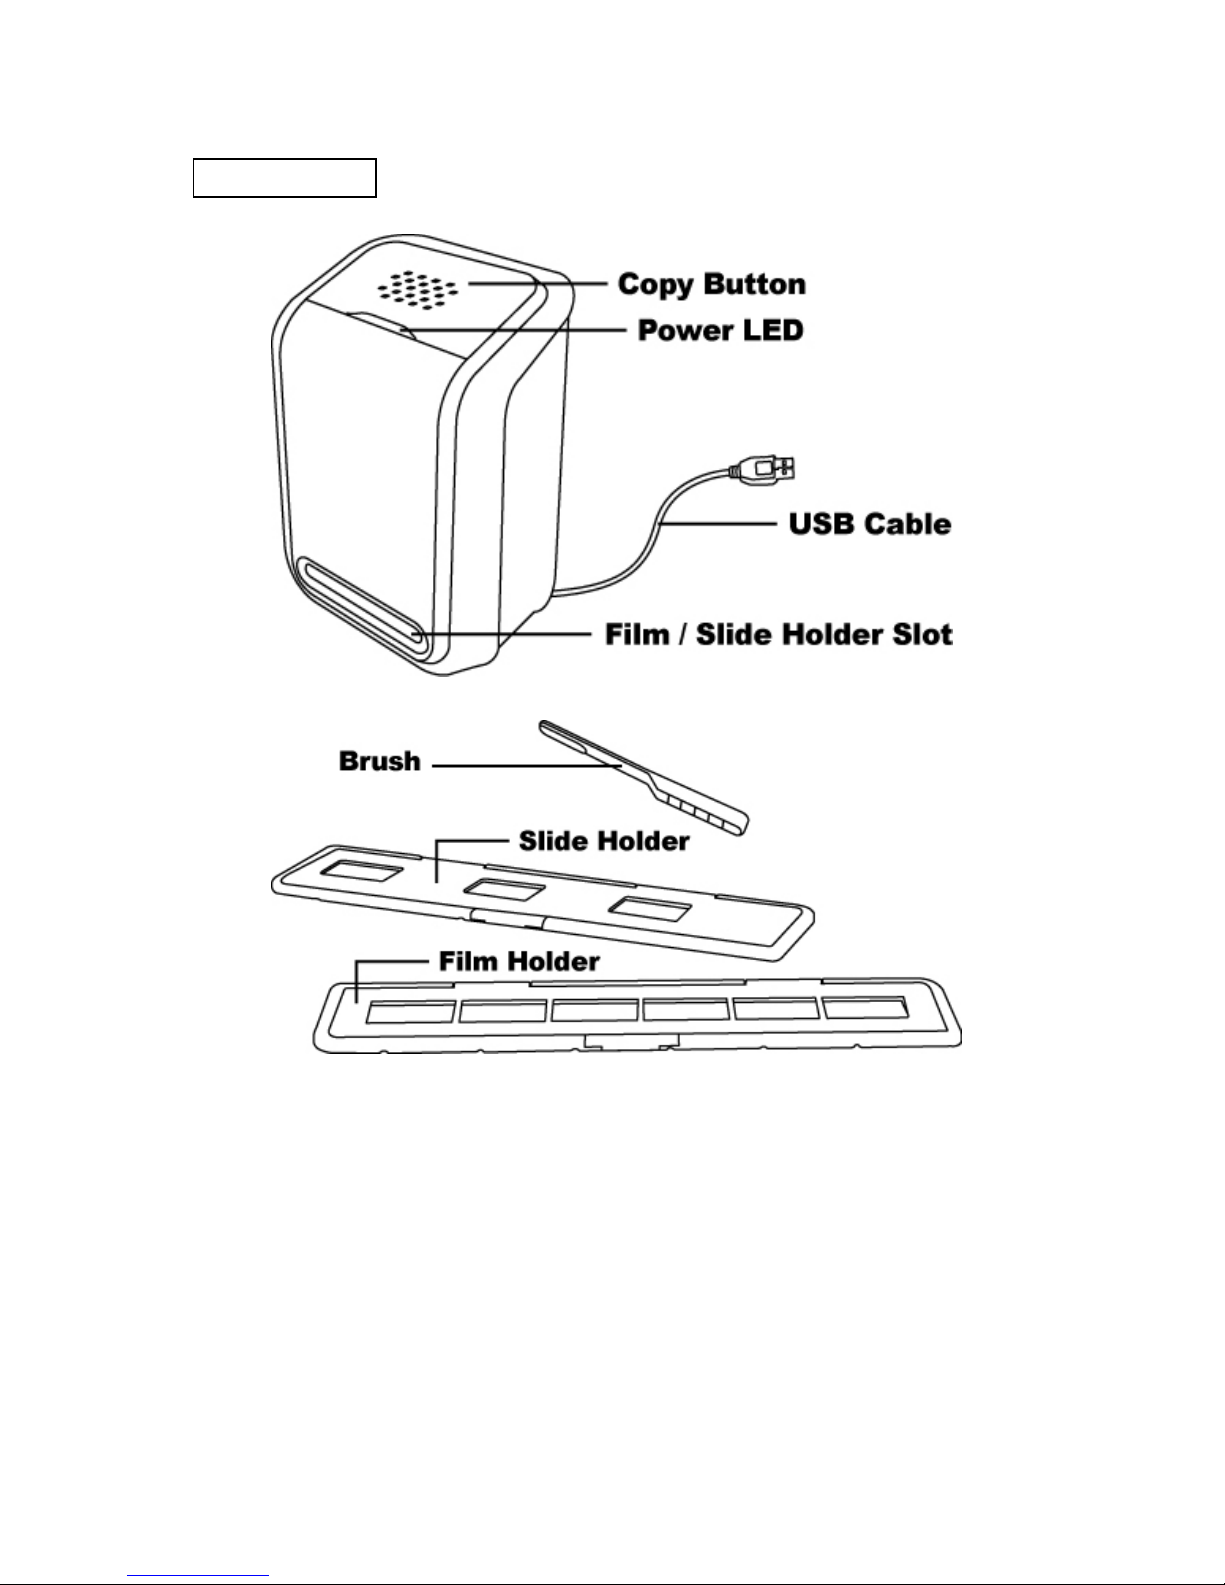
Part Names
Note: We strongly suggest using a clean, dry , non-alcohol cotton
swab to insert into the BRAUN NovoScan I slot and clean the
glass surface periodically to produc e a clear image. Please
make sure your film negatives/ mounted slides and cover trays
are clean before inserting into the BRAUN NovoScan I as well.
Dust or dirt from the negatives and cover trays will affect the
quality of your scanned images.
-7-
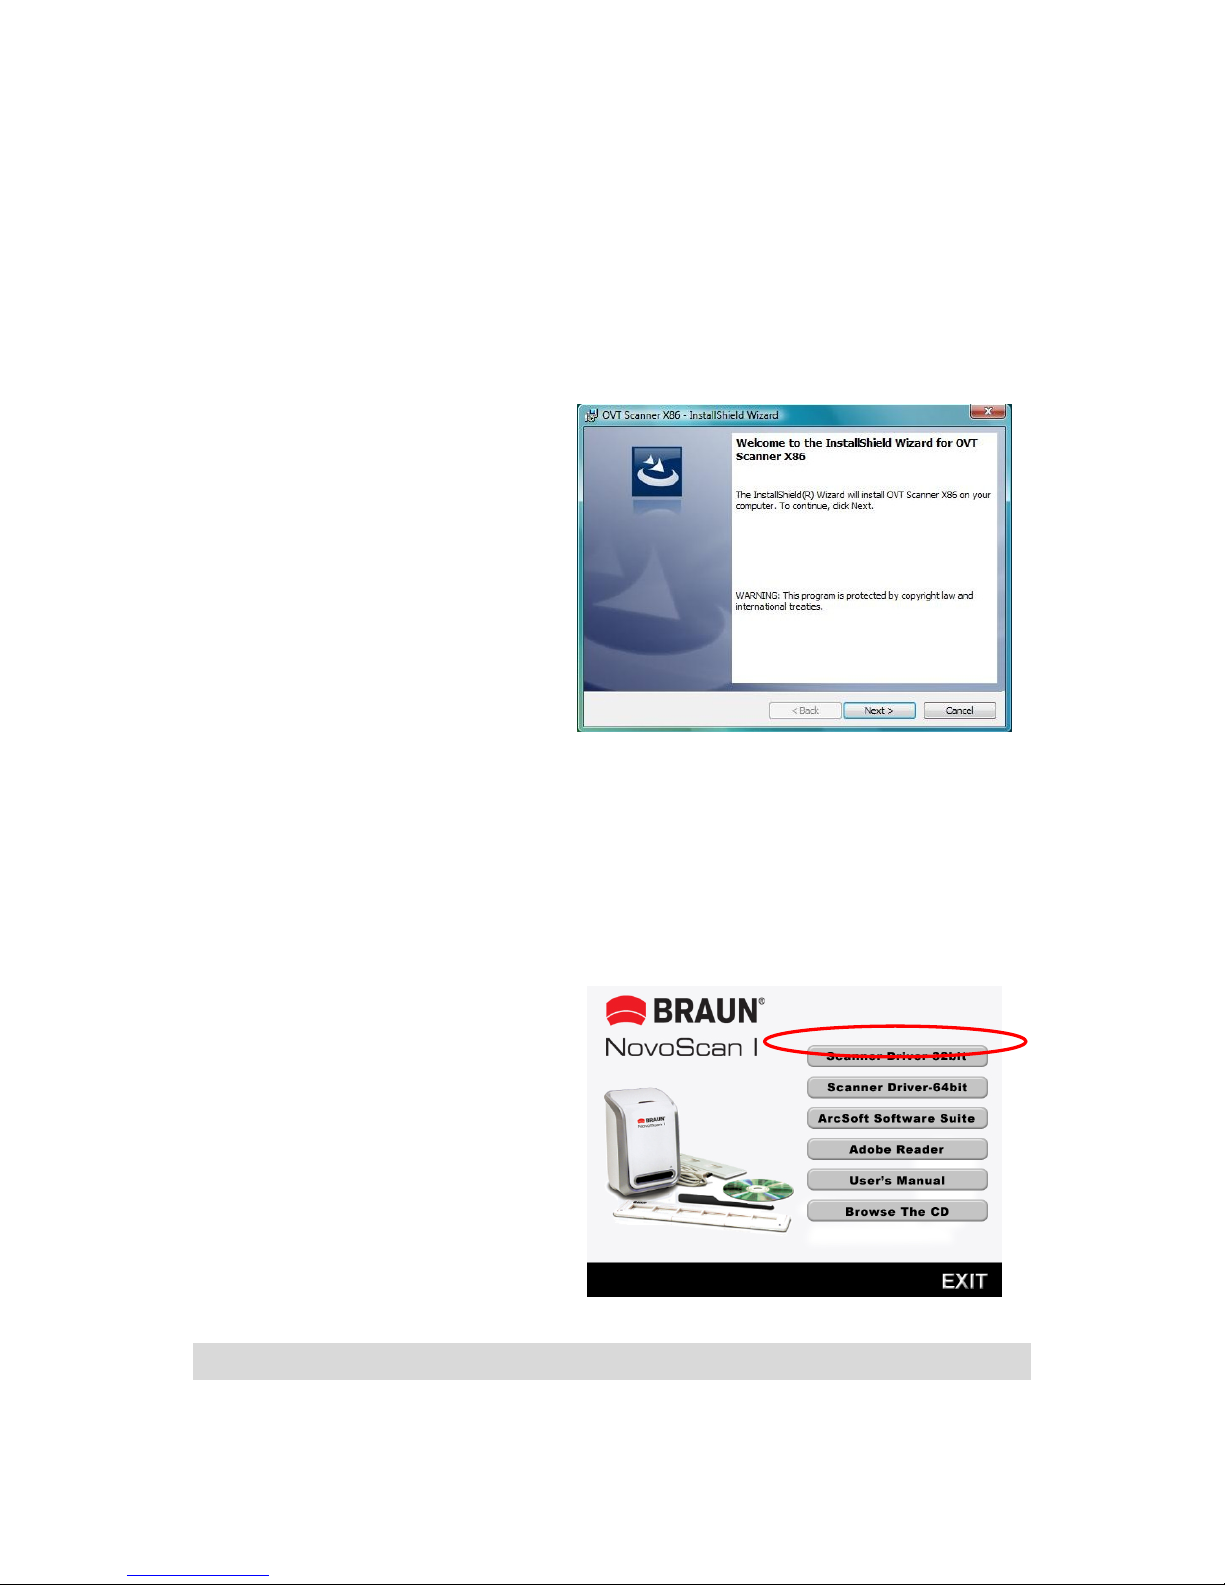
3. Install the Driver and Software
To use the BRAUN NovoScan I you must install the
BRAUN NovoScan I driver and ArcSoft PhotoImpression
6 in advance.
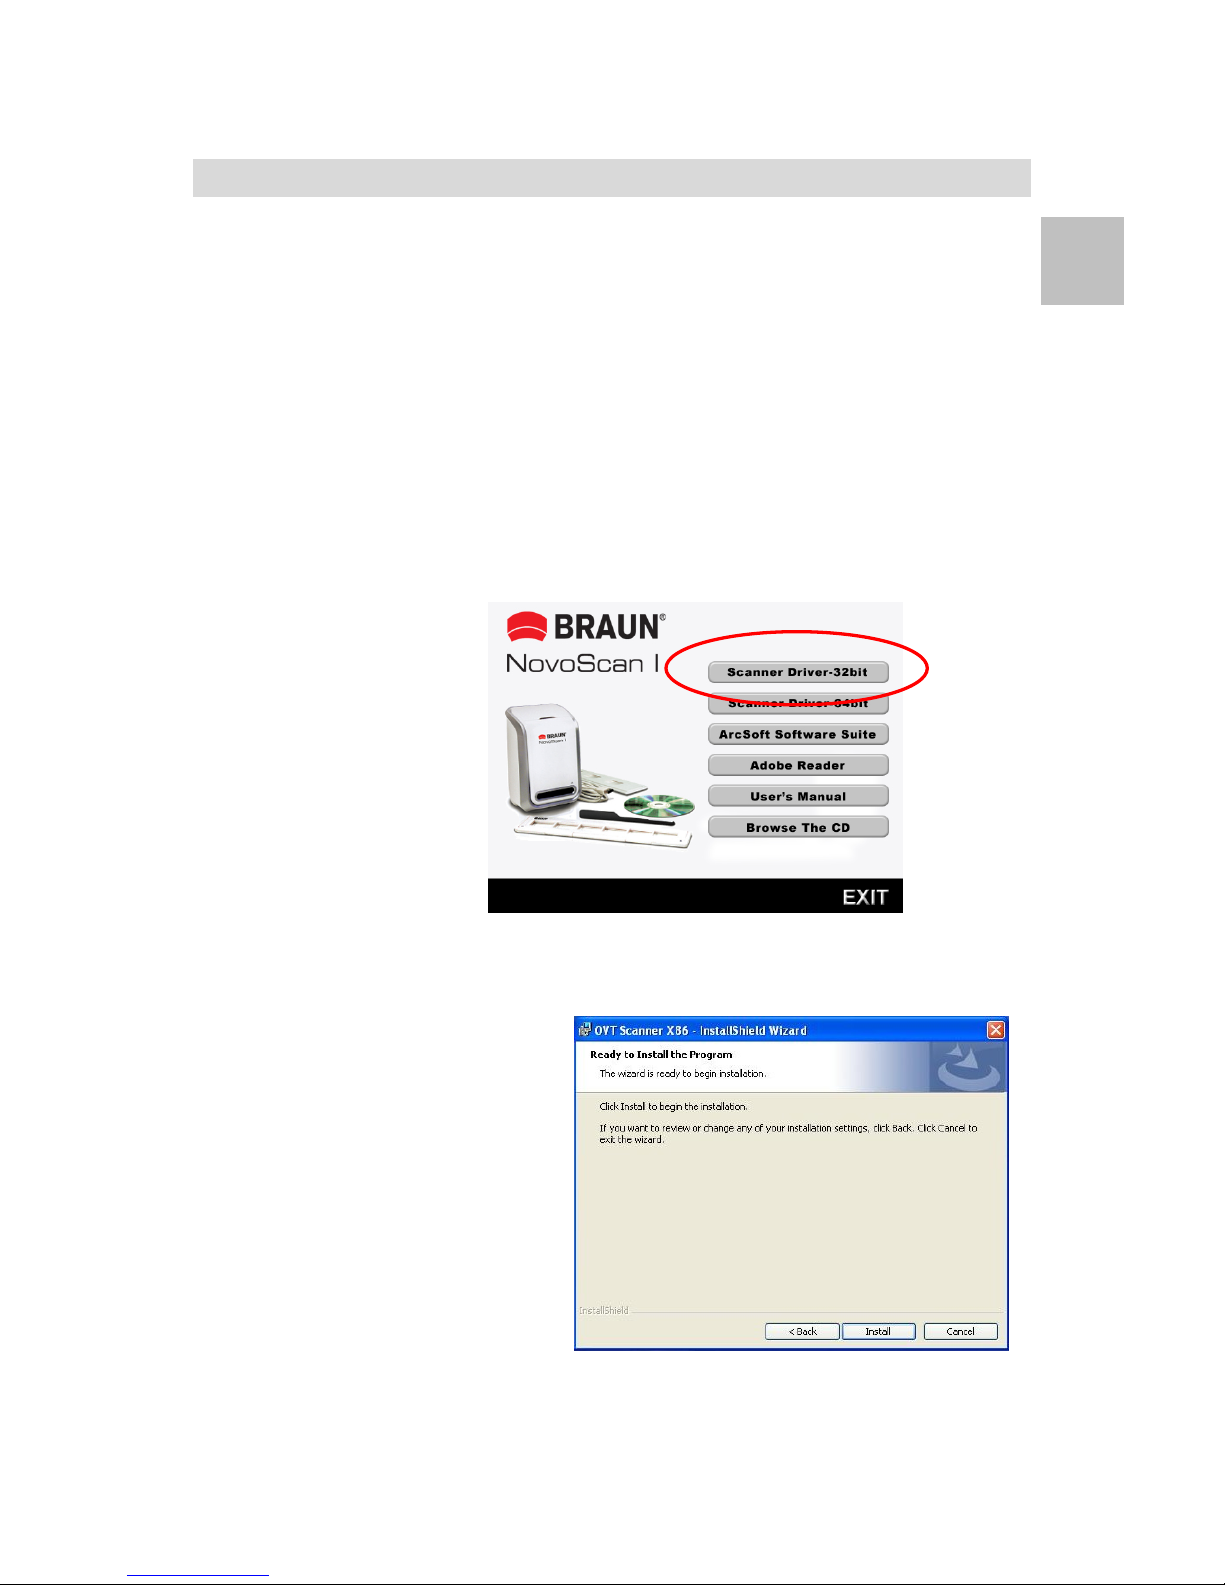
Installing the Driver
1. Turn on the computer.
2. Insert the installation CD into the CD-ROM drive and
the installation CD menu will appear.
3. When you see the following screen, Choose
“Scanner Driver”.
4. Follow the on-screen instructions to install driver.
Under XP OS
- Click “Next”
- Click “Install”
- Click “Finish”
EN
-8-
Under Vista OS
- Click “Next”
- Click “Install”
- Click “Finish”
- Select “Locate and install driver software
(recommended)”
Installing the Software
1. Insert the installation CD into the CD-ROM drive and
the installation CD menu should appear.
2. When you see the following screen, choose “ArcSoft
Software Suite” to install the software.
3. Follow the on-screen instructions.
4. Setup MicroSoft
DirectX 9.0
5. The installed
software will
automatically create
a PhotoImpression
6 logo on your
desktop.
6. Restart the computer.
4. Place Film/ Slide Into The Holder
 Loading...