

Brandt DFH15624X, DFH15624W Instruction Manual

Dear C usto mer,
1) Sa fety In stru c tions........ ........ .... ..... . ........... 1 -4
2) Quic k us er gui de..... . ..... ... .... ...... .. ......... . ......5
Pleas e ca refu lly r ead th is man ual befor e using t he
dishw ash er, it will help you use and maint ai n t he
dishw ash er pr o pe rly.
Keep this ma nual for future re ference.
Pass it on to any subsequent ow ner of th e ap plia nce.
This m anual c ontains sectio ns on safety Inst ructions ,
Operati ng Instruct ions, Install ation Instr uctions a nd
Troubles h ooti ng Tip s, etc.
To re view the sec tion o n troubl e shooti n g Tips
will help you to s olve so me co mmon pro b lems
by yo urself .
If yo u can not s olve the pro blems by yoursel f ,
plea se a sk f o r the he lp of prof essio nal techn icia n s.
3) Oper ating Instructio ns.. ...... ...... ............ ... ....6
Con trol Panel... ...... ...... ... ......... ... ... ........... . .......6
Dis h wa sher Fea tures.... ........ .... ..... . ........... ........6
4) Prior to first time use..... ..... . ........ .... ........ .....7
A.Water Softene r.... . ............ ............ ...... .. ......... . 7
B.Loadi ng t he Salt in to the S often er.. ............ . .....8
C.F illing t he Ri n se Aid Di spense r..... . ........ .... ......8
D.F unct ion of Det ergent...... . ........ .... ..... . .... ........ 9
5) Prep aring and lo adin g dishe s...... .... ..... . .....12
Rec omm en dation s for lo adin g an d unload ing
the dishwas her. ... ... .. ......... . ........ .... ........ ..... .... 1 2
Sta ndard loa din g patt ern.... . ........ .... ..... . .. ......... 1 3
6) Start ing a was hing p rogram. .. ......... . ........ ..14
Was h Cycle Table... . ........... . ........ .... ..... . .. ........1 4
Turning on t he A ppli ance..... ... ......... . .. ......... . ....1 4
Cha n ging th e Progr a m mi d-cycl e..... . ........ .... ....1 5
At the end o f the Wash Cycle............ ... ... ...... ... ..1 5
7) Main tena nce and cle anin g.. . ........ .... ..... . .. ...16
Fil ter System. ... ...... ...... ............ ... ... .. ......... . .....16
Car ing f or the D i shwash e r......... . ........ .... ...... .. ...17
The man u fa cture r, f o llowing a pol icy of co n s ta nt
dev elopment and up datin g of the pr od uct, may
make modi ficat ions wi thout givin g prio r no tice .
If l ost o r ou t-of- dat e, you can r eceive a new user
ma nua l fro m th e manu factu rer o r re s pon sib le
vendor.
8) In stall ation I nstr u ction.. ...... ........ .... ...... .. ...18
Pos ition ing the A ppl ianc e...... ..... .... ........ ..........18
Abo ut P owe r Co nnect ion..... ........ .... ..... . .. ..... .... 1 8
Wat er c onne ctio n.... ...... ...... ...... ...... ...... ...........1 9
Sta rt of dish was her....... ..... . ........... . ........ .... ..... 20
9) Troubles hooti ng Tips.... ........ .... ..... ........ .... 2 1
Bef ore c alli n g for service.... . ........ .... ...... .. ..... .... 2 1
Erro r codes ...... ........ .... ..... . ........... . ........ .... ....2 2
Technical in form a tion.... ........ ......... . ............ .....23
Loa din g the basket s according to E n5 0 242

When using your dishwasher,
follow the precautions listed below:
This appliance is intended to be used in household
and similar applications such as:
-staff kitchen areas in shops, offices and other
working environments;
-farm houses;
-by clients in hotels, motels and other residential type
environments;
-bed and breakfast type environments.
This appliance can be used by children aged from 8
years and above and persons with reduced physical,
sensory or mental capabilities or lack of experience
and knowledge if they have been given supervision
or instruction concerning use of the appliance in a
safe way and understand the hazards involved.
Children shall not play with the appliance. Cleaning
and user maintenance shall not be done by children
without supervision.(For EN60335-1)
Packaging material could be dangerous for children!
This appliance is for indoor household use only.
To protect against the risk of electrical shock,
do not immerse the unit, cord or plug in water or
other liquid.
Please unplug before cleaning and performing
maintenance on the appliance.
Use a soft cloth moistened with mild soap, and then
use a dry cloth to wipe it again.
1

This appliance must be earthed. In the event of a
malfunction or breakdown, earthing will reduce the
risk of an electric shock by providing a path of least
resistance of electric current. This appliance is
equipped with an earthing conductor plug.
The plug must be plugged into an appropriate outlet
that is installed and earthed in accordance with all
local codes and ordinances.
Improper connection of the equipment-earthing
conductor can result in the risk of an electric shock.
Check with a qualified electrician or service
representative if you are in doubt whether the
appliance is properly grounded.
Do not modify the plug provided with the appliance;
If it does not fit the outlet.
Have a proper outlet installed by a qualified electrician.
Do not abuse, sit on, or stand on the door or dish
rack of the dishwasher.
Do not operate your dishwasher unless all enclosure
panels are properly in place.
Open the door very carefully if the dishwasher is
operating, there is a risk of water squirting out.
Do not place any heavy objects on or stand on the door
when it is open. The appliance could tip forward.
When loading items to be washed:
1) Locate sharp items so that they are not likely to
damage the door seal;
2

2) Warning: Knives and other utensils with sharp points
must be loaded in the basket with their points
facing
down or placed in a horizontal position.
Check that the detergent powder is empty after
completion of the wash cycle.
Do not wash plastic items unless they are marked
dishwasher safe or the equivalent.
“ ”
For check the
unmarked plastic items not so marked,
manufacturer's recommendations.
Use only detergent and rinse agents recommended for
use in an automatic dishwasher.
Never use soap, laundry detergent, or hand washing
detergent in your dishwasher.
The door should not be left open, since this could increase
the risk of tripping.
If the supply cord is damaged, it must be replaced by the
manufacturer or its service agent or a similarly qualified
person in order to avoid a hazard.
During installation, the power supply must not be
excessively or dangerously bent or flattened.
Do not tamper with controls.
The appliance needs to be connected to the main water
valve using new hose sets. Old sets should not be reused.
The maximum number of place settings to be washed
is 15.
The maximum permissible inlet water pressure is 1MPa.
The minimum permissible inlet water pressure is 0.04MPa.
3
This appliance's packaging materials are recyclable.
Dispose of the packaging into a suitable waste
collection container to recycle it.
It is prohibited to dispose of this appliance as
household waste.
Correct Disposal of this product: this symbol on the
product or in its packing indicates that this product
may not be treated as household waste. Instead,
it should be taken to the appropriate waste collection
point for the recycling of electrical and electronic
equipment. By ensuring this product is disposed of
correctly, you will help prevent potential negative
consequences for the environment and human health,
which could otherwise be caused by the inappropriate
waste handling of this product.
For more detailed information about the recycling of
this product, please contact your local council your
household waste disposal service, or the shop where
you purchased the product.
For disposing of package and the appliance please
go to a recycling centre. Therefore cut off the power
supply cable and make the door closing device
unusable.
Cardboard packaging is manufactured from recycled
paper and should be disposed in the waste paper
collection for recycling.
By ensuring this product is disposed of correctly, you
will help prevent potential negative consequences
for the environment and human health, which could
otherwise be caused by inappropriate waste handling
of this product.
For more detailed information about recycling of this
product, please contact your local city office and your
household waste disposal service.
DISPOSAL: Do not dispose this product as unsorted
municipal waste. Collection of such waste separately
for special treatment is necessary.
4
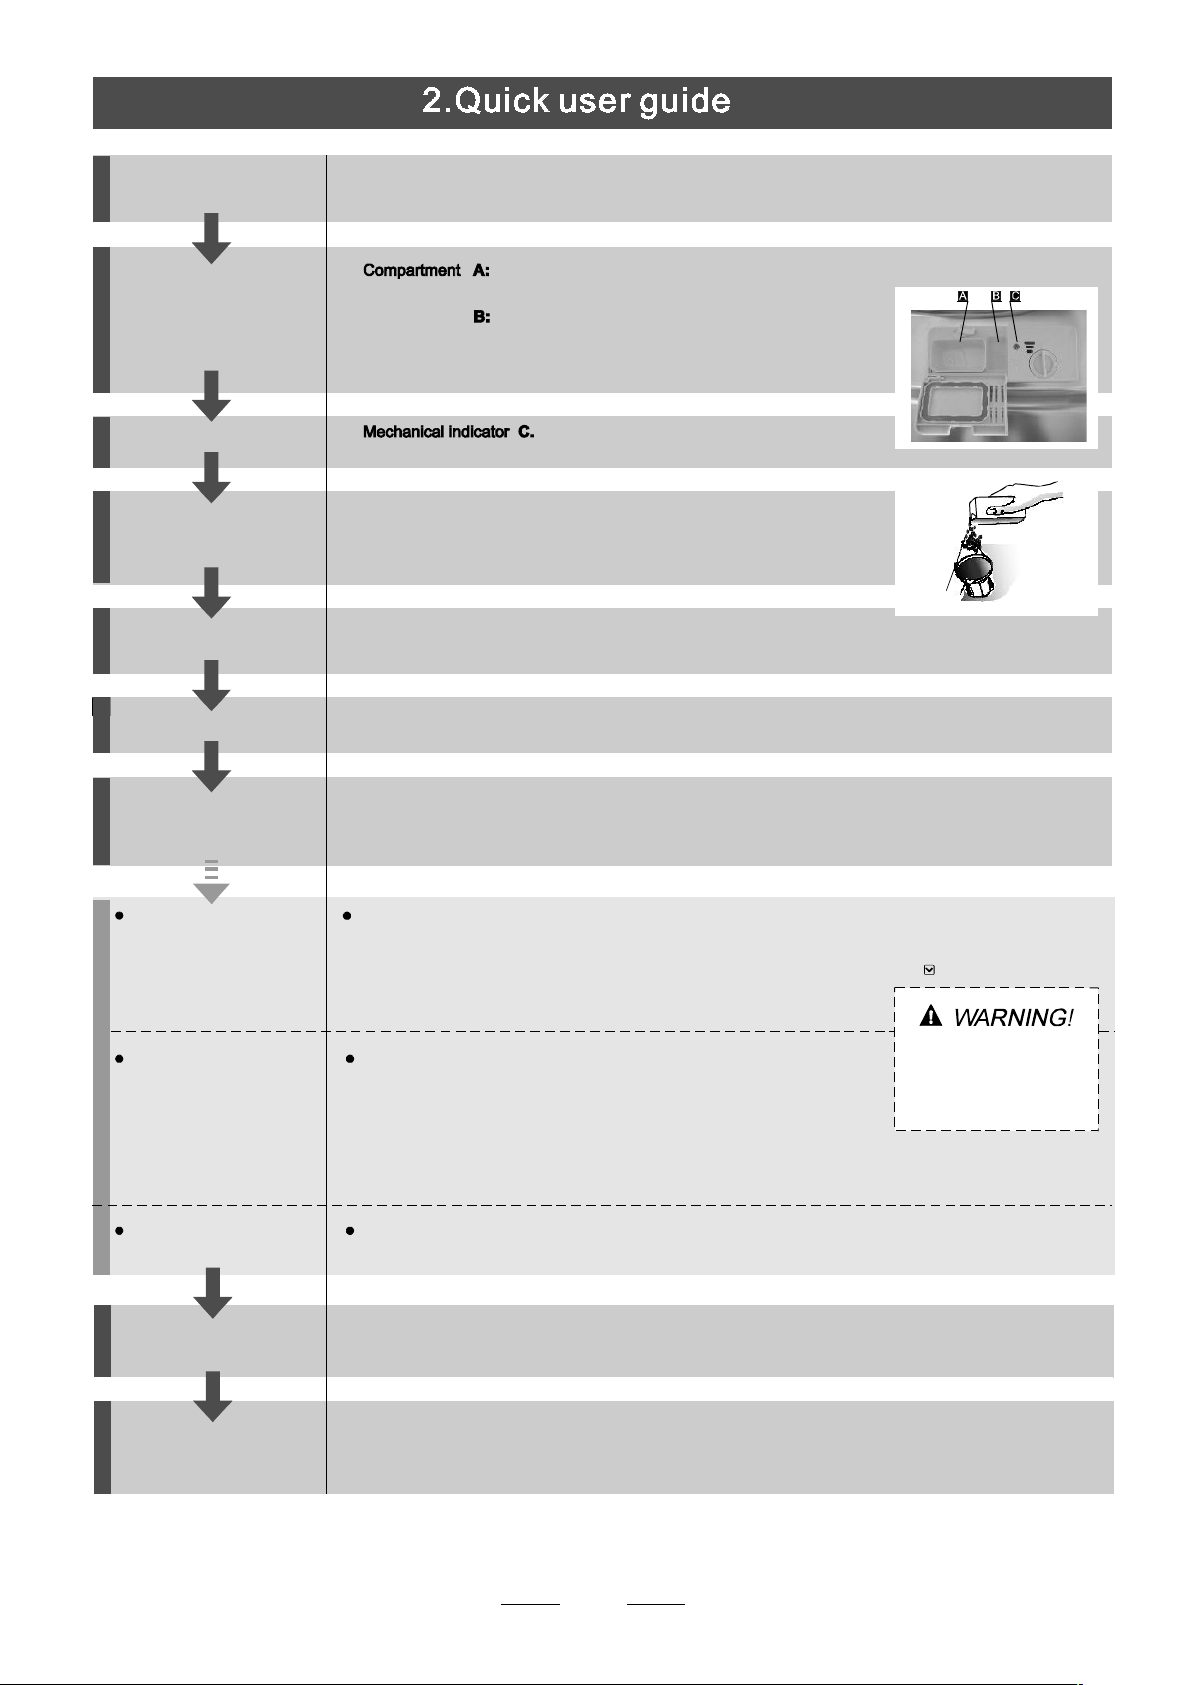
For detailed o pe rating me thod read th e co rres pon ding conte nt on the instr uctio n man ual.
Switch on the appliance
Fill the d etergent dispenser
Check the rinse aid level
Check the regeneration
salt level
Load the baskets
Select a programme
Press the On/Off button to switch on the appliance, Open the door.
With each w ash cycle.
Compartment
For programmes with pre-wash only.
(Follow the user instructions!)
Electric indic ator on control panel (if provided).
(On models with water softener system only.)
Electric indicator on contro l panel (if provided).
If there is no salt warning light in the control panel
(for some models), you can estimate when to fill the salt into
the softener by the number of cycles the dishwasher has run.
To load the baskets, re f er to t he se c tion en title d Lo a ding th e Dishwas h er B as kets .“ ”
Close the door, press the program button until the selected programme lights up.
( See the section entitled Operation instruction )“ ”
Running the dishwasher
Changing the pro gramme
Ad ding forgo tte n dis h es
in the dishwa sher.
If the appliance i s switched
off during a wash cycle.
Switch o ff the appliance
Turn on the water tap and press the Start/Pause Button. The machine will start working
after about 10 seconds.
1. A running cycle can only be modified if it has been running for a short time. Otherwise the detergent
may have already been released and the w ater already drained. If this is the case, the detergent
dispenser must be refilled.
2. Press the Start/Pause Button to stop washing , Then press programme button for more than 3 seconds,
the programme will cancel.
3. Press the program button to select a new programme.
4. Press the Start/Pause Button, the dishwasher will run after 10 seconds. .
1.Press the Start/Pause Button to stop the washing.
2.Open the d oor a l ittle .
3.After the spray arms stop working, you can open the door
completely.
4.Add forgotten dishes.
5.Close the door
6.Press the Start/Pause Button, the dishwasher will run
after 10 seconds.
If the appliance is switched off during a wash cycle, when switched
on again, please re-select the washing cycle and operate the dishwasher
according to the original Power-on state ).
When the w orking cycle has finished, t he buzzer of the
dishwasher will sound 8 times, then sto p.
Turn off the appliance usi ng the On/Off Button,to turn off the appliance
Open the do o r care f ully.
Look o u t f or ho t st e am
when openin g the door!
Turn off the water tap,
unload the ba skets
Warning : wait a fe w mi nutes (abo ut 15 m inute s ) bef ore unlo ading t he di s hwa s her to avoi d
hand ling the dis h es and utensi ls wh ile the y are s till ho t and m ore su scep t ible to break .
The dishes will al so dry bette r. First start unload ing t h e low e r bas k ed .
5
To get the best perf orm ance from yo ur di shwas her, read all op er atin g ins tru ctions
bef o re using it fo r the first tim e.
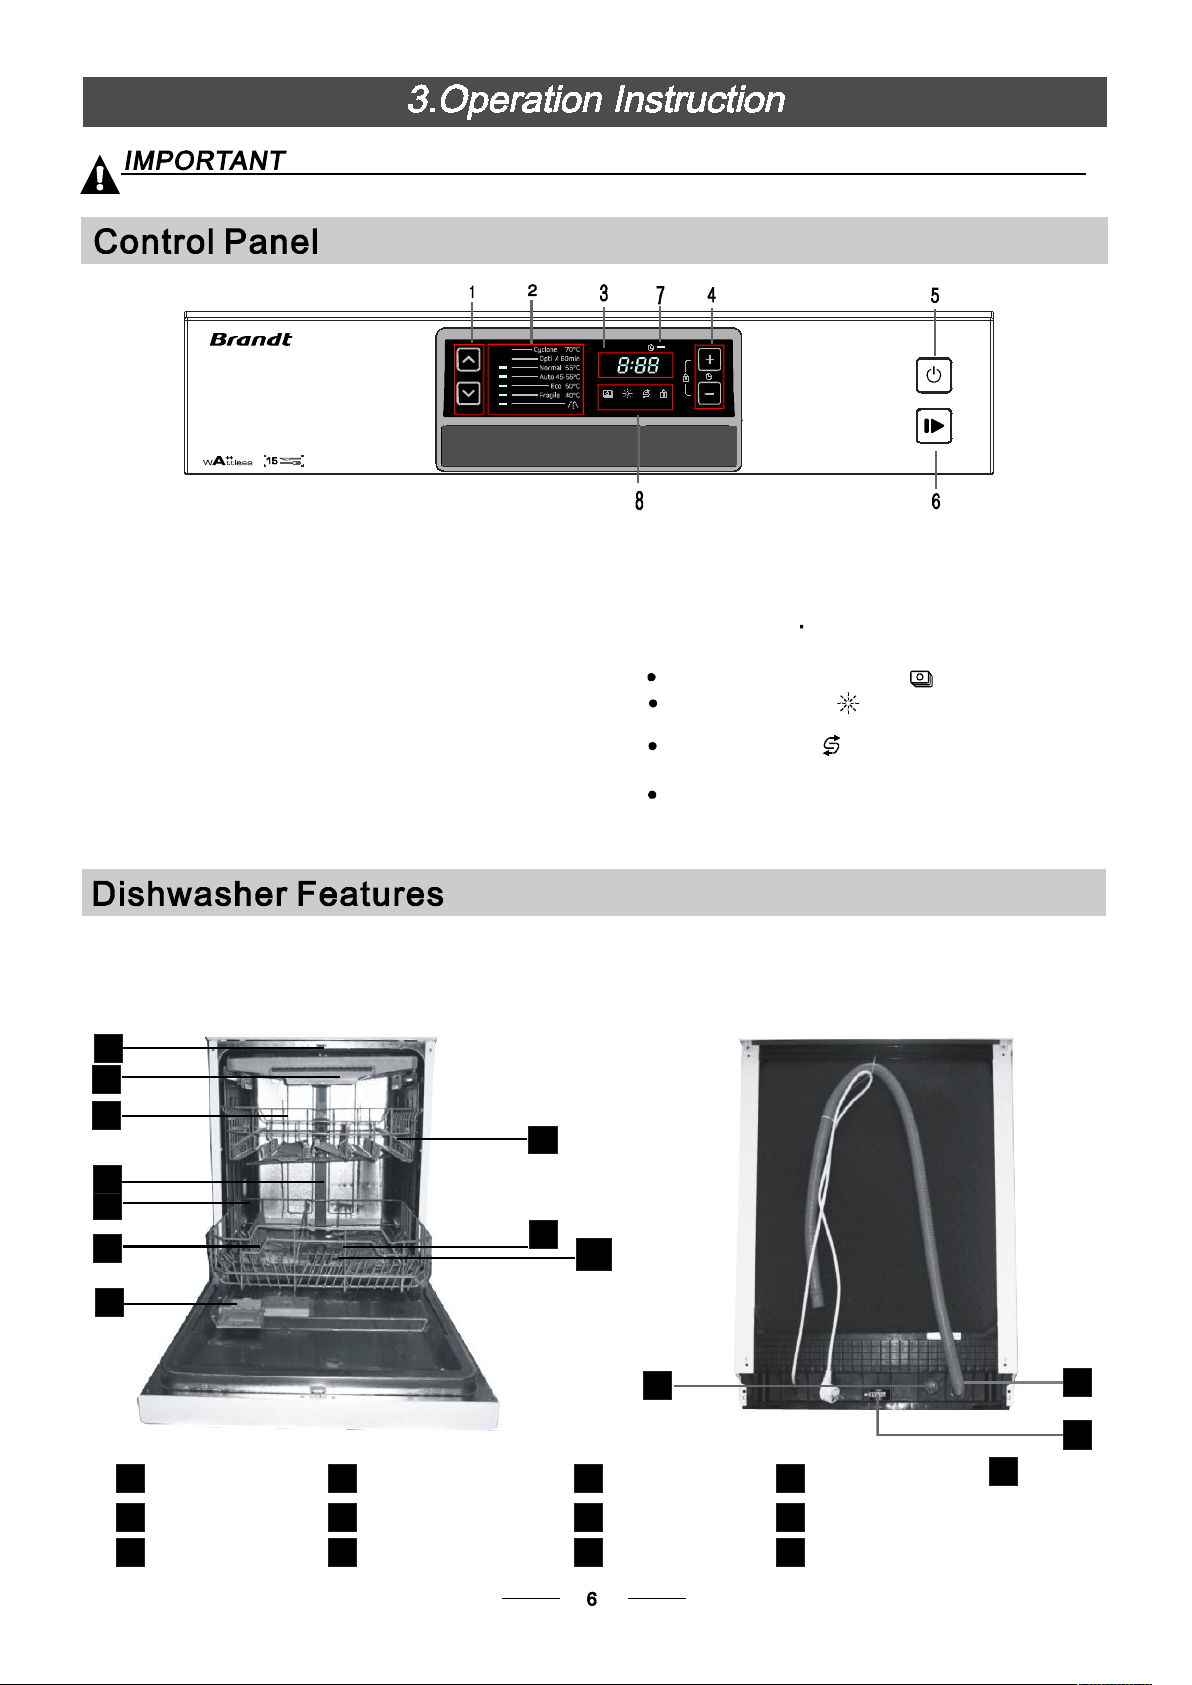
1. Pro gram Button :Pres s the b u tton to select a
wash Progra m.
Pr ess the two but tons fo r 3 s ec o nds
si multa ne o usly to sel ect the all in o ne f u nctio n.
Pr es s them ag ain to c a ncel .
2.Pr o gram in dicators
3.Di splay s cre en : to show the remaining time
and the s tate(ru nning sta te, delay time etc )
4.De l ay butto n: P ress th e bo utons to d elay de start of
th e wash cycle. Pr ess + and - b utton s simoultaneousl y
fo r 3sec on d s to lock th e prog ram , press the m aga in to
cancel.
5.On/Off But ton: To tu rn o n /off the power su pp ly.
Fr on t view
1
2
3
6.S t ar t /Paus e button: To star t the sele ct ed
washing p rogram or pause the washing program
when t he machine is work in g.
7.D e la y indic at or
8.Di splay i ndicator:
All in one f un ction indicator :
Rinse A id indica to r:
Indi cates when the dispense r needs to be re fille d.
Add s a lt indicator:
Indi cates when the dispense r needs to be re fille d.
Child lo ck indicato r
Ba ck View
8
4
5
6
7
Top spr ay arm
1
Cutl er y ra ck
2
Uppe r basket
3
Inner pipe
4
Lower basket
5
Salt co ntain er
6
9
10
11
12
13
Adju s te r
Disp en ser
7
Cup shel f
8
Spra y arms
9
Fi lter ass embly
10
11
In let pi pe connecto r
12
Drain pi pe
13
Before using yo u r dishwash e r for the firs t time :
A. Set the wate r soften e r
B. Add 1.5K g di shw asher sa lt and then full fi l l t he salt con tain er with wate r
C. Fill the rinse ai d dispens er
D. Fill in de tergent
The wat er softe n er mu st be set m an ually, using the water hard ness dia l.
The wat er softe n er is des igned to rem ov e minera l s and s a lts from t he wate r, wh ich woul d ha ve
a detrim ental or adv ers e eff e ct on the operat ion of the appliance .
The more mi ne rals there are, the har de r yo u r wat er is
The softener sh o uld be adju sted acc o rd ing to the hard ness of the water in your ar ea. Your local Water A uthor it y
can ad v ise you on th e hardne ss o f th e wa t er in your a r ea .
Adjusting Salt Consumption
The dishwasher is des igned to a llow for adj ustment in the amo unt of salt co nsumed bas ed o n the h a rdness o f
the water u s ed. Thi s is in te nded to op ti mise and cus tomise th e level o f sa lt consum pt ion.
Ple a se follo w the s teps belo w fo r adju stment in sa lt consumpt ion.
1. Switch on the applia nce;
2. Pres s th e Start/ Pau se bu tto n fo r more than 5 secon ds to start the wate r
so fte ner settin g mode (to be done wi thin 60 seco nds after the ap pliance is sw itc hed o n;
3. Pres s th e Start/ Pau se bu tto n to sele ct the proper s etting depe ndin g on the hardne ss
of your loc al wa ter, the se tti ng s will c hange in t he fol lowi ng
se quence: H1- >H2->H 3-> H4->H5->H6;
4. To end the s etting mod e , ei ther pre ss the On/O ff b utt on or wait 5 seco nds.
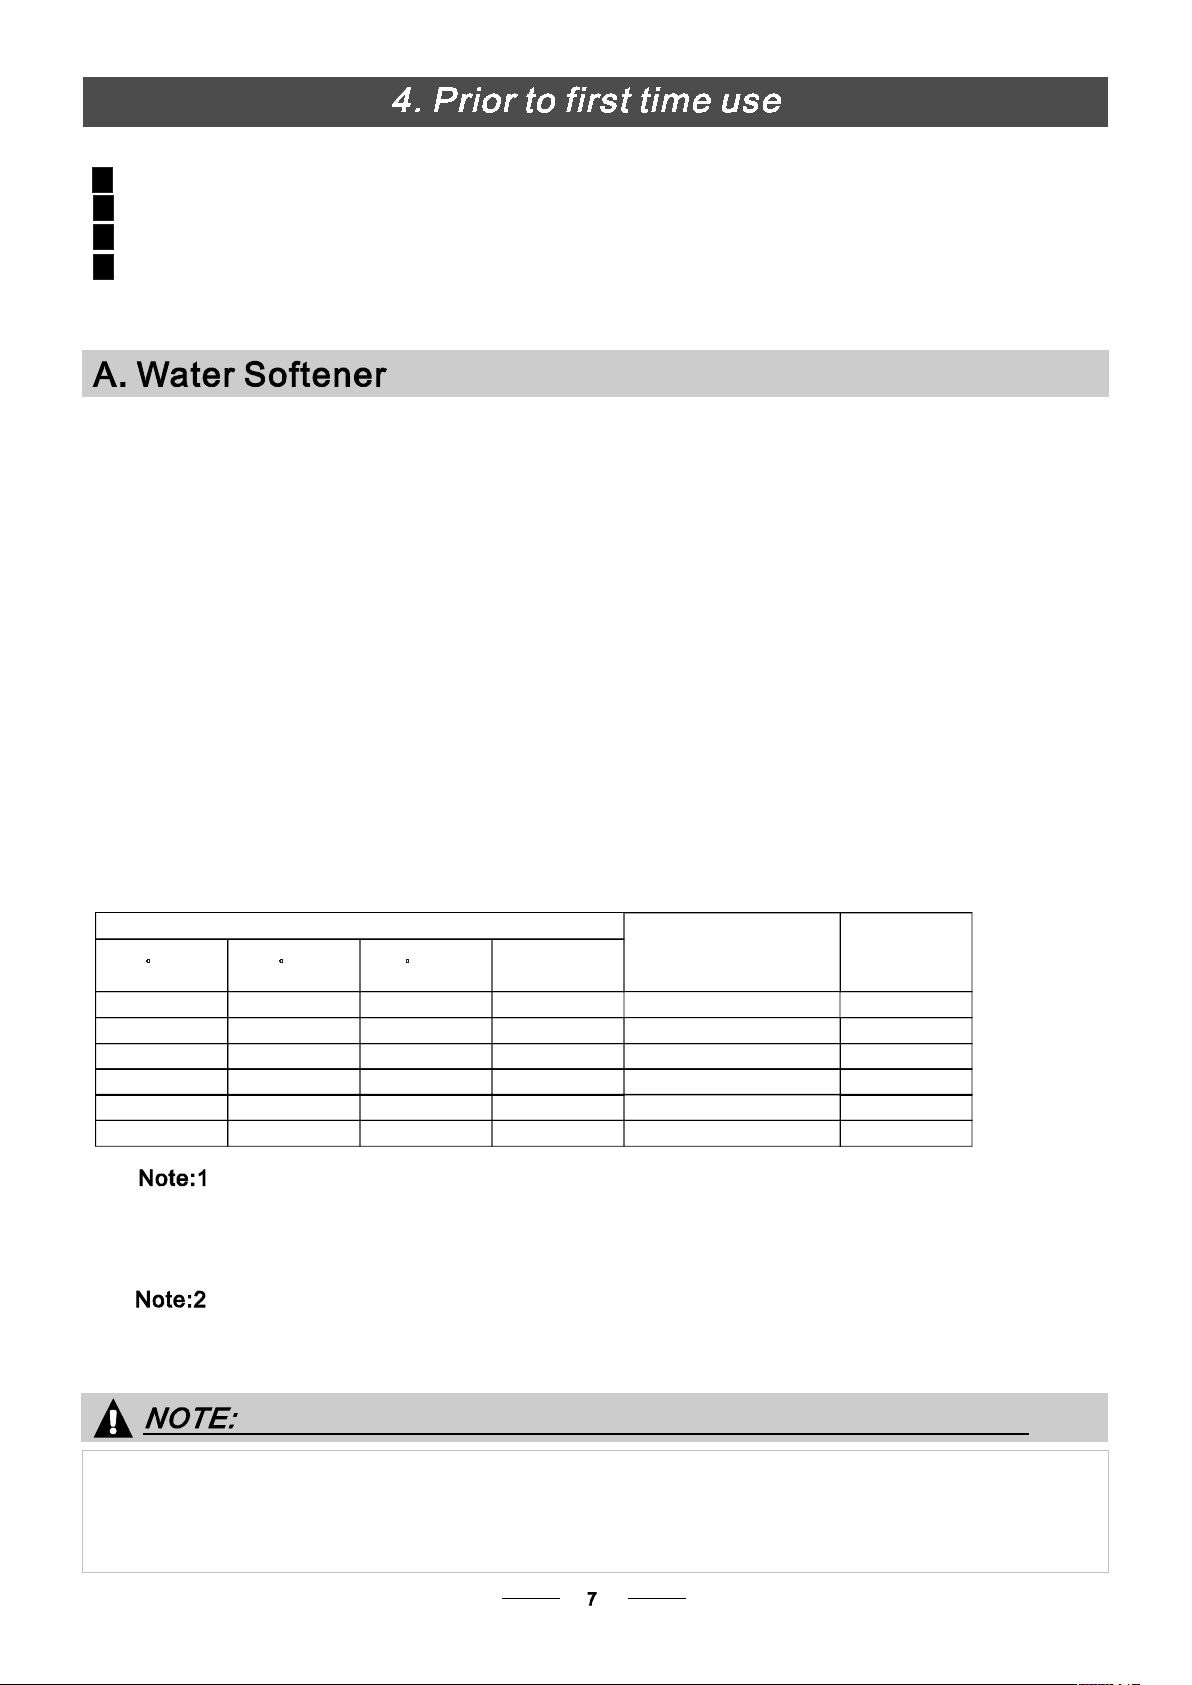
WATE R H ARDN ES S
dH
6-11
18-22 31- 40 22-28 3. 1- 4 .0
35 -55
fH
0~ 90~5 0~0 .94 0
10-20
21-3012- 17 2.1- 3 .0 1 2
41-6023- 34 4.1- 6 .0 3 0
61-98
dH =1 .25 Clar ke=1.78 fH=0. 178 mmol/l
1
Cla rke
0~ 6
7- 14
15-21
29-42
43-69
mm ol/l
1.0-2.0
6.1-9 .8
Selecto r P o si tion
H1 -> Soak Ligh t br ig ht s
H2->Rapi de light b rig ht s
H3 ->Rapide,S oak lig hts br ig ht
H4- >Eco light bright s
H5 ->Eco,soa k ligh ts b ri ght
H6 ->E co,r ap id e li gh ts bri ght
Salt c on sum pt ion
(gram /cyc le)
9
20
60
DH : Germ an deg ree
fH : French degr ee
Clar k: Bri tis h degree
The manu fa cto ry s etting: H3 (EN 50242)
Cont act yo ur loc al w ater boar d for inf orm ation on the hardnes s of your wat er sup pl y.
If yo ur model does n ot have any water softener, you may skip this section.
WATER SOFTENER
The h ardne ss o f the w a ter varie s f rom place to place. If hard w ater is us ed i n t he dishwa sh e r, de posits will
for m on th e dish es a nd ute n sils .
The a pplian ce is e quipp ed with a sp ecial so ft ener that uses a salt con tainer sp ecifi c ally de s igned to el imi nate
lim e an d mi ne ra ls from the wat e r.
 Loading...