

BRANDT A210U1, BR500M, BR530M, BR600M, BR750M User Manual
...
dishwasher
OPERATING INSTRUCTIONS

3
AFTER SALES SERVICE
In the unlikely event of there being a problem please call the number below quoting the
model number of your appliance – this can be found on its rating plate. Our trained staff
are available to advise or book a service call to one of our authorised service agents.
For any other information on our products
please contact us at:
Brandt UK Ltd
Intec 4
Wade Road
Basingstoke
RG24 8NE
Tel: 01256 308000
SERVICE LINE TEL: 01159 766937
MON - SAT 9 am - 6 pm
SUN - 10 am - 4 pm
2
Contents
Please read carefully Precautions when using
Environmental protection Advice, tips and remarks
Page
1 - Description of your dishwasher . . . . . . . . . . . . . . .4-5
2 - What to do before using the machine for the first time . . . . . .
6-9
Step 1: Adjusting the water softener – Measuring the water hardness 6
Mechanical adjustment . . . . . . . . . . . . . . . . . . . . . . . . . .6
Filling the regenerating salt reservoir . . . . . . . . . . . . . . . .7
Step 2: Rinse aid – Filling – Setting . . . . . . . . . . . . . . .8
Step 3:
Washing products . . . . . . . . . . . . . . . . . . . . . . .9
3 - Loading the dishwasher . . . . . . . . . . . . . . . . . . . .10-12
The lower basket – Cutlery – The upper basket . . . . . . . .10-12
4 - Selecting and running a washing programme . . . . .13
Selecting a washing programme Starting - Programme end13
The washing programmes
. . . . . . . . . . . . . . . . . . .14
5 - Running a programme and options
. . . . . . . . . . . . . . .
15
Cancelling a programme - Extra drying option . . . . . . . . .15
6 - Running maintenance
. . . . . . . . . . . . . . . . . . . . . .16-17
Cleaning the waste filters . . . . . . . . . . . . . . . . . . . . . . . .16
Cleaning and maintenance . . . . . . . . . . . . . . . . . . . . . . .17
7 - Protecting the environment . . . . . . . . . . . . . . . . . .18
Recycling the packaging . . . . . . . . . . . . . . . . . . . . . . . . .18
Recycling your old dishwasher . . . . . . . . . . . . . . . . . . . .18
Washing ecologically and economically . . . . . . . . . . . . . .18
8 - Troubleshooting, what to do? . . . . . . . . . . . . . . . . .19-23
9 -
Instructions for laboratory tests . . . . . . . . . . . . . . .24-25

5
4
Description of your dishwasherDescription of your dishwasher
The above photograph of the machine with the lower basket removed shows
you all the main components described in these operating instructions.
Your dishwasher is fitted with safety system protecting :
The ANTI-OVERFLOW SYSTEM. This system automatically activates
the drain pump if the water in the tub reaches an abnormal level.
Please read your dishwasher’s installation and operating
manuals carefully so that your machine will provide full and
complete satisfaction. These will enable you to discover all
the advantages of this machine and put them to best use.
Regenerating
salt reservoir
Waste filters
Washing product
container
Rinse aid
container
Lower sprinkling
arm
Information
plate (After-
Sales service
reference)
Drying valve
(depending on
the model)
Upper basket
Main filter
Anti-blocking
size wire
Rotating nozzle
(depending on
the model)
PROGRAMMES KNOB: turn
the programmes knob to
the desired position.
SALT LIGHT:
This indicates that there
is no regenerating salt.
RINSE AID : This
indicates that there
is no rinse aid.
WASHING LIGHT:
this
shows you that the
washing programme
is running.
END OF PROGRAMME
LIGHT
: this shows you that
the washing cycle has
finished.
START/CANCEL:
Pressing this button
starts this
programme.
Holding the button
pressed down for 2
seconds cancels the
Programme.

7
6
What to do before using the machine for the first timeWhat to do before using the machine for the first time
STEP 1: Adjusting the water softener
For impeccable washing and drying results with no streaks.
The water softener must be adjusted correctly to ensure no streaks
after washing and drying.
Your dishwasher is fitted with a water softening system that operates
using regenerating salt.
You must set the water softener according to the hardness of the water
in your area.
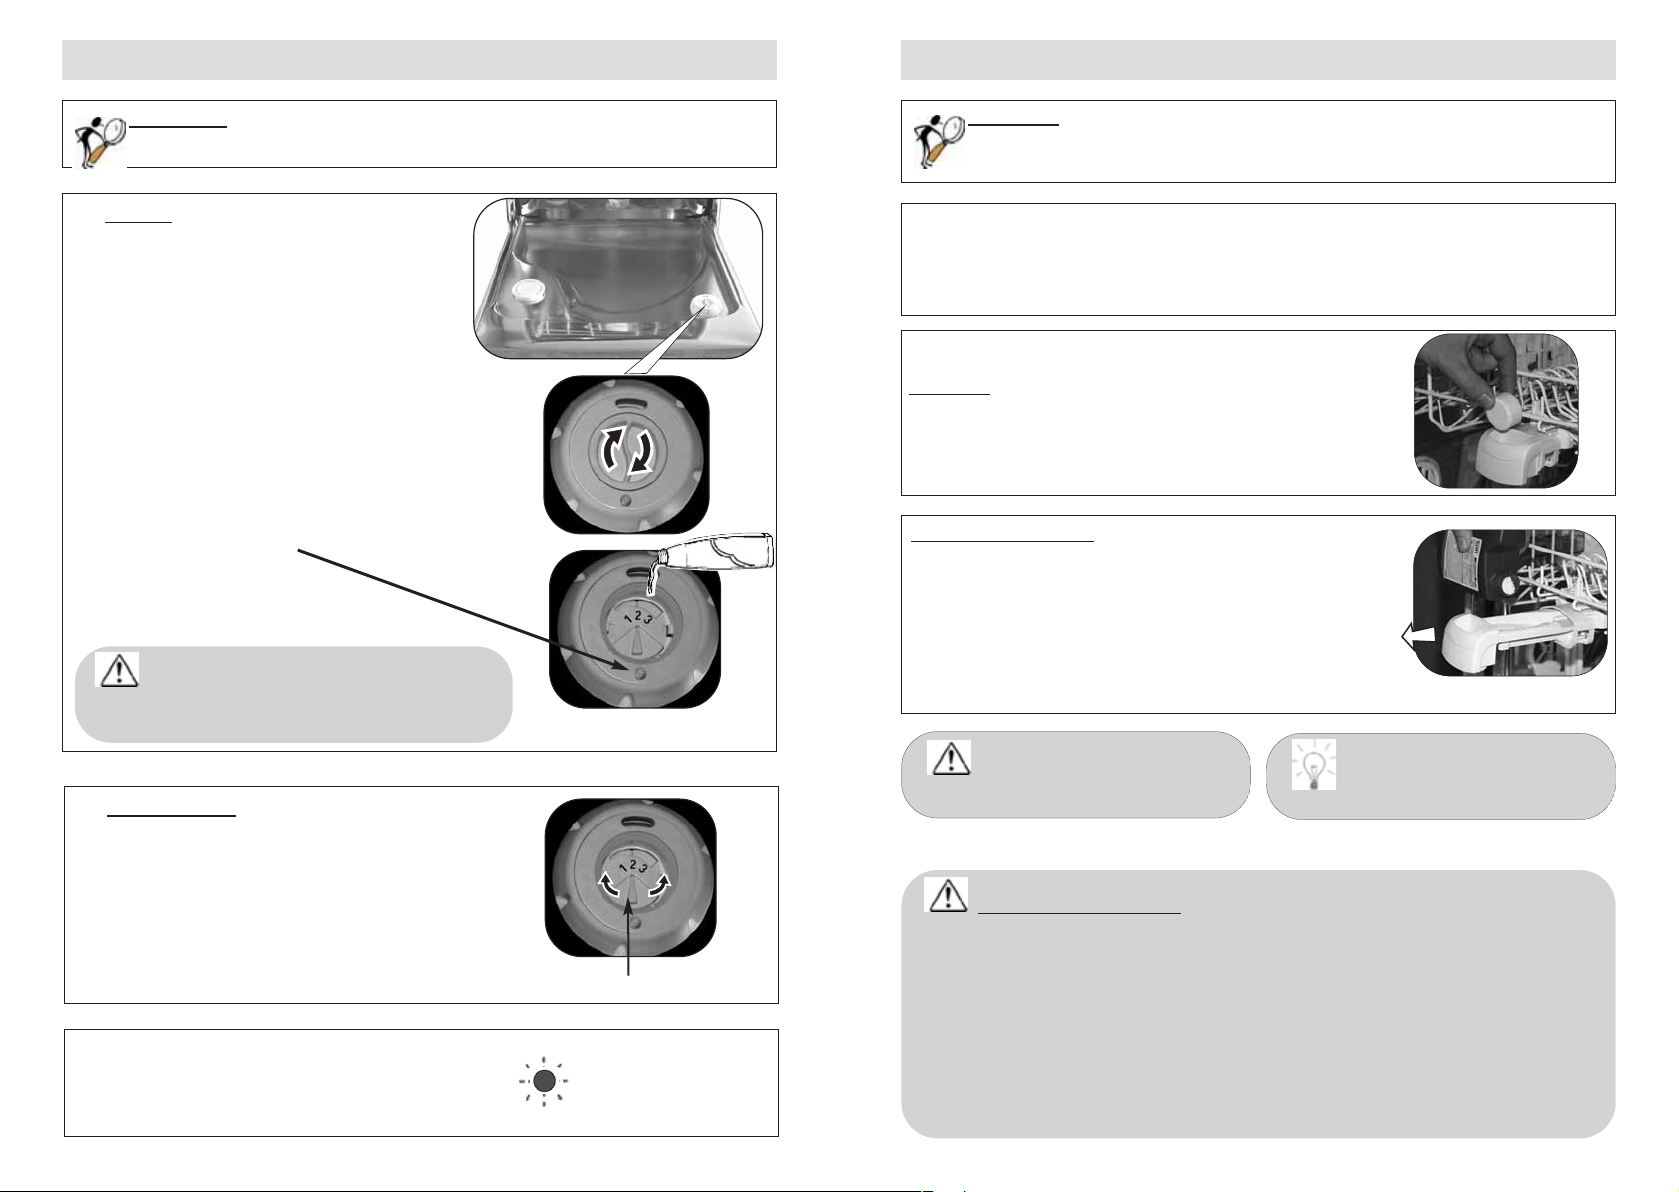
➁➁
-
Adjustment via the cursor inside the tub.
Adjust the setting using the cursor on the left-hand side inside the
tub by positioning it correctly on the desired number, depending on
the water hardness.
Salt
required
55 - 70°F
40 - 55°F
25 - 40°F
18 - 25°F
10 - 18°F
0 - 10°F
YES
YES
YES
YES
YES
NO
Water
hardness
Testing strip
0 - 10°F
NO
Check that the
cursor is fully
over the number.
You must fill the salt reservoir with water before using
the machine, even if the water softener setting selected
does not require any regenerating salt.
If you move house and take the dishwasher with you you will
need to check the water hardness and adjust accordingly.
For good wash results it is very important to set the dishwasher
to the correct level of water hardness and to set the correct
level of rinse aid (see page 8)
➀➀
-
Measuring the water hardness
To do this: contact your local water supplier to find out the water
hardness level and adjust on the machine as described below.
③③
Filling the regenerating salt reservoir
You must fill this, with water just
before starting your first wash then
add the salt:
Filling with salt is essential to obtain a good
wash with no streaks. The salt regener-
ates the resins, which soften the water by
removing its limestone content unless
the water is already sufficiently soft
(see “Adjusting the water softener”).
Salt reservoir
Should any regenerating salt overflow when filling,
we recommend that you remove the loose salt crystals
to avoid oxidising the tub.
Never put detergent in this reservoir:
this will ruin the
water softener.
- Unscrew the salt reservoir’s stopper and
remove it.
- Fill the reservoir with regenerating salt
specially designed for dishwashers. (the funnel available from the after-sales department
reference : 31X3964)
- On the first time, add water
until it reaches the edge
of the reservoir.
- Screw the salt reservoir’s
stop back in fully.
Indication of the level of
regenerating salt
SALT indicator light:
This illuminates showing salt
needs to be added. After you have
refilled the salt reservoir, the light
may still remain lit until the salt
has dissolved sufficiently, generally
after one cycle (or if the reservoir
has not been completely filled, for
instance when putting the
machine into operating using the
sample.
Do not use kitchen
salt.
If the water is especially
soft and does not require
the use of any regenerating
salt, the SALT light remains lit.
SALT
9
8
What to do before using the machine for the first time
STEP 3: the washing products
for a clean wash
What to do before using the machine for the first time
Contents: 120 ml (approx. one glass)
Should any regenerating salt
overflow when filling, mop up
the excess to avoid foam forming.
➀➀
Filling
When putting the machine into operation, fill the container level with the
top of the adjustment lever.
Put in at least all the contents of the
sample supplied.
Close the container tightly
Opaque: some product remaining
Brilliant: container empty
Indicator:
STEP 2: Rinse aid
For brilliant and very dry results
➁➁
Adjustment (if necessary)
The original setting is in the middle
(Medium position: setting 2).
After a few cycles, if there are streaks or
the drying is poor, you can adjust the setting using the adjustment lever:
- Setting 1 to reduce the dose, (soft water)
- Setting 3 to increase the dose
(hard water)
Adjustment lever
The rinse aid indicator light:
This illuminates showing rinse aid must be
added.
Rinse aid
For easy loading, the detergent container is located on the front of the
upper basket.
The detergent container is designed to take tablets powder or liquid
recommended for dishwasher use.
VERY IMPORTANT:
- For good wash results it is recommended to use individual
detergent, salt and rinse aid products.
- However “2 in 1” tablets (detergent and rinse aid) can be
used, if so, you may need to adjust the rinse aid dial according
to the wash results (see page 8)
- Good wash results depend on getting the salt + rinse aid
levels set correctly according to use level of water hardness
(see pages 6-8).
Tablets
Place the tablet in the compartment.
underneath the top basket.
Only use the washing
products specially designed for dishwasher use.
Powder or liquid
Pull the container out to fill it with liquid detergent or powder.
Fill it up to the Minimum mark for lightly soiled
items.
Fill it up to the Maximum mark for dirty items.
Close the container.
Keep all these products out of children’s
reach and away from
any damp environments.
 Loading...