

Page 1

User Guide
for
MarkWare™ and MarkWare™ LEAN
English
Page 2

Page 3

Contents
CHAPTER 1 Introduction
About MarkWare™............................................................................................. 1-2
Contacting Technical Support ............................................................................ 1-3
CHAPTER 2 Installing Application Components
Installation Requirements................................................................................... 2-2
Installing MarkWare™........................................................................................ 2-4
Installing Print Drivers ........................................................................................ 2-7
Connecting Brady Printers to a PC .................................................................... 2-9
Installing Brady Printers using USB Connections...................................... 2-10
Installing Printers using Serial Port Connections....................................... 2-11
Installing Printers using Parallel Port Connections .................................... 2-13
Changing the Display Language...................................................................... 2-14
CHAPTER 3 Creating Documents
Introduction to Templates................................................................................... 3-2
Right-to-Know (RTK) Terminology ..................................................................... 3-3
Creating HSID Templates................................................................................... 3-4
Creating Documents with Templates.................................................................. 3-8
Setting Document Attributes ............................................................................ 3-14
CHAPTER 4 Getting Started
Preparing the Printer.......................................................................................... 4-2
Launching the Application .................................................................................. 4-2
About the Application Toolbars........................................................................... 4-4
Standard Toolbar ......................................................................................... 4-5
Format Toolbar ............................................................................................ 4-6
Draw Toolbar ............................................................................................... 4-7
Document Toolbar ....................................................................................... 4-8
Object Toolbar ............................................................................................. 4-8
Status Toolbar.............................................................................................. 4-9
Draw Attributes Toolbar ............................................................................... 4-9
Contents-iii
Page 4

Setting Document Preferences ........................................................................ 4-10
Document Tab............................................................................................ 4-10
Shapes Tab ................................................................................................ 4-12
Tex t Tab ..................................................................................................... 4-13
Bar Code Tab ............................................................................................. 4-14
Graphics Tab.............................................................................................. 4-16
Program Tab .............................................................................................. 4-17
CHAPTER 5 Working with Objects
Selecting Objects ............................................................................................... 5-2
Sizing Objects .................................................................................................... 5-3
Positioning Objects............................................................................................. 5-4
Aligning Objects ................................................................................................. 5-6
Changing Object Color....................................................................................... 5-7
Rotating Objects................................................................................................. 5-8
Framing Objects ................................................................................................. 5-9
Moving Objects to the Front or Back .................................................................. 5-9
Grouping and Ungrouping Objects................................................................... 5-10
Cutting, Copying, and Pasting Objects............................................................. 5-11
Deleting Objects............................................................................................... 5-12
Using the Undo Command............................................................................... 5-12
For More Information........................................................................................ 5-12
CHAPTER 6 Working with Text
Creating Text Boxes ........................................................................................... 6-2
Selecting Text and Text Objects ......................................................................... 6-4
Applying Fonts and Character Formats.............................................................. 6-5
Sizing Text .......................................................................................................... 6-6
Positioning Text in Text Objects.......................................................................... 6-7
Reversing Text Colors ........................................................................................ 6-8
Creating Text on a Circle .................................................................................... 6-9
Creating Vertical Text ....................................................................................... 6-10
Creating TextArt ............................................................................................... 6-11
CHAPTER 7 Working with Bar Codes
Creating Bar Codes............................................................................................ 7-2
Setting Bar Code Density and Ratio................................................................... 7-3
Working with Human-readable Text ................................................................... 7-4
Selecting Text within Bar Codes......................................................................... 7-5
Sizing Text within Bar Codes .............................................................................. 7-6
Contents-iv
Page 5

CHAPTER 8 Working with Graphics
Selecting Graphics from the Library................................................................... 8-2
Importing Graphics from Outside of the Application........................................... 8-3
CHAPTER 9 Working with Variable Data
Creating Sequences........................................................................................... 9-2
Creating and Using Text Lists ............................................................................ 9-4
Linking to Databases and Spreadsheets............................................................ 9-7
Prompting for Data at Print Time...................................................................... 9-10
Creating Date/Time Stamps ............................................................................. 9-11
CHAPTER 10 Working with Shapes
Using Equipment Visuals ................................................................................. 10-2
Using Draw Tools and HotShapes ................................................................. 10-12
CHAPTER 11 Printing
Previewing Documents .................................................................................... 11-2
Printing a Document Proof............................................................................... 11-3
Printing Documents.......................................................................................... 11-4
Print ........................................................................................................... 11-4
QuickPrint .................................................................................................. 11-6
Batch Printing ............................................................................................ 11-7
Using Supply Saver.......................................................................................... 11-9
Tiling Print Jobs...............................................................................................11-11
Printing to GLOBALMARK® Systems - Special Information.......................... 11-12
Printing Multiple Copies and Labels............................................................... 11-14
Using Mirror Print Option................................................................................ 11-14
Graphics Quality Settings for Full Color ......................................................... 11-15
CHAPTER 12 Cutting Out Objects or Documents
Cutting Out Documents.................................................................................... 12-2
Cutting Out Text ............................................................................................... 12-3
Cutting Out Graphics and Shapes ................................................................... 12-6
Contents-v
Page 6

© 2008 Brady Worldwide, Inc. All Rights Reserved.
MarkWare
TM
(hereafter “MarkWare”) User’s Guide
This manual is proprietary to Brady Worldwide, Inc. (hereafter “Brady”), and may be revised
from time to time without notice. Brady disclaims any understanding to provide you with
such revisions, if any.
All brand or product names referenced in this manual are trademarks (
TM
) or registered
trademarks (®) of their respective companies or organizations.
Protected by US Patent 5,823,689.
Written and designed by Varitronics, a business unit of Brady Worldwide, Inc.,
6835 Winnetka Circle, Brooklyn Park, Minnesota 55428, USA.
Contents-vi
Page 7

BRADY WORLDWIDE, INC.
YOU SHOULD CAREFULLY READ THE FOLLOWING TERMS AND CONDITIONS OF THIS LICENSE
AGREEMENT BEFORE OPENING THIS PACKAGE. IF YOU DO NOT AGREE WITH THESE TERMS AND
CONDITIONS, PLEASE PROMPTLY RETURN THIS PACKAGE FOR A FULL REFUND.
LICENSE AGREEMENT
Brady Worldwide, Inc. (hereafter "Brady") hereby grants you a non-exclusive, nontransferable license to use
this software and the accompanying documentation according to the following terms:
1. LICENSE GRANT
copy of the software in machine readable form solely for backup purposes.
2. LICENSE RESTRICTIONS
license; 2) modify, adapt, translate, reverse engineer, decompile, disassemble, create derivative works
based on, or copy (except for the backup copy) this software or the accompanying documentation; 3)
rent, transfer or grant any rights in the software or accompanying documentation without the prior,
express written consent of Brady; or 4) remove any proprietary notices, labels, or marks on the software
and accompanying documentation.
3. NATURE OF THIS AGREEMENT
consideration of the licenses granted under this Agreement. Title and copyrights to the software,
accompanying documentation, and any copy made by you, remain the property of Brady or its
suppliers. Unauthorized copying of the software or the accompanying documentation, or failure to
comply with the above restrictions, shall automatically terminate this license, without further notice, and
terminate your rights to use the software, and Brady shall, in addition to its other legal remedies, be
entitled to its reasonable attorney fees.
4. LIMITED WARRANTY
you as evidenced by a copy of your receipt, the software, as furnished, under normal use, will perform
without significant errors that make it unusable. Brady's entire liability and your exclusive remedy under
this warranty (which is subject to you returning the software to Brady) will be, at the option of Brady, to
attempt to correct or help you around errors, to replace the software with functionally equivalent
software or diskettes, or to refund the license fee of the software and terminate this Agreement.
EXCEPT FOR THE ABOVE EXPRESS LIMITED WARRANTY, BRADY MAKES AND YOU RECEIVE
NO WARRANTIES, EXPRESS, IMPLIED, STATUTORY OR IN ANY COMMUNICATION WITH YOU,
AND BRADY SPECIFICALLY DISCLAIMS ANY IMPLIED WARRANTY OF MERCHANTABILITY OR
FITNESS FOR A PARTICULAR PURPOSE. BRADY DOES NOT WARRANT THAT THE OPERATION
OF THE PROGRAM WILL BE UNINTERRUPTED OR ERROR FREE.
Some states do not allow the exclusion of implied warranties so the above exclusions may not apply to
you. This warranty gives you specific legal rights. You may also have other rights which vary from state
to state.
: You may 1) install the software on only one computer at a time, and 2) make one (1)
: You may not: 1) transmit the software over a network without an additional
: This license is not a sale. License fees paid by you, if any, are in
: Brady warrants that, for a period of ninety (90) days from the date of delivery to
Contents-vii
Page 8

5. LIMITATION OF LIABILITY: IN NO EVENT WILL BRADY BE LIABLE FOR ANY DAMAGES,
INCLUDING LOSS OF DATA, WHEN LOADING THIS SOFTWARE OR OTHERWISE, OR LOST
PROFITS, COST OF COVER OR OTHER SPECIAL, INCIDENTAL, CONSEQUENTIAL OR INDIRECT
DAMAGES ARISING FROM THE USE OF THE PROGRAM OR ACCOMPANYING
DOCUMENTATION, HOWEVER CAUSED AND ON ANY THEORY OF LIABILITY. THIS LIMITATION
WILL APPLY EVEN IF BRADY HAS BEEN ADVISED OF THE POSSIBILITY OF SUCH DAMAGE.
Some states do not allow the limitation or exclusion of liability for incidental, or consequential damages,
so the above limitation may not apply to you.
6. GENERAL
Wisconsin, USA. You acknowledge that U.S. law and regulations may restrict the export/re-export of
the software. You agree not to export/re-export the software or portions thereof in any form without the
appropriate U.S. and foreign government licenses. This obligation shall survive and continue after this
Agreement terminates. This Agreement is the entire agreement between the parties and supersedes
any other communications or advertising with respect to the software and accompanying
documentation. If any provision of this Agreement is held invalid, the remainder of this Agreement shall
continue in full force and effect.
: This Agreement shall be governed by, and interpreted under, the laws of the State of
viii 6555 West Good Hope Road, P.O. Box 571, Milwaukee, Wisconsin 53201-0571, USA, tlf. +1 (414) 358-6600
Page 9

CHAPTER 1 Introduction
Thank you for choosing Brady Worldwide MarkWareTM facility identification
software.
MarkWare is a Windows
®
-based application used to create a variety of labels,
signs, tags, pipe markers, and other industrial identification.
This guide provides a brief overview of MarkWare, describes installation
procedures, and provides basic instruction on how to start the application and
create documents.
Topics in this chapter include:
About MarkWare™
Contacting Technical Support
1-1
Page 10

About MarkWare™
The following features make MarkWare™ facility identification software easy-touse, flexible, and powerful:
A label creation wizard that guides you through the process of creating
the desired output.
A Help button that automatically opens the User guide, which contains
detailed information about every aspect of the application.
A complete stock of pre-designed templates and ready-to-use artwork
that simplify the creation of commonly used signs, labels, and other
industrial identification.
A full range of editing and drawing tools that let you customize designs.
A connection to roll-fed printers that lets you use Brady high
performance ribbons and tapes.
An easily accessible library of international standard graphics
containing over 800 industrial graphics and safety graphics.
1-2 Introduction
Page 11

Contacting Technical Support
Please contact Brady Worldwide, Inc. with any questions or concerns. The
contact support numbers for each region are listed below.
Americas www.bradycorp.com
United States 800-643-8766 technical_support@bradycorp.com
Canada 888-262-7576 techsuppcanada@bradycorp.com
Mexico 0 1-800-112-7239 bradymexico@bradycorp.com
Brazil 55 11 3604-7700 technical_support@bradycorp.com
Other (Americas) 414-438-6868 bradyintl@bradycorp.com
Europe www.bradyeurope.com
Austria +49 6032 8091 800 tsbelgium@bradyeurope.com
Benelux and
other European
countries
France Signmark
Germany Signmark
Italy +39 029 628 60 14 tsitaly@bradyeurope.com
Spain +33 437 245 234 tsspain@bradyeurope.com
Switzerland +49 6032 8091 800 tsbelgium@bradyeurope.com
United Kingdom +44 1295 228 205 tsuk@bradyeurope.com
Nordic Region +46 (0) 8590 057 33 tssweden@bradyeurope.com
Eastern Europe +36 23 42 85 26 ts_ece@bradyeurope.com
+32 52457 397 (Dutch)
+32 52457 393 (French)
+32 52457 394 (English)
+32 52457 390 (German)
+33 4 72 66 26 80 tsfrance@bradyeurope.com
+49 6032 8091 800 tsgermany@bradyeurope.com
tsbelgium@bradyeurope.com
Pacific www.bradyaust.com.au
Australia 1800 644 834 brady_aust@bradycorp.com
New Zealand 0800 446 269 brady_aust@bradycorp.com
1-3
Page 12

1-4 Introduction
Page 13

CHAPTER 2 Installing Application
Components
The MarkWare™ installation and print driver CDs provide all the files necessary
for installing the application and the print drivers for Brady printers.
Topics in this chapter include:
Installation Requirements
Installing MarkWare™ Application
Installing Print Drivers
Connecting Brady Printers to a PC
Changing the Display Language
2-1
Page 14

Installation Requirements
Be sure that your computer meets the following minimum requirements for
running the MarkWare™ software before you attempt installation:
Processor
Operating
System
Display
Memory
Disk Space
Internet
Explorer
Printer Drivers
Adobe Acrobat
Reader
Drives
Data Ports
Minimum: 400 MHz Pentium or equivalent
Recommended: 1 GHz Pentium or equivalent
®
Microsoft
Vista Ultimate (SP1).
Minimum: 640 x 480 at 256 colors
Recommended: 1024 x 768 High Color, 32 Bit
Minimum: 96 MB RAM
Recommended: 256 MB RAM
Note: If you have Windows
minimum hardware requirements for Vista.
Up to 500 MB of available hard disk space (for a complete
installation) may be required.
6.0 or greater
Shipped with select printers or software. (For more information on
installing print drivers, see Installing the Print Driver.)
6.0 or greater recommended (To load the latest version of the
Adobe
CD-ROM Drive
Available parallel, serial, or USB port, plus data cable for all
desired printers
Windows® 2000 (SP4), XP PRO (SP3), or
®
Acrobat® Reader®, go to /www.adobe.com/)
®
Vista, make sure your PC meets the
Note: In addition to the hard disk space listed above, you need additional free space
to run the application. The amount of space needed depends on the size of the
files you create. If the MarkWare™ application closes down unexpectedly,
check that your PC meets the memory and hard disk space requirements. If it
does comply, try clearing some additional hard disk space on the system.
2-2 Installing Application Components
Page 15

If you use a Brady printer, make sure that the version of the operating system
on your printer is compatible for use with MarkWare™.
POWERMARK
HANDIMARK
GLOBALMARK
GLOBALMARK
GLOBALMARK
MINIMARK
®
Sign and Label Maker 1.0 or higher
®
Portable Labeling System 1.05 or higher
®
Industrial Label Maker Monocolor 1.0 or higher
®
Industrial Label Maker Multicolor 1.0 or higher
®
Industrial Label Maker Color & Cut 1.0 or higher
™
Printer 3.4 or higher
2-3
Page 16

Installing MarkWare™ Application
MarkWare™ software and Brady print drivers are shipped on separate
CD-ROMs. A standard Windows setup wizard guides you through the
application installation procedure.
For information on installing Brady print drivers, see the Print Driver Installation
Sheet that was shipped with the application, or the documentation that
accompanied your printer.
Note: If you had a previous version of MarkWare™ installed, you must uninstall and
then reinstall all Brady print drivers from your PC for the application to function
properly. For more information on uninstalling Brady print drivers, see the
documentation that accompanied your printer.
Use the following procedures to install and uninstall the application
components.
Hint! Before you begin the installation procedure, close all open applications and
disable all anti-virus software on your PC.
To install the application:
1. Insert the MarkWare™ (or MarkWare™ LEAN) 3.7 Installation CD into your
CD-ROM drive and select Install/Upgrade MarkWare from the Flash page.
- or -
If the installation does not automatically start, click
x:\MarkWare\setup.exe (x corresponds to your CD-ROM drive) and
click
OK to start the install manually.
2. The Language box displays. Select a language and click
3. The Welcome screen displays, indicating that you should close all open
programs. Click
4. The License Agreement screen displays. Click the radio button to agree
with the license terms, then click
5. The Serial Number screen displays. Enter the serial number, then click
Next.
The serial number is located on a label on the CD case.
6. Choose whether to install the Right-to-Know Chemical Database, then click
Next.
Next.
Next.
Start>Run. Type
Next.
2-4 Installing Application Components
Page 17

7. Choose the option to install “full” or “print only” capability, then
click
Next.
•
Full Capability (default): Installs the application program files,
templates, help files, sample databases, and sample graphics. Also
installs the Template Design module which allows you to create and
save your own templates.
•
Print Only: Installs a version of the program that allows you to
enable only the printing function. You cannot modify templates or
create new documents.
8.
Choose whether you want a Templates Design shortcut icon on your desktop
(default is No), then c
9. Select the regions for which you will be printing, then click
Note: You may choose as many regions as you want. Setup will install the templates
for each of the regions you select.
lick Next.
Next.
10. The Installation Folder screen displays. Click Next to accept the default
installation folder (recommended) or click Change to install to a different
folder, then click Next.
11. The Document Folder screen displays. Click
installation folder (recommended) or click
folder, then click
Note: You can also share files across a network connection by pointing the
Document Location folder to a folder on your system’s server.
Next.
Next to accept the default
Change to install to a different
12. The Shortcut Folder screen appears. Select one of the install options, then
click
Next.
• Install shortcut for current user
• Make shortcut available for all users
13. The Ready to Install screen displays. Click Next to accept the default
locations and install the application.
Note: Depending on your location, a registration form may display. You can submit
your registration information now, or close the form and submit the registration
later.
2-5
Page 18
To uninstall the application:
Hint! This procedure uninstalls MarkWare™ (or MarkWare™ LEAN) version 3.7 only.
To uninstall earlier versions, refer to the documentation that accompanied that
software version.
1. On the Windows taskbar, click Start>Settings>Control Panel.
2. On the Control Panel, double-click the
3. Highlight MarkWare (or
MarkWare LEAN) and click Remove.
4. In the MarkWare Uninstaller window, click
Add or Remove Programs.
Next.
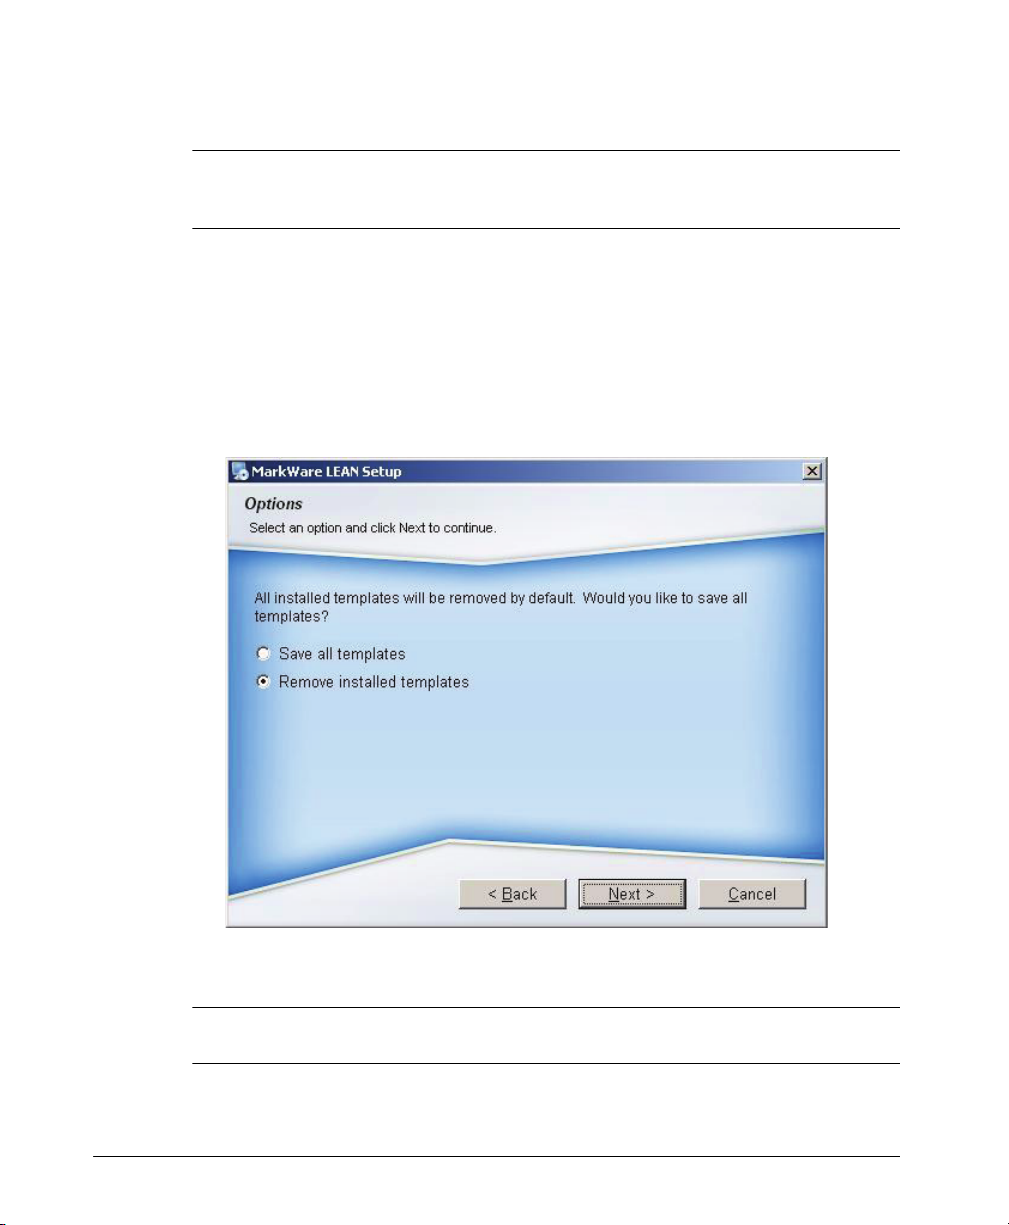
5. When prompted, click the option to save or remove your installed
templates. If you choose to save your old templates, the folder is renamed
“Template Backup” and is not removed.
Figure 2-1. Uninstall Templates
6. When the uninstall is complete, click Finish to exit the program.
Note: This procedure does not remove print drivers. For more information on
removing print drivers, see the documentation that accompanied your printer.
2-6 Installing Application Components
Page 19

Installing Print Drivers
If your POWERMARK®, HANDIMARK®, or GLOBALMARK® Brady print drivers
are older than version 1.0, you must delete them and install the new print
drivers.
The MarkWare™ (or MarkWare™ LEAN) application and the Brady print drivers
are shipped on 2 separate CD-ROMs. Use the Printer Drivers CD-ROM to add
to, or upgrade, your print drivers.
To delete old Brady print drivers:
1. Select Start>Settings>Printers or Start>Printers and Faxes.
2. In the Printers and Faxes list, click on the Brady printer you want to delete,
then press
3. Select
4. Choose the print driver you want to delete, then click
confirm the deletion.
5. Repeat Steps 2-4 to delete all Brady print drivers.
6. When all of the print drivers are deleted, reboot your computer.
Delete.
File>Server Properties and click the Drivers tab.
Remove and Yes to
2-7
Page 20

To install new Brady print drivers:
A standard Windows setup wizard guides you through the print driver
installation procedure.
Note: For maximum quality, documents created with MarkWare™ should only be
printed to Brady printers or to printers using Brady supplies.
1. Insert the Printer Drivers CD into your CD-ROM drive and double-click the
Printer Driver Install.exe icon.
2. Select a language and click
Next.
3. On the Printer Setup screen, choose the printer(s) for the drivers you want
to install, then click
Next.
4. From the Choose Printer Port screen, highlight your printer port
(i.e., USB, COM or LPT) and click
Note: If you are installing multiple print drivers, repeat Step 4 until a print port has
been selected for each printer.
OK.
5. On the Ready to Install screen, click Next. The installation will begin.
6. On the Configure screen, click
7. Click
Yes to make this your default printer, otherwise click No.
8. When the installation is complete, click
or
No to restart your computer at a later time.
Next.
Yes to restart your computer,
Note: It is not necessary to restart your computer if this print driver is installed to
replace an old print driver.
9. Remove the Printer Drivers CD-ROM from your drive, then click Finish.
10. To connect a Brady printer to a personal computer, see Connecting Brady
Printers to a PC.
2-8 Installing Application Components
Page 21

Connecting Brady Printers to a PC
Before you can use your personal computer to print to your label printing system
or to transfer files, your label printing system must be set up as a new hardware
device.
Use these instructions to install Brady printers (and print drivers, if needed) for
the following labeling systems using any of the available connection options:
Printer Connection Options
USB Serial Parallel
POWERMARK
GLOBALMARK
HANDIMARK
MINIMARK
®
™
®
®
XX
XX
X
XXX
Note: Ignore these instructions if you are using Windows
printers.
®
-compatible inkjet or laser
2-9
Page 22

Installing Brady Printers using USB Connections
Use the following procedure to connect your printer to a computer using a USB
connection.
GLOBALMARK®, POWERMARK® or MINIMARK® USB Connections
Note: If you are using Windows Vista, you must connect your printer via a USB cable.
If your computer is running Windows 2000 or XP, we recommend that you
connect your printer via a USB cable.
1. Connect the AC adapter from the printer to the power outlet. DO NOT apply
power.
2. Turn off the computer, if necessary.
3. Connect the USB cable (E200534) from the printer to the USB port on the
computer.
4. Turn on the printer and wait for the Main Menu screen to display.
5. Turn on the computer. The Found New Hardware Wizard dialog box
appears.
6. On the computer, click Install the software automatically (Recommended). If
the USB driver has been previously downloaded to the hard drive or
network drive, select a specific location option (GLOBALMARK
POWERMARK
®
: PM3USB or MINIMARK™: USB001):
®
: USB,
Note: When the MarkWare™ software is installed, the USB driver for a MINIMARK™
printer is installed automatically and the virtual port (USB001) appears when the
printer is connected to the PC for the first time.
Select
Search for suitable driver for my device, then click Next. When
the Locate Driver Files screen appears, select your CD-ROM drive and
click
Next.
Note: You only need the Print Driver CD-ROM if you did not previously install the print
driver for this device.
7. Once installation is complete, the Completing the Found New Hardware
Wizard dialog box displays. Click
8. See the User Guide for your printer to complete any additional setup
requirements.
2-10 Installing Application Components
- or -
Finish to close the wizard.
Page 23

Installing Printers using Serial Port Connections
Use the following procedures to connect your printer to a computer using a
Serial Port connection.
Note: To add a USB printer to your system, see Installing Brady Printers using USB
Connections.
GLOBALMARK® Serial Connection
Although it is possible to install a GLOBALMARK® printer using a serial printer
on Windows
faster, more reliable data transmission.
1. Connect the PC data cable to the printer and to the 9-pin serial port on your
computer.
®
2000 computers, Brady recommends a USB connection for a
Note: If needed, you can order the GLOBALMARK
from your distributor.
2. Turn on the printer.
®
3. On the GLOBALMARK
a. Click
b. Select
c. Click
d. Press
Setup and go to the Online tab.
Serial.
OK to accept the changes.
Online.
touch screen:
®
cable kit (Brady Part No. 76805)
2-11
Page 24

HANDIMARK® or MINIMARK™ Serial Connections
1. Connect the PC data cable to the printer and to the 9-pin serial port on your
computer.
Note: If needed, you can order the HANDIMARK
from your distributor.
®
cable kit (Brady Part No. 42004)
2. Turn on the printer.
3. Set the printer to online as follows (for a MINIMARK™ printer, go to Step 4):
•
HANDIMARK
press
®
Press 2
:
Online/Escape.
nd
key. On the HANDIMARK
®
keypad,
4. Insert the Printer Drivers CD-ROM into the drive and follow the on-screen
directions:
•From the Select Printer screen, choose your printer, then click
• Click
•At the Choose Printer Port window, click
OK and complete the installation process.
Configure Port and verify
OK.
the following setups:
HANDIMARK
Baud rate 19200
(or 38400)
Stop bits 11
Parity None None
Data bits 88
Flow control Xon/Xoff Xon/Xoff
®
MINIMARK™
9600
5. Click
OK to accept the changes, then click Yes to reboot your computer.
2-12 Installing Application Components
Page 25

Installing Printers using Parallel Port Connections
Use the following procedure to connect your printer to a computer using a
Parallel Port connection.
Note: If you are using Windows
printer with a USB connection. See Installing Brady Printers using USB
Connections for installation instructions.
®
Vista, you must connect to your POWERMARK®
POWERMARK® or MINIMARK™ Parallel Connections
1. Connect the PC data cable to the printer and to the 25-pin LPT parallel port
on your computer.
Note: The printer uses a standard IEEE1284 parallel bi-directional cable. If needed,
order Brady Part No. 13509 from your distributor.
2. Turn on the printer.
POWERMARK
3.
a. POWERMARK
b. On your computer, set the parallel port to
mode (ECP or EPP mode cannot be used).
Note: If you experience problems, check the BIOS settings on your computer to
ensure that the proper mode is selected.
4. Insert the Print Drivers CD-ROM into your CD-ROM drive and follow the onscreen directions:
a. From the Select Printer screen, choose
MINIMARK™, then click OK.
b. From the Choose Printer Port screen, choose
c. When the installation process is complete, click
reboot your computer.
®
printer (for a MINIMARK™ printer, go to Step 4. ):
®
keyboard, press Online.
Standard or Bi-directional
POWERMARK
LPT1, then click OK.
®
or
Finish, then Yes to
2-13
Page 26

Changing the Display Language
Once you start using MarkWare™, you can change the language of the
screens. For instance, you can switch from English to French.
To change display languages:
1. From the Options menu, select Preferences.
2. Select the
3. Click
Program tab and choose the appropriate language.
OK. The screen(s) will change to the selected language.
2-14 Installing Application Components
Page 27

CHAPTER 3 Creating Documents
The signs, labels, and tags you create in the MarkWare™ application are called
documents. Documents can be saved as files that can be used again.
The application provides pre
-designed layouts, called templates, to create a
variety of commonly-used industrial sign, tag, and label applications. You can
group and save frequently-used templates in one easy-to-find location using the
My Templates feature.
If you installed the template design capabilities for the application, you can
modify and save templates to meet your own needs. Contact Technical Support
for more information on using the template design feature.
Topics in this chapter include:
Introduction to Templates
Right-to-Know (RTK) Terminology
Creating HSID Templates
Creating Documents with Templates
Setting Document Attributes
3-1
Page 28
Introduction to Templates
Templates are like wizards that help guide you through each step of the
document by prompting you for the necessary text and graphic information.
Template objects are automatically positioned and sized in the document.
Note: Some documents are only available for certain countries and for Brady printers.
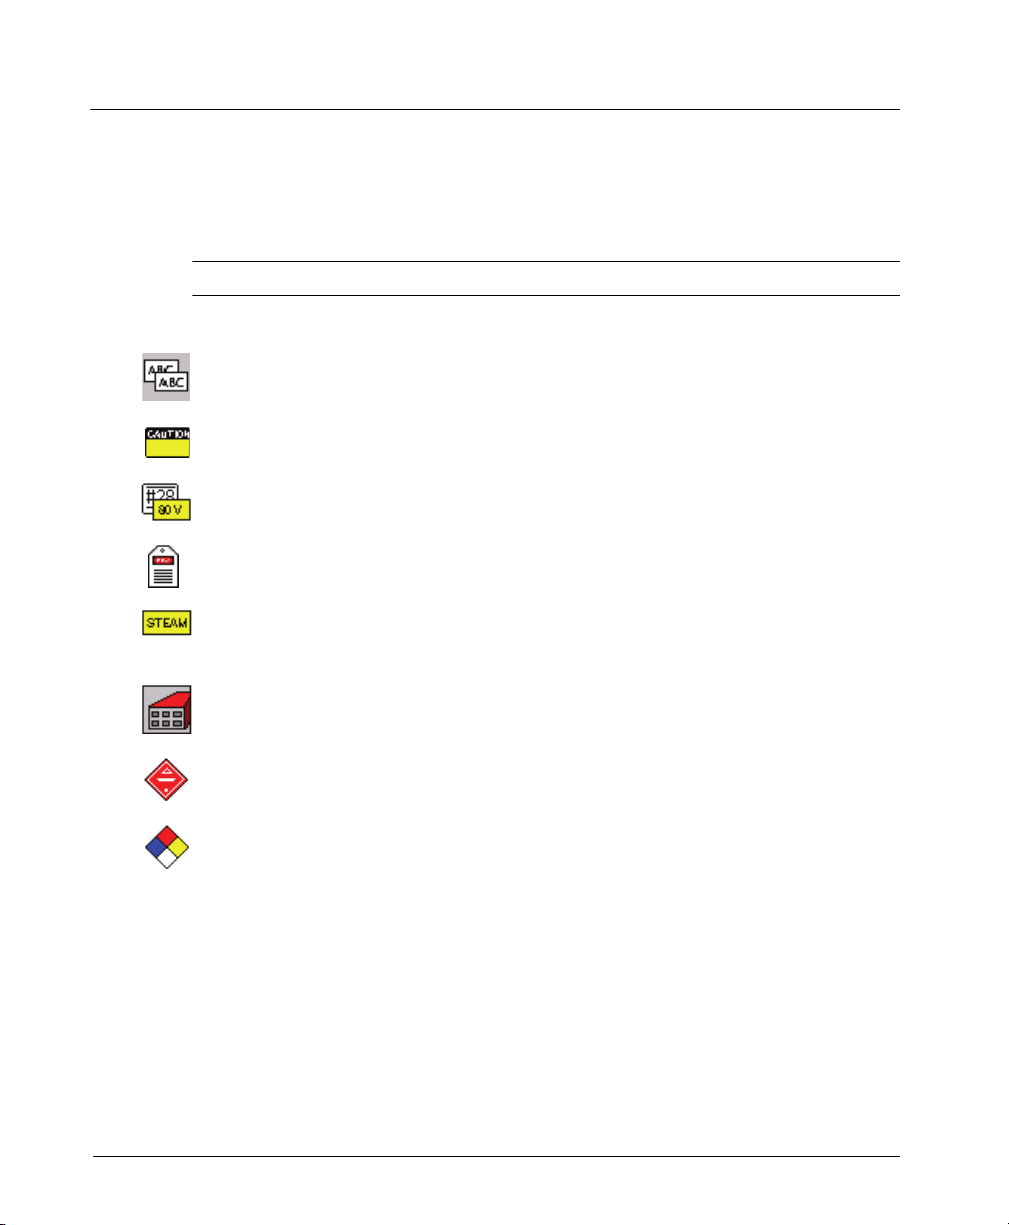
Icon Template Type Creates the following type of documents:
Text Labels Simple, text-only documents.
Safety & Facility Safety signs, warning labels, and general facility
signage.
Asset & Equipment Property and equipment identification and maintenance
inspection labels.
Tags Hazard prevention, maintenance, production, and
quality and control tags.
Pipe Markers Standard or roll-form pipe markers and symbol and
arrow-tape pipe markers. These templates are only
available for Brady printers.
Warehouse Warehouse facility labels such as shelf, rack, bin, and
production and quality control labels.
Hazardous Materials Hazardous material shipping labels for land, sea, and
Right-to-Know OSHA (Occupational Safety and Health Administration)
3-2 Creating Documents
air. Installed for European markets only.
compliant chemical warning labels for use in the United
States. Right-to-know uses a built-in chemical database
and specific hazard and target organ pick lists.
Database information is available in English only, but
you can type label information in any language.
Page 29
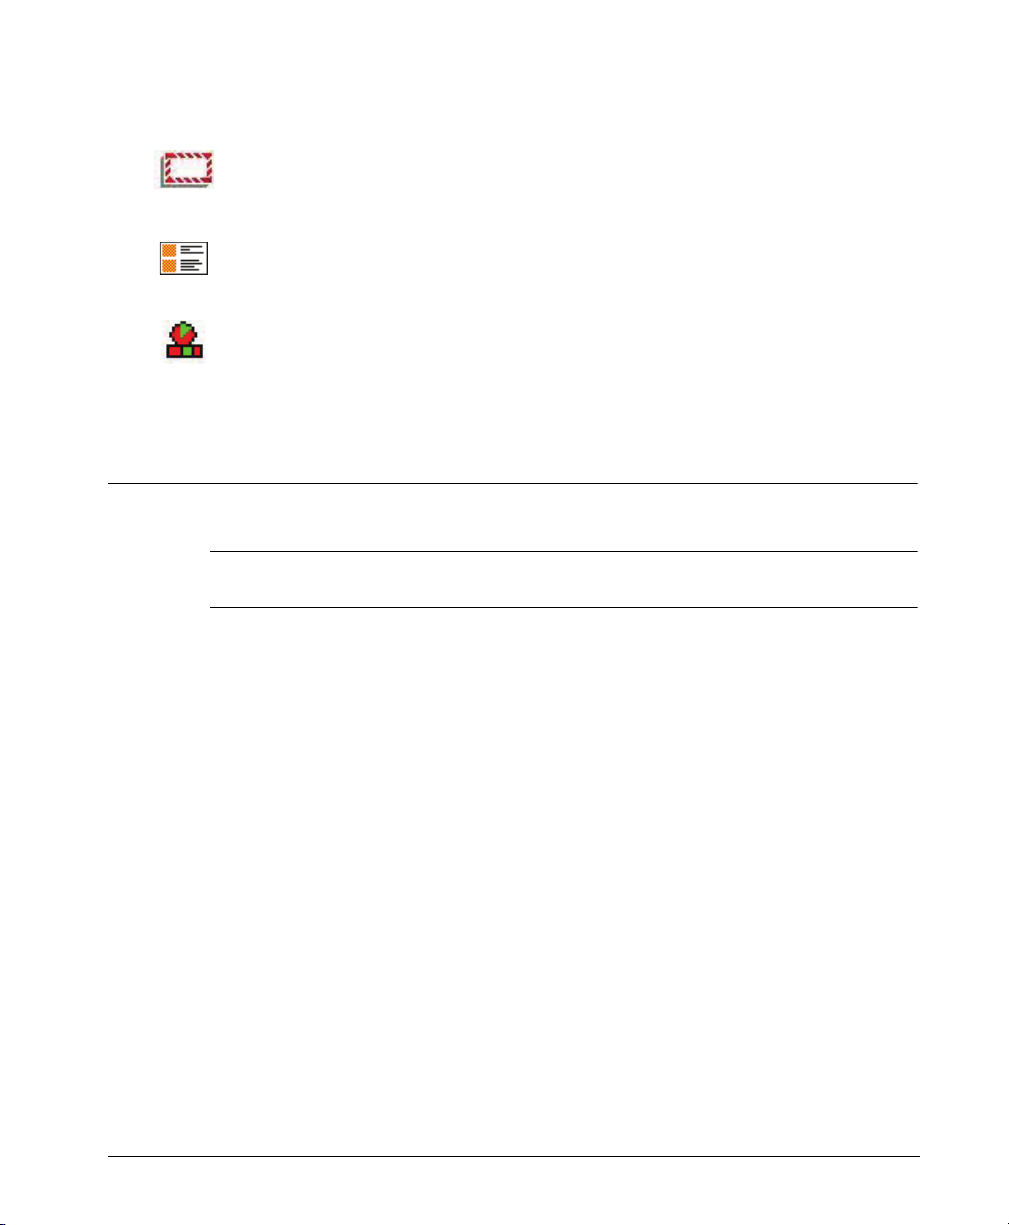
Icon Template Type Creates the following type of documents:
WHIMIS Workplace Hazardous Materials Information system
(WHMIS). Canada’s national hazard communication
program for hazardous workplace chemicals of
controlled products and hazardous materials.
HSID (Hazardous
Substances
Identification)
Equipment Visuals Labels that can be applied to gauges and moving parts
HSID compliant chemical warning labels for use in
Europe. These templates are installed for European
regions only.
to visually see when equipment needs maintenance
performed without taking actual readings. Equipment
Visuals are available with the MarkWare™ LEAN
version only.
Right-to-Know (RTK) Terminology
Note: If you’ve previously used RTK templates and software, please note that the
term, reactivity, has been replaced with the term, instability.
3-3
Page 30
Creating HSID Templates
The HSID (Hazardous Substances Identification) application has its own
specialty dialog boxes that differ from other MarkWare™ applications. These
specialty dialog boxes are accessible only when the HSID document type on
the Document Type dialog box is selected.
Simply opening an HSID template does not display the specialty HSID dialog
boxes. This means that HSID templates must be opened only from within the
HSID document type, not from “My Templates.”
Note: The Add to My Templates button on the Create New Document dialog box is
greyed out when you create an HSID label. This prevents you from adding
HSID templates in My Templates.
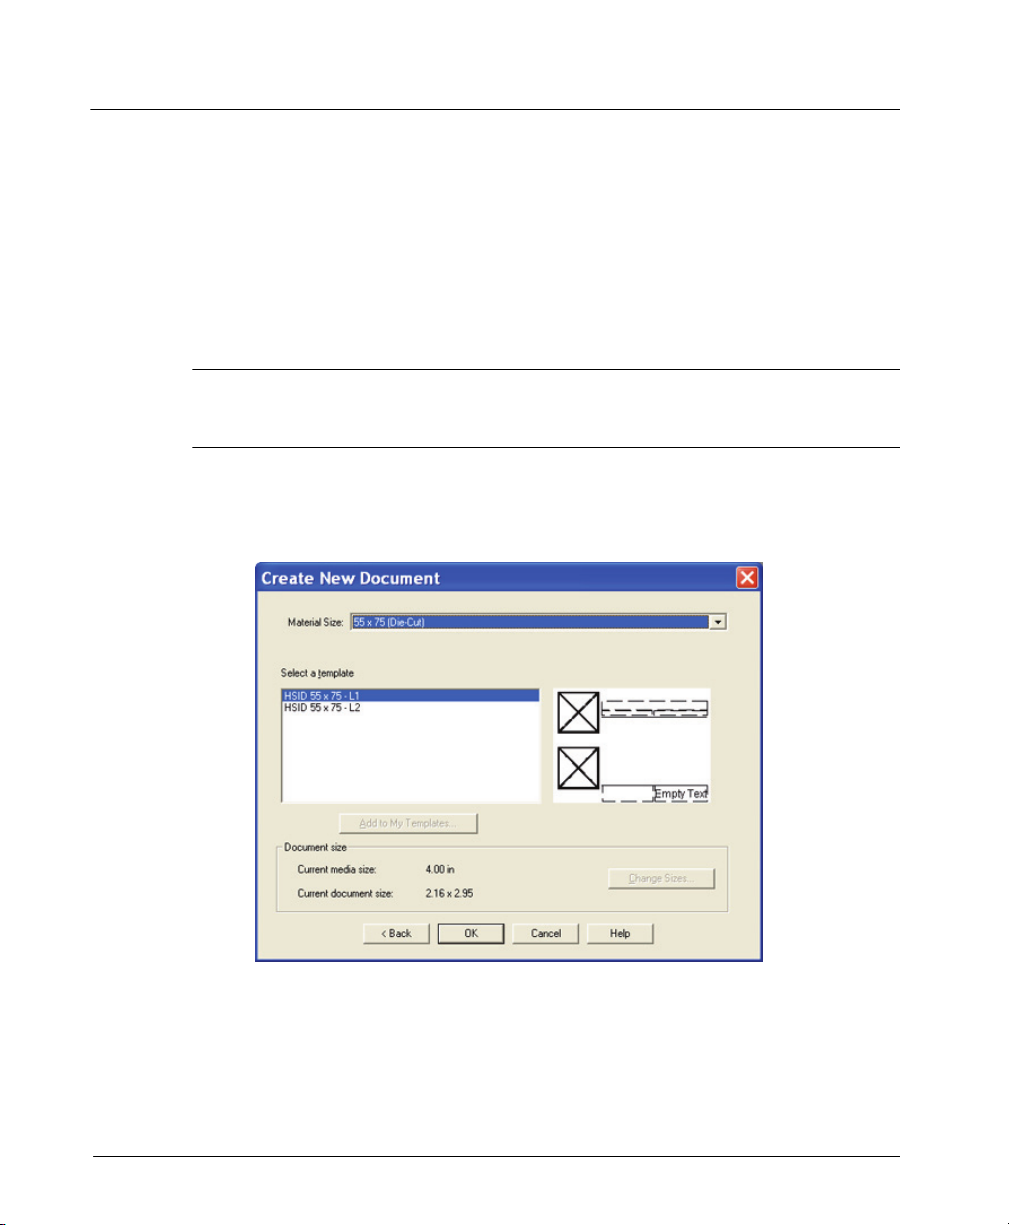
1. From the Document Type icon list, open the application and select HSID.
2. Select the Printer and click OK. The Create New Document dialog box
displays (Figure 3-1).
3-4 Creating Documents
Figure 3-1. Create New Document
Page 31

3. Select a template from the list and click OK. The HSID Data dialog box
displays (Figure 3-2).
Figure 3-2. HSID Data
4. In the Name field, enter or select a hazardous substance. Click Subscript to
apply subscript formatting to numerical characters 1-9. You must select and
highlight the numerical character before you click Subscript.
5. In the Special text field, enter any additional text. Click
Subscript to apply
subscript formatting to numerical characters 1-9. You must select and
highlight the numerical character before you click Subscript.
3-5
Page 32

6. (optional) Click More substance data to display the Additional Substance
Data dialog box (Figure 3-3).
Figure 3-3. Additional Substance Data
7. In the Additional Substance Data dialog box you can enter the EEC number,
CAS Number
substance. Click
8. If desired, enter a
Subscript to apply subscript formatting to numerical characters 1-9. You
and/or Internal Reference Number to further identify the
OK to return to the HSID Data dialog box.
Second Language and its Name in language 2. Click
must select and highlight the numerical character before you click
Subscript.
9. If you selected a Second Language, select the substance name from the
Name in language 2 list. Click Subscript to apply subscript formatting to
numerical characters 1-9. You must select and highlight the numerical
character before you click Subscript.
10. If you selected a
Special text for language 2 list. Click Subscript to apply subscript
Second Language, select the substance name from the
formatting to numerical characters 1-9. You must select and highlight the
numerical character before you click Subscript.
11. Click
Risk Phrases to display the Phrases dialog box. If selected, you can
enter risk phrases in English and a second language.
12. Click
Safety Phrases to display the Phrases dialog box. If selected, you can
enter safety phrases in English and a second language.
13. Click
Graphics to display the Graphics dialog box which lets you include
one or more images.
14. Enter any additional text in the
15. Enter contact information in the
Comments field.
Address field.
3-6 Creating Documents
Page 33

16. Click OK to display your HSID label (Figure 3-4).
Figure 3-4. Sample HSID Label
17. Click the Print icon or select File>Print to print your HSID label.
3-7
Page 34
Creating Documents with Templates
This section describes how to create a document in three easy steps using a
pre-made template.
1. Select the template you want to use.
2. Enter the prompted information.
3. Print your document.
To create a document using a template:
1. From the Document Type dialog box, select Create New Document.
Hint! If you have a document open and want to select a document from the current
template category, select
want to select a different template category, select
File>Change Document Type or click on the Standard toolbar.
2. Choose a printer.
3. In the Select your document type option, select a template category.
Note: If you select a Custom template, a blank document automatically displays in
the editing window.
File>New or click on the Standard toolbar. If you
3-8 Creating Documents
Page 35

4. Click OK to continue. The Create New Document dialog box displays.
Hint! Click Back to return to the previous screen, or click Cancel to exit without
creating a document.
Figure 3-5. Create New Document dialog box
5. Select group and sub-group, where available.
6. Select a template. A preview of the selected template displays on the right
of the selected template.
7. Verify the document size. To change the document size, click
Change Sizes
and select new settings.
Note: You can save frequently-used templates by clicking Add to My Templates.
The template becomes available in the document type
access.
My Templates for easy
8. Click OK to continue.
3-9
Page 36

9. Prompt screens appear for data that is required to populate the document.
Depending on how the template was created, the following prompts may
appear:
•
Text prompt: Lets you type single text objects, create new text list
objects, or use existing text list objects. Creating a text list lets you
enter a list of text items that are applied to the same text object in
multiple documents. The text items you enter create a minidatabase that prints a new document for each item in the list. If you
want to create multiple documents from a previously saved text list,
you can select the Use text list option in any Text prompt.
For example, if you had three text list items, one document would
print for each item in the text list.
Note: You must press Enter after each item in the list or the items will be treated as
one text item.
When creating a text
list, press ENTER
between items
Figure 3-6. Enter Data dialog box: Text prompt with text list items
3-10 Creating Documents
Page 37

• Pick list prompt: A pick list differs from a text list in that only one
item from the pick list is inserted into the text object. A pick list
prompt lets you select from several predetermined text items for
insertion in the document. A pick list is developed when the
template is created. You can choose from a pick list or enter your
own text.
If you type your own entries, you can save those entries to the
current pick list, however, you cannot delete items from a pick list.
Pick lists are arranged in alphabetical order so you can quickly and
easily locate the desired text.
Type your own pick list
item and click “Add to
List” to save the entry.
Figure 3-7. Enter Data Dialog Box: Pick List Prompt
3-11
Page 38

• Graphic prompt: The graphic prompt lets you select graphics from
the resident library or import graphics from outside the application.
Click
Browse to locate graphics outside of the graphic library.
Note: Only print graphics can be accessed from this prompt. Once the document is
displayed in the editing window, you can access print and cut graphics and cutonly graphics using the Insert graphic option.
Graphic
Preview
Figure 3-8. Enter Data Dialog Box: Graphic Prompt
3-12 Creating Documents
Page 39

10. On the last prompt screen, click Finish to accept the changes. Your
document displays in the editing window.
Hint! You can change information that you enter in template prompts after the fact by
clicking on the Draw toolbar.
prompt, click
click
Cancel to stop the prompting process for the template. You can then enter
information directly into the editing window.
Next or Finish without entering any information. You can also
If you don’t want to enter text for the current
11. To modify document attributes, see Chapter 3: Setting Document Attributes.
12. To name your document and save it for the first time,
select
File>Save As. The Save Document dialog box displays.
Note: If you have previously saved the document, select File>Save to add the
additional changes.
13. In the Document name field, type a name for your document.
14. Select an existing file group or type a name to create a new group in the
File group option.
Note: The default file destination was set up during installation. The current document
path is specified in Full path. If you want to save the file to a directory other
than the default directory, click Browse and select the appropriate path.
15. Click OK to save the document.
3-13
Page 40

Setting Document Attributes
Use the following procedures to change the size, color, orientation, and
boundaries of your document.
To change document size:
1. Select Document>Properties or click on the Document toolbar. The
Document Properties dialog box displays.
Figure 3-9. Document Properties Dialog Box: General Tab
2. From the Available sizes option, select the media size. The installed media
in the printer is shown in
3. Do one of the following:
• If you want the document to match the size of the currently installed
media, select
• If you want to set a specific width for your document, select
Set custom width, and then choose the appropriate width.
Hint! To override a document size setting and match the installed media, select
Document>Match media size.
3-14 Creating Documents
Currently installed sizes.
Match media size.
Page 41

4. Do one of the following if you want the application to:
• Automatically scale the length of your document proportionally
when you change the width: select
when width changes (objects do not scale
Resize length proportionally
).
• Determine document length based on the objects on the document:
select
Auto calculate length.
• Let you set a custom length for your document: select
and then choose the appropriate measurement.
5. Click
OK to accept the changes.
To change document color:
1. Do one of the following:
• On the Object toolbar, click . The Document Color dialog box
displays. Select the desired color and click
Set length,
OK.
•Select
Document>Properties or click . The Document
Properties dialog box (Figure 3-9) displays.
2. Click the
3. Select the color and click
4. On the Document Properties dialog box, click
Select color button. The Document Color dialog box displays.
OK.
OK to accept the changes.
To change document orientation:
1. Select Document>Properties or click . The Document Properties dialog
box (Figure 3-9) displays.
2. Click the
Orientation tab.
3. Choose one of the following:
• Document is taller than it is wide:
Portrait
• Document is wider than it is tall: Landscape
4. To accept the changes, click OK.
3-15
Page 42

To apply a border to the document:
1. Select Document>Properties or click . The Document Properties dialog
box (Figure 3-9) displays.
2. Click the
Frame tab.
Figure 3-10. Document Properties Dialog Box: Frame Tab
3. From the Shape option, select the a shape for the frame. If you don’t want a
frame around your document, select
4. To change the color of the frame, click
appropriate color. Click
5. To change the weight of the document frame, select a width from the
width
option.
6. To print the frame around the document, select
7. To cut out the frame around the document (printer with a plotter cutter only),
select
Cut out frame.
8. Click
OK to accept the changes.
3-16 Creating Documents
None.
Select color and choose the
OK to accept the changes.
Line
Print frame.
Page 43

CHAPTER 4 Getting Started
For the application to work properly, you need to complete the tasks described
in this chapter to set up the printer and application settings.
This chapter also describes the setup of the application toolbars and how each
toolbar is used.
Topics in this chapter include:
Preparing the Printer
Launching the Application
About the Application Toolbars
Setting Document Preferences
4-1
Page 44

Preparing the Printer
Before you begin working in the application, you should check the following to
be sure that the printer is ready for use:
The printer is online and communicating
The desired tape and ribbon are installed in the printer
Note: If the printer is online and communicating with your PC, the application
automatically detects the installed tape size, tape color, and ribbon color.
Launching the Application
Use the following procedure to launch the application.
To launch the application:
1. On the Windows taskbar, click Start>Programs>MarkWare>MarkWare. The
Document Type dialog box displays.
Hint! You can also start the application by double-clicking the MarkWare™ icon
if it is displayed on your desktop.
4-2 Getting Started
Page 45

The Document Type dialog box (Figure 4-1) shows the available document
types and provides access to your saved documents in the application.
Figure 4-1. Document Type Dialog Box: Create New Document
Table 1 describes the options in the Document Type dialog box.
Table 1. Document Type Options
Option Description
Create New Document
Open Saved Document
Print Saved Document
Select your document type
Selected
Select the printer your want
for your documents
Lets you create a new document using either the
custom feature or one of the pre-defined templates.
Lets you open a previously-saved document.
Lets you print a saved document without opening it.
Lets you select the document type you want to use.
Displays the currently selected document type.
Lets you select the printer you want to use. Displays
all printers defined in your system.
You are now ready to begin creating documents in the application. For more
information on creating documents from pre-designed templates,
see Chapter 3: Creating Documents with Templates.
4-3
Page 46

About the Application Toolbars
The MarkWare™ application has the following toolbars to assist you in creating
your signs and labels.
• Standard
•Format
• Document
•Draw
•Object
•Status
• Draw Attributes
You may turn application toolbars off and on from the View menu, by selecting a
toolbar to display. If the toolbar is on, a check mark displays next to the toolbar
name.
4-4 Getting Started
Page 47

Standard Toolbar
The Standard toolbar provides common menu items (Table 2) that you can
access quickly.
Table 2. Standard Toolbar Descriptions
Icon Name Description
New
Creates a new document.
Open
Save
Change
Document Type
Cut
Copy
Paste
Undo
Zoom In
Zoom Out
Print
About
MarkWare
Opens an existing document.
Saves the active document.
Selects a new printer or document type.
Cuts the selected object or text and puts it on the Clipboard.
This function removes the original from the document.
Copies the selected object or text and puts it on the
Clipboard. This function leaves the original in the document.
Places the Clipboard contents into the document.
Removes the last action performed.
Increases the document magnification on the screen 10%
each time it is selected.
Decreases the document magnification on the screen 10%
each time it is selected.
Prints the active document.
Displays the application About window, which provides
version numbers, copyright dates, and the serial number that
was entered during installation.
4-5
Page 48
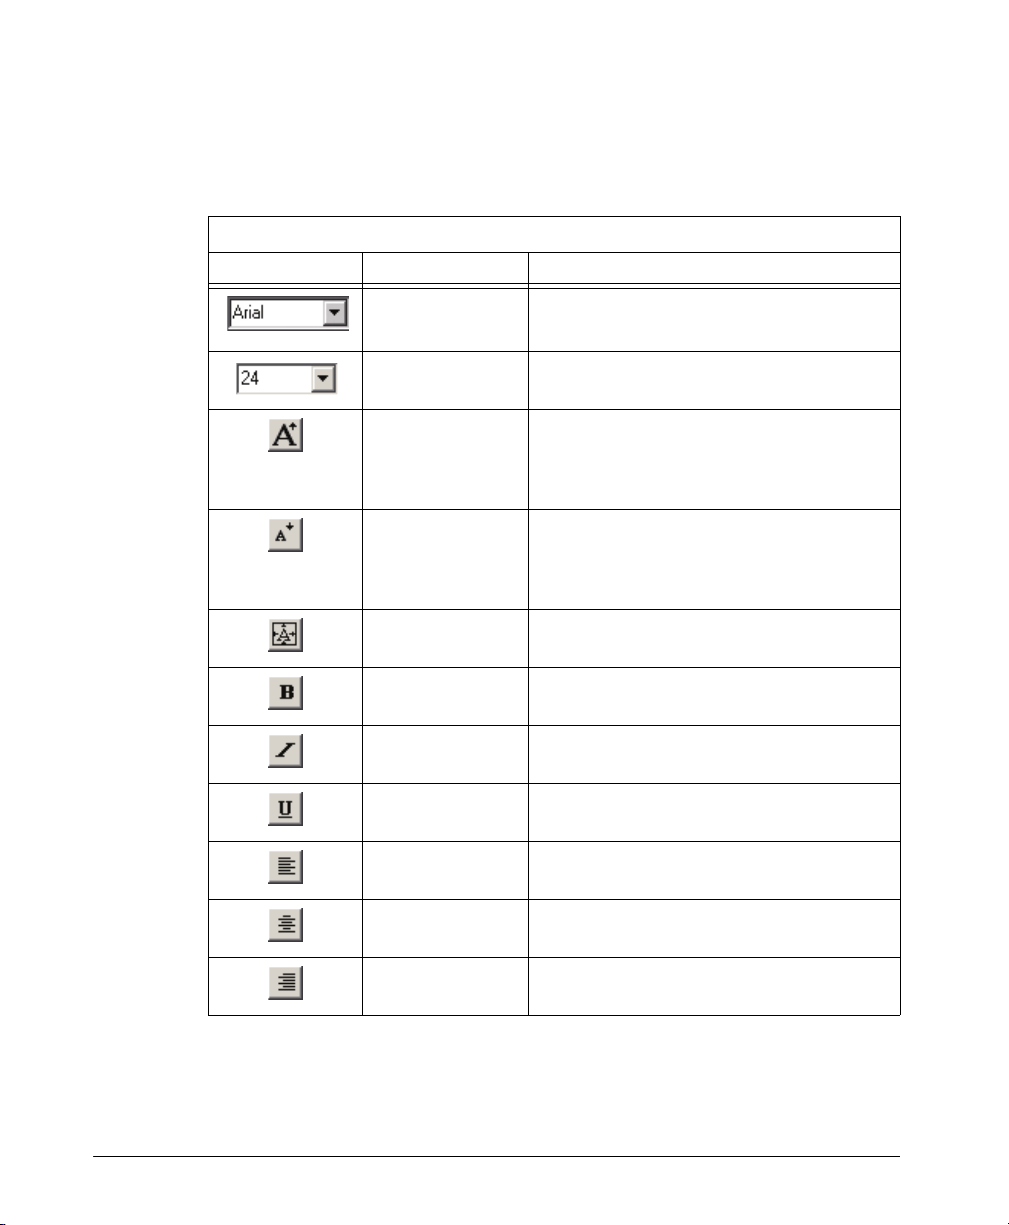
Format Toolbar
The Format toolbar provides menu items (Table 3) that let you edit font style
and size.
Icon Name Description
Table 3. Format Toolbar Descriptions
Font Selection
Selects a font.
Font Size
Increase Font
Size
Decrease Font
Size
Size Font
Automatically
Bold
Italic
Underline
Justify Left
Justify Center
Selects a font size.
Increases the font size at the click of a
button. The selected font increases by one
point per click. The font size is displayed in
the Font Size option.
Decreases the font size at the click of a
button. The selected font decreases by one
point per click. The font size is displayed in
the Font Size option.
Automatically sizes the font to best fit the
frame.
Bolds the selected text.
Italicizes the selected text.
Underlines the selected text.
Changes the justification of text within a
frame to the left side.
Changes the justification of text within a
frame to the center.
4-6 Getting Started
Justify Right
Changes the justification of text within a
frame to the right side.
Page 49

Draw Toolbar
The Draw toolbar provides menu items (Table 4) that let you add objects to
your sign or label.
Icon Name Description
Table 4. Draw Toolbar Descriptions
Selector
Selects objects in the document.
Text
Bar Code
Rectangle
Circle
Line
HotShapes
Lines Toolbar
Text Art
Text on a
Circle
Equipment
Visuals
Creates text in the document.
Places bar code objects in the document.
Creates rectangles or squares in the document.
Creates circles in the document.
Creates straight lines in the document.
Opens the HotShapes toolbar, which has buttons
for additional shapes to create in the document.
Opens the Lines toolbar, which has buttons for
additional types of lines to create in the document.
Creates text art graphics in the document.
Creates text on a circle in the document.
Opens the Equipment Visuals toolbar, which has
additional shapes for indicating whether a machine
is operating within tolerance levels. Equipment
Visuals are available with the MarkWare
version only.
™ LEAN
Insert graphic
Edit Data
Inserts a graphic in the document.
Opens the first dialog box of the prompt sequence
used to create the current document.
4-7
Page 50

Document Toolbar
The Document toolbar provides menu items (Table 5) that let you modify
document properties.
Table 5. Document Toolbar Descriptions
Icon Name Description
Document Color
Changes the document color.
Object Toolbar
The Object toolbar provides menu items (Table 6) that let you quickly change
specific settings of an object.
Icon Name Description
Document
Properties
Displays the Document Properties dialog box.
Table 6. Object Toolbar Descriptions
Symbology
Color Print
Setting
Reverse
Rotate
Properties
Selects the symbology for bar codes.
Selects the color print setting for multi-color
printers. Changing the setting here changes the
setting in the driver.
Reverses the text and background colors for the
selected text object.
Rotates the selected object.
Displays the Properties dialog box for the selected
object.
4-8 Getting Started
Group
Move to Front
Move to Back
Groups the selected objects or ungroups a
selected group.
Moves selected object to the front of any layered
objects.
Moves selected object behind any layered objects.
Page 51

Status Toolbar
The Status toolbar, or message area, is located at the bottom of the document
window. The Status toolbar lists the status of a document and gives other
information (e.g., For Help, press F1).
Draw Attributes Toolbar
The Draw Attributes toolbar provides menu items (Table 7) that let you change
the attributes of draw objects.
Table 7. Draw Attributes Toolbar Descriptions
Icon Name Description
Object Color
Changes the color of the selected object(s).
Line Width
Fill Pattern
Print Object
Cut Out Object
Changes the line width of the selected object(s).
Changes the fill pattern of the selected object(s).
Indicates that objects in the document are print
objects.
Indicates that objects in the document are cut out
objects. This option is only available for printers
containing a plotter cutter.
4-9
Page 52

Setting Document Preferences
You can set standard preferences in the Preferences dialog box. The
preferences become your defaults for all of the documents you work with in the
application.
You can access the Preferences dialog box by selecting
The following sections describe the available selections on each of the
Preference tabs.
Document Tab
The Document tab displays the rulers and sets the unit of measure for your
document.You can also adjust and display grid and center lines for assistance
in positioning objects.
Options>Preferences.
4-10 Getting Started
Figure 4-2. Preferences Dialog Box: Document Tab
Page 53

Table 8 describes the available options on the Document tab:
Table 8. Document Tab Options
Option Description
Snap to grid Indicates that new or repositioned objects should “snap”
into alignment with the nearest grid lines. (This option has
no effect on objects already placed in the document.)
For the selected document, you can override this setting
by selecting
Options>Snap to Grid.
Dots Displays the grid as a series of dots representing the
intersections of the grid lines. You only see this if you also
select the Grid option.
Dotted lines Displays the grid as a set of dashed lines. You only see
this if you also select the Grid option.
Horizontal grid
Specifies the desired horizontal interval for the grid.
spacing
Vertical grid spacing Specifies the desired vertical interval for the grid.
Unit of measure Specifies whether the unit of measure is displayed in
inches or millimeters.
Grid Displays the grid in the application window. You can
override this setting by selecting View>Grid.
Center lines Displays the center lines in the application window. You
can override this setting by selecting View>Center Lines.
Rulers Displays the rulers in the application window. You can
override this setting by selecting View>Rulers.
4-11
Page 54

Shapes Tab
The Shapes tab lets you select the default settings for creating lines and
shapes in your documents.
Figure 4-3. Preferences Dialog Box: Shapes Tab
Table 9 describes the available options on the Shapes tab:
Table 9. Shapes Tab Options
Option Description
Drawing color Indicates drawing color for all objects in the application, including text.
Line width Specifies the line width for all drawing objects.
Fill pattern Specifies the pattern that fills all closed drawing objects.
Number of
polygon sides
Number of seal
points
Close multi-
Specifies the number of sides to be used for polygon shapes.
Specifies the number of points to be sealed on a shape.
Indicates that multi-lines and arcs will be “closed” when you draw them. A line
line
segment automatically connects the ending point with the starting point.
4-12 Getting Started
Page 55

Text Tab
The Text tab lets you select the default settings for text in your documents.
Table 10 describes the available options on the Text tab:
Figure 4-4. Preferences Dialog Box: Text Tab
Table 10. Text Tab Options
Option Description
Automatically size
Show frame Indicates that a frame outline of the text object prints.
Line width Specifies the width of the frame to be printed around text objects.
Reverse text colors Indicates that the text displays in the background color, and the
Vertical text Indicates that the text letters appear vertically (one below the
Unit of measure Specifies whether the unit of measure is displayed in points,
Indicates that the application selects a font size that best fits a
font
text object with boundaries. This setting is ignored for free-form
text objects.
This option is available only when the you select the Show frame
option.
background (inside the text box) displays in the foreground color.
other).
inches, or millimeters.
4-13
Page 56

Bar Code Tab
The Bar Code tab lets you select the default settings for bar codes in your
documents.
Figure 4-5. Preferences Dialog Box: Bar Code Tab
4-14 Getting Started
Page 57

Table 11 describes the available options on the Bar Code tab:
Table 11. Bar Code Tab Options
Option Description
Symbology Specifies the default bar code symbology.
Height Specifies the height of the bar code. The height does not
include the size of the human-readable data.
Density Specifies the width of a narrow bar in the bar code. The
available selections include 10, 20, 30, 40, 50, 60, 80 and 100
mils.
Ratio Specifies the ratio of a wide bar to a narrow bar. The available
selections include 2:1, 2.5:1 and 3:1.
Orientation Specifies vertical or horizontal bar code orientation.
No text Prints a bar code without human-readable text.
Text above bar code Prints a bar code with human-readable text above the bar code.
Text below bar code Prints a bar code with human-readable text below the bar code.
Include check
character
Print human-readable
check character
Print human-readable
start/stop (*)
Specifies that a check character should print with all bar codes.
Specifies that the check character should print in humanreadable form. This option is available only if the Include check
character option is selected.
Specifies that start and stop character (*) should print in humanreadable form.
4-15
Page 58

Graphics Tab
The Graphics tab lets you select the default settings for graphics in your
documents.
Figure 4-6. Preferences Dialog Box: Graphics Tab
Table 12 describes the available options on the Graphics tab:
Option Description
proportional sizing
Always size
proportionally
4-16 Getting Started
Allow non-
Table 12. Graphics Tab Options
Specifies that width and height of a graphic can be changed
independently using either the side or corner handles.
Dragging the corner handles scales the object proportionally.
Dragging the side handles only scales the dimension of the
side you select.
Specifies that a graphic will always be sized proportionately.
This option displays only the corner handles.
Page 59

Program Tab
The Program tab lets you select the default settings for the default directory,
supply saver, and template set options.
Figure 4-7. Preferences Dialog Box: Program Tab
4-17
Page 60

Table 13 describes the available options on the Program tab:
Table 13. Program Tab Options
Option Description
Default document
directory
Standard Turns on the basic supply saver printing features, which arranges
Recalibrate columns
during cutting
Advanced Turns on the advanced supply-saver printing features, which
Indicates the default directory where you save documents. Use
the Browse button to select a different directory.
Off Turns off supply saver printing. For more information on supply
saver printing, see Chapter 11: Using Supply Saver.
same-size documents in columns on the print media. For more
information on supply-saver printing, see Chapter 11: Using
Supply Saver.
Applies only when cutting out multiple labels using the supply-
saver option. When the option is selected, the GLOBALMARK
printer rewinds the tape to the leading edge after every column of
labels is cut out. This makes the cut output more accurate, but
takes longer to cut out the entire set of labels.
Initial default is not selected. The setting is greyed out unless
supply saver is set to Standard. It is also greyed out if the selected
printer does not support XY cutting (i.e., if the printer is not a
GLOBALMARK
arranges varying size documents on the print media. This option
prints slower than the Standard option. For more information on
supply-saver printing, see Chapter 11: Using Supply Saver.
®
Color & Cut system).
®
Template set Sets the language the program runs in. Also sets the language of
the template names and template prompts. Some templates are
only available in certain languages.
Print document outline Indicates that you want the application to print a dashed document
outline when the document size does not match the media size.
Enable document
outline cutting
Enable printing NYC
RS 6-1 MEA tagline
Indicates that you want the application to cut out the document
boundary when the document size does not match the media size.
Displays only when a printer with a plotter cutter is selected.
Turns on the New York City compliance tagline for glow-in-thedark media.
4-18 Getting Started
Page 61

CHAPTER 5 Working with Objects
In the application, objects are defined as text boxes, shapes, bar codes, or
graphics. This chapter describes the basic procedures for all objects.
Topics in this chapter include:
Selecting Objects
Sizing Objects
Positioning Objects
Aligning Objects
Changing Object Color
Rotating Objects
Framing Objects
Moving Objects to the Front or Back
Grouping and Ungrouping Objects
Cutting, Copying, and Pasting Objects
Deleting Objects
Using the Undo Command
For More Information
5-1
Page 62

Selecting Objects
Before you can work with an object, you need to select it. Use the following
procedures to select objects within your document.
To select one or multiple objects:
1. Choose Draw>Selector or click on the Draw toolbar.
2. Use one of these methods:
• Click the desired object. Handles surround the object, indicating
that the object is selected. To select additional objects, hold down
the
Shift key while clicking each of the objects you want to select.
• Click and hold down the left mouse button. Drag the cursor until the
dotted outline encloses the objects you want to select. An object
need only be partially within the dotted outline to be selected.
To select all objects:
Select all objects in your document by selecting Edit>Select All.
5-2 Working with Objects
Page 63

Sizing Objects
You can size almost any object except free-form text objects. Use the following
procedures to size objects in your document.
To size an object using the mouse:
Click on one of the sizing handles that appear around the object, then drag to
the desired size. If you drag one of the corner handles, the object sizes
proportionally.
To scale an object:
1. Select the object(s) you want to scale.
2. Select
3. On the cascading menu, choose one of the following:
4. Select one of the designated scaling options or enter a scaling factor in the
Custom option.
5. Click
Hint! You can also size objects using the Object Properties dialog box.
Object>Scale.
• Select one of the designated scaling percentages. The object is
scaled to the desired percentage.
•Select
OK. The object is scaled accordingly.
Custom. The Scale dialog box displays.
Select Object>Properties or click on the Object toolbar. Use the Height
and Width options on the General tab.
5-3
Page 64

Positioning Objects
In your document, you can specify the location coordinates for an object,
position an object using your mouse or keyboard, or snap objects to the grid.
Use the following procedures to position objects.
To position an object using a mouse or keyboard:
1. Select the object you want to move.
2. Do one of the following:
• Position the cursor over the selected object. The move cursor ( )
displays. Click and drag the desired object to a new position. As
you drag an object, a dotted outline displays so you can identify the
object edges for accurate positioning.
• Press any of the arrow keys to move the object by one screen pixel,
or hold down the Shift key while pressing an arrow key to move the
object by ten screen pixels.
To position an object precisely on the document:
1. Select the object you want to position.
2. Select
3. Click the
4. Click
Note: The coordinates of the upper left corner of the printable area are 0,0. On the
5-4 Working with Objects
Object>Properties or click on the Object toolbar.
• If the object is not a line, type new location values in the
Top options.
• If the object is a straight or diagonal line, type new location values
for any of the fields:
Point 2/Horizontal (x)
OK. The object is repositioned according to the new values.
editing window, the outer edge of the label is displayed in grey and the label you
are creating is displayed in white.
General tab and do one of the following:
Left and
Point 1/Horizontal (x), Point 1/Vertical (y),
or Point 2/Vertical (y).
Page 65

To position an object using the grid:
1. Do one of the following:
•Select
•Select
Snap to grid option.
Options>Snap to Grid.
Options>Preferences. On the General tab, select the
2. Select and slightly move the object you want to position. The object aligns
with the nearest grid line.
Hint! You can adjust the grid spacing and display the grid using the Preferences
dialog box. For more information on using the grid, see
Chapter 4: Setting Document Preferences.
5-5
Page 66

Aligning Objects
You can align selected objects with respect to one another or with respect to the
document. Use the following procedures to align objects.
To align objects to one another:
1. Select the objects you want to align with each other.
2. Select
Note: The objects are aligned with each other based on the selected option. For
To center objects on a document:
1. Select the object(s) you want to center and do one of the following:
2. Do one of the following to center all objects on a document (objects do not
need to be individually selected):
Object>Align Objects and select one of the following:
•
Vertically: Select Left, Center, or Right.
•
Horizontally: Select Top , Middle, or Bottom.
•
Center Point of selection: Select Center Point.
example, if you choose Left, the selected objects align on the left edge of the
left-most object.
• Horizontally: Select
available only if you have set a document length. For more
information on setting document length, see Chapter 3: Setting
Document Attributes.
• Vertically: Select Object>Center Vertically.
•
Center all objects Horizontally: Select Object>Center All Objects
Horizontally
document length. For more information on setting document length,
see Chapter 3: Setting Document Attributes.
• Vertically: Select Object>Center All Objects Vertically.
Object>Center Horizontally. This option is
. This option is available only if you have set a
5-6 Working with Objects
Page 67

Changing Object Color
You can change the color of an object in your document. The available colors
are dependent on the printer you are using and your application settings.
Use the following procedures to change application settings and object colors.
To set printer color setting:
If your printer supports multiple color printing, select one of the following color
settings from the Printer color setting option on the Object toolbar:
•
Monochrome: All objects print in a single color. Changing the color
of one object changes the color of all objects in the document. In
multi-colored objects, the document prints in shades of the installed
ribbon color.
•
Spot Color: The objects on the document print by color matching to
spot color ribbons.
•
Full Color: Objects print in their original colors using the process
color ribbon.
To change the color of an object:
1. Select the object(s) you want to change.
2. Do one of the following:
•Select
Object>Color. The Object Color dialog box displays.
• Click on the
displays.
3. Click the desired color for the selected objects.
4. Click
Hint! You can also change object color by choosing Object>Properties or clicking
OK.
on the Object toolbar.
Object toolbar. The Object Color dialog box
5-7
Page 68

Rotating Objects
You can rotate objects to a precise angle or manually rotate an object using
your mouse. Use the following procedures to rotate objects in your document.
To rotate objects with the mouse:
1. Select one or more objects to rotate. The rotation handle displays to the
right of the rectangle formed by the sizing handles.
2. Move the mouse pointer over the rotation handle. The cursor changes to
the Rotate cursor:
3. Click and drag the
current degree of rotation displays in the status bar.
4. Release the mouse button when the object is rotated to the desired degree.
To rotate objects using the object menu or toolbar:
1. Select one or more objects to rotate.
2. Do one of the following:
•Select
designated degrees of rotation, or use
rotation angle. The object is automatically rotated.
Rotate cursor without releasing the mouse button. The
Object>Rotate. From the cascading menu, select one of the
Custom to set another
• Click on the
Click on a pre-set value or set your own rotation angle.
3. Click
Hint! You can also rotate objects by choosing Object>Properties or clicking on
5-8 Working with Objects
OK. The object rotates to the new degree of rotation.
the Object toolbar.
Object toolbar. The Rotate dialog box displays.
Page 69

Framing Objects
Use the following procedure to place a frame around an object.
To frame an object using the object toolbar:
1. Select the object you want to frame.
2. On the Object toolbar, click .
3. Select an appropriate line width. A frame displays around the selected
object in the selected line weight.
Hint! You can also frame objects by choosing Object>Properties or
clicking on the Object toolbar.
Moving Objects to the Front or Back
When objects overlap, you can position them so they are either in front of, or
behind, other objects. Use the following procedure to move an object to the front
or back of other objects.
To move an object to the front or back:
1. Select the object you want to send to the front or back.
2. Do one of the following:
•Select
selected object is brought to the front so it is completely visible.
•Select
selected object is obscured where it overlaps the other objects.
Object>Move to Front or click on the Object toolbar. The
Object>Move to Back or click on the Object toolbar. The
5-9
Page 70

Grouping and Ungrouping Objects
You can group objects within a document to make them a single element. Any
modifications you make to a grouped object uniformly change all objects within
the group. Use the following procedures to group and ungroup objects in your
document.
To group objects:
1. Select the objects you want to combine into a group.
2. Do one of the following:
•Select
Object>Group. A check mark displays next to the command.
• On the
Hint! Grouped objects become a single object, with its own set of properties. To
change the attributes for a single object inside the group, you must first ungroup
the collection.
Object toolbar, click . The selected objects are grouped.
To ungroup objects:
1. Select the object group you want to ungroup.
2. Do one of the following:
•Select
• On the
ungrouped.
Object>Group. The check mark is removed from the menu.
Object toolbar, click . The selected objects are
5-10 Working with Objects
Page 71

Cutting, Copying, and Pasting Objects
To remove an object from one area to another area, use the Cut option. The
original object is removed and placed on your Windows™ clipboard.
To create a duplicate of an object, use the Copy option. The object remains in
its original location, but is also copied to your Windows™ clipboard.
Both options let you paste the copy of the object into another location.
Use the following procedures to cut, copy, and paste objects.
To cut an object:
1. Select the object you want to remove.
2. Select
removed and placed on your Windows clipboard.
Edit>Cut or click on the Standard toolbar. The selected object is
To copy an object:
1. Select the object you want to copy.
2. Select
copied to your Windows clipboard, leaving the original object in the
document.
Edit>Copy or click on the Standard toolbar. The selected object is
To paste an object:
1. Cut or copy the desired object.
2. Select
Clipboard are inserted in one of these locations:
Edit>Paste or click on the Standard toolbar. The contents of the
• If pasting text within a text object, the pasted text is inserted in
the object at the cursor position.
• If pasting other objects, the pasted objects appear slightly offset
from the original object you cut or copied.
5-11
Page 72

Deleting Objects
You can remove objects that you no longer want in your document by using the
following procedure.
To delete an object:
1. Select the object you want to delete.
2. Select
CAUTION! A deleted object is not placed on the Clipboard, so you cannot paste the
Edit>Delete or press the Delete key. The selected object is deleted.
object elsewhere. Use the Edit>Cut command to place a deleted object on
the Clipboard. For more information on using the cut command, see the
previous section.
Using the Undo Command
If you perform an action that you do not want, such as moving or resizing an
object, use the Undo command to reverse the action. Use the following
procedure to undo an action.
To undo actions:
Select Edit>Undo or press Ctrl + Z on your keyboard. This feature reverses the
previous action. You can undo multiple actions by repeating this process. This
feature becomes unavailable when you cannot undo any additional changes.
For More Information
For more information on working with specific objects, see the following
chapters:
Chapter 6: Working with Text
Chapter 7: Working with Bar Codes
Chapter 8: Working with Graphics
Chapter 9: Working with Variable Data
Chapter 10: Working with Shapes
5-12 Working with Objects
Page 73

CHAPTER 6 Working with Text
To include text in your document, you need to create a text object. This chapter
explains how to create text objects, such as text boxes, text on a circle, vertical
text, and TextArt.
Topics in this chapter include:
Creating Text Boxes
Selecting Text and Text Objects
Applying Fonts and Character Formats
Sizing Text
Positioning Text in Text Objects
Reversing Text Colors
Creating Text on a Circle
Creating Vertical Text
Creating TextArt
6-1
Page 74

Creating Text Boxes
You can create fixed-size or free-form text boxes as described below. You can
also convert existing text boxes from one type to another.
•
Fixed size: A fixed text box restricts text you type to the parameters
of the boundaries you set.
•
Free-form: A free-form text box expands as you type.
To create fixed or free-form text objects, use the following procedure.
To create a fixed or free-form text box:
1. On the Format toolbar, select the desired font and character formats. For
more information on selecting font styles and character formats, see
Applying Fonts and Character Formats.
2. Select
cross-hair cursor ( ).
3. Move the cursor where you want the text to start.
4. Do one of the following:
5. Type the desired text. It displays with the text attributes shown on the
Format toolbar.
6. Click anywhere outside the text object to accept your changes.
Draw>Text or click on the Draw toolbar. The cursor changes to a
•
Create a fixed text box: hold down and drag the left mouse button
to create a text box of the desired size. Release the mouse button.
The text cursor displays in the box.
•
Create a free-form text box: click the left mouse button and release
without dragging. The text cursor displays.
6-2 Working with Text
Page 75

To convert a fixed or free-form text object:
1. Select the text object you want to convert.
2. On the Object toolbar, select
Object Properties dialog box displays.
Object>Properties or click . The Text
Figure 6-1. Text Object Properties Dialog Box
3. Click the Format tab. In the Object boundary option, the current text box
type is indicated.
4. Do one of the following to convert a text object:
5. Click
• Fixed text object to a free-form text object
text object
option.
• Free-form text object to a fixed text object
with boundaries
OK to accept the changes.
option.
: select the Free form
: select the Text object
6-3
Page 76

Selecting Text and Text Objects
To apply text editing changes to individual text characters or entire text objects,
use the following procedure.
To select an entire text box:
1. On the Draw toolbar, select Draw>Selector or click .
2. Click once on the text box you want to edit.
3. Complete the text format changes.
To select individual characters:
1. On the Draw toolbar, select Draw>Selector or click .
2. Select the text box you want to edit.
3. Select
object, one of the following happens:
4. Do one of the following:
5. Complete your changes.
6. Click outside of the text box to accept the changes, or click
Data or TextArt dialog boxes.
Object>Open or double-click the object. Based on the selected
• Text boxes and vertical text: the cursor displays within the object.
• Text in a circle object: the Tex t Da ta dialog box displays.
• TextArt o b j ec t : the TextArt dialog box displays.
• Select individual characters: Place the cursor over the starting
point of the text you want to select. Click and hold the left mouse
button, and drag the cursor across the desired characters.
• Select an entire word: Place the cursor over any part of the word
and double-click the left mouse button.
OK in the Text
6-4 Working with Text
Page 77

Applying Fonts and Character Formats
You can select different font styles and apply different character formats to that
font. You can apply formatting changes to individual characters or to the entire
text object. For more information on selecting text objects and characters, see
the previous section. To change text font and character formats, use the
following procedures.
To change text font:
1. Select the text you want to change.
2. On the
The type style changes to reflect your selection.
Format toolbar, select a type style from the font selection .
To change character formats:
1. Select the text you want to change.
2. On the
The selected text changes to reflect the selected character format.
Format toolbar, select one or more of the following:
•
Bold text:
•
Italics text:
•
Underlined text:
6-5
Page 78

Sizing Text
The application can automatically size text, or you can manually size text
according to the specific requirements of the document you are creating.
To automatically size text:
1. Select the text object you want to change.
2. On the Format toolbar, click . The application increases or decreases
the font size of the text object to fit within the boundaries of the text box.
Note: This option is available for fixed text objects only. For more information on
To manually size text:
1. Select the text you want to change.
2. Do one of the following:
converting text objects, see To convert a fixed or free-form text object:.
• Click to increase or to decrease the size of the selected
text.
•On the Format toolbar, select or type the desired font size in the
font size option . The selected text changes to your
specifications.
6-6 Working with Text
Page 79

Positioning Text in Text Objects
You can justify text so it is positioned to the left, center, or right side of the text
box. You can also position text vertically in the text box. Use the following
procedures to position text within text objects.
To select text justification:
1. Select the text object you want to change.
2. Do one of the following:
• On the Format toolbar, click (left), (center), or (right) to
align text objects. The text aligns within the text box.
•Select
the
3. From the Alignment option, select
4. Click
OK. The settings you chose are applied to the selected text object.
Object>Properties or click on the Object toolbar. Click
Format tab, then continue with Step 3.
Left, Center, or Right justification.
To select vertical text position:
1. Select the text object you want to change.
2. Select
3. Click the
4. From the
5. Click
Object>Properties or click on the Object toolbar.
Format tab.
Position option, select Top , Middle, or Bottom.
OK. The settings you chose are applied to the selected text object.
6-7
Page 80

Reversing Text Colors
To reverse the background and foreground colors on a text object, use the
following procedure.
To reverse text colors:
1. Select the text object you want to reverse.
2. On the
automatically reverse.
Hint! You can also reverse text colors using the Object Properties dialog box.
Object toolbar, click . The foreground and background colors
Select Object>Properties or click on the Object toolbar. On the Format
tab, select Reverse text colors.
6-8 Working with Text
Page 81

Creating Text on a Circle
To create text that wraps around a circle, use the following procedure.
To create text on a circle:
1. On the Format toolbar, select the desired font and format attributes.
2. Select
changes to a cross-hair cursor ( ).
3. Move the cursor where you want the circle to start.
4. While holding down the left mouse button, drag to create a circle of the
desired size.
5. Release the mouse button. The Text D ata dialog displays.
6. Type the text for the top and bottom lines. The Tex t Da ta dialog box displays
the text attributes beneath each line.
7. To change the text attributes, click the Font button next to the text you want
to modify. You can set attributes for the top and bottom text lines
independently from each other.
8. Click
Draw>Text on a Circle or click on the Draw toolbar. The cursor
Figure 6-2. Text Data Dialog Box
OK. The text displays as specified on the circle.
Note: Your text aligns inside the diameter of the circle. If the font size differs between
the top and bottom lines of text, the line with the smaller text size aligns to the
inner edge of the line with the larger text size.
6-9
Page 82

Creating Vertical Text
Vertical text objects stack the letters on top of one another to create a vertical
line of text. To move and modify vertical text in the same manner as horizontal
text objects, use the following procedure.
To create vertical text:
1. Create a new text object or select an existing one.
2. Select
3. Click the
4. Select the
5. Click
Hint! Manual line breaks (returns) are treated as character spaces when making a
Object>Properties or click on the Object toolbar.
Format tab.
Vertical text option.
OK. The application vertically formats the text object.
text object into vertical text. If you want more than one line of vertical text,
create separate text objects.
6-10 Working with Text
Page 83

Creating TextArt
TextArt is a tool that allows you to morph text into different shapes, such as
diagonal and curved shapes.
A TextArt object is treated the same as a draw object. For more information on
modifying object size, color, fill pattern, position, and rotation, see
Chapter 5: Working with Objects and Chapter 10: Working with Shapes.
Use the following procedure to create TextArt objects.
To create TextArt:
1. On the Draw toolbar, select .
2. Hold down the left mouse button and drag to create a text box of the desired
size.
3. Release the mouse button. The Text Ar t dialog box displays.
Figure 6-3. TextArt Dialog Box
4. In the Shape option, select a shape for your text.
5. In the
6. In the
7. From the Font Style option, select a character format.
8. Click
Text option, type the desired text.
Font option, select the desired font.
OK. The TextArt object is scaled to fit the text box you created.
6-11
Page 84

6-12 Working with Text
Page 85

CHAPTER 7 Working with Bar Codes
You can add bar code data to any document, including documents you create
from a template. The application supports a variety of bar code symbologies
and allows you to modify bar code attributes, such as density, ratio, and humanreadable positioning.
Topics in this chapter include:
Creating Bar Codes
Setting Bar Code Density and Ratio
Working with Human-readable Text
Selecting Text within Bar Codes
Sizing Text within Bar Codes
7-1
Page 86

Creating Bar Codes
Use the following procedure to add bar codes to any document.
To insert a bar code:
1. On the Object toolbar, select the desired bar code symbology .
2. Select
to a cross-hair cursor ( ).
3. Place the cursor where you want the bar code to start. Then, holding down
the left mouse button, drag the mouse to create a place holder for the bar
code. The Bar Code Data dialog box displays.
4. Type the data you want to appear in the bar code.
5. In the Bar Code Data dialog box, click
displays as bar code data.
Draw>Bar Code or click on the Draw toolbar. The cursor changes
Figure 7-1. Bar Code Data Dialog Box
OK to finish. The typed information
7-2 Working with Bar Codes
Page 87

Setting Bar Code Density and Ratio
Use the following procedure to position the text within bar codes.
To change bar code density and ratio:
1. Select the bar code object you want to change.
2. Select
3. Click the
Object>Properties or click on the Object toolbar.
•
•
Bar Code tab and enter a value for the following settings:
Density: Specifies the width of a narrow bar in the bar code. The
available selections include 10, 20, 30, 40, 50, 60, 80, and 100 mils.
Ratio: Specifies the ratio of a wide bar to a narrow bar. The
available selections include 2:1, 2.5:1, and 3:1.
Figure 7-2. Object Properties Dialog Box: Bar Code Tab
4. Click OK to accept the changes.
7-3
Page 88

Working with Human-readable Text
Use the following procedure to position the text within bar codes.
To change the position of text within a bar code:
1. Select the bar code object you want to change.
2. Select
3. Click the
Object>Properties or click on the Object toolbar.
• No text: Prints a bar code without human-readable text.
• Text above bar code: Prints a bar code with human-readable text
• Text below bar code: Prints a bar code with human-readable text
• Include check character: Specifies that a check character should
• Print human-readable start/stop (*): Specifies that start and stop
Bar Code tab (Figure 7-3) and complete the desired settings:
above the bar code.
below the bar code.
print with all bar codes.
character (*) should print in human-readable form.
4. Click OK to accept the changes.
7-4 Working with Bar Codes
Figure 7-3. Bar Code Properties Tab
Page 89

Selecting Text within Bar Codes
You can edit the human readable text in a bar code, as well as the bar code
symbology and size. Use the following procedure to select bar code characters.
Select text within bar codes:
1. Select Draw>Selector or click on the Draw toolbar.
2. Select the bar code object you want to edit.
3. Select
box (Figure 7-4) displays.
4. Select the characters you want to edit.
5. Apply the changes you want to make.
6. Click
Object>Open or double-click the object. The Bar Code Data dialog
Figure 7-4. Bar Code Data Dialog Box
OK to accept the changes.
7-5
Page 90

Sizing Text within Bar Codes
You can modify the size of text within bar code objects. Use the following
procedure to size text in bar codes.
To increase the font size:
1. Create a new bar code or select an existing bar code object.
2. Do one of the following:
• Click to increase or to decrease the size of the text in the
selected bar code.
• On the Format toolbar, select or type the desired font size in size
option .
7-6 Working with Bar Codes
Page 91

CHAPTER 8 Working with Graphics
The application provides a wide range of safety symbols and industrial
pictograms in the built-in graphics library. The library includes over 800
graphics. For easy retrieval, they are organized by category, such as Arrows,
Mandatory, Prohibition, and so on. In addition, graphics are classified by
monochrome and multi-color.
You can also import graphics from outside the application, including pictures,
logos, and clip art.
Topics in this chapter include:
Selecting Graphics from the Library
Importing Graphics from Outside of the Application
8-1
Page 92

Selecting Graphics from the Library
Use the following procedure to insert a graphic from the library into your
document.
To insert a graphic from the library:
1. Select Draw>Insert Graphic or click on the Draw toolbar. The
Insert Graphic dialog box displays.
2. From the Graphic category option, select a category. All graphics in the
selected category appear in the graphic selection option.
3. From the
4. If your printer is a color printer, select
select this option, only monochrome graphics appear.
5. For a printer with a plotter cutter, you can select to display print, cut, or print
and cut graphics. For more information on cut and print and cut graphics,
see Chapter 12: Cutting Out Objects or Documents.
6. Use the scroll bar to browse through the graphics and click the graphic you
want.
7. Click
8-2 Working with Graphics
OK to add the graphic to your document, or click Cancel to exit without
adding a graphic.
Figure 8-1. Insert Graphic Dialog Box
Subcategory option, if available, select a subcategory.
Show color graphics. If you do not
Page 93

Importing Graphics from Outside of the Application
The application lets you import graphics from outside the application. You can
use graphics from paint programs, graphic programs, web sources, and so on.
You can import pictures in any of the following file formats:
Format Extension
Windows
®
MetaFile
*.WMF
TIFF
Bitmap
JPEG
Portable Network Graphics
PCX
®
Macintosh
SunRaster
Encapsulated PostScript
Hint! The application does not support all versions of the graphic formats listed
above. If you have difficulty importing a graphic, try saving the graphic as a
different format in your graphic editor.
PICT
*.TIF
*.BMP, *.DIB
*.JPG
*.PNG
*.PCX
*.PCT
*.RAS
*.EPS
8-3
Page 94

To import a graphic:
1. On the Draw toolbar, select Draw>Insert Graphic or click . The Insert
Graphic dialog box (Figure 8-1. Insert Graphic Dialog Box) displays.
2. Click the
Browse button. The Get Graphic dialog box displays.
Figure 8-2. Get Graphic Dialog Box
3. Navigate to the file folder where your graphic is stored.
4. In the Files of type option, select the file format of the graphic you want to
import.
5. In the File name option, select the graphic you want to import from the
directory.
6. Click
7. Click
Preview to view a thumbnail of the selected graphic.
Open to insert the graphic into the document, or click Cancel to exit
without importing a graphic.
8-4 Working with Graphics
Page 95

CHAPTER 9 Working with Variable
Data
Variable data refers to data in your documents that is changing or is not
constant. The following types of variable data are available:
• Sequences (serial numbers)
• Date/time stamps
• Prompts for data at print time
• Query a database or spreadsheet
• Text lists
Topics in this chapter include:
Creating Sequences
Creating and Using Text Lists
Linking to Databases and Spreadsheets
Prompting for Data at Print Time
Creating Date/Time Stamps
9-1
Page 96

Creating Sequences
To create documents that contain number sequences or letters that print as
multiple documents at print time, use the following procedure.
To create a sequence:
1. Select or create text or bar code object.
2. Select
3. Click the
4. Select
5. Click the
Object>Properties or click on the Object toolbar.
Sequence.
Data Source tab.
Sequence tab.
Figure 9-1. Object Properties Dialog Box: Sequence Tab
9-2 Working with Variable Data
Page 97

6. In the Starting value field, enter the sequence starting point. You can enter
numbers or single alphabetic character.
7. In the
Change by field, enter an amount to increase or decrease the
sequence.
8. To determine the number of documents in the sequence, click one of the
following:
•
Ending value and enter the ending point (numeral or alphabetic
character). The total number of documents is calculated and
displayed in the Number of documents field.
•
Number of documents and enter the total number of documents in
the sequence. The ending value is calculated and displayed in the
Ending value field.
• Unlimited. The application uses another document object, such as
a database query object, to determine the number of documents.
9. To enter constant text to precede or follow the sequence, type the prefix or
suffix in the
10. Click
Before sequence and After sequence fields.
OK to accept the sequence. The first sequence number displays in the
text or bar code object you created.
9-3
Page 98

Creating and Using Text Lists
Text lists are created and assigned to a text object. The text items you enter
create a mini-database that prints a new document for each item in the list. For
more information on using text lists in template prompts, see
Chapter 3: Creating Documents with Templates. Use the following procedures
to create and use text lists.
To create a new text list:
1. Select or create a text object.
2. Select
3. Click the
4. Click the
5. In the List data option, type the items for the text list, or click Open list to
use an existing text list. For more information on using existing text lists,
see
Object>Properties or click on the Object toolbar.
Data Source tab and select Text list.
Text Lists tab.
Figure 9-2. Object Properties Dialog Box: Text Lists Tab
To use an existing text list:.
Hint! Be sure to press Enter between each text list item.
6. Click OK. The first item in the text list displays in the text object.
9-4 Working with Variable Data
Page 99
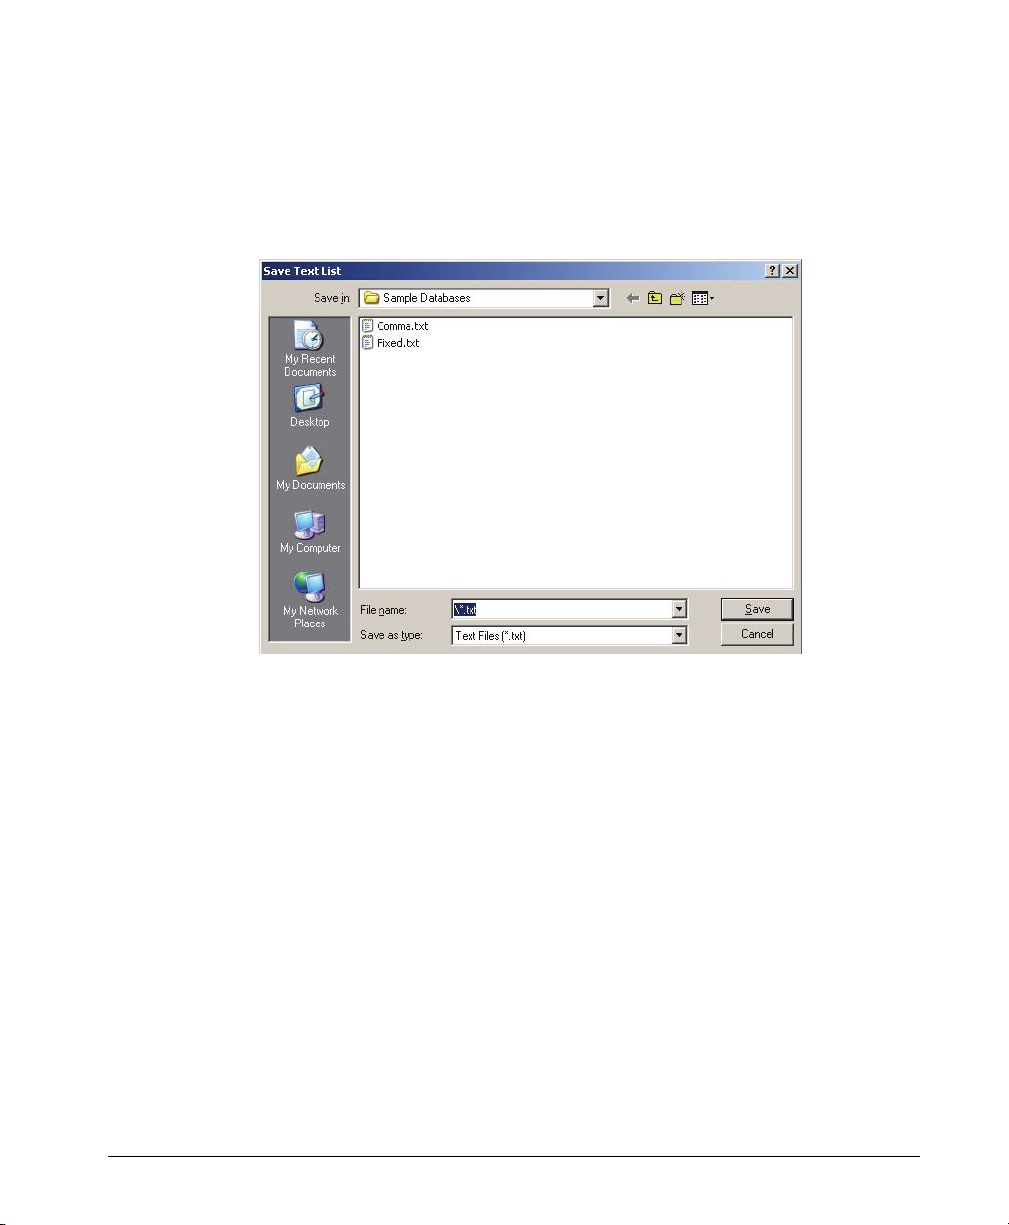
To save a text list:
1. Follow Steps 1-6 in To create a new text list:, or click the Use text list option
in the Enter Data dialog box for a text prompt (Figure 3-6) during the prompt
sequence.
2. Click
Save List. The Save Text List dialog box displays.
Figure 9-3. Save Text List Dialog Box
3. Type a name for the text list and click Save.
4. Click
OK to accept the settings, or click Next to continue the prompt
sequence.
9-5
Page 100

To use an existing text list:
1. Follow Steps 1-6 in To create a new text list:, or click the Use text list option
in the Enter Data dialog box for a text prompt during the prompt sequence
(Figure 3-6).
2. Click
Open list. The Get Text List dialog box displays.
Figure 9-4. Get Text List Dialog Box
3. Select the text list you want to open.
4. Click
5. Click
Open. The text list data displays in the text field.
OK on the Text Lists tab, or click Next to continue the prompt
sequence.
To delete a text list:
1. Open Windows Explorer.
2. Navigate to
Brady>MarkWare>Text Lists (e.g.,
C:\Program Files\Brady\MarkWare\Text Lists.)
3. Select the text list(s) you want to delete and press
4. Do one of the following:
• Click
• Click
9-6 Working with Variable Data
Delete.
Yes to delete the files.
No to retain the files.
 Loading...