

Page 1

Page 2

Quick Start Manual
Copyright by Brady Worldwide, Inc.
All specifications about delivery, design, performance and weight are given to
the best of our current knowledge and are subject to change without prior
notice.
All rights reserved, including those of the translations.
No part of this manual nor any translation may be reproduced or transmitted
in any form or by any means, for any purpose other than the purchaser’s
personal use, without the express written permission of Brady.
United States
Note: This equipment has been tested and found to comply with the limits for
a Class A digital device, pursuant to part 15 of the FCC Rules. These limits
are designed to provide reasonable protection against harmful interference
when the equipment is operated in a commercial environment. This
equipment generates, uses, and can radiate radio frequency energy and, if
not installed and used in accordance with the instruction manual, may cause
harmful interference to radio communications. Operation of this equipment in
a residential area is likely to cause harmful interference in which case the user
will be required to correct the interference at his own expense.
Changes or modifications not expressly approved by the party responsible for
compliance could void the user’s authority to operate the equipment.
Industry Canada
This Class A digital apparatus meets all requirements of the Canadian
Interference-Causing Equipment Regulations.
Cet appareil numérique de la classe A respecte toutes les exigences du
Reglement sur le Matériel Brouilleur du Canada.
Taiwan
Europe
Warning — This is a Class A product. In a domestic environment, this product
may cause radio interference in which case the user may be required to take
adequate measures.
Page 3

Quick Start Manual
Welcome to Brady’s Intelligent Printing System. The Brady IP Printer is a
main component to the fully integrated printing system. Working together, the
printer, media and software provide hassle free functionality and are
optimized to print Brady’s high quality specialized materials.
To gain the full benefit of the system, material and ribbons from Brady are
programmed with the ability to communicate with the printer and software.
Material identified with this logo will work in Brady mode on the printer.
Material marked with this logo will communicate with the printer and software
by the user selection in the software.
Page 4

Quick Start Manual
1
Quick Start Manual
About the Printer
The Brady IP™ printer is designed to work with BradySoft, IdentiLab or
LabelMark software. When used with one of those software packages, the
printer will automatically recognize all Brady non-metallized materials up to 4
inches (101.6 mm) wide. For operation of the printer with other manufacturer’s
labels, metallized labels and other software packages, refer to the “Brady IP™
Printer Operator/Configuration Manual” located on the Product CD.
Contents
Quick Start Road Map ............................................................................. 2
Safety ...................................................................................................... 2
Unpacking the Brady IP printer................................................................ 3
What’s in the Box .............................................................................. 4
Stress Free System Setup....................................................................... 4
Installation ............................................................................................... 5
Printer Connection ............................................................................ 5
Interface Connections ....................................................................... 6
USB Connection ......................................................................... 7
RS-232 Connection .................................................................... 7
Ethernet Connection................................................................... 7
USB Printer Driver ............................................................................ 8
Printer Wizard............................................................................. 8
Multiple Printers.......................................................................... 9
RS-232 or Ethernet Printer Driver................................................... 12
Software Installation........................................................................ 12
On-line Status Monitor .................................................................... 12
Printer Overview ............................................................................. 13
Loading the Ribbon ......................................................................... 13
Loading the Material ....................................................................... 16
Reading the LCD Display................................................................ 18
Calibrating the Printer ..................................................................... 19
Printing............................................................................................ 19
Other Modes.......................................................................................... 19
Registering your Printer......................................................................... 19
Page 5

Quick Start Manual
2
Quick Start Road Map
1. Review all safety messages .......................................................... Page 2
2. Unpack the printer and verify that all parts are included ............... Page 4
3. Connect the printer ........................................................................ Page 5
4. Install the printer driver .................................................................. Page 7
5. Install the software ....................................................................... Page 11
6. Load the ribbon ............................................................................ Page 13
7. Load the material ......................................................................... Page 15
8. Calibrate the printer ..................................................................... Page 19
Safety
■ The Brady IP printer is configured for voltages of 100 to 240 V ~ (50 to 60
Hz). Connect only to a grounded power outlet.
■ The Brady IP printer may only be used in a dry environment, do not expose
it to moisture (water, mists, etc.).
■ If the Brady IP printer is operated with the cover open, ensure that people’s
clothing, hair, jewelry etc. do not come into contact with the exposed
rotating parts.
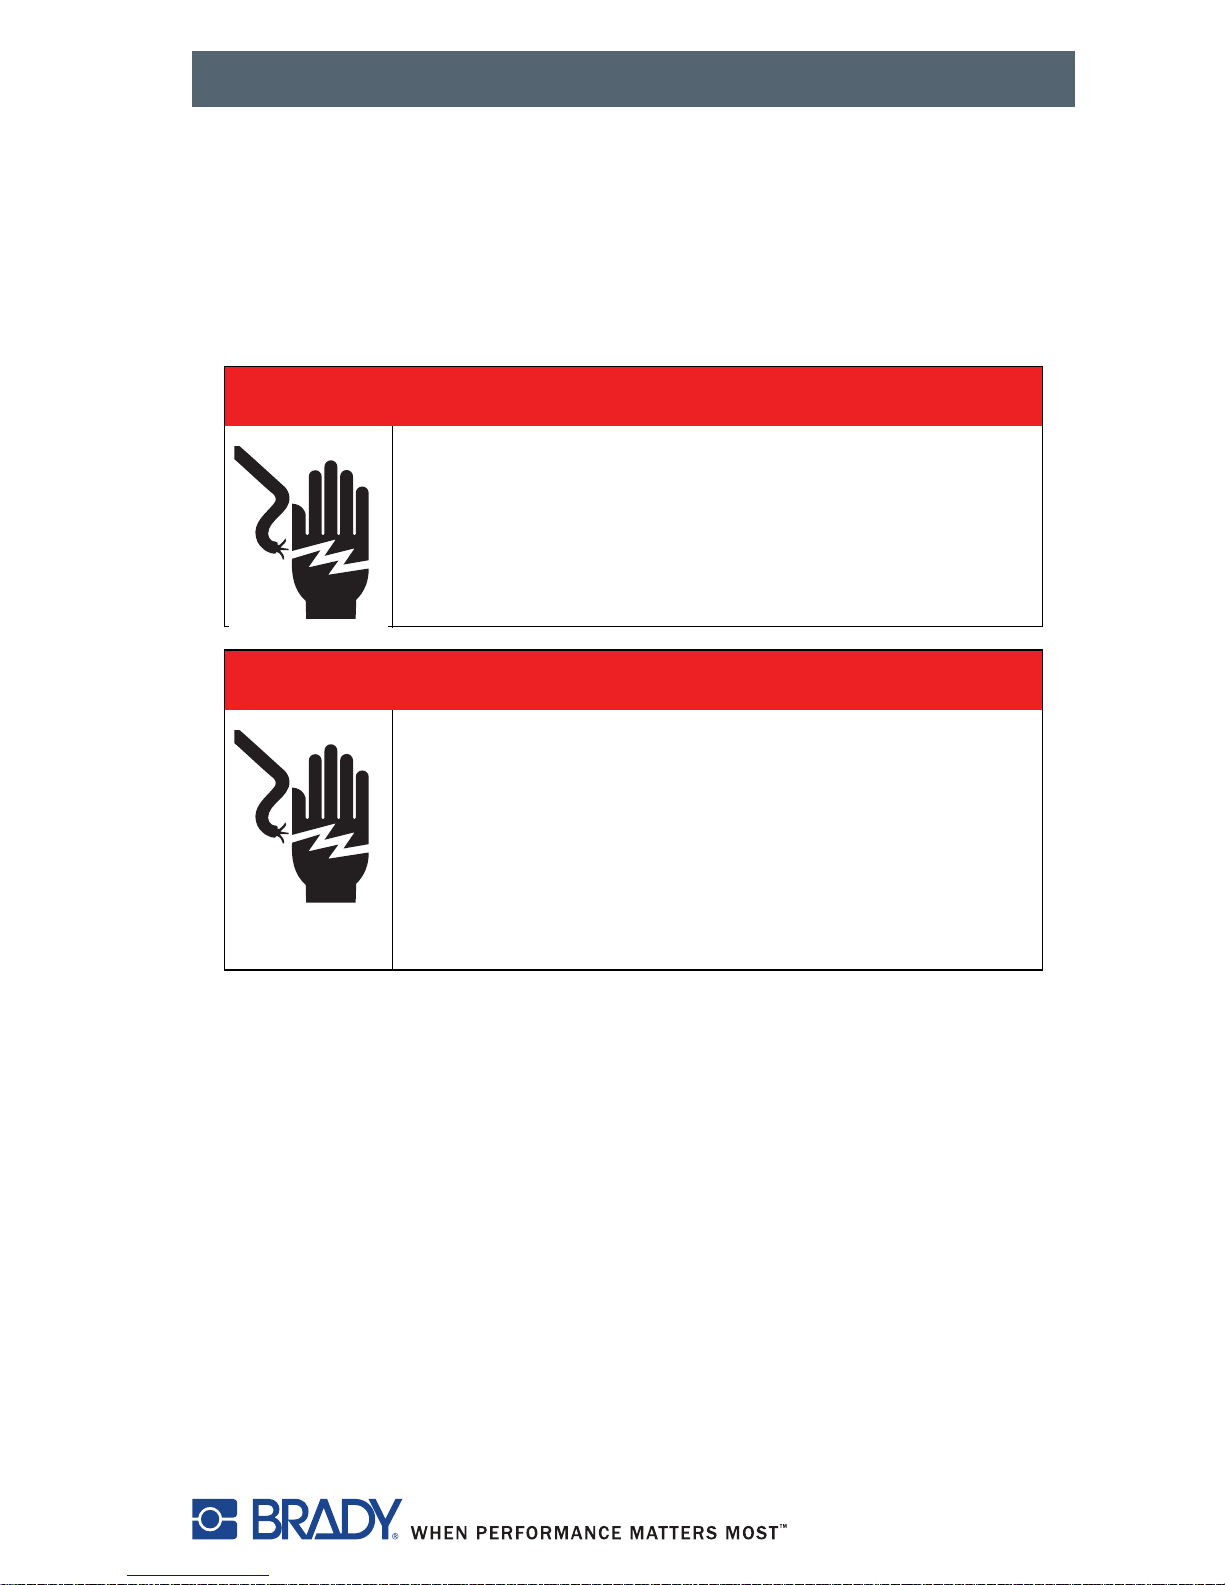
A WARNING
Entanglement Hazard
• MOVING PARTS can entangle.
• AVOID wearing jewelry or loose fitting clothing.
• ALWAYS tie back long hair.
A ADVERTENCIA
Peligro de enredos
• Las PIEZAS EN MOVIMIENTO pueden enredar.
• EVITE usar joyas o ropa suelta.
• Amárrese SIEMPRE el cabello largo.
Page 6
Quick Start Manual
3
■ During the print process, the print assembly can become hot. Do not touch
the print assembly during operation, and allow the assembly to cool down
before changing material and before disassembly.
■ Perform only those actions described in this quick operator’s manual. Work
going beyond this may only be performed by trained personnel or service
technicians.
Unpacking the Brady IP printer
Carefully unpack and inspect the printer for possible damage incurred during
shipping.
■ Check all exterior and interior surfaces for damage.
■ Check the Brady IP printer for any possible transportation damage.
A DANGER
Electric Shock Hazard
• DO NOT open the Brady IP printer casing.
• UNPLUG power cord before servicing.
• CONTACTING power supply can cause
electrocution.
A PELIGRO
Peligro de choque eléctrico
• NO ABRA la caja de la Brady IP impresora de
rótulos.
• DESENCHUFE el cordón de energía antes de
darle servicio.
• El hacer CONTACO con la fuente de energía
puede causar electrocución.
Page 7

Quick Start Manual
4
What’s in the Box
■ Brady IP printer
■ Power cable
■ Printed “Quick Start Manual”
■ Product CD including Windows printer driver, electronic “Quick Start
Manual,” “Brady IP™ Printer Operator/Configuration Manual” and web links.
■ Software demo CD
■ Printer cleaning Kit
■ USB cable
NOTE: Please keep the original packaging, including the box, in the
event the printer must be returned.
Stress Free System Setup
Stress Free System Setup is available, free of charge, in North America.
Brady’s Stress Free System Setup helps you set up your new printer
and software.
To schedule a free phone setup assistance appointment, call 1-800-643-8766
and select Menu Option 4.
+
Stress
FREE
Setup
System
Page 8

Quick Start Manual
5
Installation
Printer Connection
■ Place the printer on a level surface away from moisture.
■ Open the Brady IP printer cover (Figure 11, 4).
■ For operation in Peel-off mode, ensure the drivers are set to Peel-off mode
and place the printer in such a position that the liner can run down without
hindrance. Refer to the “Brady IP™ Printer Operator/Configuration Manual”
for additional information about Peel-off mode.
1. Plug the power cable into the power connection socket on the back of the
printer (Figure 1, 4).
2. Plug the power cable into a grounded 100 to 240 V ~ (50 to 60 Hz) power
source.
NOTICE
The device and printing materials will be damaged
by moisture and wet conditions.
Set up Brady IP printers only in dry locations
protected from moisture.
AVISO
El dispositivo y los materiales de impresión serán
dañados por la humedad y las condiciones
mojadas.
Coloque las Brady IP impresoras de rótulos
únicamente en ubicaciones secas y protegidas de
la humedad.
NOTICE
Ensure that the foam transportation protection
has been removed from around the printhead.
AVISO
Asegúrese de que la espuma de protección de la
cabeza durante el transporte haya sido removida
del área de la cabeza de impresión.
Page 9

Quick Start Manual
6
NOTE: The Brady IP printer senses the voltage type and automatically
adjusts for the power source.
3. Connect the printer to the computer using the supplied USB cable, an
RS-232 cable or an Ethernet cable (refer to Interface Connections on
page 6).
4. If you do not have BradySoft, LabelMark or IdentiLab software installed on
your computer, refer to Software Installation on page 11.
5. Turn on the power switch on the back of the printer (Figure 1, 5). The
printer will perform a self test and then go into Ready mode.
NOTE: If an error occurs during installation, refer to the “Brady IP™
Printer Operator/Configuration Manual” located on the Product
CD.
Interface Connections
The printer has a RS-232 port (Figure 1, 1), a USB port (Figure 1, 2) and an
Ethernet port (Figure 1, 3).
Figure 1, Interfaces and Connectors
1. RS-232 port 4. Power connection socket
2. USB port 5. Power switch
3. Ethernet port
1
2
3
4
5
Page 10

Quick Start Manual
7
USB Connection
1. Ensure that the Brady IP Printer is turned off.
2. Connect the printer to the computer using the supplied USB cable. The
USB cable connects to the printer at the USB port (Figure 1, 2) and to a
USB port on the computer.
RS-232 Connection
1. Ensure that the Brady IP Printer is turned off.
2. Connect the printer to the computer using an RS-232 cable (not
provided). The RS-232 cable connects to the printer at the port
(Figure 1, 1) and to the computer.
3. Secure the cable with the connection screws.
4. Configure the printer RS-232 interface to match the connected computer.
Refer to the “Brady IP™ Printer Operator/Configuration Manual” located
on the Product CD.
Ethernet Connection
1. Ensure that the Brady IP Printer is turned off.
2. Connect the printer to the computer using an Ethernet cable (not
provided). The Ethernet cable connects to the printer at the Ethernet port
(Figure 1, 3) and to an Ethernet port on the computer or Local Area
Network (LAN).
USB Printer Driver
Printer Wizard
1. Insert the product CD in the CD drive on your computer. Turn the printer
power on. Connect the USB cables (refer to Printer Connection on
page 5). The Found New Hardware dialog box appears.
NOTICE
Do not install drivers if using Bradysoft. Bradysoft
uses its own drivers. Follow instructions included
with Bradysoft to set up your IP printer using
USB, serial or Ethernet connections.
Page 11

Quick Start Manual
8
Figure 2, Found New Hardware Wizard
2. Click NEXT. The driver will load automatically.
This completes the installation of the printer driver. If you have additional IP
printers, using USB, to install, continue to Multiple Printers on page 8.
Multiple Printers
If you want to add an additional IP Printer to your PC, ensure the additional IP
Printer is powered on, then connect to your computer
NOTICE
When connected to your PC, the Found New
Hardware Wizard will appear. (At this point the
Plug and Play process should have created a new
USB virtual port. The Brady IP printer driver will
be added in later steps.) Cancel the New Hardware
wizard. If using Windows XP, skip ahead to step 1.
Otherwise, with Windows 2000, a copy of your
additional IP printer is automatically created but
must be deleted. Go to Start | Settings | Printers
and delete the last copy that was added by right
clicking on the icon of the last printer created, and
select delete.
Page 12

Quick Start Manual
9
Figure 3, Printers Window
1. Ensure the Product CD is in the CD drive. Select Run from your
computer’s start menu. Choose the drive where the Product CD is
located. Choose Setup\Setup.exe. Choose OK.
Figure 4, Run Dialog Box
2. Choose your language.
Figure 5, Choose Setup Language Dialog Box
Page 13

Quick Start Manual
10
3. Choose the printer.
Figure 6, Choose Printer Dialog Box
4. Choose the appropriate port.
Figure 7, Choose Printer Port Dialog Box
5. Click Yes.
Figure 8, Read Only File Detected Dialog Box
Page 14

Quick Start Manual
11
6. Choose to restart your computer.
Figure 9, Restart Printer Dialog Box
7. Once your printer has restarted, ensure the added printer is powered on
and connected to your computer. Check to make sure the new printer
driver is not offline by choosing Start | Settings | Printers and right clicking
on the printer icon.
This completes the installation. Repeat this section for any additional IP
printers you will be installing on this computer.
RS-232 or Ethernet Printer Driver
To install an RS-232 or Ethernet printer driver, ensure that power is turned
OFF, connect the cable (refer to RS-232 Connection on page 7 or Ethernet
Connection on page 7 and complete steps 1 through 7 starting on page 9.
Software Installation
If you do not have BradySoft, LabelMark or IdentiLab software installed on
your computer:
1. Insert the software CD in the CD drive on your computer.
2. Follow the autoload directions for software installation.
On-line Status Monitor
The On-line Status Monitor provides printer status information. From the
Options menu, you can select Warn if no Brady Smart Supply, Always on
top or Unit of Measure (inches or mm). The Help menu provides links to
Brady Online.
Page 15

Quick Start Manual
12
Figure 10, On-line Status Monitor
Printer Overview
Figure 11, Brady IP Printer
1. Print Module Release Button 4. Printer Cover
2. Ribbon Carrier Close Points 5. Material Holder
3. Ribbon Take-up Spindle 6. Control Panel
5
1
6
2
2
4
3
Page 16

Quick Start Manual
13
Loading the Ribbon
Figure 12, Print Module Release Button
1. Open the cover (Figure 11, 4) and press the green print module release
button (Figure 12, 1) to open the control panel (Figure 13, 1).
2. Raise the print module (Figure 13, 4).
Figure 13, Loading the Ribbon
1. Print module release button
1. Control panel 4. Print module
2. Ribbon spindle notch 5. Adjustment wheel
3. Thermal printhead
1
2
1
4
5
3
Page 17

Quick Start Manual
14
3. Position the square end of the new ribbon spindle in the square notch on
the right side of the printer, push the spindle slightly to the right and slide
the other end of the spindle into the notch (Figure 13, 2) on the left side of
the printer.
4. Bring the ribbon end forward and over the thermal printhead
(Figure 13, 3) to the ribbon take-up spindle (Figure 14).
Figure 14, Ribbon Take-up Spindle
NOTE: If you need to remove the ribbon take-up spindle, push the
spindle slightly to the right and slide the other end of the spindle
out of the notch on the left side of the printer. Remove the ribbon
take-up spindle.
To replace the ribbon take-up spindle, position the square end
(Figure 14, 1) of the spindle in the square notch on the right side
of the printer, push the spindle slightly to the right and slide the
other end of the spindle into the notch on the left side of the
printer.
5. Slide the end of the ribbon under the ribbon hold-down tab (Figure 14, 2)
so that about 2 inches (50.8 mm) protrudes past the tab.
NOTE: Install the ribbon so the ribbon path is under the take-up spindle,
NOT over the spindle.
Fold the end of the ribbon back on top of itself over the tab.
6. Turn the adjustment wheel (Figure 13, 5) a few complete revolutions, to
ensure that the ribbon will not pull out from under the ribbon hold-down
tab. The ribbon should now be snug and smoothed out against the
printhead.
NOTE: The spindle is self-adjusting and will smooth the ribbon out and
position it correctly as the adjustment wheel is turned.
1. Square end 3. Round end
2. Ribbon hold-down tab 4. Thumb lever
1
2
3
4
Page 18

Quick Start Manual
15
NOTE: To remove ribbon from the ribbon take-up spindle, press and hold
the thumb lever (Figure 14, 4) to compress the spindle and slide
the spent ribbon off the spindle.
Loading the Material
Figure 15, Material Supply Holder
1. Remove the material supply holder (Figure 15) from the printer by lifting it
up and out of the frame.
1. Green tab 3. Electrical contacts
2. End piece
NOTICE
There are electrical contacts located under the
side tabs (Figure 15, 3) on both sides of the
material supply holder. Be careful not to damage
these electrical contacts or the Brady IP printer
will be unable to read the material identification
tag on the labels.
AVISO
Hay sensores ubicados debajo de las orejas
laterales (Figura 15, 3) a ambos lados del soporte
de alimentación de material. Tenga cuaidado para
no dañar estos contactos eléctricos, de lo
contrario la Brady IP impresora de rótulos
quedará incapacitada para leer la etiqueta de
identificación del material que se encuentra en los
rótulos.
3
2
1
Page 19

Quick Start Manual
16
2. Press and hold the green tab (Figure 15, 1) on the material supply holder
and slide the end piece (Figure 15, 2) outward.
Figure 16, Labeling Material
3. Slide the Brady labeling material roll onto the material supply holder and
reinstall the end piece (Figure 16, 1), which will automatically center the
roll on the holder.
4. Reinsert the material supply holder onto the bracket grooves on the
frame. Ensure the electrical contacts under the side tabs (Figure 16, 2)
are properly seated in the frame so the printer will correctly read the
material identification tag. Ensure the material rolls from the top of the roll
as shown in Figure 16.
Figure 17, Alignment Guides
1. End piece 2. Electrical contacts under side tabs
1. Green dial 2. Material guides
2
1
1
2
Page 20

Quick Start Manual
17
5. Thread the material under the print module, under the guides
(Figure 17, 2) and forward through the slot in the control panel.
6. Turn the green dial on the left (Figure 17, 1) to adjust the guides so they
just snug up against the labels. Do not tighten the guides enough to crimp
the labels.
7. Apply thumb pressure to the close points (Figure 11, 2) on both sides of
the print module until it latches securely in place. Once the print module is
latched in place, raise the control panel and snap into the closed position.
8. Close the printer cover (Figure 11, 4).
Reading the LCD Display
The use of Brady-brand supplies and LabelMark, BradySoft or IdentiLab
labeling software allows access to the full operation of Brady mode. For
detailed information about Brady mode, refer to the “Brady IP™ Printer
Operator/Configuration Manual” located on the Product CD.
The LCD display should read Ready and display the type of material loaded
into the printer as well as the type of ribbon loaded. Figure 18 is an example
of a typical display.
Page 21

Quick Start Manual
18
Figure 18, Typical Ready Display
If the printer is in a state other than Ready, refer to the “Brady IP™ Printer
Operator/Configuration Manual” located on the Product CD to determine what
the problem might be.
If the printer is operated with non-Brady software and/or non-Brady labels, the
printer will function only as a standard THT printer. Refer to the “Brady IP™
Printer Operator/Configuration Manual” located on the Product CD for
additional information.
1. Designates printer in Brady
mode
2. Online printer status
3. Sensor position
4. Ribbon number and
estimated amount remaining
5. Material part number and
estimated amount remaining
26
20
10
0
30
40
50
3
2
1
5
4
3
2
1
5
4
2
21
Page 22

Quick Start Manual
19
Calibrating the Printer
No calibration is necessary when using BradySoft, IdentiLab or LabelMark
software and Brady non-metallized materials. For operation of the printer with
other manufacturer’s labels, metallized labels and other software packages,
refer to the “Brady IP™ Printer Operator/Configuration Manual” located on the
Product CD.
Printing
When the ribbon and material are installed and the printer is powered up and
connected to the computer, the printer is ready for use. Start the printing
program (BradySoft, LabelMark, or Identilab) and the program should identify
the labeling material installed in the printer. At this time, refer to the manual for
your selected software for the creation and printing of the labels.
Other Modes
The Brady IP printer can be used in modes other than described in this
manual. For information regarding use of metallized labels, other non-Brady
IP-enabled materials or software packages and Auto Peel-off mode, refer to
the “Brady IP™ Printer Operator/Configuration Manual” included on the
Product CD.
Registering your Printer
Register your printer online at: www.bradyid.com/register.
Page 23

Quick Start Manual
For Repair or Technical Assistance, find your regional
Brady Tech Support office by going to:
■ In the Americas: www.bradyid.com
■ In Europe: www.bradyeurope.com
■ In Asia: www.bradycorp.com
 Loading...