

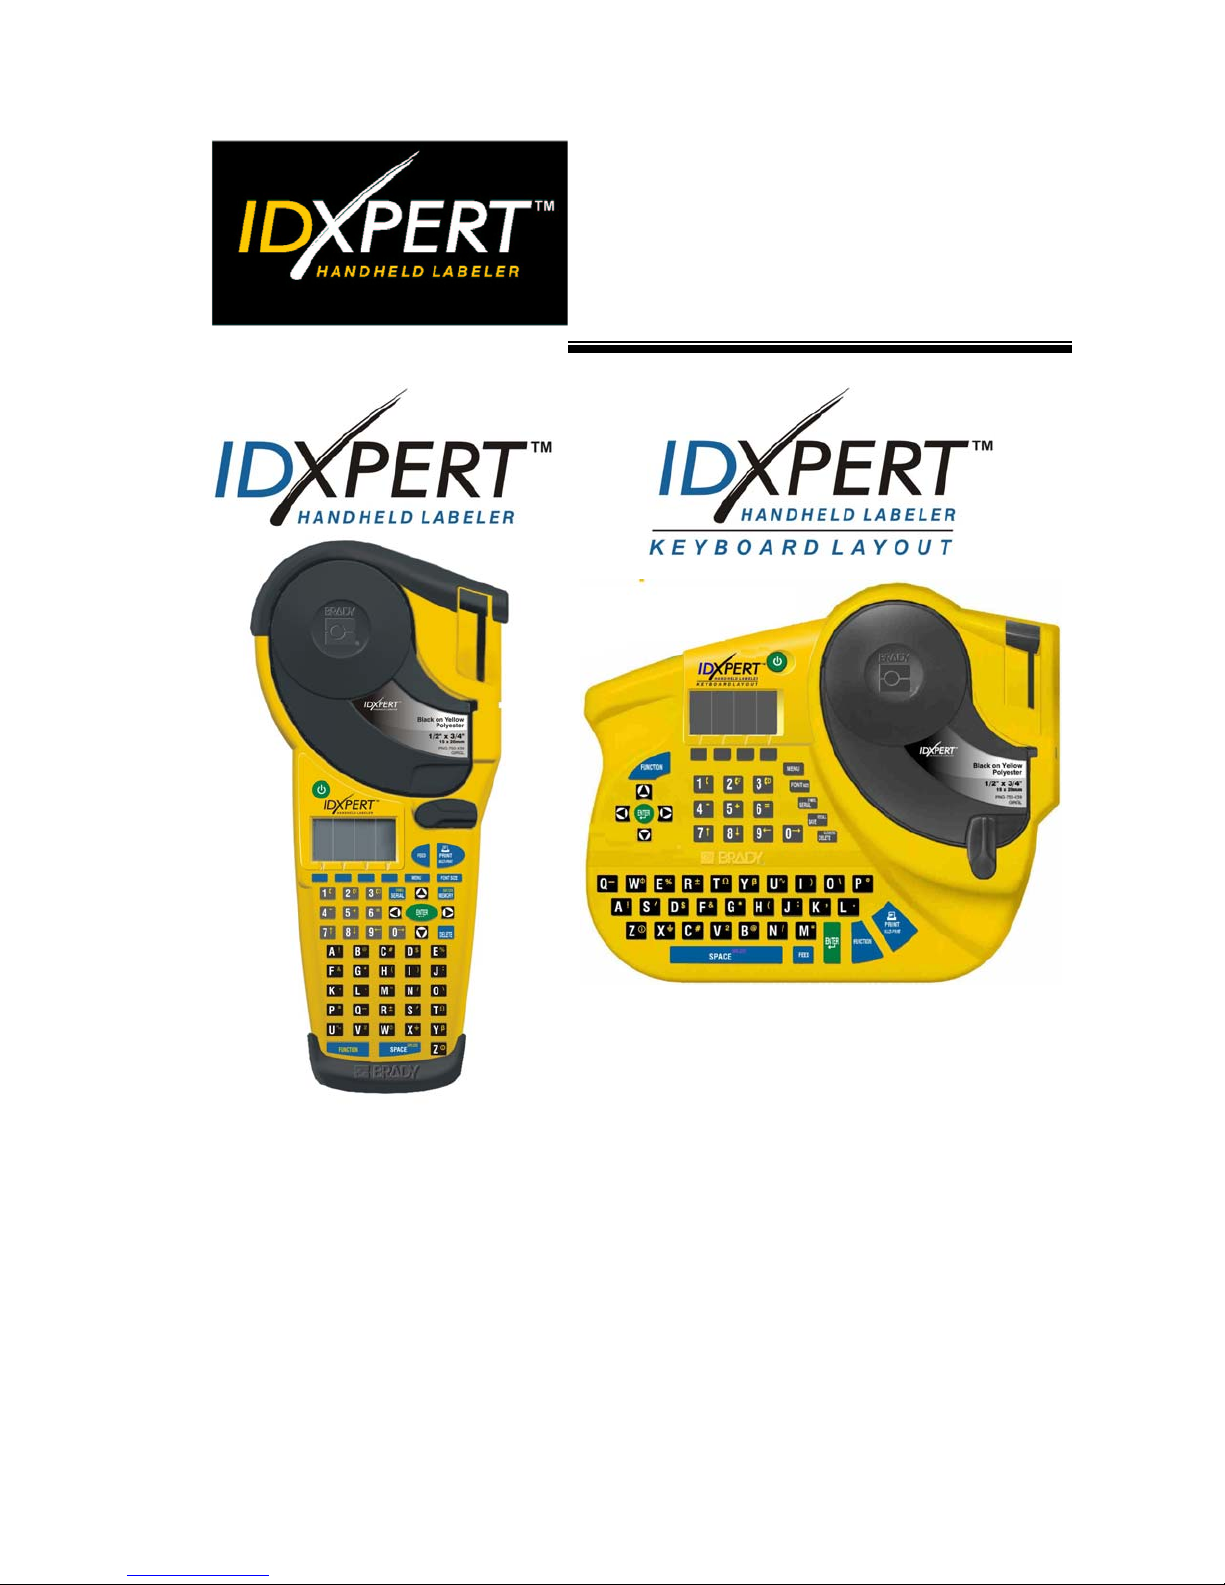
Brady IDXpert Handheld Labeler, IDXpert Handheld Labeler Keyboard Layout Quick Start Manual
Page 1
QUICK START
GUIDE
For additional information, please
refer to the IDXPERT
Labeler User’s Manual
TM
Handheld
www.bradyid.com/idxpert
Page 2
Welcome to the IDXPERT
TM
Handheld Labeler, Brady’s
newest lightweight, handheld printer!
Use this Quick Start Guide to begin using your printer immediately.
TM
Refer to the IDXPERT
and additional information.
Check Package Contents
Before you begin setting up the printer, verify that you have received the
following items in your packaging:
IDXPERTTM Printer
Hard Case
Free Media Cartridge: XC-1500-580-WT-BK
Communications Cable
Handheld Labeler User’s Manual for details
Product CD containing:
Quick Start Guide
o
o Sample Label Tutorial
User’s Manual
o
o Link to Product Registration/Warranty
Printed Quick Start Guide—4 languages
Register Your Printer
Register your IDXPERTTM Handheld Labeler on-line at
www.bradyid.com/idxpertregistration.
Quick Start Guide 1
Page 3

Cartridges available for your IDXPERT
Material Description Applications
TM
Handheld Labeler
B-580 Indoor/Outdoor
Vinyl
B-342 3:1 Heat-Shrink
Polyolefin
B-427 Self-laminating
Vinyl
B-498 Vinyl Cloth
(Repositionable)
B-499 Nylon Cloth
(Permanent)
B-428 Metalized
Polyester
B-461 Self-laminating
Polyester
Pipemarkers, panel and switch ID,
equipment ID, small safety signs, asset ID,
bar code labels
Colored supplies and printing
Wire and cable marking (heat shrink sleeves)
Wire and cable marking (self-laminating)
Wire and cable marking (general adhesive),
component marking, terminal blocks,
general laboratory ID
Wire and cable marking (general adhesive),
component marking, terminal blocks,
general laboratory ID
Rating plate, product and asset ID
Laboratory ID, self-laminating vial, tube,
and slide ID
Withstands liquid nitrogen, freezer,
autoclave, hot water bath, centrifuge
B-488 Matte Polyester Laboratory ID, slides, plates, bottles, and
general laboratory ID
Withstands Xylene, DSMO, ethanol, freezer,
autoclave, hot water bath
B-483 Ultra Aggressive
General labeling, powder coated surface ID
Glossy Polyester
B-422 Glossy Polyester Component marking, electrical outlet and
patch panel ID
Note: For specific part numbers, consult product literature or your Brady
distributor.
2 Quick Start Guide
Page 4
Set up your printer
Note: The instructions in this section show the ABC Keypad
version of the IDXPERTTM Printer. The same instructions apply if
you are using the Keyboard Layout version.
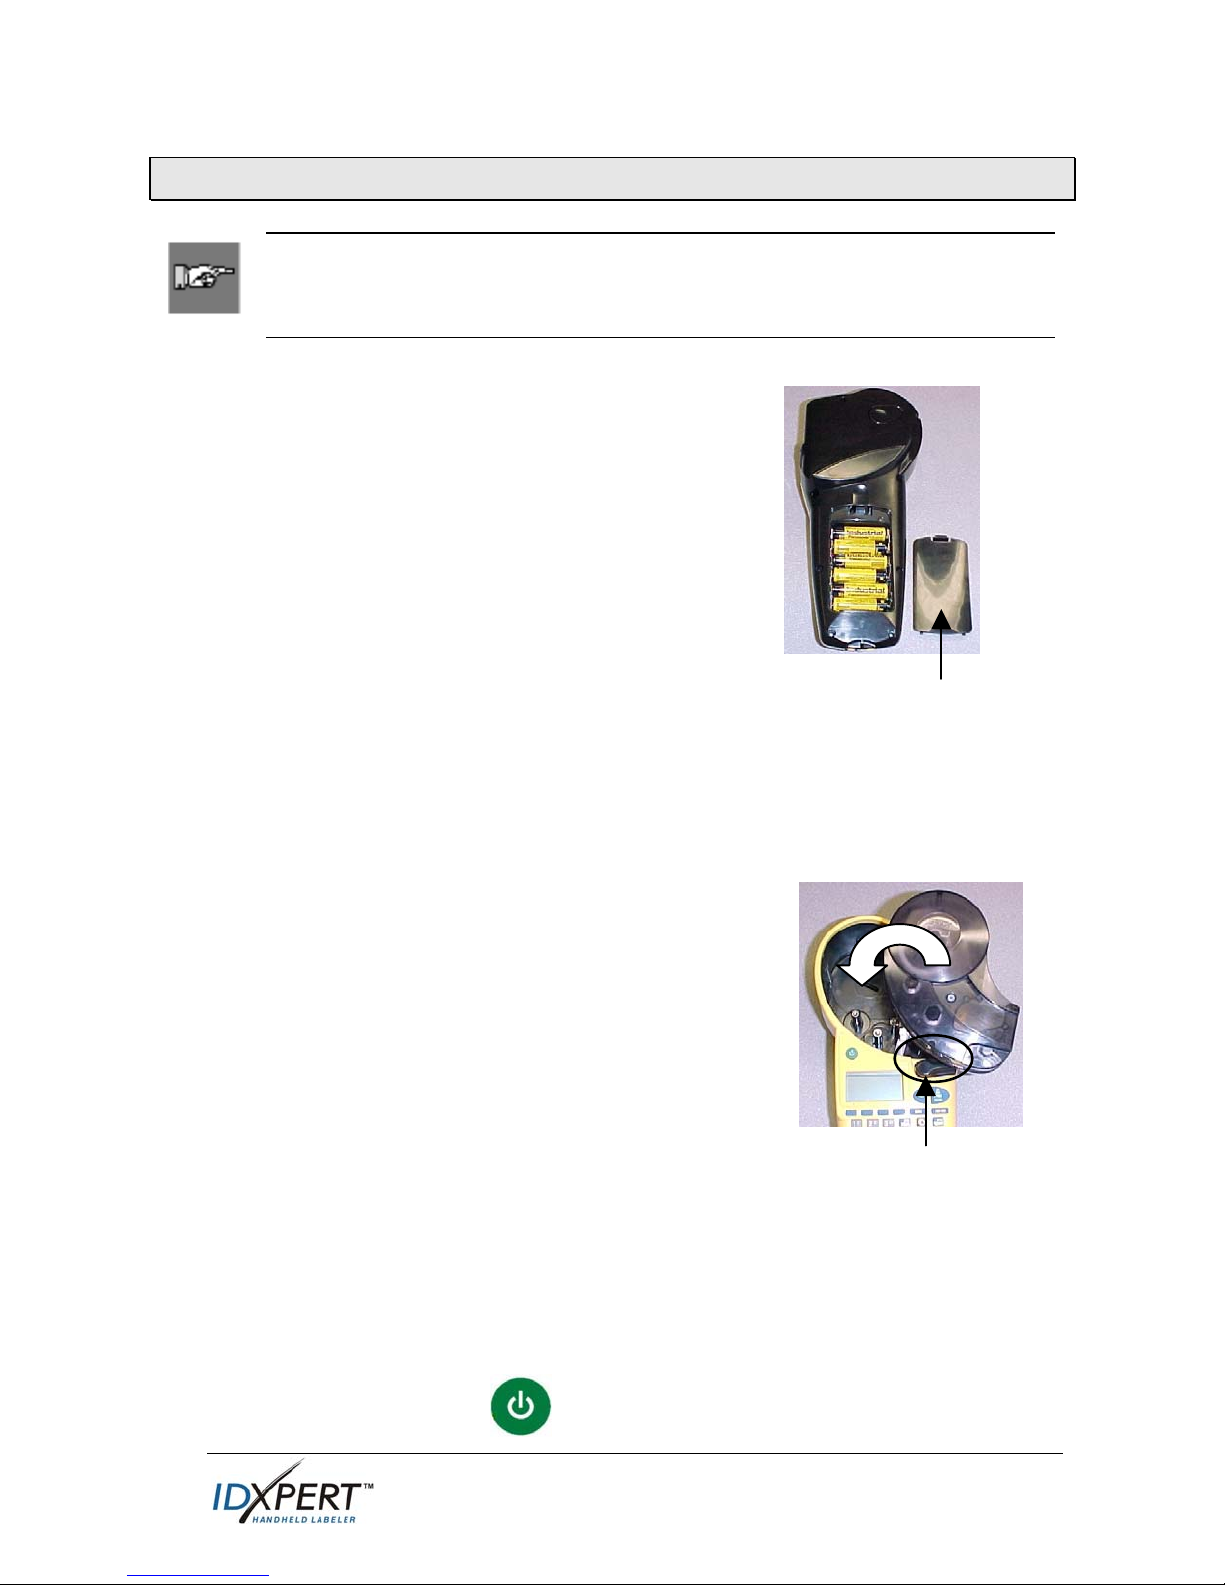
Step 1. Install the batteries or connect to power
Insert six AA alkaline batteries (not
included)
1. Remove the battery cover located on the
backside of the printer.
2. Install the batteries as shown. See inside
the battery compartment for the batterypositioning grid.
3. Close the battery compartment.
The printer can also be powered by use of an
optional A/C adaptor.
Battery
Cover
Step 2. Replace material cartridge
Your printer ships with a cartridge installed. Follow these instructions to
replace the existing cartridge.
1. Turn the locking lever down to unlock the
cartridge.
2. Locate the cartridge release button on the
backside of the printer and push firmly to
eject cartridge.
3. Remove the existing cartridge.
4. Install the new cartridge as shown.
5. Turn the locking lever up to lock both the
Locking Lever
cartridge and printhead.
Thanks to innovative smart-cell technology, the IDXPERTTM printer
recognizes the label material and automatically adjusts to it, saving setup
time and effort.
Step 3. Turn the printer ON
Press the POWER key.
Quick Start Guide 3
Page 5

Understand the display screen & menu
The Display Screen
When the Power button is pressed, the display screen appears.
LINE:01 FONT:20 pt Gen
The display allows you to see up to
three lines of text and 16 characters per
line. The display auto-scrolls when you
enter more than the maximum displayed
lines or characters. Use the arrows on
your keypad to navigate the screen.
Status Bar
The status bar, located on the bottom of the display, indicates the current
text line, font size, and label format.
Menu
Use the menu and related softkeys to perform many of the label
formatting commands. See the Menu Tree on page 9 of this guide. To
access the menu:
Step 1. Press
When the
MENU
.
key is pressed, a series of menu choices appears. The
blue softkeys correspond to the menu choices shown on the screen.
SOFTKEYS
Step 2. Press
ROT UNIT BAR NEXT
NEXT
to advance to the next set of menu choices:
Pressing NEXT again cycles back to the first set of menu choices when
the last menu choice is reached.
Press
CLEAR/ESC to either back up to the previous menu
level, or exit menu mode and return to the text editor screen.
4 Quick Start Guide
Page 6

Create labels
Note: Follow these instructions to create and print a basic label. For
details and information on advanced features, refer to the IDXPERTTM
Handheld Labeler User’s Manual.
TIP: See the IDXPERTTM Handheld Labeler Sample Label Tutorial for
step-by-step instructions on creating a variety of labels.
Step 1. Press POWER.
Step 2. Press FONT SIZE.
The display screen shows the
current font size and bold status.
FONT:10 pt
Bold: OFF
Step 3. Use the up/down arrow softkeys—or
the arrows on your keypad—to select
[▲] [▼]
a font size.
Note: See the Font Size Chart on page 10 of this guide.
Step 4. Press the [BOLD] softkey to toggle bold ON
or OFF.
Step 5. Press ENTER.
Step 6. Type Text. Press ENTER after each line
of text.
Note: You may also select from a list of symbols to include on your
label. See the Symbol Library on page 11 of this guide.
Step 7. Press PRINT.
For multiple copies, press FUNCTION +
PRINT/MULTI-PRINT.
Step 8. Pull the cutter lever down to cut the label.
Quick Start Guide 5
Page 7

Save and recall a label
You may save up to ten labels and then recall them for future use. To
save, recall, and delete labels from memory:
Step 1. Press MEMORY.
A grid appears showing the 10
storage positions. A bold
number indicates that a storage
position is occupied.
Step 2. Use the arrows on your keypad
1 2 3 4 5
6 7 8 9 10
XC-1500-580
ABC
—[▲] [▼]—to navigate to the
desired storage location on the grid.
Step 3. Press the softkey that corresponds to the action you want to
perform:
• To save a label, press the Save [SAVE] softkey.
• To recall a label from memory, press the Recall [RCL] softkey.
To delete a label from memory, press the Delete [DEL] softkey.
•
Additional label formatting options
Symbols can be added to your label. See the Symbol Library on page 11
of this guide. To add a symbol:
•
Press
+ . A list
of symbol categories appears:
• Use the up/down arrow
Electrical/Voice Data
Greek
Mandatory/PPE
Warning
…….
softkeys—or the arrows on
your keypad
• Press
The symbols appear, one at a time, for the category selected. Use the
•
up/down arrow softkeys—or the arrows on your keypad
—[▲] [▼]—to scroll through the symbol categories.
to select a category.
—[▲] [▼]—
to scroll through the symbols in the selected category.
•
Press
to select a symbol. The symbol will appear on the
display screen in the place where you have set your cursor. Some
symbols appear as generic character symbols on the display, but will
appear correctly when printed.
6 Quick Start Guide
Page 8

Font and bold settings are set on a line-by-line basis. To change the font
size or boldface text:
Press
•
The display screen shows the
current font size and bold status.
FONT SIZE
• Use the up/down arrow softkeys—or the arrows on your keypad
[▼]—
to select a font size.
FONT: 10 pt
Bold: OFF
—[▲]
• Press the [BOLD] softkey to toggle bold ON or OFF.
Formatting with Menu Choices
The smart-cell recognizes the cartridge material installed in the printer
and automatically sets many label formatting options. The following
menu choices allow you to add or change the formatting:
Note: See the Menu Tree on page 9 of this guide for a listing
of submenus related to each selection.
To perform a type of formatting, press MENU and the
corresponding softkey:
Label Format—Select general or wiremarker labels. Wiremarker
mode repeats text line(s) as many times as will fit on a label.
Softkey
FRMT
Continuous—Set either auto or fixed length, for terminal block
CONT
and banner labels.
Justify—Set horizontal and vertical justification of label data. JUST
Rotate—Set rotation of label data to 0, 90, 180, or 270 degrees. ROT
Units—Change units—to inches, mms, or points—for displaying
UNIT
label and font sizes.
Barcode—Add Code 39 barcodes with human readable text. BAR
Set Time—Set the time to print a real-time stamp on your label. TIME
Set Date—Set the date to print a real-time date stamp on your
DATE
label.
Language—Change the default language LANG
Quick Start Guide 7
Page 9

Guide to Keys
POWER—powers on the printer.
Press the POWER button again to power off the printer. The printer
automatically shuts off after 10 minutes of non-use.
FUNCTION— accesses a secondary function or character when pressed
along with the desired key.
A secondary function or character is shown in yellow on each button.
ARROW—adjusts cursor positioning by one character or one line.
FUNCTION + ARROW—adjusts cursor positioning to the first or last
character position or line.
ENTER—creates a new line when typing text.
Pressing ENTER confirms menu selection when in MENU mode.
DELETE—clears the character immediately behind the cursor position.
FUNCTION + CLEAR/ESC—clears the entire legend from the text
editor screen, or backs out of the menu if in menu mode.
When in MENU mode, the Clear/Esc function works whether or not you
use it in conjunction with the Function key.
PRINT—prints one copy of the legend.
FUNCTION + MULTI-PRINT—prints up to 99 copies of the legend.
FONT SIZE—displays font size and allows font size changes through
softkeys. See the Font Size Chart on page 10 of this guide.
Also toggles BOLD on/off.
MENU—toggles through soft key menu options/displays additional soft
key choices.
FEED—feeds material through the printer without printing. Use for fixed
length continuous labels in order to advance the label strip to the cut
position.
MEMORY—accesses Save, Recall, Delete softkeys used to store
legends.
FUNCTION + BARCODE—toggles between text and barcode mode.
SERIAL—performs a standard serialization of the character on which the
cursor is placed. A serialization results in a series of label data that is
incremented by one number (0-9) and/or one letter (A-Z, a-z).
FUNCTION + SYMBOL—accesses the symbol library.
See the Symbol Library on page 11 of this guide.
SPACE—creates a space between characters when creating legends.
FUNCTION + CAPS LOCK—toggles CAPS on and off.
FUNCTION +
either the softkey or keypad arrows to navigate the character menu.
8 Quick Start Guide
—brings up a selection of international characters. Use
Page 10

Menu Tree
Quick Start Guide 9
Page 11

Font Size Chart
Point Size Inch mm PRINT SAMPLE
7 .10 3.0
BRADY 12345
10 .14 4.0
13 .18 5.0
20 .28 7.0
26 .36 9.0
38 .53 14.0
BRADY 12345
BRADY 12345
BRADY 12345
BRADY 12345
BRADY 123
45 .63 16.0
BRADY 12
51 .71 18.0
76 1.1 28.0
102 1.4 36.0
The IDXPERTTM printer also offers a 126 pt., (1.25”, 31.75mm) font for
UPPERCASE characters only.
10 Quick Start Guide
Page 12

Symbol Library
*Arrows are available in four rotations: 0
Note: Some symbols are accessible directly from the keypad.
Quick Start Guide 11
o
, 90 o, 180 o, and 270 o.
Page 13

Technical Support
Choose one of the following options to contact system support provided by
Brady Corporation:
U.S. and Canada
Phone: (800) 643-8766, Monday - Friday 7:00 a.m. - 6:00 p.m. (CST).
Fax: (414) 358-6767.
E-Mail: tech_support@bradycorp.com.
Assistance is available 24 hours per day / 7 days per week. Go to:
www.bradyid.com, and then select Knowledge Base from the left-hand panel.
Belgium / Luxembourg / The
Netherlands
Phone: +32 52 457 937
Fax: +32 52 457 800
E-Mail: tsbelgium@bradycorp.com
Italy
Phone: +39 02 96 28 60 14
Fax: +39 02 96 70 08 62
E-Mail: tsitaly@bradycorp.com
UK / Ireland
Phone: +44 1295 228 205
Fax: +44 1295 27 17 55
E-Mail: tsuk@bradycorp.com
Mexico
Phone: 01 800 112 7239
Fax: 52 55 5527 55 86
E-Mail: bradymexico@bradycorp.com
France
Phone: +33 169.296 717
+800 907 107
Fax: +33 169 296 718
E-Mail: tsfrance@bradycorp.com
Germany / Austria / Switzerland
Phone: +49 6103 75 98 451
Fax: +49 6103 7598 670
E-Mail: tsgermany@bradycorp.com
Sweden / Norway / Finland
Phone: 46 85 90 057 33
Fax: 46 85 90 818 68
E-Mail: tssweden@bradycorp.com
Brazil
Phone: 55 11 3604 7729/7715
Fax: 55 11 3686-5236
E-Mail: brady_service_brazil@bradycorp.com
Latin America & Caribbean
Phone: (414) 438-6868
Fax: (414) 438-6870
E-Mail: bradyintl@bradycorp.com
Spain
Phone: +33 437 245 234
Fax: +33 472 74 45 54
E-Mail: tsspain@bradycorp.com
12 Quick Start Guide
Africa
Denmark
Israel
Middle East
Turkey
Phone: +32 52 457 937
Fax: +32 52 457 800
E-Mail: tsbelgium@bradycorp.com
Eastern Europe
Greece
Portugal
Malta
Russia
 Loading...