

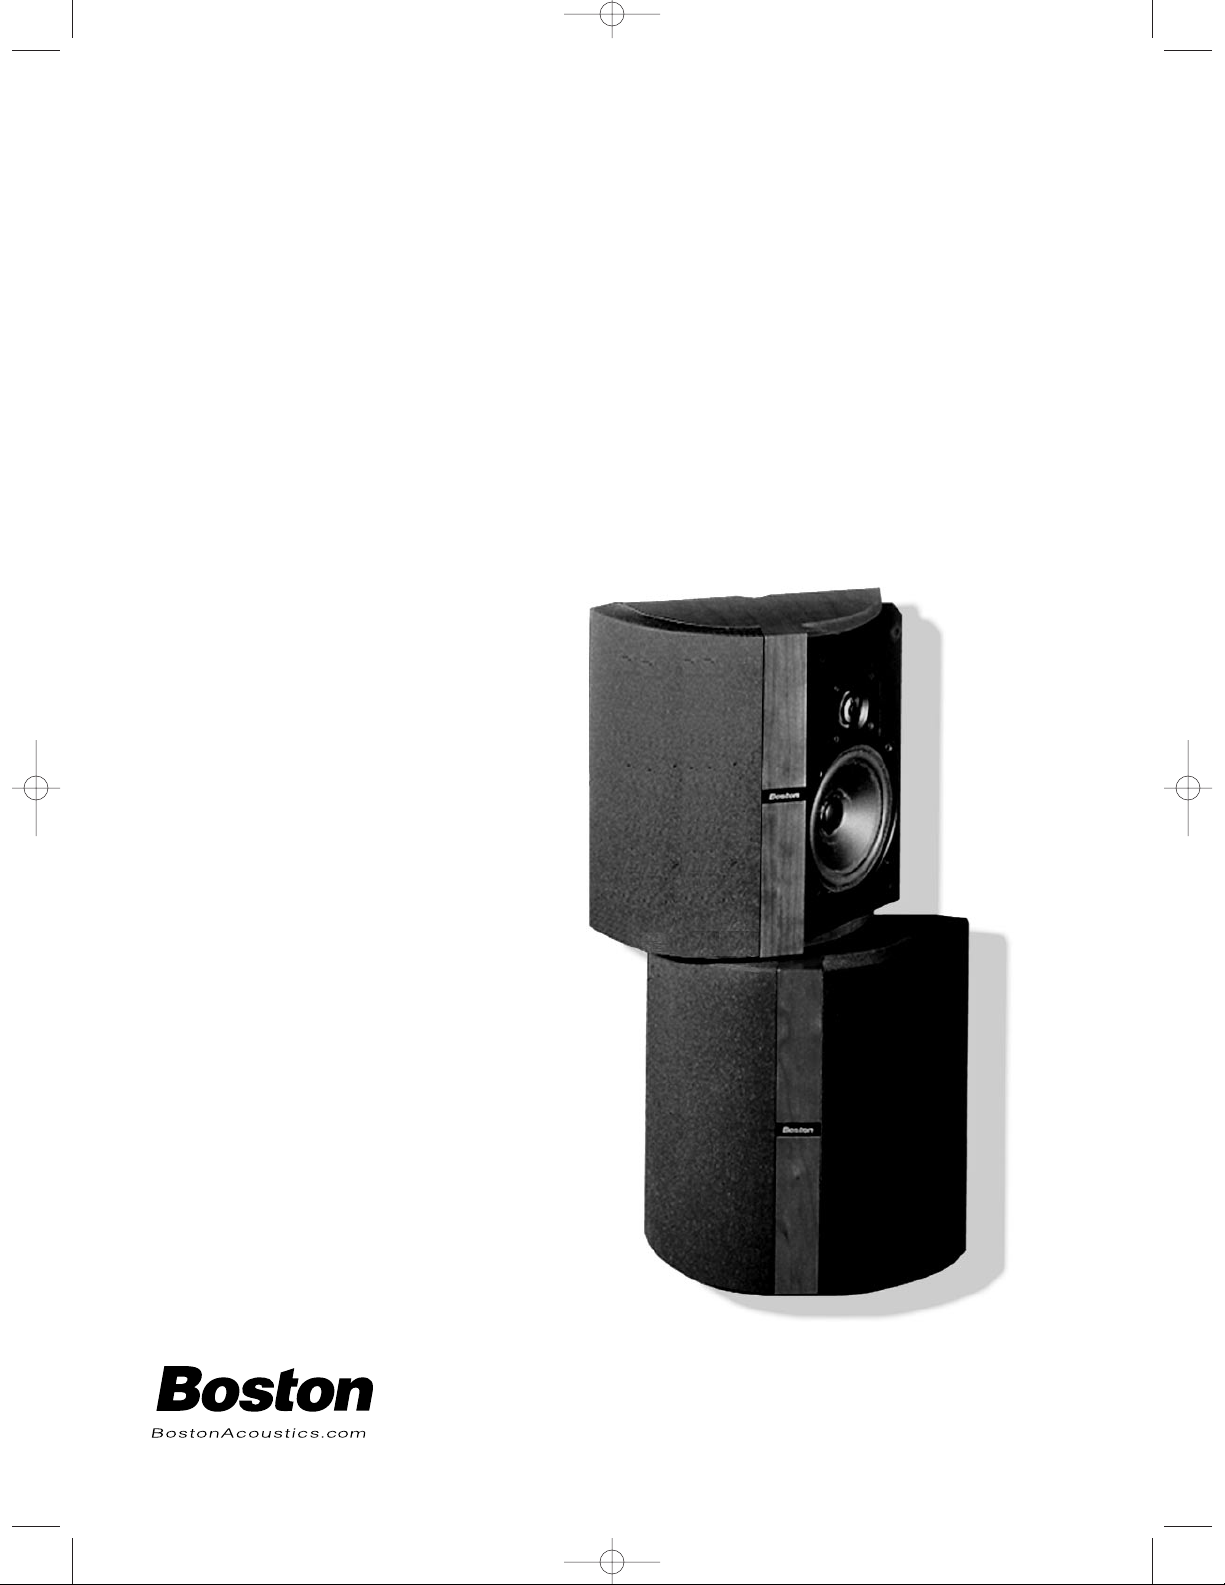
VR-MX
Wide Dispersion
Home Theater
Surround Speaker
VRMX Manual 2/9/01 12:16 PM Page 1
2
Specifications
Frequency Response (±3dB) 80–20,000Hz
Recommended Amplifier Power 15–200 watts
Nominal Impedance 8 ohms
Sensitivity [1 watt (2.83v) at 1m] 90dB
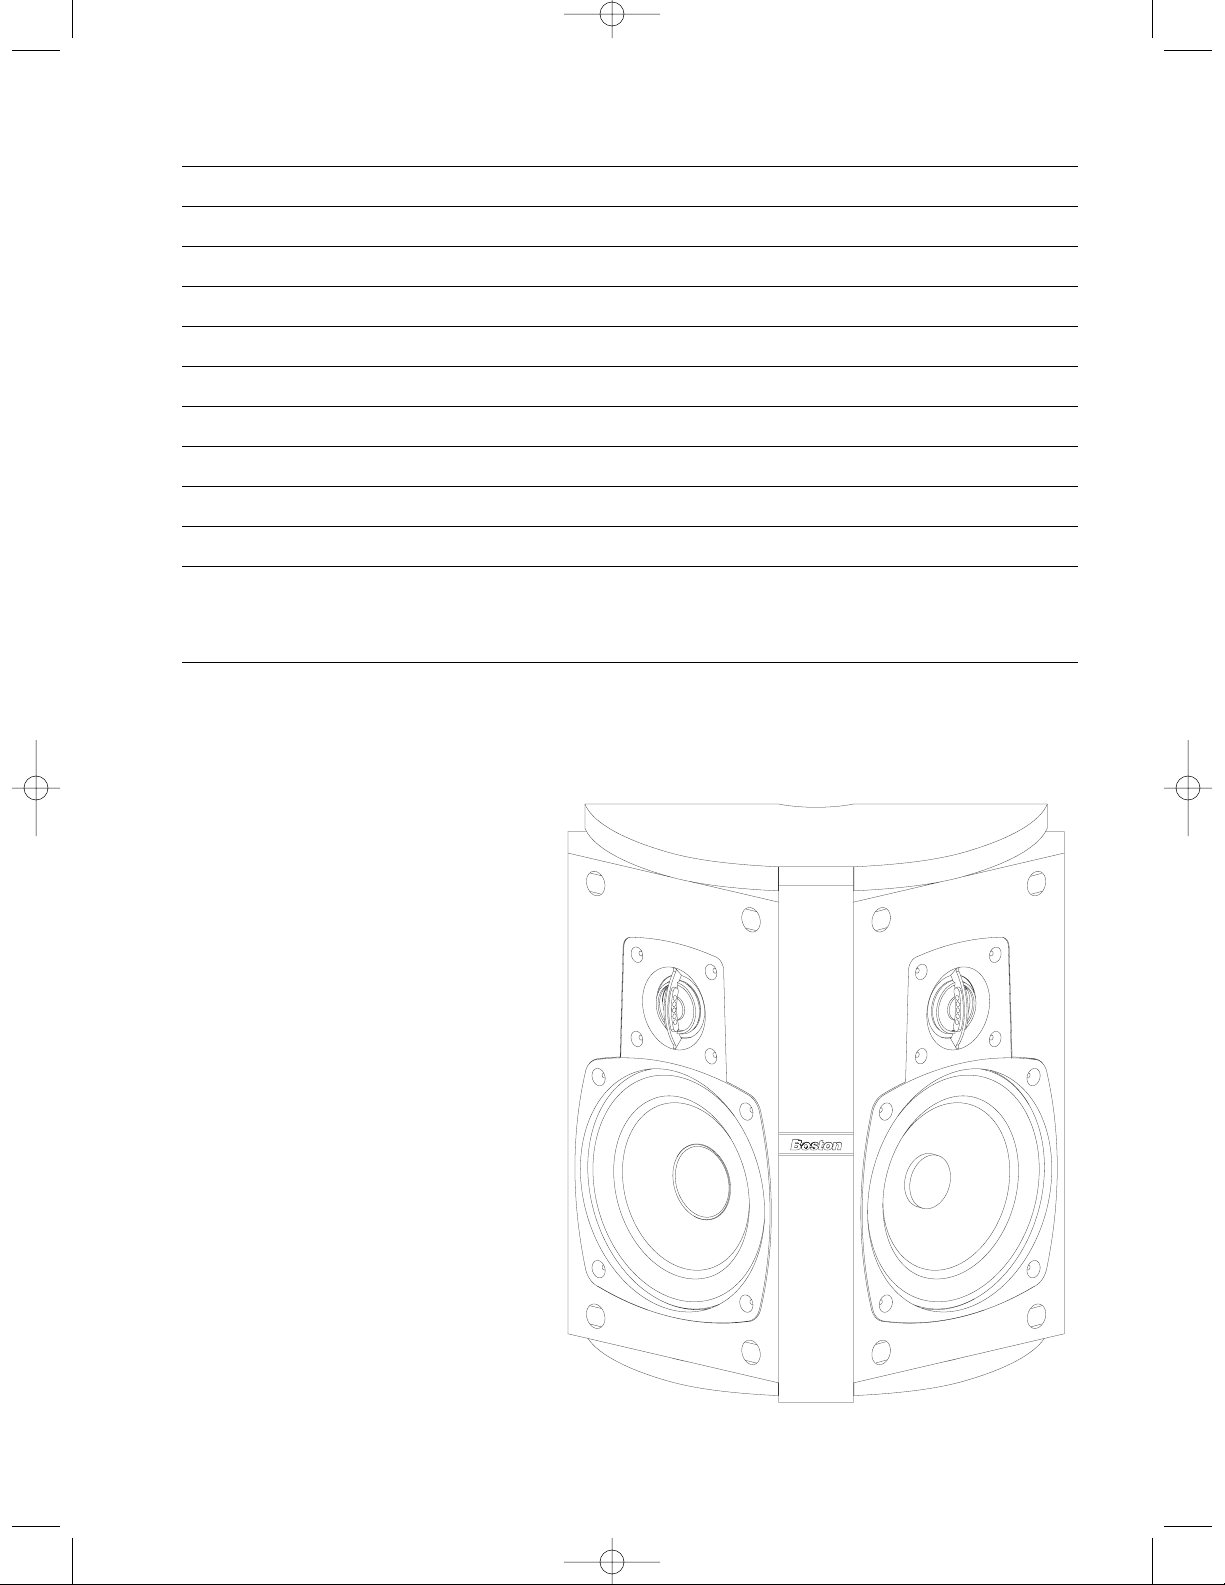
Bass Unit 51⁄4" (135mm) copolymer
Passive Radiator 51⁄4" (135mm) copolymer
High-Frequency Driver Dual 1" (25mm) VR aluminum dome with AMD
Crossover Frequency 2500Hz
Dimensions (HxWxD) 11 x 115⁄16 x 515⁄16" (279 x 286 x 151mm)
Weight/each 9 lbs (4.25kg)
Finish Cherry wood veneer with gray grille cloth
or black ash wood veneer with black grille cloth
or white vinyl with white grille cloth
Description
The Lynnfield VR-MX surround speaker delivers the wide frequency response, high power-handling
and placement flexibility required by the finest home theater systems. Its unique driver
complement creates an enveloping sense of surround sound, simulating the multiple surround
speakers found in a quality movie theater.
The VR-MX is a high output, wide dispersion surround speaker. It provides the rear channel
surround sound effects with Dolby
®
Digital, DTS®and Dolby®Pro-Logic®decoding electronics.
The VR-MX may be placed on a shelf or mounted on a wall or ceiling using the supplied template,
mounting hardware and bracket. Gold-plated five-way binding posts allow the connection of
virtually any speaker cable. Its unique design allows for it to be used to create a seemingly larger
or more intimate acoustic space, depending upon how it is oriented relative to the listening space.
Direct vs. Diffused Sound Pattern
The VR-MX represents a product evolution based upon our considerable experience with direct
and diffused radiating surround speakers. The surround channels from a movie soundtrack are
designed to help the moviemaker transform the theater into the environment that is being
portrayed on the screen. Since a movie theater is a relatively large space, several surround
speakers are placed along the theater’s walls. If you would like your listening room to sound more
like a larger acoustic space and more like a movie theater or live music performance venue, then
the VR-MX should be placed so that the speakers’ passive radiators acoustically interact with most
VRMX Manual 2/9/01 12:16 PM Page 2
3
of the room. This is accomplished by mounting the speaker so that the diffuse side of the arrow on
the back of the speaker is aimed toward the bulk of the listening area. If you prefer the surround
effects to be more discreet and localized, then you should mount the speakers so that the direct side
of the arrow on the back of the speaker is aimed toward the bulk of the listening area. In either case,
the best results will be obtained if the VR-MX is mounted above ear level and out at least 20 inches
from the corner. However, it has been our experience that satisfactory results can be obtained with a
wide variety of placement choices.
Direct Configuration Diffuse Configuration
The VR-MX can be placed on the side or back walls, as well as hung from the ceiling. Recommended
placement is above ear level on the side walls opposite the primary listening position, ideally 20
inches or more out from the back wall. However, experimentation will yield the best possible results
for every room. If possible, permanent mounting of the VR-MX should only be done after the
optimum location is determined.
In general, surround speakers are either directional or diffuse. Directional surround speakers provide
a high degree of localization, and are considered best for music. Diffuse surround speakers are
difficult to localize, and are considered best for movies. The VR-MX can be used in either manner.
The VR-MX surround speaker is shipped in mirror-image pairs. Refer to the label on the back of the
VR-MX to assist you in placing the speakers for the desired result (see the label picture on page 5).
After mounting the wall brackets, experimentation between direct and diffused patterns can be
easily achieved simply by swapping the right and left speakers.
MOUNTING TIPS: Use the supplied template to aid in positioning the mounting bracket. At least 4
inches of clearance is required between the top of the template and the ceiling. Please take care
that the mounting brackets are attached securely to the chosen surface. Toggle bolts are supplied
for use on drywall or hollow plaster walls. Alternatively, you may wish to obtain wood screws for
wood or wall studs, molly bolts or screw anchors for drywall or plaster walls, or masonry anchors for
masonry walls. You can also just place the speakers to sit upright on a shelf or other flat surface. In
this case, be sure to use the supplied self-adhesive rubber feet to prevent any possible slippage.
D
i
f
f
u
s
e
D
i
f
f
u
s
e
VRMX Manual 2/9/01 12:16 PM Page 3
Direct
Direct
 Loading...