

Boston Acoustics P4FL User's Manual
P4FL
Vertical Floor Stand for the P4, Bravo®II, and Bravo Speakers
P4 Assembly Instructions:
This configuration is compatible with Models: P460,
P450, P442, and P430.
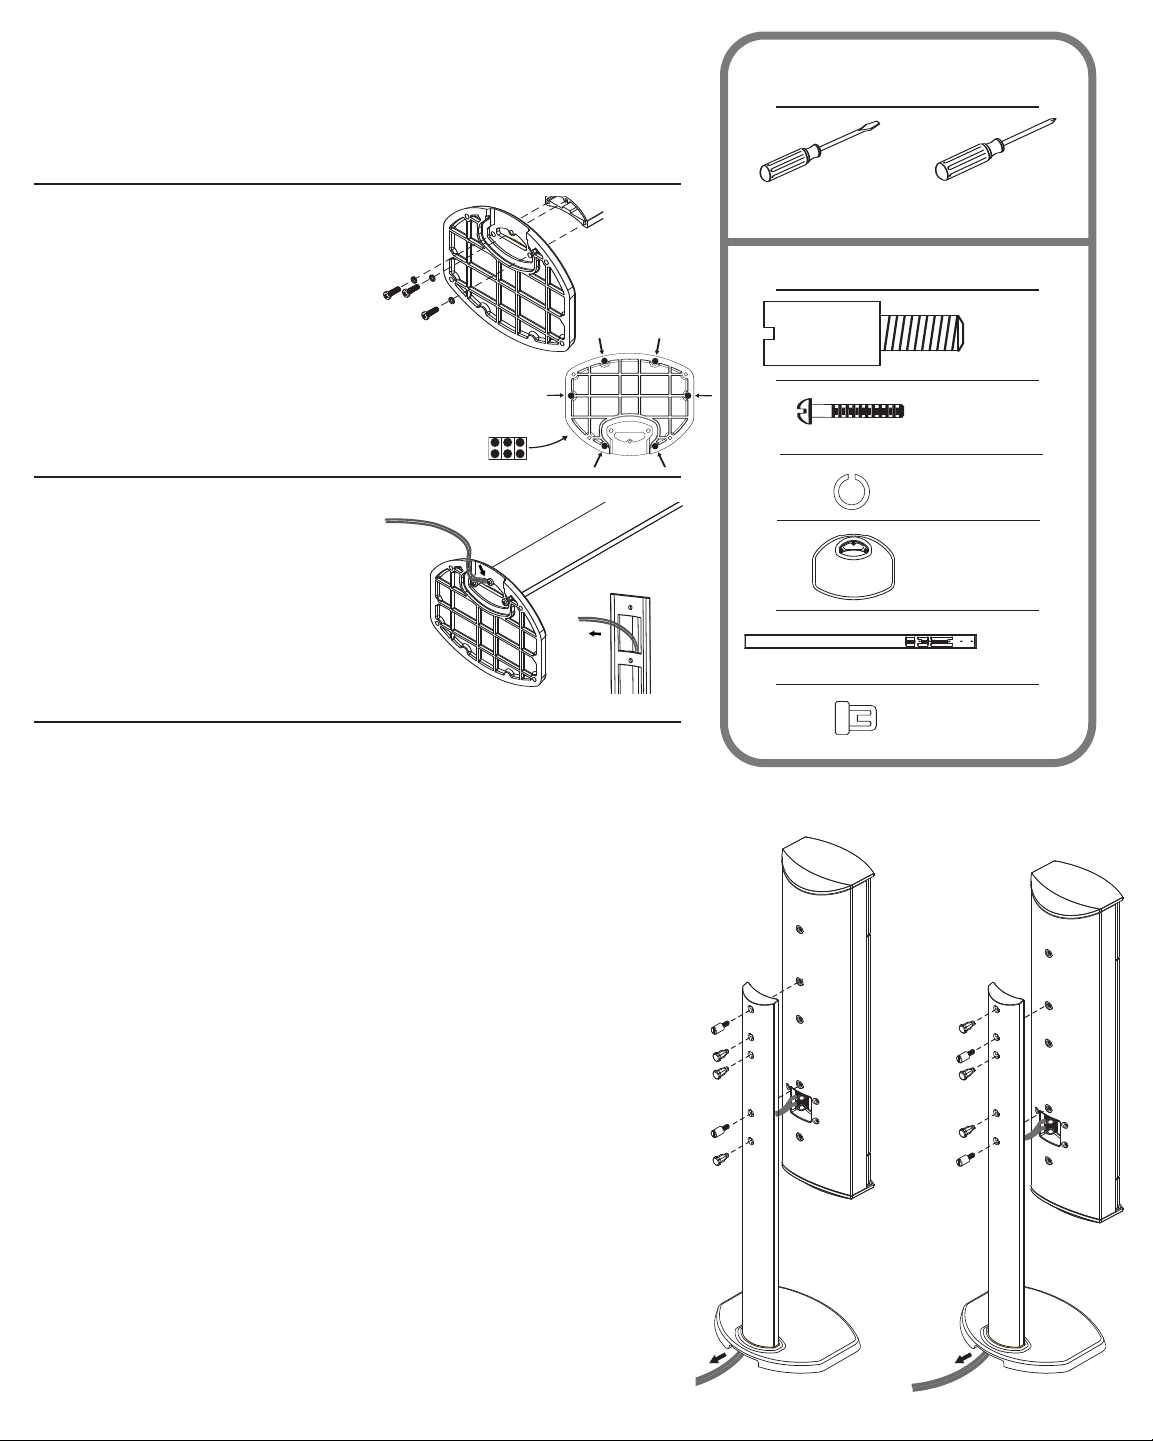
Required Tools:
not included)
(
Step One: Attach Base
Attach the base to the vertical
post with the three included
threaded machine screws and
split washers (small) using a
Phillips head screwdriver. The
post has already been threaded
to ease screw installation. Attach
rubber feet to base.
Step Two: Speaker Wire
With the stand still inverted, route
the speaker wire through the opening in bottom of the base, down
through, and out the opening in
the post. Leave several extra inches
of speaker wire exposed to ease
connection with the P4 speaker.
Step Three: Mounting the P4 Speaker
There are two heights available for vertical mounting allowing you
to match the height of the speakers with your television. The
higher option is illustrated on the left and the lower on the right.
The total difference in height is 2-inches (51mm). Due to the weight
of the P4 speaker, it is recommended that the installation be
performed with the P4 speaker laying face down with the grille
removed on a soft surface such as a plush carpeted floor or the P4
shipping carton. Inspect the area where the speaker will lay making
sure that there are no objects that could damage the speakers or
scratch the front of the P4.
•Flat head
Screwdriver
Hardware: (
•Phillips head
crewdriver
S
Per Speaker Stand)
Speaker
Screw
(short) x 2
Threaded
Machine
Screw x 3
Split W
asher
(small) x 3
P4FL
Base x 1
P4FL
Vertical
Post x 1
Hole Plug
x 3
1. Position the P4FL close to the P4 speaker as illustrated.
2. Connect the speaker wire to the terminals on the P4 speaker.
Mount the speaker to the post by lining up the appr
3.
opriate
threaded inserts in the back of the P4 speaker with the
machined holes in the post. Use the “P4 Mounting Chart” on
the back page of this manual to determine the correct
threaded inserts to use. Insert the two speaker screws (short)
and tighten.
Note: Do not over
-tighten the scr
ews.
4. Insert the three hole plugs in the unused mounting holes on
the back of the P4FL post.
5. Take up any slack in the speaker wire by
gently pulling the wire
at the opening in the base.
 Loading...