

Page 1

The Bose
October 17, 2001
®
Wave
®
Radio
Owner’s Guide
AM255380_01_v.pdf
Page 2
Important Safety Information
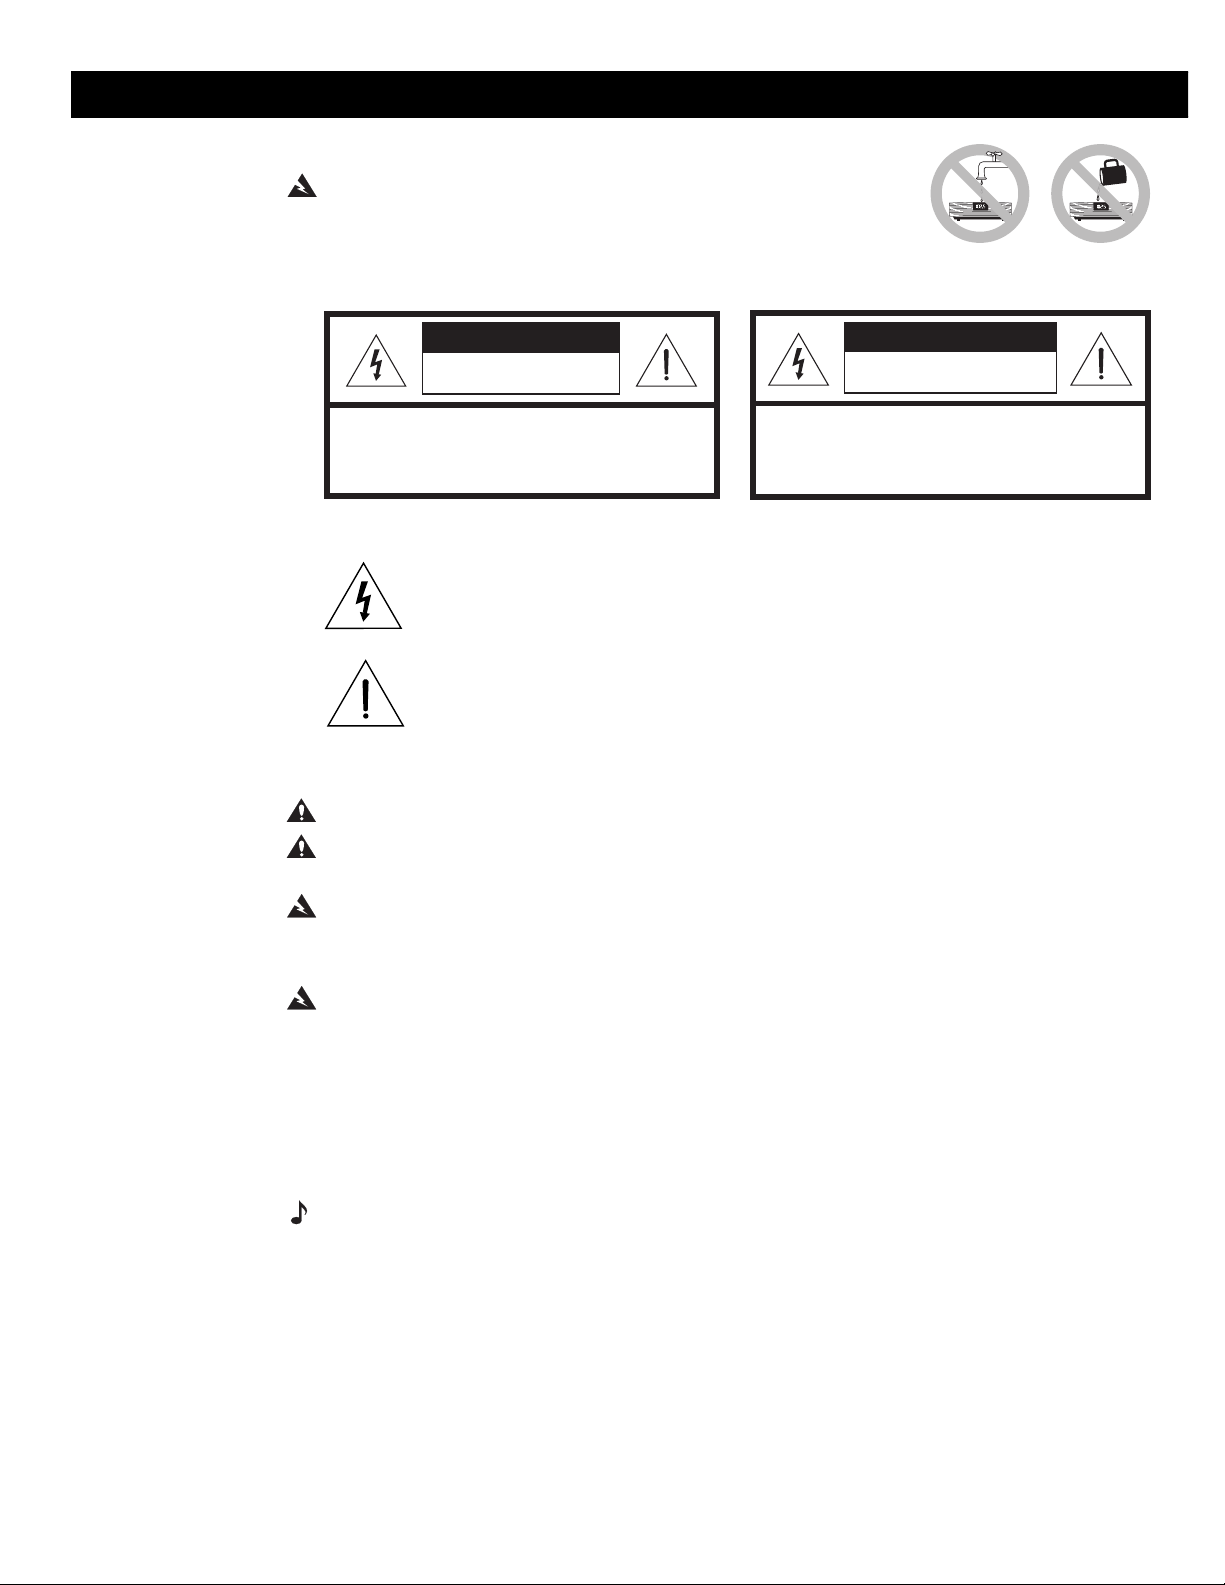
WARNING: To reduce the risk of fire or electric shock, do not
expose the Wave
®
radio to rain or moisture.
As with any electronic product, use care not to spill liquids into any
part of the radio. Liquids can cause a failure and/or a fire hazard.
CAUTION
RISK OF ELECTRICAL SHOCK
DO NOT OPEN
CAUTION: TO REDUCE THE RISK OF ELECTRIC SHOCK,
DO NOT REMOVE COVER (OR BACK).
NO USER-SERVICABLE PARTS INSIDE.
REFER SERVICING TO QUALIFIED PERSONNEL.
RISQUE DE CHOC ÉLECTRIQUE
ATTENTION : POUR RÉDUIRE LE RISQUE DE DÉCHARGE
ÉLECTRIQUE, NE RETIREZ PAS LE COUVERCLE (OU
L’ARRIÈRE). IL NE SE TROUVE ÀL’INTÉRIEURAUCUNE
PIÈCE POUVANT ÊTRE RÉPARÉE PARL’USAGER.
S’ADRESSER À UN RÉPARATEUR COMPÉTENT.
AVIS
NE PAS OUVRIR
These CAUTION marks are located on the bottom of your Wave radio:
The lightning flash with arrowhead symbol, within an equilateral triangle, is
intended to alert the user to the presence of uninsulated dangerous voltage
within the system enclosure that may be of sufficient magnitude to constitute a
risk of electric shock.
The exclamation point within an equilateral triangle, as marked on the system, is
intended to alert the user to the presence of important operating and maintenance instructions in this owner’s guide.
CAUTION: To prevent electric shock, match wide blade of plug to wide slot, insert fully.
ATTENTION: Pour éviter les chocs électriques, introduire la lame la plus large de la fiche
dans la borne correspondante de la prise et pousser jusqu’au fond.
WARNING: Keep the remote control battery away from children. It may cause a fire or chem-
ical burn if mishandled. Do not recharge, disassemble, heat above 100˚C (212˚F), or incinerate. Dispose of used battery promptly. Replace only with a battery of the correct type and
model number.
WARNING: No naked flame sources, such as lighted candles, should be placed on the
apparatus.
Batteries
Please dispose of used batteries properly, following any local regulations. Do not incinerate.
Please read this owner’s guide
Please take the time to follow this owner’s guide carefully. It will help you set up and operate
your radio properly, and enjoy all of its advanced features. Save your owner’s guide for future
reference.
Note: DO NOT place the Wave radio on any heat-sensitive surface, such as the finished sur-
face of fine furniture. Like all electrical equipment, it generates some heat.
2 October 22, 2001 AM255380_01_V.PDF
Page 3

Important Safety Information
1. Read these instructions
– for all components before
using this product.
2. Keep these instructions
3. Heed all warnings
– on the product and in the owner’s
– for future reference.
guide.
4. Follow all instructions.
5. Do not use this apparatus near water or
moisture
– Do not use this product near a bathtub,
washbowl, kitchen sink, laundry tub, in a wet basement,
near a swimming pool, or anywhere else that water or
moisture are present.
6. Clean only with a dry cloth
®
Bose
Corporation. Unplug this product from the wall
– and as directed by
outlet before cleaning.
7. Do not block any ventilation openings. Install in
accordance with the manufacturer’s
instructions
– To ensure reliable operation of the
product and to protect it from overheating, put the
product in a position and location that will not interfere
with its proper ventilation. For example, do not place
the product on a bed, sofa, or similar surface that may
block the ventilation openings. Do not put it in a built-in
system, such as a bookcase or a cabinet that may keep
air from flowing through its ventilation openings.
8. Do not install near any heat sources, such as radiators, heat registers, stoves or other apparatus
(including amplifiers) that produce heat.
9. Do not defeat the safety purpose of the polarized
or grounding-type plug. A polarized plug has two
blades with one wider than the other. A grounding-type plug has two blades and a third grounding
prong. The wider blade or third prong are provided
for your safety. If the provided plug does not fit in
your outlet, consult an electrician for replacement of the obsolete outlet.
10. Protect the power cord from being walked on or
pinched, particularly at plugs, convenience receptacles, and the point where they exit from the apparatus.
11. Only use attachments/accessories specified by
the manufacturer.
12. Use only with the cart, stand, tripod,
bracket or table specified by the
manufacturer or sold with the apparatus. When a cart is used, use
caution when moving the cart/apparatus combination to avoid injury
from tip-over.
13. Unplug this apparatus during lightning storms or
when unused for long periods of time
– to prevent
damage to this product.
14. Refer all servicing to qualified service personnel.
Servicing is required when the apparatus has
been damaged in any way: such as power-supply
cord or plug is damaged; liquid has been spilled or
objects have fallen into the apparatus; the apparatus has been exposed to rain or moisture, does
not operate normally, or has been dropped
– Do not
attempt to service this product yourself. Opening or removing covers may expose you to dangerous voltages
or other hazards. Please call Bose to be referred to an
authorized service center near you.
15. To prevent risk of fire or electric shock, avoid
overloading wall outlets, extension cords, or integral convenience receptacles.
16. Do not let objects or liquids enter the product
– as
they may touch dangerous voltage points or short-out
parts that could result in a fire or electric shock.
17. See product enclosure bottom for safety related
markings.
Information about products that
generate electrical noise
If applicable, this equipment has been tested and found to
comply with the limits for a Class B digital device, pursuant
to Part 15 of the FCC rules. These limits are designed to
provide reasonable protection against harmful interference
in a residential installation. This equipment generates, uses, and can radiate radio frequency energy and, if not installed and used in accordance with the instructions, may
cause harmful interference to radio communications. However, this is no guarantee that interference will not occur in
a particular installation. If this equipment does cause harmful interference to radio or television reception, which can
be determined by turning the equipment off and on, you are
encouraged to try to correct the interference by one or more
of the following measures:
• Reorient or relocate the receiving antenna.
• Increase the separation between the equipment and
receiver.
• Connect the equipment to an outlet on a different circuit
than the one to which the receiver is connected.
• Consult the dealer or an experienced radio/TV technician
for help.
Note: Unauthorized modification of the receiver or radio re-
mote control could void the user’s authority to operate this
equipment.
This product complies with the Canadian ICES-003 Class B
specifications
AM255380_01_V.PDF October 22, 2001 3
Page 4
Important Safety Information
18. Use proper power sources
– Plug the product into a
proper power source, as described in the operating instructions or as marked on the product.
19. Avoid power lines
– Use extreme care when installing
an outside antenna system to keep from touching power lines or circuits, as contact with them may be fatal.
Do not install external antennas near overhead power
lines or other electric light or power circuits, nor where
an antenna can fall into such circuits or power lines.
20. Ground all outdoor antennas
– If an external antenna
or cable system is connected to this product, be sure
the antenna or cable system is grounded. This will provide some protection against voltage surges and builtup static charges.
Section 810 of the National Electrical Code ANSI/NFPA
No. 70 provides information with respect to proper
grounding of the mast and supporting structure,
grounding of the lead-in wire to an antenna discharge
unit, size of grounding conductors, location of antennadischarge unit, connection to grounding electrodes,
and requirements for the ground electrode. Refer to the
antenna grounding illustration on this page.
Antenna grounding
Example of antenna grounding as per National Electrical
Code, ANSI/NFPA 70.
Antenna lead-in wire
Ground clamp
Electric service
equipment
Groundclamps
Power service grounding
electrode system
(NEC ART 250, Part H)
Antenna discharge unit
(NEC Section 810-20)
Grounding conductors
(NEC Section 810-21)
Note to CATV system installer
This reminder is provided to call the CATV system installer’s
attention to Article 820-40 of the NEC (of USA) that provides
guidelines for proper grounding. In particular, it specifies
that the cable ground shall be connected to the grounding
system of the building, as close to the point of cable entry
as is practical.
4 October 22, 2001 AM255380_01_V.PDF
Page 5

Contents
Setting Up Your Wave
Before you begin . . . . . . . . . . . . . . . . . . . . . . . . . . . . . . . . . . . . . . . . . . . . . . . . . . . . . . . . . . . . 7
Unpacking the carton . . . . . . . . . . . . . . . . . . . . . . . . . . . . . . . . . . . . . . . . . . . . . . . . . . . . . . . . . 8
Selecting a location for your radio . . . . . . . . . . . . . . . . . . . . . . . . . . . . . . . . . . . . . . . . . . . . . . .8
Installing the battery . . . . . . . . . . . . . . . . . . . . . . . . . . . . . . . . . . . . . . . . . . . . . . . . . . . . . . . . . . 9
Connecting the power cord . . . . . . . . . . . . . . . . . . . . . . . . . . . . . . . . . . . . . . . . . . . . . . . . . . . . 10
Adjusting the antennas . . . . . . . . . . . . . . . . . . . . . . . . . . . . . . . . . . . . . . . . . . . . . . . . . . . . . . . . 10
Receiving cable radio signals as an option . . . . . . . . . . . . . . . . . . . . . . . . . . . . . . . . . . . . . . . . 10
Setting up the remote control . . . . . . . . . . . . . . . . . . . . . . . . . . . . . . . . . . . . . . . . . . . . . . . . . . 11
Connecting other components . . . . . . . . . . . . . . . . . . . . . . . . . . . . . . . . . . . . . . . . . . . . . . . . . . 13
Using other components . . . . . . . . . . . . . . . . . . . . . . . . . . . . . . . . . . . . . . . . . . . . . . . . . . . . . . 13
®
Radio
Operating Your Wave Radio
Operating the remote control . . . . . . . . . . . . . . . . . . . . . . . . . . . . . . . . . . . . . . . . . . . . . . . . . . . 15
Operating the radio control panel . . . . . . . . . . . . . . . . . . . . . . . . . . . . . . . . . . . . . . . . . . . . . . .16
Reading the clock display . . . . . . . . . . . . . . . . . . . . . . . . . . . . . . . . . . . . . . . . . . . . . . . . . . . . . 17
Setting the time . . . . . . . . . . . . . . . . . . . . . . . . . . . . . . . . . . . . . . . . . . . . . . . . . . . . . . . . . . . . . 17
Customizing the display . . . . . . . . . . . . . . . . . . . . . . . . . . . . . . . . . . . . . . . . . . . . . . . . . . . . . . . 18
Listening to the radio . . . . . . . . . . . . . . . . . . . . . . . . . . . . . . . . . . . . . . . . . . . . . . . . . . . . . . . . . 19
Reading the radio display . . . . . . . . . . . . . . . . . . . . . . . . . . . . . . . . . . . . . . . . . . . . . . . . . . . . . . 20
Setting the alarms . . . . . . . . . . . . . . . . . . . . . . . . . . . . . . . . . . . . . . . . . . . . . . . . . . . . . . . . . . . 21
Using the Alarms . . . . . . . . . . . . . . . . . . . . . . . . . . . . . . . . . . . . . . . . . . . . . . . . . . . . . . . . . . . . 22
Maintaining Your Wave Radio
Taking care of your Wave radio . . . . . . . . . . . . . . . . . . . . . . . . . . . . . . . . . . . . . . . . . . . . . . . . .23
Cleaning your radio . . . . . . . . . . . . . . . . . . . . . . . . . . . . . . . . . . . . . . . . . . . . . . . . . . . . . . . 23
Replacing the batteries . . . . . . . . . . . . . . . . . . . . . . . . . . . . . . . . . . . . . . . . . . . . . . . . . . . .23
Technical information . . . . . . . . . . . . . . . . . . . . . . . . . . . . . . . . . . . . . . . . . . . . . . . . . . . . . . . . . 23
Power rating . . . . . . . . . . . . . . . . . . . . . . . . . . . . . . . . . . . . . . . . . . . . . . . . . . . . . . . . . . . . . 23
Dimensions . . . . . . . . . . . . . . . . . . . . . . . . . . . . . . . . . . . . . . . . . . . . . . . . . . . . . . . . . . . . . 23
Weight . . . . . . . . . . . . . . . . . . . . . . . . . . . . . . . . . . . . . . . . . . . . . . . . . . . . . . . . . . . . . . . . . 23
Troubleshooting . . . . . . . . . . . . . . . . . . . . . . . . . . . . . . . . . . . . . . . . . . . . . . . . . . . . . . . . . . . . . 24
Customer service . . . . . . . . . . . . . . . . . . . . . . . . . . . . . . . . . . . . . . . . . . . . . . . . . . . . . . . . . . . . 24
Warranty period . . . . . . . . . . . . . . . . . . . . . . . . . . . . . . . . . . . . . . . . . . . . . . . . . . . . . . . . . . . . . 24
Index
®
Bose
Corporation Sales and Service
For your records
The serial number is located on the bottom of your radio.
Wave radio serial number: ____________________________
Purchase date: ______________________________________
We suggest you keep your sales receipt and warranty card together with this owner’s guide.
AM255380_01_V.PDF October 22, 2001 5
Page 6

6 October 22, 2001 AM255380_01_V.PDF
Page 7
Setting Up Your Wave
Before you begin
Thank you for purchasing the Bose
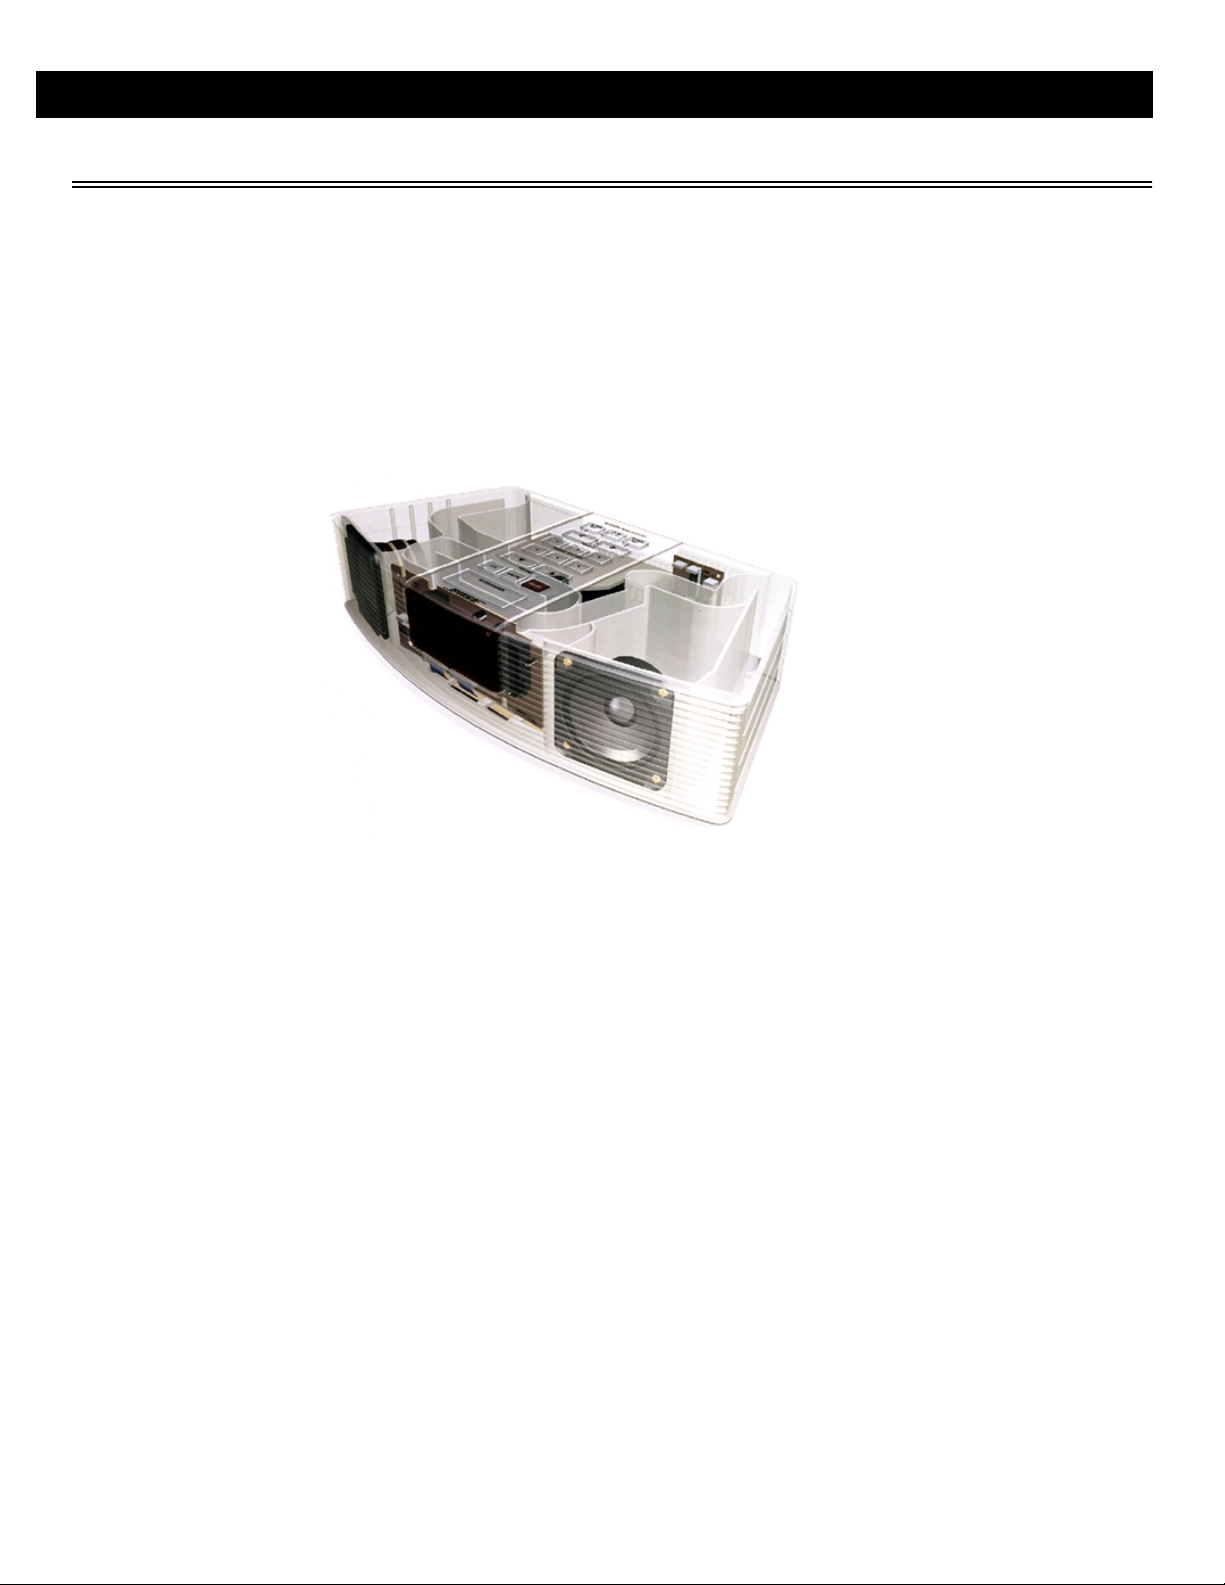
Fourteen years of research by Bose Corporation bring you the benefits of award-winning pat-
ented acoustic waveguide speaker technology. Using this technology, a tube efficiently trans-
fers energy from a small loudspeaker to the outside air over a whole range of bass notes.
And, by folding long waveguides into intricate patterns, they fit into products small enough to
be placed comfortably in your home. There is a 37-inch (93.5-cm) long waveguide inside the
Wave radio’s enclosure, enabling this tabletop radio to produce room-filling sound with full,
deep bass.
®
Radio
®
Wave radio.
Your Wave radio also includes:
• Integrated system design for high acoustic quality requiring no complex adjustments
• A high performance stereo tuner with 6 AM and 6 FM station presets
• Two independent alarms, with battery backup power to save the settings for wakeup during
power loss
• A credit card-size infrared remote control with optional mounting strip
• Inputs for an additional sound source, such as a CD or tape player
To fully appreciate all of these features, please take the time to follow this owner’s guide care-
fully. It helps you set up and operate your radio and enjoy its high-fidelity sound.
AM255380_01_V.pdf October 22, 2001 7
Page 8
Setting Up Your Wave
®
Unpacking the carton
Carefully unpack your system. Save all packing materials for possible future use. The original
packing materials provide the safest way to transport your Wave radio. If any part of the prod-
uct appears damaged, do not attempt to use it. Notify Bose
(See phone numbers on the inside back cover.)
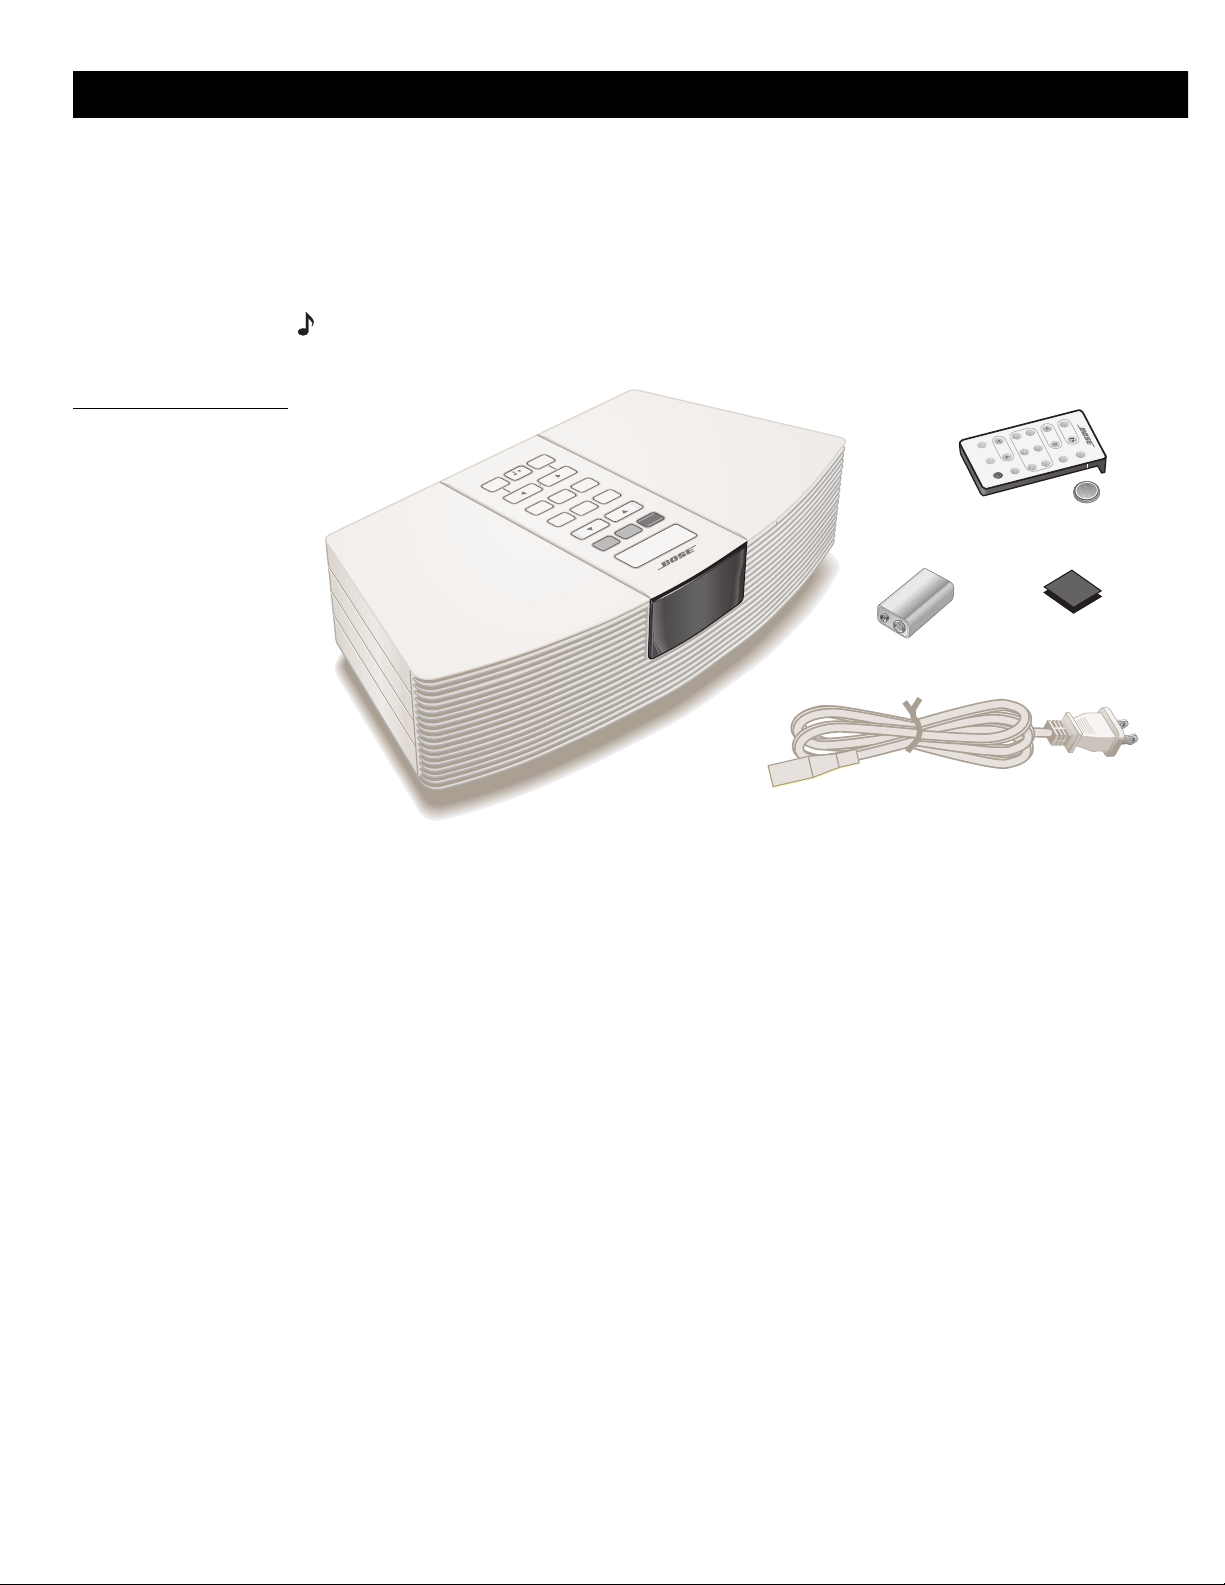
Check to be sure your Wave radio contains the parts identified in Figure 1.
Note: Find the serial number on the bottom of your radio. Write it on your warranty card and
in the space provided on page 5.
Figure 1
Carton contents:
• Wave radio
• Power cord
• 9V battery
• Remote control
• Lithium battery
• Mounting strip
Radio
®
Customer Service immediately.
T
im
e
Alarm
1
Tu
ning
4
AU
Vo
X
Pres
lum
23
ets
e
5
S
l
ee
p
W
AM
a
FM
et
Clock
S
Alarm Mode
Alarm
Set
3
ing
Tun
2
6
Presets
1
5
4
On/Off
Volume
AM/FM
AUX
Sleep/Snooze
Wave Radio
ve R
a
d
io
O
ff
Remote
control
O
n
S
ta
tio
n
6
M
ute
Lithium
battery
Mounting strip
9V battery
Selecting a location for your radio
Please keep these guidelines in mind when selecting a location for your radio:
• Place the radio on a table or other flat surface.
• Do not place it on a metal surface or table that could interfere with AM reception.
• Do not place it on a heat-sensitive surface. Like all electrical equipment, it generates some
heat.
• To ensure reliable operation of the product and to protect it from overheating, put the product in a position and location that will not interfere with its proper ventilation.
• Do not use the radio in a damp location. It is important to prevent moisture from getting into
the unit.
• Locate it within 2 feet (61 cm) of a wall for best bass performance.
• Place it across the room from where you will be listening to enjoy maximum performance of
the Wave radio.
Feel free to place and position it where you find the sound most pleasing.
Wave radio
Power cord
8 October 22, 2001 AM255380_01_V.pdf
Page 9
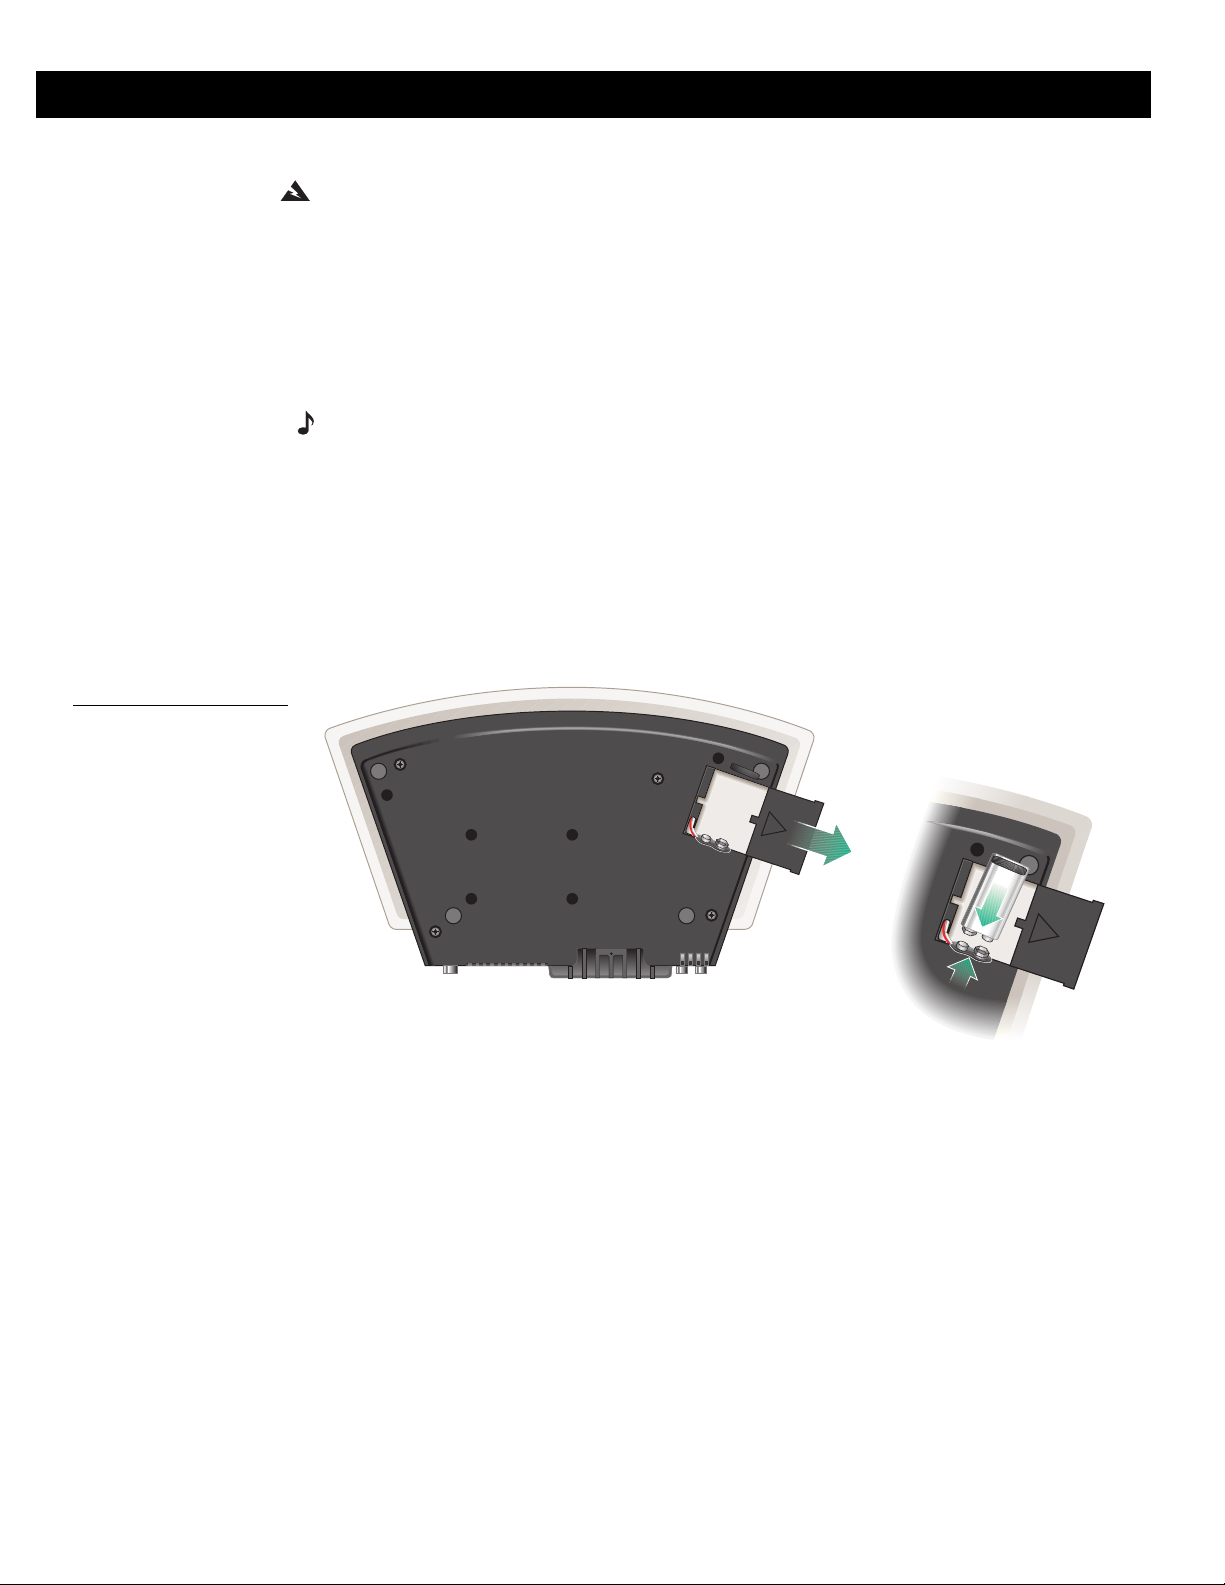
Installing the battery
WARNING: Keep the remote control battery away from children. It may cause a fire or chem-
ical burn if mishandled. Do not recharge, disassemble, heat above 100˚C (212˚F), or incinerate. Dispose of used battery promptly. Replace only with a battery of the correct type and
model number.
The 9V battery maintains clock and alarm settings and operates the Wave radio’s alarm sys-
tem for approximately 48 hours during a power loss, or while the radio is temporarily
unplugged. Operating without this battery results in the loss of clock and alarm settings, and
station presets in the event of a power loss, but does not harm the radio.
Use a standard 9V battery (IEC 6F22 in Europe), available at most retail stores.
Note: The battery does not provide power for Wave radio operation or for the display.
1. Carefully turn your radio upside down.
2. Locate the battery compartment on the bottom (Figure 2).
3. Press the arrow on the cover to slide the compartment open.
4. Lift the battery clip out of the compartment and align it with the battery as shown.
5. Snap the terminals together firmly.
6. Place the battery in the compartment and slide the cover closed. Then turn the radio right
side up.
Setting Up Your Wave
®
Radio
Figure 2
Installing the battery
AM255380_01_V.PDF October 22, 2001 9
Page 10

Setting Up Your Wave
®
Radio
Connecting the power cord
1. Untie and straighten the bundled power cord completely to ensure the best FM recep-
tion. The FM antenna is built into the power cord.
2. Plug the small end of the power cord into the power jack on the back of your radio (Figure
3). The connector is shaped to fit in only one direction. Line up the flat edge of the plug
with the flat edge on the side of the jack.
3. Plug the other end of the power cord into an electric outlet. The display panel lights and
the time display begins flashing.
4. Press the Clock Set button once to stop the flashing. See “Setting the time” on page 17
to set the clock.
Figure 3
Connecting the power cord
FM 75Ω EXTERNAL
antenna connector
Flat edge of connector
Adjusting the antennas
With the FM antenna built into the power cord, adjusting the cord position affects FM radio
reception slightly. With the AM antenna built into the radio, turning the radio more to one side
or the other adjusts AM reception slightly.
Receiving cable radio signals as an option
To connect your radio to the FM signal available from some cable TV companies, contact
your cable provider for assistance.
The cable screws onto threads of the FM 75 Ω EXTERNAL antenna connector on the back of
the Wave radio (Figure 3). To make this connection easier, you may want to obtain a screw-on
to push-on RF adapter (available at electronic stores).
CAUTION: Make sure the installation includes a signal splitter. It is important that only the FM
band, not the cable TV band, is transmitted to the radio. It is necessary to use a splitter that
filters the signal to prevent any re-emissions of the TV spectrum through the radio.
Straighten
power cord for
best FM reception
10 October 22, 2001 AM255380_01_V.pdf
Page 11

Setting up the remote control
WARNING: Keep the remote control battery away from children. It may cause a fire or chem-
ical burn if mishandled. Do not recharge, disassemble, heat above 100˚C (212˚F), or incinerate. Dispose of used battery promptly. Replace only with a battery of the correct type and
model number.
Your remote control may be one of two types. Each is identified by the way the battery compartment unlocks to install or replace the battery (Figure 4 or Figure 5).
1. Place the remote control face down on a flat surface.
2. If your remote has a slot on the back (Figure 4), follow step A. Otherwise, follow step B
and refer to Figure 5:
A. Insert the tip of a ballpoint pen into the slot. Push to the side as shown and hold.
Slide the battery compartment open with your finger.
B. Using your finger, push the tab lock to the side as shown and hold. Slide the battery
compartment open.
Figure 4
Locating the slot-type
safety lock
battery to be used
instructions for types of
See operating
Slot
Setting Up Your Wave
+ Symbol
®
Radio
Figure 5
Locating the tab-type safety
lock
See operating
battery to be used
instructions for types of
Ta b
See operating
battery to be used
instructions for types of
+ Symbol
f
d
es o
r typ
e use
erating
b
p
ns fo
e o
e
ctio
S
ttery to
a
b
stru
in
AM255380_01_V.PDF October 22, 2001 11
Page 12

Setting Up Your Wave
Figure 6
Installing the mounting strip
for the remote control
®
Radio
Note: Use only a Duracell, Eveready, Maxell, or Toshiba CR2032 or DL2032 lithium battery
(available at electronics stores). If you have difficulty finding a replacement battery, contact
®
Bose
Customer Service. (See phone numbers on the inside back cover.)
3. Keeping the remote control face down, insert the new battery into the compartment with
the + symbol facing up.
4. Gently slide the battery compartment closed. It locks automatically.
5. Use the supplied mounting strip if you want to attach the remote to a surface in your lis-
tening room. Peel off the protective backing to stick one piece to the back of the remote
and the other to the selected surface (Figure 6).
See operating
instructions for types of
battery to be used
CAUTION: Danger of explosion if battery is incorrectly replaced. Replace only with the same
or equivalent type.
12 October 22, 2001 AM255380_01_V.pdf
Page 13

Connecting other components
You can use your Wave radio to improve the sound of a CD player, tape player, or TV. You can
also use your radio as extension speakers for a Bose® Lifestyle® music system. Connect one
of these components to the right and left AUX IN jacks.
To play your radio through external speakers, connect Bose powered speakers to the radio’s
right and left VARIABLE OUT jacks. Audio cables for these connections are available at electronics stores, or by calling Bose Product and Technical Support.
Most audio cables are color coded. Match the red plug to the R (red) jack and the black or
white plug to the L (white) jack (Figure 7).
Note: Connecting components or speakers to the VARIABLE OUT jacks shuts off the radio
speakers.
Figure 7
Connecting another component
R
AUX IN
VARIABLE OUT
Setting Up Your Wave® Radio
L
Using other components
Select your CD player, tape player, or other auxiliary source by pressing the AUX button.
Adjust the listening volume with the Volume buttons. Control all other functions, including on/
off, at the source, referring to its owner’s manual, if necessary.
Control your auxiliary powered speakers from the Wave radio. If these speakers have a volume control, you may use it.
Note: Recording from your Wave radio is not recommended. Connecting a tape recorder to
the VARIABLE OUT jacks shuts off the radio speakers, preventing you from monitoring the
recording volume.
AM255380_01_V.PDF October 22, 2001 13
Page 14

Setting Up Your Wave® Radio
RL
AUX IN
RL
AUX IN
RL
AUX IN
VARIABLE OUT
Component Cable
Portable CD or tape
player
CD player, tape deck,
or VCR
Television
One miniplug-to-stereo
audio cable
One stereo audio cable Audio output jacks
Use a standard RCA
cable for a TV with stereo
output jacks.
Use a standard “Y”
adapter for a TV with a
single (mono) audio output jack.
You may need a special
adapter (such as a
miniplug stereo audio
cable) for a TV with a
headphone outlet.
Connection at
component
Headphone jack
For best sound, set
the player volume
control to approximately 3/4 of maximum volume.
If there are two sets
of outputs (fixed and
variable), use fixed so
that the volume can
be controlled from the
radio.
Audio output jacks
If there are two sets
of outputs (fixed and
variable), use fixed so
that the volume can
be controlled from the
radio.
Connection at
Wave radio Notes
AUX IN jacks
AUX IN jacks Recording from your Wave radio is
RL
AUX IN
AUX IN jacks To make sure the sound seems to
not recommended because connecting cables to the VARIABLE
OUT jacks shuts off the radio
speakers, preventing you from
monitoring the recording volume.
come from the screen, place the
Wave radio close to the TV.
Bose® Lifestyle®
music system
®
Powered speakers
with volume control
Stereo cable with maleto-male RCA plugs.
Use the audio input
cable that came with
your speakers.
TAPE (REC) jacks AUX IN jacks
Speaker system input
VARIABLE OUT jacks If your powered speaker audio
(as described in the
speaker owner’s
guide)
input cable has three connectors
on each end, use only the two
connectors that look alike to connect to the Wave radio outputs.
DO NOT USE THE THIRD CONNECTOR.
Connecting powered speakers to
the VARIABLE OUT jacks shuts
off the radio speakers.
14 October 22, 2001 AM255380_01_V.pdf
Page 15

Operating Your Wave® Radio
Operating the remote control
You can use the remote control (Figure 8) to operate the most frequently used functions of the
radio and alarms. Aim the remote control at the display of your Wave radio. Use the remote
buttons in the same way you use the radio control panel. The remote normally works up to 20
feet (6.1 m) in front of the radio, and 6 feet (1.8 m) to either side. Replace the remote control
battery when it stops operating, or its range seems reduced (normally every year or two).
Keep in mind that lighting and other room conditions, in addition to battery age, can affect the
operating range of an infrared remote control.
Figure 8
The Wave radio remote
Set or check the
wakeup time
Tunes up or down
the AM or FM band
Time
Alarm
Selects radio, tone,
both, or no alarm
Sets timed shutoff
Sleep
Turns on and stores
or selects a preset
station
Raises or lowers
volume
Turns the radio on
and selects AUX
AUX
Tuning
1
4
23
Presets
5
Volume
AM
FM
Wave Radio
Station
Mute
On
Off
6
Turns the radio on and
selects AM or FM
Displays current station
Mutes/unmutes the radio
Turns the radio on/off,
deactivates the alarm
AM255380_01_V.PDF October 22, 2001 15
Page 16

Operating Your Wave® Radio
Operating the radio control panel
Most of the functions of the clock and the radio are operated by similar buttons on the control
panel or the remote control (Figure 9). You can access additional functions by pressing two
control panel buttons simultaneously (such as both Tuning buttons to display the station),
which requires a separate button on the remote (Station).
The control panel On/Off and VOLUME buttons have raised ridges to help you locate these
frequently used buttons.
Figure 9
The Wave radio control
panel
Selects radio, tone,
both, or no alarm
Sets the time
Sets or checks the
wakeup time
Turns on and stores
or selects a preset
station
Raises or lowers
volume
Turns the radio on
and selects AUX
Alarm
Alarm Mode
Set
Tuning
123
Presets
456
Volume
AUX AM/FM
Sleep/Snooze
Wave Radio
Clock
Set
On/Off
Tunes the radio; displays
the current station when
pressed together
Turns the radio
on and selects
AM or FM
Turns the radio on/off,
deactivates the alarm
Sets timed shutoff
16 October 22, 2001 AM255380_01_V.PDF
Page 17

Reading the clock display
Alarm Mode
Alarm
Set
Clock
Set
Volume
Presets
123
456
Tuning
Sleep/Snooze
AUX AM/FM
On/Off
Wave Radio
You can set the Wave radio to always show either the clock display (Figure 10) or the radio
display when the radio is on.
To change the display mode, press and hold Clock Set, and then press the AM/FM button.
To make additional changes to the display, see “Customizing the display” on page 18.
Figure 10
The clock display
Shows current time, wakeup time, sleep time,
station frequency, or volume setting
Operating Your Wave® Radio
Indicates ALARM is
set for radio alarm
Indicates ALARM
is selected
Setting the time
ALARM
AM
Indicates ALARM is
set for tone alarm
PM
SLEEP
ALARM 2
Indicates ALARM 2 is
set for tone alarm
Indicates ALARM 2
Indicates sleep mode
Indicates AM or PM
Indicates ALARM 2 is
set for radio alarm
is selected
Time
Alarm
Tuning
1
4
Volume
AUX
23
Presets
5
AM
FM
Wave Radio
Sleep
Station
6
Mute
On
Off
Function Control panel Remote control
To set the clock – Hold down the Clock
Set button and press Tuning up (4 ) or down
(3 ). The time display changes slowly at first,
then faster. Release the Tuning button to stop.
Clock
Set
Use the control panel
to select this feature.
Tuning
AM255380_01_V.PDF October 22, 2001 17
Page 18

Operating Your Wave® Radio
Alarm Mode
Alarm
Set
Clock
Set
Volume
Presets
123
456
Tuning
Sleep/Snooze
AUX AM/FM
On/Off
Wave Radio
Clock
Set
Volume
and
Customizing the display
Function Control panel
To set AM/PM (12 hour) or Military (24 hour) time – Press
the On/Off button once to turn your Wave radio off.
Press and hold Clock Set, and then press On/Off to switch between
AM/PM (12 HR) or military (24 HR) formats
To set the display to clock or radio mode – In the clock
mode, the display shows the time while the radio is on; In radio mode,
the display shows the selected radio station.
With the radio turned on, press and hold Clock Set and then press the
AM/FM button to switch between clock and radio modes.
To adjust the display brightness – In low light situations, the
display dims automatically.
To adjust the brightness level for the automatic dim setting:
• Hold down the Clock Set button while pressing Volume up to view
the 10 levels of increasing brightness.
• Hold down the Clock Set button while pressing Volume up or down
to select you preferred setting.
The selected setting is retained by the radio with the 9V battery as
backup in case of power loss.
On/Off
Clock
Set
Clock
Set
and
and
On/Off
AM/FM
18 October 22, 2001 AM255380_01_V.PDF
Page 19

Operating Your Wave® Radio
Alarm Mode
Alarm
Set
Clock
Set
Volume
Presets
123
456
Tuning
Sleep/Snooze
AUX AM/FM
On/Off
Wave Radio
Volume
AM
FM
Tuning
Tuning
Station
AUX
Listening to the radio
Sleep
Time
Alarm
Tuning
Station
1
23
Presets
4
5
6
Mute
Volume
AM
On
AUX
Off
FM
Wave Radio
Function Control panel Remote control
To turn on/off – Press once to turn on (to the last source played) or off. Or,
press AM/FM or any
Presets button to turn the radio on.
To adjust the volume – While the radio is either on or off, press and hold
either button to adjust the volume. The display shows the volume level, from
0 (silent) to 99 (loud).
To select AM or FM – If the radio is off or in the AUX mode, press to
select the radio. Press again to change between AM and FM.
To tune in a station – Press and hold either button until the desired station is selected.
To seek a station – Press and hold either button until you hear a beep.
Release to find the next strong station.
To preset up to 6 AM and 6 FM stations – Use the Tuning buttons to
find the desired station. Then hold down any Presets button until you hear a
beep. The station is now preset to that number.
To select a preset station – Choose AM or FM. Press the Presets but-
ton for the station you want.
To display the selected station – If the display is in clock mode and
the radio is on, press both Tuning buttons (control panel) together or press
Station (remote).
Tuning
AM/FM
On/Off
Volume
AM/FM
Tuning
Tuning
123
456
123
456
Tuning
Presets
Presets
Tuning
On
Off
1
23
Presets
4
5
6
1
4
23
Presets
5
6
AM
FM
To mute the sound – On the remote control ONLY, press to silence the
radio. Press again to restore volume.
To listen to a component connected to AUX – Press to turn on the
radio in AUX mode. This does not turn on the component.
To go to sleep listening to music – Press Sleep to set the automatic
shutoff time. Initially, the display shows you the first setting of 75 minutes.
Use the remote control to
select this function.
AUX
Sleep/Snooze
Mute
Sleep
Press again to change the automatic shutoff time to 60, 45, 30, 15, 10, 5, or
0.
AM255380_01_V.PDF October 22, 2001 19
Page 20

Operating Your Wave® Radio
Reading the radio display
You can set the Wave radio to always show either the clock display or the radio display (Figure 11) when the radio is on.
To change the display mode, press and hold Clock Set, and then press the AM/FM button.
To make additional changes to the display, see “Customizing the display” on page 18.
Figure 11
The radio display
Indicates FM
stereo broadcast
Indicates
volume setting
is displayed
Indicates radio
is searching for the
next strong station
Indicates the selected
AUX FM
STEREO
VOL AM
SEEK
PRESET
sound source
Shows station frequency, current time,
wakeup time, sleep time, or volume setting
1 2 3 4 5 6
Indicates a preset
station is set
Indicates the selected
preset station
20 October 22, 2001 AM255380_01_V.PDF
Page 21

Operating Your Wave® Radio
Alarm Mode
Alarm
Set
Clock
Set
Volume
Presets
123
456
Tuning
Sleep/Snooze
AUX AM/FM
On/Off
Wave Radio
Time
Alarm
Tuning
Sleep
Time
Setting the alarms
Note: There are two alarms indicated on the clock display as ALARM (primary) and ALARM 2
(secondary). You can set the wakeup time for either alarm with the radio on or off. The indicator for the selected alarm flashes when setting time or mode. The ALARM 2 indicator continues flashing for 10 seconds after setting ALARM 2.
Sleep
Time
Alarm
Tuning
Station
1
23
Presets
4
5
6
Mute
Volume
AM
On
AUX
Off
FM
Wave Radio
Function Control panel Remote control
To select which alarm to set – On the control panel, press and hold
Alarm Set. Press Alarm Mode to select ALARM or ALARM 2. The indicator
flashes for the alarm you are setting.
On the remote, press Time. Press Alarm to select ALARM 2 or to return
to ALARM. The indicator flashes for the alarm you are setting.
To set the alarm time – On the control panel, hold down Alarm Set and
press Tuning up ( ) or down ( ). The time display changes slowly at first,
then more quickly. Release Tuning to stop.
On the remote, press Time. Press Tuning up ( ) or down ( ). The time dis-
play changes slowly at first, then more quickly. Release Tuning to stop. Press
Time to return to the current time display.
To set the alarm mode – On the control panel, after selecting the alarm,
release Alarm Set and press Alarm Mode to select one of the following alarm
modes (Press Alarm on the remote):
For tone only, press until you see the indicator.
For radio only, press until you see the indicator.
For tone and radio, press until you see both indicators .
When the alarm tone sounds, press Sleep/Snooze to turn the radio on. Press
Sleep/Snooze to pause the radio for 10 minutes.
To cancel the alarm mode – Follow the directions for setting the alarm
mode. Press Alarm Mode (control panel) or Alarm (remote) until the
display shows no alarm mode indicators.
To check the alarm setting – On the control panel, press and hold
Alarm Set to see the ALARM wakeup time and the preset station. While hold-
ing Alarm Set, press Alarm Mode to see the ALARM 2 wakeup time and the
preset station.
On the remote, press Time to see the ALARM wakeup time. Press Alarm
to see the ALARM 2 wakeup time. Press Time again to return the dis-
play to the current time. ALARM 2 flashes for 10 seconds.
Alarm
Set
Alarm
Set
Alarm
Set
Tuning
Alarm Mode
Sleep/Snooze
Alarm Mode
Alarm Mode
Time
Alarm Mode
To wake to a preselected radio station – On the control panel,
ONLY, select ALARM or ALARM 2. Press and hold Alarm Set, and then press
one of the six station Presets buttons (you can change between AM and FM
if needed). To clear the preset, press and hold Alarm Set and press the but-
Alarm
Set
123
Presets
456
Use the control panel to
select this feature.
ton for that preset again.
AM255380_01_V.PDF October 22, 2001 21
Page 22

Operating Your Wave® Radio
Alarm Mode
Alarm
Set
Clock
Set
Volume
Presets
123
456
Tuning
Sleep/Snooze
AUX AM/FM
On/Off
Wave Radio
Sleep
Volume
Volume
Using the Alarms
Sleep
Time
Alarm
Tuning
Station
1
23
Presets
4
5
6
Mute
Volume
AM
On
AUX
Off
FM
Wave Radio
Function Control panel Remote control
To stop the alarm – Press On/Off. The indicators remain lit.
Or, if you do not press On/Off, the tone alarm shuts off in 30 minutes, the
radio alarm shuts off in 60 minutes.
The alarm automatically resets to repeat daily.
To pause the alarm for 10 minutes – Press Sleep/Snooze or Sleep to
have the radio or tone alarm repeat in 10 minutes. When the alarm is
in both radio and tone mode, press Sleep/Snooze or Sleep to pause the tone
for 10 minutes and turn on the radio. Press Sleep/Snooze or Sleep again to
silence the radio – the tone repeats in 10 minutes.
You can repeat the pause cycle as many times as you want. If you do not
press any button while the tone is sounding, it shuts off in 30 minutes.
To set the volume of the radio alarm – The radio alarm turns on and
gradually increases to the last volume setting used. You can select a volume
setting with the radio on or off.
To set the volume of the tone alarm – The tone alarm turns on and
gradually increases to the last tone setting used. You can set a louder or
softer tone by pressing Volume up or down while the tone is sounding.
To use the alarm during a power loss – Press On/Off to silence the
alarm. The backup battery runs the alarm for approximately 48 hours without
AC power. To conserve power, only the tone alarm sounds even if the radio
alarm is selected. Normal operation resumes when power is restored.
Replace the 9V battery after an extended power loss.
Note: The Wave radio does not respond to remote control during a
power loss.
On/Off
Sleep/Snooze
Volume
Volume
On/Off
On
Off
Use the control panel to
operate the alarm dur-
ing a power loss.
22 October 22, 2001 AM255380_01_V.PDF
Page 23

Maintaining Your Wave® Radio
Taking care of your Wave radio
The only necessary maintenance is periodic battery replacement and cleaning.
Cleaning your radio
Use only a dry cloth to clean the outside of the Wave radio. If necessary, you may use a softbristled attachment to gently vacuum the front of the radio.
Do not use any solvents, chemicals, or cleaning solutions containing alcohol, ammonia, or
abrasives. Do not allow liquids to spill into any openings on the radio.
If liquids get into the product, turn the radio off. Call Bose® Customer Service as soon as possible to arrange for service. (See phone numbers on inside back cover.)
Replacing the batteries
WARNING: Keep the remote control battery away from children. It may cause a fire or chem-
ical burn if mishandled. Do not recharge, disassemble, heat above 100˚C (212˚F), or incinerate. Dispose of used battery promptly. Replace only with a battery of the correct type and
model number.
To ensure correct operation of your Wave radio’s alarm system, replace the 9V battery every
year and following an extended power loss. A dead battery may leak and cause damage. Do
not unplug your Wave radio from the power outlet while replacing the battery. If you do
unplug it, you will need to reset the clock, alarm settings, and station presets. For further
information on replacing the 9V battery, see “Installing the battery” on page 9.
For information on replacing the remote control battery, see “Setting up the remote control”
on page 11.
Technical information
Power rating
USA/Canada: 120V AC, 50/60 Hz
Dimensions
14"W x 8 1⁄4”D x 4 3⁄16”H (35.6 cm x 21.0 cm x 10.6 cm)
Weight
6.8 lb (3.1 kg)
AM255380_01_V.PDF October 22, 2001 23
Page 24

Maintaining Your Wave® Radio
Troubleshooting
Problem What to do
Radio does not function • Make sure the power cord connector is inserted securely into the radio, matching the flat side of
No sound • Increase the volume.
Remote control is inconsistent or does not work
AM reception is weak • Adjust the internal AM antenna by turning the radio slightly.
FM reception is weak • Extend the power cord as much as possible. The FM antenna is in the power cord.
the connector to the flat side of the jack.
• Make sure the power cord is fully plugged into an operating AC wall outlet.
• Press the Mute button on the remote control to unmute the sound.
• Check the connections for any auxiliary component.
• Press AUX to hear a source connected to the AUX IN jacks.
• Be sure that the component is turned on.
• Check battery and its polarity (+ and –).
• Replace the battery, if necessary (See “Replacing the batteries” on page 23.).
• Operate the remote control closer to the radio.
• Check for interference from room lighting or sunlight, or dust or dirt on the lens. Try the radio in a
different location.
• Try moving the radio farther from a television, fluorescent lights, dimmer switches, or other electronic equipment which generate electrical noise.
• You may be in an area of weak AM signal coverage.
• Move the power cord to adjust the FM antenna.
• If you still have problems with FM reception, you may need an external antenna. Call Bose
and Technical Support to request one.
®
Product
Customer service
Warranty period
For additional help in solving problems, contact Bose Customer Service. See the inside back
cover for Bose Corporation offices and phone numbers.
The Bose Wave radio is covered by a limited 1-year transferable warranty. Details of the warranty are provided on the warranty card that came with your radio. Please fill out the information section on the card and mail it to Bose.
24 October 22, 2001 AM255380_01_V.PDF
Page 25

Index
A
Acoustic Waveguide 7
ALARM 17, 21
ALARM 2 17, 21
alarm check 21
Alarm Mode 21
Alarm Set 21
alarm time 21
alarms 7, 22
alarms, setting 21
AM 15, 16, 19, 20
AM antenna 10, 24
AM reception 24
AM/FM 17
automatic dimming 18
automatic shutoff 19
AUX 13, 15, 16, 20, 24
AUX IN jacks 13, 14, 24
auxiliary source 13
B
backup battery power 7, 9, 18, 22, 23
bass 7
batteries included 8
battery (9V) installation 9
battery (9V) replacement 22, 23
battery (remote control) installation 11
battery (remote control) replacement
11, 23, 24
battery disposal 2, 9, 11, 23
C
cable radio signals 10
cable TV 10
CD player 7, 13, 14
cleaning 23
clock display 17
clock functions 16, 17
clock mode 17, 18, 19
Clock Set 10, 17, 18, 20
connections 10, 13
control panel 16, 19, 21, 22
customer service 8, 12, 23, 24
D
dimensions 23
display brightness 18
E
electrical noise 4, 24
external antenna 10
F
features 7
fluorescent lights 24
FM 15, 16, 19, 20
FM antenna 10, 24
FM reception 24
H
heat from radio 2, 8
I
infrared remote control 7, 15
installing your radio 7
interference 4, 24
L
lithium battery 8, 12
location 8, 24
M
moisture 2, 3, 8
mounting strip 8, 12
Mute 15, 19, 24
O
On/Off 15, 16, 18, 19, 22
P
power connector 10
power cord 8, 10, 24
power loss 9, 22
power rating 23
powered speakers 13, 14
PRESET 20
presets 19, 20, 21
R
radio alarm 15, 16
radio alarm volume 22
radio display 20
radio mode 18
radio reception 10
remote control 8, 11, 12, 15, 19, 21, 22,
24
S
safety information 2, 3, 4
SEEK 20
seek a station 19
serial number 8
signal splitter 10
SLEEP 17
Sleep 15, 22
Sleep/Snooze 16, 21, 22
station frequency 20
station presets 15, 16, 19, 20
STEREO 20
T
tape player 7, 13, 14
television 14, 24
Time 15, 21
time, AM or PM 17
time, AM/PM (12 hour) 18
time, military (24 hour) 18
tone alarm 15, 16
tone alarm volume 22
troubleshooting 24
Tuning 15, 16, 17, 19, 21
U
unmute 15, 19, 24
unpacking 8
V
VARIABLE OUT jacks 14
VOL 20
Volume 15, 16, 19
W
wakeup time 15, 16, 17
warranty card 8, 24
weight 23
AM255380_01_V.PDF October 22, 2001 25
Page 26

26 October 22, 2001 AM255380_01_V.PDF
Page 27

Bose® Corporation Sales and Service
USA & Canada Sales
Bose Corporation, The Mountain
Framingham, MA 01701-9168
1-800-637-8781
USA & Canada Service
Bose Corporation, The Mountain
Framingham, MA 01701-9168
1-800-637-8781 or
508-879-7330, x63055
European Office
Bose Products B.V., Nijverheidstraat 8
1135 GE Edam, Nederland
TEL 0299-390111 FAX 0299-390114
Australia
Bose Pty Limited, 1 Sorrell Street
Parramatta NSW, 2150
TEL 02 9204-6111 FAX 02 9204-6122
Deutschland
Postfach 1468
48504 Nordhorn
TEL 0130-2673555 FAX 05921-724250
France
6, Rue Saint Vincent
78100 Saint Germain en Laye
TEL 01-3061 6363 FAX 01-3061 4105
Nederland
Bose B.V., Nijverheidstraat 8
1135 GE Edam, Nederland
TEL 0299-390111 FAX 0299-390114
United Kingdom
Freepost EX 151
Exeter EX1 1ZY
TEL 0800 614 293 FAX 0870 240 2013
World Wide Web
www.bose.com
AM255380_01_V.PDF October 22, 2001 27
Page 28

©2001Bose Corporation
The Mountain, Framingham, MA 01701-9168 USA
255380 AM Rev.01 JN10846
 Loading...