

Page 1

BASS MODULE 700
Page 2

IMPORTANT SAFETY INSTRUCTIONS
IMPORTANT SAFETY INSTRUCTIONS
Please read and keep all safety and use instructions.
Important Safety Instructions
1. Read these instructions.
2. Keep these instructions.
3. Heed all warnings.
4. Follow all instructions.
5. Do not use this apparatus near water.
6. Clean only with a dry cloth.
7. Do not block any ventilation openings. Install in accordance with the manufacturer’s instructions.
8. Do not install near any heat sources such as radiators, heat registers, stoves, or other apparatus (including
amplifiers) that produce heat.
9. Protect the power cord from being walked on or pinched particularly at plugs, convenience receptacles, and the
point where they exit from the apparatus.
10. Only use attachments/accessories specified by the manufacturer.
11. Unplug this apparatus during lightning storms or when unused for long periods of time.
12. Refer all servicing to qualified personnel. Servicing is required when the apparatus has been damaged in any
way, such as power-supply cord or plug is damaged, liquid has been spilled or objects have fallen into the
apparatus, the apparatus has been exposed to rain or moisture, does not operate normally, or has been dropped.
2
ENG
|
Page 3
IMPORTANT SAFETY INSTRUCTIONS
WARNINGS/CAUTIONS
This symbol on the product means there is uninsulated, dangerous voltage within the product enclosure that
may present a risk of electrical shock.
This symbol on the product means there are important operating and maintenance instructions in this guide.
This product contains a tempered glass surface. Use caution to avoid impact. In the event of breakage, use
care in handling broken glass.
This product contains magnetic material. Consult your physician on whether this might aect your
implantable medical device.
• To reduce the risk of fire or electrical shock, do NOT expose this product to rain, liquids or moisture.
• Do NOT expose this product to dripping or splashing, and do not place objects filled with liquids, such as vases, on
or near the product.
• Keep the product away from fire and heat sources. Do NOT place naked flame sources, such as lighted candles, on
or near the product.
• Do NOT make unauthorized alterations to this product.
• Do NOT use a power inverter with this product.
• Do NOT use in vehicles or boats.
• The speaker wire and interconnect cables included with this system are not approved for in-wall installation. Please
check your local building codes for the correct type of wire and cable required for in-wall installation.
• Where the mains plug or an appliance coupler is used as the disconnect device, the disconnect device shall remain
readily operable.
仅适用于 2000m 以下地区安全使用
Use at altitude less than 2000 meters only.
• Due to ventilation requirements, Bose does not recommend placing the product in a confined space such as in a
wall cavity or in an enclosed cabinet.
• The product label is located on the bottom of the product.
3
ENG
|
Page 4

REGULATORY INFORMATION
This device complies with part 15 of the FCC Rules and with Industry Canada license-exempt RSS standard(s).
Operation is subject to the following two conditions: (1) This device may not cause harmful interference, and (2) this
device must accept any interference received, including interference that may cause undesired operation.
This device complies with FCC and Industry Canada radiation exposure limits set forth for general population.
This equipment should be installed and operated with a minimum distance of 20 cm between radiator and your body.
This transmitter must not be co-located or operating in conjunction with any other antenna or transmitter.
This device for operation in the 5150 - 5250 MHz is only for indoor use to reduce the potential for harmful interference
to co-channel mobile satellite systems.
Receiver Category = 2
CAN ICES-3 (B)/NMB-3(B)
Management Regulation for Low-power Radio-frequency Devices
Article XII
According to “Management Regulation for Low-power Radio-frequency Devices” without permission granted by
the NCC, any company, enterprise, or user is not allowed to change frequency, enhance transmitting power or alter
original characteristic as well as performance to an approved low power radio-frequency devices.
Article XIV
The low power radio-frequency devices shall not influence aircraft security and interfere legal communications; If
found, the user shall cease operating immediately until no interference is achieved. The said legal communications
means radio communications operated in compliance with the Telecommunications Act.
The low power radio-frequency devices must be susceptible with the interference from legal communications or ISM
radio wave radiated devices.
Bose Corporation hereby declares that this product is in compliance with the essential requirements and
other relevant provisions of Directive 2014/53/EU and all other applicable EU directive requirements. The
complete declaration of conformity can be found at: www.Bose.com/compliance
The product, in accordance with the Ecodesign Requirements for Energy Related Products Directive 2009/125/EC, is
in compliance with the following norm(s) or document(s): Regulation (EC) No. 1275/2008, as amended by Regulation
(EU) No. 801/2013.
Required Power State Information
Power consumption in specified power mode, at 230V/50Hz
input
Time after which equipment is automatically switched into mode
Power consumption in networked standby if all wired network
ports are connected and all wireless network ports are activated,
at 230V/50Hz input
Network port deactivation/activation procedures. Deactivating
all networks will enable standby mode.
Standby Networked Standby
< 0.5 W
< 2.5 hours
N/A
Per Annex II 3(a) of Regulation 801/2013 (“Lot 26” amendment of 1275/2008), the requirement to deactivate a wireless
port “does not apply to products which rely on a single
wireless network connection for intended use and have no
wired network connection.”
Power Modes
Wi-Fi®, Bluetooth® < 2.0 W
< 20 minutes
< 2.0 W
4
ENG
|
Page 5
REGULATORY INFORMATION
For Europe:
Frequency band of operation 2400 to 2483.5 MHz:
• Wi-Fi: Maximum transmit power less than 20 dBm EIRP.
Frequency bands of operation 5150 to 5350 MHz and 5470 to 5725 MHz:
• WiFi: Maximum transmit power less than 20dBm EIRP.
This device is restricted to indoor use when operating in the 5150 to 5350 MHz frequency range in all EU Member
States listed in the table.
BE DK IE UK FR CY SK HU AT SE
BG DE PT EL HR LV LT MT PL
CZ EE FI ES IT RO LU NL SI
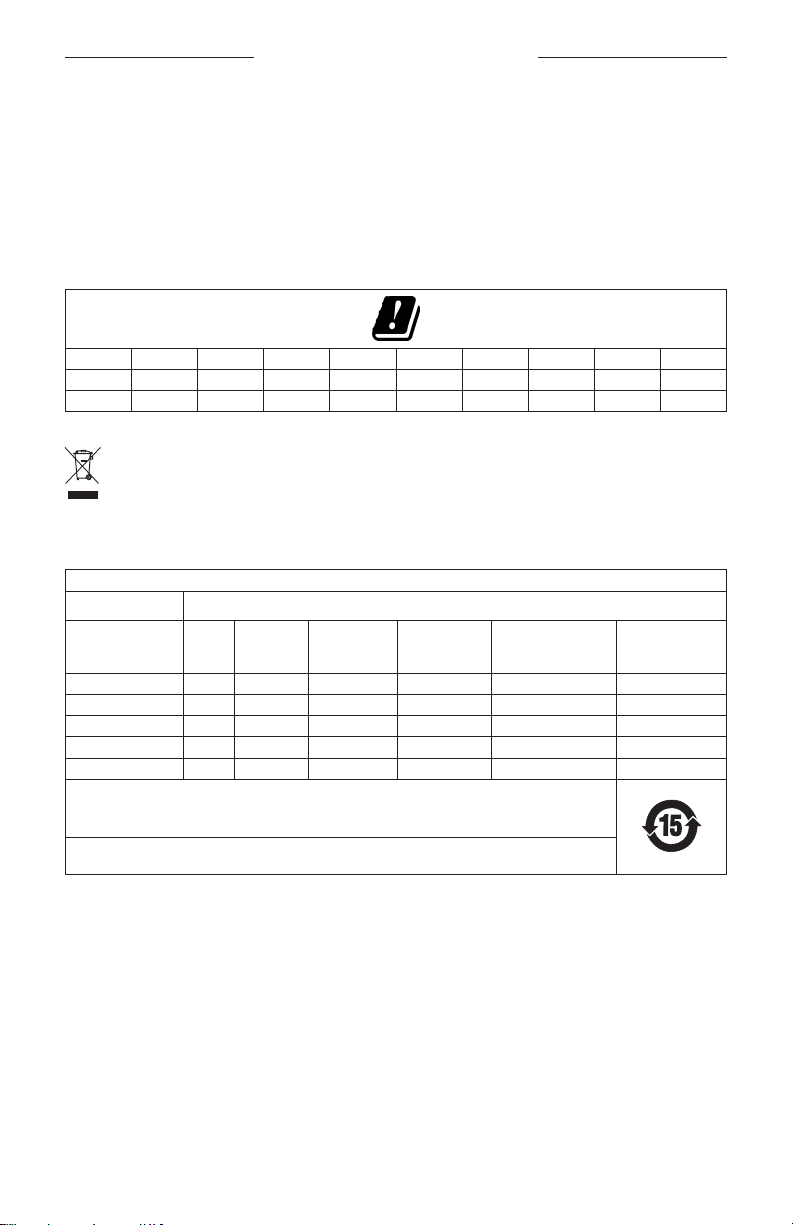
This symbol means the product must not be discarded as household waste, and should be delivered to an
appropriate collection facility for recycling. Proper disposal and recycling helps protect natural resources,
human health and the environment. For more information on disposal and recycling of this product, contact
your local municipality, disposal service, or the shop where you bought this product.
China Restriction of Hazardous Substances Table
Names and Contents of Toxic or Hazardous Substances or Elements
Toxic or Hazardous Substances and Elements
Lead
Part Name
PCBs X O O O O O
Metal Parts X O O O O O
Plastic Parts O O O O O O
Speakers X O O O O O
Cables X O O O O O
This table is prepared in accordance with the provisions of SJ/T 11364.
O: Indicates that this toxic or hazardous substance contained in all of the homogeneous materials for this part
is below the limit requirement of GB/T 26572.
X: Indicates that this toxic or hazardous substance contained in at least one of the homogeneous materials
used for this part is above the limit requirement of GB/T 26572.
(Pb)
Mercury
(Hg)
Cadmium
(Cd)
Hexavalent
(CR(VI))
Polybrominated
Biphenyl
(PBB)
Polybrominated
diphenylether
(PBDE)
5
ENG
|
Page 6
REGULATORY INFORMATION
Taiwan Restriction of Hazardous Substances Table
Equipment name: Bass Module, Type designation: 419357, 419356
Restricted substances and its chemical symbols
Unit
PCBs
Metal Parts
Plastic Parts
Speakers
Cables
Note 1: “○” indicates that the percentage content of the restricted substance does not exceed the percentage of reference value
of presence.
Note 2: The “−” indicates that the restricted substance corresponds to the exemption.
Lead
Mercury (Hg) Cadmium (Cd)
(Pb)
- ○ ○ ○ ○ ○
- ○ ○ ○ ○ ○
○ ○ ○ ○ ○ ○
- ○ ○ ○ ○ ○
- ○ ○ ○ ○ ○
Hexavalent
chromium (Cr+6)
Polybrominated
biphenyls (PBB)
Polybrominated
diphenyl ethers
(PBDE)
Please complete and retain for your records
The serial and model numbers are located on the bottom of the bass module.
Serial number: ____________________________________________________________________
Model number: ____________________________________________________________________
Please keep your receipt with your owner’s guide. Now is a good time to register your Bose product.
You can easily do this by going to http://global.Bose.com/register
Date of Manufacture: The eighth digit in the serial number indicates the year of manufacture; “8” is 2008 or 2018.
China Importer: Bose Electronics (Shanghai) Company Limited, Part C, Plan 9, No. 353 North Riying Road, China
(Shanghai) Pilot Free Trade Zone
EU Importer: Bose Products B.V., Gorslaan 60, 1441 RG Purmerend, The Netherlands
Taiwan Importer: Bose Taiwan Branch, 9F-A1, No.10, Section 3, Minsheng East Road, Taipei City 104, Taiwan
Phone Number: +886-2-2514 7676
Mexico Importer: Bose de México, S. de R.L. de C.V. , Paseo de las Palmas 405-204, Lomas de Chapultepec, 11000
México, D.F. Phone Number: +5255 (5202) 3545
Input Rating: 100-240V 50/60 Hz, 180W
Android, Google Play, and the Google Play logo are trademarks of Google Inc.
The Bluetooth® word mark and logos are registered trademarks owned by Bluetooth SIG, Inc. and any use of such
marks by Bose Corporation is under license.
The terms HDMI and HDMI High-Definition Multimedia Interface, and the HDMI logo are trademarks
or registered trademarks of HDMI Licensing LLC in the United States and other countries.
Apple and the Apple logo are trademarks of Apple Inc., registered in the U.S. and other countries. App Store is a
service mark of Apple Inc.
SoundTouch and the wireless note design are registered trademarks of Bose Corporation in the U.S. and
other countries.
Bose Corporation Headquarters: 1-877-230-5639
©2018 Bose Corporation. No part of this work may be reproduced, modified, distributed or otherwise used without
prior written permission.
6
ENG
|
Page 7

CONTENTS
WHAT’S IN THE CARTON
Contents ............................................................................................................................. 9
BASS MODULE PLACEMENT
Recommendations.......................................................................................................... 10
Placing a second bass module .......................................................................... 11
POWER
Connect the bass module to power ........................................................................ 12
CONNECT TO A SOUNDBAR
Choose your connection method ............................................................................. 13
Connect using the Bose® music app ....................................................................... 14
New to the Bose Music app? .............................................................................. 14
Connect using the SoundTouch® 300 remote ..................................................... 15
Check for sound ...................................................................................................... 15
Connect a second bass module (optional) ........................................................... 16
Compatible bass modules ................................................................................... 16
Connect to a Bose Soundbar 500, Bose Soundbar 700 or
SoundTouch® 300 soundbar .............................................................................. 16
Connect to a Lifestyle® 650/600 home entertainment system ........... 16
ADAPTIQ® AUDIO CALIBRATION
Choose your audio calibration method .................................................................. 17
Run ADAPTiQ audio calibration using the Bose® music app ......................... 18
Initial setup ................................................................................................................ 18
Use the Settings menu ......................................................................................... 18
Run ADAPTiQ audio calibration using the SoundTouch® 300 remote ...... 19
7
ENG
|
Page 8

CONTENTS
BASS SETTING
Choose your bass adjustment method .................................................................. 21
Adjust the bass using the Bose® Music app.......................................................... 22
Adjust the bass using the SoundTouch® 300 remote ....................................... 22
Reset the bass .......................................................................................................... 23
BASS MODULE STATUS
Status light ........................................................................................................................ 24
CARE AND MAINTENANCE
Clean the bass module ................................................................................................. 25
Replacement parts and accessories ........................................................................ 25
Limited warranty ............................................................................................................. 25
TROUBLESHOOTING
Try these solutions first ................................................................................................ 26
Other solutions ................................................................................................................ 26
Unable to complete ADAPTiQ® audio calibration with your
SoundTouch®300 soundbar ....................................................................................... 28
Connect using an audio cable ................................................................................... 29
8
ENG
|
Page 9
WHAT’S IN THE CARTON
CONTENTS
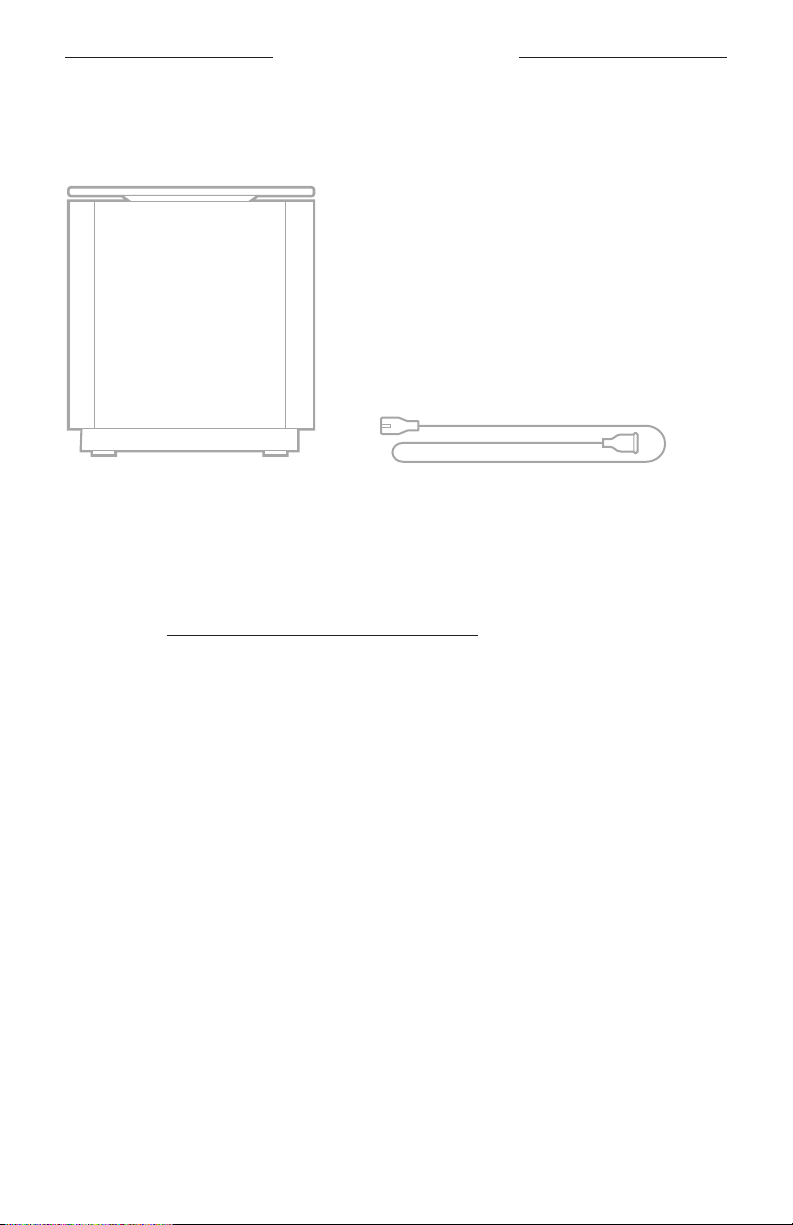
Confirm that the following parts are included:
Bose® Bass Module 700
Power cord*
*May ship with multiple power cords. Use the power cord for your region.
NOTE: If any part of the product is damaged or if the glass on the bass module
is broken, do NOT use it. Contact your authorized Bose® dealer or Bose
customer service.
Visit: worldwide.Bose.com/Support/BASS700
9
ENG
|
Page 10
BASS MODULE PLACEMENT
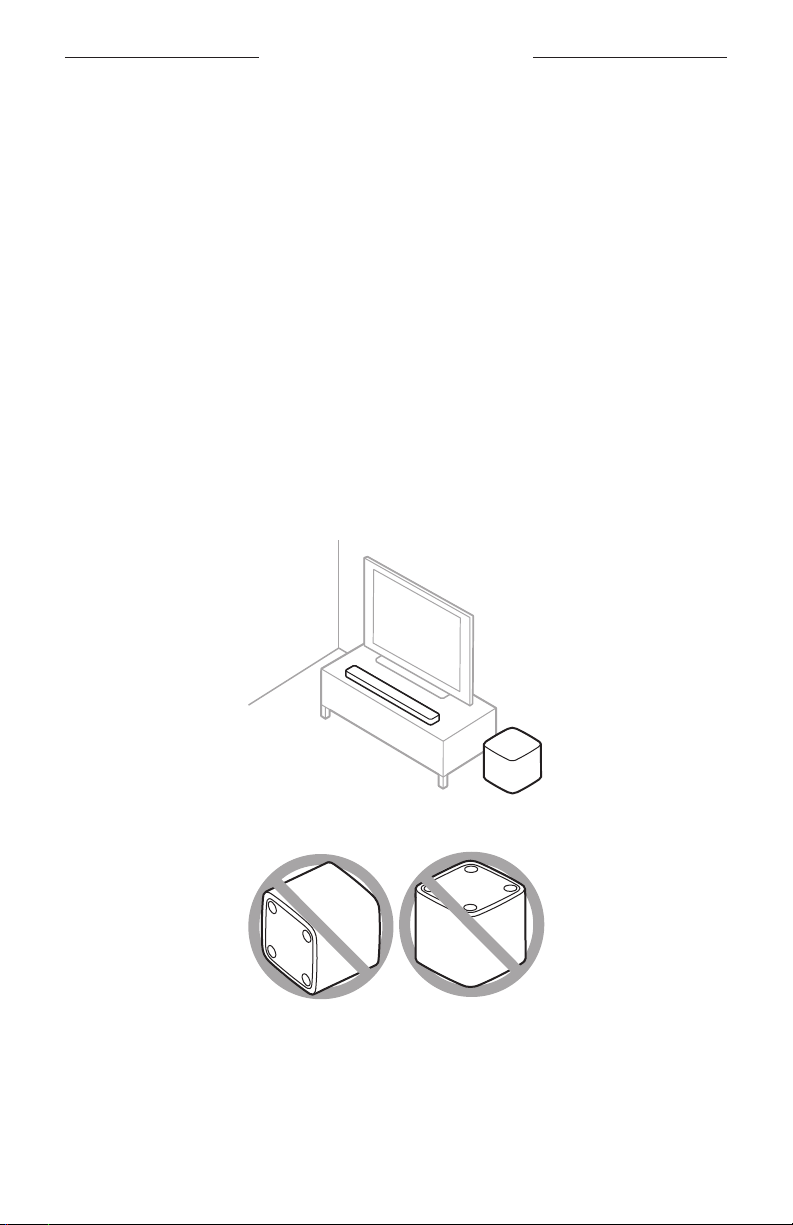
RECOMMENDATIONS
For best performance, follow these recommendations when placing the bass module:
Do NOT place any objects on top of the bass module.
To avoid wireless interference, keep other wireless equipment 1 – 3 ft. (0.3 –
0.9 m) away from the bass module. Place the bass module outside and away
from metal cabinets, other audio/video components and direct heat sources.
Place the bass module on a stable and level surface. Vibration can cause the bass
module to move, particularly on smooth surfaces like marble, glass or highly
polished wood.
Place the bass module along the same wall as your TV, or along any other wall in
the front third of the room.
Keep the front side of the bass module (the side opposite the POWER connector)
at least 3 in. (7.6 cm) from any other surface. Blocking the port on the bottom of
this side may aect acoustic performance.
For more bass, place the bass module closer to walls and corners. For less bass,
place the bass module further from walls and corners.
Make sure there is an AC (mains) outlet nearby.
CAUTION: Do NOT place the bass module on its top or sides when in use.
10 | ENG
Page 11

BASS MODULE PLACEMENT
Placing a second bass module
Try placing each bass module in multiple locations to see what sounds best for
your listening area. After placing a module in a new location, run ADAPTiQ® audio
calibration (see page 17). For more bass, place the modules closer to each other or
closer to walls and corners.
11 | ENG
Page 12

POWER
CONNECT THE BASS MODULE TO POWER
1. Connect the power cord to the b connector on the bass module.
2. Plug the other end of the power cord into an AC (mains) power outlet.
12 | ENG
Page 13

CONNECT TO A SOUNDBAR
CHOOSE YOUR CONNECTION METHOD
The way you connect the bass module depends on your soundbar. Choose your
connection method from the table below.
SOUNDBAR CONNECTION METHOD
Connect using the Bose Music app (see page 14).
Bose® Soundbar 500 or
Bose Soundbar 700
NOTE: If you can’t access or have trouble
connecting using the Bose Music app,
see “Troubleshooting” on page 26.
SoundTouch® 300 soundbar
Connect using your soundbar’s remote
(see page 15).
13 | ENG
Page 14

CONNECT TO A SOUNDBAR
CONNECT USING THE BOSE® MUSIC APP
1. In the Bose Music app, from the My Bose screen, select your soundbar.
2. Tap the soundbar image in the bottom-right corner of the screen.
3. Tap Settings > Accessory Speakers > Add Bose Accessory Speakers.
Follow the app instructions.
New to the Bose Music app?
1. On your mobile device, download the Bose Music app.
2. Follow the app instructions.
NOTE: For support information related to the Bose Music app, visit:
global.Bose.com/Support
14 | ENG
Page 15

CONNECT TO A SOUNDBAR
CONNECT USING THE SOUNDTOUCH® 300 REMOTE
1. On the SoundTouch® 300 remote, press the SoundTouch® button e.
2. Press and hold k until the connectivity light l on the soundbar blinks white.
Once connected, you hear a tone. The light on the back of the bass module and l
on the soundbar glow white.
NOTES: Connecting may take several minutes.
If the bass module doesn’t connect to the soundbar, see “Troubleshooting”
on page 26.
Check for sound
NOTE: To avoid hearing distorted audio, turn o your TV speakers. Refer to your TV
owner’s guide for more information.
1. Power on your TV.
2. If you are using a cable/satellite box or other secondary source:
a. Power on this source.
b. If this source is connected to your TV, select the appropriate TV input.
3. Power on the soundbar.
You hear sound coming from the bass module.
NOTE: If you do not hear sound from the bass module, see “Troubleshooting” on
page 27.
15 | ENG
Page 16

CONNECTING TO A SOUNDBAR
CONNECT A SECOND BASS MODULE (OPTIONAL)
Connecting a second bass module may produce more consistent or powerful bass
throughout your listening area.
NOTES:
For instructions on placing a second bass module, see page 11.
If your current bass module is connected to your soundbar or system with a
3.5 mm audio cable (see page 29), you can’t connect a second bass module.
Compatible bass modules
You can connect a Bose® Bass Module 700 or an Acoustimass® 300 bass module as a
second bass module.
Connect to a Bose Soundbar 500, Bose Soundbar 700 or SoundTouch® 300 soundbar
Choose the connection method that’s appropriate for your soundbar
(see page 13).
Connect to a Lifestyle® 650/600 home entertainment system
1. On the Lifestyle® 650/600 remote, press SETUP.
2. From the UNIFY® menu, select Speaker Management, then select
Setup Second Bass Module.
3. Follow the on-screen instructions to connect your second bass module.
16 | ENG
Page 17

ADAPTIQ® AUDIO CALIBRATION
After setting up the bass module and connecting with the soundbar, run ADAPTiQ
audio calibration for best acoustic performance. ADAPTiQ audio calibration
customizes the sound of the system to the acoustics of your listening area by taking
five audio measurements. To run an audio calibration, you need 10 minutes when the
room is quiet.
During ADAPTiQ audio calibration, a microphone on the top of the ADAPTiQ headset
(provided with the soundbar) measures the sound characteristics of your room to
determine optimal sound quality.
If you no longer have the ADAPTiQ headset, contact Bose® customer service for a
replacement.
CHOOSE YOUR AUDIO CALIBRATION METHOD
The way you run ADAPTiQ audio calibration depends on your soundbar. Choose your
audio calibration method from the table below.
SOUNDBAR AUDIO CALIBRATION METHOD
Bose® Soundbar 500 or
Bose Soundbar 700
SoundTouch® 300 soundbar
Run ADAPTiQ audio calibration using the
Bose Music app (see page 18).
Run ADAPTiQ audio calibration using the
soundbar’s remote (see page 19).
17 | ENG
Page 18

ADAPTIQ® AUDIO CALIBRATION
RUN ADAPTIQ AUDIO CALIBRATION USING THE BOSE® MUSIC APP
Initial setup
After you connect the bass module to your soundbar, the Bose Music app prompts
you to run ADAPTiQ audio calibration. Follow the app instructions.
Use the Settings menu
If you later connect the optional Bose Surround Speakers or Virtually Invisible® 300
surround speakers, move the bass module or move any furniture, run ADAPTiQ audio
calibration to ensure optimal sound quality.
1. In the Bose Music app, from the My Bose screen, tap your soundbar.
2. Tap the soundbar image on the bottom-right corner of the screen.
3. Tap Settings > ADAPTiQ > Run ADAPTiQ.
18 | ENG
Page 19

ADAPTIQ® AUDIO CALIBRATION
RUN ADAPTIQ AUDIO CALIBRATION USING THE
SOUNDTOUCH® 300 REMOTE
1. Insert the ADAPTiQ headset cable into the a connector on the back of the
SoundTouch® 300 soundbar.
ADAPTiQ
2. Put on the ADAPTiQ headset.
19 | ENG
Page 20

ADAPTIQ® AUDIO CALIBRATION
3. On the remote, press the SoundTouch® button e.
4. Press and hold f until the TV light g and the Bluetooth® light l on the soundbar
glow green.
ADAPTiQ audio calibration begins.
NOTE: If you don’t hear your language, press d and c on the navigation pad to
cycle through languages. To reset the language, press and hold f for
10 seconds.
5. Follow the voice prompts until the ADAPTiQ process is complete.
If you hear an error message and are unable to complete ADAPTiQ audio
calibration, see page 28.
6. Unplug the ADAPTiQ headset from the soundbar and store it in a safe place.
TIP: If you later connect the optional Bose® Surround Speakers or
Virtually Invisible® 300 surround speakers, move the bass module or move
any furniture, run ADAPTiQ audio calibration again to ensure optimal sound
quality.
20 | ENG
Page 21

BASS SETTING
CHOOSE YOUR BASS ADJUSTMENT METHOD
The way you adjust the bass depends on your soundbar. Choose your bass adjustment
method from the table below.
SOUNDBAR BASS ADJUSTMENT METHOD
Bose® Soundbar 500 or
Bose Soundbar 700
SoundTouch® 300 soundbar
Adjust the bass using the Bose Music app
(see page 22).
Adjust the bass using the SoundTouch® 300 remote
(see page 22).
NOTE: For optimal sound quality for dialogue-only
programs, such as news and talk shows, enable
dialogue mode. For more information, refer to
the SoundTouch® 300 owner’s guide.
Visit: global.Bose.com/Support/ST300
21 | ENG
Page 22

BASS SETTING
ADJUST THE BASS USING THE BOSE® MUSIC APP
1. In the Bose Music app, from the My Bose screen, select your soundbar.
2. Tap the soundbar image in the bottom-right corner of the screen.
3. Tap Adjustments to adjust the bass.
ADJUST THE BASS USING THE SOUNDTOUCH® 300
REMOTE
1. On the SoundTouch® 300 remote, press h.
The lights on the soundbar glow according to the current bass setting.
22 | ENG
Page 23

BASS SETTING
BASS SETTING LIGHT ACTIVITY
+4
+3
+2
+1
0 (default)
-1
-2
-3
-4
2. Adjust the bass by doing one of the following:
Press the Volume up button i to increase the bass.
Press the Volume down button j to decrease the bass.
3. Press h.
The soundbar saves your settings.
Reset the bass
On the remote, press and hold h until the SoundTouch® light e on the
soundbar blinks twice.
The bass setting resets to original factory settings.
23 | ENG
Page 24

BASS MODULE STATUS
STATUS LIGHT
The light on the back of the module shows system status.
LIGHT ACTIVITY SYSTEM STATE
Solid white Connected to soundbar
Blinking white Downloading a software update
Solid amber (dim) Disconnected from the soundbar
Blinking amber Ready to connect to the soundbar
O Power-saving mode
Blinking red
24 | ENG
Error - contact Bose® customer service
Page 25

CARE AND MAINTENANCE
CLEAN THE BASS MODULE
Clean the exterior of the bass module with a soft, dry cloth.
CAUTIONS:
Do NOT allow liquids to spill onto the bass module or into any openings.
Do NOT use any sprays near the bass module.
Do NOT use any solvents, chemicals or cleaning solutions containing alcohol,
ammonia or abrasives.
Do NOT allow objects to drop into any openings.
REPLACEMENT PARTS AND ACCESSORIES
Replacement parts and accessories can be ordered through Bose® customer service
Visit: worldwide.Bose.com/Support/BASS700
LIMITED WARRANTY
Your bass module is covered by a limited warranty. Visit our website at
global.Bose.com/warranty for details of the limited warranty.
To register your product, visit global.Bose.com/register for instructions.
Failure to register will not aect your limited warranty rights.
25 | ENG
Page 26

TROUBLESHOOTING
TRY THESE SOLUTIONS FIRST
If you experience problems with the bass module:
Unplug the power cords for the bass module and soundbar, wait 30 seconds and
plug them firmly into a live AC (mains) outlet.
Secure all cables.
Check the bass module status (see page 24).
Move the bass module and soundbar away from possible interference
(wireless routers, cordless phones, televisions, microwaves, etc.).
Move the bass module within the recommended range of your wireless router or
mobile device for proper operation.
Place the bass module according to the placement guidelines (see page 10).
OTHER SOLUTIONS
If you could not resolve your issue, see the table below to identify symptoms and
solutions to common problems. If you are unable to resolve your issue, contact
Bose® customer service.
Visit: worldwide.Bose.com/Support/BASS700
SYMPTOM SOLUTION
Bose® Music app
doesn’t work on
mobile device
Bass module
doesn’t connect
to the soundbar
26 | ENG
Make sure the Bose Music app is compatible with your device.
Visit: global.Bose.com/Support
Confirm that the status light is blinking amber, indicating that the bass
module is ready to connect (see page 24).
Repeat the connection process (page 13).
Unplug the power cords for the bass module and soundbar, wait 30
seconds and plug them firmly into a live AC (mains) outlet.
Connect the bass module to the soundbar using a 3.5 mm audio cable
(see page 29).
NOTE: If you don’t have a 3.5 mm audio cable (commonly used for
headphones and mobile devices), contact Bose customer service
to obtain this part. You can also purchase this part at your local
electronics store.
Page 27

SYMPTOM SOLUTION
Unmute the system.
Increase the volume.
Confirm that the soundbar is playing audio. If not, refer to your soundbar
owner’s guide for troubleshooting. Visit:
Bose® Soundbar 500: worldwide.Bose.com/Support/SB500
Bose Soundbar 700: worldwide.Bose.com/Support/SB700
Intermittent or
no audio
SoundTouch® 300 soundbar: global.Bose.com/Support/ST300
Confirm that the system status light is glowing solid white, indicating
that the bass module is connected to the soundbar (see page 24).
Test dierent sources (if available).
Make sure that you’re playing audio that has bass frequencies, such as
music or movies.
Repeat the connection process (see page 13).
Place the bass module according to the placement guidelines
(see page 10).
Test dierent sources (if available).
Place the bass module according to the placement guidelines
Poor or distorted
sound from bass
module
(see page 10).
Remove all protective films from the bass module.
Run ADAPTiQ® audio calibration (see page 17).
NOTE: If you no longer have the ADAPTiQ headset (provided with your
soundbar), contact Bose customer service for a replacement.
TROUBLESHOOTING
Adjust the bass (see page 21).
Run ADAPTiQ audio calibration (see page 17).
Bass is too heavy
or low
NOTE: If you no longer have the ADAPTiQ headset (provided with your
soundbar), contact Bose customer service for a replacement.
Place the bass module according to the placement guidelines
(see page 10).
27 | ENG
Page 28

TROUBLESHOOTING
UNABLE TO COMPLETE ADAPTIQ® AUDIO CALIBRATION WITH YOUR SOUNDTOUCH® 300 SOUNDBAR
If you can’t complete ADAPTiQ audio calibration with your SoundTouch® 300
soundbar, listen to the voice prompts for the following error messages:
ERROR MESSAGE PROBLEM WHAT TO DO
The microphone on
the ADAPTiQ headset
can’t detect sound.
1
2
3
4
5
The room is too loud. Re-run ADAPTiQ audio calibration when the
The ADAPTiQ headset
is too close to the
speakers.
The listening locations
are too similar.
The ADAPTiQ
headset cannot take
measurements due
to movement.
Secure all cables.
Disconnect the ADAPTiQ headset cable
and reconnect it firmly into the soundbar’s
a connector.
Ensure the microphone opening on the top
of the ADAPTiQ headset is not blocked.
Your ADAPTiQ headset may be damaged.
Call Bose customer service for
replacement parts.
room is quiet.
Move the ADAPTiQ headset farther away
from the speakers.
Move 1 – 2 ft. (0.3 – 0.6 m) away from your
previous listening location.
Hold your head still.
After correcting your problem, you must re-run ADAPTiQ audio calibration
(see page 17).
If you hear a dierent error message, contact Bose customer service for
further instructions.
28 | ENG
Page 29

TROUBLESHOOTING
CONNECT USING AN AUDIO CABLE
You can also connect the module to the soundbar using a 3.5 mm audio cable
(not provided).
If you don’t have a 3.5 mm audio cable (commonly used for headphones and mobile
devices), contact Bose® customer service to receive this part. You can also purchase
this part at your local electronics store.
1. Connect one end of a 3.5 mm audio cable to the x connector on the
bass module.
2. Connect the other end of the cable to the bass module connector on the back of
the soundbar (see page 30).
29 | ENG
Page 30

TROUBLESHOOTING
SOUNDBAR BASS MODULE CONNECTOR LOCATION
Bose® Soundbar 500
Bose Soundbar 700
BASS
BASS
30 | ENG
Page 31

TROUBLESHOOTING
SOUNDBAR BASS MODULE CONNECTOR LOCATION
ACOUSTIMASS
SoundTouch® 300
soundbar
31 | ENG
Page 32

©2018 Bose Corporation, The Mountain, Framingham, MA 01701-9168 USA AM772090-0020 Rev. 01
 Loading...