

Bosch SE3401 Installation Instructions Manual

SE3401
Installation Instructions
EN
Wireless (RF)
Point Tracking Transmitter
SE3401 | Installation Instructions |
Avoid mounting the point transmitter on
metal surfaces as it can reduce the range of
the unit. Placing the point transmitter on
ferrous metal (iron or steel) surfaces can
affect operation of the magnetic contact.
M A G N E T
2
1
2
1
2
1
1.0 General Information
EN | 2
1.0 General Information
The SE3401 Point Transmitter is a magnetic and dry
contact wireless transmitter used for monitoring assets.
The unit is equipped with an internal reed contact for
use with an external magnet assembly (included), a
cover tamper switch, and RF supervision. The SE3401
can accept a supervised dry contact input from an
external device.
1.1 Supervision
Supervision is provided by transmitting a low power
level signal to the receiver every 70 min. if there is no
other activity. All transmissions from the SE3401 send
battery status information to the system.
1.2 Auto Tracking
Once an alarm is initiated, such as the transmitter
moved away from the magnet, the auto tracking feature
begins. The transmitter sends a signal back to the
central console every few seconds, updating its location
for several minutes. To reset the transmitter after an
alarm has been initiated, all device conditions (such as
tamper, loop, or magnet) must be reset to normal.
3.0 Mounting the Point Transmitter
3.1 Recommended Mounting
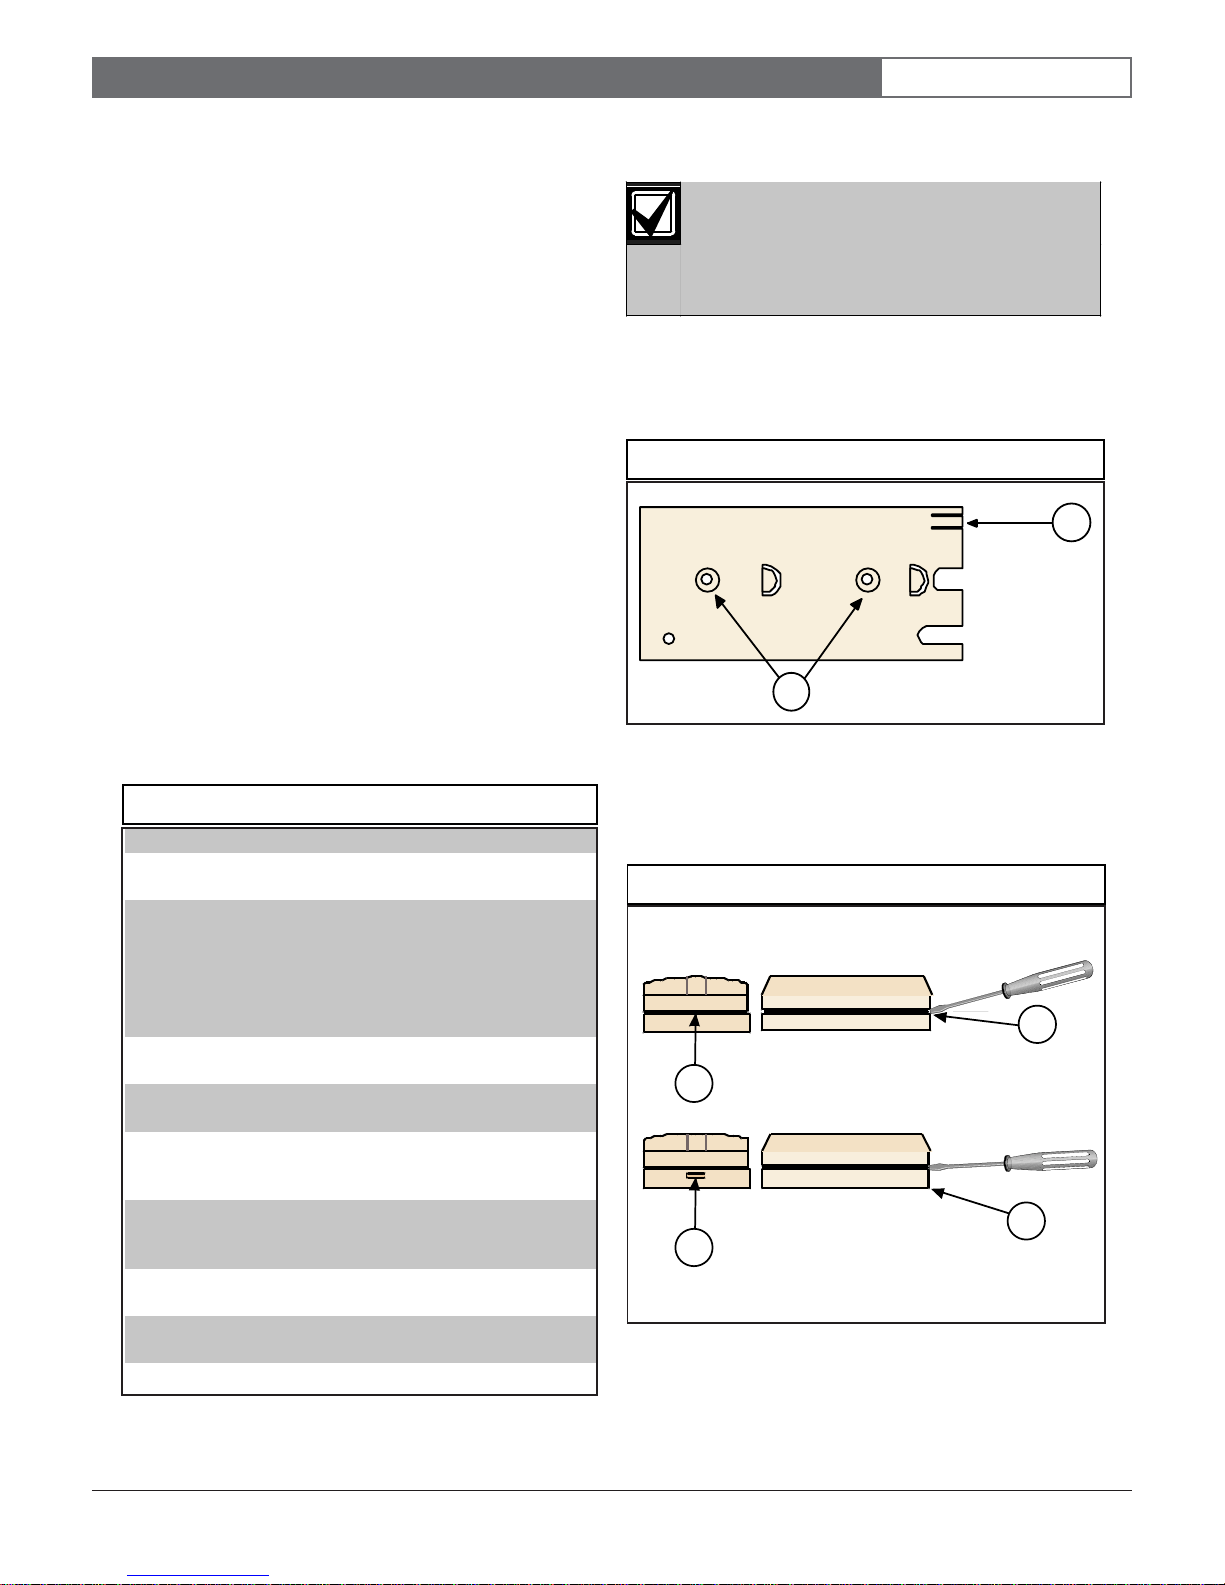
1. Position the mounting plate over the desired
location and attach it with the supplied screws.
Figure 1: Attach Mounting Plate
2.0 Specifications
Table 1: Specifications
Description
Dimensions
(H x W x D)
Operating
Temperature
Operating
Voltage
Battery Life
Recommended
Battery Types
Compatible
Receivers
Options
SE3401 Wireless Point Tracking
Transmitter
Transmitter without Mounting Plate:
35 mm x 76.5 mm x 19 mm
(1.4 in. x 3.25 in. x 0.75 in.)
Mounting Plate:
35 mm x 76.5 mm x 3.2 mm
(1.4 in. x 3.25 in. x 0.125 in.)
-20°C to +65°C (-4°F to +150°F)
Supplied by a 3 VDC lithium battery.
Up to five years under normal usage
with the recommended battery types.
Higher usage decreases battery life.
Duracell DL 123A,
Energizer EL 123AP, or
Panasonic CR 123A
EA102A-304
Magnet-RF-10 Assembly (supplied in
packages of ten)
1 - Release tab
2 - Mounting holes
2. Depending on the product you are using, select the
picture that best describes it to open the cover.
Figure 2: Open Cover
1 - Insert screwdriver and press here
2 - Push in
Bosch Security Systems | 6/03 | 40281E
SE3401 | Installation Instructions |
3.0 Mounting the Point Transmitter
EN | 3
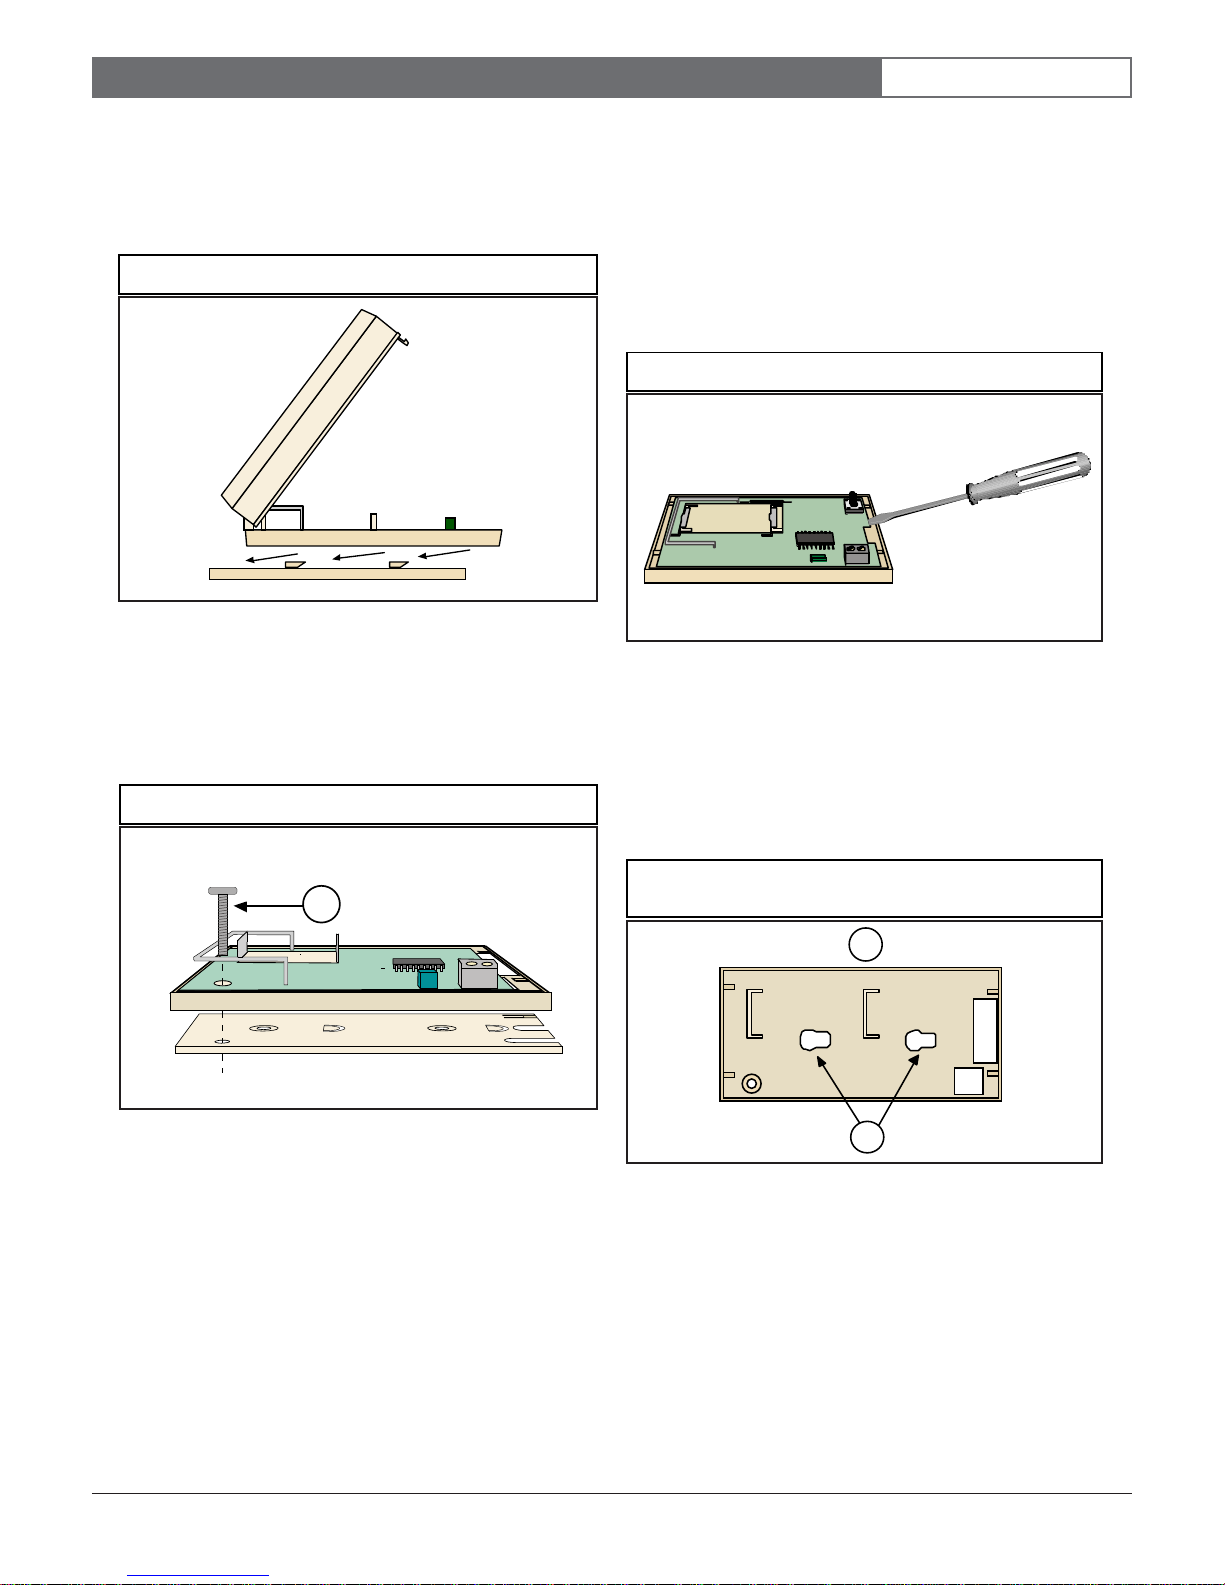
3. Be sure to note the location of the magnet when
mounting the base.
4. Slide the point transmitter over the base to lock it
into place as shown is Figure 3.
Figure 3: Slide Point Transmitter Over Base
5. The point transmitter can be released from the base
by pressing the release tab with a small screwdriver
or a paper clip.
6. For higher security installations, mount the
transmitter using the tamper screw provided (see
Figure 4).
Figure 4: Mount Transmitter Using Tamper Screw
3.2 Mounting Without the Mounting Plate
1. If the battery was installed in the point transmitter,
remove it at this time.
2. Using a small screwdriver, gently lift the printed
circuit board away from the case mounting clips.
You do not need to remove the cover to remove the
board.
Figure 5: Lift Printed Circuit Board
3. Rock the board gently to loosen the battery clips
from the case and slide the board away from the
mounting clips near the area where the cover
connects to the base.
4. Mount the point transmitter in the desired location,
taking note the magnet needs to be on the same side
of the case as the reed switch.
1 - Tamper screw
Figure 6: Mount Point Transmitter in Desired
1
1 - Magnet side
2 - Mounting holes
Location
1
2
Bosch Security Systems | 6/03 | 40281E
 Loading...