Bosch MCM68830AU, MCM68861AU User Manual

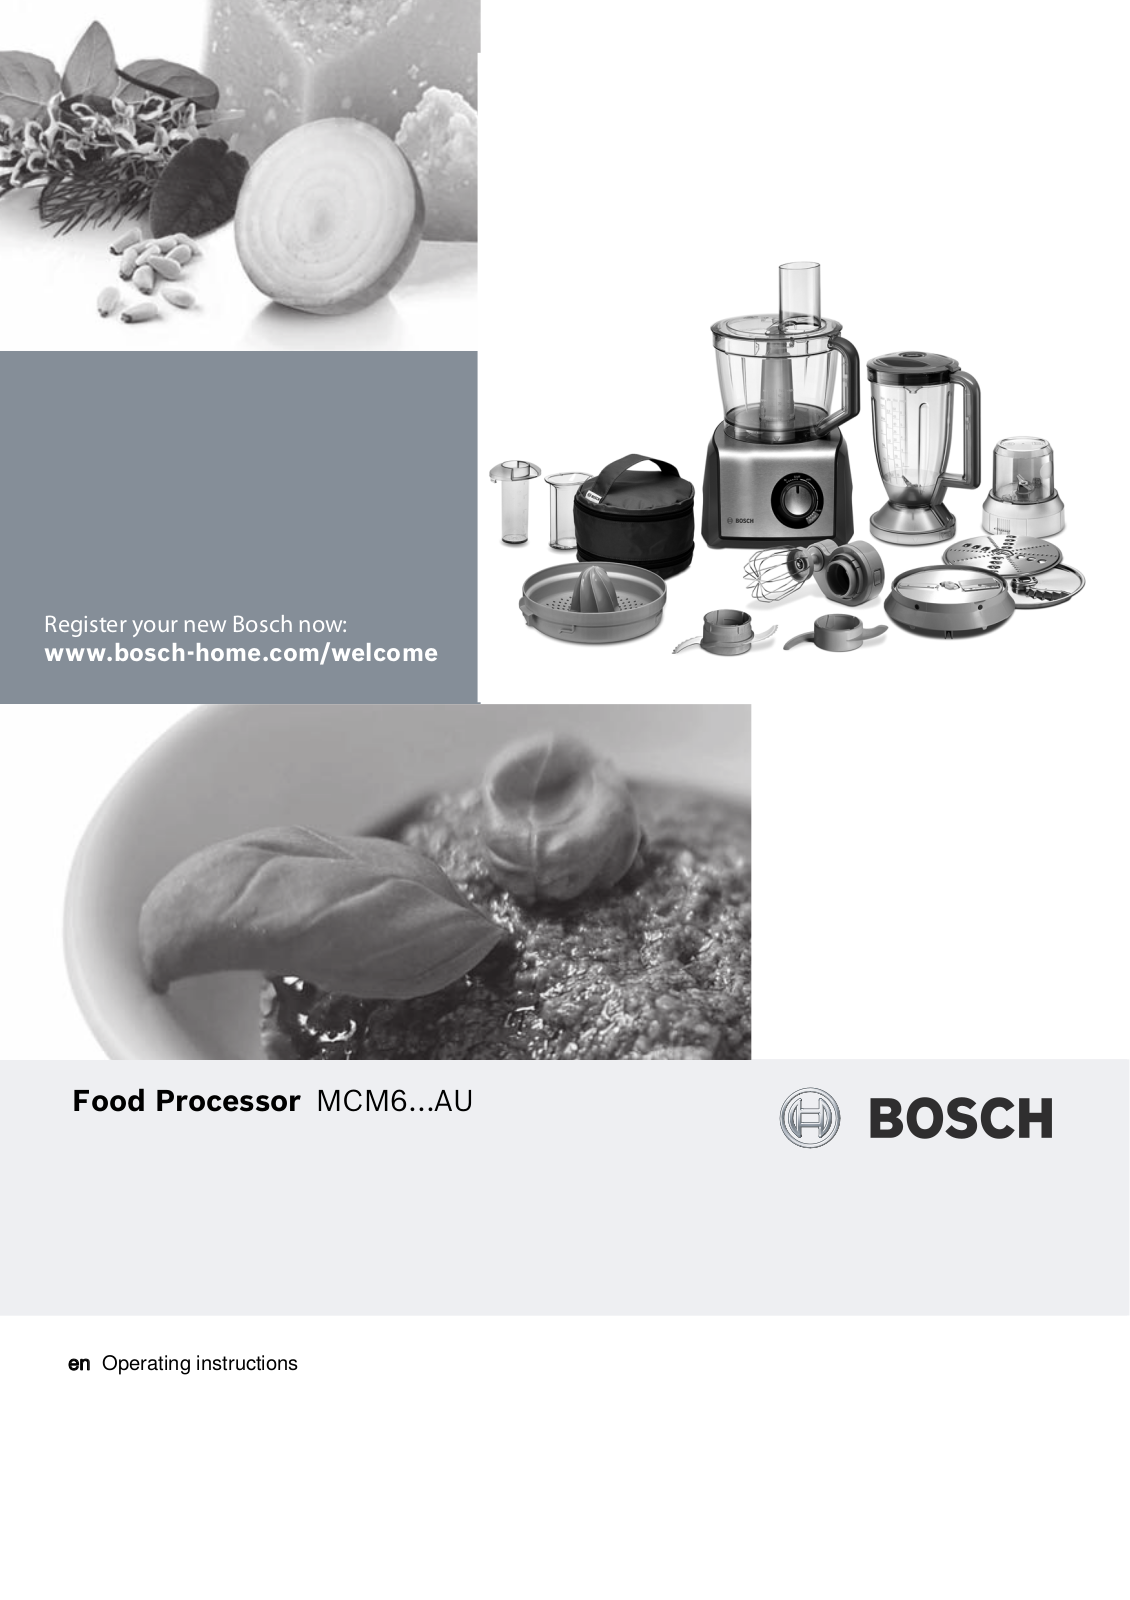
Register your new Bosch now: www.bosch-home.com/welcome

Food Processor MCM6...AU

en Operating instructions

en

Congratulations on the purchase of your new BOSCH appliance.

In doing so, you have opted for a modern, high-quality domestic appliance.

You can find further information about our products on our web page.

Contents

For your safety . . . . . . . . . . . . . . . . . . . 2 Overview . . . . . . . . . . . . . . . . . . . . . . . . 4 Operation . . . . . . . . . . . . . . . . . . . . . . . 5 Recommended applications . . . . . . . . . 10 Cleaning and servicing . . . . . . . . . . . . . 10 Storage . . . . . . . . . . . . . . . . . . . . . . . . . 11 Troubleshooting . . . . . . . . . . . . . . . . . . 11 Extra accessories . . . . . . . . . . . . . . . . . 12 Instructions on disposal . . . . . . . . . . . . . 12 Warranty conditions . . . . . . . . . . . . . . . 12

For your safety

Beforeuse,readtheseinstructionscarefullyinordertobecomefamiliar with important safety and operating instructions for this appliance.

If the instructions for correct use of the appliance are not observed, the manufacturer’s liability for any resulting damage will be excluded. Thisapplianceisdesignedforprocessingnormalhouseholdquantities in the home or similar quantities in non-industrial applications.

Non-industrial applications include e.g. use in employee kitchens in shops, offices, agricultural and other commercial businesses, as well as use by guests in boarding houses, small hotels and similar dwellings. Use the appliance for processing normal amounts of food for the household.

This appliance is suitable for mixing, kneading, beating, slicing and shredding food. Other applications are possible if the accessories approved by the manufacturer are used. It must not be used

for processing other objects or substances. Use the appliance with original accessories only.

Please keep the Operating instructions in a safe place.

If passing on the appliance to a third party, always include the Operating instructions.

, General safety instructions

Electric shock risk

The appliance must not be used by children.

The appliance and its power cord must be kept away from children. Appliances can be used by persons with reduced physical, sensory or mentalcapabilitiesorlackofexperienceandknowledgeiftheyhave been given supervision or instruction concerning use of the appliance in a safe way and if they understand the hazards involved.

Children shall not play with the appliance.

Connect and operate the appliance only in accordance with the specifications on the rating plate. Do not use outdoors. Do not use the appliance if the power cord and/or appliance are damaged.

2

Robert Bosch Hausgeräte GmbH

en

Switch off the appliance and disconnect from supply before changing accessories or approaching parts that move in use.

Always disconnect the appliance from the supply if it is left unattended and before assembling, disassembling or cleaning.

Do not place the power cord over sharp edges or hot surfaces. To prevent injury, a damaged power cord must be replaced by the

manufacturer or his customer service or a similarly qualified person. Only our customer service may repair the appliance.

, Safety instructions for this appliance

Risk of injury Electric shock risk

If the power is interrupted, the appliance remains switched on and restarts when the power is restored.

Change accessories and tools only when the appliance is at a standstill (rotary switch on 0/off) and the mains plug has been pulled out.

Never immerse the base unit in liquids or place under running water and do not clean in the dishwasher.

Before rectifying a fault, pull out the mains plug. Risk of injury from the rotating tools!

While the appliance is operating, never place fingers in the mixing bowl.Alwaysusethepusherforaddingingredients.Afterswitchingoff, the drive continues running for a short time. Change tools only when the drive is at a standstill.

Risk of injury from sharp blades!

Grip the universal blade by the edge of the plastic handle only. When not in use, always store the universal blade in the blade guard. Do not put fingers in the feed tube. Only use the pusher when adding more ingredients.

Do not grip the sharp blades or edges of the cutting discs. Take hold of cutting discs by the edge only.

Risk of injury from sharp blades/rotating drive!

Never place fingers in the attached blender! Do not remove/attach the blenderuntilthedriveisatastandstill.Donottouchblenderblades with bare hands. Clean them with a brush.

Risk of scalding!

If processing hot liquids, steam escapes through the funnel in the lid. Add a max. 0.4 litres of hot or frothing liquid.

Robert Bosch Hausgeräte GmbH

3

Bosch MCM68830AU, MCM68861AU User Manual

en

, Explanation of the symbols on the appliance or accessory

Follow the instructions in the operating instructions.

Caution! Rotating blades.

Caution! Rotating tools.

Do not place fingers in the feed tube.

These operating instructions refer to various models. An overview of the different models can be found on the illustrated pages

(Fig.)

Overview

Please fold out the illustrated pages.

Fig. Base unit

1Rotary switch 0/off = Stop

M=Instantaneousswitchingatmaximum speed, hold switch for required blending duration.

min/max = Operating speed steplessly adjustable from low to high speed.

Pulse = Switch position for intermittent operation at maximum speed. Recommended for making e.g. milkshakes in the blender.

2Operating indicator

Lights up while the appliance is operating.

Flashesiftheappliancehasbeenoperated incorrectly, the electronic fuse has tripped or the appliance is defective – see section “Troubleshooting”.

3 Drive

4 Cord store

Bowl with accessories 5 Bowl

6 Lid

7a) Pusher

b) Pusher insert

Tools

8 Drive shaft

9 Tool holder

10Universal blade with blade guard

11Kneading hook

12Stirrer

13Disc holder

14Reversible slicing disc – thick/thin

15Reversible shredding disc – coarse/fine

16Chipper disc *

17Asian vegetable disc *

18Citrus press *

a)Strainer basket

b)Pressing cone

19Dicer with drive shaft *

a)Drive shaft

b)Base holder

c)Catch

d)Blade insert

e)Slicing disc

f)Blade cover

g)Cutting grid cleaner

20Universal cutter *

a)Jug with drive

b)Lid

21Blender

a)Blender jug with drive

b)Lid

c)Refill opening

d)Funnel

22Accessories bag *

* Not all models.

4

Robert Bosch Hausgeräte GmbH

Operation

Before operating the appliance and accessories for the first time, clean thoroughly; see “Cleaning and servicing”.

Warning!

Use only the rotary switch (1) to switch theappliance on or off.

Switchingofftheappliancebyopeningthelid (6, 20b, 21b) will damage the appliance.

Important!

Bowl (5), lid/jug of the universal cutter (20) andblenderjug(21a)arenotsuitableforuse in the microwave!

Preparation

Place the base unit on a smooth, clean surface.

Pull cord out of the cord store to the required length.

Bowl with accessories/tools

Risk of injury from the rotating tools!

Whiletheapplianceisoperating,neverplace fingers in the mixing bowl.

Always use the pusher (7) for adding ingredients.After switching off, the drive continues running for a short time.Change tools only when thedrive is at a standstill.

Warning!

When working with the bowl, the appliance cannot be switched on until the bowl has been attachedandthelidhasbeenattached and screwed on tight.

Universal blade (10) for cutting and chopping.

Risk of injury from sharp blades!

Grip the universal blade by the edge of the plastic handle only.

When not in use, always store the universal blade in the blade guard.

en

Kneading hook (11)

for stirring and kneading dough and for mixing in ingredients which are not to be cut.

Stirrer (12)

for cream, beaten egg white and light dough. Not suitable for solid ingredients.

Before using, fit stirrer.

Insert stirrer into drive housing and lock into position (Fig. -5b).

Fig.

Attach the bowl (arrow on bowl on dot on the appliance) and rotate as far as possible in a clockwise direction.

Inserting universal blade/kneading hook:

Pressthedriveshaftintothetoolholder until it locks into position.

Insert tool holder into the bowl.

Place universal blade/kneading hook into the tool holder and let go.

Inserting stirrer:

Insert drive shaft into the bowl.

Attach stirrer with a slight rotation to the drive shaft.

Warning!

Addingredientstobeprocessedalwaysafter the tool has been inserted.

Add ingredients.

Attach lid (match arrow on lid on dot on bowl) and rotate in a clockwise direction.

Lid lug must be located fully in the slot in the bowl handle.

Insert pusher and pusher insert.

Insert the mains plug.

Set the rotary switch to the desired setting.

To add more ingredients, set the rotary switch to 0/off.

Remove the pusher and add ingredients through the feed tube.

Add liquids through the pusher. Pusher insert can be used as a measuring jug.

Robert Bosch Hausgeräte GmbH

5

en

Cutting discs

Risk of injury from sharp blades!

Do not grip the sharp blades or edges of the cutting discs.Take hold of cutting discs by the edge only.

Reversible slicing disc – thick/thin (14)

for slicing fruit and vegetables.

Designation on the reversible slicing disc: “1” for the thick slicing side

“3” for the thin slicing side

Warning!

The reversible slicing disc is not suitable for slicinghardcheese,bread,rollsorchocolate. Slice boiled, waxy potatoes only when they are cold.

Reversible shredding disc – coarse/fine (15)

for shredding vegetables, fruit and cheese, except for hard cheese (e.g. Parmesan).

Designationonthereversibleshreddingdisc: “2” for the coarse shredding side

“4” for the fine shredding side

Warning!

The reversible shredding disc is not suitable for shredding nuts.Shred soft cheese with the coarse side only.

Chipper disc (16) For slicing raw potatoes for chips.

Asian vegetable disc (17)

Slices fruit and vegetables into fine strips for Asian vegetable dishes.

Note:

Attach chipper disc or Asian vegetable disc with the blade face up.

Discs suitable for further purposes are available from dealers (see the chapter “Optional accessories”).

Fig.

Attach the bowl (arrow on bowl on dot on the appliance) and rotate as far as possible in a clockwise direction.

Insert drive shaft into the bowl.

Take disc out of the protective cover.

Place disc on disc holder.

Turn required slicing/shredding side face up. Place disc onto the disc holder such thatthedrivecouplingsonthedischolder gripintothediscopenings.Discmustrest on the lateral lug of the disc holder.

Lightly rotating, attach disc holder to the drive shaft.

Risk of injury from sharp blades!

Do not place fingers in the feed tube. Only use the pusher when pushing down ingredients.

Attach lid (match arrow on lid on dot on bowl) and rotate in a clockwise direction.

Lid lug must be located fully in the slot in the bowl handle.

Insert pusher and pusher insert.

Insert the mains plug.

Set the rotary switch to the desired setting.

Fill with contents which are to be sliced or shredded. When adding contents which are to be sliced or shredded, apply only light pressure to the pusher.

Remove the pusher and add ingredients through the feed tube.

Add long and thin sliced contents by using the pusher. To do this, remove pusher insert.

Warning!

Empty the bowl before it becomes so full that the sliced or shredded contents reach the disc holder.

Instructions for cutting chocolate:

Add chocolate before switching on the appliance and cover with the pusher.

After switching on the appliance, push down with the pusher.

After using the appliance

Set the rotary switch to 0/off.

Remove mains plug.

Rotate the lid in an anti-clockwise direction and remove.

Remove tool:

Take the tool holder together with universal blade or kneading hook out of the bowl. Remove the tools from the tool holder.

After cleaning the universal blade, attach the blade guard.

Remove stirrer from drive shaft. Take drive shaft out of bowl. Dismantle stirrer for cleaning (Fig. ).

Lift the disc holder on the recesses from the bowl. Take out discs. Take drive shaft out of bowl.

6

Robert Bosch Hausgeräte GmbH

Rotate the bowl in an anti-clockwise direction and remove.

Clean all parts, see “Cleaning and servicing”.

Citrus press

for pressing the juice out of citrus fruits, e.g. oranges, grapefruits, lemons.

Warning!

The citrus press must be completely assembled before use.

Fig.

Attach the bowl (arrow on bowl on dot on the appliance) and rotate as far as possible in a clockwise direction.

Insert drive shaft into the bowl.

Attach the strainer basket to the drive shaft (arrow on citrus press on dot on the bowl) and rotate in a clockwise direction. The lug on the strainer basket must be located fully in the slot in the bowl handle.

Attach and press on pressing cone.

Insert the mains plug.

To extract juice from the fruits, set the rotary switch to low speed and press the fruit onto the pressing cone.

Warning!

Check the level.Maximum processing quantity: 1000 ml fruit juice.

After using the appliance

Set the rotary switch to 0/off.

Remove mains plug.

Rotate the citrus press in an anticlockwise direction and remove.

Rotate the bowl in an anti-clockwise direction and remove.

Clean all parts, see “Cleaning and servicing”.

en

Dicer

Dicer for cutting food into cube shapes.

Risk of injury from sharp blades/ rotating drive!

Never place fingers in the attached dicer!

Donotremove/attachthediceruntilthedrive is at a standstill.

The dicer will not operate until the lid has been screwed on tight.

When disassembling/assembling the dicer, take hold of the slicing disc by the plastic stud in the centre only.

Warning!

Application guidelines!

The dicer is suitable only for dicing potatoes (raw or boiled), carrots, cucumbers, tomatoes, peppers, onions, bananas, apples, pears,strawberries,melons,kiwis,eggs,soft pork sausage (e.g.Mortadella), boiled or fried boneless poultry.

Very soft cheese (e.g.Mozarella, Feta) can not be processed.

In the case of cheese slices (e.g.Gouda) and hard cheese (e.g.Emmentaler) thequantityprocessed inonecyclemustnot exceed 3 kg.

Before processing pip and stone fruits (apples, peaches, etc.), remove the pips orstones.Before processing boiled

or fried meat, remove the bones. Food must not be frozen.

If these guidelines are not observed, thedicer, including the cutting grid and therotating blade, may be damaged.

If the dicer is not used as intended, is modifiedorisusedimproperly,RobertBosch Hausgeräte GmbH cannot assume liability for any resulting damage.

Also excluded is the liability for damage (e.g.blunt or deformed blades) which result from the processing of unapproved food.

Important information

When working withthedicer, use thedrive shaft supplied with the dicer (Fig. -2).

Robert Bosch Hausgeräte GmbH

7

en

Selectoperatingspeedaccordingtothefood to be diced.

Low operating speed („min“):

boiled potatoes, potatoes, carrots and eggs; cucumbers; bananas; strawberries; melons.

Medium operating speed:

raw potatoes and carrots; soft sausage (e.g. Mortadella); cheese slices, hard cheese; peppers, tomatoes, onions; apples, kiwifruit.

Warning!

When working with the dicer, never use intermittent operation (Pulse).

Important information:

Food must not contain any bones, pips or other solid constituents.

Food must not be frozen.

Fruit/vegetables should not be too ripe, as the juice may escape.

Leave cooked food to cool down before dicing it, as it will then be firmer and the dicing result will be better.

Thelengthofthecubescanbeinfluenced by increasing or reducing the pressure on the pusher.

Assembling the dicer

Fig.

Insert the blade insert into the base holder. Observe recesses!

Insert the dicing disc into the base holder.

Pressupthe4catchesuntiltheylockinto position.

Working with the dicer

Fig.

Placedriveshaftforthediceronthedrive on the base unit.

Attach the bowl (arrow on bowl on dot on the appliance) and rotate as far as possible in a clockwise direction.

Insert the dicer.

The arrow on the dicer and the arrow on the bowl must be in alignment!

Dicermustbepositionedfullyonthedrive shaft!Ifrequired,turnthebladeinsertinto the correct position using the blade cover (Fig. -6).

Remove the blade cover.

Attach lid (match arrow on lid on dot on bowl) and rotate in a clockwise direction.

Lid lug must be located fully in the slot in the bowl handle.

Insert pusher and pusher insert.

Insert the mains plug.

Set the rotary switch to the desired setting.

Place the food to be diced in the feed tube. If required, apply light pressure to the pusher. If required, chop up food beforehand.

Warning!

Empty the bowl without delay:

after processing 500 g,

before the cubes have reached the lower edge of the dicer.

After using the appliance

Set the rotary switch to 0/off.

Remove mains plug.

Rotate the lid in an anti-clockwise direction and remove.

Attach the blade cover.

Take dicer out of the bowl.

Rotate the bowl in an anti-clockwise direction and remove.

Remove the drive shaft.

Remove food remnants from the cutting grid using the cutting grid cleaner.

Blender

for blending liquid or semi-solid food, for cutting/chopping raw fruit and vegetables, for puréeing food.

Risk of injury from sharp blades/ rotating drive!

Never place fingers in the attached blender!

Blenderwillnotoperateuntilthelidhasbeen screwed on tight.Do not remove the blender until the drive is at a standstill.

Risk of scalding!

If processing hot liquids, steam escapes through the funnel in the lid.Add a max. 0.4 litres of hot or frothing liquid.

Warning!

Blender may be damaged.Do not process deep-frozen ingredients (except ice cubes). Do not operate blender when empty.

8

Robert Bosch Hausgeräte GmbH

Loading...
+ 16 hidden pages