BOSCH KDW 40402 User Manual [fr]

BOSCH KDW 40402 User Manual


$%

%"1!4#(2!.,%)34.'


%.

0%1!3).' ).2314#3)/.2

&1

/3)#% $ 43),)2!3)/.

)3

23148)/.)

0%1 , 42/

.,

%"14)+2!!.6)*8).'

$!

14'2!.5)2.).'

./

14+2!.5)2.).'

25

14+2!.5)2.).'

&)

9733</(*%

%2

.2314##)/.%2 $% 42/

03

.2314:;%2 $% 2%15):/


ç å

óç


t

u

t t


.3%1.%3 (330 666 "/2#(=(!42'%1!%3% $%/2#( .&/= %!- %, 1 5 5 12 ).

1 21

de Inhaltsverzeichnis

'+4#'0# 72/ +10,/%2+%


6


) 0!+ #'+,/"+#+


'+4#'0# 72 &/#/

'!/'1


6

/ (1'0! '-0 72/

#'+) %#/2+%


#/91

(#++#+)#/+#+


#/91

/#'+'%#+


#"'#+

)#+"#


+#/%'# 0- /#+


2*1#*-#/ 12/ 2+" #)>$12+%


#1/'#

0%#/920!


# !&1#+


0#)

01


# #+


)#'+#

1=/2+%#+


#/91

+0!&)'#8#+


9


2+"#+"'#+01

#/91

200!& )1#+


en Index

+01/2!1',+0 ,+ --)' +!#

"'0-,0 )


5

// +%'+%


,11)#0

'+ 1

--)' +!#


9

$#16 '+$,/* 1',+


5

/ !1'! )

1'-0

$,/

01,/'+%

4'+#


#11'+%

1,

(+,4

6,2/

--)' +!#


)# +'+%


1

/#$/'%#/ 1,/


0!'


'-0 $,/


0 3'+% #+#/%6


,1#

* '#+1

1#*-#/ 12/#


-#/ 1'+%

+,'0#0


+"

3#+1') 1',+


$ 2)10

6,2/0#)

$


)'*'+ 1'+% *'+,/


,++#!1'+%

1

--)' +!#


201,*#/

0#/3'!#


4'1!&'+%

,$$ 1

--)' +!#


9


fr Table

des

matières


,+0#')0

-,2/

)


*'0#

2

/# 21


+%#*#+1

"#0

,21#'))#0


,+0'%+#0

"#

0;!2/'1;


,+0#')0

-/ 1'.2#0

-,2/

)#


/;0#+1 1',+

"#

) -- /#')


6


/ +%#*#+1

"#0

,21#'))#0

"#

3'+


9


+"# 2

"#

!,** +"#


6


#11,6 %#

"# ) -- /#')


,+0'%+#0

-,2/

) 1#*-;/ 12/#


!,+,*'#0

" ;+#/%'#


* ' +1#

#1 ) ;/ 1',+


/2'10 "# $,+!1',++#*#+1


/ +!*#+1 "# ) -- /#')


#*;"'#/ 0,'?*<*#

25


-#1'1#0

- ++#0


'0# &,/0

1#+0',+

"#

) -- /#')


#/3'!#

-/:0?3#+1#


it Istruzioni

per

l uso


vvertenze


per

lo

smaltimento


Sistemare


le


bottiglie


vvertenze


per

la

Vostra


sicurezza


onsigli pratici per la

conservazione


onoscere

l apparecchio


6


del vino


9


Pannello

comandi


6


Pulire

l apparecchio


onsiderare la temperatura


ambiente


Risparmiare


energia


e la ventilazione


Rumori di

funzionamento


ollegare


l apparecchio


Eliminare

da


soli

piccoli

guasti


Spegnere l apparecchio


Servizio

assistenza

clienti


nl Inhoud


anwijzingen over de afvoer


Flessen

inruimen


Veiligheidsvoorschriften


Praktische


tips bij het opslaan


van

wijn


Kennismaking

met

het

apparaat


5

Schoonmaken van het apparaat


9


edieningspaneel


5


Energie

besparen


9


Let op omgevingstemperatuur en


edrijfsgeluiden


5


beluchting


6


zelf


verhelpen


5


Kleine

storingen


pparaat


aansluiten


6


5


Servicedienst


Uitschakelen van het apparaat


da Inholdsfortegnelse


ortskaffelset

5


Placering af flasker


55


Sikkerhedsanvisninger

og

advarsler


5


Praktiske

tips

vedrørende


Lær skabet

at

kende


5

opbevaring

af

vin


56


etjeningspanel


5


Rengøring


56


Lagttag

rumtemperaturen


Sådan

sparer

du

energi


5


og ventilationen


5


Tips mht

driftsstøj


5


Elektrisk tilslutning


5


fhjælpning

af

små


forstyrrelser


5


Sluk


55


Kundeservice


59


no Bruksanvisning


Veiledning om utrangering


6

Påfylling av flaskene


6


Sikkerhetsveiledninger


6


Tips for lagring

av vin


6

li kjent


med

apparatet


6

Rengjøring


65


etjeningspanel

6


Slik kan du spare energi


65

Klimaatklasse

7

toelaatbare


Driftsstøy


66


omgevingstemperatuur


6


som du

kan

rette

på selv


Små feil


Tilkopling


av

apparatet


6


6


Kundeservice


Utkopling


6


sv Bruksanvisning

Råd beträffande avfallshantering. . . . . .68

Lägga in

flaskor. . . . . . . . . . . . .71. .

Säkerhetsanvisningar . . . .

.

.

.

.

. 68.

. . .Praktiska. .

tips för vinlagring. . . . . . . . .72. .

Lär känna ditt kylskåp. . . .

.

.

.

.

. .

.69.

.Rengöring. .

och skötsel. . . . . . . . . .72. .

Kontrollpanel . . . . . . . . . . . . .70. . . Så. . här. . kan. . du spara energi. . . . . . . . . .73.

Observera

rumstemperatur


Driftsljud .


. . . . . . . . . . . . . .73. . .

och ventilation. . . . . . . . . . . .

.70. . . . . . . .

man själv kan avhjälpa. . .

. .

74


Enklare fel


Ansluta skåpet. . . . . . . . . . . .

.70. . . . . .

.

.

.

. . . . . . . . . . . .

. 75. . . .


Service .


Stänga av

strömmen. . . .

. . . . . .

.71. . . . .


fi Käyttöohje

Hävittämisohjeita . . . . . . . . . . . 76.

. . .Pullojen. . .

.sijoittaminen kaappiin. .

. . . . .80.

Turvallisuusohjeita . . . . . . . . . . .76. . . Viinien. . . .säilytysvihjeitä. . . . . . . . . . 81. . .

Tutustuminen laitteeseen. . . . . . . . 78. . . Laitteen. puhdistus. . . . . . .

. . . . 81. . .

Ohjaustaulu . . . . . . . . . . . . . 78. . . .Näin. . voit. . .säästää.

energiaa. . . . . . . . .82. .

Huomioi

sijoitustilan

lämpötila


Käyttöäänet . . . . . . . . .

. . .

. 82. . . .

ja ilmankierto. . . .

. .

. . . . . .

.

78. . . . . . . . .


. . .

. .83.


Ohjeita

käyttöhäiriöiden varalle. .

Laitteen

liitäntä. . .

. .

. . . . . .

.

.79. . . . . . . .


Huoltopalvelu . . . . . . . . . . . . .83. . .

Laitteen

kytkeminen

pois

toiminnasta. .


80


es Índice

Consejos para la eliminación y el


Colocar

y

ordenar

las botellas. . . . . . . .89

desguace de los aparatos usados. . . .

. 84

Consejos


prácticos

para

almacenar

Consejos de

seguridad

y advertencias


las botellas

de

vino.

. .

. . . .

. . . . 90. . .

de carácter

general. . . . . . . . . .

. 84. . . . . .

del

aparato. . .

. . . . . . . .90. .


Limpieza

Familiarizándose con la

unidad. . . . . .

. 86.

Consejos


prácticos

para

ahorrar

energía

Cuadro de mandos. . . . . . . . . . . 87. . .eléctrica. . . . . . . . . . . . .

. . . . .91. . .

Prestar atención a la temperatura


Advertencias

sobre

los ruidos

de


del entorno y la ventilación. . . .

.

.

.

. .87.

.funcionamiento del aparato . . . .

. .

. 92. . .

Conexión del aparato. . . . . .

.

.

.

. 88. .

.Pequeñas. .

averías

de fácil solución. .

.

. .

93

Desconectar el aparato. . . . .

.

.

.

. .89.

. Servicio. .

de

Asistencia Técnica. . .

. .

.

. 94.

pt Indicacões

Instruções sobre Reciclagem. . . . . . . 95. .


Arrumação das Garrafas. . . . . . . . . 99. . .

Indicações

sobre


segurança. . .

. .

.

.

.95.

. Conselhos

práticos

para


Familiarização

com

o

aparelho. .

. .

.

.

. 97.

armazenamento

do vinho. . . . . . .

.100. . .


Painel de

comandos. . . . . .

. .

.

.


Limpeza . . . . . . . . . . . . . . 101. . . .


.97. . . . .


Ter em atenção a temperatura


Como

poupar

energia. . . . . . . .

.

.101. . .


ambiente e a ventilação. . . . . . . . . . 98. .

Ruídos. .

de funcionamento. . . . . . . .102. . .


Ligação do aparelho à corrente. . . . . . .98

Eliminação de pequenas anomalias. . . . 102


Desligar o aparelho. . . . . . .

. .

.


.99. .

. Assistência. . .

Técnica. . . . . . . . .

.

103. . . .


el Ресйечьменб


'& % )

'0*,(* )


( !+ ! )

*,# &," )

+$


'& % )


+$

*-"

* )


'& ! ,*

!( * &1


$/( *+

+

*,*! ,


6


( *#0)

+ )

*,*! , )


$! )

. ( *#&1


7


¸+*


#'&( +

$


%& !&$ * +


(&*&.

*. + !

# +

(#&!( *


$(


0(, &


" +&,( )


+&,

.2(&,

!


+&$


( *#0


7


1$*

+ )

*,*! , )


2)


&( 2* +

#0$) &


# !(& " )


*

!+0)

" +&,( )


* )


+ .$ ! )

%,' ( + * )


&'& + *

- "2$


' ( *


' " +2$


tr ŽçŽndeki er


! )% !$!$)!


5


2!3$)!& )$3+!)!$% *!


5-&$!#

!$!$)!


6


2 ) ($)1& ('$&% *1 ##1&


!

/1

&1%


) )$1

!$!$)


,% & ( &$!


!

/1&

%!/$&% *!


*1 #$101& - - $& 1)% .


& )"! + * )), !$!$)!


!## + !$% *!


')%$ 4$13%

* *$)!

5)5$+5$)!


!

/1&

$#+)!0


0$&% *1


9


545# )1/$)1& ! )!$% *!


!

/1&

# ( +1$% *1


+#!$!

* )-!*


Altgeräte sind kein wertloser Abfall! Durch umweltgerechte Entsorgung können wertvolle ohstoffe wiedergewonnen werden.
Lesen ie Gebrauchs> und Montageanleitung aufmerksam durch! ie enthalten wichtige Informationen über Aufstellen, Gebrauch und Wartung des Gerätes.

de

Hinweise

zur

Hinweise zu Ihrer

Entsorgung

Sicherheit

Altgerät

entsorgen

Bevor Sie das Gerät in

Bitte beachten, wenn Ihr neues

Gerät Betriebein

nehmen

Altgerät ersetzt.


Altgerät

unbrauchbar


machen:


Der

Hersteller

haftet

nicht,

wenn

ie

die


Hinweise

und

Warnungen

der


1. Netzstecker

ziehen,


Gebrauchsanweisung

missachten.


2. Anschlusskabel

durchtrennen

und

mit Bewahren

ie

Gebrauchs>

und


dem

Netzstecker


entfernen,


Montageanweisung

für

einen


Nachbesitzer

auf.


3. Türschloss

entfernen,

damit

spielen-


de

Kinder

sich

nicht

einsperren und


in

Lebensgefahr


geraten.


Warnungen


ältegeräte

enthalten


ältemittel

und

in


Das

Gerät enthält in geringer Menge


das

umweltfreundliche

aber

brennbare

der Isolierung Gase. ältemittel und Gase ältemittel 600a. Achten ie darauf,

müssen

fachgerecht


entsorgt

werden.


dass

die

ohre

des


ohre des ältemittel> reislaufes bis zur


ältemittel> reislaufes bei ransport


fachgerechten

Entsorgung

nicht


oder

Montage

nicht

beschädigt

werden.

beschädigen.


Herausspritzendes ältemittel kann zu


Verpackung

entsorgen


Augenverletzungen

führen

oder


sich


entzünden.


Achtung:


Wenn

ältemittel

austritt,

darauf

achten:


Verpackungsmaterial


ist

kein


- dass kein offenes Feuer oder


Spielzeug

für Kinder

-


Zündquellen


in

der

Nähe

sind.


Erstickungsgefahr

durch

Faltkartons


-

Netzstecker

ziehen,

aum

für einige

und

Folien!


Minuten

gut

durchlüften.


Ihr neues

Gerät

wurde auf

dem Weg

zu

mehr

ältemittel

in

einem

Gerät

ist,

Ihnen

durch

die

Verpackung

geschützt.


Je


umso

größer


muss

der

aum

sein,

in

Alle

eingesetzten

Materialien

sind


dem

das

Gerät

steht.

In

zu

kleinen


umweltverträglich

und

wieder

verwertbar.


äumen kann bei einem Leck ein


Bitte helfen ie mit:


Entsorgen

ie

die


brennbares

Gas>Luft>Gemisch


Verpackung


umweltgerecht.


entstehen.


Über aktuelle Entsorgungswege informieren ie sich bitte bei Ihrem Fachhändler oder bei der Gemeindeverwaltung.

ro

8 g ältemittel

muss

der

aum


3


Menge

mindestens 1 mgroß sein. Die

des ältemittels Ihres Gerätes

steht auf

dem

ypschild im

Inneren

des

Gerätes.

6


de


Bei

Notfällen


Nur

Fachkräfte dürfen

Reparaturen

-

Augen

ausspülen

und Arzt


durchführen.

Unsachgemäße

aufsuchen.


den

Benutzer


Reparaturen können

In folgenden Fällen Netzstecker ziehen

erheblich

gefährden.


oder

Sicherung

ausschalten


Sockel, Auszüge, Türen usw. nicht als


-

Abtauen


Trittbrett

oder

zum

Abstützen

-

Reinigen


missbrauchen.


Am


Netzstecker

ziehen,

nicht

am


Hochprozentigen

Alkohol

nur dicht


verschlossen

und

stehend lagern.

Anschlusskabel.


Nie


elektrische

Geräte

innerhalb des

Bei Gerät mit Türschloss: Schlüssel

Gerätes verwenden

(z. B. Heizgeräte,


außer

Reichweite

von

Kindern


aufbewahren!


elektrische

Eisbereiter

usw.)


Keine Produkte mit brennbaren Treibgasen (z. B. Spraydosen) und keine explosiven Stoffe lagern -

Explosionsgefahr!

KunststoffBTeile und Türdichtung nicht mit Öl oder Fett verschmutzen. KunststoffBTeile und Türdichtung werden sonst porös.

Allgemeine Bestimmungen

Das Gerät ist kein Spielzeug für Kinder!

Das Gerät eignet sich

Nie

das

Gerät

mit

einem


zum Kühlen von Getränken

Dampfreinigungsgerät

abtauen


oder


reinigen!

Der

Dampf

kann

an

elektrische


Verwendung im


Das Gerät ist nur für die

Teile

gelangen

und

einen

Kurzschluss Haushalt bestimmt.


oder

einen

Stromschlag auslösen.


Das Gerät ist funkentstört nach

Beim

Gebrauch

beachten


EUBRichtlinie

89/336/EEC.


Die

Luft

an

der

Rückwand

des

Geräts


Der Kältekreislauf ist auf Dichtheit geprüft.

erwärmt

sich. Die

erwärmte

Luft

muss


ungehindert

abziehen

können.


Die

Dieses Erzeugnis entspricht

den


einschlägigen

Sicherheitsbestimmungen

Kühlmaschine

muss

sonst

mehr


leisten.


Dies erhöht den StromB verbrauch.

für Elektrogeräte (EXI 60335/2/24).


Daher: Nie BeB

und


Entlüftungsöffnungen

abdecken

oder


zustellen!


7

de

Taste ständig oder so oft drücken bis

Gerät kennenlernen gewünschtes Temperaturanzeige3 Lämpchen Bild /2a leuchtet.

Bitte klappen

Sie

die letzte

Seite mit

den


Abbildungen

aus.

Diese


2a Temperaturanzeige1Lämpchen


Gebrauchsanweisung gilt für

mehrere

Die Zahlen bei den Temperatur3

Modelle.


anzeige3

Lämpchen

bedeuten


Kühlraum3 Temperaturen

in°C Das


leuchtende Lämpchen zeigt die ein3


gestellte

Temperatur

an.


Das Lämpchen blinkt wenn die


eingestellte

Temperatur

noch nicht


erreicht

ist.


Abweichungen bei den Abbildungen sind


und

möglich.


Raumtemperatur


Belüftung

beachten

Beispiel für eine Ausstattung

Bild

113 Bedienblende

4Innenbeleuchtung

5Traggitter

6Tauwasserablaufrinne

7Korb

8Sockelblende (mit Belüftungsöffnung)

Die Klimaklasse steht auf dem Typenschild. Sie gibt an, innerhalb welcher Raumtemperaturen das Gerät betrieben werden kann.

i k


i


p


°

i

°


6 °

i

°


8 °

i

8°


8 °

i

°


Bedienblende

Bild


Belüftung


Bild


1 Ein/Aus1Taste


Die Luft an

der Rückwand

des

Geräts

Die Inbetriebnahme

wird durch

erwärmt sich. Die erwärmte Luft muss

Blinken eines der


Temperaturanzeige3

abziehen

können. Die


Lämpchen Bild /2a

angezeigt.

ungehindert


Kühlmaschine

muss

sonst

mehr

leisten.


2Temperatur1Einstelltaste Kühlraum Dies erhöht den Stromverbrauch.

Daher: Nie Be3 und Entlüftungsöffnungen Die Kühlraum3 Temperatur lässt sichabdecken oder zustellen!

von +14°C bis +°C6 einstellen

8

Vor der ersten Inbetriebnahme den Innenraum des Gerätes reinigen (siehe Reinigen).
Das Gerät ist vom Werk aus auf +10 °C Kühlraumtemperatur eingestellt.
T%mp%r!tur %)nst%ll%n
Taste B)l$ 2/1 drücken.
ach dem Aufstellen des Gerätes sollteTemperaturlämpchen +10 °C blinkt. Das Gerät beginnt zu kühlen, die
man mind. 1/2 Std. warten, bis das Gerät
Innenbeleuchtung ist bei geöffneter Tür in Betrieb genommen wird. Während des
Transports kann es vorkommen, dass eingeschaltet. sich das im Verdichter enthaltene Öl im Kältesystem verlagert.
G%rät !ns#(l)%ß%n
G%rät %)ns#(!lt%n
$%


Die

Einstellwerte

können

geändert


Die

Steckdose


werden,

siehe

Beschreibung

zur


sollte frei zugänglich sein.


Das

Gerät an

220-240 V/50 Hz


Bedienblende:

2

Temperatur;Einstelltaste

Wechselstrom


über

eine

vorschriftsmäßig


installierte

Steckdose

anschließen.

Die

H)nw%)s%

zum

B%tr)%"


Steckdose

muss

mit


einer


S)nkt

$)%

Um'%"un'st%mp%r!tur

10;A;Sicherung


oder

höher

abgesichert


sein.


unt%r

+6 °C,

%n$%t

$)%

Kü(l&unkt)on


$%s

G%rät%s.

D%r

Kü(lr!um

w)r$


B%)

G%rät%n,

$)%

)n


n)#(t<%uropä)s#(%n '%n!u so

k!lt

w)%

$)%


Län$%rn

"%tr)%"%n

w%r$%n,

)st


!u&

$%m


Um'%"un'st%mp%r!tur. A" 0 °C


Typs#()l$

zu

ü"%rprü&%n,

o"

$)%


"%st%(t

Frost'%&!(r

)m

Kü(lr!um.

!n'%'%"%n%

Sp!nnun'

un$

Strom!rt

Die

Stirnseiten

des

Gehäuses

werden

m)t

$%n

%rt%n

I(r%s

Stromn%tz%s


teilweise

leicht

beheizt,

dies

verhindert

ü"%r%)nst)mmt.

D!s

Typs#()l$

"%&)n$%t

s)#(


)m

G%rät

l)nks


unt%n.

E)n


Schwitzwasserbildung

im

Bereich

der


%v%ntu%ll


notw%n$)'%r Aust!us#( $%r


Türdichtung.


N%tz!ns#(lussl%)tun'


$!r& nur $ur#(

Während

die Kühlmaschine

läuft,

bilden

%)n%n

F!#(m!nn

%r&ol'%n.


sich

Wasserperlen

oder

Reif


an

der


!rnun'!


Rückseite


des

Kühlraumes,

dieses ist


funktionsbedingt.

Ein

Abschaben

der

Au&

k%)n%n

F!ll $!r&

$!s


G%rät !n


Reifschicht

oder

Abwischen

der


%l%ktron)s#(%


En%r')%sp!rst%#k%r


Wasserperlen

ist

nicht notwendig. Die

z.B.


E#o"oy;

S!v!

Plu'

un$

!n


Rückwand

taut

automatisch ab. Das

%#(s%lr)#(t%r,

$)%

Gl%)#(strom

)n


Tauwasser

wird in der Ablaufrinne

230 V

%#(s%lstrom


umw!n$%ln,


B)l$ 7/A aufgefangen,

zur


!n'%s#(loss%n

w%r$%n

z.B.


Kühlmaschine

geleitet

und

dort


Sol!r!nl!'%n,

S#()&&sstromn%tz% .


verdunstet.


9

Traggitter sind hinten im Gehäuse gegen Kippen gesichert.
Zum Herausnehmen, Hülsen •A"Bild 5 in Pfeilrichtung schieben, gleichzeitig Traggitter nach vorne ziehen.
Die Hülsen langsam loslassen, bis die Federn in den Hülsen entspannt sind.

de

Gerät ausschalten

Taste Bild /1 drücken. Temperaturanzeige;lämpchen Bild /a erlischt, damit ist die Kühlung und Beleuchtung ausgeschaltet.

Gerät stilllegen

Kunststoff;Teile

und

Türdichtung nicht

mit Öl oder Fett verschmutzen.

Kunststoff;Teile

und

Türdichtung

werden sonst

porös.


Achtung: Hochprozentigen Alkohol nur dicht verschlossen und stehend lagern.

Im Gerät keine explosiblen Stoffe aufbewahren.

Wenn Sie das Gerät längere Zeit nichtTraggitter herausnehmen benutzen:

1. Netzstecker ziehen

2. Gerät reinigen

3. Geräte; Tür offen lassen.

Flaschen

einordnen

Kälte Zonen im

Kühlraum


beachten!


Beim Einordnen

beachten

Durch die Luft;Zirkulation im Kühlraum

Bild 0


entstehen Zonen unterschiedlicher


Temperatur:


Insgesamt können

140

dreiviertel


Liter;Flaschen oder 128 Liter;Flaschen

Die kältesten Zonen sind an der

auf den Traggittern und im Korb

Rückwand und über der untersten

untergebracht

werden.


Ablage. Hinweis: Lagern Sie in den

Diese Stückzahlen

können erreicht

kältesten Zonen z. B.

Sekt, Weißwein,

Champagner, Rosè.


werden, wenn

die

Flaschen


gegengleich abgelegt werdenBild 6/A.

Die wärmste Zone ist ganz oben.

Die angegebene Stückzahl der

Hinweis: Lagern Sie

in der wärmsten

Zone


Flaschen kann abweichen bei anderer


z. B. Rotwein.


Flaschenform

und

Größe.


Bild 6/B Darauf achten, daß die Flaschen die Kühlraumrückwand nicht berühren. Das Tauwasser könnte über die Flaschen ins Geräte;Innere gelangen.

Warme Getränke außerhalb des Gerätes abkühlen lassen.

10

de

Praktische

Tips

zur

Gerät

reinigen


Weinlagerung


1. Achtung:

Netzstecker

ziehen oder

Flaschenweine

grundsätzlich


Sicherung

ausschalten!


ausgepackt - nicht in Kisten oder

2. Die

Türdichtung

nur

mit klarem

Wasser

Kartons

aufbewahren.


abwischen


und

danach

gründlich


Alte Flaschen müssen so gelegt

trockenreiben.


werden, daß der Kork stets benetzt

ist3. .Reinigen Sie das Gerät mit lauwarmem

Niemals

sollte

zwischen Wein

und Kork Spülwasser.

Das

Spülwasser

darf

nicht

ein Luftzwischenraum

bestehen.

in TemperaturAWähler

oder


Offene Drahtregale

eignen

sich

Beleuchtung

gelangenBild /4.


besonders gut, weil sie die


4. Nach

dem

Reinigen:

Gerät

wieder

Luftzirkulation

nicht unterbrechen und

anschließen

und

einschalten.


somit Luftfeuchtigkeit,

die

an

den

Achtung: Nie das Gerät mit einem

Flaschen

kondensiert,

schnell

wieder

Dampf) reinigungs)Gerät

reinigen!

Der

abgetrocknet

werden

kann.


Dampf

kann

an

spannungsführende


Vor dem Genuß sollte der Wein langsamTeile des Geräts gelangen und einen

•angewärmt"

(chambriert) werden:

Kurzschluss oder einen Stromschlag

Holen Sie z.

B. den Rosé ca. 2A5

auslösen! Der Dampf kann die

Stunden, den Roten 4A5 Stunden undKunststoff) Oberflächen beschädigen.

italienische Rotweine sogar

Verwenden

Sie

keine

sandhaltigen oder

12A24 Stunden vorher auf

den Tisch,

säurehaltigen

PutzA und Lösungsmittel.

dann haben Sie die richtige


Trinktemperatur. Weißwein

dagegen

TauwasserARinne

und

Ablaufloch

kommt direkt auf den Tisch. Sekt undBild 7/A regelmäßig reinigen, damit das

Champagner sollten kurz

vor dem

Tauwasser

ablaufen

kann.

Genuß im

Kühlschrank

gekühlt werdenTauwasserARinne.

mit

Stäbchen o. ä.

Die richtige Trinktemperatur beträgt fürreinigen.


Weißweine +10 bis +12 °C,


Das Spülwasser darf nicht durch das

für Rosé

und leichte


Ablaufloch

in die

Verdunstungsschale

Rotweine +12 bis +16 °C,

für schwere

laufen.


Rotweine

+16 bis +19 °C,


für Champagner und Schaumweine +6 bis +8 °C.

11

Getränke erst abkühlen ins Gerät stellen!
Gefäße berühren sich
Gerät in einem trockenen, belüftbaren
Raum aufstellen! Das Gerät soll nicht Rücken Sie bitte die Flaschen oder Gefäße leicht auseinander.
direkt in der Sonne oder in der Nähe einer Wärmequelle stehen (z. B. Heizkörper, Herd). Verwenden Sie ggf. eine Isolierplatte.

de

Wichtige Pflegehinweise für


Betriebsgeräusche

Edelstahlgeräte

Zum

Pflegen der Edelstahloberflächen

Ganz normale Geräusche

das

Pflegemittel •Chromol" verwenden.

Das Mittel ist im Handel unter dem Namen •Chromol" oder bei Ihrem Kundendienst unter der

Ident2Nr. 310359 als 500 ml Sprühflasche und

Brummen - Kälteaggregat läuft.

Blubbernde, surrendeoder gurgelnde Geräusche - Kältemittel fließt durch die Rohre.

Klicken - Motor schaltet ein oder aus.

Ident2Nr.

166787 als

50

ml

Probeflasche


erhältlich.


Geräusche,

die


sich

leicht

Um

die

Oberflächen

nicht

zu


beheben

lassen


beschädigen, auf keinen Fall kratzende

Das

Gerät

steht

uneben


Schwämme,

Metallbürsten,

scharfkantige

Bitte

richten

Sie

das

Gerät

mit Hilfe eine

Gegenstände

oder Scheuermittel

Wasserwaage

eben

ein.

Verwenden

Sie

benutzen.

Auch

chemisch

aggressive

dazu

die

Schraubfüße

oder

legen

Sie

Reinigungsmittel

wie

Abtausprays,

etwas

unter.


Backofensprays,

Lösungsmittel

oder


Fleckenentferner

dürfen sie nicht

Das

Gerät

•steht

an"


verwenden.


Bitte rücken Sie das Gerät von


Die

Pflege

der

Edelstahloberfläche sollteanstehenden

Möbeln


oder

Geräten

weg.

in

Richtung

der Struktur

erfolgen!

Schubladen,

Körbe

oder


Abstellflächen wackeln

oder

klemmen


Prüfen Sie bitte die herausnehmbaren


Energie sparen


Teile

und

setzen

Sie

sie

eventuell

neu ei


lassen, dann

Geräte>Tür so kurz wie möglich öffnen!

Die

Geräterückseite sollte gelegentlich

mit

einem Staubsauger oder Pinsel

gereinigt werden, um einen erhöhten Stromverbrauch zu vermeiden.

12


de


Kleine


Störungen

selbst

beheben


Bevor Sie den Kundendienst rufen:


Überprüfen

Sie,

ob

Sie

die

Störung

aufgrund

der

folgenden

Hinweise


selbst beh

können.


Sie

müssen

die

Kosten

für

Beratung

durch

den Kundendienst selbst

übernehmen

auch während

der

Garantiezeit!


Störung


Mögliche

Ursache

Abhilfe


Die

Innen,Beleuchtung

Die

Glühlampe ist

defekt. Glühlampe

austauschen


funktioniert

nicht;

die


1.

Netzstecker

ziehen

bzw. Sicherung

Kältemaschine

läuft.


ausschalten.


2.

Glühlampe

wechseln


Bild 8/A.


(Ersatzlampe

max.

15 W,


220-240 V Wechselstrom, Sockel


E14)


Der Boden des Kühlraums ist nass.

Temperaturanzeige,Läm pchen Bild 2/2a blinkt (Im Gerät zu warm)

Keine Kontrolllämpchen leuchten

Der

Lichtschalter

klemmt. Prüfen, ob er sich bewegen lässt. Wenn

Bild 8/B


nicht,

rufen

Sie

bitte

den Kundendienst.


Das

Tauwasser9Ablaufrohr

Reinigen

Sie

die

Tauwasserrinne und

ist

verstopft.Bild

7/A

das

Ablaufrohr


(Bild 7/A, siehe

Gerät reinigen)


Häufiges

Öffnen

der

Tür nicht

unnötig

öffnen.

Geräte9Tür.


Es

wurden

viele

Flaschen Superkühlen

vor

dem

Einlegen

eingelegt.


einschalten.


Die

Be9

und


Hindernisse

entfernen.


Entlüftungsöffnungen sind


verdeckt.


Das

Gerät

ist


Taste

Ein/AusBild 2/1

drücken.

ausgeschaltet.


Stromausfall;

die


Prüfen, ob Strom vorhanden ist,

Sicherung


ist


Sicherungen

überprüfen.

ausgeschaltet;

der


Netzstecker

sitzt

nicht fest.


13

de


Sie finden

diese

Angaben auf dem


Kundendienst


Typenschild. Bild 9


Einen Kundendienst

in Ihrer


Bitte helfen Sie durch Nennung der

Nähe finden

und

Fertigungsnummer mit,

Sie im Telefonbuch

oder

im


Erzeugnis+


unnötige Anfahrten zu vermeiden. Sie

Kundendienst+Verzeichnis.


Geben

Sie


sparen die

damit verbundene

bitte dem Kundendienst

die


Mehrkosten.


Erzeugnisnummer

(E+Nr.)

und

die


Fertigungsnummer

(FD+Nr.)

des

Gerätes


an.


14

Instructions on appliance disposal

x Disposal of your old appliance

en

Please ask your dealer or inquire at your local authority about current means of disposal.

Safety information

When

replacing


your

old

appliance

with

a


switching


on

the


new one,

please

comply

with

the


Before


appliance


following:


Old appliances

are not

worthless


Please

read

the

operating

and installation

rubbish.


carefully.

They

contain


Valuable

raw

materials

can be


instructions


reclaimed


information

on

how

to

install,

by recycling

old

appliances.


important


use and maintain the appliance.


Render


your

old

appliance

unusable:

The manufacturer

is

not

liable

if

you

fail


1. Pull

out

the

mains

plug,


comply

with

the

instructions and

warnings

2. Cut

off

the

power

cord

and

discard

in the

operating

manual.


Please

retain


with

operating

and

installation


mains

plug,


these


instructions

as they

may


be

required

by


3.To prevent children from locking subsequent appliance user. themselves in the refrigerator and

suffocating, REMOVE THE LOCK. Installing and connecting

Professional

disposal

is

required

for

the

appliance


refrigerants in refrigeration appliances and


gases

contained

in the

insulation. Ensure


Warning!


that refrigeration tubing and coils are not


damaged

or

punctured

prior

to

their


The

appliance

contains

a

small

quantity

proper

disposal.


of

the

environmentally1friendly


but


flammable

refrigerant

R600a.

Ensure

x Disposal of


packaging


that

the

refrigeration

tubing


is

not


damaged

during

transportation

and


Warning:


installation.

Leaking

refrigerant

may


cause eye injuries or ignite.


Keep children away from the shipping


carton

and

packaging

components.


If refrigerant

is

leaking

out:


Danger of suffocation from folding


cartons

and plastic

film.


- Avoid naked flames and ignition

You received your new appliance in a


sources

near


the

leakage.


protective shipping carton. All packaging

- Unplug

the


appliance

and

ventilate

materials are environmentally friendly and

the room for several minutes.


recyclable. Please contribute to a better

The

more

refrigerant

in

an

appliance,

environment

by

disposing of

packaging


the

larger

the

room

must

be

in

which

materials

in

an

environmentally1friendly


appliance

is

situated. If a leak

occurs in

manner.


a room which is too small, a flammable


gas1air

mixture


may

occur.


15

en


he room

must

be

at


3


g


Do


NO

allow

children to

play

with the


least per1 m8


of

refrigerant.

he

amount

of

refrigerantappliance.


in your appliance is indicated on the

If the

appliance

features

a

lock,

keep


rating

plate

inside

the

appliance.


the


key

out

of

the

reach

of

children!


In an

emergency


NEVE

use

a

steam

cleaner

to

defrost

Wash

eyes

and

call

a doctor.


or clean the appliance. team may


Using

the

appliance


come

into

contact

with

live

components

In

the

following

cases

remove

the


in

the

appliance and

cause


mains


or

an

electric shock.


plug

or

switch

OFF

the

fuse:


a short:circuit


-

Defrosting


Do


NO

allow

oil

or

fat

to

come into


contact with the plastic components or


-

Cleaning


door

seal,

otherwise

the

plastic

parts


and


door

seal

could

become

porous.


Do NO pull out the plug by tugging the


mains

cable.


General

requirements


epairs may only be performed by


he

appliance

is

suitable


qualified

customer:service

technicians.


for

cooling

drinks


Improper repairs may put the user in


considerable


danger.


he

appliance

is

designed

for

domestic


use.


NEVE

use


electrical


appliances inside


the appliance (e.g. heater, ice:cream

he appliance has been


maker,

etc).


interference suppressed

in

compliance


with

EU

Directive

89/336/EEC.


Do

NO

stand

or

support

yourself

on


the

base,

drawers

or


doors,

etc.


he refrigerant circuit has been tested for


leaks.


Bottles

which

contain


a

high

percentage


his

product


complies

with

the relevant


of alcohol must be sealed and placed


vertically

in

the

refrigerator.


safety

regulations

for

electrical

appliances


(EXI 60335/2/24).


NEVE store products which contain flammable propellant gases (e.g. aerosols) or explosive substances in the appliance -Explosion hazard!

16

The lamp flashes until the set temperature has been reached.

Getting to know your appliance

en

Press button continuously or a sufficient number of times until the desired temperature display lamp Fig. /2a •super" lights up.

Please

fold out

the illustrated back page2a.

Temperature

display

lamp

These

operating

instructions refer to

The

numbers on the temperature

several

models.


display lamp

indicate

refrigerator


Diagrams may

vary.

compartment

temperatures in°C


The lamp which

is illuminated shows


the

temperature

which

has been set.


Note

ambient


Example

of

features


temperature and


ventilation


Fig.


113

Fascia


The

climatic

class can

be

found on


the

4

Interior light


rating plate.

It

specifies

the

ambient


temperatures

at

which

the

appliance


may


5

Rack


be

operated.


6

Condensation

drainage channel


Climatic

category


Permitted

ambient


7

Basket


temperature


8

Base

panel


(with ventilation

hole) SN


°

to

°


N


6 °

to

°


Fascia


ST


8 °

to

8°


Fig.


T


8 °

to

°


1

ON/OFF

button


Ventilation


The

start

of


the

refrigeration


process is


Fig.


indicated by the blinking of one of the


temperature

indicator lamp,Fig. /2a


The

air

at

the

back of the appliance will

2

Temperature


adjustment button

ofheat

up. This

warm air must be allowed


refrigerator

compartment


freely escape, otherwise the refrigerating


machine must perform more. This raises


The

refrigerator

compartment


electricity

consumption.

Hence, the


temperature

can

be adjusted

betweenair(inlet

and

outlet apertures

should

never


+1 °C and

+ °C6


be

covered

or

blocked

off!


17

en


Switching

on

the appliance


Connecting

the


Press buttonFig. 2/1. Temperature lamp


appliance


blinks

+10

°C.

The

appliance starts to


cool,

the

interior light is switched on whe


After

installing the

appliance,

you shouldthe door is opened.


wait

at least ½ hour before

switching

on


the appliance. While the appliance is

Selecting

the

temperature


being


transported, the oil in

the

The

refrigerator compartment


compressor may leak into the refrigeration


system.


temperature is

set

in the factory to +10

The set values can be changed, Clean the interior of the appliance before

using for the first time (see •Cleaning"). see description of the control panel: 2 Temperature adjustment button.

The mains socket should be easily


accessible.


Connect

the appliance


to

Operating

tips


a 220-240


V/50


Hz

AC

mains

supply


at


a correctly installed socket. The socket

If the ambient temperature drops

must

be

equipped with

a fuse protectionbelow +6°C,

the

cooling function of

rated

10

A

or

higher.


the

appliance

ceases.


If the

appliance

is

to

be operated


The

refrigerator0compartment


in a


non0European country, check that the

becomes exactly as cold as the

ambient

temperature.

From °C0


voltage and current type indicated

on

there is a risk of frost in the


the

rating

plate

correspond

with

the


specifications of your power supply.

refrigerator0compartment.


The rating plate is situated

in

the


The end sides of the housing are

bottom left0hand side of the appliancesometimes.

moderately

heated. This

The mains connection cable may be

prevents

condensation

from

forming

replaced

by an

electrician only.


around

the

door

seal.


Warning!


When the refrigerating machine is


The

appliance

may

not, under

any


running,

beads

of

water

or

frost

form a


the

rear

of

the

refrigerator

compartment.

circumstances,

be

connected

to


This

is

function4related.

It

is

not


electronic


energy0saving

plugs


necessary to

scrape

off

the

frost

coating


e.g. Ecoboy; Sava Plug and to power


inverters

which


convert

direct

current

or wipe

away

the beads

of

water. The

to

230 V

alternating current

e.g.

solarback

plate

defrosts

automatically.

The

energy systems,

power

networks

on

thawing

water

is

caught

in

the

run4off

channel Fig. 7/A,

channelled

to

the

ships

.


refrigerating

machine

and

there


evaporated.

18

Switching off the appliance

Press buttonFig. /1. Temperature display lampFig. /a goes out. The cooling process and the lighting are thereby switched off.

Disconnecting the appliance

en

Fig. 6/B Ensure that the bottles do not touch the rear panel of the refrigerator7compartment.

Condensation could drip off the bottles

into

the appliance.

Allow

warm drinks to cool down outsid

the

appliance.

Do NOT allow oil or fat to come into contact with the plastic components or door seal, otherwise the plastic parts and door seal could become porous.

If the

appliance

is not

to

be

used

for Warning: Bottles containing a high


a prolonged


period:


percentage

of

alcohol

must be sealed

1. Pull

out

the


mains plug


and

stored

upright.


2. Cleaning

the


appliance


NEVER

store

explosive

substances

in


the

appliance.


3. Leave

the

appliance

door open.


Removing the

racks


The racks are attached in the back of t


housing

to prevent

them

from falling out.


Arranging

bottles

in


To remove the racks, push sleeves •A"

the


appliance


Fig. 5 in the direction of the arrow and


simultaneously pull the racks forwards.

Arrange


bottles

in

the


Note


refrigeration

zones

in

appliance according to the

the refrigerator$


following

instructions:


compartment!


Fig. 0


The air

circulation in the


A total

of


140 ¾ litres

or128 litres

refrigerator7compartment

produces


bottles,

if


the racks and the basket

different

temperature

zones:


are


also used, can be stored in the


The

coldest

zones

are

on the rear pan


refrigerator7compartment.


and

above the bottom shelf. Note: Stor


This

quantity

can be

stored

if the


sparkling wine, white wine, champagne,


bottles

wine in

the

coldest zones.


are

stacked

diametrically

opposed


rosé


Fig. 6/A.


The

warmest

zone

is

at

the top

of the


The

indicated


number

of

bottles may

door.


Note: Store red wine in the warmest


vary

if

the

shape and size

of the


bottles


differ.


zone.


19

20
The water used for cleaning must not be allowed to pass out through the drainage hole and into the evaporator tray.
Clean the drainage channel with a cotton bud or similar item.
The correct drinking temperature for white wines is +10 to°C,+12
for rosé and light red wines +12 to
+16 °C, Clean the drainage channel and outlet
for dark red wines +16 to°C,+19 hole Fig. 7/A at regular intervals so that thawed water can flow out freely.
for champagne and sparkling wines +6 to +8°C.
The water used for cleaning must not be allowed to penetrate the temperature selector or interior lightFig. /4.
Wine should be brought to room Important
temperature (chambré) prior to Do not use a steam cleaner to defro consumption: For example, allow roséor clean the refrigerator. The steam wine to stand for approx. 2.5 hours, could come into contact with live
components and cause a short!circuit red wine for 4.5 hours and talian wines
or electric shock. Steam could also for even 12-24 hours. They will then be
at the correct drinking temperature. damage the plastic parts of the appliance.
White wine, however, should be served
cool. Sparkling wine and champagne Do not use cleaning agents that contain should be cooled in the refrigerator priorscouring powder or acid6based solvents. to consumption.
Open wire shelves are especially
suitable because the air circulation is
not interrupted and air humidity which4. When you have cleaned the
condenses on the bottles will quickly refrigerator, plug it into the mains again evaporate. and switch it on.
3. Use clear water only to wipe the door seal clean and then rub it thoroughly dry.
When stacking old bottles of wine, 2. Clean the refrigerator with lukewarm ensure that the wine touches the cork. soapy water.
There must never be an air gap between the wine and cork.
Unpack bottles of wine - do NOT store1.Pull out the mains plug or switch off in crates or boxes. refrigerator at the main fuse box.
Practical tips for storing wine
Cleaning the refrigerator
en


en


Important

care


information


Operating

noises


for

stainless

steel


appliances


Completely

normal

noises


Use

•Chromol"

cleaning

agent

for


cleaning

stainless steel

surfaces.


Humming noiserefrigerating unit is


This cleaning agent is available on the


running.


market under

the name •Chromol" or

from


your

customer

service


under


Bubbling, whirringor gurgling noises-


refrigerant is flowing through the


ident*no.

310359 as

a

500


ml


refrigeration

tubing.


spray can


or under


Clicking noise-

motor is switching

on

or

ident*no.

166787 as

a

50

ml

trial can. off.


To

prevent damage

to

the

surfaces, under


no

circumstances use


abrasive sponges,Noises which can easily be

metal brushes,

sharp,edged


implements


eliminated


or scouring agents.

Chemically

aggressive


is

not

standing level


cleaning

agents, such

as defrosting


The appliance


Please use

a spirit,level

to

ensure

that

th

sprays, oven sprays,

solvents

or stain


appliance is

standing level.

Adjust

the


removers

must

not

be used

either.


threaded feet or place something


The stainless steel surface should be


underneath

to bring

the

appliance

level.


cleaned in the

direction of

the

grain.


The appliance

is

crowded


Please leave clearance between the appliance and surrounding furniture

Tips for saving energyor appliances.

Install the appliance in a

dry,

well

Drawers, baskets

or

storage surfaces

are unsteady

or

stick.

ventilated room, but not in direct

Please check

that

the

removable parts

sunlight

and not

near a

heat

source


are correctly in position and reinsert if

(e.g.+radiator, cooker, etc.). If

required, necessary.


use an

insulating

plate.


Allow drinks to cool down before placing in the appliance!

Open and close the door as briefly as+possible.

Occasionally clean the rear of the appliance with a vacuum cleaner or paint brush to prevent an increased power consumption.

The containers are touching

Place the bottles or containers a little apart.

21

en

Eliminating

minor


faults


yourself


Before you call in Customer Service:


Check to see whether or not you can remedy the fault

yourself

on

the basis o

following

instructions


You

have

to

bear

the

cost

of

consultation from

Customer

Service

yourself, even

the period of guarantee


Fault


Possible

cause


Remedial action


The

interior

light does


The

bulb

is


defective.


Change

the

bulb


not

function;


1. Pull

out

the

mains plug

or


the refrigerating

unit

is


disconnect

the

fuse.


running.


2. Changing the bulb Fig. . 8/A.


(Replacement bulb max. 15 W,


220-240 V alternating current,


base E14)


The

light

switch

is

stickingCheck.

whether it can be moved. If not,


Fig. 8/B


then please call customer service.


Floor of the refrigerator The

condensation

outlet


Clean the condensation channel and

compartment is

wet.


pipe

is

blockedFig.

. 7/A


outlet. Fig( . 7/A, see Cleaning the


appliance)


The

temperature display The

appliance

door

has


Do not

open

door

unnecessarily.

bulb

Fig. 2/2a

is


been

opened

too

often.


blinking.

(Too warm

in


A

lot of

new

bottles hasSwitch

on the

super cooling

feature

the

appliance).


been

put

in


the


before

placing

the

food in

the

appliance.


refrigerator.


The

ventilation openings


Remove

any

obstacles.


are

blocked.


No

indicator

lights are

litAppliance.

has

been


Press the ON/OFF

buttonFig. 2/1


switched

off.


Power

failure;

the

fuse

hasCheck

that the power is on

and check


tripped;

the

mains

plug

isthe fuses.


not

in

properly.


22

These numbers can be found on the Please check your telephone book or the
customer'service list for your nearest rating plate.Fig. 9
customer'service facility. When To prevent unnecessary call'outs, please contacting customer service, please assist customer service by quoting the ALWAYS quote the product number product and production numbers. This
will save you additional costs.
23

Customer service

en

(E'number) and production number (FD'number) of your appliance.

fr


Les

réfrigérateurs

et

congélateurs


Conseils

pour

la

mise contiennent des

gaz isolants et des fluide

au

rebut


réfrigérants qui nécessitent une mise au


rebut

adéquate.

Prenez garde à ce que l

x Mise

au rebut de

circuit frigorifique

de votre appareil ne soit

pas

endommagé

jusqu à son élimination

l ancien

appareil


dans

les règles

de

l art.

Consignes à respecter lorsque votre

Pour

vous parvenir,

votre nouvel appareil

nouvel

appareil

remplace

un

appareil

a été conditionné dans un emballage

ancien.


protecteur. Tous les matériaux qui le


constituent


sont


compatibles

avec


Les appareils usagés ne sont

pas

des l environnement


et

recyclables.


déchets

sans

valeur.

Leur

élimination

Aidez.nous à recycler l emballage en

dans

le


respect

de

l environnement


respectant


l environnement.


permet d en récupérer de précieuses


matières


premières.


Pour

savoir

comment

vous

débarrasser

Rendez

l ancien

appareil

inutilisable:


de

l emballage, veuillez consulter votre


revendeur

ou

les

services

administratifs


. Débranchez la fiche mâle de la prisededevotre mairie.


courant.


. Sectionnez le cordon d alimentation


Consignes

de

sécurité

puis


retirez.le

avec

la

fiche mâle.


3. Retirez

la

serrure

de

la

porte

afinAvant

de

mettre

l appareil

que


les enfants

en

train

de jouer ne


s enferment pas dedans et risquenten


service


leur


vie.


Veuillez

lire

attentivement

et

entièrement


Les

réfrigérateurs

et

congélateurs


les

informations

figurant

dans

les

notices


d utilisation


et

d installation.

Elle


contiennent des gaz isolants et des fluides


réfrigérants qui nécessitent une mise aucontiennent

des


remarques

importantes

rebut

adéquate.

Prenez

garde

à ce queconcernantle


l installation, l utilisation

et

circuit

frigorifique

de

votre

appareil

ne soitl entretien

de

l appareil.


pas endommagé jusqu à son

éliminationLe

fabricant

décline

toute

responsabilité si

dans

les

règles

de

l art.


les consignes et mises en garde


x Elimination

de


énoncées

dans la notice d utilisation ne


sont

pas

respectées:


l emballage


Conservez

les

notices

d utilisation

et

Attention:


d installation.

Elles

pourront

servir


ultérieurement

à

un

autre

utilisateur.


Ne permettez pas aux enfants de jouer


avec les emballages et ses pièces


constitutives. Ils risquent de s étouffer


avec

les

cartons

pliants

et

les

feuilles


de

plastique.


24

- Si vous dégivrez l appareil.

Installation et branchement de l'appareil


fr


- Si vous nettoyez l appareil.


Pour débrancher l appareil, tirez

sur la

fiche mâle et non pas sur son

cordon.


Attention:


Seuls des spécialistes sont habilités à

et

appareil

contient

un

fluide


effectuer

les

réparations.

Des


réparations

inexpertes

peuvent


réfrigérant

compatible

avec


engendrer

des


risques

considérables


l environnement mais inflammable, le


R600a.

Pendant

le

transport


et

la


misepour


l utilisateur.


en place de l appareil, veillez à ne pasN utilisez jamais d appareils électriques

endommager les tuyauteries du circuit

à l intérieur du congélateur (par ex.


frigorifique. Si le fluide réfrigérant jaillit,

machineil

à

glaçons,


etc.).


peut

s enflammer

et

provoquer

des


Ne


vous

appuyez

pas

sur

le

socle,

les

lésions

oculaires.


clayettes, les portes, etc., et ne vous e


Si du fluide réfrigérant fuit, veuillez


servez

pas

comme


marchepied.


respecter

les

consignes

suivantes:


Les

boissons

fortement

alcoolisées


- Il ne

doit

y avoir

aucune

flamme

nuedoiventni

être

fermées

hermétiquement

et


de source d ignition à proximité du

stockées


verticalement.


point

de

fuite.


N y


rangez

aucun

produit

contenant


- Débranchez l appareil, aérez à fond lades

gaz

propulseurs

inflammables

(par


pièce

pendant

quelques


minutes.


ex. bombes de crème hantilly et


Plus

l appareil

contient

du

fluide


bombes

aérosols)

ni


produits

explosifs.


Risque

d'explosion!


réfrigérant

et

plus

la

pièce


dans


laquelle


il se trouve doit être grande. Dans les

L appareil n est

pas


un

jouet:


éloignez

pièces trop petites, un mélange

gaz8air les


enfants.


inflammable

peut

se

former


en

cas

de

Si

l appareil

est

équipé

d une


serrure,

fuite.


rangez

la

clé

hors

de

portéedes

enfants


3


de


omptez

1

m de


volume

minimum


Ne


dégivrez

ni

ne

nettoyez

jamais


la

pièce


pour

8 g

de

fluide

réfrigérant.

La


avec

un

nettoyeur

à


vapeur.

quantité

de

fluide

présente


dans


l appareil


La

vapeur

pourrait

atteindre

des

pièces

l appareil


est

indiquée

sur

la

plaque


électroconductrices

et

provoquer

un


signalétique

située

à

l intérieur

de

ce


court8circuit

ou

vous

électrocuter.


dernier.


En

cas d'urgence


Veillez

à

ne

pas

salir les pièces

en


plastique

et

le

joint


de

porte

avec

de

Si

le

liquide

a jailli

dans

les


yeux,


l huile

ou

de

la

graisse.

es

pièces

et

rincez8les

abondamment

et


joint

risquent

sinon

de

devenir

poreux.

rendez8vous

chez


un

médecin.


Pendant

l'utilisation


Dispositions

générales


la L appareil

convient

pour


Dans

les

cas

suivants,

débranchez


fiche mâle de la prise de courant ou

A

réfrigérer

des

boissons


défaites

le

fusible/coupez

le

disjoncteur:


appareil

est


destiné

à

un

usage


et


domestique.

25

Figure
Bandeau de
Le circuit frigorifique a subi un contrôlecommande d étanchéité.
L appareil a été antiparasité conformément à la directive UE 89/336/CEE.
fr


Ce

produit

est


1

Touche

Marche/Arrêt


conforme aux dispositions


de

sécurité

applicables

aux appareils


L un

des

voyants

de

température

électriques

(EX

60335/2/24).


Fig. /2a

se

met

à

clignoter pour


indiquer que l appareil est entré en


service.


Présentation

de


2

Touche

de

réglage

de la

l appareil


température

dans

le

compartiment


réfrigérateur


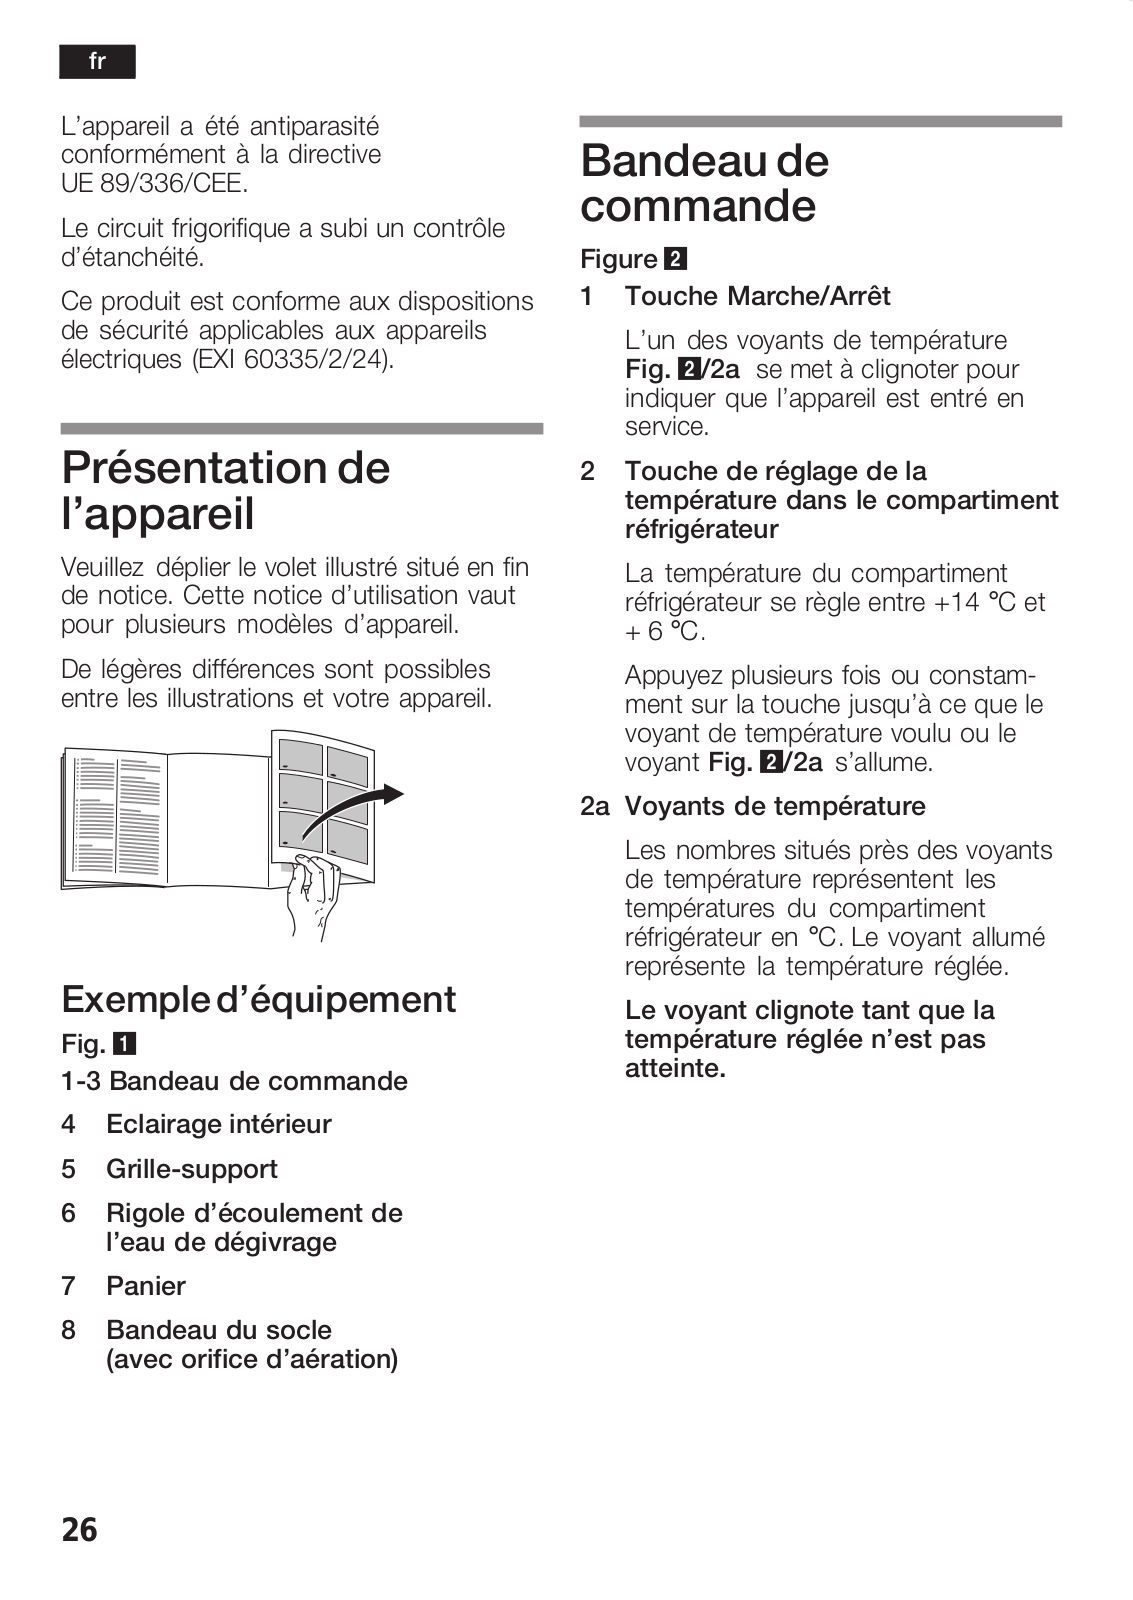
Veuillez déplier

le

volet

illustré situé


en

fin La

température

du

compartiment

de

notice.

Cette

notice

d utilisation

vaut


réfrigérateur

se

règle

entre +14°C et

pour plusieurs

modèles

d appareil.


+ 6 °C.


De légères différences sont possibles entre les illustrations et votre appareil.

Appuyez plusieurs fois ou constam6 ment sur la touche jusqu à ce que le voyant de température voulu ou le voyant Fig. /2a s allume.

2a Voyants de température

Les

nombres

situés près

des voyants

de

température

représentent les

températures

du

compartiment

réfrigérateur en°C. Le voyant allumé

représente la

température

réglée.

Exemple d équipement

Fig.

113 Bandeau de commande

4Eclairage intérieur

5Grille1support

6Rigole d écoulement de

l eau de dégivrage

7Panier

8Bandeau du socleavec orifice d aération

Le voyant clignote tant que la température réglée n est pas atteinte.

26

Aération
C tégorie clim tique
N
N


fr


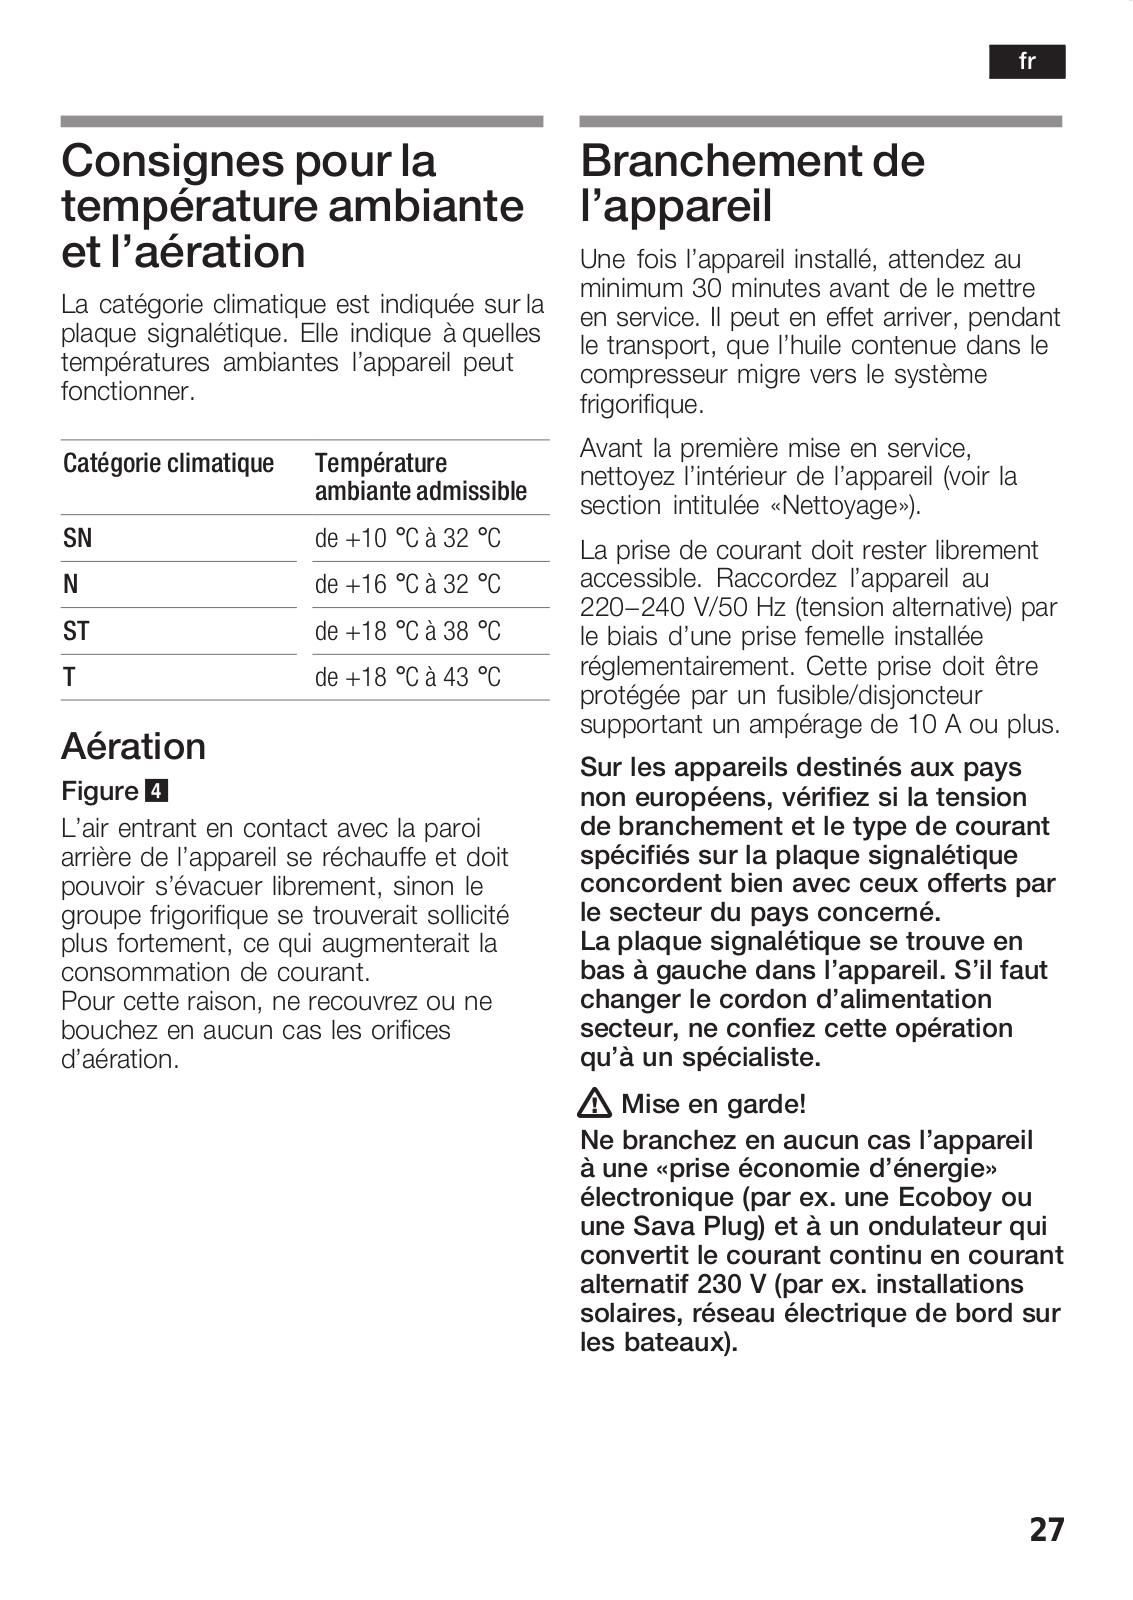
Consignes pour la


Branchement

de

température ambiante

l'appareil


et

l'aération


Une fois l appareil installé, attendez au

La

catégorie climatique


minimum 30

minutes avant de le mettre

est indiquée sur la


plaque signalétique. lle

indique


en service. Il peut en effet arriver, penda

à quelles

que

l huile

contenue dans le

températures ambiantes

l appareil

peut

le transport,

compresseur

migre

vers

le système

fonctionner.


frigorifique.


empér turembi nte dmissible

de 10°C à 32°C

de 16°C à 32°C

de 18°C à 38°C

de 18°C à 43°C

Avant la première mise en service, nettoyez l intérieur de l appareil (voir la section intitulée «Nettoyage»).

La prise de courant doit rester librement accessible. Raccordez l appareil au 220-240 V/50 Hz (tension alternative) par le biais d une prise femelle installée réglementairement. ette prise doit être protégée par un fusible/disjoncteur supportant un ampérage de 10 A ou plu

Figure 4


Sur les appareils destinés aux pays


non

européens,

vérifiez

si

la tension

L air entrant en contact avec la paroi

de branchement et le type de courant

arrière de l appareil se réchauffe et doitspécifiés

sur

la

plaque

signalétique

pouvoir s évacuer librement, sinon le

concordent

bien

avec ceux

offerts par

groupe frigorifique se trouverait sollicité

le secteur

du

pays

concerné.

plus fortement, ce qui augmenterait la

La plaque signalétique se trouve en

consommation de

courant.

bas à gauche dans l'appareil. S'il faut

Pour cette raison, ne recouvrez ou ne

changer

le

cordon

d'alimentation

bouchez en aucun

cas les orifices

secteur, ne confiez cette opération

d aération.


qu'à

un

spécialiste.


Mise en garde!

Ne branchez en aucun cas l'appareil à une «prise économie d'énergie» électronique (par ex. une Ecoboy ou une Sava Plug) et à un ondulateur qu convertit le courant continu en courant alternatif 23 V (par ex. installations solaires, réseau électrique de bord sur les bateaux).

27

fr

Enclenchement de l appareil


Mise

hors

tension

de

Appuyez sur

la toucheFig. /1. Le


voyant de

température +10 ° clignote.

l appareil


L appareil commence à se refroidir. Porte

sur la toucheFig. /1. Le


ouverte, l éclairage

intérieur est allumé.

Appuyez


voyant de températureFig. /a s éteint,

Réglage de

la température ce qui signifie

que

le refroidissement et

A la fabrication, le compartiment


l éclairage

se

sont

éteints

eux aussi.


réfrigérateur de l appareil a été réglé

sur


durée

une température de +10 ° .


Inutilisation longue


Vous pouvez

changer les réglages :

voirSila vous

n utilisez pas votre appareil

description

du

bandeau de commande : pendant

longtemps :


2 Touche

de

réglage de la température.1. Débranchez

la fiche mâle de

la prise


de courant.


Conseils d utilisation

2. Nettoyage de l appareil.

Si

la

température

ambiante

descend


la porte

de


l appareil

ouverte.

en*dessous de +6°C, l appareil ne

3. Laissez


produit plus de froid et le


compartiment réfrigérateur s aligne


Rangement

des


sur la température ambiante. Une


température

ambiante

inférieure

à


0 °C peut provoquer l apparition debouteilles


gel

dans

le compartiment


réfrigérateur.


Consignes

lors


Les

parois


frontales

capotant

le


du rangement


réfrigérateur

sont

légèrement

chauffées Fig. 0


pour empêcher l apparition de


Vous pouvez ranger au total 140


condensation

près

du

joint

de

porte.


bouteilles

de

75 cl

ou

128 bouteilles

Pendant le fonctionnement du groupe


d un litre sur les

grilles8

supports

et

frigorifique,

des

gouttelettes

d eau

ou


dans

le

panier.


du

givre

se

forment

sur la

paroi

arrière

pouvoir

ranger

autant de


du

compartiment

congélateur.


Pour


bouteilles,

disposez8les

alternées

goulot

e phénomène est le résultat du


contre corpsFig. 6/A.


fonctionnement de l appareil. Inutile de


gratter

le


givre

ou

d essuyer les

gouttes


d eau. La paroi arrière se dégivre


Le nombre de bouteilles indiqué peut


varier selon la forme et la taille des

automatiquement. L eau de dégivrage


bouteilles.


est

récupérée

dans

la

rigole


Fig. 6/B Veillez à

ce


que

les

bouteilles

d écoulement

Fig. 7/A,

puis

coule


ne touchent

pas

la

paroi

arrière

du

jusqu au

groupe frigorifique

elle


compartiment

réfrigérateur

car

l eau

de

s évapore.


condensation,

28


fr


en coulant sur les bouteilles, pourraient


Conseils

pratiques


pénétrer

à

l intérieur

de


l appareil.


Laissez les boissons chaudes

refroidir pour

le

rangement


avant

de

les

ranger

dans

l appareil.


des bouteilles

de

vin


Veillez à ne pas salir les pièces en


plastique

et


le

joint

de

porte

avec


de

Déballez

toujours

les

bouteilles

de

vin

l huile

ou

de

la

graisse.

Ces

pièces

et

le


de les ranger; ne les

laissez pas


avant

joint

risquent

sinon

de

devenir

poreux.

dans leurs caisses ou cartons.


Attention:

les

boissons

fortement


Placez

les anciennes bouteilles de sorte

alcoolisées

doivent

être

fermées


que leur bouchon soit toujours


hermétiquement

et

stockées


maintenu mouillé par le liquide. Il ne do

verticalement.


jamais

y

avoir de


poche

d air

entre le

Ne rangez dans l appareil aucun produitet le bouchon.


explosif.


Les

rayonnages

grillagés

ouverts


Extraire

les

grilles supports


conviennent


tout

particulièrement

car


l air peut circuler

librement

et

l humidité

Les grilles9supports sont fixées à l arrière

qui

se

condense

sur

les


bouteilles


dans

le

corps

de l appareil,

ce

qui

les

sèche

ainsi

rapidement.


empêche

de

tomber.


Pour les retirer: poussez les douilles

«A»

Avant

de déguster le vin, ce

dernier do

Fig. 5 dans le sens de la flèche et tirezpouvoir «se réchauffer» lentement (le

simultanément


la

grille9support

en

avant.

servir

chambré): par ex., apportez le vin


rosé sur la table env. 2 heures et dem

Consignes

concernant

les


avant de

le

boire;


pour

le

vin

rouge, il


faut

compter

4

heures et

demi

et

pour

zones de froid dans le


les vins italiens 12 à 24 heures. Vous

compartiment

réfrigérateur


obtenez ainsi la température de


Le

compartiment

réfrigérateur

présente


dégustation

qui

leur

convient.

Par


contre,

le


vin blanc

se sert

directement

des zones différemment froides. Cette


de au

sortir

du

réfrigérateur.

Le

mousseux

caractéristique


est

due

à la

circulation


l air

dans

l appareil:


et

le

champagne

doivent

être

refroidis


un instant dans le réfrigérateur avant


Les zones les plus froides se trouvent

dégustation.


contre

la

paroi

arrière et

sur

la

clayette

température

de

dégustation


du


bas.

Remarque:

rangez

à

ces


La


appropriée

est comprise

entre

+10

et

endroits par

ex.

le mousseux,

le

vin

+12 °C

pour

les

vins

blancs,

+12

et

blanc,

le

champagne

et


le

vin rosé.


+16 °C pour les rosés et les rouges


La zone la plus chaude se trouve


légers, +16 à +19°C pour les rouges

complètement

en

haut,

juste


corsés

et

+6 à °C+8 pour

les


en9dessous de la porte. Remarque:


champagnes

et

les

mousseux.


rangez

à

cet endroit par

ex.

le

vin

rouge.


29

fr


Consignes

importantes


Nettoyage de l appareilrelatives

à l entretien des

1. Débranchez


la

fiche

mâle

de

la

prisesurfaces

en

acier

inox


secteur ou


coupez

le


Pour

entretenir

les

surfaces en

acier inox,

fusible/disjoncteur.


utilisez

le produit

d entretien

«Chromol».


2. Nettoyez

l appareil

avec de

l eau

tiède


Vous trouverez ce produit en vente

additionnée

de

liquide

pour

la

vaisselle.


dans le commerce sous la marque


3. N essuyez


le

joint

de

porte

qu avec

«Chromol»,

ou

auprès de

votre

service


un


chiffon et


de

l eau

propre;

ensuite,

après4vente, auquel cas il porte les


numéros

de référence suivants

:


séchez4le

à

fond.


4. près le

nettoyage:

rebranchez

la


310359 flacon

pulvérisateur

de 500 ml,


fiche


mâle de l appareil puis


ou


réenclenchez4le.


166787 flacon

d essai

de

50

ml.


Attention:


Pour ne pas endommager les

surfaces,

Ne dégivrez

ni

ne

nettoyez

jamais

n utilisez

en

aucun

cas d éponges

à dos

l appareil avec

un

nettoyeur

à vapeur.


brosses

métalliques, objets

à

La vapeur

pourrait

atteindre

des


abrasif,


arêtes

vives

ou

produits

récurants.


pièces électroconductrices

de


N employez

jamais

non plus

de


l appareil et

provoquer

un

court.circuit


détergents corrosifs tels que les aérosols

ou vous faire électrocuter. La

vapeurde dégivrage, nettoyants pour fours en

peut endommager

les

surfaces en

aérosol,

solvants

et

produits

détachants.

plastique.


Pour entretenir les surfaces en acier


N employez

pas

de

produits

de

nettoyage


procédez

dans

le

sens


inoxydable,


ou solvants contenant du sable ou desde la structure.


acides.


L eau de nettoyage

ne

doit

pas

atteindre


le sélecteur du thermostat ni

l éclairage


Fig. /4.


Nettoyez régulièrement la rigole d écoulement et la goulotte collectrice Fig. 7/A afin que l eau de condensation puisse s écouler librement.

Nettoyez la rigole avec un bâtonnet ou assimilé.

L eau de nettoyage ne doit pas gagner le bac d évaporation via la goulotte

collectrice.

30

Loading...
+ 98 hidden pages