

Bosch Integral TS13 Operating Instructions Manual

Operating Instructions
Integral TS13 ISDN Telephone
connected
Integral 33 systems
to

Familiarize yourself with your phone
This
manual is designed to help you learn the basics of your telephone quickly and
easily
.
What you should definitely read
Basic operating principles → starting on p. 15.
Y
ou should read this section to learn about the special features of your new tele
phone, even if you are already familiar with deluxe phones.
This manual uses a number of practical scenarios to provide you with a better
understanding of the functions your phone has to of
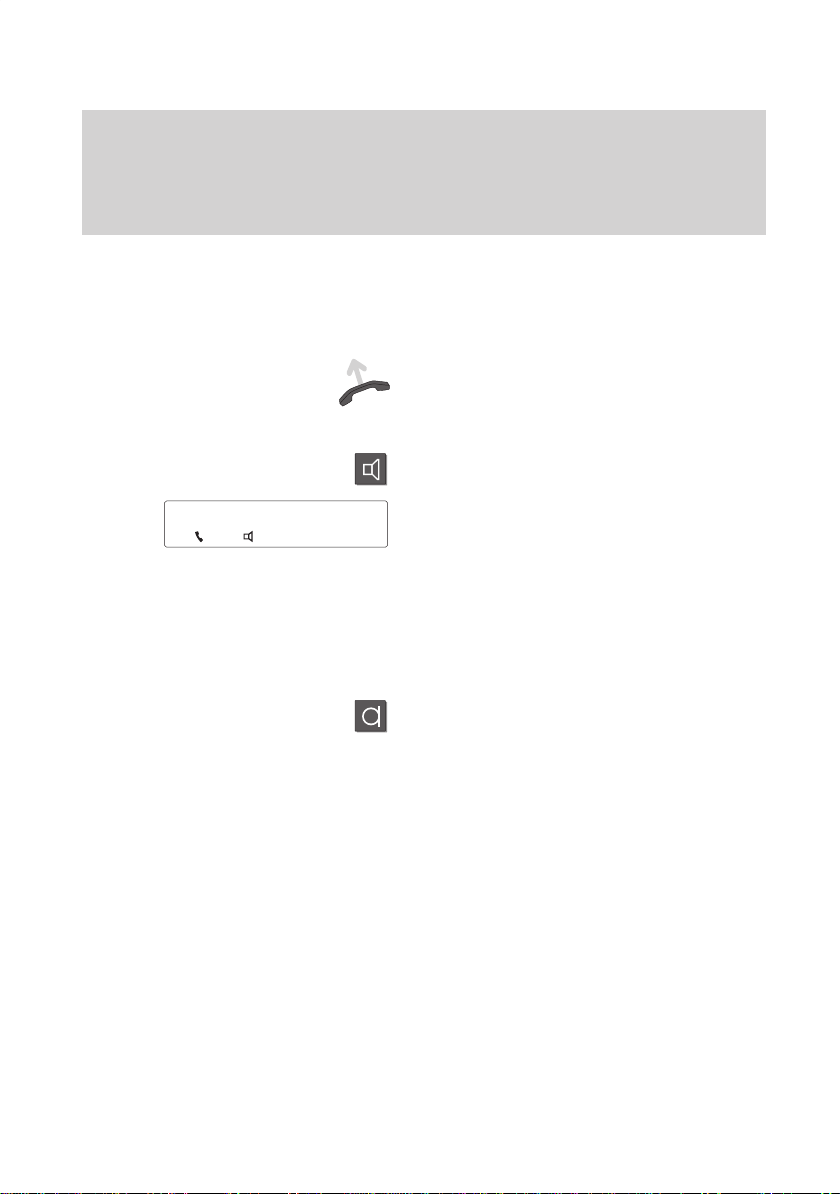
Making calls
This section describes the various options you can use to make calls.
Receiving calls
There are also a number of functions that make phoning even easier
explained in this section.
During a call
Useful functions help you keep track of several calls at once.
Using the phone in a partner group
Some things are easier for partners. These functions are contained in a separate
section, as they are only valid within a partner group.
fer.
. These are
-
Setting the telephone for your own specific needs
Y
ou won’t need to do it every time you use the phone. But your TS 13 phone provi
des you with the ability to set up various functions according to your own personal
needs.
T
eam functions
Y
ou can set up any number of phones within your system to form a team.
Y
ou then receive a special tone (VIP tone) from your team partners.
If in doubt, look it up
If you are looking for something specific, you can look it up in this section.
Y
ou will also find an alphabetic overview of all menu items in this section.
2
-

Table
Familiarize yourself with your phone
Familiarize yourself with your phone
T
able of Contents
TS 13 - Overview 5
Which keys for which functions? 6
Special features of your telephone
How to use this manual
Basic operating rules
Making a standard call
Making calls
Dialing stored numbers
Dialing a call number from the call list
Call back 25
T
ransmitting text (Minimail)
Recording call charges for projects
Receiving calls
Answering calls 29
Requesting info message
Receiving minimail (Mailbox)
of Contents
11
14
20
22
23
26
28
30
32
2
3
9
During a call
Monitoring 33
Handsfree talking
Deactivating the call number and charge display
Temporary switchover to DTMF 37
Additional call during an existing call
Several calls simultaneously
Using the phone in a partner group
Overview of partner functions
Using the phone in a partner group
Setting partner functions
34
36
38
39
44
45
47
3

able of contents
T
Setting up the telephone for your own needs
Storing call numbers
Diverting calls 51
Answering calls at another telephone (Follow me)
Double Call
Setting function keys
Setting up the telephone
Switching of
Switching on key beep
Handsfree talking with auxiliary loudspeaker –
Displaying call charges 62
Specifying audio, contrast and do not disturb
Private User Mobility (Mobile direct dialing number)
Storing personal data centrally
VIP functions
Setting up VIP functions –
f autom. postdialing (DTMF)
48
52
53
54
57
58
59
60
64
68
69
70
If in doubt, look it up
T
elephone functions overview
Display messages 77
Menu items on the display
Setting tones and distinctive rings on your phone
If something goes wrong
Protecting the phone from unauthorized users
T
esting the telephone
Registering for automatic call distribution
Additional information and functions
Index 104
4
72
82
96
97
99
101
102
103

Familiarize yourself with your phone
TS
13 - Overview
The
functions of a number of keys may dif
set up and how it is connected to the telephone system.
fer depending on how your telephone is
LED display
flashes for call
and illuminates
for call diversion
Display
The displays assist you
with operation.
Digit keys with
additional
alphabetic
labelling
for dialing and
entering codes.
Programmable
function keys
standard programming see
page 7
AEI interface
to connect
accessories
(underside of unit)
Fixed function keys
to select certain
functions quickly
5

Familiarize yourself with your phone
Which keys for which functions?
This
section gives you a brief overview of the keys on your phone and their respec
tive functions.
The use of the individual keys is explained in detail under the corresponding func
tion on the following pages.
Fixed function keys
ABC
Digit
2
*
#
keys with alphabetic
labelling
for dialing call numbers and en
tering codes. The alphabetic la
belling allows you to dial means
of letters (vanity numbers).
Handsfree
with the handset on the hook.
Monitor
ker on/of
dialing.
Redial
again and displays the last
5 numbers that were dialed.
Star and hash keys
for special functions.
for making calls
switches the loudspea
f and permits on-hook
dials the last number
-
-
-
-
-
Refer-back for consultation wit-
R
Menu
+
Enter
6
–
r i
hin you
external calls and cal
Disconnect
connection and terminates an
entry.
Arrow up
lection up in the display, and acti
vates the main menu when in
idle condition.
Arrow down
selection down in the display
Enter
item.
n-house syste
clears the current
moves the menu se
moves the menu
selects a highlighted menu
m o
l t
ransfer.
r f
or
-
-
.
Familiarize yourself with your phone
Which keys for which functions?
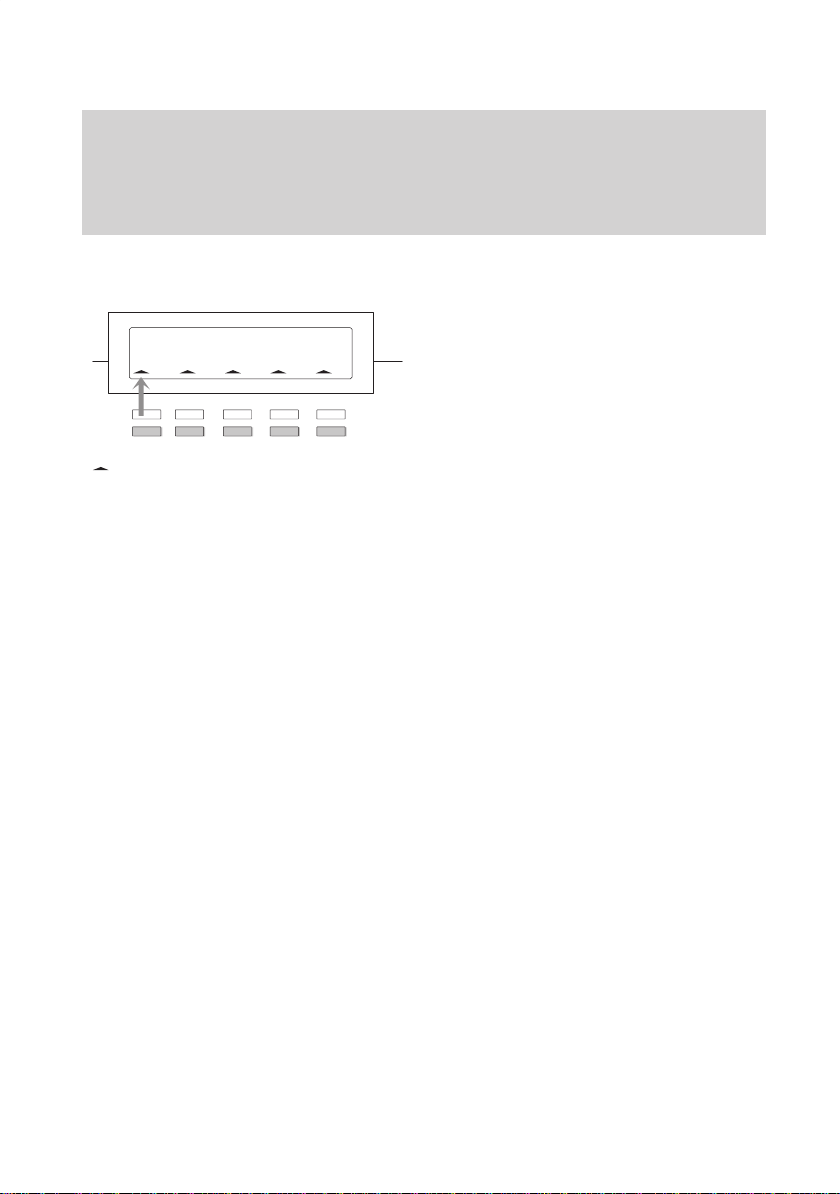
Programmable function keys (standard assignment)
The two upper rows of keys on your
telephone can be assigned any func
tions. The “Transfer” and “Interchange”
keys are programmed as a default.
The symbols above these keys indicate
the status of your respective partners.
Symbol for the upper key
Symbol flashes slowly: first call
Symbol flashes quickly: second call
Symbol illuminates:
Symbol of
f:
busy
free
The keys in the second row are pre-set
to the following functions in the standard
setting:
“T
ext shift key”, “Speed dial”, “Retrieve”,
“T
ransfer” and “Interchange”.
"
-
7
Familiarize yourself with your phone
Display
call list
Messages
Call diversion
Call charges
Lock
T
elephone book
Call back
Which keys for which functions?
Call list entries 1
⇒
317 10:41 +1
⇒
Delete all entries
⇒ Back
⇒
Request Server Message
⇒
Send Minimail
⇒ V
iew Mailbox
⇒ Back
Call div
. to
Call div
. to
Call div
. to
Call div
. from
Call div
. from
Call div
. busy
Call div. ⇒ store
Call
div. ⇒ back
Charges
for last call
06975056285...s0–exchange–...000
2.04
Call sum 00003.00
⇒
Call charges on
⇒
Display units
⇒
Delete single counter
⇒ Back
BER
2: 1...5
⇒
BER 2: 1...5 ⇒set pin
⇒
BER 2: 1...5
⇒ Tel.book,pos.no.1...0*#
⇒ back
⇒locking
⇒back
A
Further functions
8
⇒
Set telephone:
⇒
Further Specifications:
⇒ Partner
⇒
Set function keys
⇒
Set macro
⇒
Upd time/part/In
⇒ Indiv
. emerg. no
⇒ T
est mode
⇒ Back
⇒ Silence
⇒ Audio/Contrast
⇒ Set
microphone
⇒
Save data
⇒
Direct dial
⇒ Headset/AEI
⇒ Back

Familiarize yourself with your phone
Special
You
can use your phone to make calls as you would with any ordinary phone.
This telephone also of
This chapter contains a brief overview of some of these special features.
The display assists you
The display provides you with important information, e.g. on the current call.
In addition, display messages guide you through operation step by step.
The call number of every ISDN caller is displayed on your telephone, so that
you can see who is calling you before you answer
The name is also displayed, if possible.
Customizing the functions of your phone
Y
ou can select and activate most functions quickly and easily from the screen.
A number of functions can also be performed quickly using the function keys. Y
can program these keys with the functions you use most often. T
have already been assigned functions before delivery
ou can also change numerous standard settings and adapt the phone to your own
Y
personal needs.
Protection against unauthorized use
The integrated “lock” allows you to protect your telephone against unauthorized use.
Using the phone in a partner group
Y
our BOSCH TELECOM service representative can connect your phone to other
phones within your system to form a partner group. A number of functions are parti
cularly easy to use within this partner group.
features of your telephone
fers a variety of functions that make phoning even easier
.
.
.
ou
wo of these keys
-
Number of possible connections
Y
ou can establish up to 4 calls simultaneously and toggle between these calls as
you wish.
ou can display all four calls on the screen one after the other
Y
VIP functions
Y
ou can set up any number of phones within your system to form a team.
Y
ou can receive announcements from all team partners and you hear a special
ringing tone when one of these partners calls.
PTM – Personal telephone manager (optional)
PTM is a Windows program that allows you to perform some of the functions of your
phone on your PC. These functions include:
– setting up your phone
– editing telephone book entries
– saving data on your PC
.
9

Familiarize yourself with your phone
Special features of your telephone
Connecting additional ringing tones (second alarm)
Y
ou can equip your telephone with an additional ringing tone. Y
ample, receive a signal in the neighbouring room when your telephone rings.
The second alarm is connected to the telephone’
tact. Please contact BOSCH T
elecom as required.
s AEI interface via a switch con-
ou can then, for ex
A
-
10

Familiarize yourself with your phone
How to use this manual
A
number of abbreviations and symbols are used in this manual to give you a better
overview
The screens used in the manual contain only the texts or symbols that are signifi
cant for the function under consideration.
Selecting a function using a fixed function key
Selecting functions using menu items
Menu
Menu
. This section contains a brief description of each of these symbols.
Some functions can be selected using a
R
fixed function key. These keys are depicted
as shown here.
Y
Menu
+
Menu '
Do not disturb
–
ou may first need to press the
+
“Arrow up” key to call up the main menu.
T
o reach the menu item shown on the left,
press the arrow keys until the desired
menu item appears. This allows you to
scroll through all menu items one after
another.
Example:
ou want to activate the “Do not disturb”
Y
function.
Press the “Arrow up” key.
Menu
+
+
Menu 'Do not disturb
–
Press the “Arrow down” key
until the menu item “Do not disturb”
appears.
-
Call up the highlighted function
Enter
by pressing the “Enter” key.
Note:
The chapter “If in doubt, look it up” explains
all menu items that you may come across
when using your phone.
11

Familiarize yourself with your phone
Return
Enter a call number
Dial
How to use this manual
"
Note:
The main menu contains not just menu
items but also submenus, where you can
call up further menu items. Y
ou can always
move from these submenus to the previous
level with the “Return” menu item.
The keys to the left are shown when you
are required to enter a number
Y
ou can type the numbers manually or
enter a stored call number
Y
ou can initiate the dialing procedure in
.
.
different ways:
Press the “Monitor” key or lift the handset.
The symbol to the left tells you to select
one of these options.
Set up a call
12
Dial
. – The symbol to the left tells you to
set up a call. Y
ou can either enter the call
number and then lift the handset or vice
versa (→
p. 18).

Familiarize yourself with your phone
Switching the menu item
Menu 'Further
Menu 'Further settingsµ
Menu 'Silenceµ
Ringing
functions
tone
Optional functions
on±
Enter
to use this manual
How
The manual also uses a short formulation
for:
“Switch the menu item to ...”
Example:
Select the “Further functions” menu item.
µ
Select the “Further settings” menu item.
Y
ou would like to turn of
f the signal tone in
the “Silence” menu.
This function is normally activated.
Select the menu item “Ringing tone”.
The current setting is “On”.
Press the “Enter” key to change the setting
to “Off”.
The ringing tone is deactivated.
The symbol to the left indicates that the
-
described function is not a standard feature
of your telephone.
Other functions may also be blocked.
Consult your BOSCH TELECOM service
representative if you wish to use these
functions.
A
13
Familiarize yourself with your phone
Basic operating rules
The
following pages contain some basic information on how your telephone works.
The display assists you.
The illustration at the side shows you the
display as it might look when the telephone
is not in use. Y
ou can have your telephone
number
The current date and time are displayed as
well.
The idle display shows you additional
information on the status of your telephone.
A message appears if the telephone is
locked, for example.
The symbol
shows that information on
the status of your telephone is available.
You can view all status messages conse-
–
cutively with the “Arrow up” and “Arrow
down” keys.
From here you can request the appropriate
menu point directly
o do this, display the message in the idle
T
.
display.
Press the “Enter” key.
Enter
Status
Status
03.10.96
Menu
+
15:34
'Locked°
or
'Locked°
14
Enter PIN
ou can now process the appropriate set
Y
tings; unlock the telephone with the PIN,
for example.
Note:
If the status has changed, the correspon
ding message remains in the idle display
until you have scrolled to the top.
-
-
Familiarize yourself with your phone
5595
Mr. Miller
5595 Mr. Mi..
'Volume µ
operating rules
Basic
V
arious messages and the menu items
from which you can select the next opera
ting step will appear on the display
ding on the function you are currently per
forming.
The display generally only displays the
menu items associated to the respective
function.
Example: Y
ou make a call.
Dial.
The call number and name of the called
↓
party are displayed on the screen.
Y
ou can scroll through the available menu
–
items using the “Arrow down” key
ou can, for example, adjust the volume of
Y
the loudspeaker by pressing the “Enter”
key.
, depen
.
"
-
-
-
Displaying calls
5595
Mr. Miller
Y
ou receive another call while you are tal
↓
king. The additional call is indicated by the
flashing bell symbol.
-
15

Familiarize yourself with your phone
Several functions can be activated in a number of dif
The simplest way: select it from a menu.
The quickest way: using a function key
.
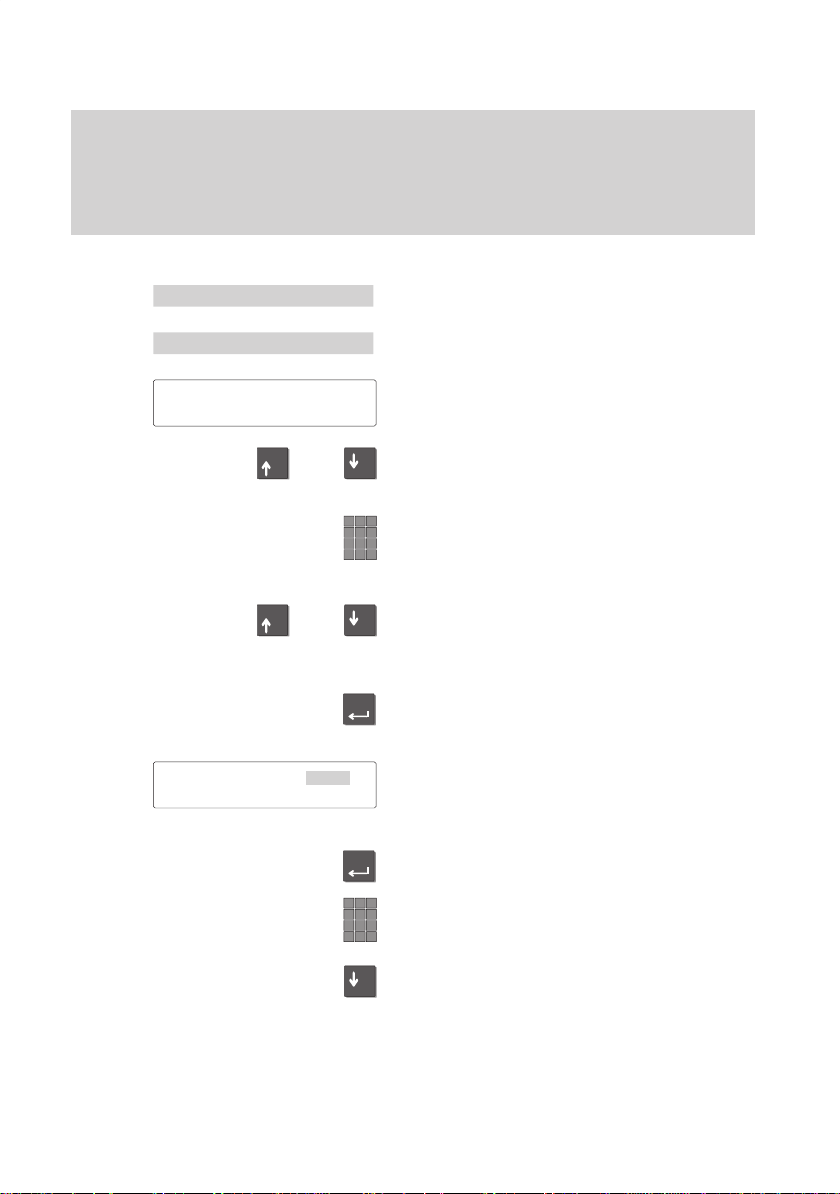
Activating functions
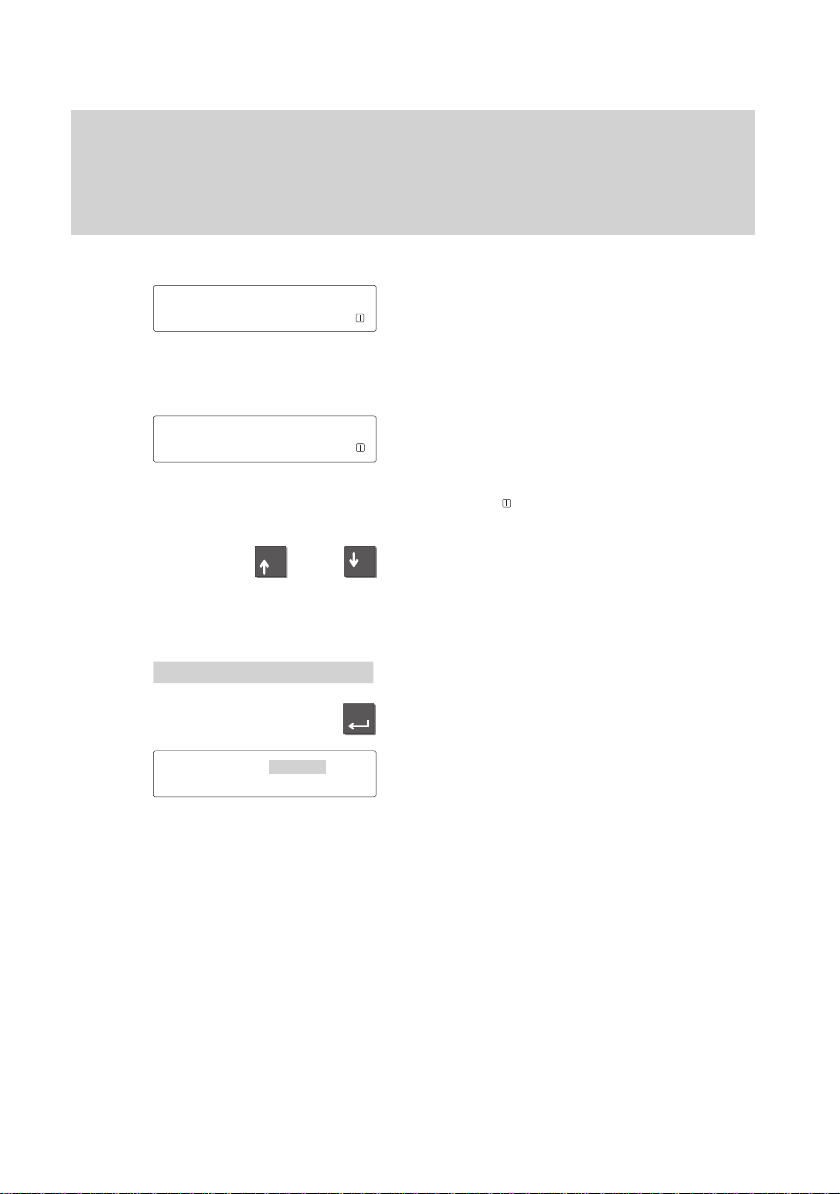
Selecting functions from the menu
Y
ou can select and activate all functions of
your phone from the display
need to remember any key symbols or
combinations for menu selection.
Arrows in the menu indicate the direction in
which you can move:
– up and down
↓
– down only
↑
– up only
Press the “up arrow” key
Menu
+
This calls up the main menu, which con
tains the most important functions. Y
select more functions under “Further func
tions”.
Menu
+
Menu
'Specifications
–
Press the “Arrow down” key until the
desired menu item appears, e.g. “Speci
fications”.
Basic
ferent ways.
operating rules
. Y
ou do not
.
-
ou can
-
"
-
16
Press the “Enter” key.
Enter
This confirms your selection and activates
the selected function.
If you want to move from a submenu to the
previous level, select the “Return” menu
function.
Note:
The display returns to idle mode if you
have not pressed a key for 60 seconds.
If you wish to switch back to the idle dis
play manually
, press the “Disconnect” key.
-

Familiarize yourself with your phone
ou can cancel all operating procedures at any time. Y
Y
connection in the same way
Activating functions with function keys
Canceling an operation
.
Several functions can also be activated
R
using a function key, e.g. refer-back.
Functions that can be activated using a
function key are not contained in the menu
selection.
Lift the handset.
Y
ou can cancel an operation at any time if
you change your mind or inadvertently acti
vate the wrong function.
The phone returns to the status it had be
fore the function was selected.
Basic operating rules
ou can clear the current
"
-
-
17

Familiarize yourself with your phone
Setting up a call
Preparing to dial
Basic operating rules
T
o set up a call you have to carry out the
two steps described below:
1.
prepare for dialing,
2.
activate dialing.
The call number is dialed.
It doesn‘t matter which of these steps you
perform first. However
maintain the order described because in
this case you can for example correct a
number before it is dialed.
Dial:
The symbol to the left is always used
in this manual to indicate that you should
set up a call as described here.
Y
ou have two possibilities. Leave the
handset on-hook.
Enter the call number manually:
T
ype the desired number using the digit
keys.
, we recommend to
"
18
or
Enter a stored call number
e.g. by pressing the function key „Speed
4
dialing“ and a digit key
Note:
ou must dial an external line code before
Y
you can enter an external call number
.
,
.
Familiarize yourself with your phone
Dialing
5595
↓
Using the phone with handset on–hook
Basic operating rules
Enter a call number
. Y
ou now have various
options.
Enter a call number
.
Lift the handset. The specified call number
is dialed. If the called subscriber answers,
you can make the call as usual.
or
Press the “Monitor” key.
The specified call number is dialed.
The loudspeaker symbol appears on the
screen.
When the other party answers, lift the
handset to talk to this party
.
Cancel:
Press the “Disconnect” key or “Monitor”
key.
Press the “Handsfree mode” key
. The mi
crophone is then activated, in addition to
the loudspeaker
. Y
ou can now use the
phone with the handset on–hook.
Handsfree mode is indicated by the symbol
shown at the left in the status line of your
display
.
Note:
Please note that, for technical reasons,
your telephone does not activate the loud
speaker and microphone at the same time.
Y
our call partner thus cannot hear your
while he is speaking.
A
-
19
Familiarize yourself with your phone
Making a standard call
You
can use your phone to make standard calls as you would with any other
telephone. Internal: Dial the desired number directly
External: Dial the external line code for the respective system (e.g. “0”) first.
Y
ou can redial call numbers or have them automatically redialed.
.
Making calls
5595
Redialing a call number
''
1 0231528865
Dial call number – by either entering each
digit separately
or
Enter a stored number by pressing the
4
function key „Speed dialing“ and a digit
key.
The number is shown on the display
↓
ou can enter additional digits and correct
Y
digits if necessary.
Dial
. The call number is dialed.
Press the “Redial” key
.
The last number that was dialed is
displayed.
Press the “Redial” key several times.
The five call numbers you dialed last are
displayed on the screen.
↓
The redial memory stores digit–, destina
tion– and partner keys.
Dial.
The displayed number is dialed.
.
-
Delayed redial
5595 'Delayed redial
20
If busy:
Select menu item “Delayed redial”. The
number is redialed up to nine times in
30-second intervals
.
Cancel:
Delayed redial is canceled as soon as you
press a key or lift the handset.

Familiarize yourself with your phone
Making
ou can dial code dial numbers that are stored in the system, regardless of your
Y
authorization. When you enter the code dial number
automatically
. If you wish, you can let other people in the room listen to the conver
, the complete number is dialed
a standard call
sation.
Making code dial calls
476
Enter the code dial number
'Code
dial
The number can be checked in the display
↓
Select the menu item “Code dial”.
.
The complete call number is dialed auto
matically.
A
-
.
-
21

Making calls
Dialing stored numbers
You
can dial stored speed-dial numbers.
Calls that you do not answer are stored in the call list with the respective date and
time. Y
ou can display this list any time and call back the subscribers specified in
the list. The list contains the 10 most recent entries.
Dialing a stored speed-dial number
Press the function key “Speed dialing” key
ou are prompted to press a digit key for
Enter
speed dial code
Y
speed dialing.
.
Press the desired digit key
8
e.g.
The stored call number is dialed.
Dialing call numbers assigned to function keys
Press the function key to which the desired
call number is assigned.
The stored call number will be dialed.
, e.g. “8”.
22
Making calls
Dialing a call number from the call list
If
you do not to answer a call—because you are not there or currently busy—the
call, date and time are saved in the call list. Y
any time. The list shows the 10 most recent entries.
Select telephone number from the call list.
05.10.94
15:16
µ
ou can view and return these calls at
The “List” message is shown in the idle dis
play.
This shows you that there are new entries
in the calling list.
-
Menu
Call list entries 5
315 12:38 3
List : 09.07.98 12:38
'
Call list
Select the menu item “Call list”.
±
The number of entries is displayed. In this
±
example, 5 subscribers have tried to reach
you.
Press the “Arrow down” key to scroll
–
through the entries.
The display contains information on each
µ
entry
. In this case, the subscriber has tried
to reach you 315 times.
If you want to see more information on a
±
particular entry
, select that caller
More information on that entry appears in
the display (date).
.
23

Making calls
Symbols in the call list
No
call number
Dialing
a subscriber back:
Calling
Dial automatically
displayed subscriber is dialed automati
. When he answers, you can telephone
cally
as usual.
Notes:
The “List” message remains in the idle dis
play until you have scrolled through all the
new entries.
The call list lists repeated calls from the
same caller under the same entry
Call without call number
+
Call has not yet been displayed
>
Diverted call
stored numbers
.
The call number of the
A
-
-
.
24
Making calls
Call
back
If
a subscriber you call is occupying the line, you can activate a signal which lets
you know when the line is free again. Y
our telephone rings, you pick up, and then
the telephone of the previously busy subscriber rings.
This is only possible for calls within your system.
Y
ou call subscriber 3613, for example.
Note:
our call partner is occupying the line.
Y
Select the “Call back” menu item.
–
3613 'Call
Status '
Callback listed
back
The following appears in the display
Activate the “Call back” feature by pressing
Enter
the “Enter” key.
Note:
Y
ou hear a short signal tone and a special
dial tone. These tones indicate that you
have activated the “Call back” feature.
The following appears in the display
↑
Note:
As soon as the busy line becomes free,
your telephone rings and the LED display
next to the handset flashes. The call num
ber of the caller appears in the display
.
.
-
.
25
Making calls
Transmitting text (Minimail)
You
can send short texts to one or more recipients. 7 prepared texts which you can
add to are available.
Sending minimail
Menu
'Minimail
Select the “Minimail” menu point.
'
Sending Minimail
Tel.conf.
00:00 00.00
Menu
+
Menu
+
Subscriber 1 31
if necessary
or
or
Select the menu point “ sending Minimail”.
The first of the prepared texts appears in
the display
Select the desired text.
–
.
Enter the corresponding digits into the text.
e.g. time, date).
Correct:
Move the marker to the next line and and
–
back again. Now can simply overwrite the
entry.
Press the “Enter” key to select the text for
Enter
transmission.
The first of the subscribers to whom you
↓
can send a message appears in the dis
play.
Select one or more subscribers. “+” indi-
Enter
cates that the subscriber is selected.
If necessary
, enter a new call number as
desired.
-
26
Scroll downward through all the sub-
–
scribers.

Making calls
'Sendµ
'
Minimail to all
Transmitting
the “Send” menu point.
Select
text (minimail)
The message is sent.
Y
ou can see in the display whether the
message has been sent successfully or
not:
“?”:
The message is on the way
The message has arrived.
“+”:
“–”: The subscriber could not be
reached.
Send to all:
T
o send a minimail to all entered subscri
°
bers: Select the corresponding menu point.
A
.
-
27

Making calls
Recording
Your
telephone system can record and calculate call charges for single projects or
private calls. Y
calls in front of an external call number
Selecting dial call number with the project number
call charges for projects
ou must enter the corresponding project code or the code for private
e.g.
e.g.
3
, which you select from your telephone.
Enter the special exchange code number
1
which has been set up in your telephone
system for dialing, e. g. “1”.
This exchange code number can have 1 to
5 digits.
Enter the code which has been set up in
343
your telephone system for the correspon
ding project, e. g. “3433”.
This code can have 1 to 9 digits.
A star “*” appears in the display for every
number.
Select the desired call number and pro
cede to telephone as usual.
The charges for this call will now be recor
ded and calculated in the system with the
corresponding project code.
Note:
Neither the exchange code number nor the
project code will be entered into the redial
memory
everytime.
Even if you want to call back a call number
from the calling list with a project code, you
must enter the exchange code number and
the project code in the calling list display
manually.
. Y
ou must enter the number anew
-
-
-
28

Answering calls
To
speak with a caller you can pick up the receiver as usual.
You can accept calls for other subscribers as well. T
“Pickup” function to one of the fully programmable function keys.
Someone calls you.
Y
our phone rings and the LED display
beside the handset flashes when a call
comes in.
5595
Mr. Miller
The corresponding message also appears
↓
on the display
The name of the caller is displayed if it is
transmitted by the caller
Lift the handset to answer the call. Y
now connected to the calling party
o do this, you must assign the
.
Receiving calls
’s system.
ou are
.
5595 Mr. Miller
↓
Another party is called (pick up a call)
Pickup
The connection continues to be displayed
on the screen.
Note:
Any call that you do not answer is stored in
the call list.
Y
ou can also answer calls for other sub
-
scribers on your phone.
Enter the respective call number when the
other telephone rings.
Press the “Pickup” function key to pick up
the call.
The call is signaled on your phone
as described above. You can now answer
this call.
29
Receiving calls
Requesting info message
If
voicemail is set up in your system, callers can leave info messages for you just
like on an answering machine. Y
Call forwarding all calls to the voicemail
Menu '
Call forwarding
ou can request these info messages by calling.
Select the menu item “Call forwarding”.
Enter the internal call number which has
been set up in your telephone system for
the voicemail, e.g. 4041).
Press the “Enter” key to activate call for-
Enter
warding onto the speech memory
T
o confirm this, the LED display illumina
.
tes.
-
+CFORW
Listening to info messages
11.11.94 11:11
Menu
'
TELFA GR.4
'
Info messages
4041↓
3045...
There is now a “+” in front of call forwar
ding in the display
, and call forwarding is
also displayed in the status display
All calls will now be diverted to voicemail.
In the standby display you will see the
symbol for “Info messages”. There is a
message for you in the voicemail.
Select the menu item “Info messages”.
The info messages will be displayed.
Lift the handset to listen to the info messa
ges.
-
.
-
30
 Loading...