

Bosch Infrared Imager EX80, Infrared Imager EX82 Installation Instructions Manual
INSTALLATION
INSTRUCTIONS
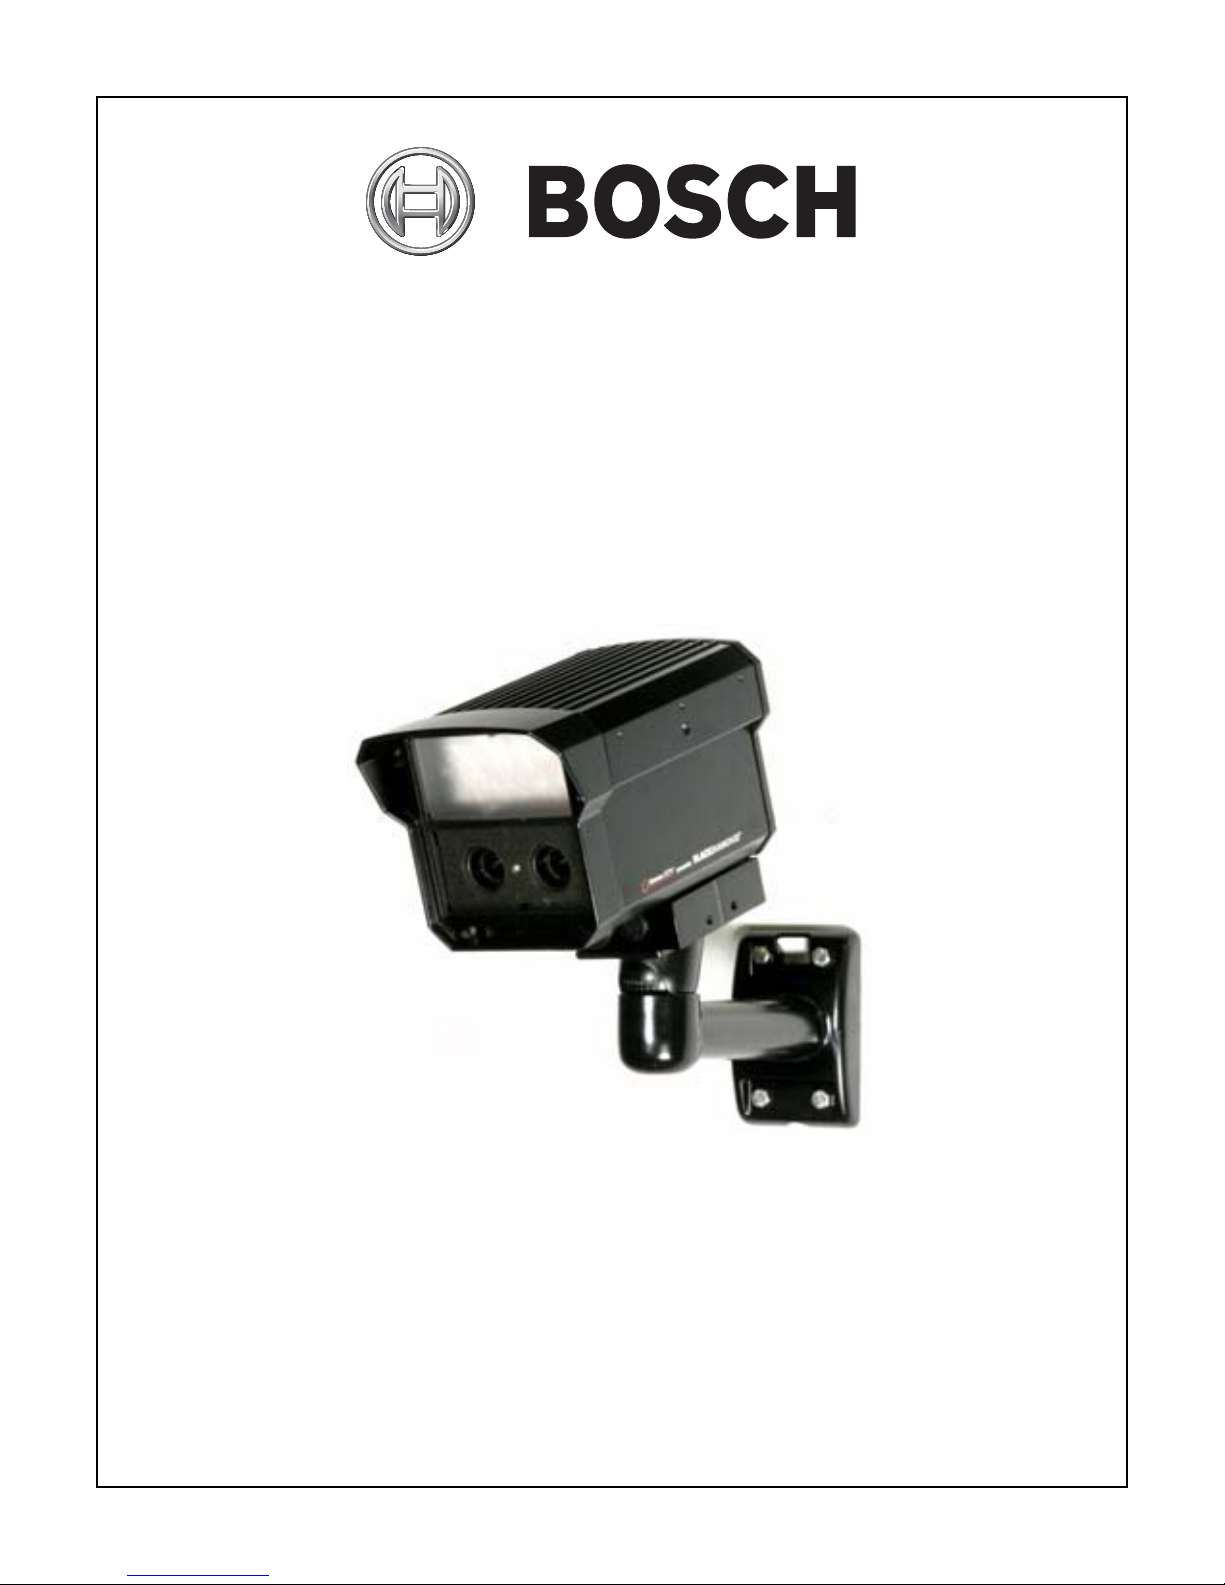
EX80/82
Infrared Imager™
MAN-80-82-08

IMPORTANT SAFETY INSTRUCTIONS
1. Read these instructions.
2. Keep this instruction.
3. Heed all warnings.
4. Follow all instructions.
5. Do not use this apparatus near water.
6. Clean only with dry cloth.
7. Do not block any ventilation openings. Install in
accordance with manufacturer instructions.
8. Do not install near any heat sources such as
radiators, heat registers, stoves or other
apparatus (including amplifiers) that produce
heat.
9. Do not defeat the safety purpose of the polarized
or grounding-type plug. A polarized plug has two
blades with one wider than the other. A
grounding type plug has two blades and a third
grounding prong. The wide blade or the third
prong is provided for your safety. If the provided

plug does not fit into your outlet, consult an
electrician for replacement of the obsolete outlet.
10. Protect the power cord from being walked on or
pinched particularly at plugs, conve nience
receptacles, and the power where they exit from
the apparatus.
11. Only use attachments/accessories specified by
the manufacturer.
12. Use only with the cart, stand, tripod, bracket, or
table specified by the manufacturer, or sold wit h
the apparatus. When a cart is used, use caution
when moving the cart/apparatus combination to
avoid injury from tip-over.
13. Unplug this apparatus during lightning storms or
when unused for long periods of time.
14. Refer all servicing to qualified service p ersonnel.
Servicing is required when the apparatus h as
been damaged in a way, such as power-supply
cord or plug is damaged, liquid has been spilled
or objects have fallen into the apparatus, the
apparatus has been exposed to rain or moisture,
does not operate normally, or has been dropped.
®
IMPORTANT
For best results, please read this Instruction Booklet
prior to installing t he
WARNING !
CSA Certified / UL Listed CLASS 2 power adaptors must be used
in order to comply with electrical safety
EX80/82 Infrared Imager.
® surveillance
“The cameras have not been evaluated for surveillance performance.”
Bosch Security Systems, Inc. will not be responsible for
injuries or damages resulting from the
improper installation or use of any product
sold by Bosch Security Systems, Inc their agents,
distributors or dealers.

NOTE: This equipment has been tested and found to
comply with the limits for a digital device, pursuant to part
15 of the FCC rules. These limits are designed to provide
reasonable protection against harmful interference in a
residential installation. As part of it's normal operation this
device can generate radio frequency ener gy and if not
installed and used in accordance with the installation
manual may cause interference to radio communications.
However, there is no guarantee that interference will not
occur on a particular installation. If the device does cause
interference to radio or television reception the user is
encouraged to try to correct the interference by one or
more of the following measures:
1) Fit Ferrite beads on all cable to and from the power
supply box, within the box walls.
2) Route the composite cable between the camera and the
power supply in steel conduit piping over the entire run of
the cable up to and including connectio n to a deep conduit
base fitted under the camera and a conduit fitting adaptor in
the wall of the PSU box.
3) Contact BOSCH Service Center for further advice.

INDEX – EX80/82 Infrared Imager™
Description………………………………………………...1
Unpacking………………………………………………....2
Parts List…………………………………………………..2
Items Required for Installation………………………….2
Initial Preparations……………………………………….3
Guidelines………………………………………………...3
1. Mounting Bracket Preparation……………….……..…...4
2. Cable/Bracket Insertion.……..……………….……….....5
3. Mounting Bracket Attachment……………….…………..6
4. Camera Mounting……….……………….….…………....7
5. Camera Lens Adjustments and Select a Windo w..…..10
6. LED Array-Power Adjustments………………..…….….13
7. Camera Re-Assembly…………………………….…..…14
8. Troubleshooting Guide-Camera…………....….……....15
9. Troubleshooting Guide-LEDs…….……….……...….…18
10. Mounting Hole – Diagram………………………..…....19
17. General Specifications………………………..…….….20

DESCRIPTION
The EX80/82 Infrared Imager™ consists of two cameras:
color and mono-chrome. These cameras give optimum color
performance during daylight conditions and LXR-infrared
illuminated performance in the pitch black of nig ht.
Both cameras have “Vari-Focal” lenses, and are seamlessly
switched by a photocell when light conditions change from
day to night, ensuring “No Focus Shift”.
The all-weather housing with tough polycarbonate windows
contains all the electronics. Low voltage operation, low power
consumption, LED illuminators, thermostat controlled
defroster and solid-state CCD technology make this camera
very reliable and efficient.
A voltage regulator circuit allows for DC or AC operation, also
providing protection from voltage surges, transient spikes,
and reverse voltage.

UNPACKING
Care should be taken when unpacking the shipped unit.
Check the parts list and confirm all items have been
located. Inspect the equipment thoroughly to ensur e
nothing was damaged in transit.
Contact BOSCH Service Center if a problem is noted,
see the rear page of this booklet for contact numbers.
PARTS LIST (items supplied with unit)
- EX80/82 Infrared Imager™ assembly
- Installation Instructions booklet
- EXMB028B or EXMB028W cable manag ement
mounting bracket.
- Extra window (80 illumination beam) for 4-9mm
version only.
ITEMS REQUIRED FOR INSTALLATION (not
supplied with units)
• Mounting hardware
• Mounting tools
• Camera Power supply

INITIAL PREPARATIONS
• Determine the operating voltage at the
installation site. The camera‘s Voltage Regulator
Board accepts both 10.5-40VDC and 12-28VAC
input without change to internal connections.
• Determine the optimum mounting location for
the camera. See Section 4, Camera Mounting.
• All cameras have been tested and pre-focus ed
with telephoto setting as factory default prior to
shipment. If any adjustment needed, it is
advisable to check the camera’s operation
before installation.
GUIDELINES
The installation of the EX80/82 Infrared Imager™ is
explained in Sections 1 to 7.
It is important that these steps are followed in numerical
order.
It is also important to follow proper safety guidelines
when installing this product.
 Loading...